Close
0%
0%

2.1 PC Amp Into a Mutliroom Audio Streaming Amp

Old 2.1 PC amplifier now running multiroom audio

Public Chat
Similar projects worth following
An old 2.1 PC amplifier is modified to serve as a kitchen audio device, synchronized with the audio played in the living room, using a similar device over WiFI.

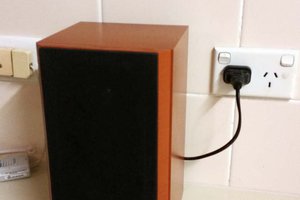
The amplifier I used in this project is an old 2.1 PC amp. 

Theoretically, any audio amplifier can be used to make it multiroom capable and save you lot's of $$ compared to the readily available solutions. This project will cost you around $45, and as a standalone amp, you can stream audio to it from your phone or network server. It also plays internet radio stations.

When you really want, you can buy an IR remote with the Arylic board, so you can control the music source presets, radio stations and audio settings, but with your phone you can do the same.

With a few handy hands and some patience you can build this on a rainy Sunday afternoon.

So don't throw out that old amplifier you never use anymore!!

  • 1 × Audio Amplifier This can be anything that has an aux input and speaker outputs.
  • 1 × Arylic audio streaming board The one I used in this project is an Arylic V3 mini
  • 1 × Step-down DC-DC converter (5V out)
  • 1 × Some ty-raps, wires, heat-shrink tubing

  • 1
    Finding the DC Power

    Locate the amplifier's power supply and follow the wires to the on-board DC power supply for the amplifier.

    Carefully power up the amplifier and measure the DC voltage that is used to power the amplifier.

  • 2
    Measure the DC Voltage and Connect the DC-DC Converter

    In my case, this amp has a 16-0-16V power supply, but other amps may have other voltages. Some even have 5VDC power on board already, so in that case you will need to verify if you can draw 1A extra from this supply to power the Linkplay module.
    Important: check if the ground that you use is the same ground as the line in ground.

    Simulate the voltage you measured with a lab power supply and connect the DC-DC converter.

    Adjust the output voltage to 5V.

    Now un-power the amplifier and solder a red and black wire to the board where you measured the +16V and 0V.

    Connect these wires to the DC-DC converter input, and double check the output to be 5VDC when you power up the amplifier.

    Wrap the converter in a piece of heatshrink and glue it to an appropriate spot.

  • 3
    Find a Spot to Mount the Linkplay Module and Connect the Audio Lines

    Find a good spot to mount the module and connect the 5VDC wires to the board's screw terminals.

    In my case, the amplifier has a separate line in board that I could solder a nice connector to, so that I could leave the supplied flatcable in one piece. But in any case, cutting the connector and soldering the wires directly to the board is fine as well. Alternatively, you can use the 3.5mm jack input of the board.

    Connect the left and right channels. At this point, like I mentioned earlier, it is important to know if your amp power supply 0V is the same 0V as the Line in grounds. If it has a different level, you may blow your Linkplay module, so be careful and double check.

View all 5 instructions

Enjoy this project?

Share

Discussions

Similar Projects

Does this project spark your interest?

Become a member to follow this project and never miss any updates