 Guillermo Perez Guillen
LoRaWAN allows devices to communicate over tens or even hundreds of kilometers, all without a cell network or a high-powered antenna array. The disadvantage with this technology is that data rates become severely restricted—in the low kb/s range depending on conditions. While you might not be able to stream a 4k movie or even a low-fi audio clip, LoRaWAN is an excellent option for intermittent sensor data spread over a wide geographic area.
Can you set up point-to-point communication between two MKR WAN boards as the first step towards LoRaWAN exploration?
The good news is that point-to-point communication is easy, though figuring out the steps can be tricky. Let’s walk through how to get one-way communication going between two of these boards.
Monitoring Temperature Using Two MKR WAN 1300
Once you have your hardware ready to go, follow these steps to install and run your Arduino LoRaWAN:
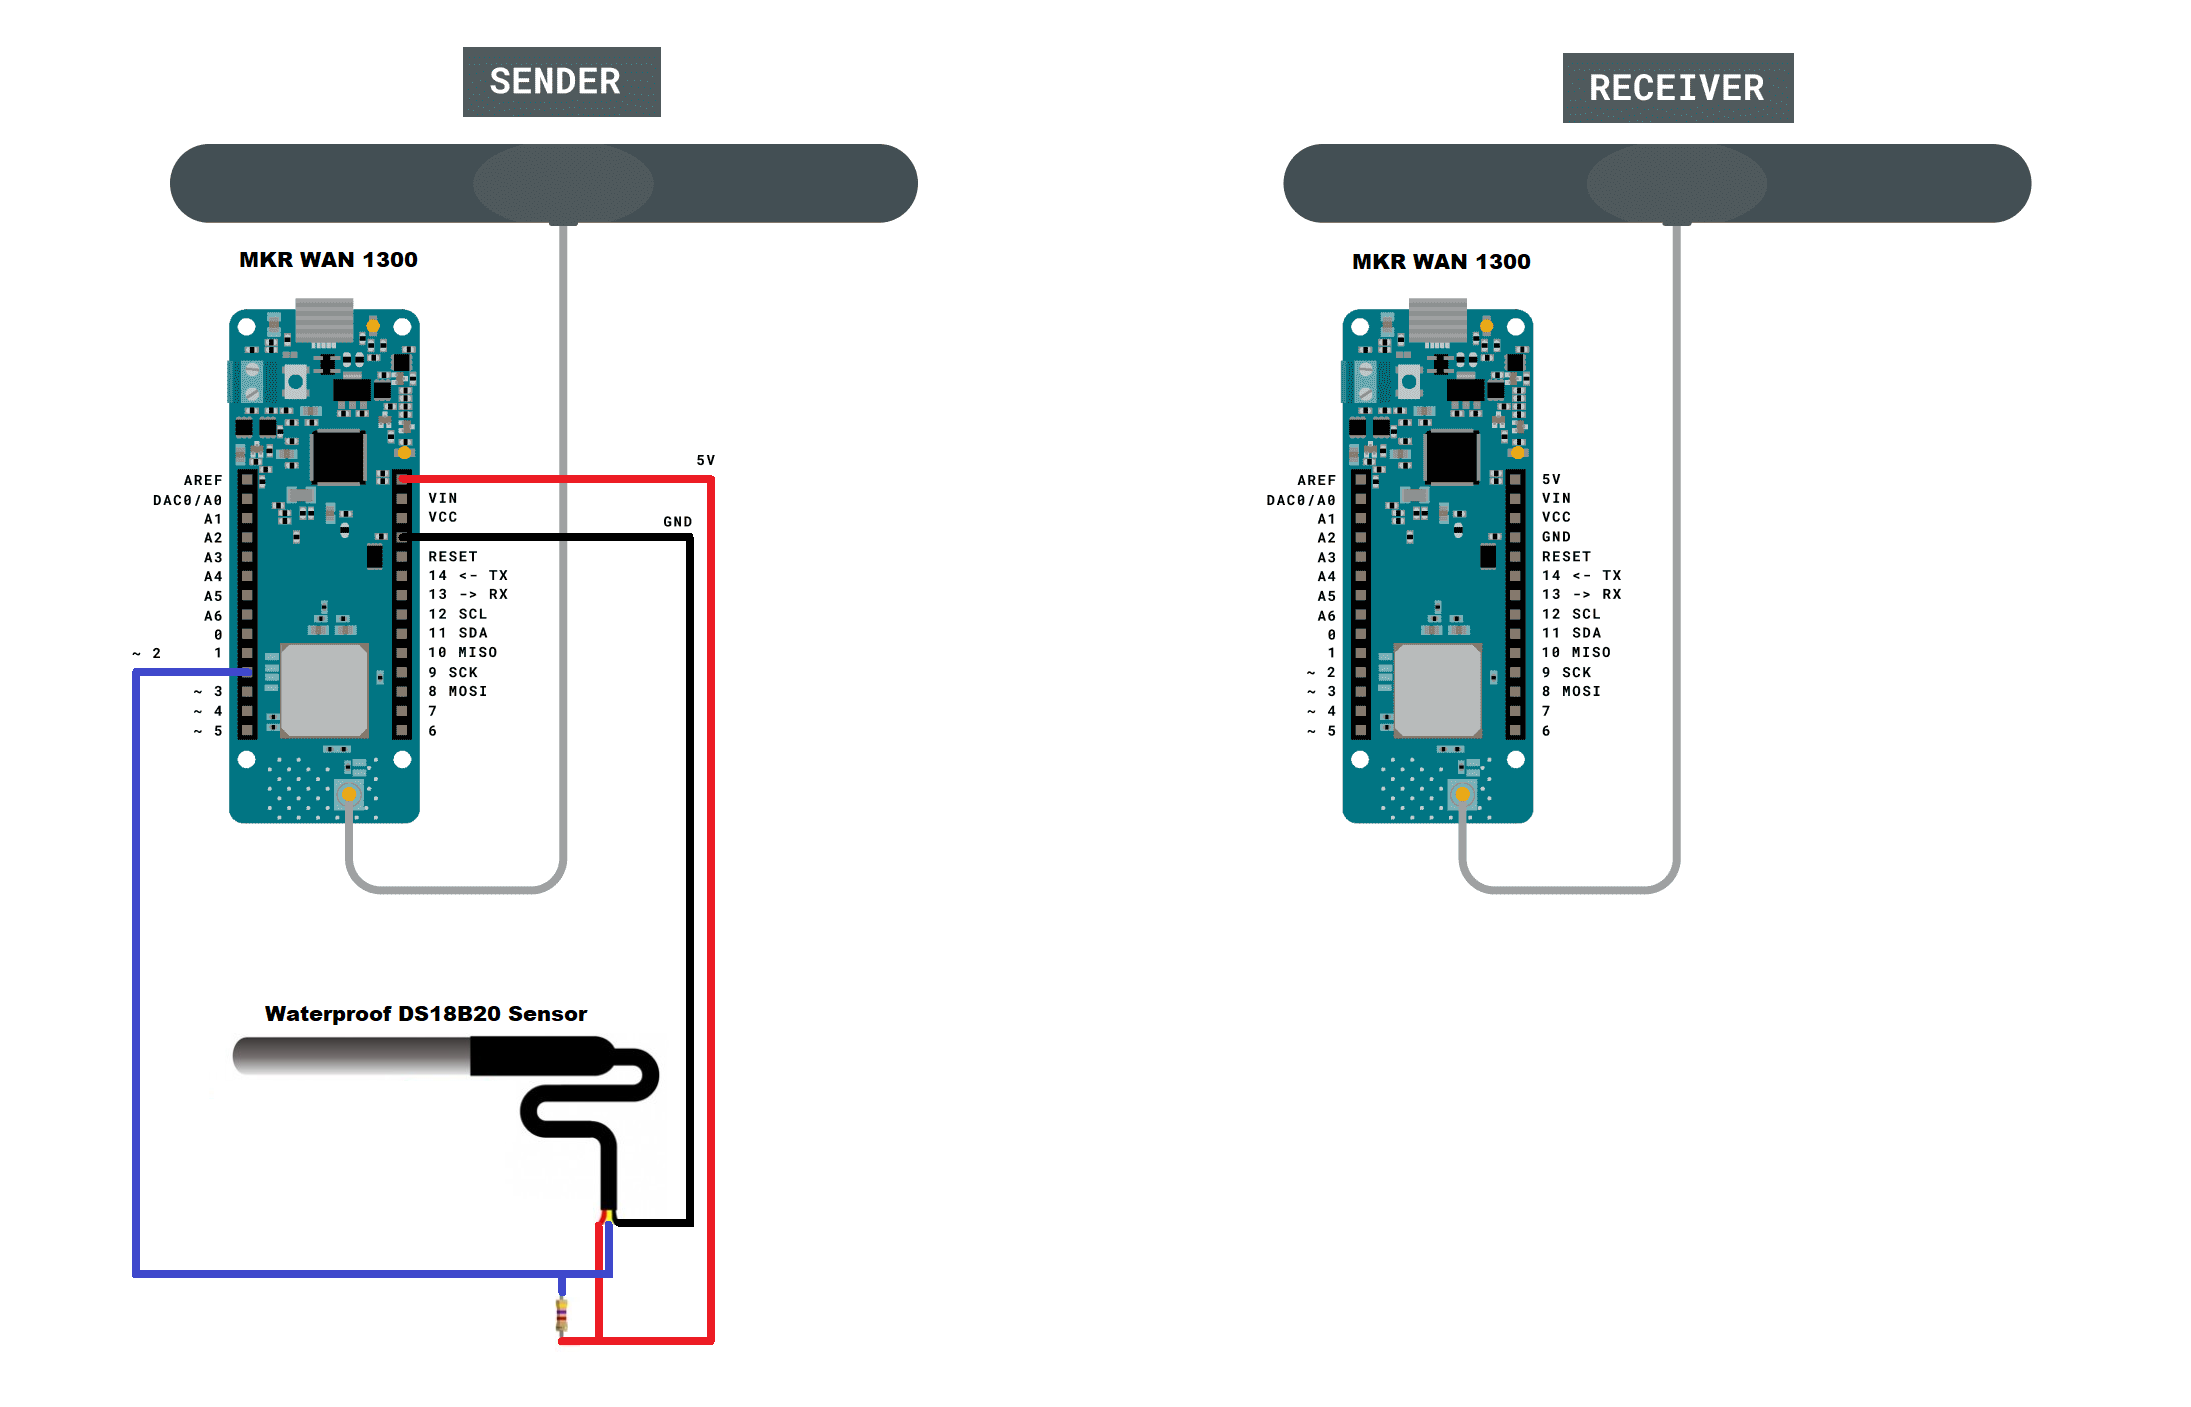
- Physically attach an antenna to both MKR WAN boards and make de connections as shown below in schematic diagram.
Open two instances of the Arduino IDE via a desktop or Start menu shortcut. Opening both separately allows you to manipulate two serial ports at the same time. Doing so will make the process much easier.
Navigate back to File-Examples, then LoRa. Under this section, load “LoRaSender” onto one board, then “LoRaReceiver” to the other.
In my case I modified these codes to monitor the temperature and using the "Waterproof DS18B20 Sensor" that came in the element14 gift kit.
The two libraries of the DS18B20 temperature sensor used you can download here: 1) Arduino-Temperature-Control-Library and 2) OneWire-Library
The sketch "LoRaSender_v1.ino" is shown below:
// AUTHOR: GUILLERMO PEREZ GUILLEN

#include <SPI.h>
#include <LoRa.h>
#include <OneWire.h>
#include <DallasTemperature.h>

// Data wire is plugged into port 2 on the Arduino
#define ONE_WIRE_BUS 2
// Setup a oneWire instance to communicate with any OneWire devices (not just Maxim/Dallas temperature ICs)
OneWire oneWire(ONE_WIRE_BUS);
// Pass our oneWire reference to Dallas Temperature.
DallasTemperature sensors(&oneWire);

int counter = 0;

void setup() {
  Serial.begin(9600);
  while (!Serial);
  Serial.println("LoRa Sender");
  if (!LoRa.begin(915E6)) {
    Serial.println("Starting LoRa failed!");
    while (1);
  }
  sensors.begin();
}

void loop() {
  sensors.requestTemperatures();   //The command to read the temperature is sent
  float temp= sensors.getTempCByIndex(0); //The temperature is obtained in ยบC
  Serial.print("Sending packet: ");
  Serial.println(counter);
  // send packet
  LoRa.beginPacket();
  LoRa.print(counter);
  LoRa.print(".- Temp = ");
  LoRa.print(temp);
  LoRa.print(" C");
  LoRa.endPacket();
  counter++;
  delay(4000);
}
The sketch "LoRaReceiver_v1.ino" is shown below:
// AUTHOR: GUILLERMO PEREZ GUILLEN

#include <SPI.h>
#include <LoRa.h>

void setup() {
  pinMode(LED_BUILTIN, OUTPUT);
  Serial.begin(9600);
  Serial.println("LoRa Receiver");
  if (!LoRa.begin(915E6)) {
    Serial.println("Starting LoRa failed!");
    while (1);
  }
}

void loop() {
  // try to parse packet
  int packetSize = LoRa.parsePacket();
  if (packetSize) {
    // received a packet
    Serial.print("Received packet '");
    // read packet
    while (LoRa.available()) {
      Serial.print((char)LoRa.read());
    }
    // print RSSI of packet
    Serial.print("' with RSSI ");
    Serial.println(LoRa.packetRssi());
    digitalWrite(LED_BUILTIN, HIGH);
    delay(2000);
    digitalWrite(LED_BUILTIN, LOW);
  }
}
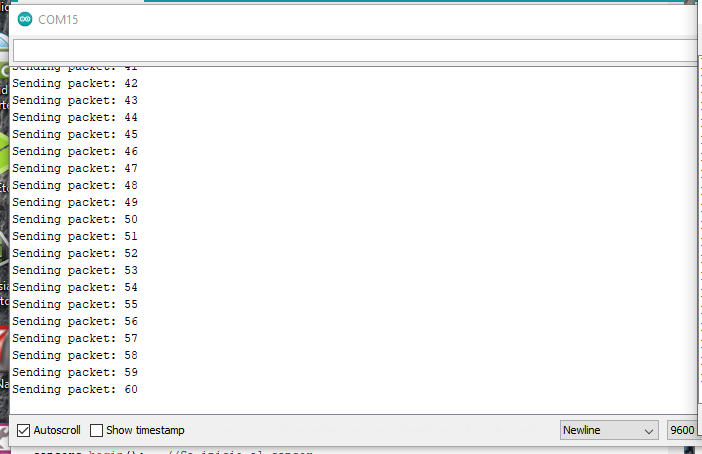
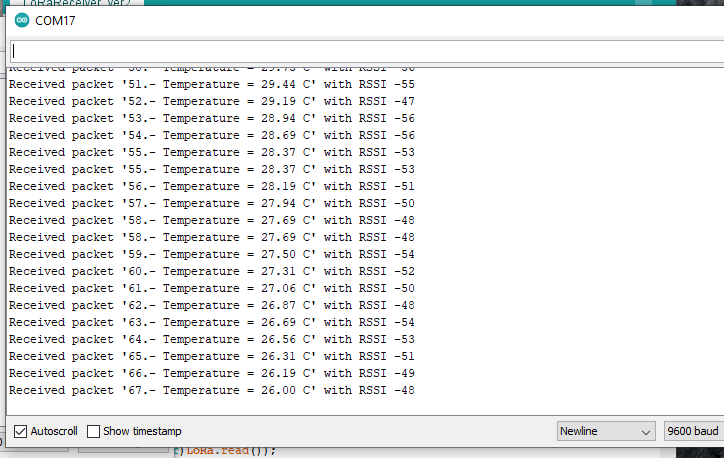
- Start a serial monitor on both ports, and you’ll see the transmitter board sending a packet every four seconds. The receiver serial port—if everything works properly—will show it receiving these the packet with the sensor's temperature and a Received Signal Strength Indication (RSSI) number to show how well the pair is communicating.
Below you can see an image of the data submission:
Below you can see an image of the data reception:
Discussions
Become a Hackaday.io Member
Create an account to leave a comment. Already have an account? Log In.