Well the case is done, the keyboard is assembled, and the Challenger 4P emulator is running on the Raspberry Pi 4. I guess it's time integrate all the pieces. To that end the only real task is to wire the keyboard to the Pi and write the emulator Python code to read the hardware keyboard keys.
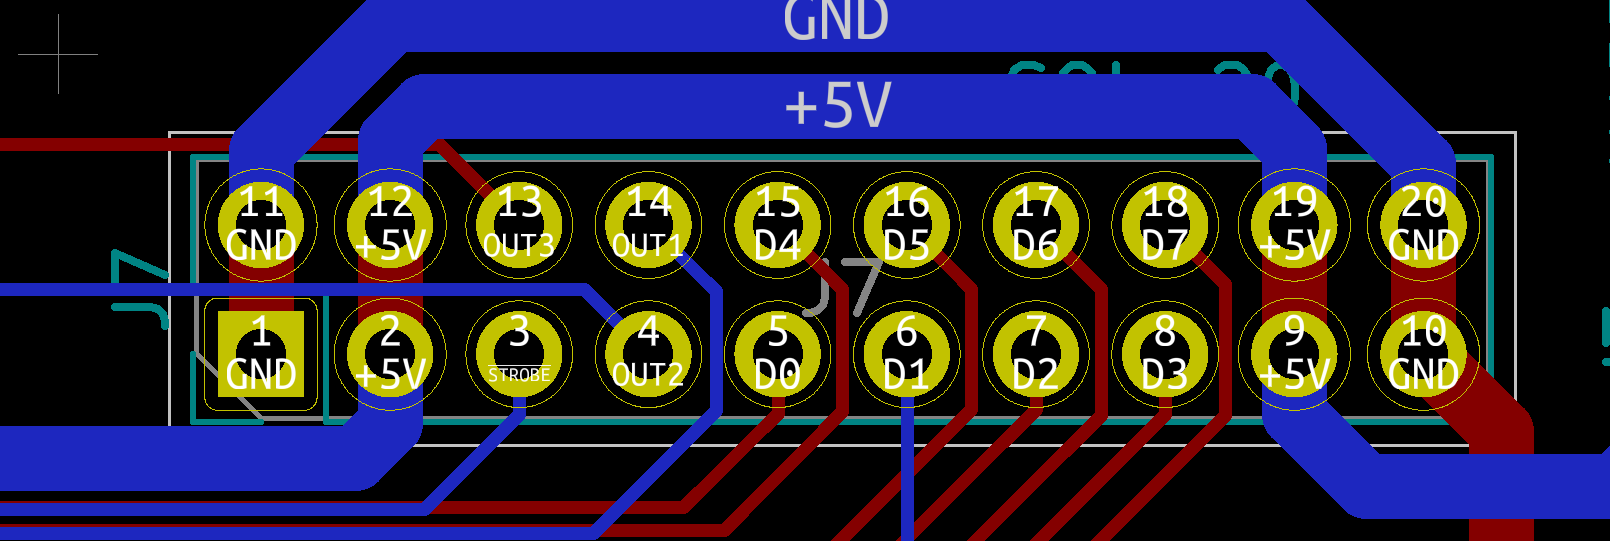
We are ready to wire the keyboard to the Pi. I'm using the header on the encoder labeled SOL-20. The pinout looks like this.

The keyboard encoder is expecting 5V while the Raspberry Pi 4 operates at 3.3V. So to overcome this I purchase a Voltage-Level Shifter Module from Amazon.

Here is how I wired the keyboard. Note that for the exception of +5V and GND lines which are wired to the 3.3V side or the level shifter, all of the other connections are wired to the 5V side.
| Keyboard Encoder | Raspberry Pi | Description |
|---|---|---|
| 5V | 5V | Power |
| GND | GND | Ground |
| D0 | GPIO5 | Key 0 bit (low) |
| D1 | GPIO6 | Key 1 bit |
| D2 | GPIO12 | Key 2 bit |
| D3 | GPIO13 | Key 3 bit |
| D4 | GPIO19 | Key 4 bit |
| D5 | GPIO16 | Key 5 bit |
| D6 | GPIO26 | Key 6 bit |
| D7 | GPIO20 | Key 7 bit (high) |
| STROBE | GPIO4 | Key ready on falling edge. |
Once the wiring was complete I update the emulator's keyboard.py code to detect and process key presses from the keyboard. Note that you can still run the emulator without attaching the "special" keyboard and just use the PC's keyboard. I have posted the updated keyboard.py file to github.
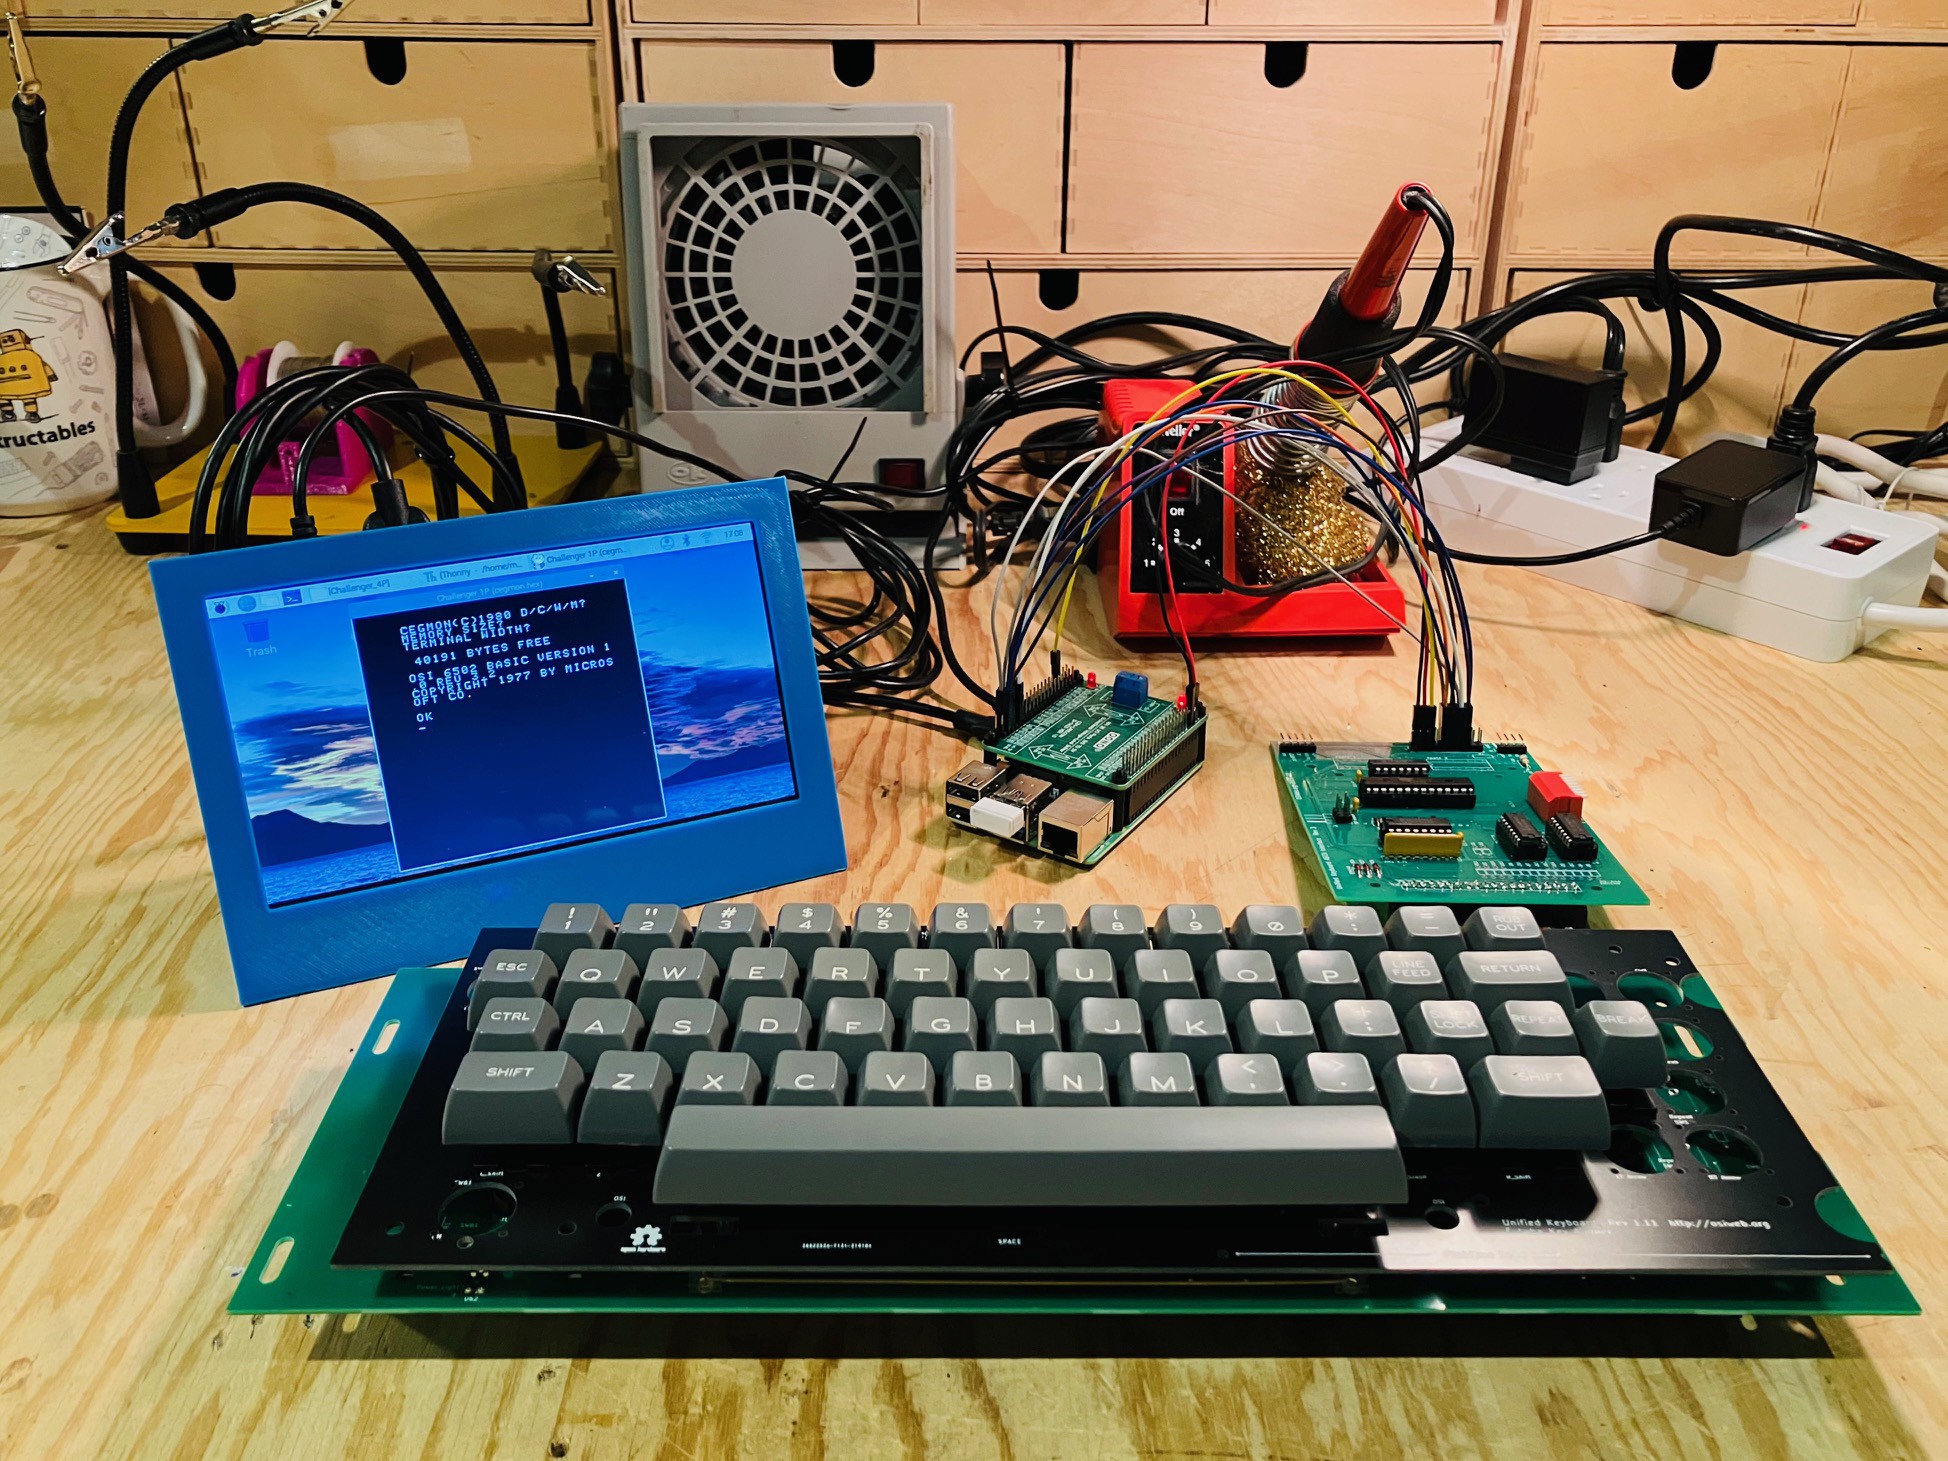
Here is what my little integration test looks like.

The emulator can be seen running on the small LCD screen. Keyboard seems to be working well. Ready now to insert everything into the case.
 Michael Gardi
Discussions
Become a Hackaday.io Member
Create an account to leave a comment. Already have an account? Log In.