Ah, home at last. After spending so long in the mechanical world, I almost felt disconnected from my electrical roots (ba-dum-tss). Corny jokes aside, it has been really nice to get to dig through datasheets, lay down some traces, tear through app notes, and do many other things that I'm used to.
So starting off with the component selection, I knew I needed a few things:
- USB Type C (because it's the hip thing now)
- A microcontroller with USB support
- TVS (transient voltage suppression)
- TI's inductance to digital converters
- And a regulator to power all of the above
The first one was easy, I just went with a generic USB 2.0 type C connector that already had a part made in the KiCAD library, and was in stock at digikey. It also had the advantage of being through-hole. I've had some experiences with SMT type-C connectors in the past and they were not positive ones.
The MCU is the heart of most hobbyist PCB designs and this one is no exception. I had a few requirements when looking for one to support the OS3M mouse: low cost, low passive count, good developer experience, and in stock. To be transparent though, I do have previous experience with STM32s, so naturally I started looking there first. There, I found the SMT32F042 line of parts, which satisfy all of my requirements. A key selling point of this product line is that they support "crystal-less" USB. This is important because most MCUs need an accurately tuned external crystal to work with the tight timing requirements of USB, but not this one! To quote the datasheet:
> The STM32F042x4/x6 embeds a special block which allows automatic trimming of the internal 48 MHz oscillator to guarantee its optimal accuracy over the whole device operational range. This automatic trimming is based on the external synchronization signal, which could be either derived from USB SOF signalization, from LSE oscillator, from an external signal on CRS_SYNC pin or generated by user software.
This is wonderful for me, and anyone else who wants to use this mouse, as it means lower component count, less things to mess up when soldering, and lower cost. Additionally, I already have experience using STM32CubeIDE, ST's poorly named but decently functional IDE. It's Eclipse-based and so there are plenty of plugins and problems are readily google-able.
TVS for this board was a requirement due to it being something people touch a lot. It's highly likely that at some point when plugging in an OS3M mouse, the USB port will take one or more ESD (electrostatic discharge, a static shock) strikes. Conveniently, the MCU I chose was already USB-focused, so it was relatively easy to find ST's app note on USB guidelines from which they recommend the USBLC6-2 IC. This monolithic chip is a device purpose built to save our bacon from spicy static shocks.
As mentioned in the last post, the sensing solution I've been betting this whole project on is inductance to digital conversion. In this realm it seems TI reigns king, and I know first hand that the products they make are quality (summer internship, sweet place to work btw). Since I needed 6 coils worth of sensing capacity, and I didn't know the degree of accuracy I needed, I went with a pairing of their higher end (26-bit resolution) LDC1612 and LDC1614 chips. These guys come in nice small, but not unsolderable, QFN and TSSOP packages. Another wonderful aspect of TI is that their datasheets, web resources, and app notes are top notch. Here, I used their coil designer webapp in combination with their app note on sensor design to actually perform the design of the PCB coil I integrated.
Lastly came the regulator, and here I chose the simple solution - a linear regulator. Since I was only going from 5 to 3.3V, the energy needing to be burned off as heat wouldn't be all that substantial and I could keep everything nice and compact. Going to a switching architecture would only have needlessly complicated things.
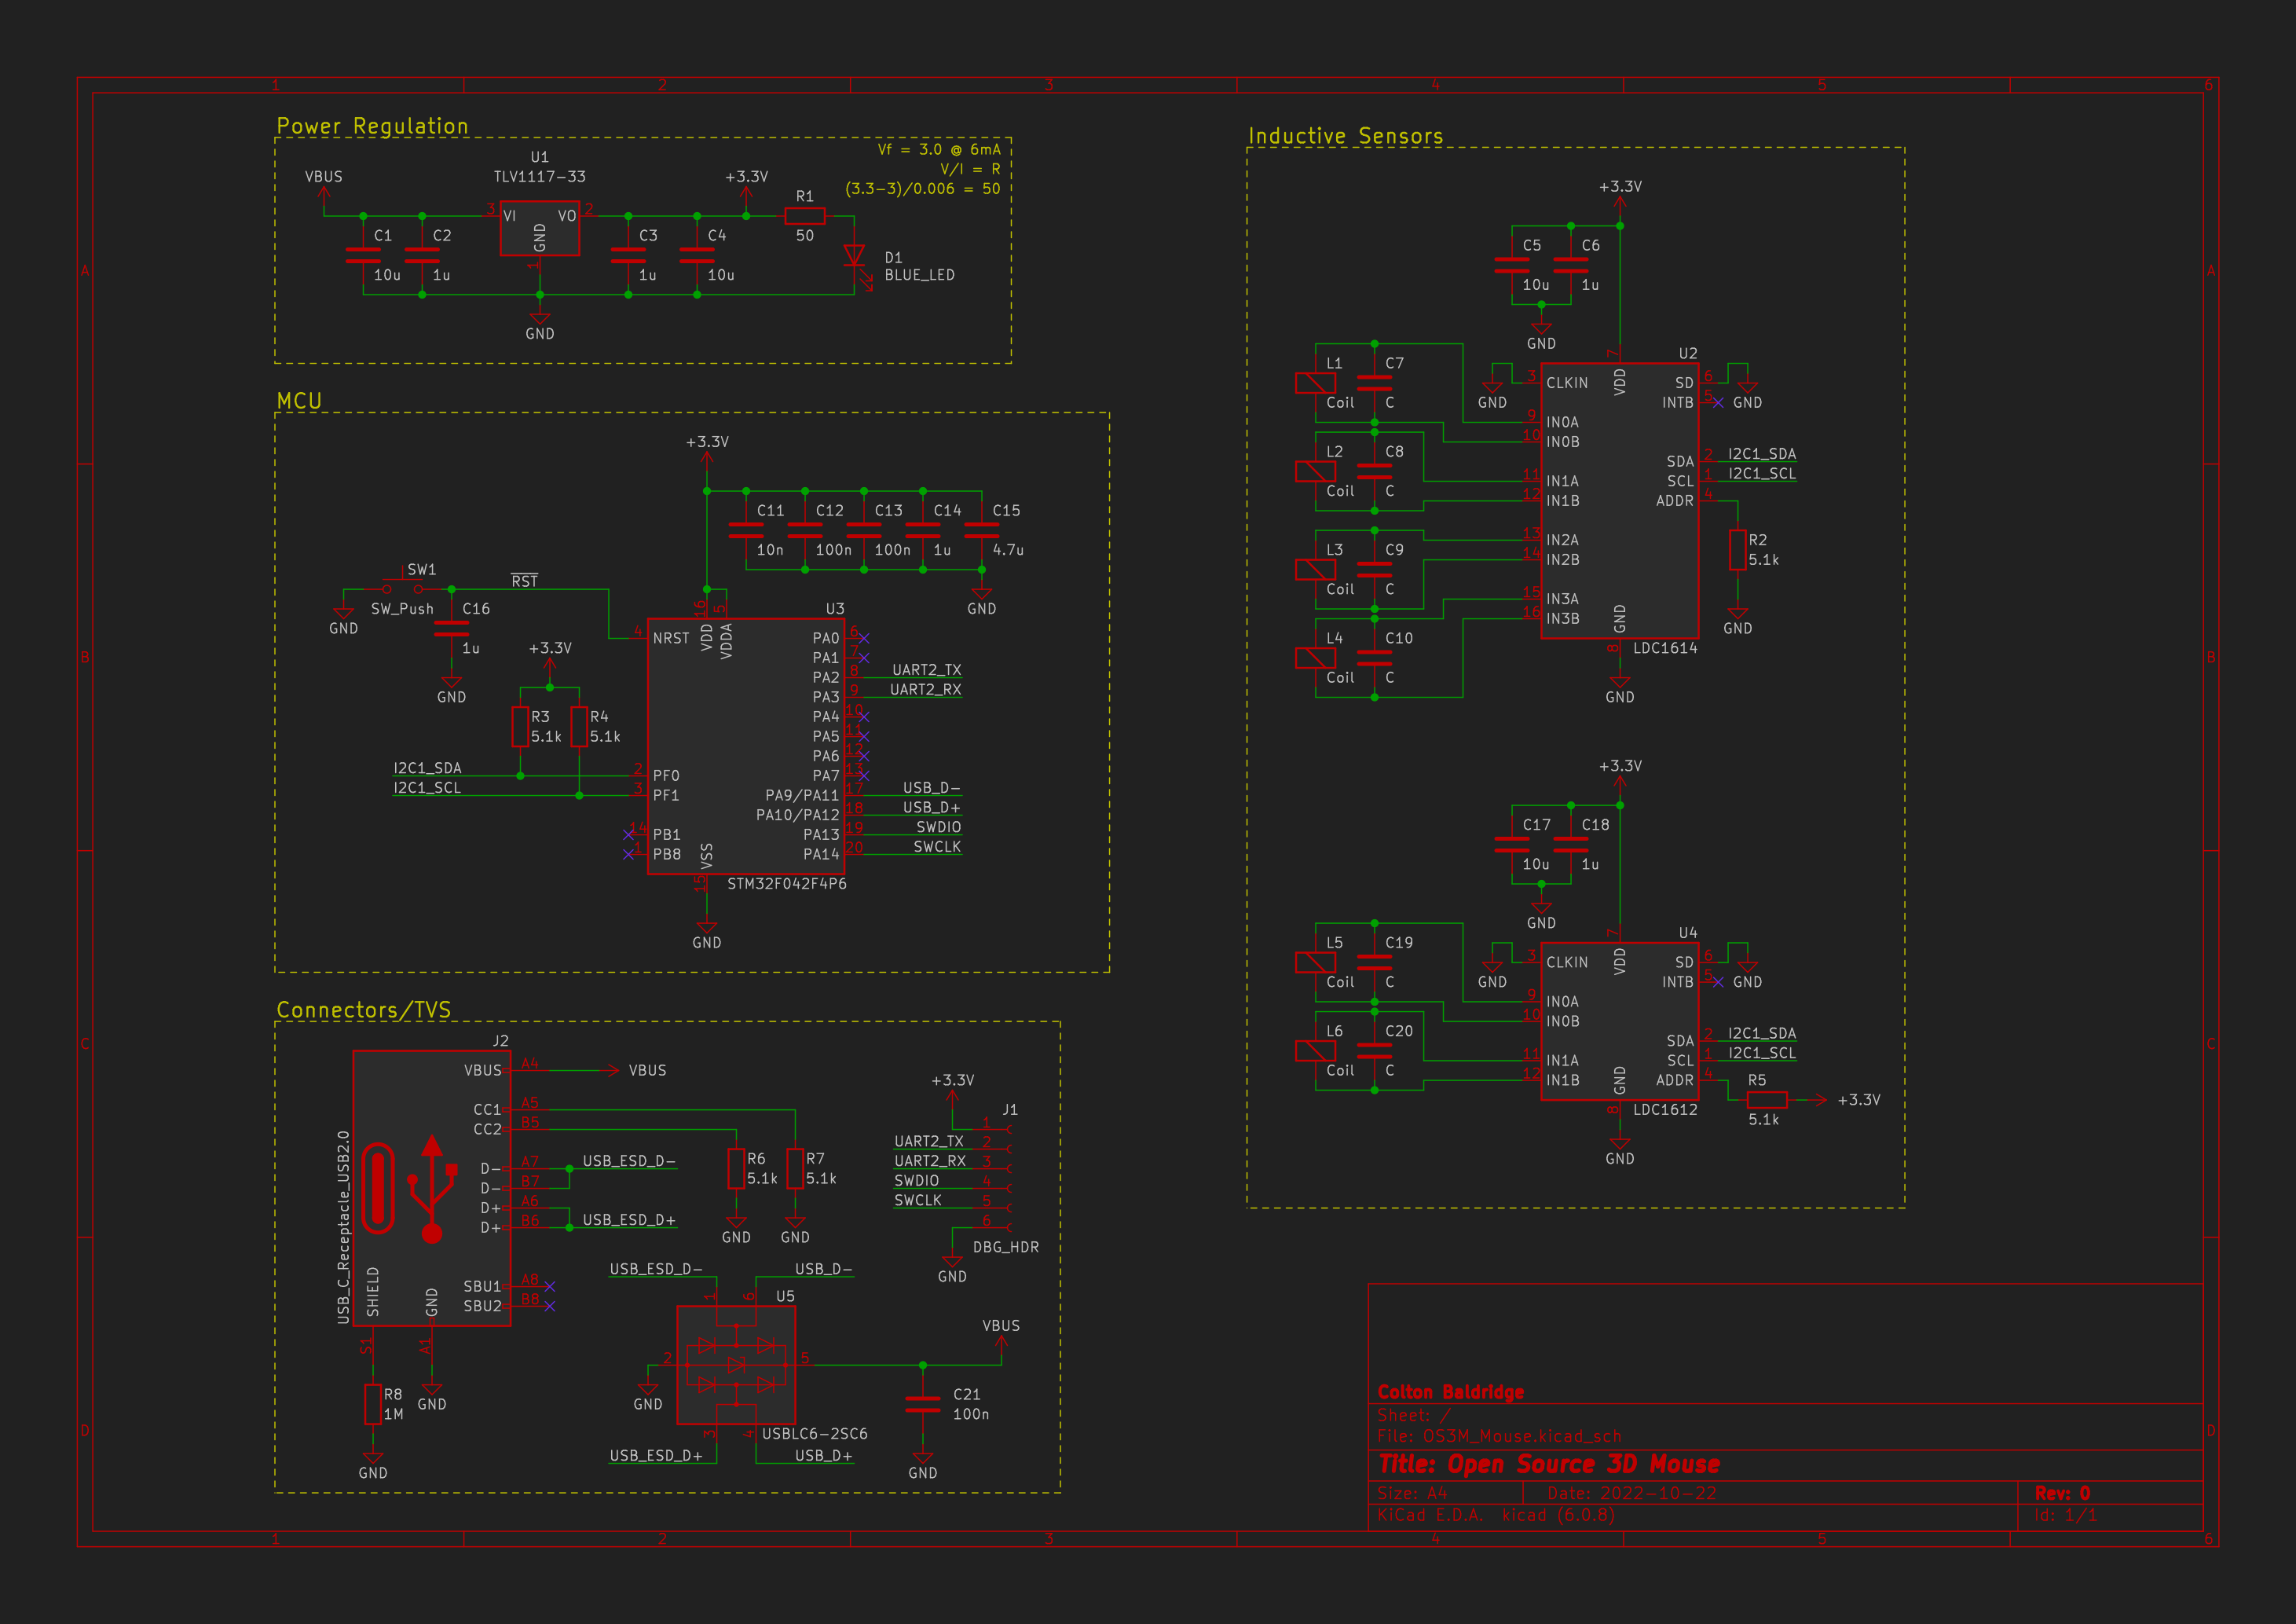
With the above key design decisions evaluated, I created the schematic!

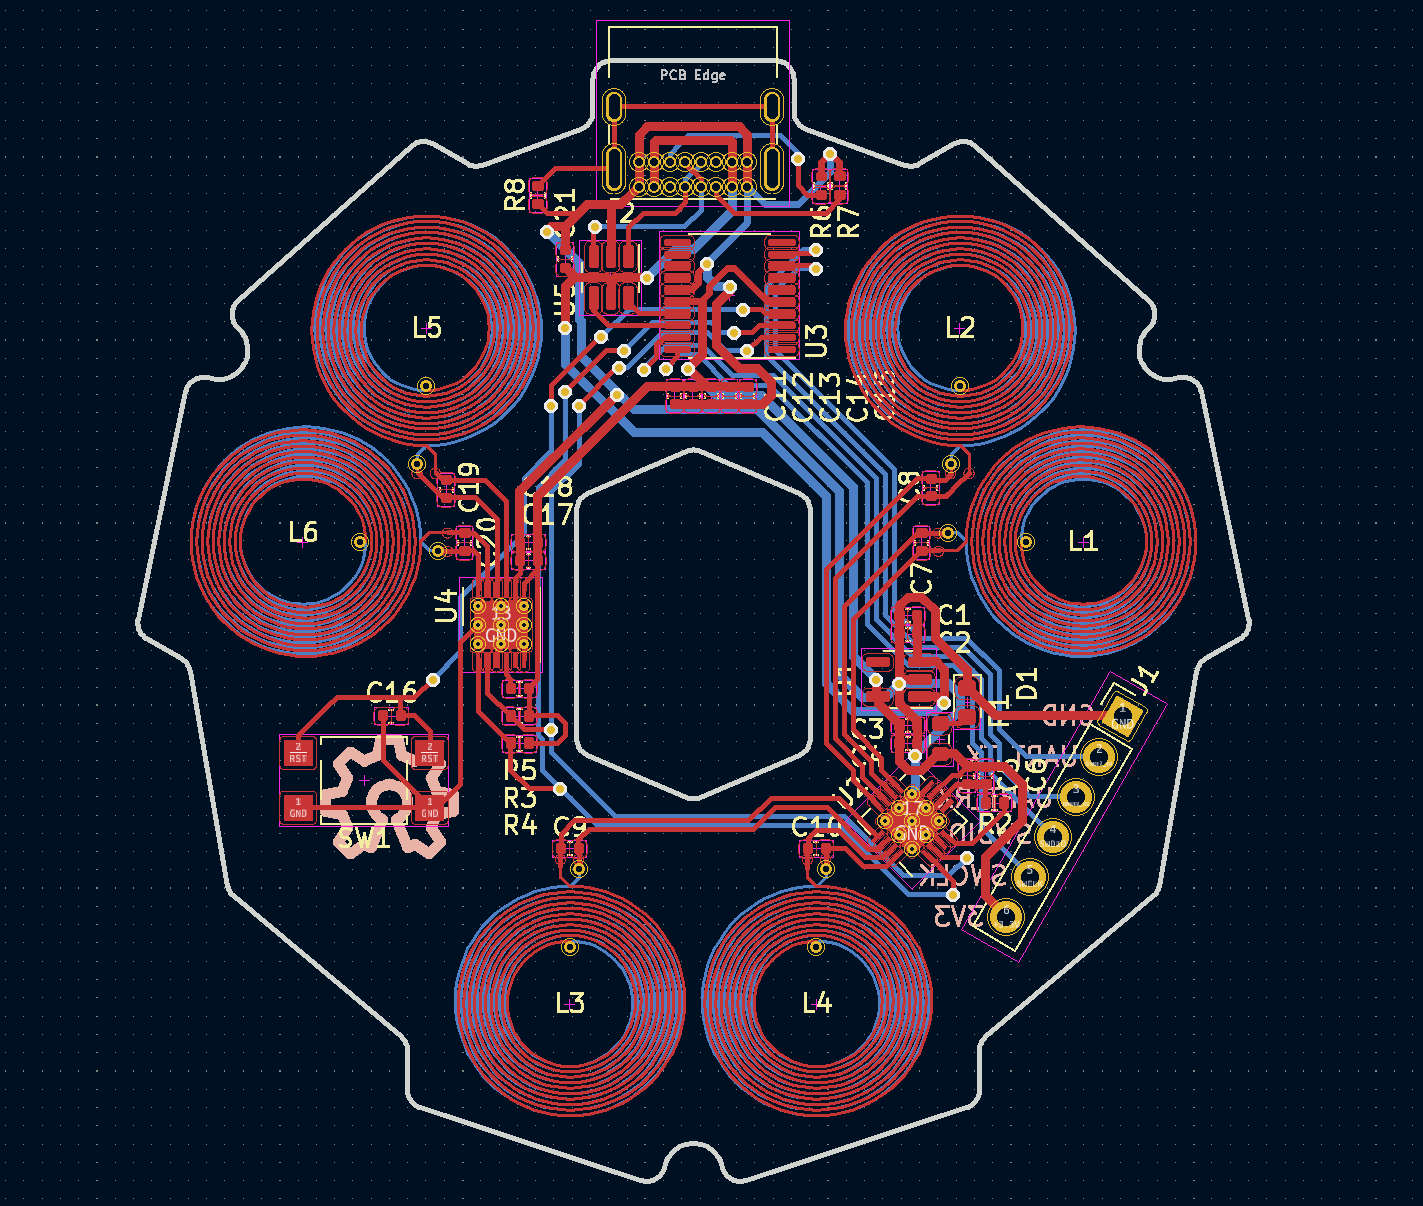
And from there I went to layout. I have a decent amount of PCB design experience both through previous personal projects and through my work, but this PCB had something special to set it apart from all previous designs I've done: 6 sensing coils. As previously mentioned, these coils are connected to TI's inductance to digital sensors, and boy were they quite the challenge to design. KiCAD has no native support for laying out coils that I could find, and any google searches pointed me towards a 7 year old github gist that was somewhat unclear on how it should be used. To resolve this issue, I actually wrote my own KiCAD coil creator that generates footprints rather than dropping them straight into a pcbnew file. In this way, it made it easy for me (and for others) to be able to create whatever coil they want on their PCB.
The rest of the PCB was relatively simple in compairison, but got pretty packed up at the top near the MCU at the end. I know it isn't a masterclass in layout, but I tried my best to avoid putting conductors close to the sensing coils and follow datasheet's recommendations for things like TVS layout, decoupling cap location, etc.
And now, the part you've all been waiting for... I give you the OS3M mouse PCB rev. 0!

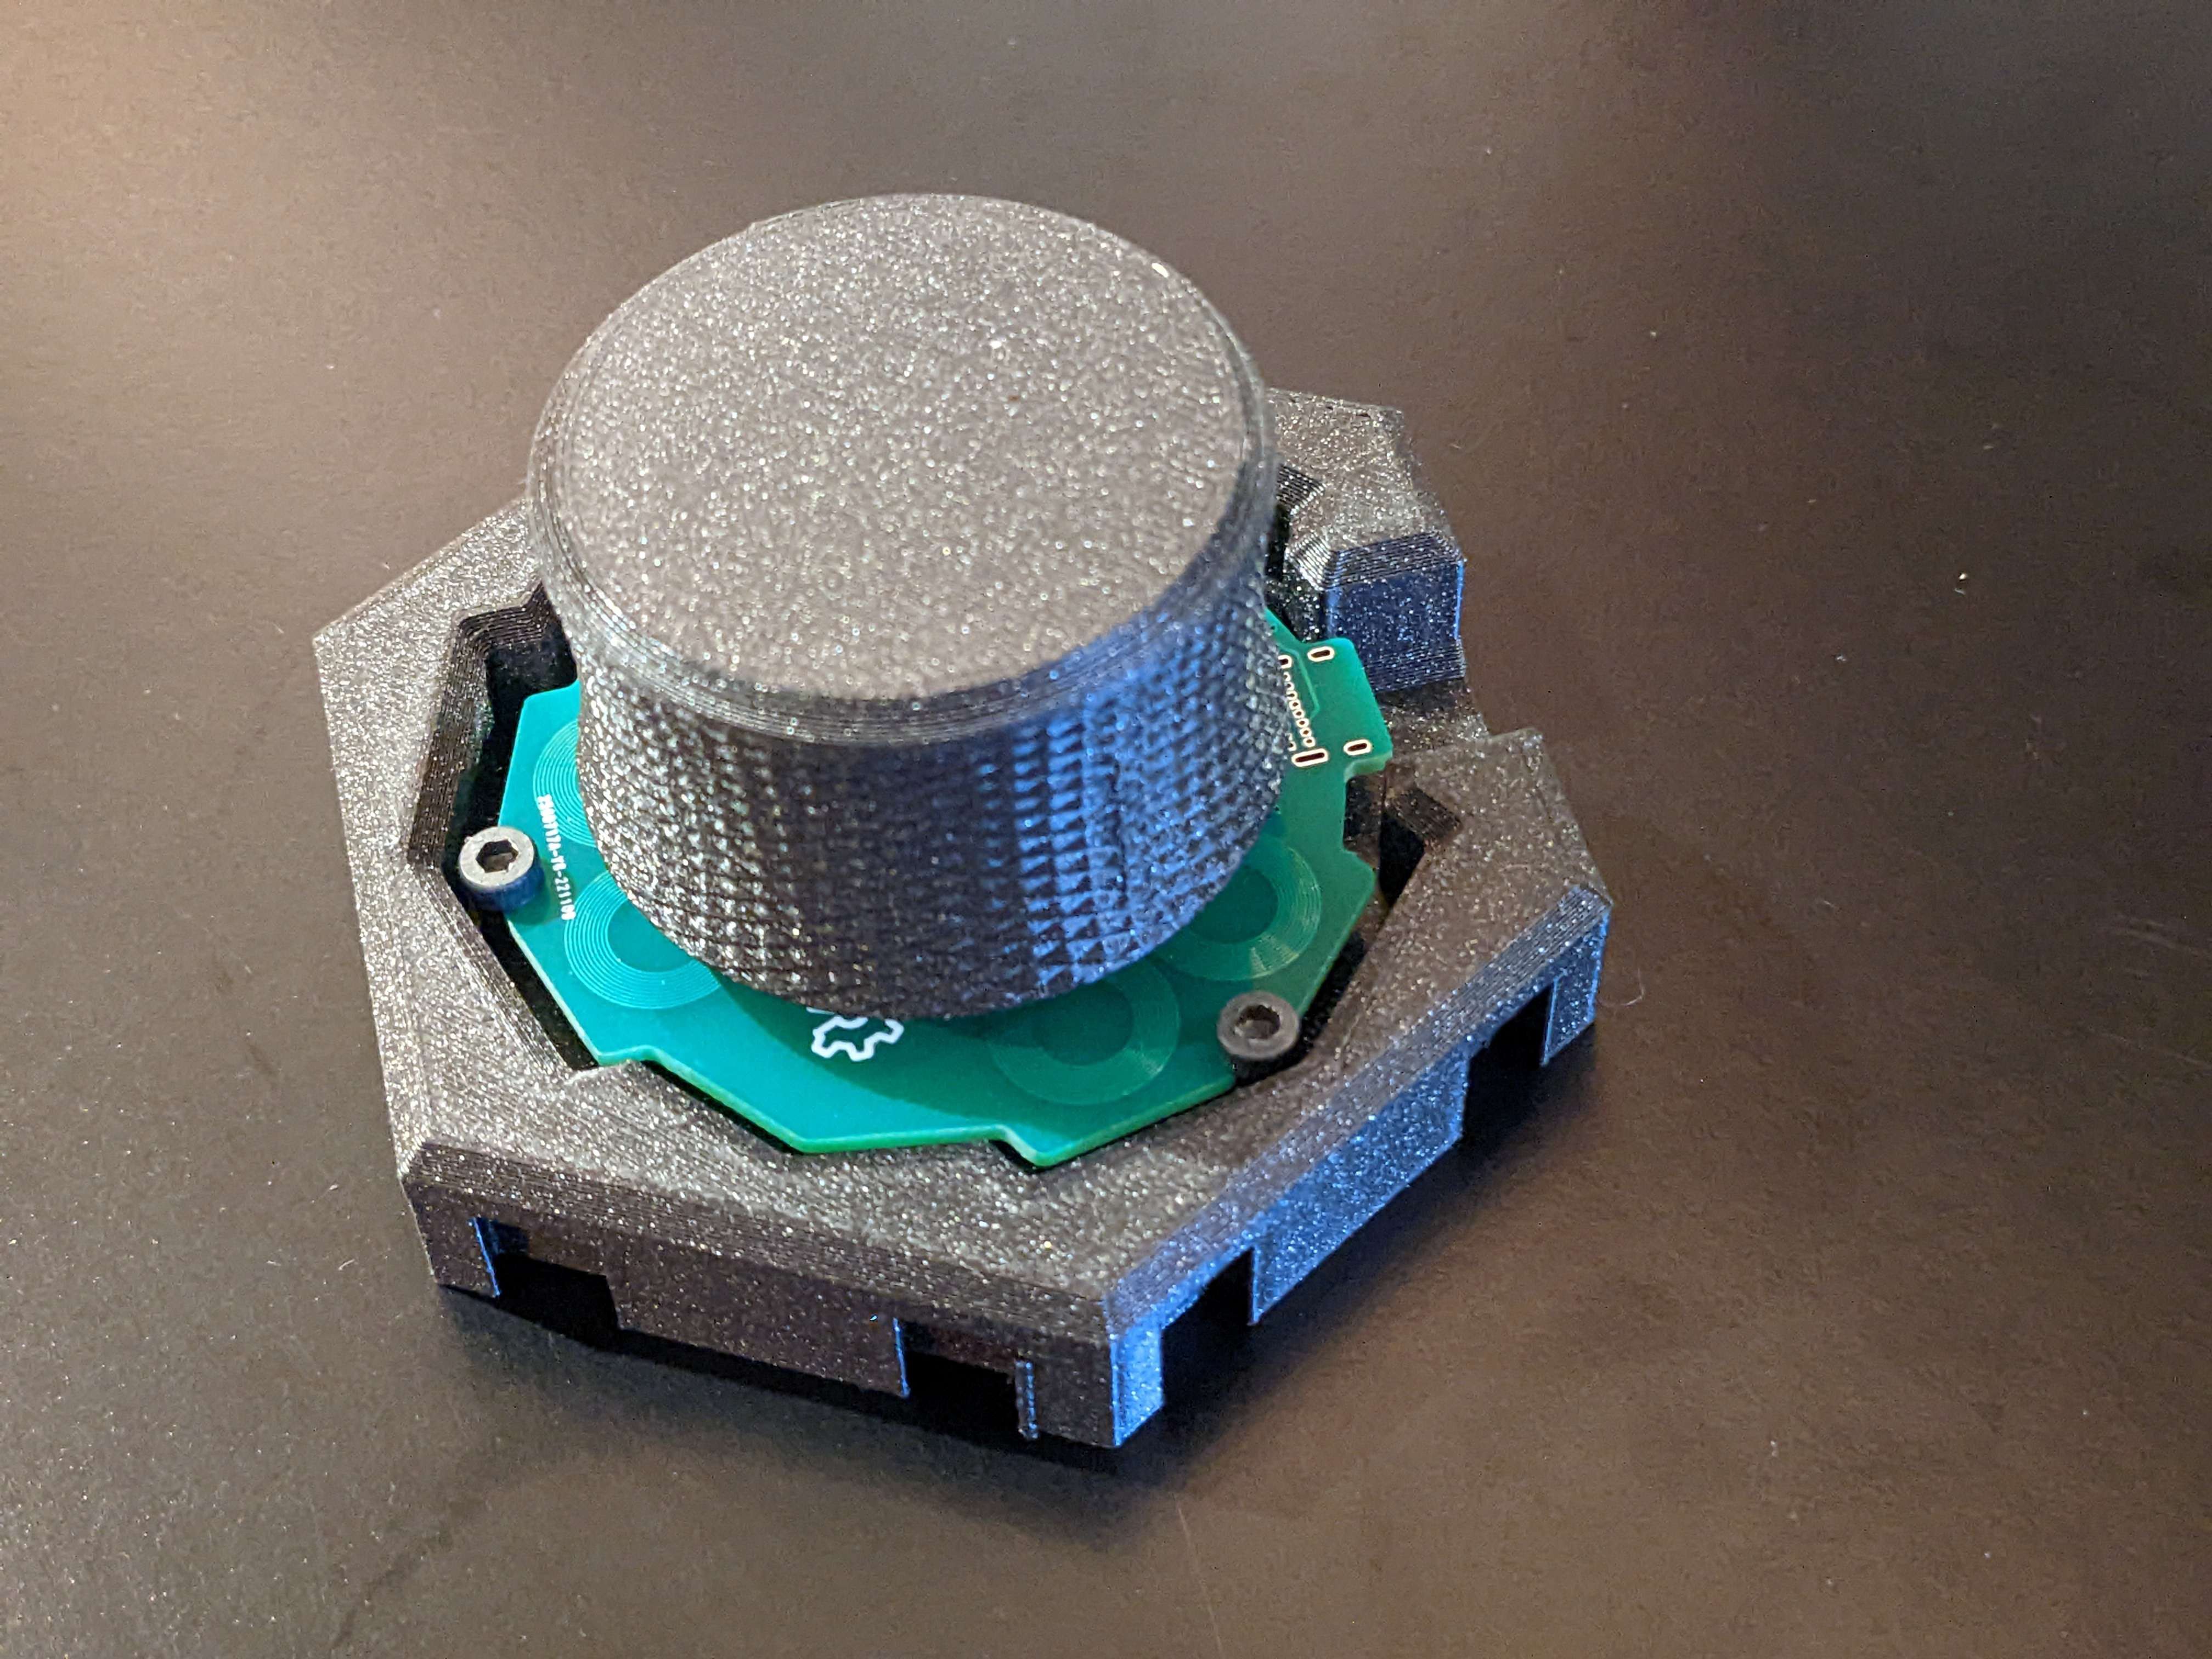
Part of the reason this update has taken so long is actually because I got in the PCBs and was too eager to try them out, rather than catching you all up on the progress I've been making. I hope you all will understand because come on, look at how cool this looks:

 colton.baldridge
Discussions
Become a Hackaday.io Member
Create an account to leave a comment. Already have an account? Log In.
Has there been any further progress / testing?
Are you sure? yes | no
Yeah, funny you should mention that today. I've been busy with some other life things for the past few months, but have lately had some time to look more back into this. Be on the lookout for an update in the next week or so!
Are you sure? yes | no
Hey Kelvin, just wanted to let you know I posted 2 new updates tonight showcasing the progress made since this log:
https://hackaday.io/project/187172-os3m-mouse/log/217133-project-log-7-hardware-completeish
https://hackaday.io/project/187172-os3m-mouse/log/217226-project-log-8-it-finally-works
Are you sure? yes | no
Nice. I've also recently written a page describing how a spacemouse could double up as a regular mouse (like an enlarged TrackPoint) if you're interested: https://hackaday.io/page/19768
Are you sure? yes | no
This looks phenomenal! I'll be watching this project.
Are you sure? yes | no