charliex
-
cutting out limit switch brackets.
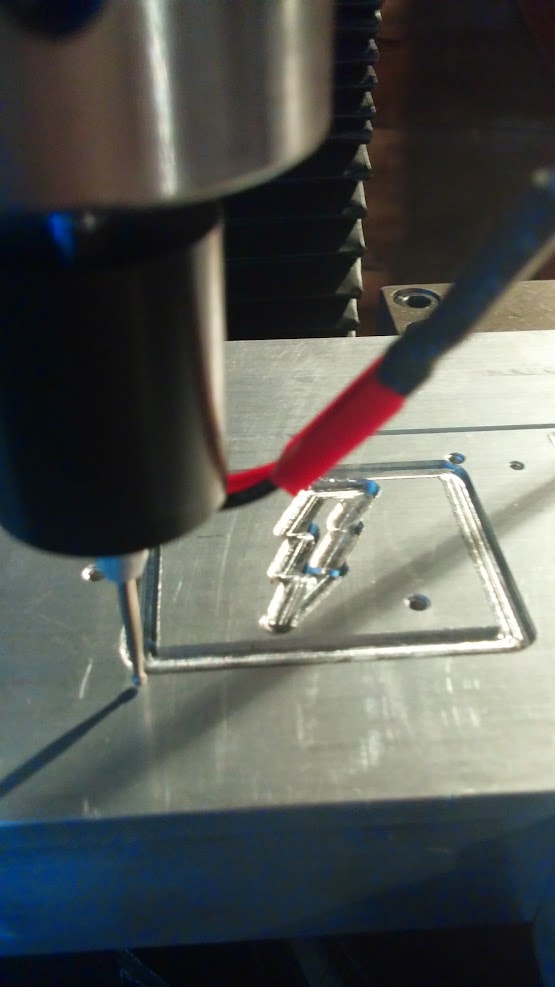
02/01/2015 at 04:07 • 1 comment![]() finally got around to making limit switch brackets. i really draw the line at $500 for a few switches, wires and brackets!
finally got around to making limit switch brackets. i really draw the line at $500 for a few switches, wires and brackets!left out the holes for the switches since they vary in location and it's just a matter of drilling two holes.
X+ X- Limit switches DXF
i used .063mil 5051 aluminium plate, it does have to be bent though since the bracket is right angle.
Still using eagle to do my CAD ! i have been getting to grip with solidworks and hsmxpress too
![]()
![]()
![]()
![]()
![]()
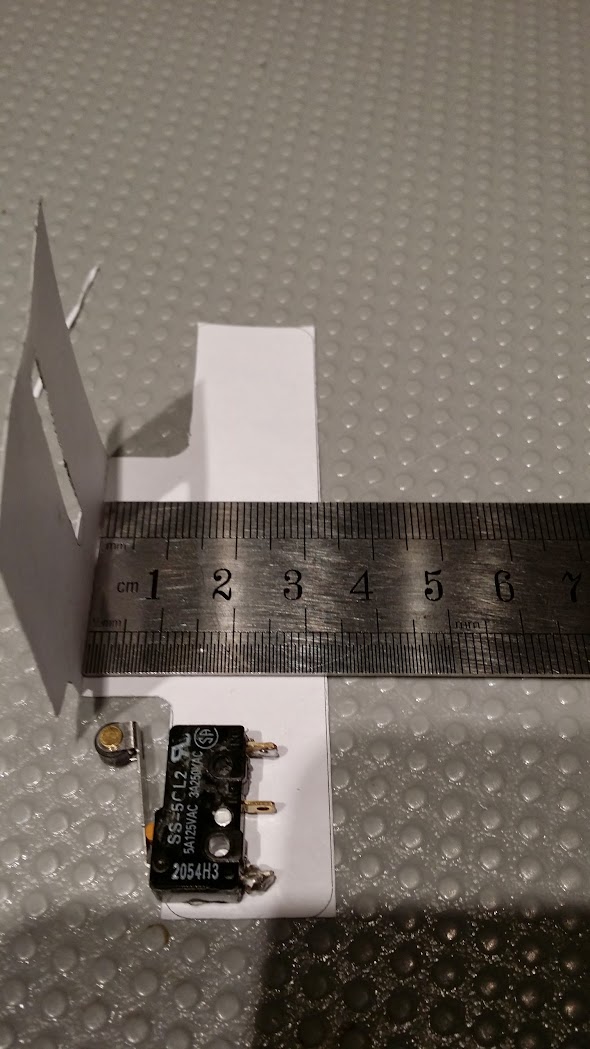
The Omron SS-5CL2's on my parts bin
http://www.omron.com/ecb/products/sw/12/ss.html
part cut out, i'd make it a tad shorter, maybe about 5mm off the bottom, and the tabs i left to hold to the metal are twice as big as the need to be for a 1/16th end mill at least. I edited the dxf to shrink the height, and make the tabs 0.1" instead of 0.2"
i don't have a good way of bending it, so a vice a soft mallet and my band saw table, plus anvil and hammer again.
![]()
Now to tap four holes, two for each switch.
I was going to tap and machine screw into the metal, then while i was looking for the rest of the switches i came across some surplus switch brackets i had from all electronics, i liked the way they were mounted. Obviously using thread locker as well.
![]()
![]()
So the thread lock goes on top side, then a small bracket on the back to screw into, helps spread the load and secure it.
x- x+ mounted
![]()
I'll add the Y and Z as i make them up.
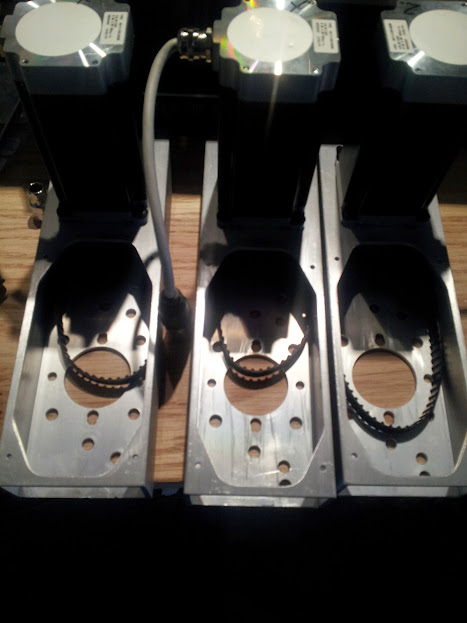
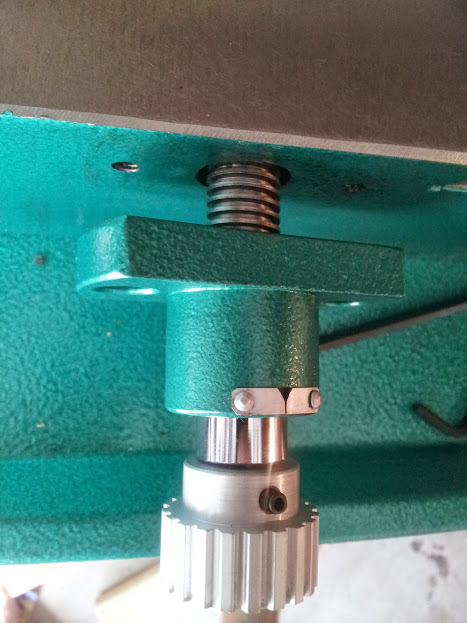
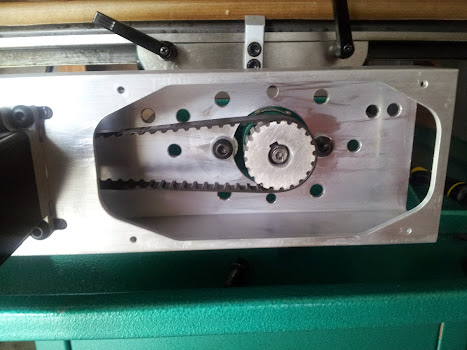
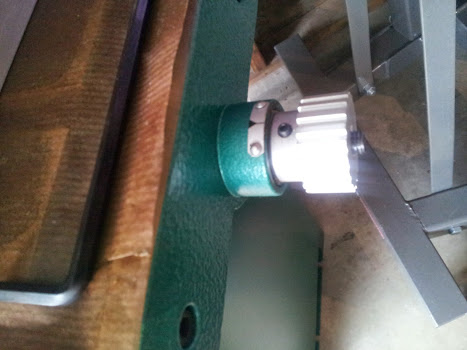
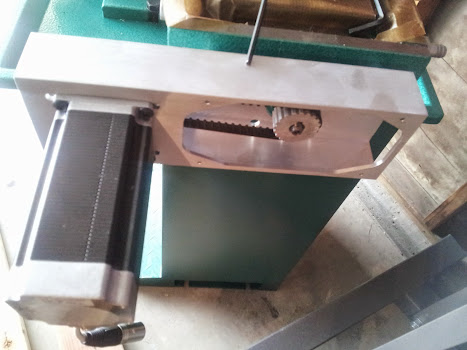
I also have most of the belt drive conversion kit in, just need the new bearings and spacers to get it installed. the gears at first seem quiet, but they definitely are a strange noise to listen too.
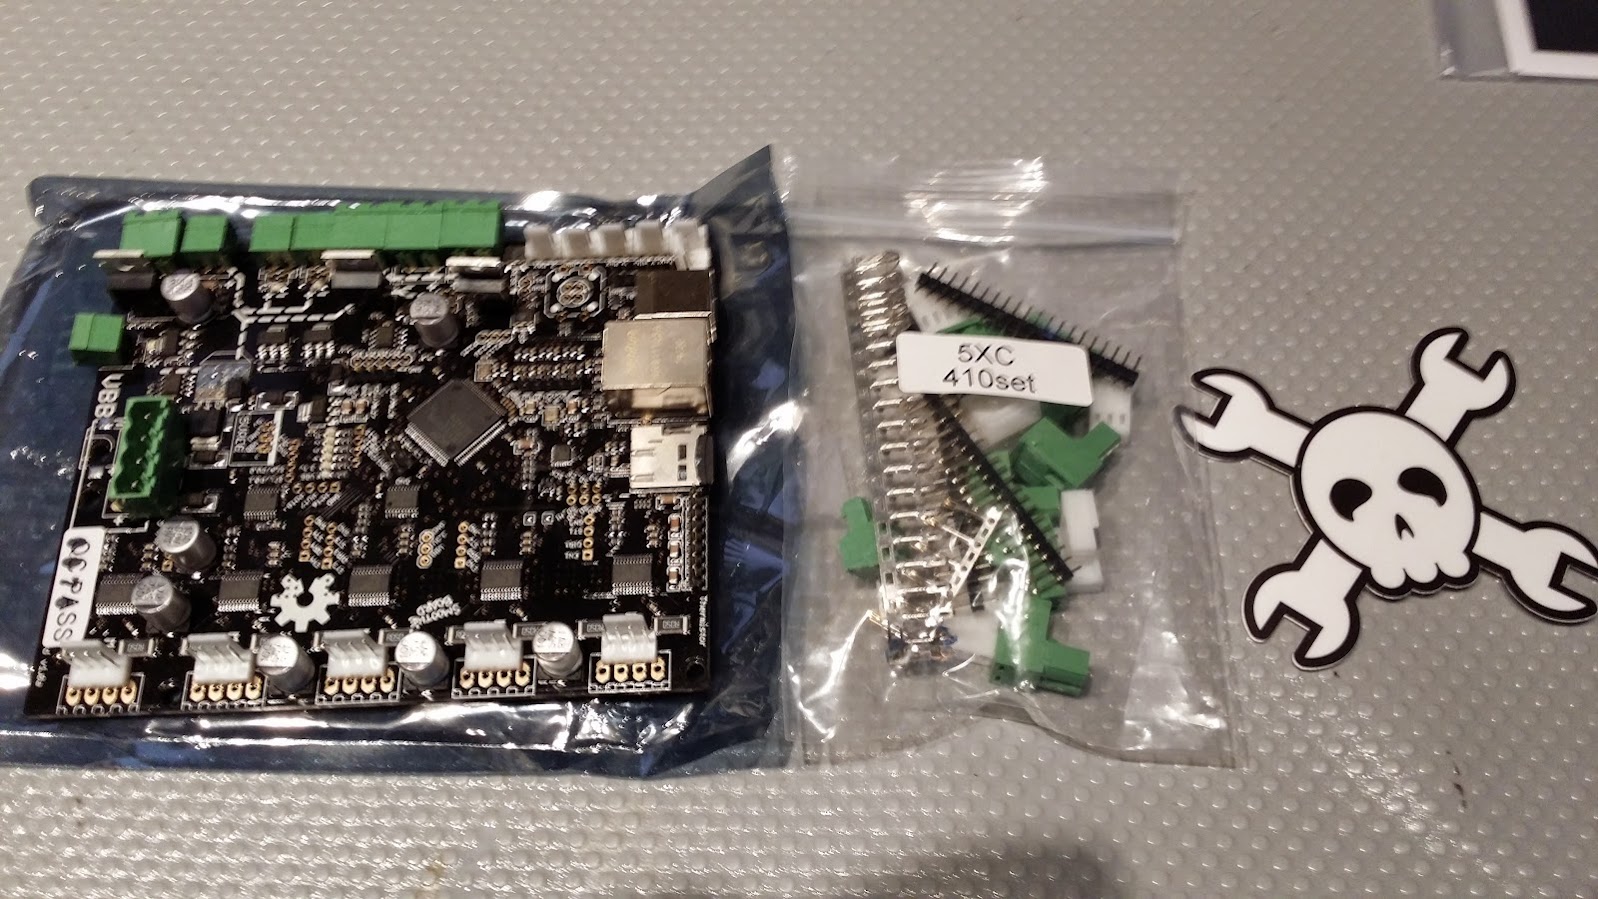
Also smoothieboard 5 (from HAD store)! , Not really sure what i want to do with it yet, but it always looked like an interesting project, and like me one of the coders is ex-3DO. I might use it for my ebay 40W laser and change out the moshiboard.
![]()
started on the Y- adapter. eagle again! its cutting out now, so once i verify it fits i'll push the files.
![]() simpler this time. smaller tabs too and just one per cutout
simpler this time. smaller tabs too and just one per cutout![]()
potato cam
![]()
![]()
make sure it clears, i put a small slope in the switch platform and make sure it doesn't interfere with the machine movements. this is a potentially messy spot. i'm doing test fit of all the switches before i wire them up.
Washer added to the bolt. putting the bracket in front makes sure the chip collector still works as designed.
![]()
You can make the switch platform longer if you want, this config does move back to just before the machines physical limits.
Y+ next. The Z limit i put on with hot melt a while ago is staying firm, but the brackets are better.
OK i wired up the X+ / X- Y+ Y- and tested it. The Y- i cheated and temporarily used a bracket that fitted that looks like one of the ones from all electronics. I did a test wire up and moved the table around to see if/where it'd bind, then ran homing tests. so far so good!
The way my control box works is that it finds the limit for home, then moves back N amount, so for the Y- it goes all the way back, and i have it come forward 0.75" that way it doesn't squish the chip guard too much. The rest are set-able by the little button on the X+ and the Y+ is dead on.
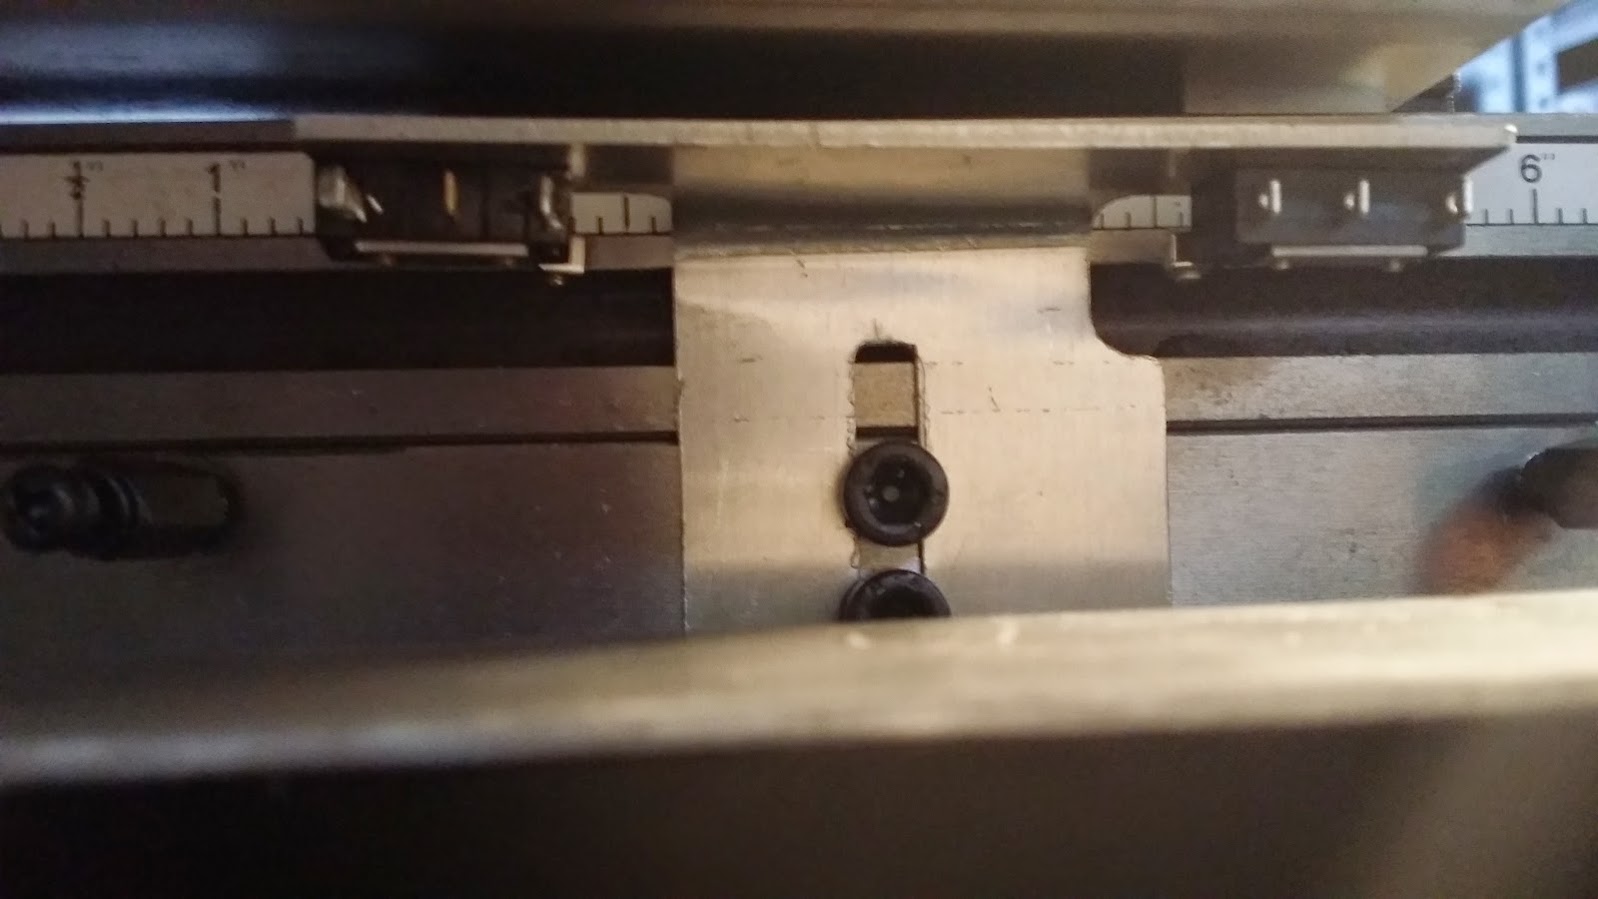
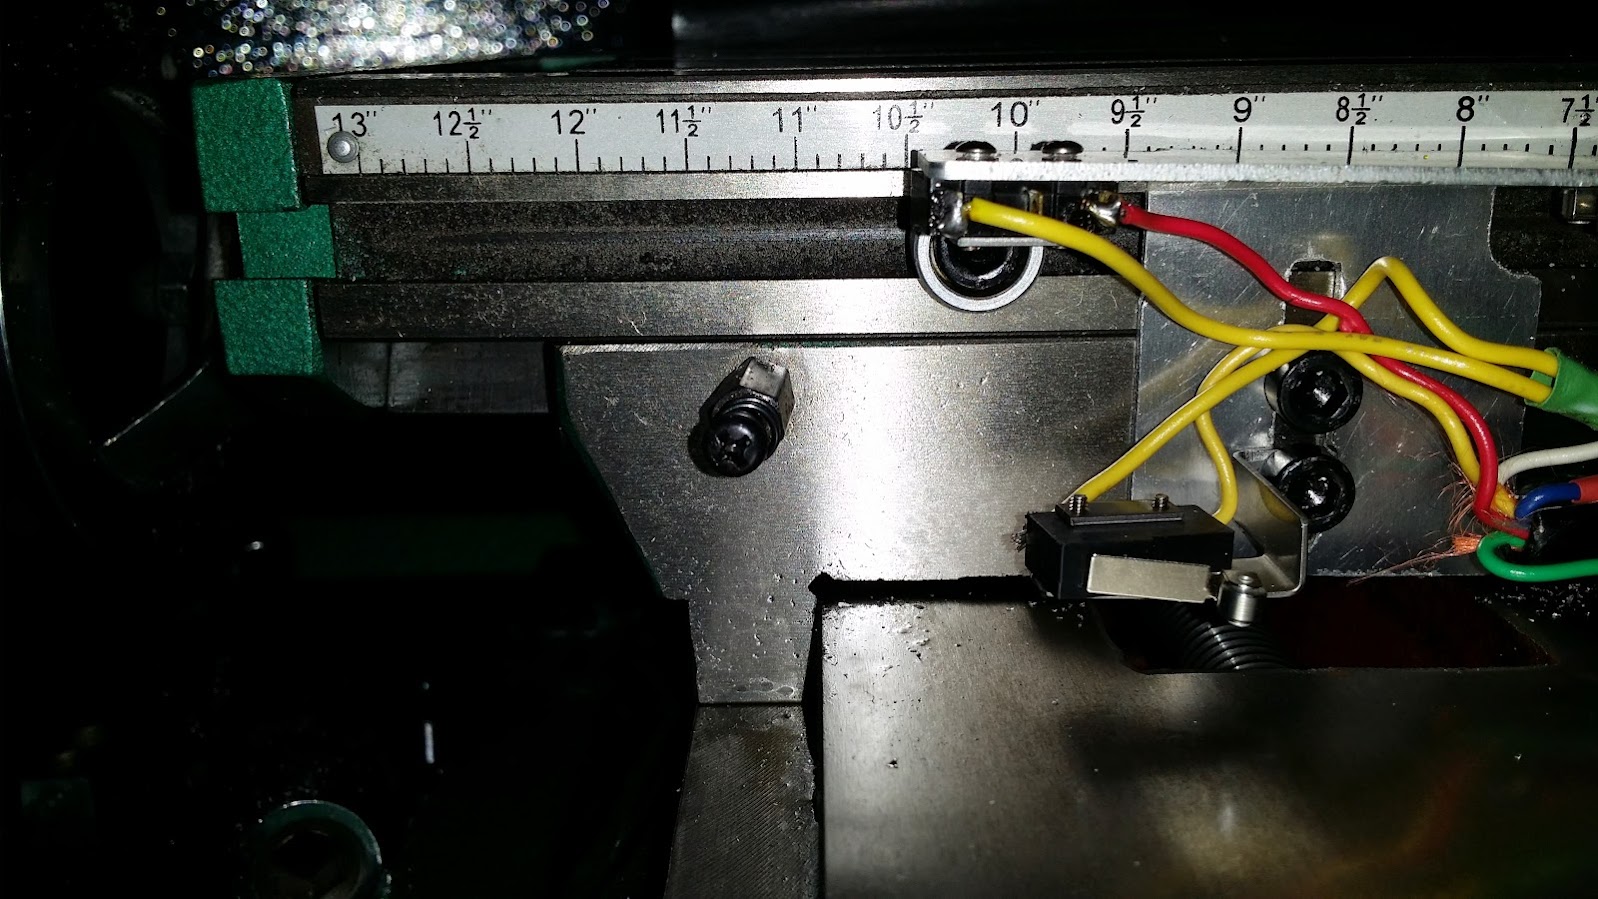
You can see the Y+ bracket here, i enlarged the holes and used the bottom bolt, other people have the Y+ on the stepper side, there might be a good reason for that, but i don't know what it is (yet), doing it this way allows me to put the X+/X-/Y+ control wires and ground all out to one position , then just run a ground + Y- control to the back.
![]()
![]()
the Y-/GND runs from the front side to the back.
![]()
![]() Once the rest of the brackets are cut, i'll liquid proof the connections.
Once the rest of the brackets are cut, i'll liquid proof the connections.I'll cut out a real Y+ next weekend, still recovering from my blood transfusion so feeling slow today...
-
External AC control box.
08/19/2014 at 17:26 • 0 commentsNow that Siggraph is over and I finished the lightstage, and my HD oculus rift modification, I can hopefully get some free time to work on things again at a decent rate.
My PCB CNC has a useful box that switches the vacuum on and off and since its noisy as all heck, i really want that, i want to be able to control the spindle too.
Since the motor is an inductive load, I am not using a zero volt crossing SSR, instead one that switches immediately, placed the order last night with digikey. I'm opting to go for a Crydom D2450-10 from dk vs a the cheapos on ebay since the fail on an SSR is either always on or big bada boom. So might as well do what I can, it is $45 vs $20.
Basically I have a power in, and C19-15 out, the controller i'm using is already opto isolated. It's very basic.
Heat sink is a must, calculate for the in rush current ( 6 to 10 times the normal load ) and appropriate gauge wiring, I'll fuse it for the load versus the rating of the SSR
I may build two boxes, one with a zero crossing, and the one without. After that i'll look at motor speed control, very simply at first by replacing the pot on the board with a frequency to voltage converter.
-
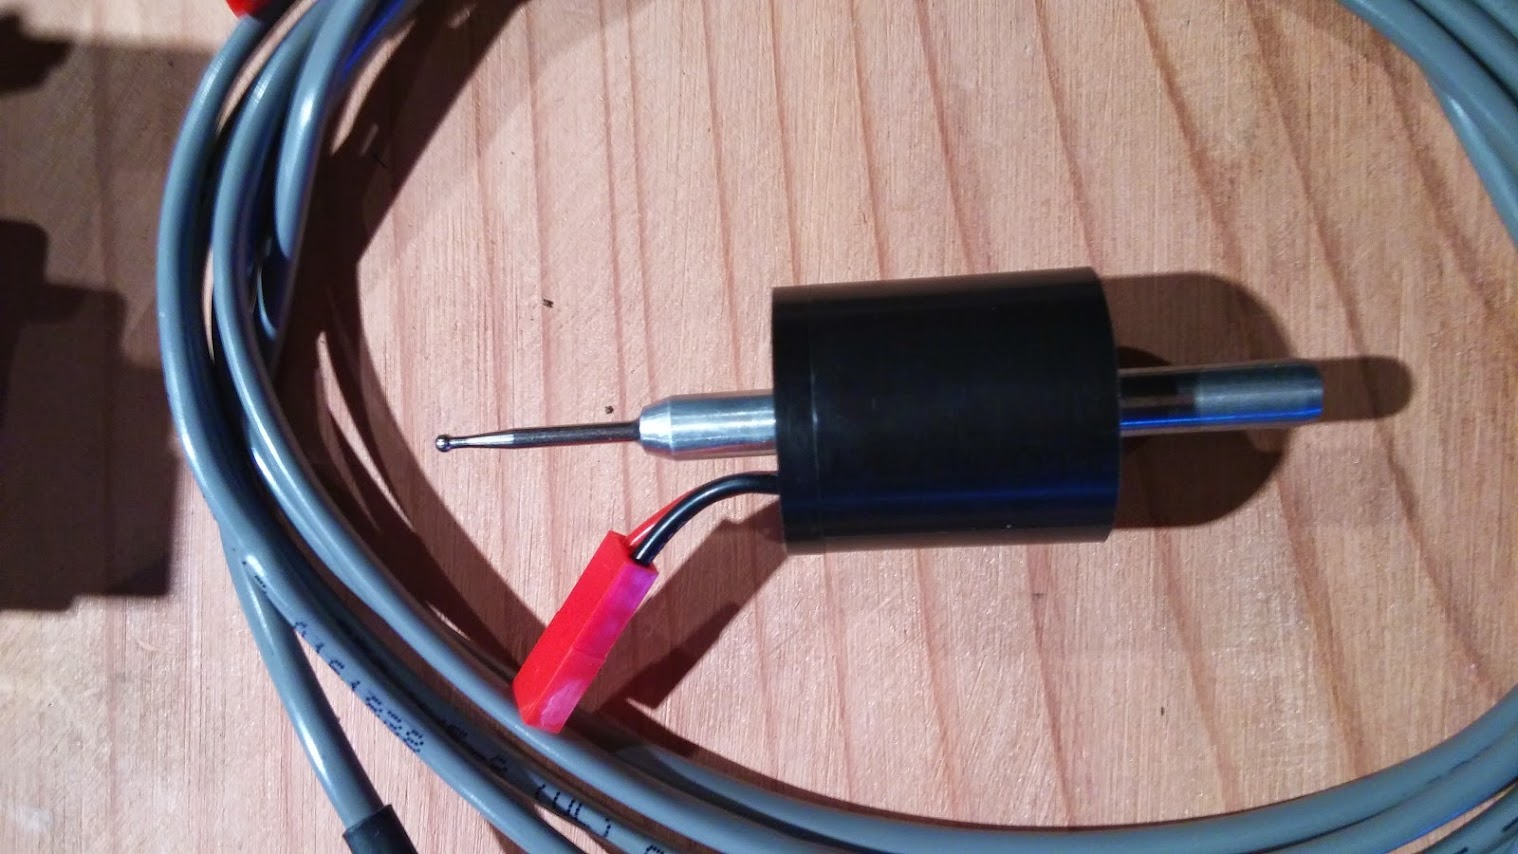
Added a touch probe
08/18/2014 at 22:54 • 0 commentsI wanted to add a touch probe, the guys who sell the flashcut cnc sell one, but they apparently don't want you to buy it, after a week of being ignored, i found one (probably cheaper) on ebay. http://www.ebay.com/itm/171403160255 "CNC Touch Probe for Mach3, LinuxCNC - 5 foot cable length"
$125
- ¼” shank (useable in CNC routers using ¼”collet) - [NOTE: if requested, I can provide turned down to 1/8"]
- Small overall size (body is 1” diameter, 1.25”tall)
- Comes with two interchangeable hardenened/ground stainless tips (.045” and .073” diameters provided)
- Uses standard M3-.5 metric thread, so you can use standard CMM style probe tips if you like (CMM styple probe not included in this sale, picture showing a ‘ruby tipped’ probe is for reference only)
- Adjustment screws so you can eliminate runout between shank and probe tip (this is important if you want to use the probe for accurate edge finding/centering of bores
- Detachable 5’ cord, makes it easier to set the probe up for adjusting runout (chuck probe in spindle and rotate against a dial indicator to dial it in)
- Probe activation force may be adjusted by replacing internal spring (3 springs: Heavy, medium, and Xtra-light NOW INCLUDED!)
I'd probably choose the 1/8" option next time. For my Little Machine Shop startup kit.
Out of the box it is definitely a lot of force needed to trigger it, it'll work for anything but soft rubbers etc. It is nicely made and comes with a JST connector, personally i'd like to see the wire come out the side or the top and not the bottom though.
![]()
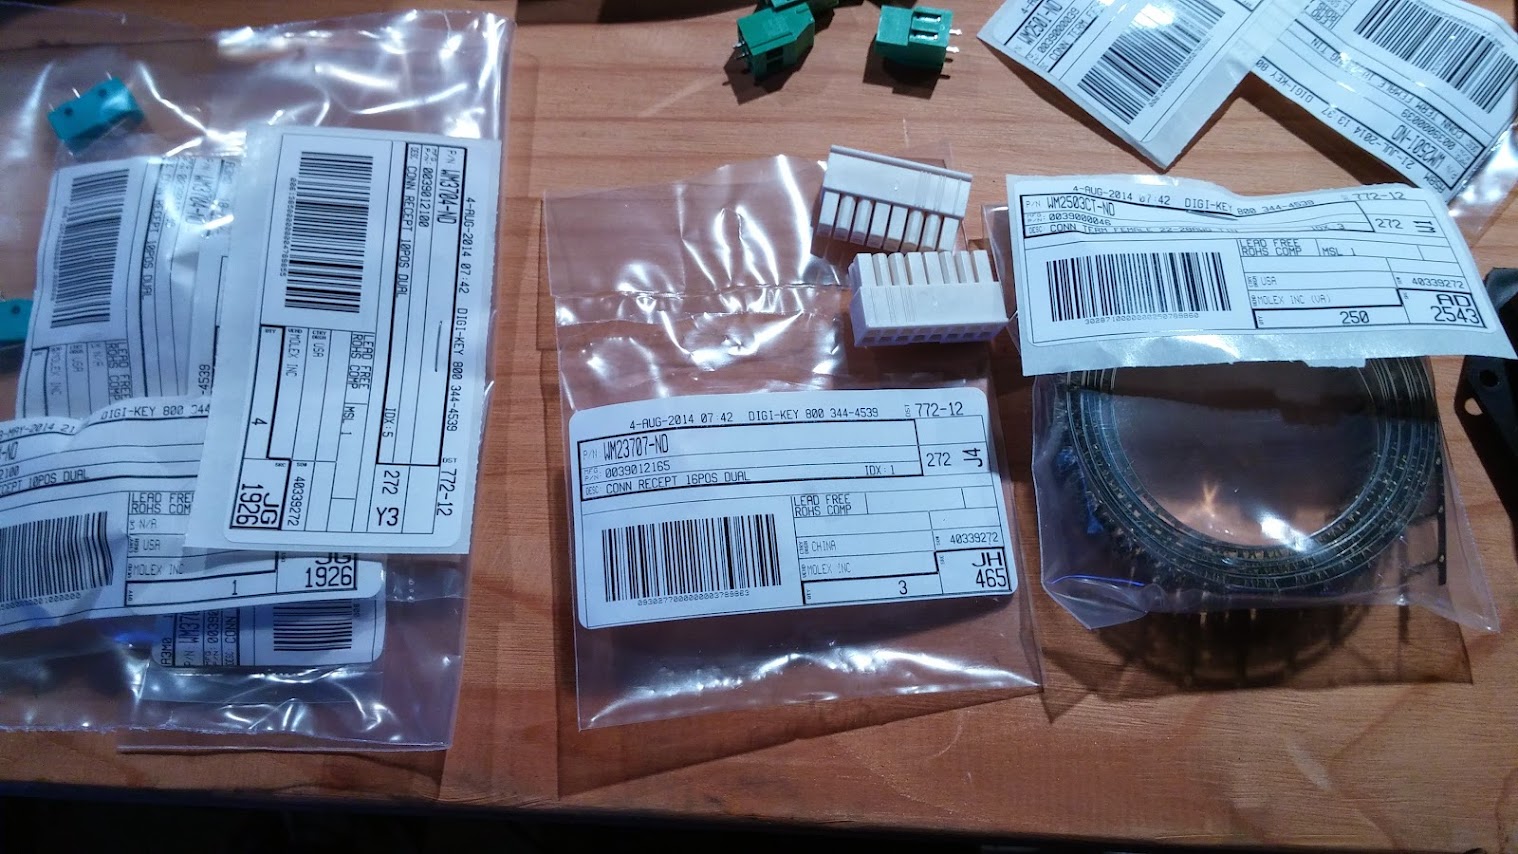
The other parts are for my relay control box, maybe to switch the spindle on/off or the vacuum I haven't decided yet. Again i could buy one from flashcut cnc, but they don't reply.
![]()
I added it to the IO line of the controller, ground+line 8, set it to a control line Normally Closed and configured the software. Ran a test and off it went
Parts for the connectors for the flashcut
![]()
A quick test.
![]()
So far, so good.
![]()
![]()
There is a video here, i never can figure out how to share a video off google+ without putting it on youtube first.
https://plus.google.com/103597034352682332839/posts/EYJUeT1sEU2
-
Installed and working!
07/27/2014 at 19:27 • 0 commentspicture heavy, i'll come back and edit, again sorry for the "buy things and stick them together project"
added the sprockets to the motors
![]()
![]()
![]()
![]()
![]()
![]()
![]()
![]()
![]()
![]()
![]()
![]()
![]()
![]()
![]()
![]()
![]()
![]()
![]()
![]()
![]()
![]()
![]()
![]()
![]()
![]()
![]()
![]()
![]()
![]()
![]()
![]()
![]()
![]()
![]()
the mystery box....
![]()
![]()
https://www.youtube.com/watch?v=Yerd04O4ykQ&feature=youtu.be
-
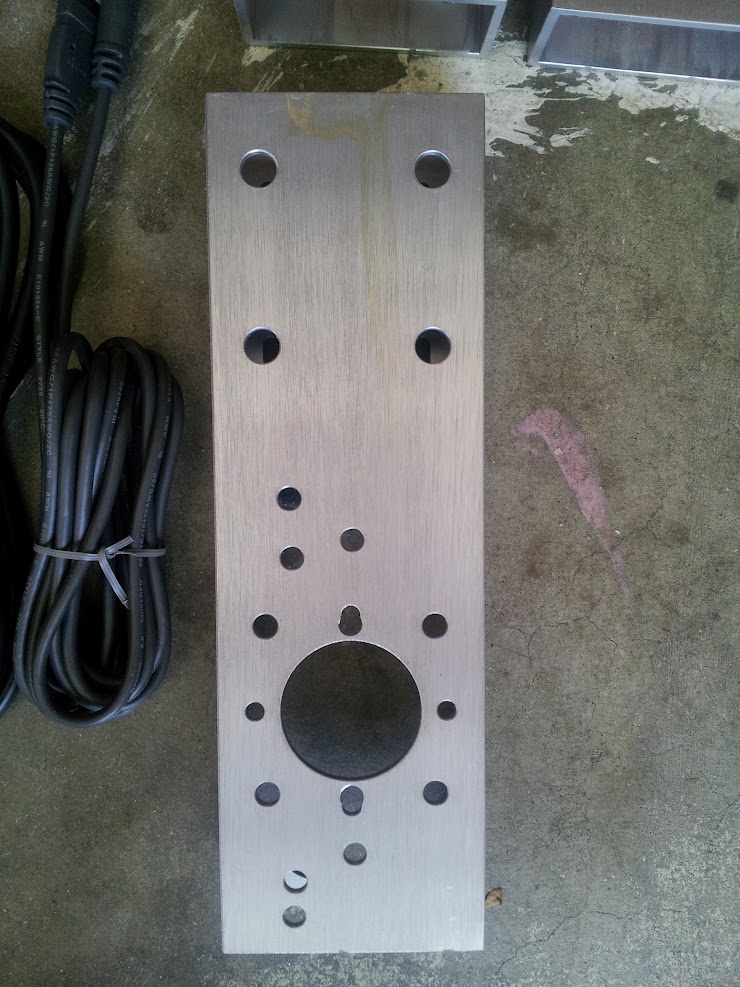
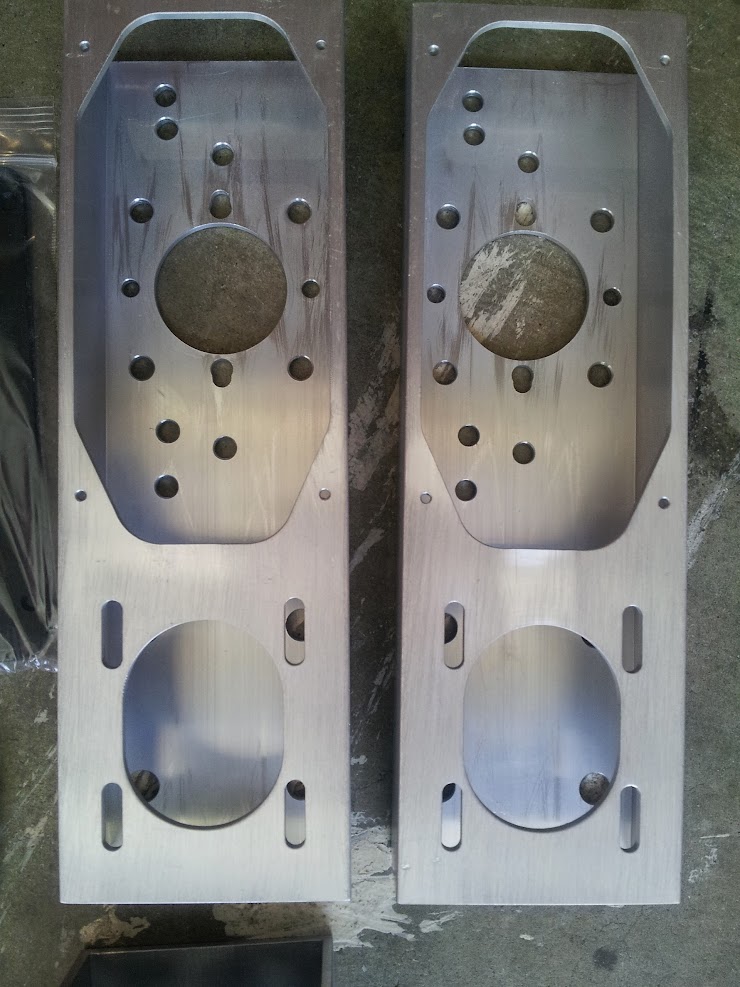
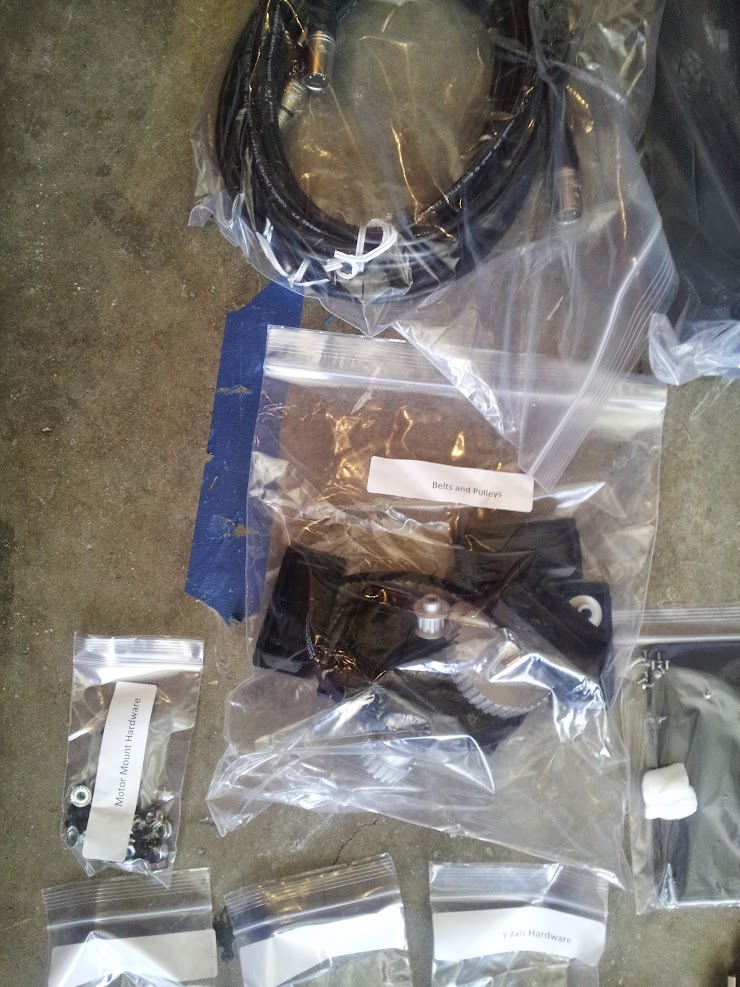
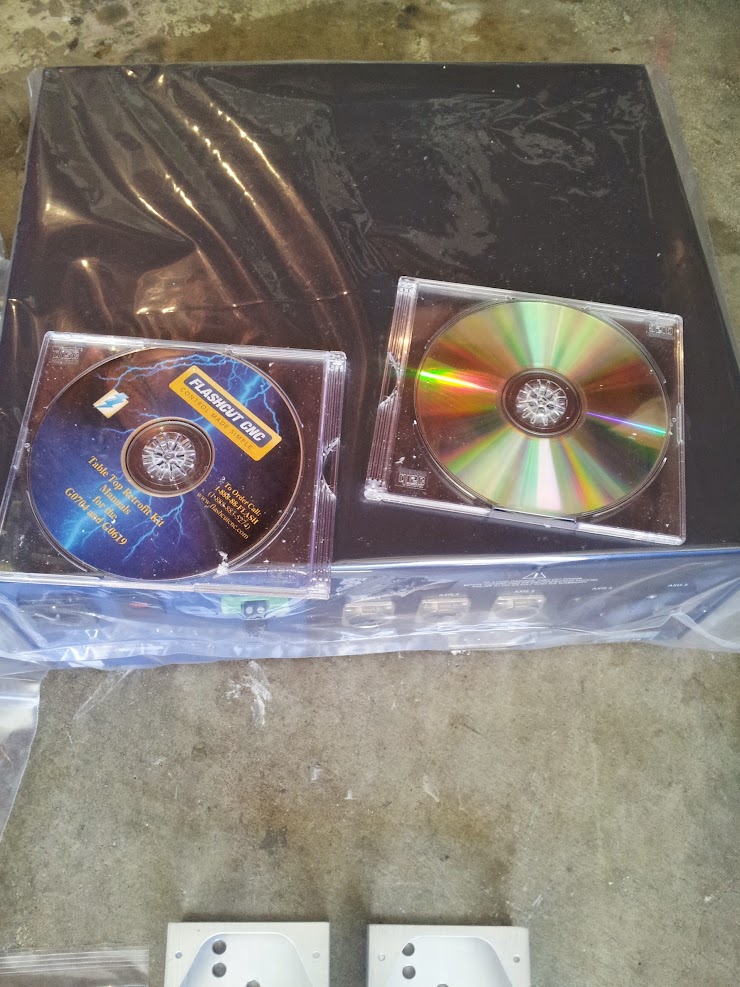
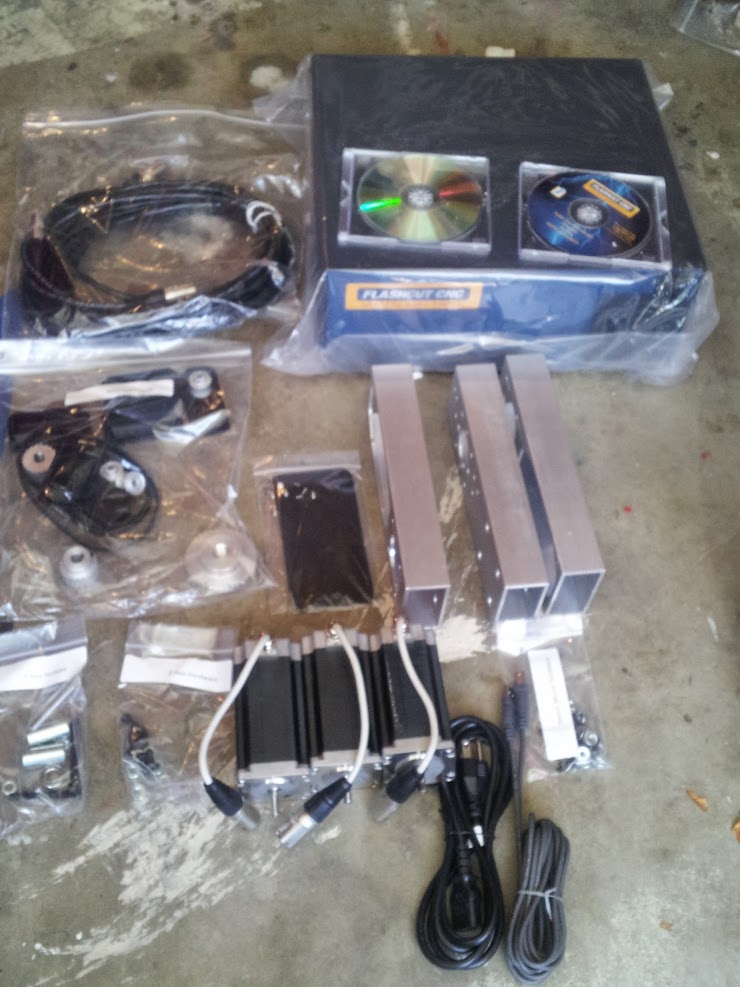
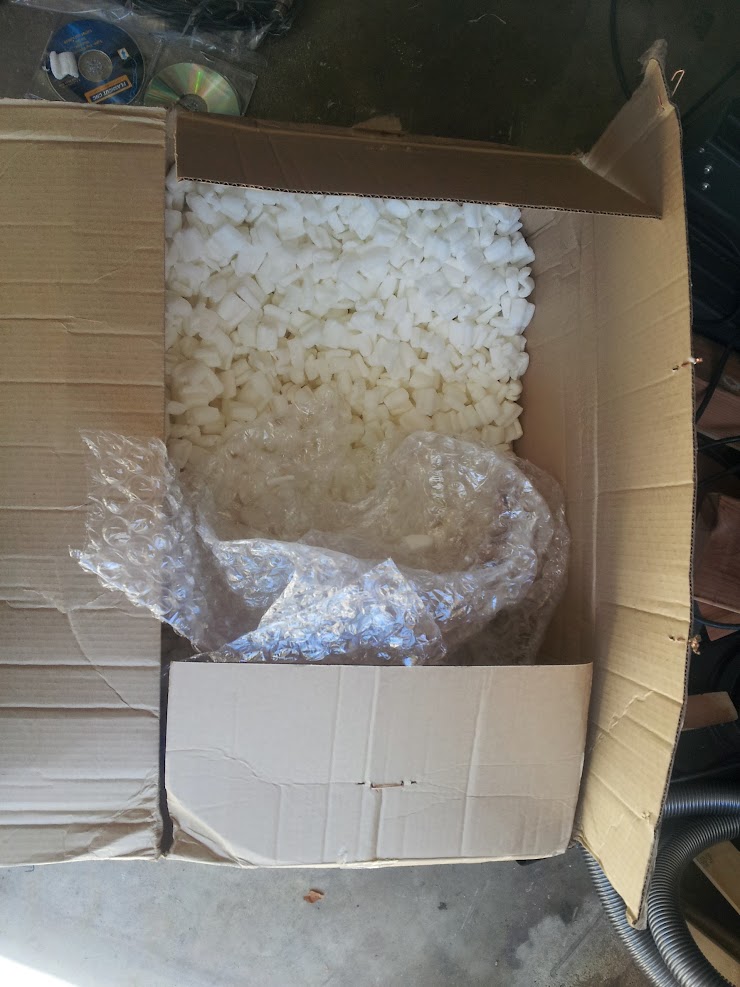
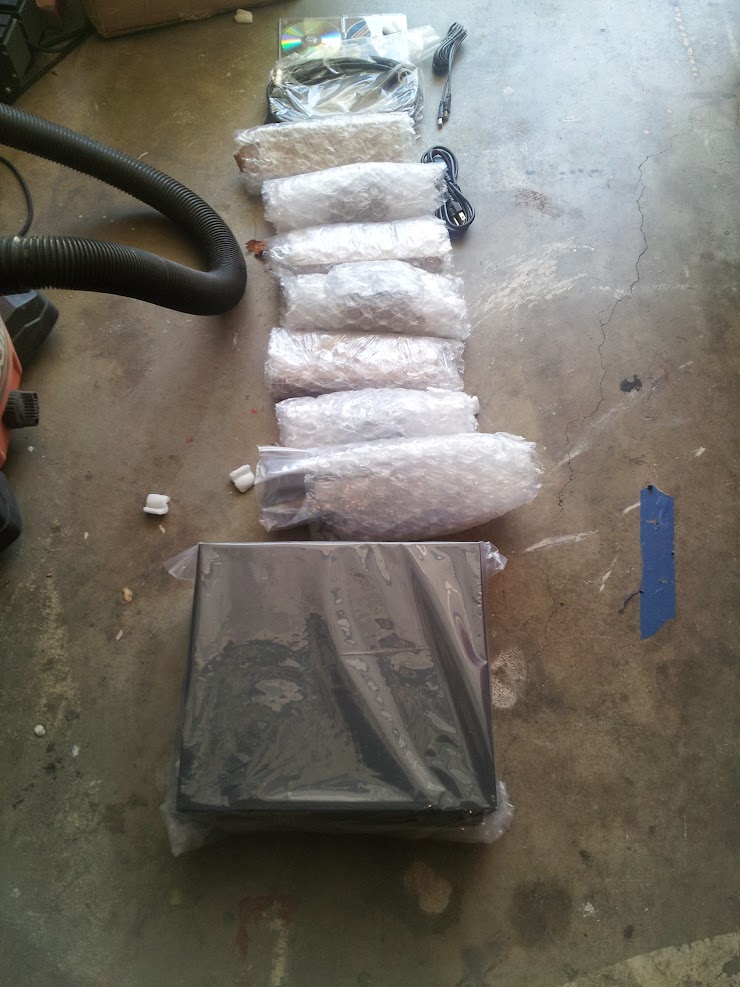
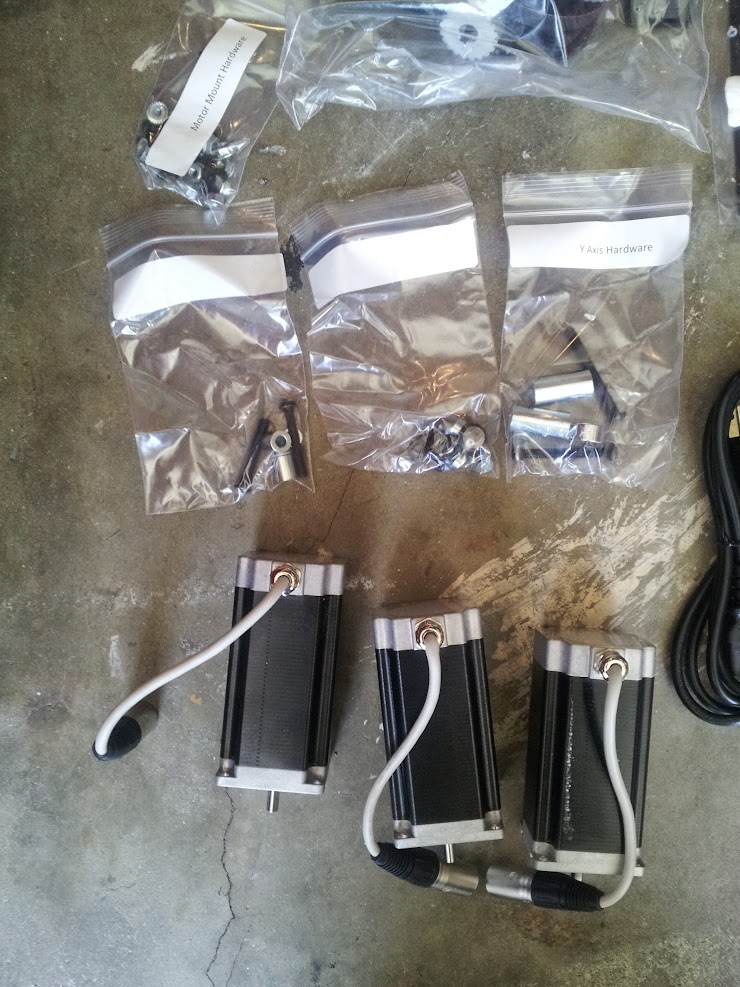
SOLD OUT!
07/26/2014 at 19:22 • 0 commentsGiven that this is first time off of work in the last few weeks, though i'm supposed to be at work at the moment, flu etc.
I ended up getting some unexpected cash just as we were about to but some of the machine parts, so talked it over with the wifey and decided to just pick up an off the shelf conversion kit, i went back and forth on it for a few days, since it doesn't sit well with me, i know they're overpriced. I've read most of the conversion logs and it takes most people upto two years to do a conversion, i have pretty much zero free time, and supposedly this is an afternoon conversion, so easy come easy go...
Let the unboxing begin...
![]()
![]()
![]() \
\![]()
![]()
![]()
![]()
![]()
![]()
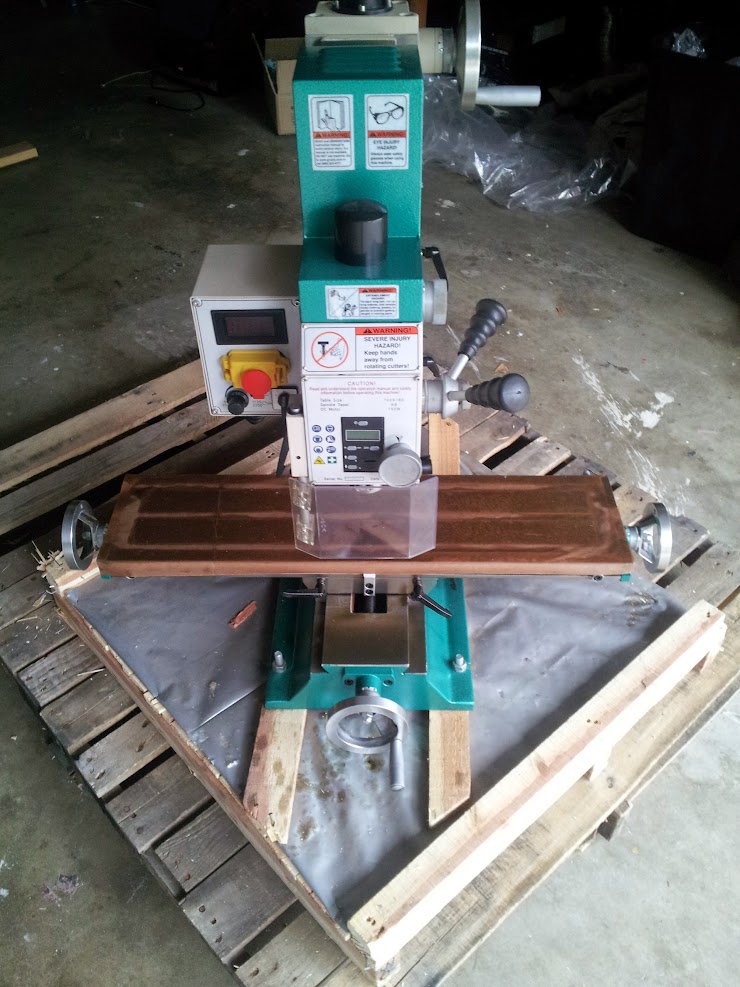
That is what a 8A 3 Axis $3,500 conversion kit looks like.. But once i get it installed , lets see the if the reviews hold up..
Interestingly one of the things that made me like the box was that they published schematics for a lot of it.
Then i'll redo the box..
-
mounted!
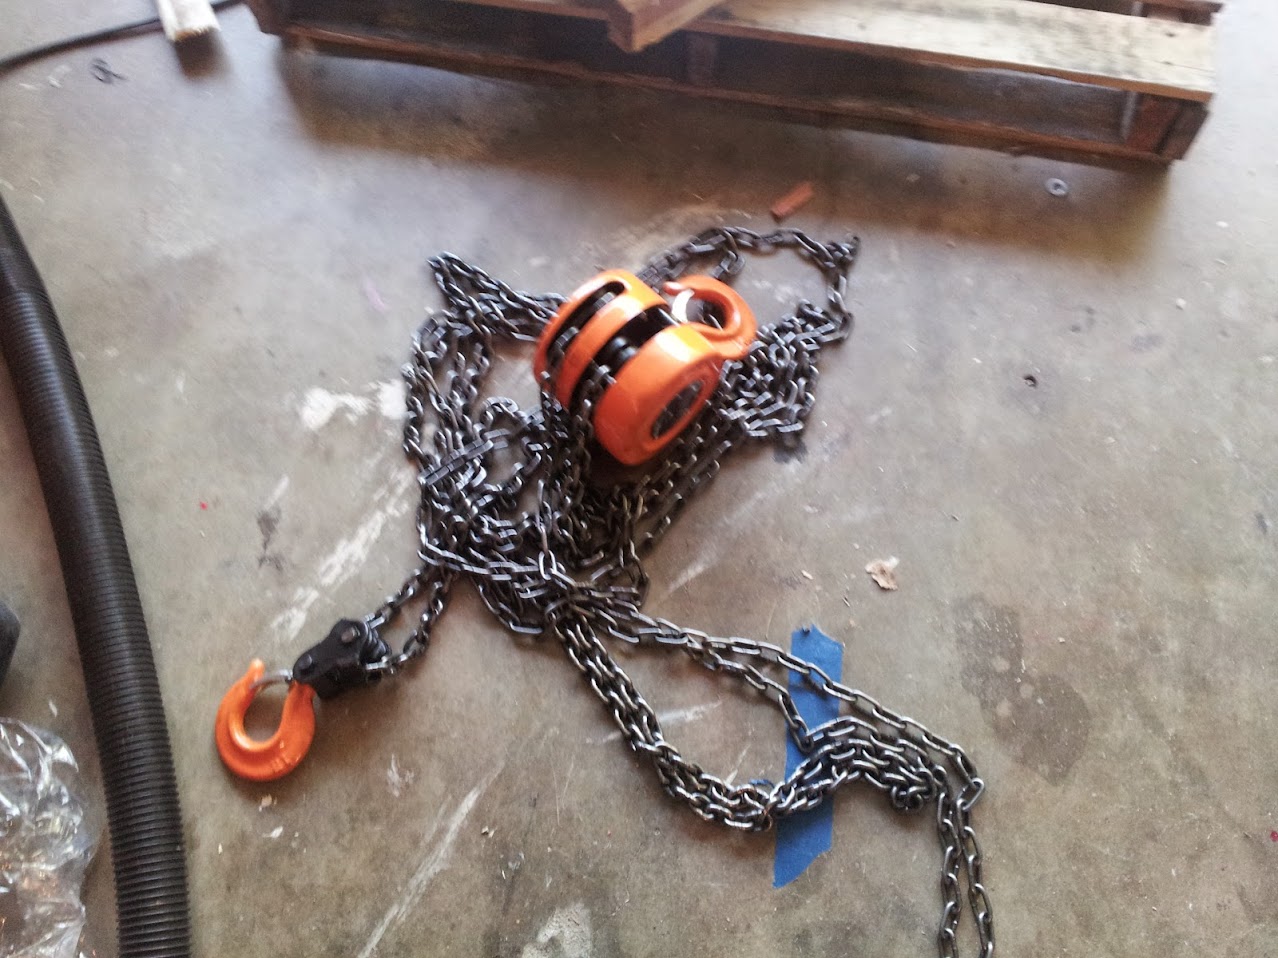
07/21/2014 at 00:33 • 0 commentsfinally had a couple of hours free at work this sunday (not joking) and went to harbor freight about 40 mins away to pick up a 2 tonne lift, chain hoist and 2000lb lifting strap. then had to leave the store and go back to work... after that we managed to get an hour to lift it onto the stand
![]()
![]()
![]()
![]()
![]()
-
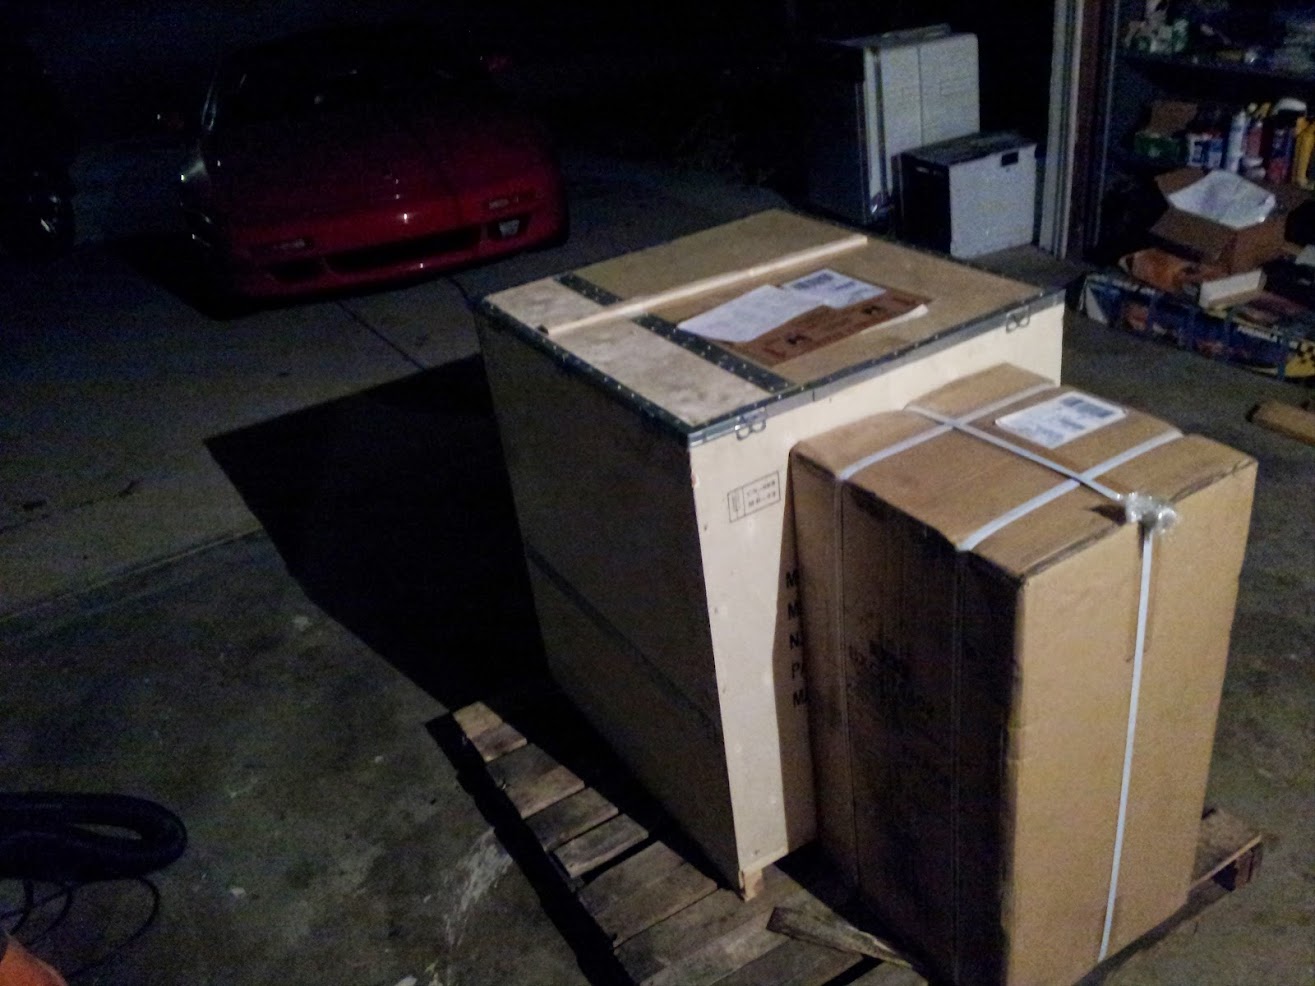
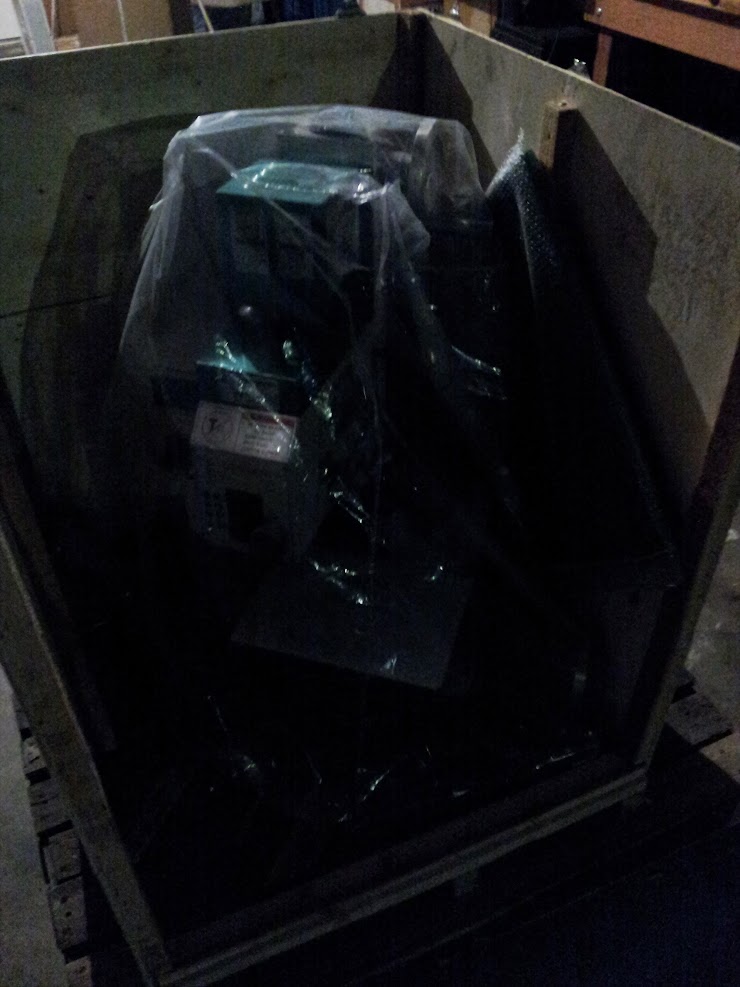
boxes arrived
07/17/2014 at 16:05 • 0 commentsedex apparently have an issue with trees, even though we've brought bigger trucks to our place but oh well, a day late and thanks to mr pika being able to be at my place for drop off the boxes arrived.
![]()
Pretty well packed too, also smaller than i thought but still heavy enough.
Took me 10 mins to open up the top of the case
![]()
![]()
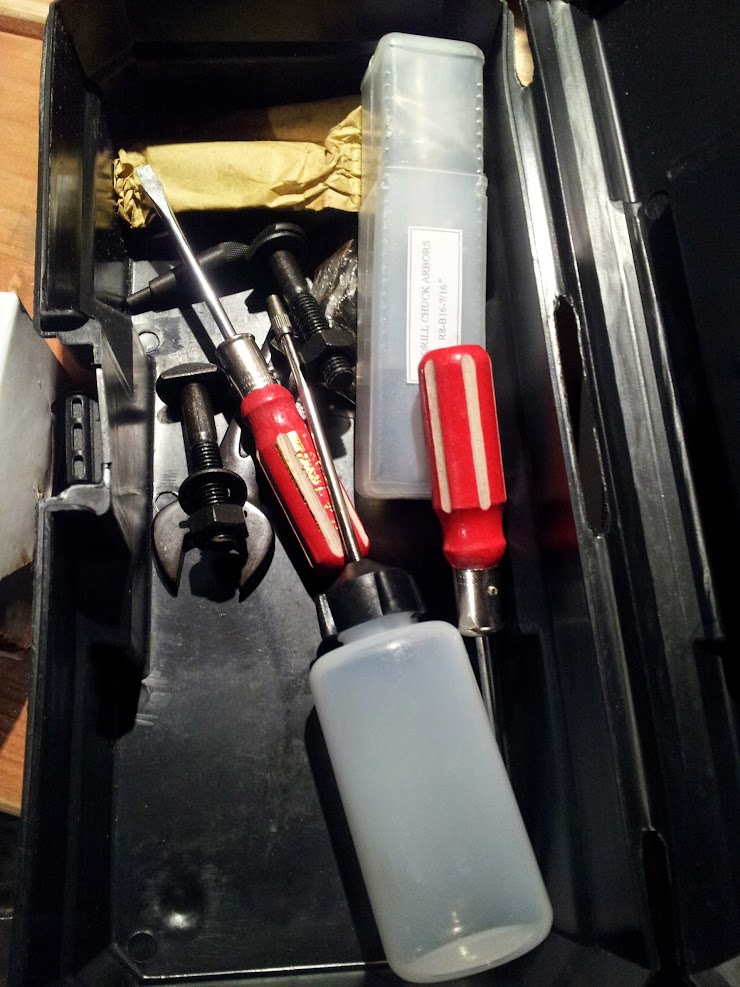
Comes with some top quality tools too!
![]()
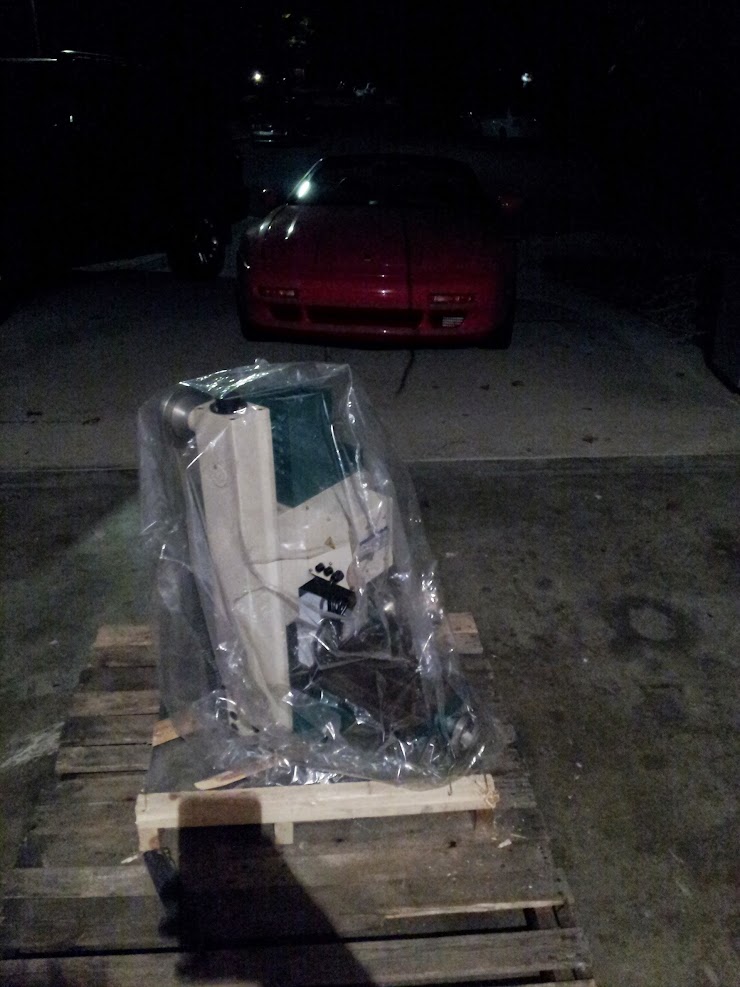
Came back to it this morning
![]()
![]()
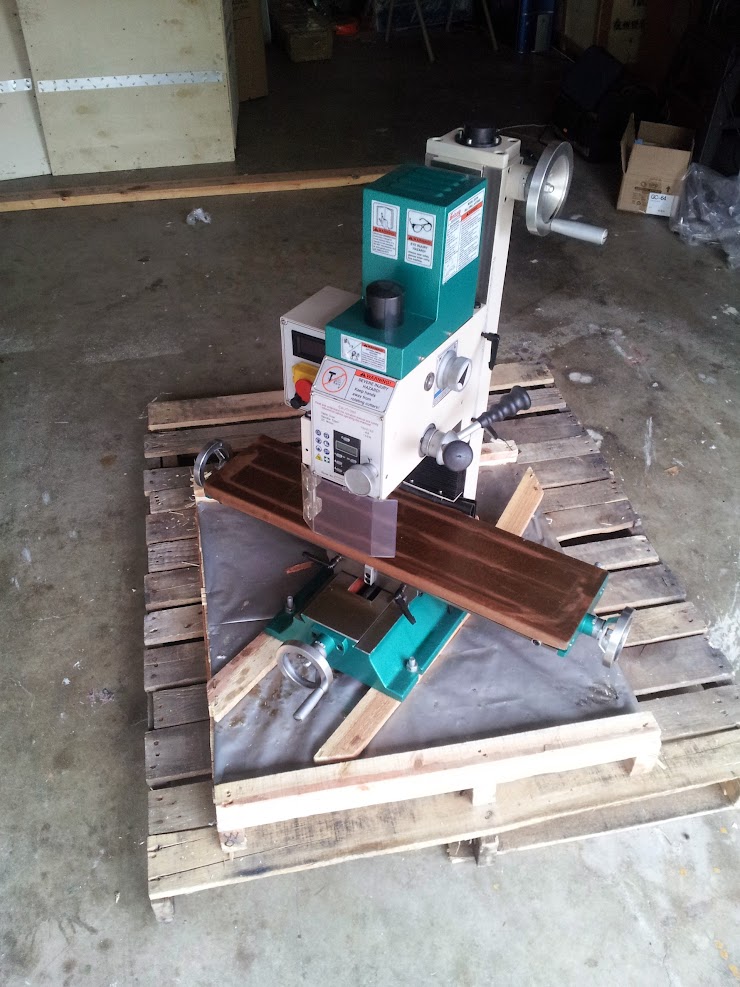
Nicely protected, wasn't as covered in the red sealant as i'd expected. Next stage is to pull it apart, clean it and pick up an engine lift/hoist and lifting strap to get it up onto to the stand.
Attach Point A to Point B, if only!
![]()
Work is even more crazy for me than normal this last few months, I'm pretty sure HAD viewers would dig seeing what i'm working at the moment, but can't show them off til siggraph in Vancouver.
Next I'm ordering the LMS starter kit, possibly a belt drive, and a gauge to help me align it.
-
Notes
07/13/2014 at 23:46 • 0 commentsAdding notes and references to things I find along the way, still researching.
Cheap TTS (like the tormach ATS without the cut ring, works with hoss style, or manufacturer has a version with ring.
Pre made Conversion kits
http://www.ebay.com/usr/cncconversionkit
Belt Drive Conversion Premade
http://www.benchtopprecision.com/bf20_belt_drive_kit.html
Bearings
Quill Drive
http://www.vxb.com/page/bearings/PROD/Nachi-Deep-Groove-Bearing/Kit9537
http://www.vxb.com/page/bearings/PROD/Nachi-Deep-Groove-Bearing/Kit9569
R8/MT3
7007, 7005 angular contact bearings
Grizzly G0704 CNC Conversion
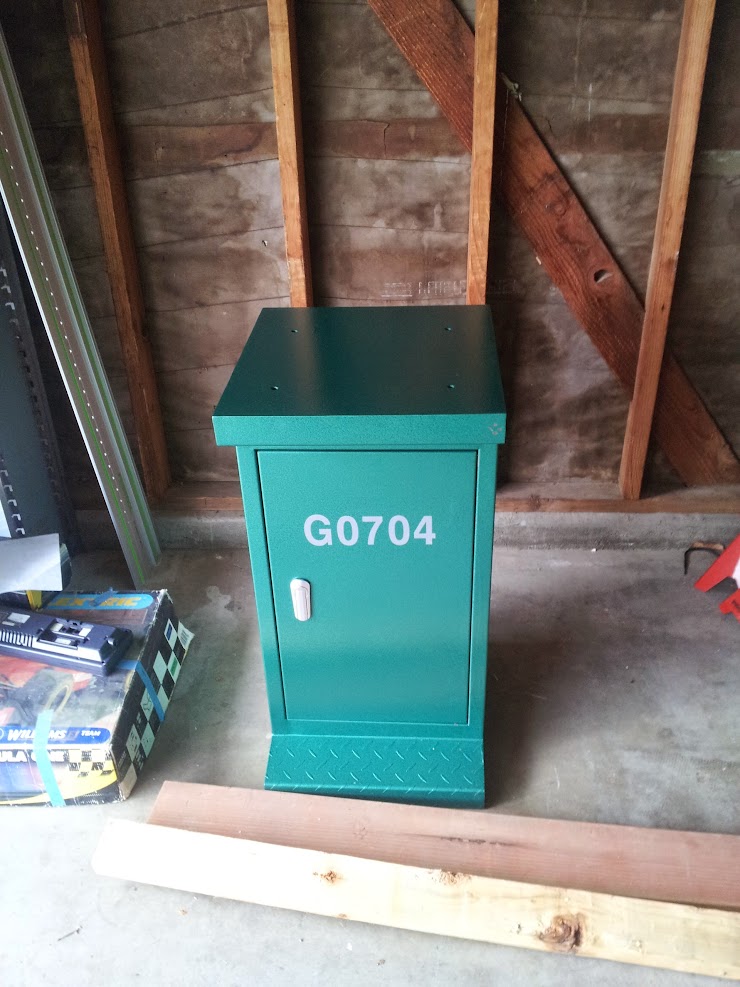
Joining the ranks of the Chinese made Grizzy G0704/BF20 conversions.
 finally got around to making limit switch brackets. i really draw the line at $500 for a few switches, wires and brackets!


 simpler this time. smaller tabs too and just one per cutout
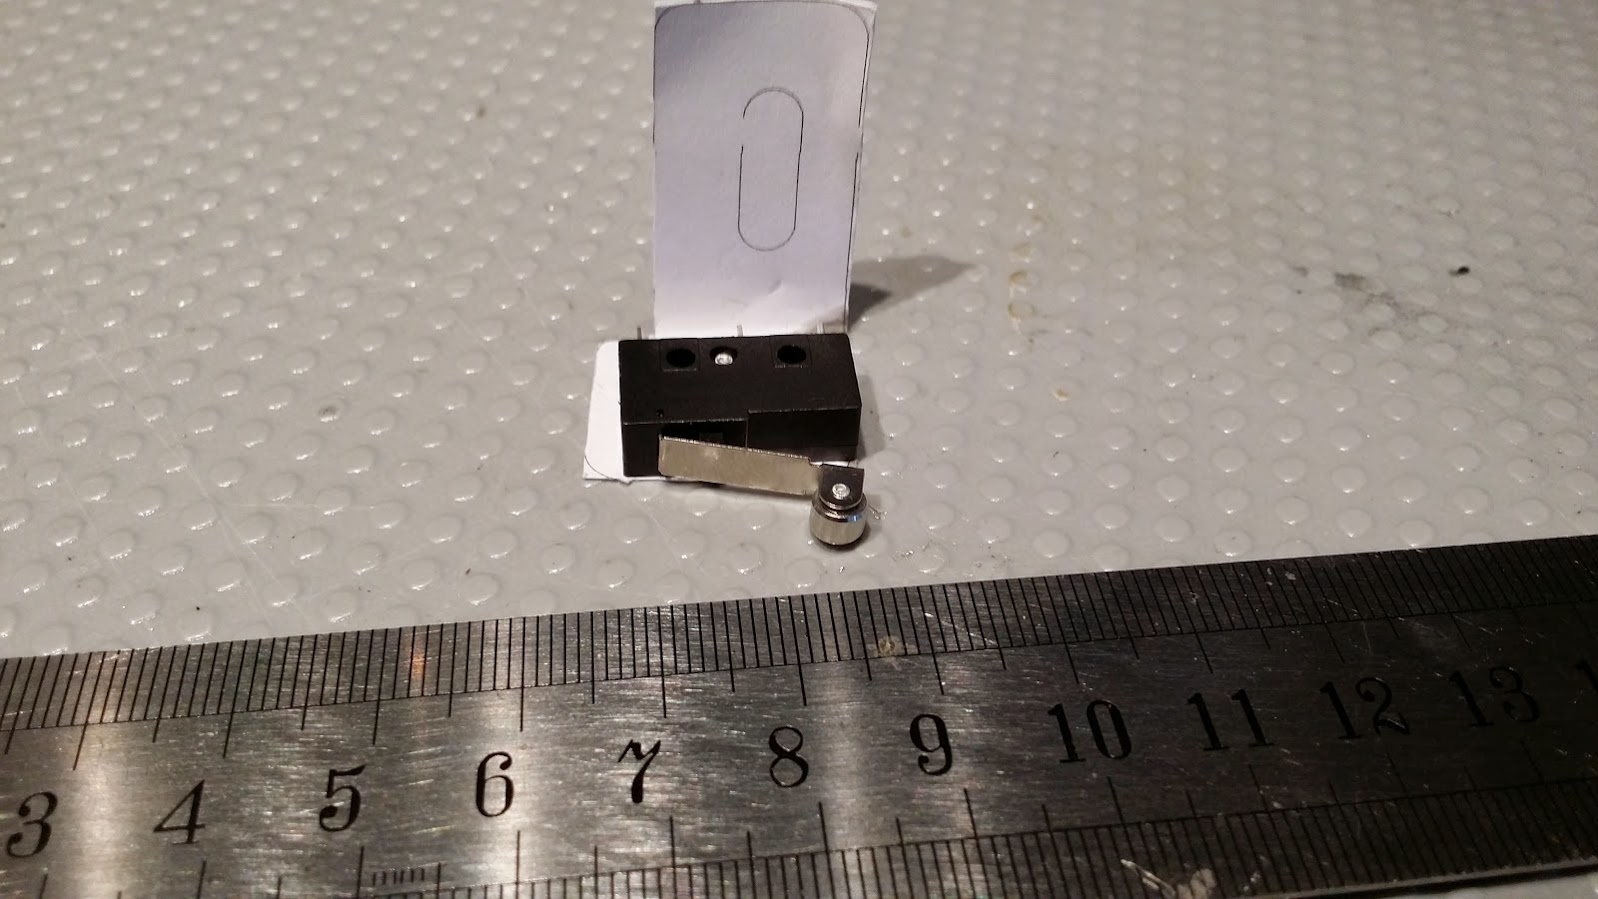


 Once the rest of the brackets are cut, i'll liquid proof the connections.
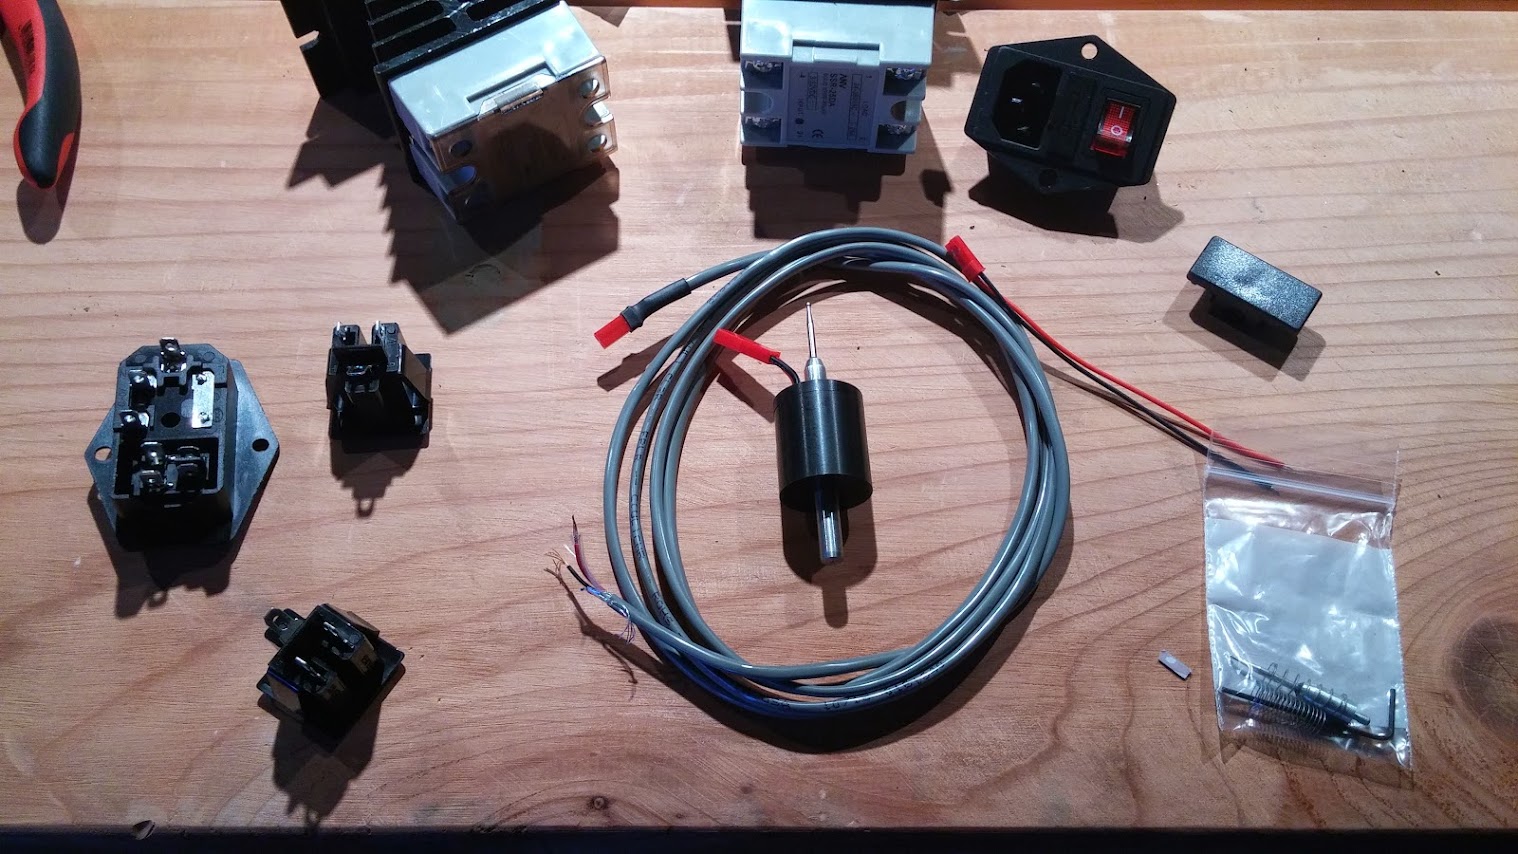


 \
\