David Tucker
-
New Ideas
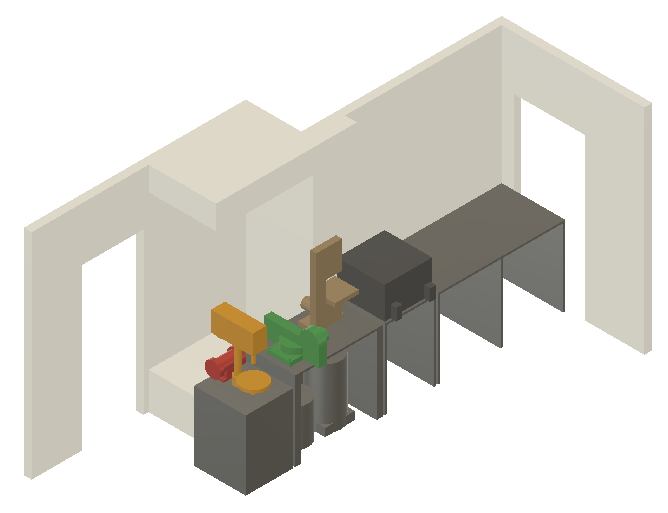
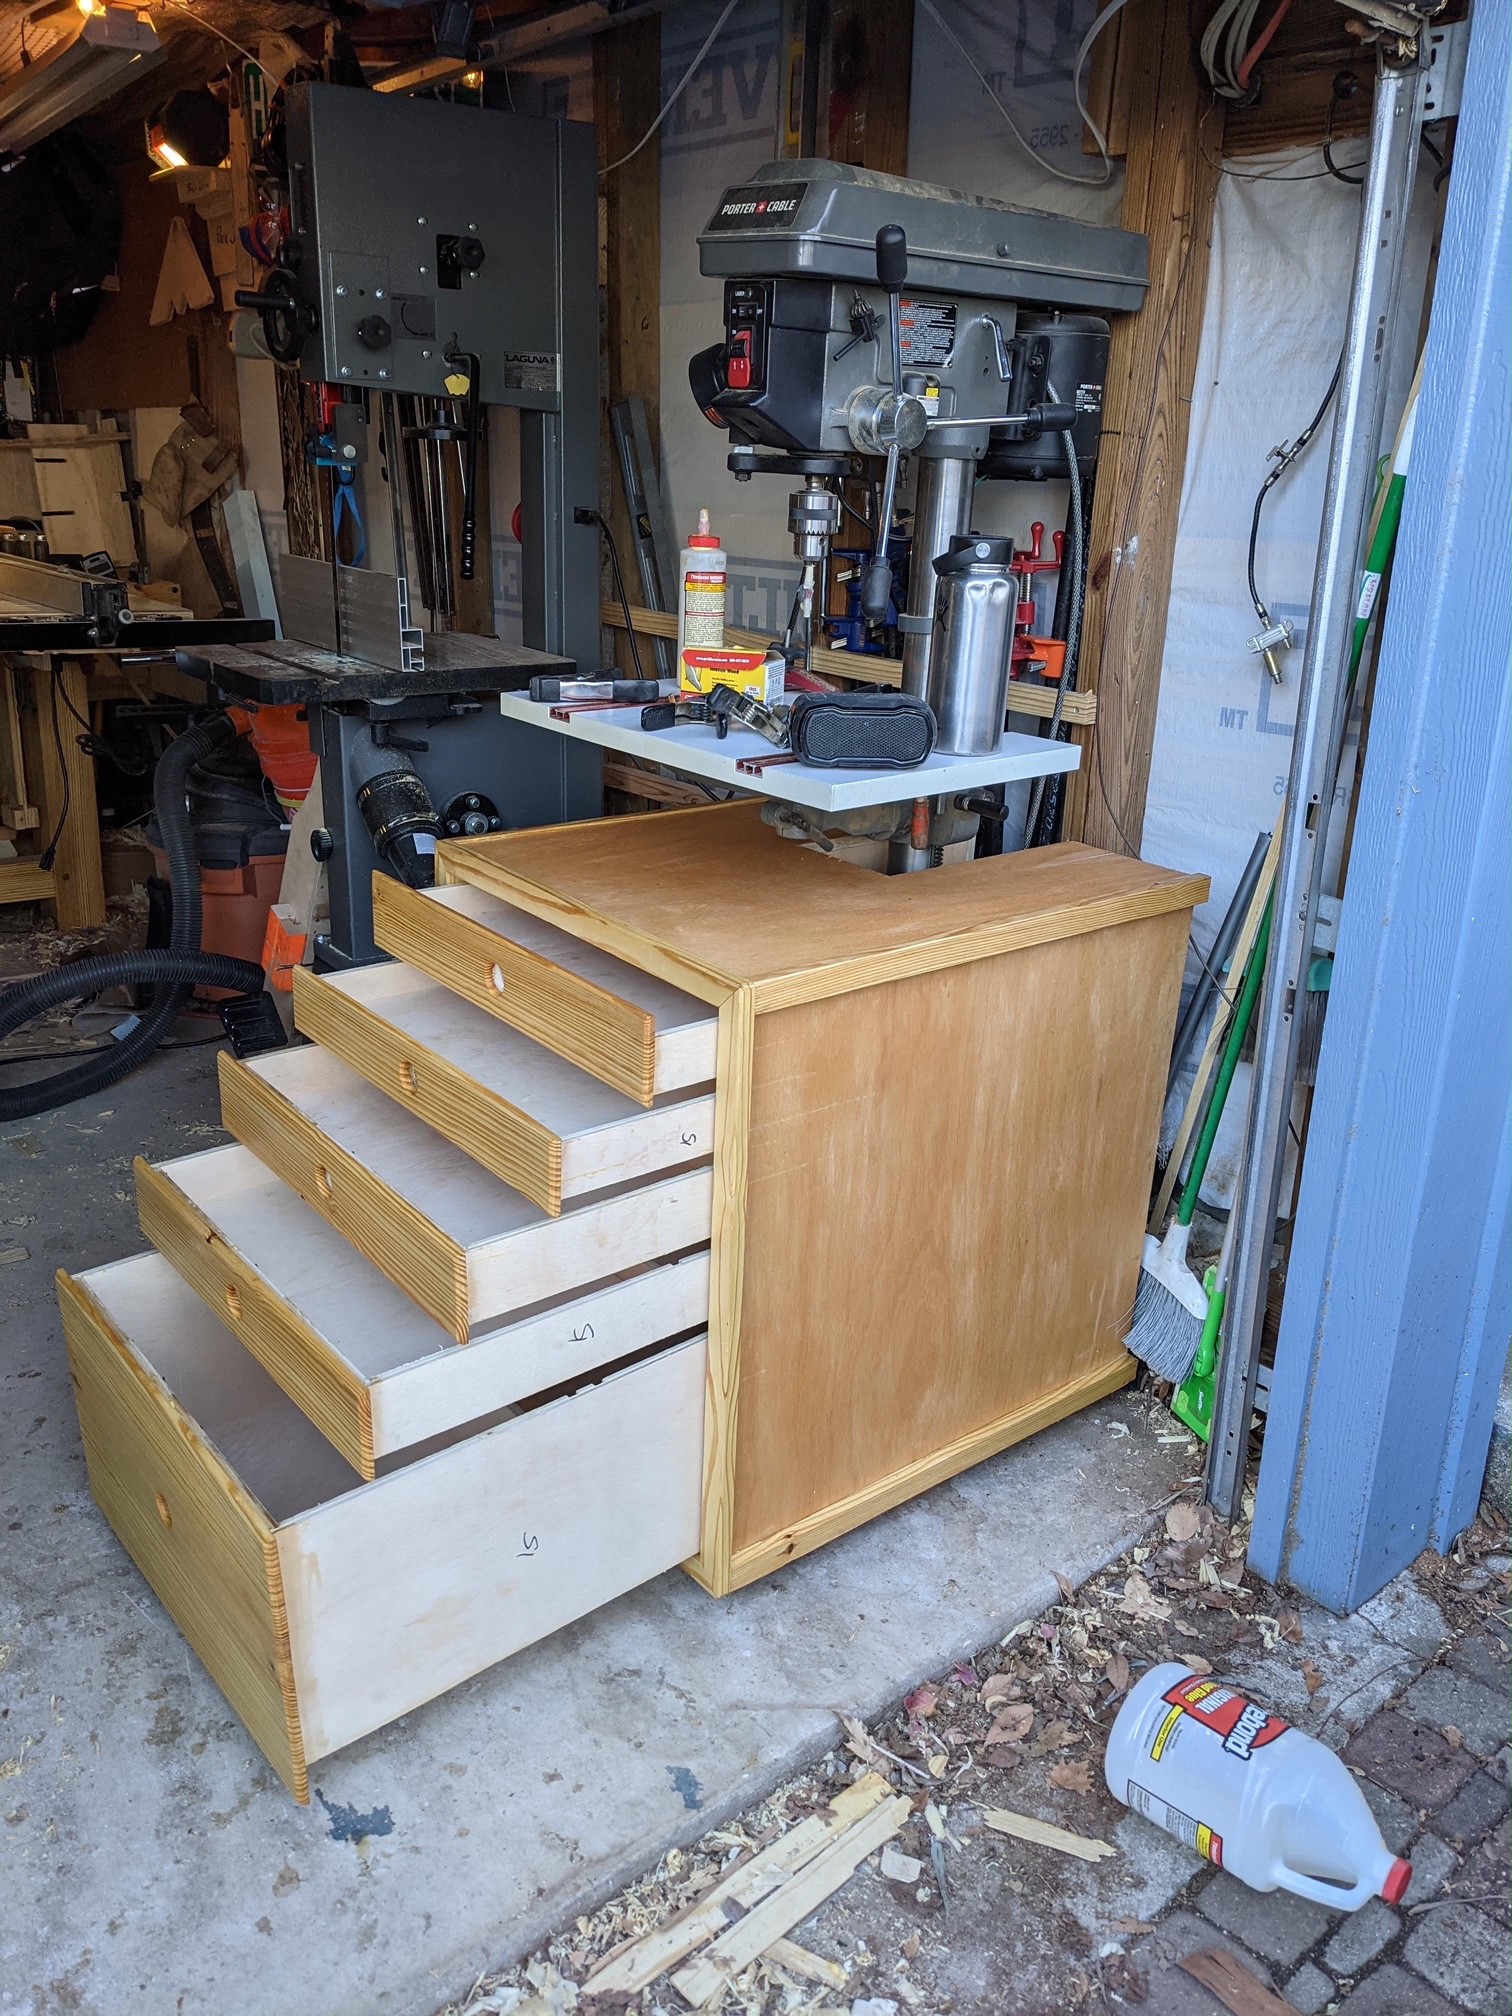
01/04/2023 at 04:42 • 0 commentsSo I had a new idea. It has been bothering me that the bandsaw is a very small tool on either a big cart with lots of waisted space on the top, or a small cart with poor storage on the bottom. It occurred to me that the miter saw and bandsaw could be put together onto one cart by turning the bandsaw sideways and placing it behind the path of the material for the chop saw. This would allow for a lot more continuous storage in the combined cart and saves a tiny bit of space as well (about 7" is cut from the combined width).
I prototyped it out on the floor and it appears that I can put both together in a reasonable configuration that allows for the full range of motion for the miter saw as well. I need to experiment with angling the blade sideways as well, but so far I have never made a compound cut so I could always temporarily remove the bandsaw if that ever came up.
![]()
![]()
I'm also playing around with the idea of shrinking the drill press down a bit and tucking it between the workbench and the shelf by the exterior door. It would make it more difficult to use the full workbench and it would make whatever storage is there more or less useless, but I could make the other carts a bit larger to compensate. It is probably not a good idea, but it is tempting to use that space.
![]()
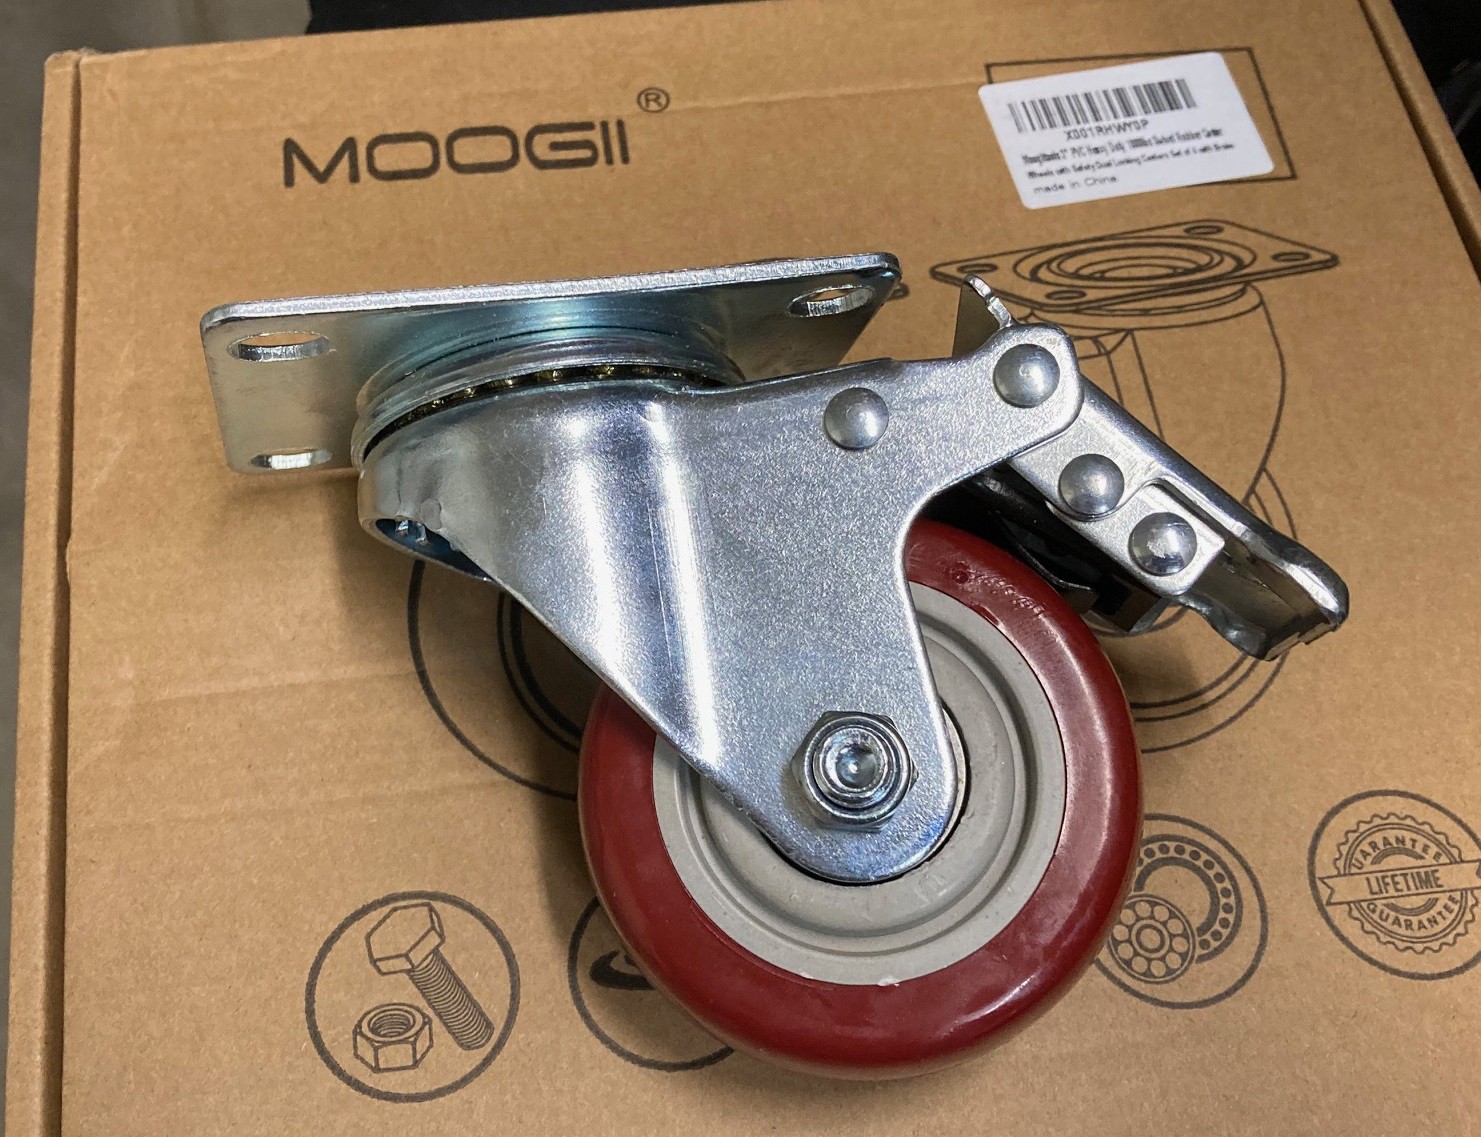
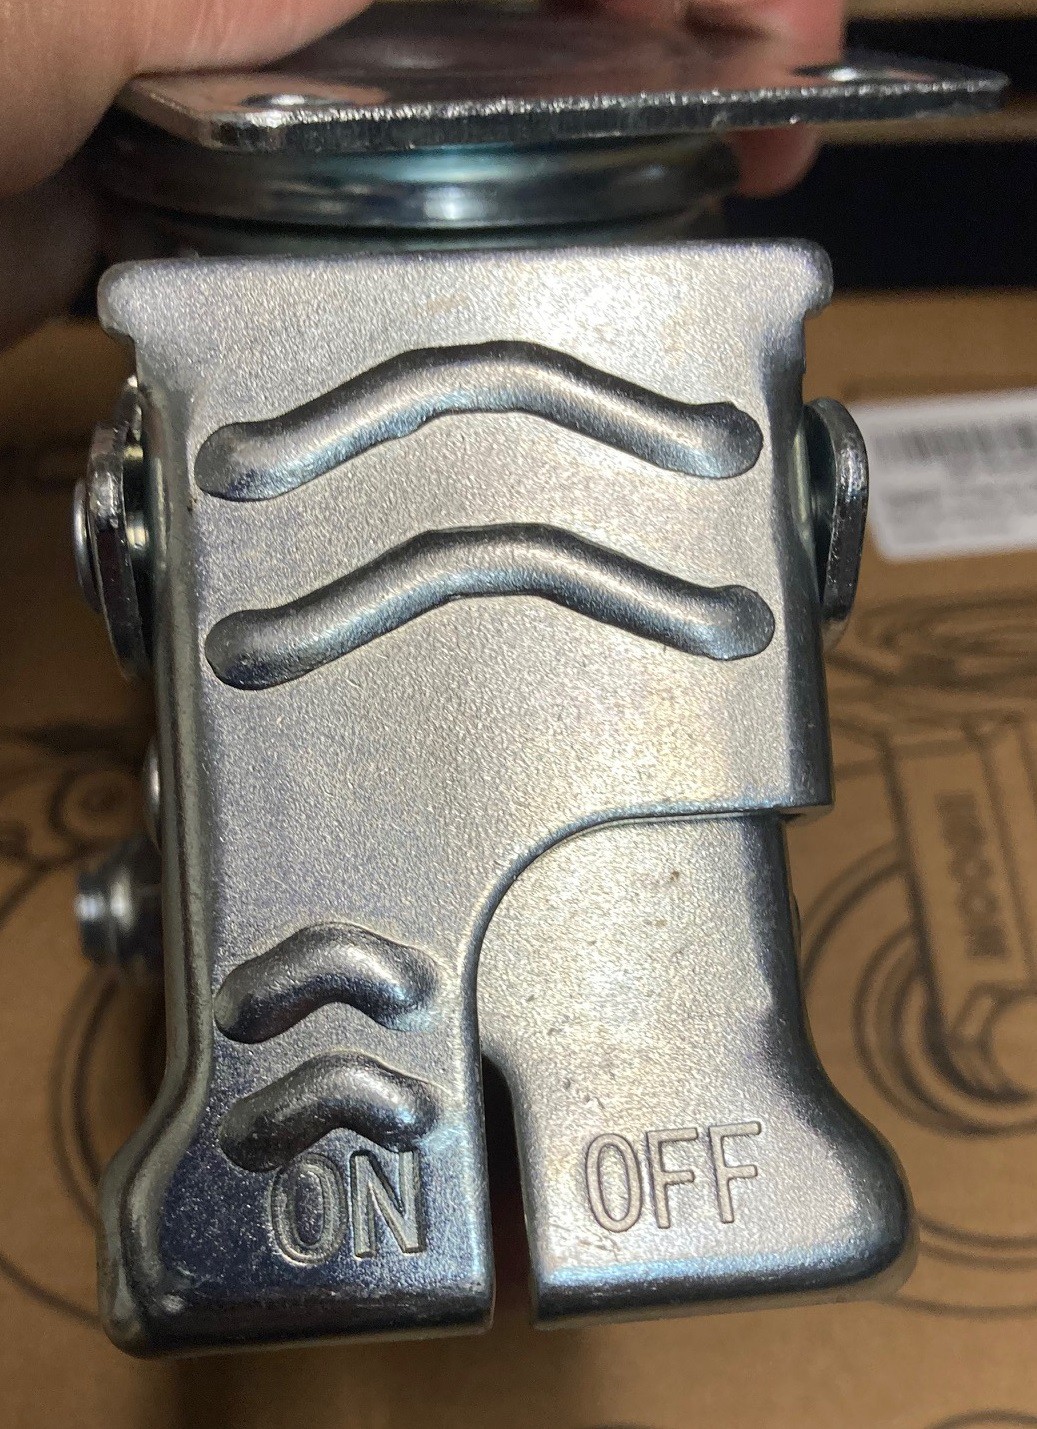
I have been looking around for a good set of casters to use with the various carts. I ended up settling on these 3" casters with locking wheels and locking swivels as well. They are rated for 1,000 pounds (250 pounds per caster).
![]()
These have a unique push down lock/release feature. Normal casters require you to put your toe under the lock and lift up to release. This should be more comfortable to use in practice.
-
Initial Plan
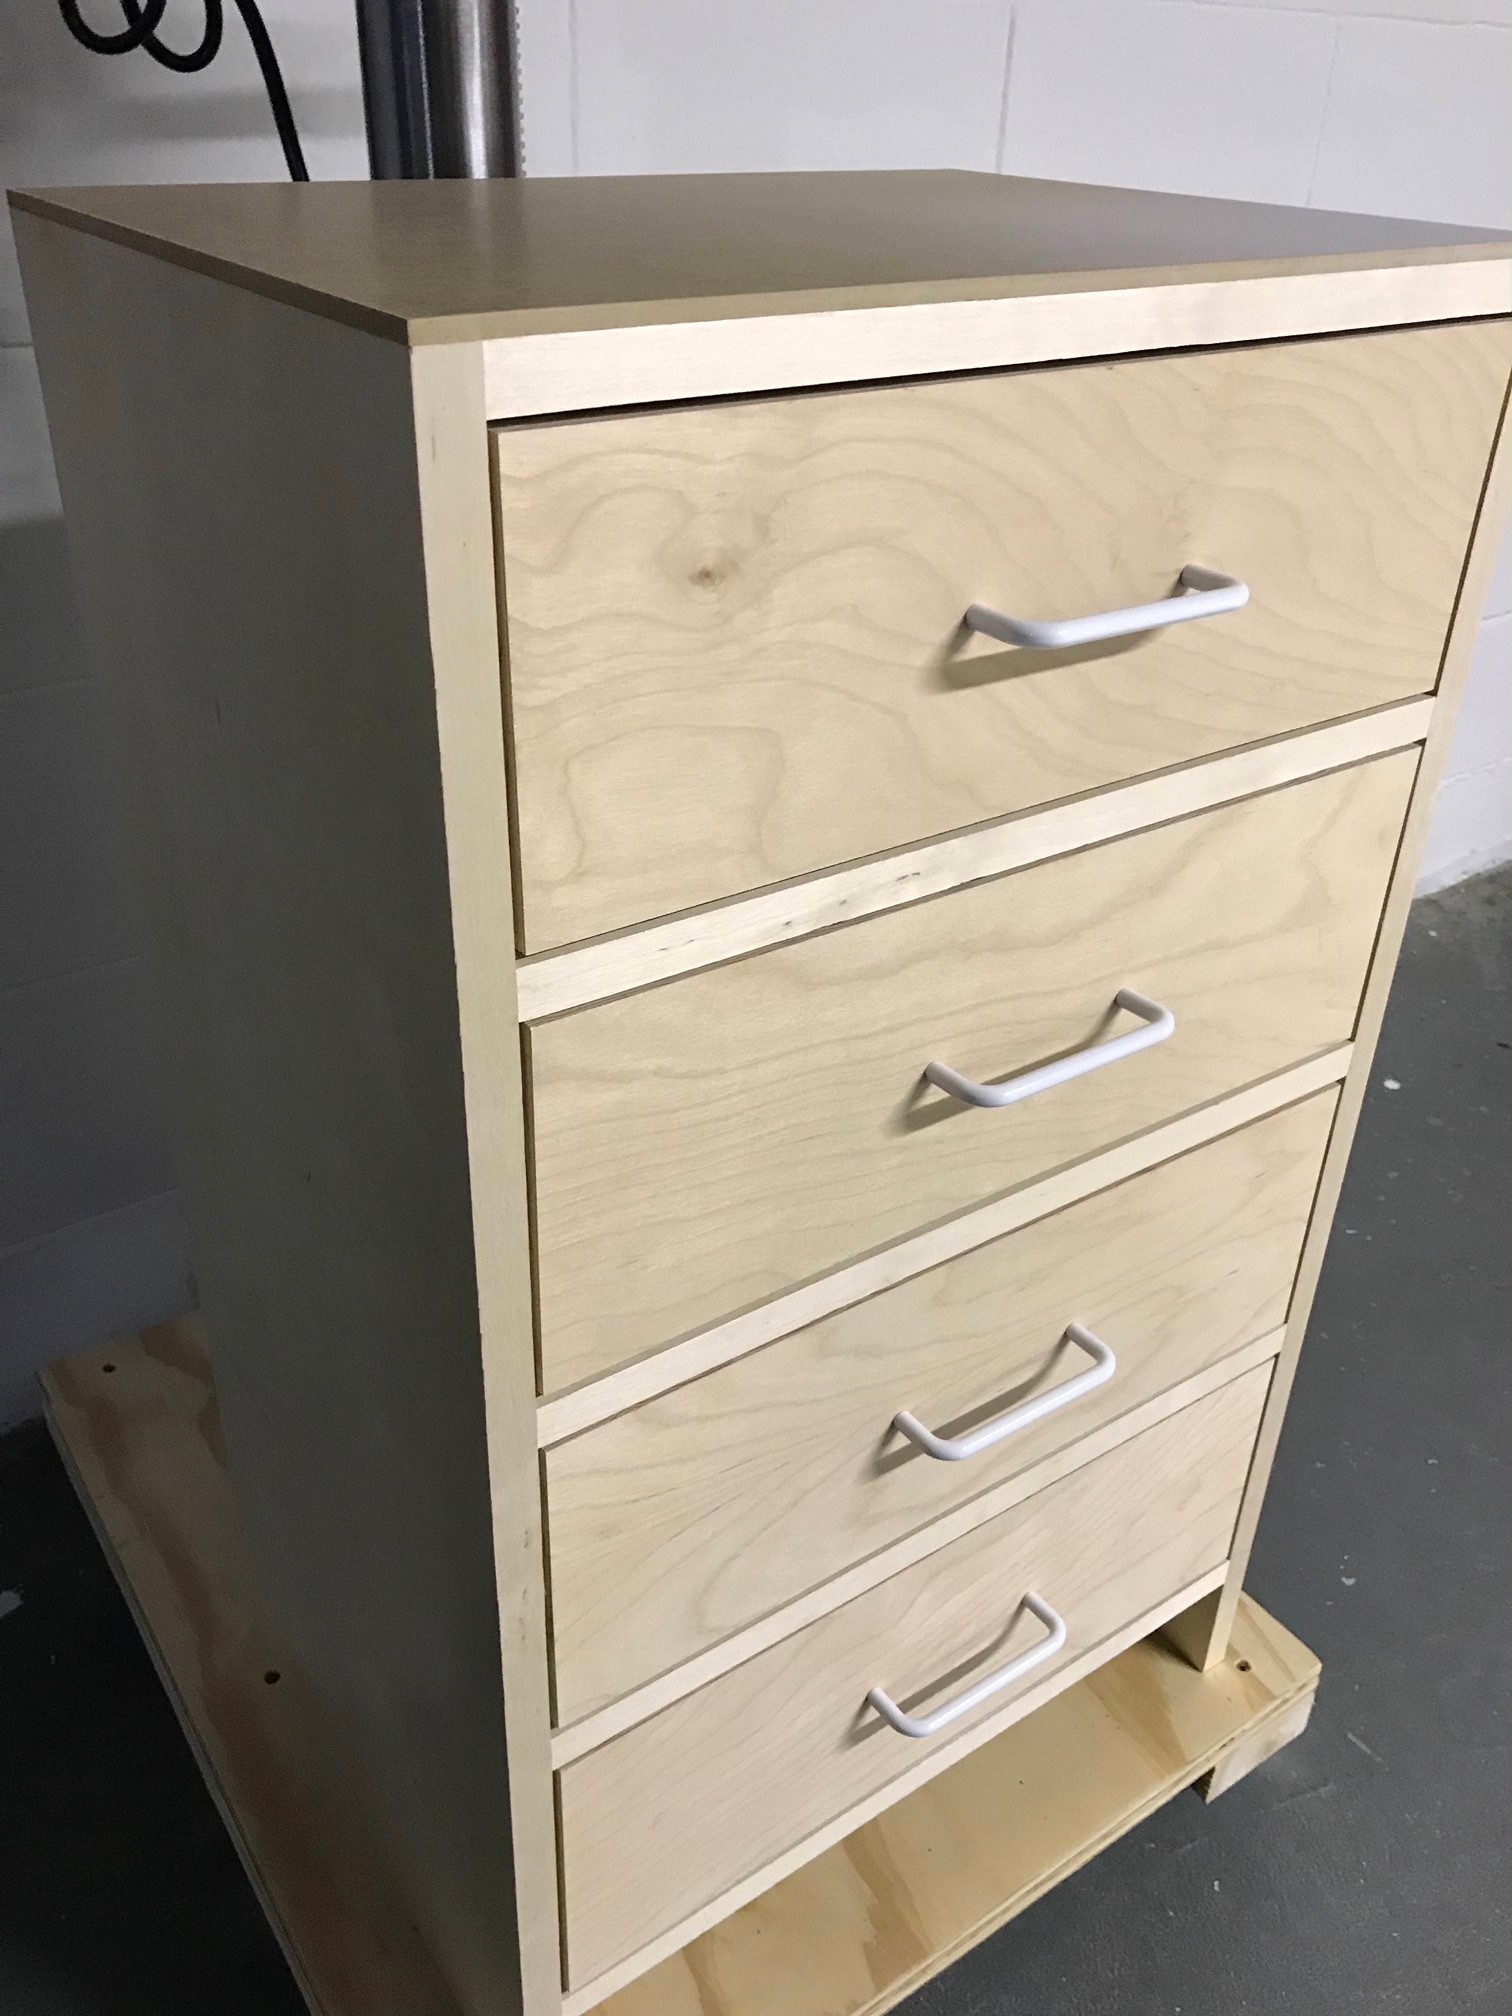
01/01/2023 at 05:49 • 0 commentsSo here is my initial plan for the various carts I hope to build. The workbench would be 32" deep and 64" wide and I would build two 32"x32" cabinets under the table. Each of the other cabinets would only be 26" deep to account for the bulge in the wall near the furnace and would vary in width from 20" to 26" as needed to fit the corresponding machine. I would perch the bench grinder on the back of whatever cart I put under the drill press. This sticks a bit past the edge of the furnace, but there is a lot of space between the furnace and washing machine so I think it won't be a big deal if it sticks out a bit and it will help me get more useful storage out of the arrangement.
In the future, if I decide to get a small table saw, I could build it into my bench at the sacrifice of a bit of storage. I can't think of any other tools I would be adding to the shop, so that should be enough storage for me. Coupled with the new shelves above I should be able to fit a lot of stuff into this small space.
I need to work out where in all of this to fit the shop vac and the air compressor. I would like the compressor to be placed in a compartment with a door that closes, but I wan the shop vac to roll out easily. Both will eat up a lot of space, but that can't be avoided unless I want to downsize to a much smaller shop vac.
I'm hoping to find time in the next couple of days to go out and pick up supplies for the shelves. I think 5 2x3's and a single sheet of 1/2" plywood should be enough to put them together. I need to work out just how to hang the front supports from the rafters. They run parallel to the longer shelf and I'm not sure if they will line up properly to the edge of the shelf. Some time with a stud finder and a ladder should sort that out.
-
Beginning of the End
12/30/2022 at 00:10 • 0 comments![]()
I finished up my wood storage. I went ahead and pulled out all my wood and sorted it by size and type then put it all back. In addition I built this small shelf out of some scraps to help sort some of my hardwood pieces together away from the more junky pieces. This also allowed me to get more out of the small sliver of space I have here for storing odds and ends.
![]()
I decided it was finally time to attack my workshop space so everything needed to be moved out. Here is all that I hope to fit into the space. It is quite a lot of stuff!
![]()
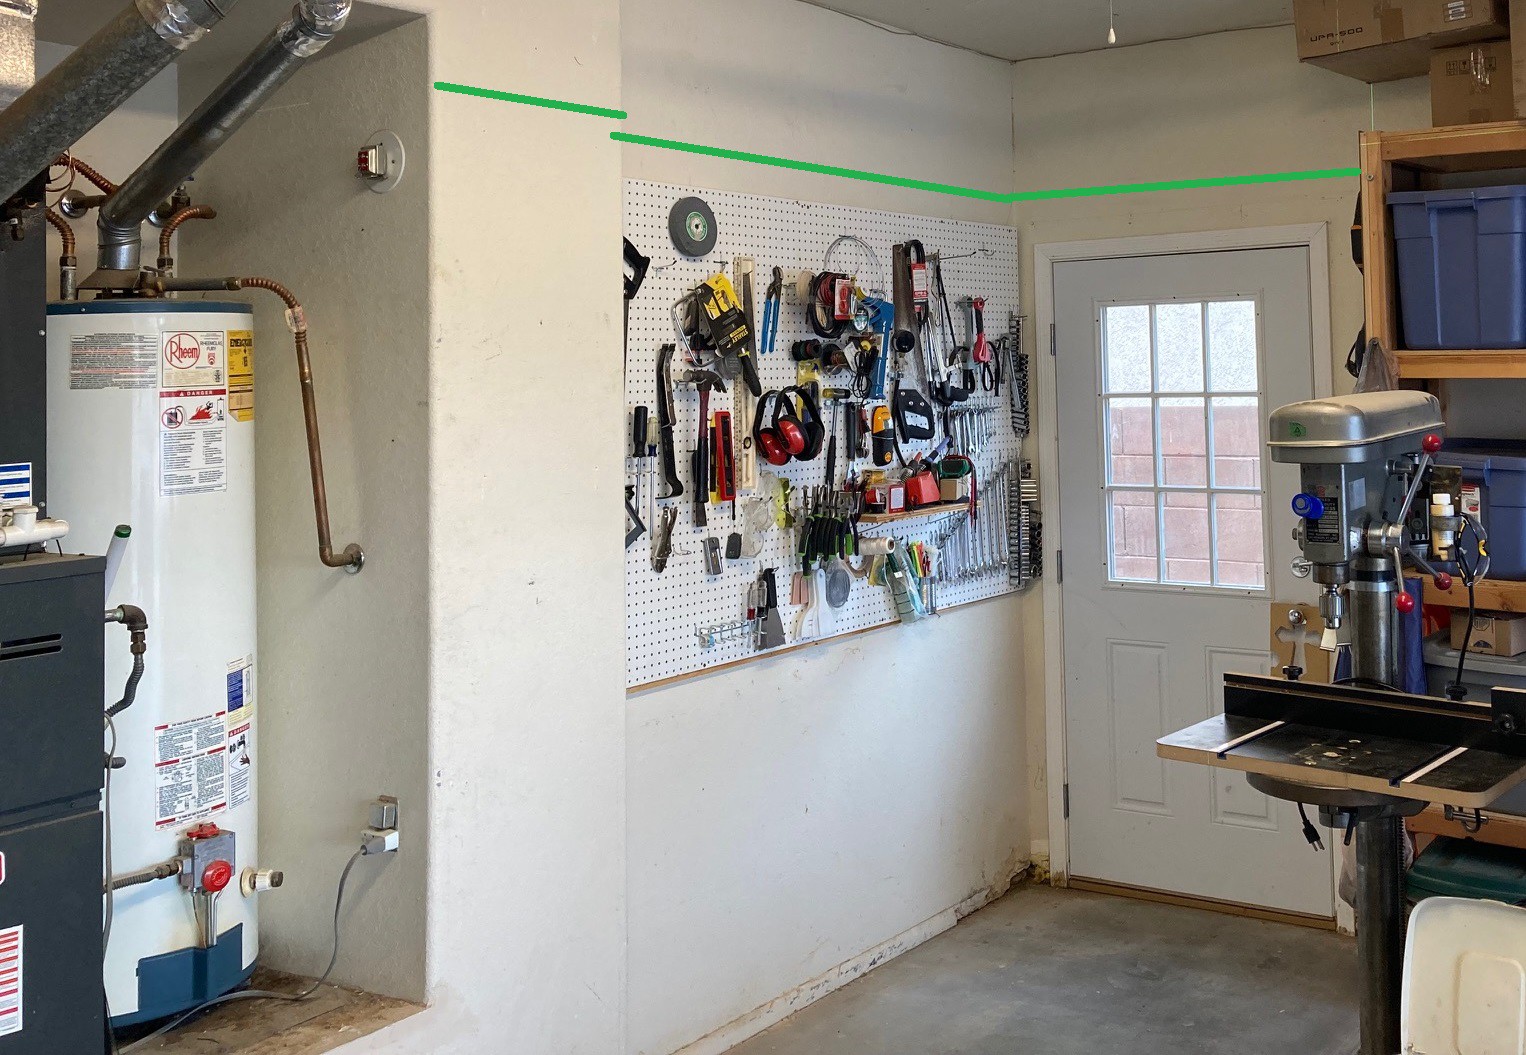
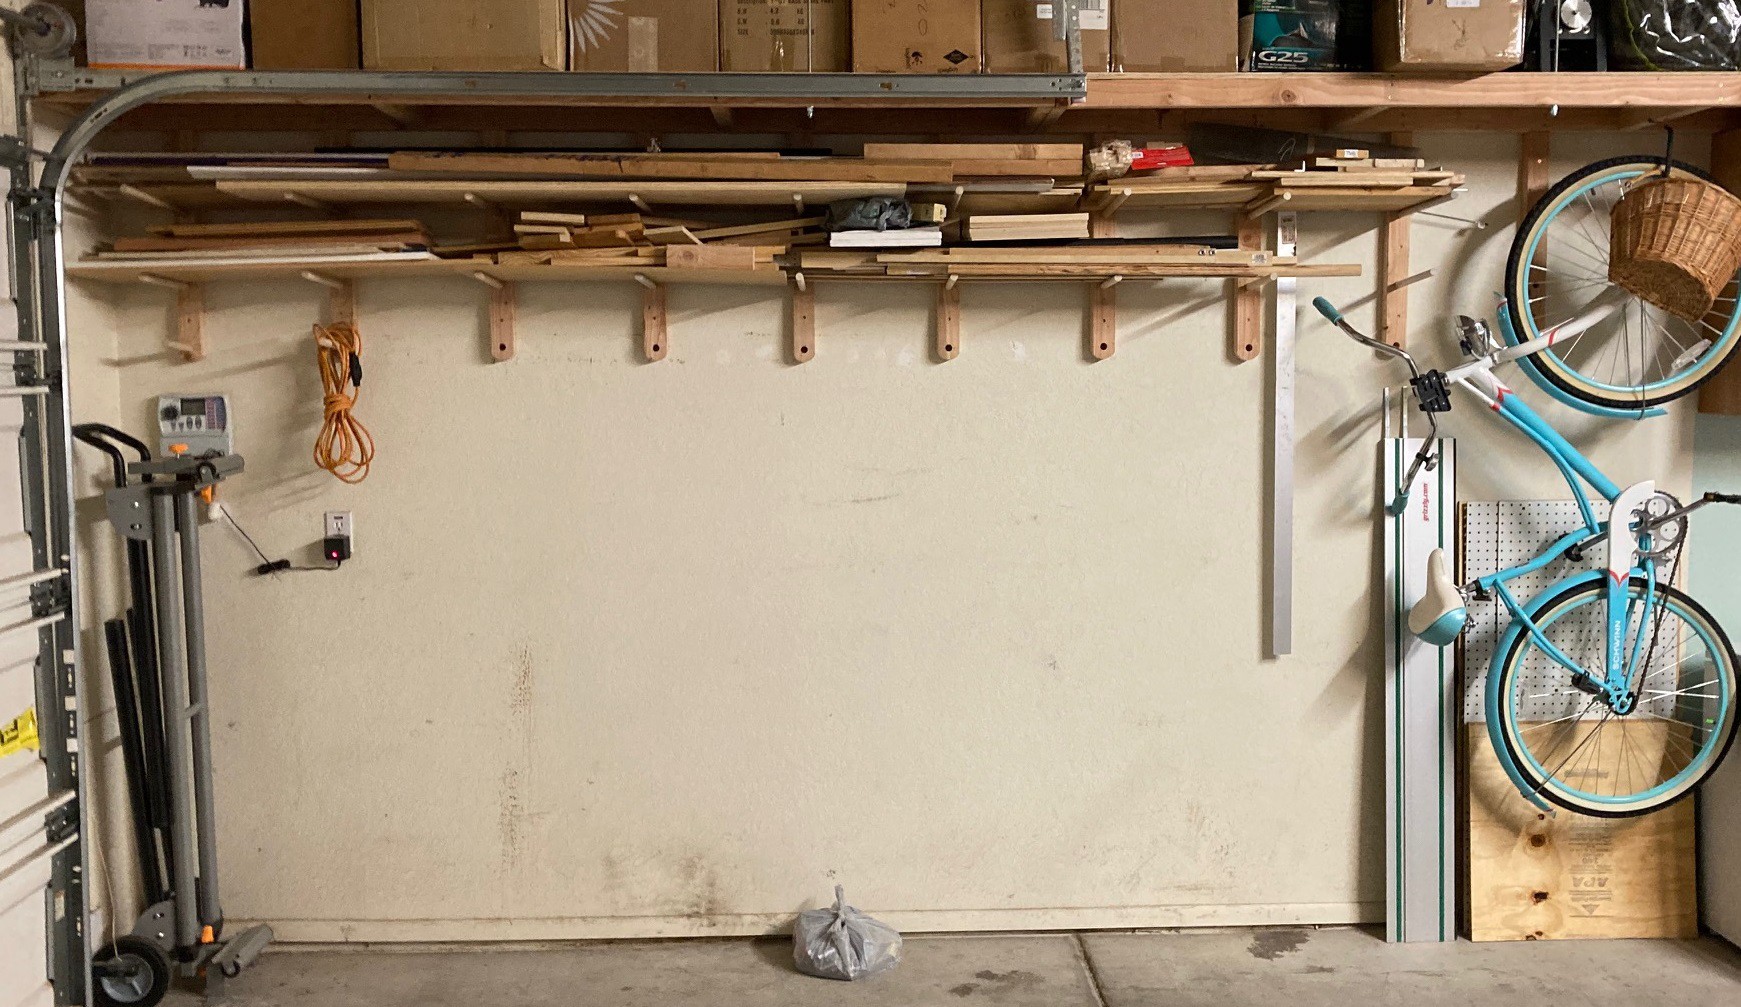
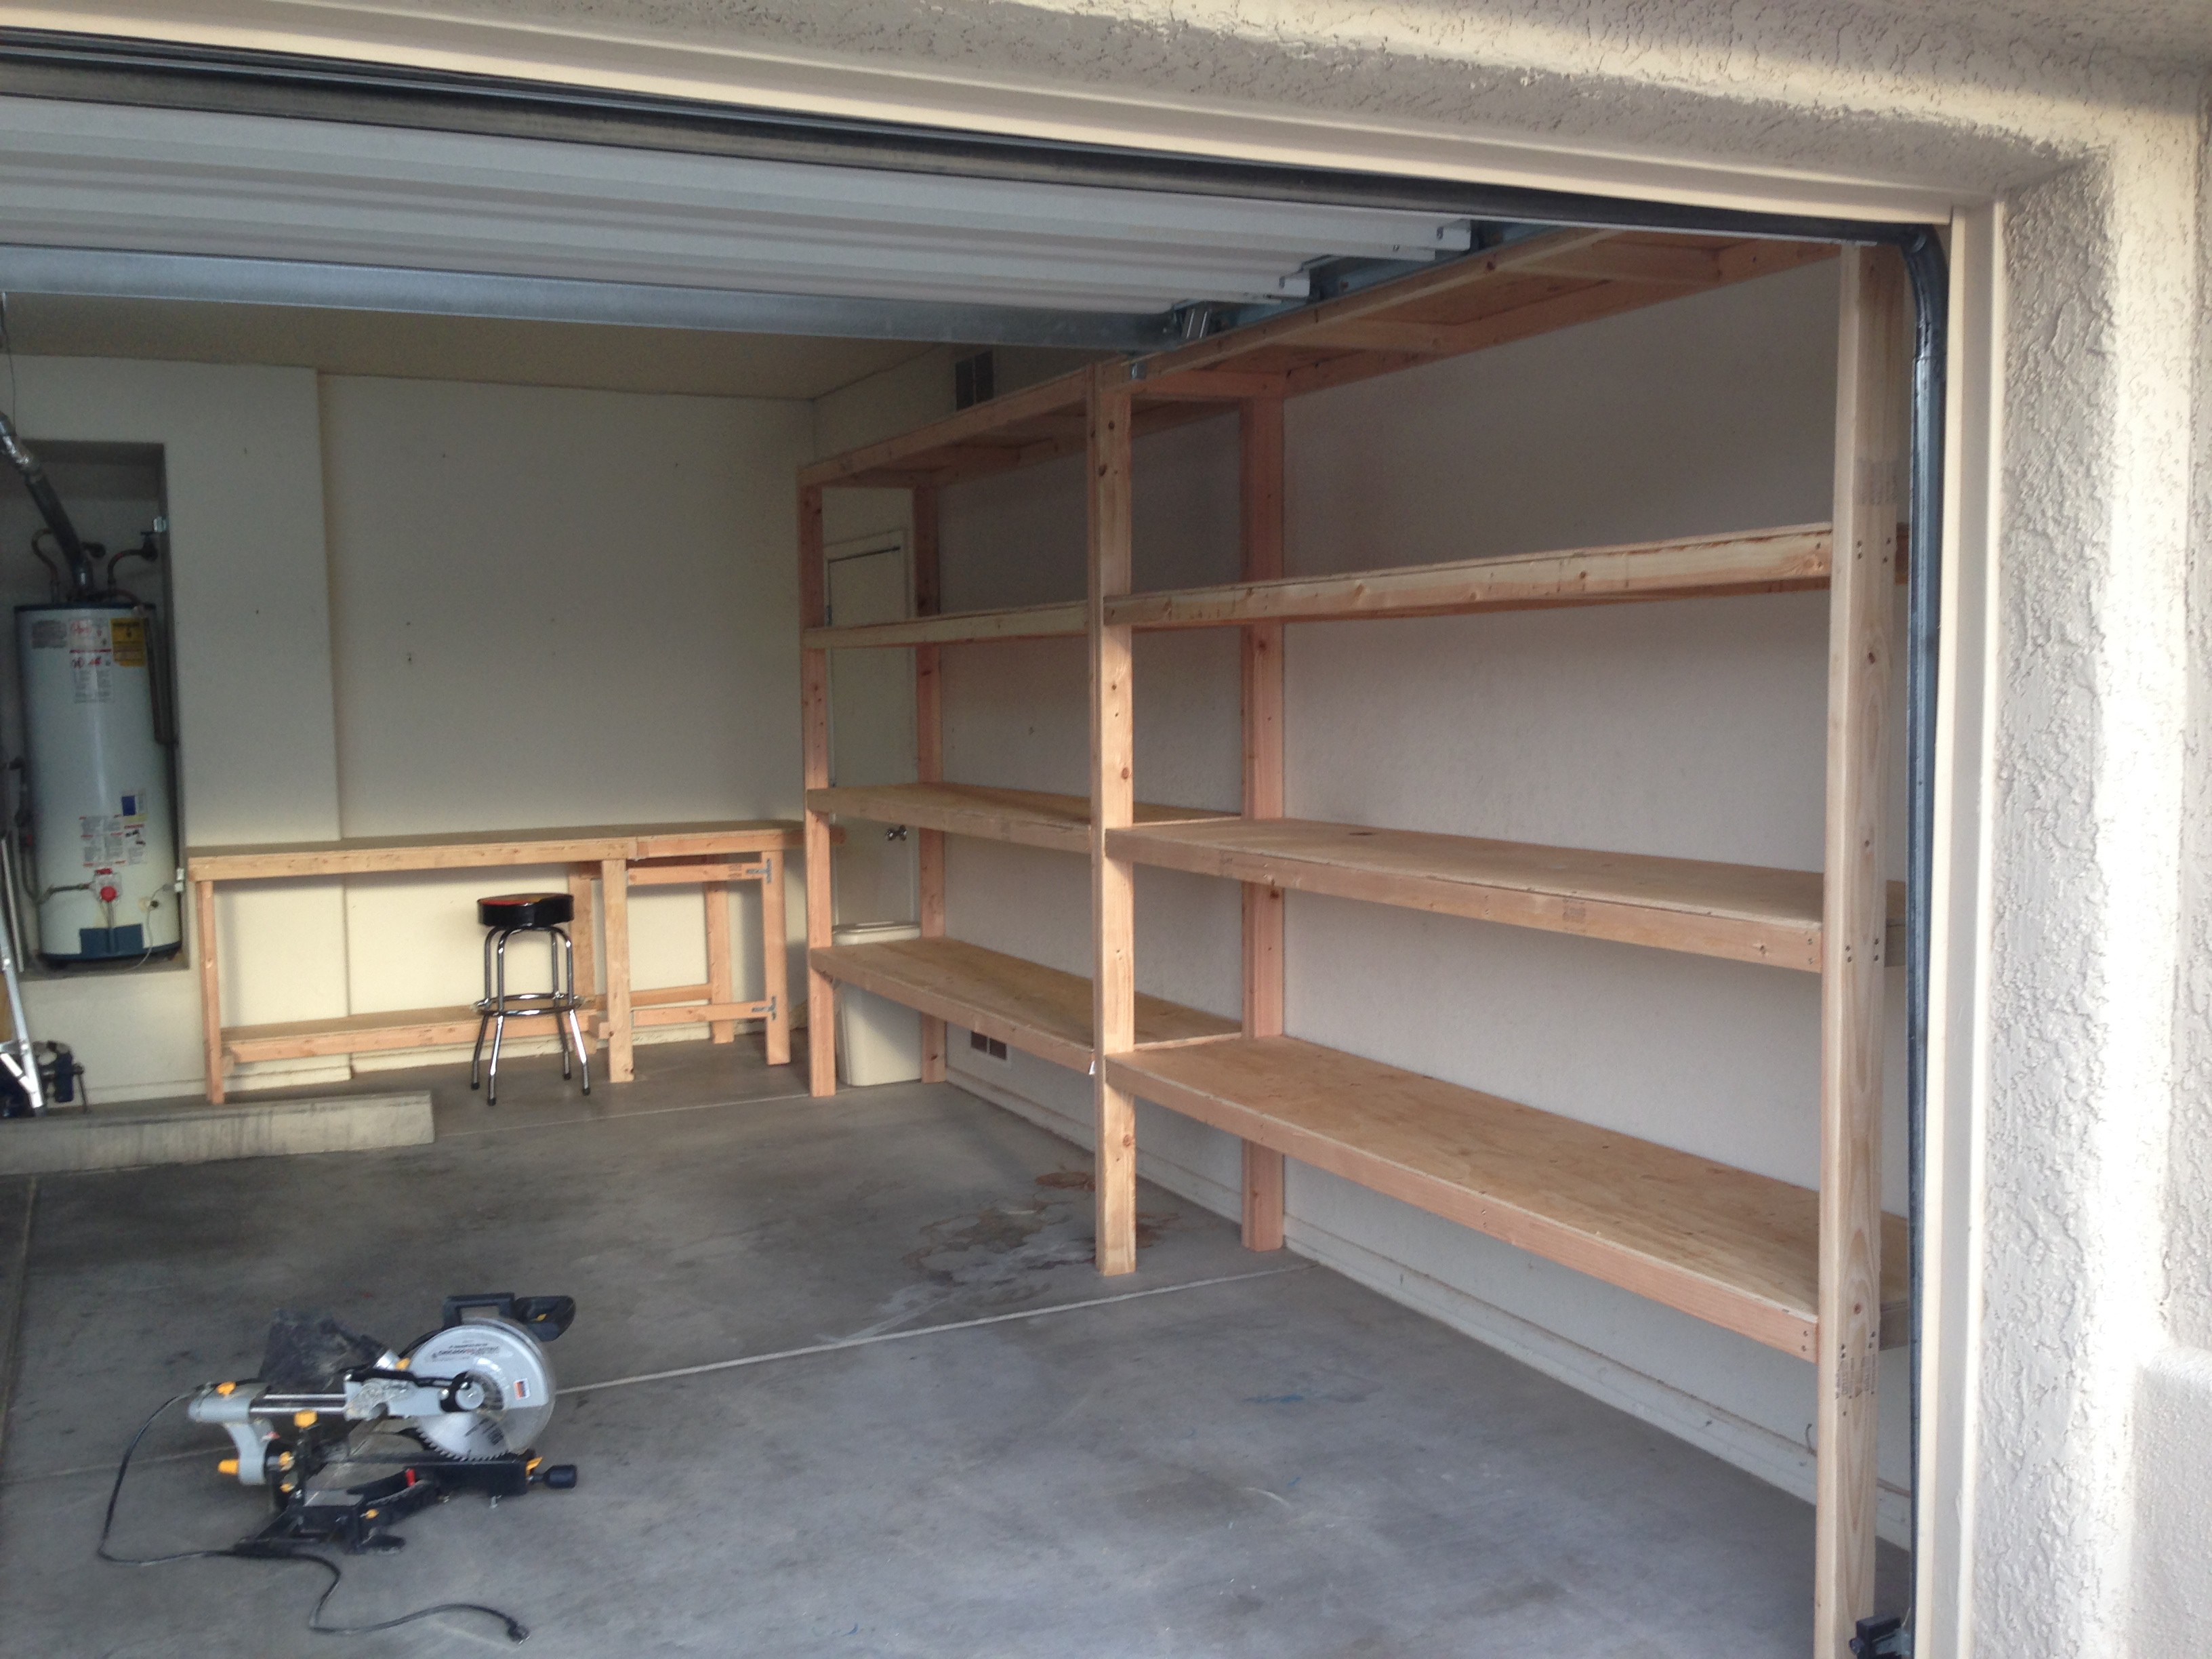
And here is the space, not nearly big enough! I went ahead and stripped out the old shelves I had over my workbench. They were free with the house and not in good shape or really big enough to hold much of anything. I will go ahead and add in my hanging shelves over the space, following the green line. this should add another 10 or so feet of shelving and should allow me to get all my tools I only occasionally use up and out of the way. For now I left the pegboard up, but only because I have no convenient place to put all the tools.
![]()
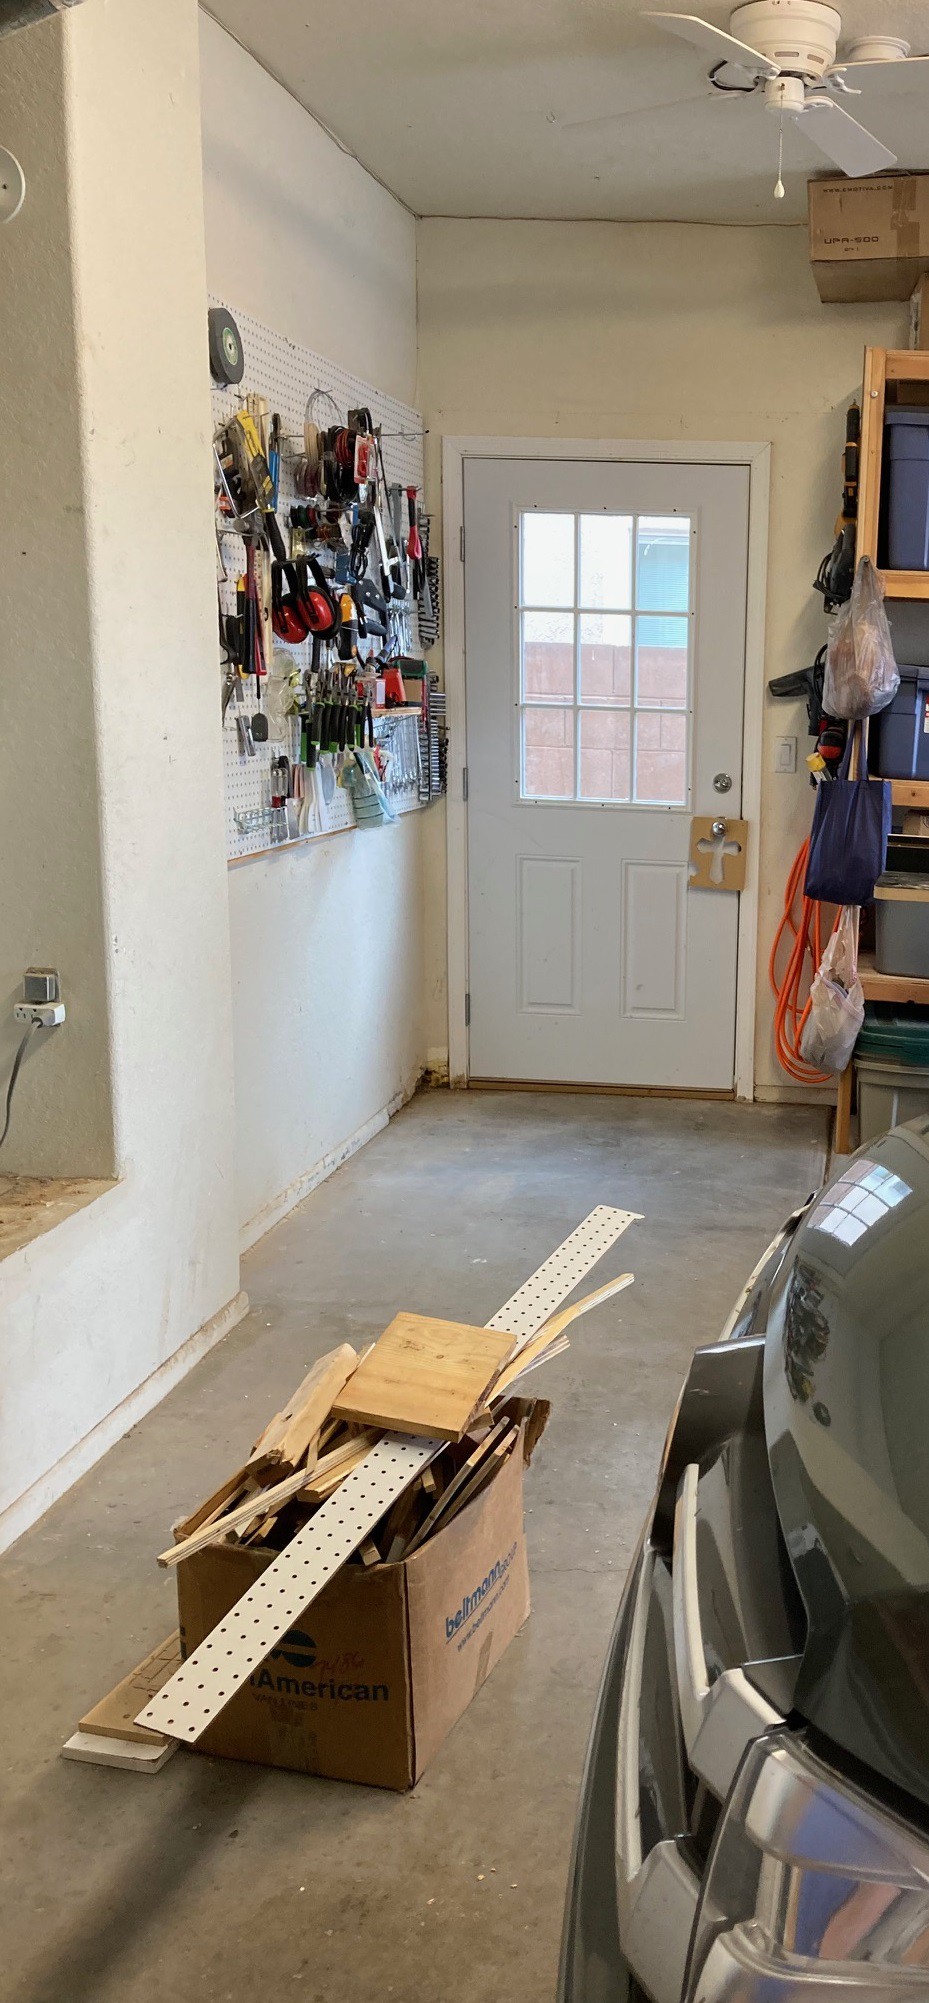
Here is another view with one of the cars parked, you can see there is just not that much space to work with. Still It is a fun challenge and I think we can make it in the end.
![]()
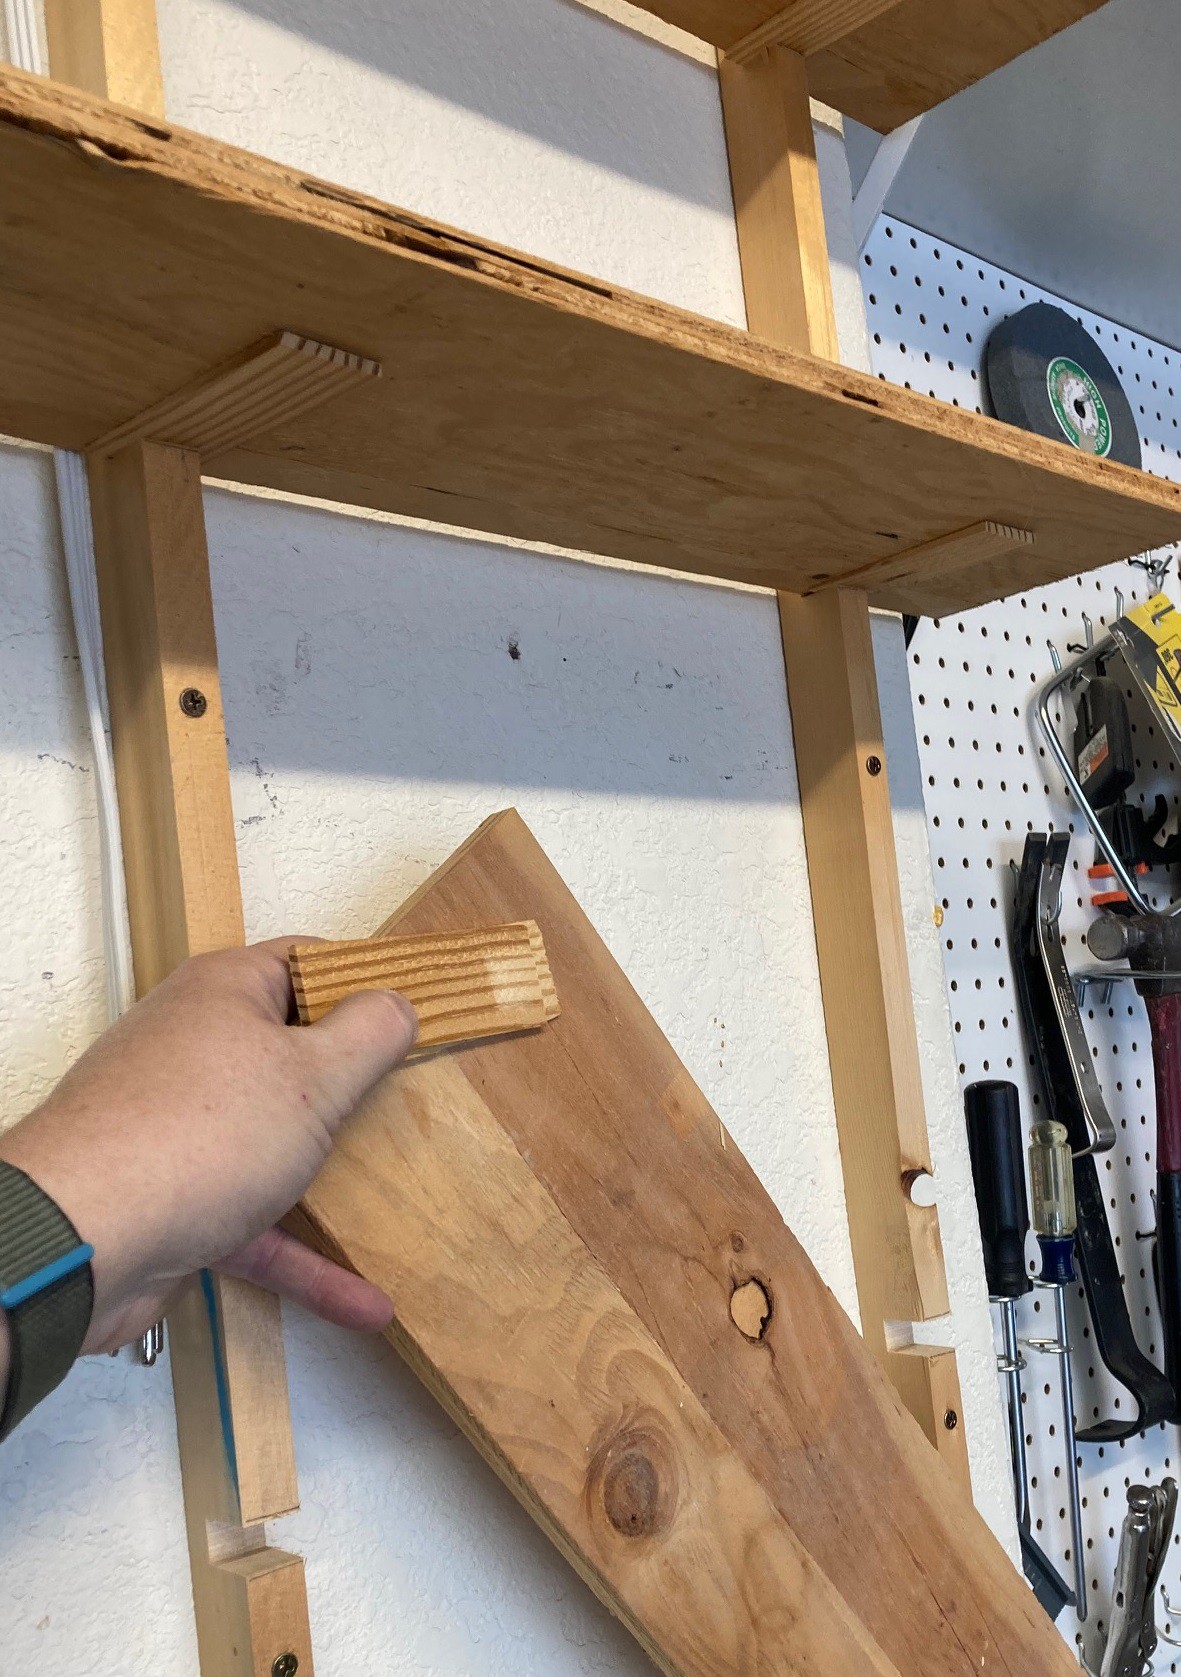
Finally I pulled down this French cleat shelving unit I made out of some scrap wood. I'm really proud of this, even though there is not much to it and it is rather rough. It is a dead simple way to get more storage without investing much at all. You just need a way to notch a board or two, and some cheap shims to pin the shelves in place. I went ahead and set this aside, but I don't think I will put it back up. As nice as it was, I think I can find something that uses the space even better.
Next up is marking out all the studs and the reference line for the shelves and then I can go pick up some wood and start banging things out. This should go faster than the last set of shelves since it is much smaller, although there are more tricky corners to deal with.
-
Christmas and Cleanup
12/28/2022 at 18:37 • 0 commentsSo Santa was nice to me this year and I got two new power tools.
![]()
I got a Ridge plug-in palm router (I don't use my tools often enough to justify batteries). This is a nice little setup that seems to be well built with a working fine adjuster and variable speed. The only thing it did not come with is any sort of hookup for a shop vac. I don't know how useful that is, but I have a 3D printer so I can always print something out if I need it.
![]()
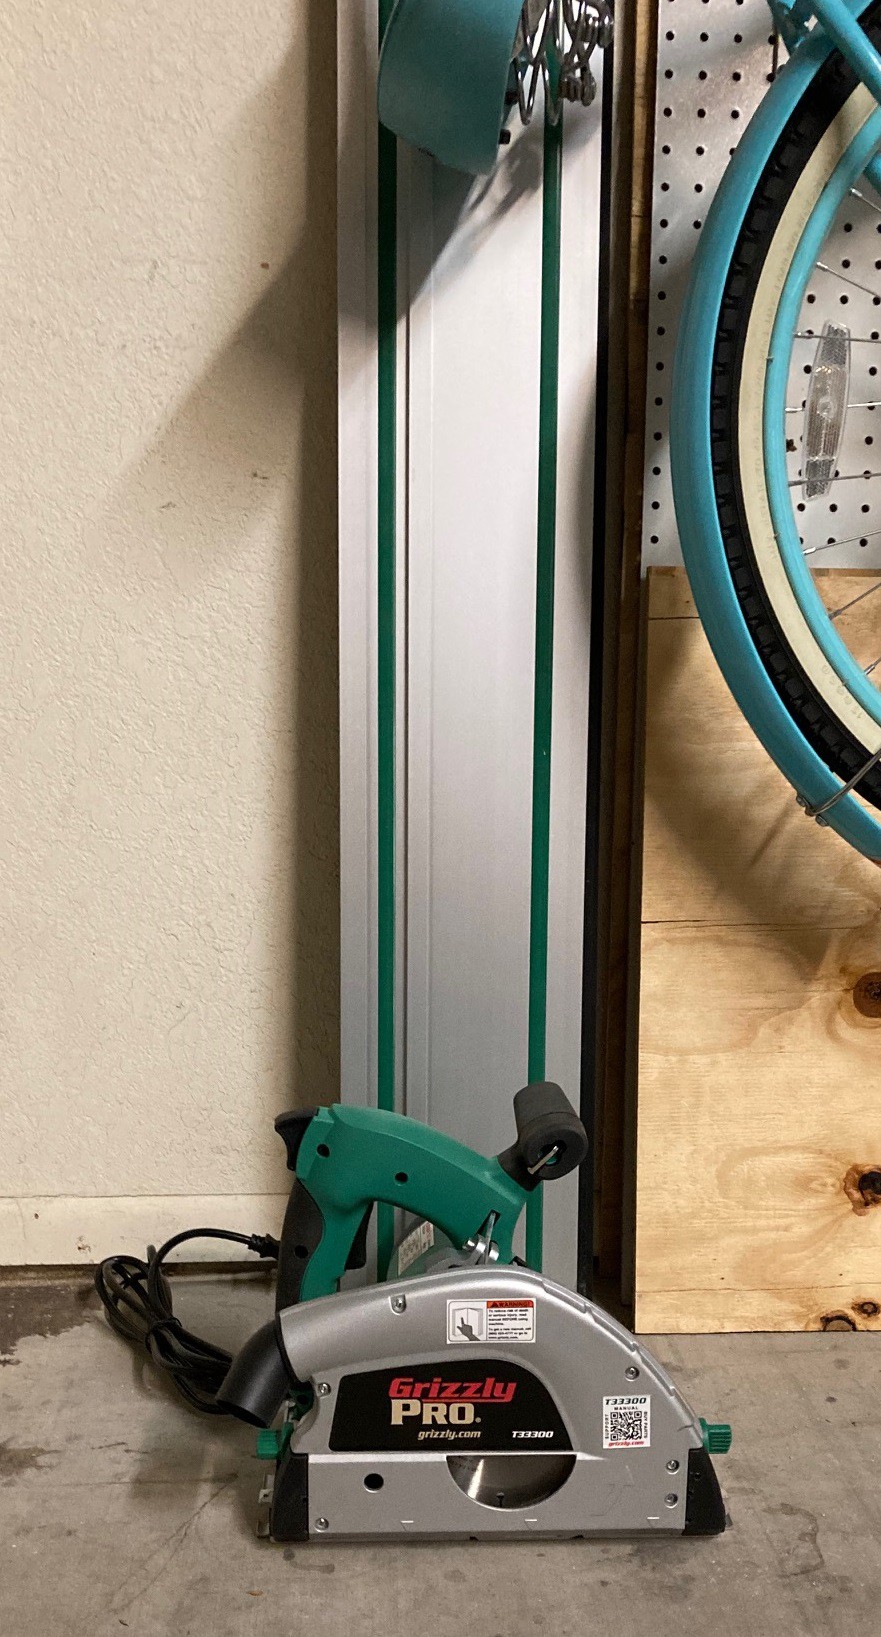
I also got a Grizzly pro track saw bundle with two 55" tracks and the clamps that go with them. I picked this one over the similar looking Wen track saw because it came with a spring loaded riving knife. I'm not sure if that is needed but it felt a bit safer and it is easy to remove if it causes trouble.
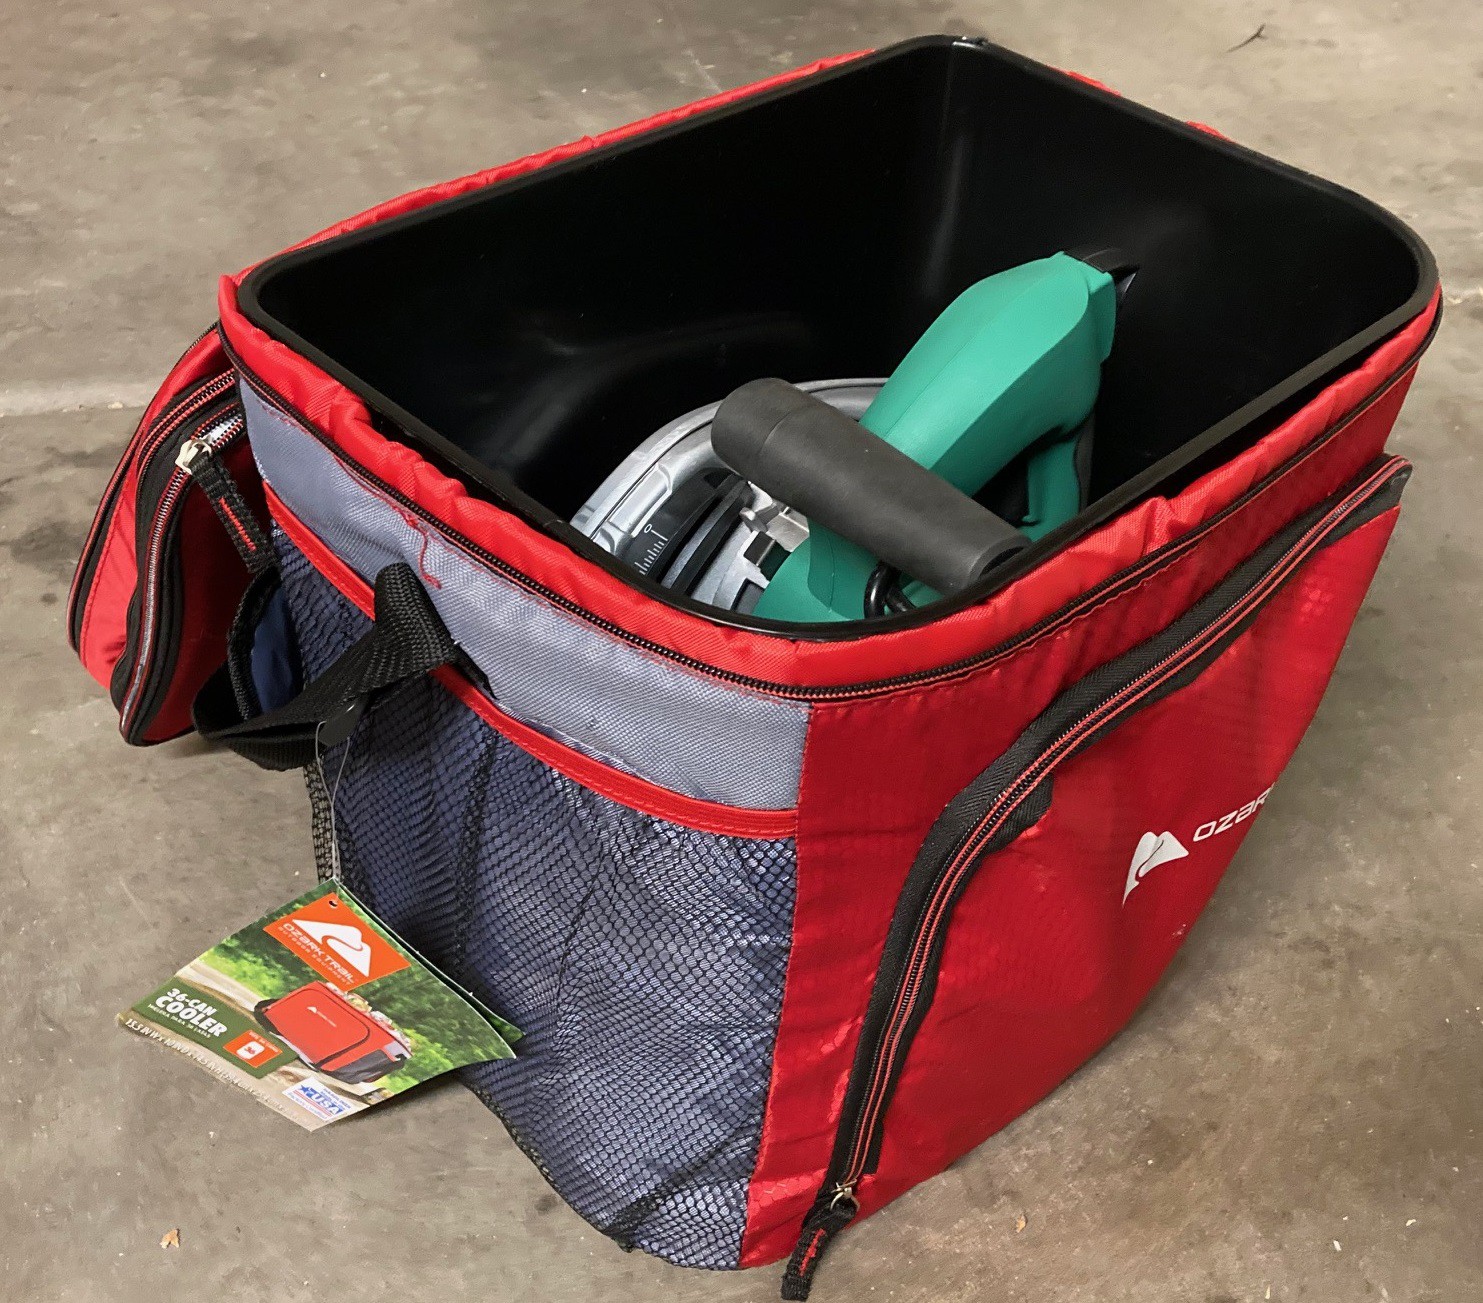
![]()
It did not come with a case, but after a bit of looking around I found this Ozark 36 can cooler from Walmart that seems to get the job done. It has a hard liner and should provide some protection. I would have liked to have found something more ridged, but unfortunately this is a really odd shape and everything was much too short or way too long.
The tracks had some damage at the corners from shipping. I spent a few minutes with a file and was able to clean it all up no problem. The saw slides nicely on the tracks now and I think it will work great. I would have loved to pick up the Makita track saw but at 3x the price it was really hard to justify.
![]()
I spent some time sorting through the rest of my wood and ended up throwing a full box of scraps away. I quickly stuffed the longer pieces in my wood rack. But I really need to take this back apart so I can properly sort it all out.
![]()
I ended up stuffing a few smaller pieces of wood back in the corner. I think I will try to build some rough shelves and stick them in here to help sort small but important scraps of hardwood away from the general wood piles. That will help reduce some of the clutter in the longer wall and it should make this space useful again.
![]()
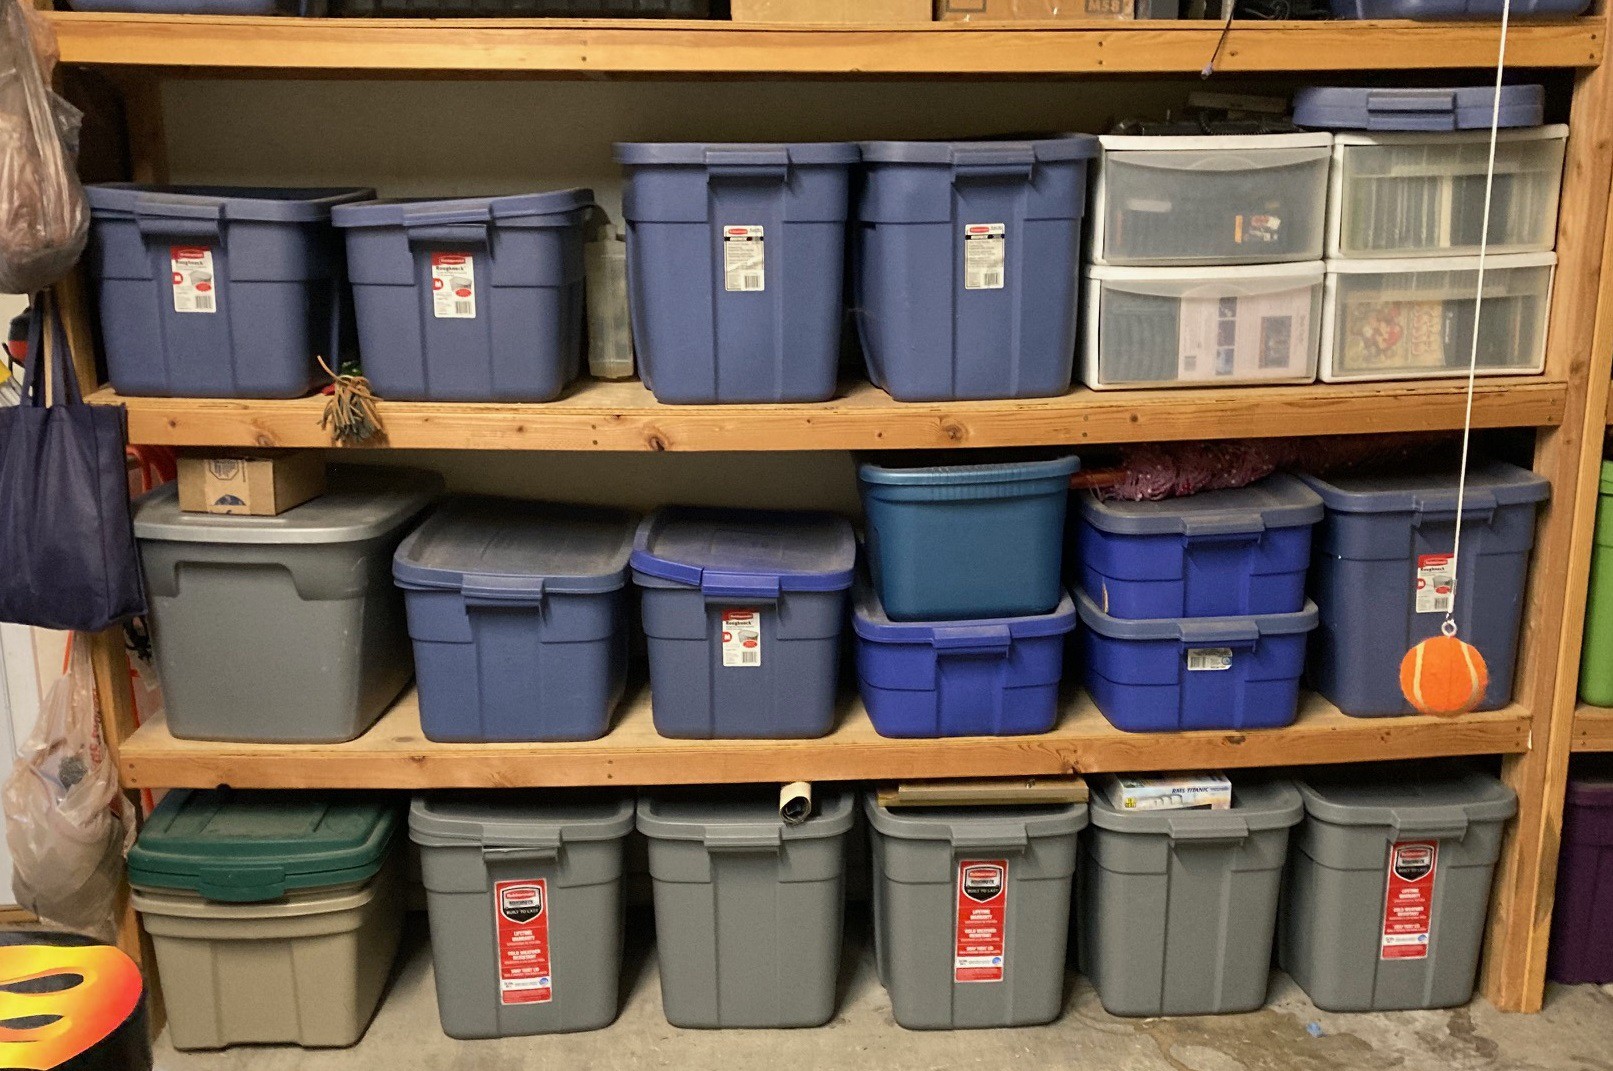
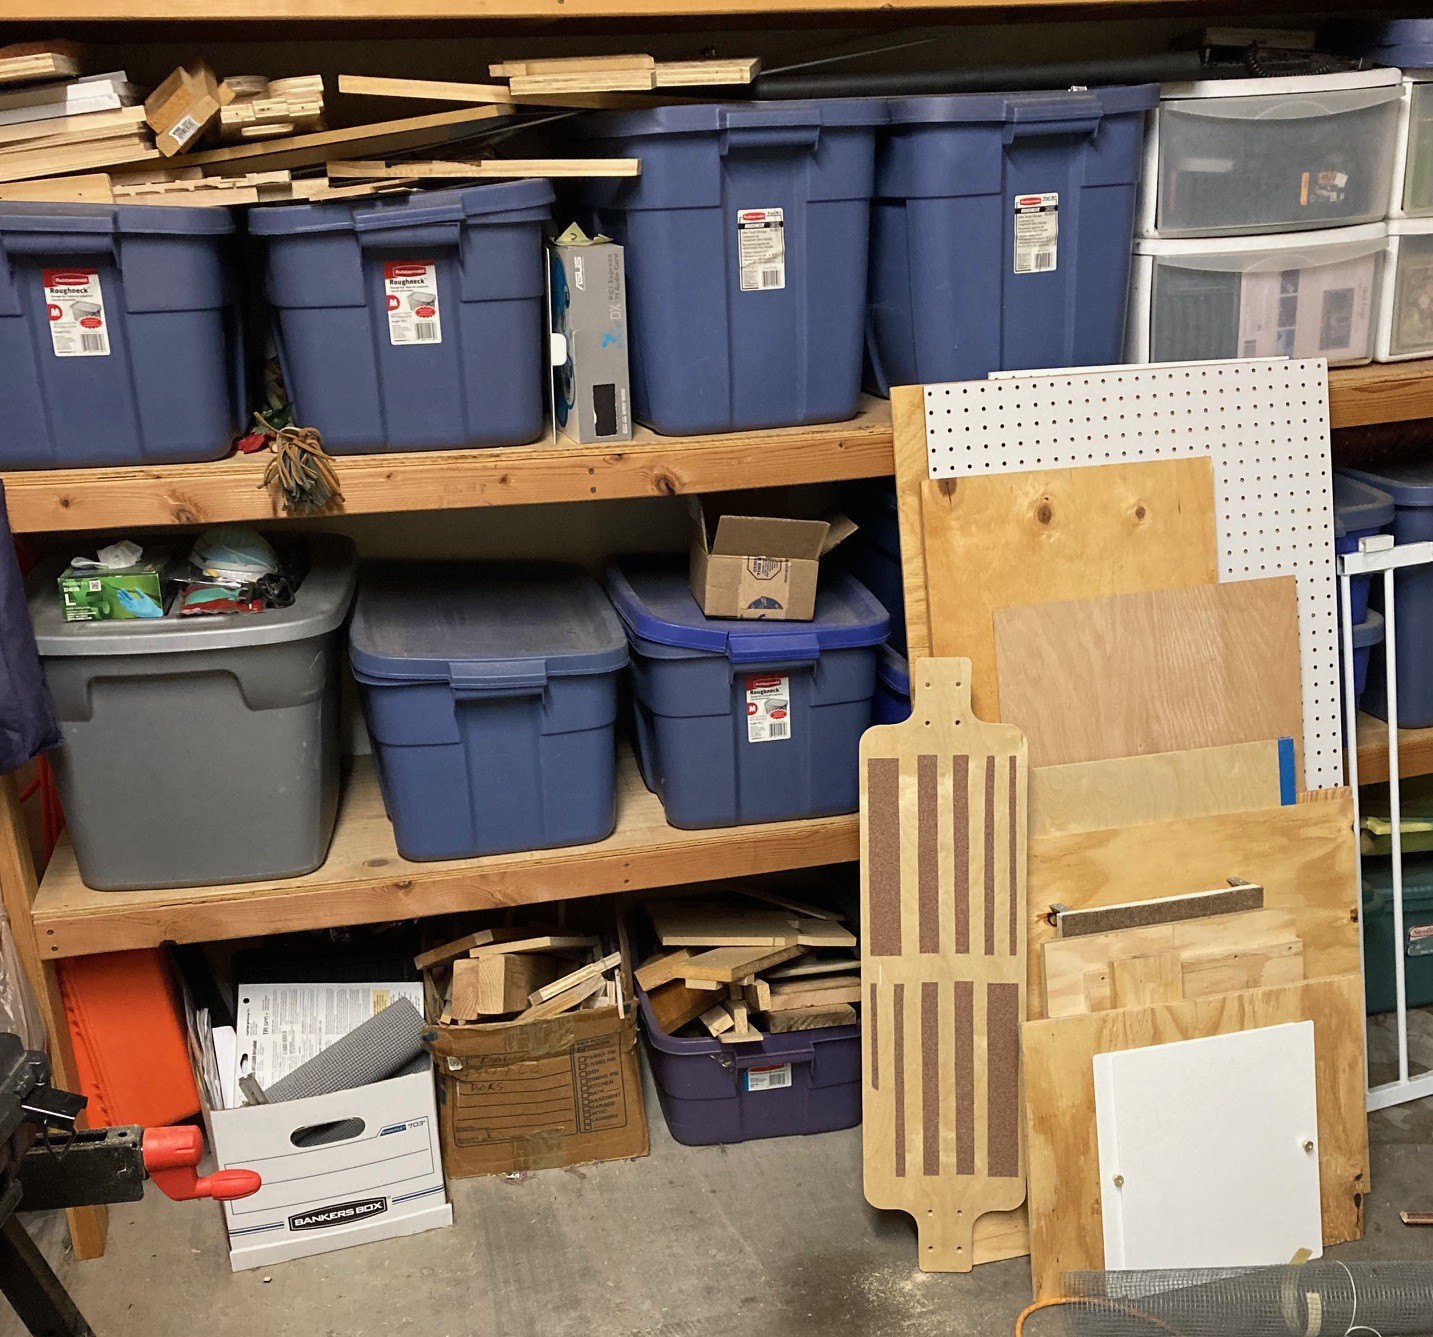
I picked up 5 more Rubbermaid bins to replace the random boxes I had stuffed on the bottom row of my shelves and went through everything and reorganized it into these larger bins. I was able to get all the rest of the loos boxes of stuff into the first three bins and now have room for some more treasures to accumulate. I also got all the wood removed from these shelves, that should make it easier to find the wood, as well as keeping the bins accessible.
![]()
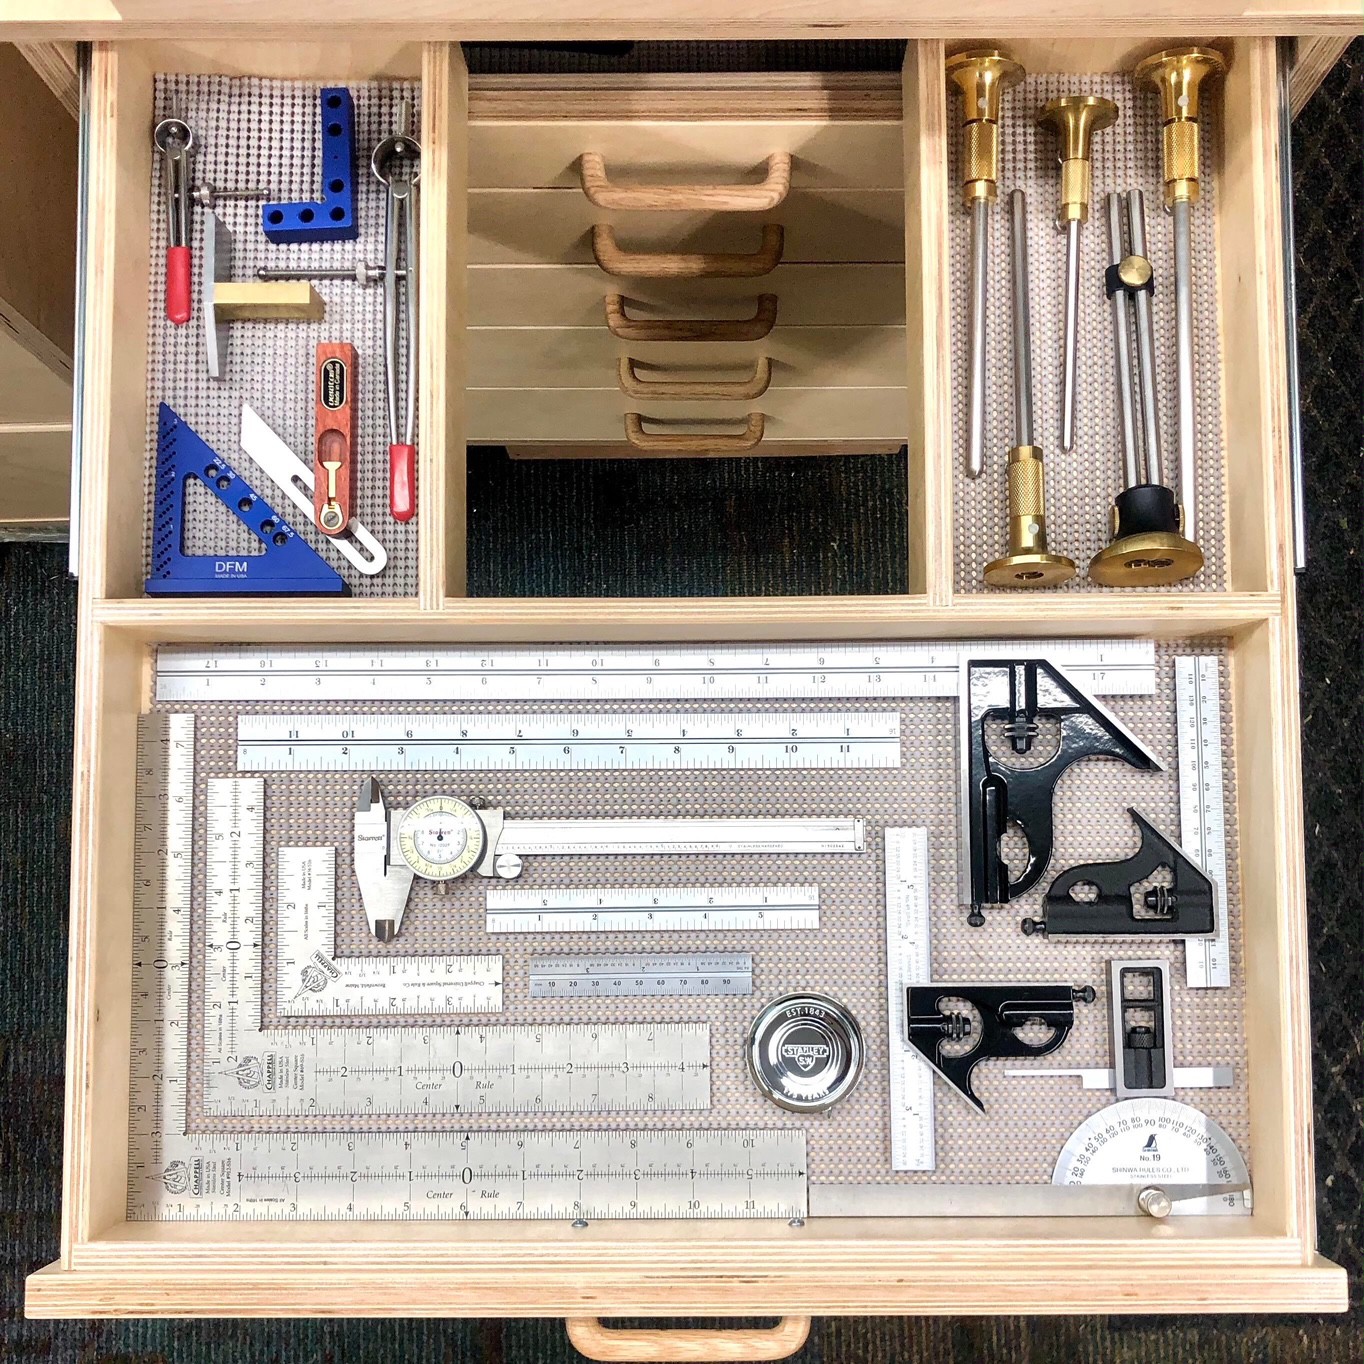
All of that means I'm basically down to the piles of tools that need to be organized into my workshop area. Ignore the box of wood, that is the scrap destine for the bin. I think I will go ahead and build the new hanging shelves around the top of my work area. That will force me to rethink my shop light but it will give me a lot more flexibility going forward for storing tool and other items I don't need easy access too. I also really want everything possible to be in a covered drawer or cupboard. I have soo much dust and wood chips covering everything and would like to reduce that going forward.
I survived Christmas with some funds left in my accounts but I need to move slowly on buying wood (because it is crazy expensive) so I will probably focus on finishing the small shelf for storing wood scraps and a new shelf around the top of my workshop for storage. I also want to rethink the pegboards, I have never liked them but can't really think of a better use for the wall space that still allows the door to open.
-
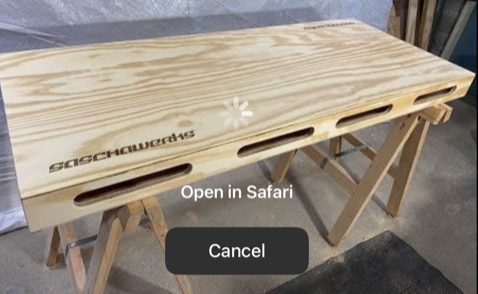
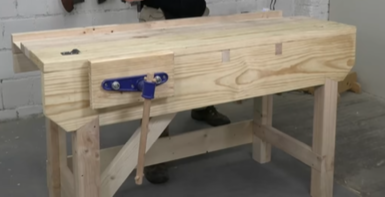
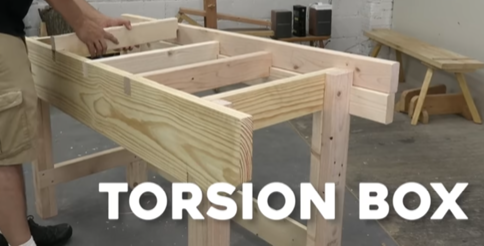
Table It
12/23/2022 at 19:48 • 0 commentsSo here are some more bench ideas.
![]()
First up is this tiny torsion box top. It does not need the holes in the side, but it shows that you don't have to go overboard on this to make a strong top with little material.
![]()
Next we have this old English style workbench that is made entirely from construction lumber. I'm not a big fan of the wide face or the tool groove in the back but it is nice to know you can make something fairly complicated with relatively inexpensive materials.
![]()
The best part of this build is this mortise and tenon support system under the table top. They call it a torsion box here but it is not because it lacks a bottom span of wood to create the torsion. I don't know that you need to mortise the wood, running screws into the ends of the cross pieces would be fine for a workbench.
![]()
![]()
Finally we have this worktable made from a solid core door and some 2x4's. I like the idea of a prebuilt top that is flat and solid for relatively little cost. However solid core doors come in fixed sizes and they are not easy to cut down. And right now new doors are crazy expensive, so I would need to look at a reclaimed material lot to find a cheap enough door to justify this.
I also really like the fact that the whole table is up on rollers and has a very open bottom area. I'm suspicious about the storage cubbies, I suspect they would be cluttered up in no time and adding drawers would be a better use of the space, but I would need to think on that. Maybe a compromise with a bit of storage and some drawers would be perfect.
![]()
Here is a picture of my original shelves, before they got cluttered up.
![]()
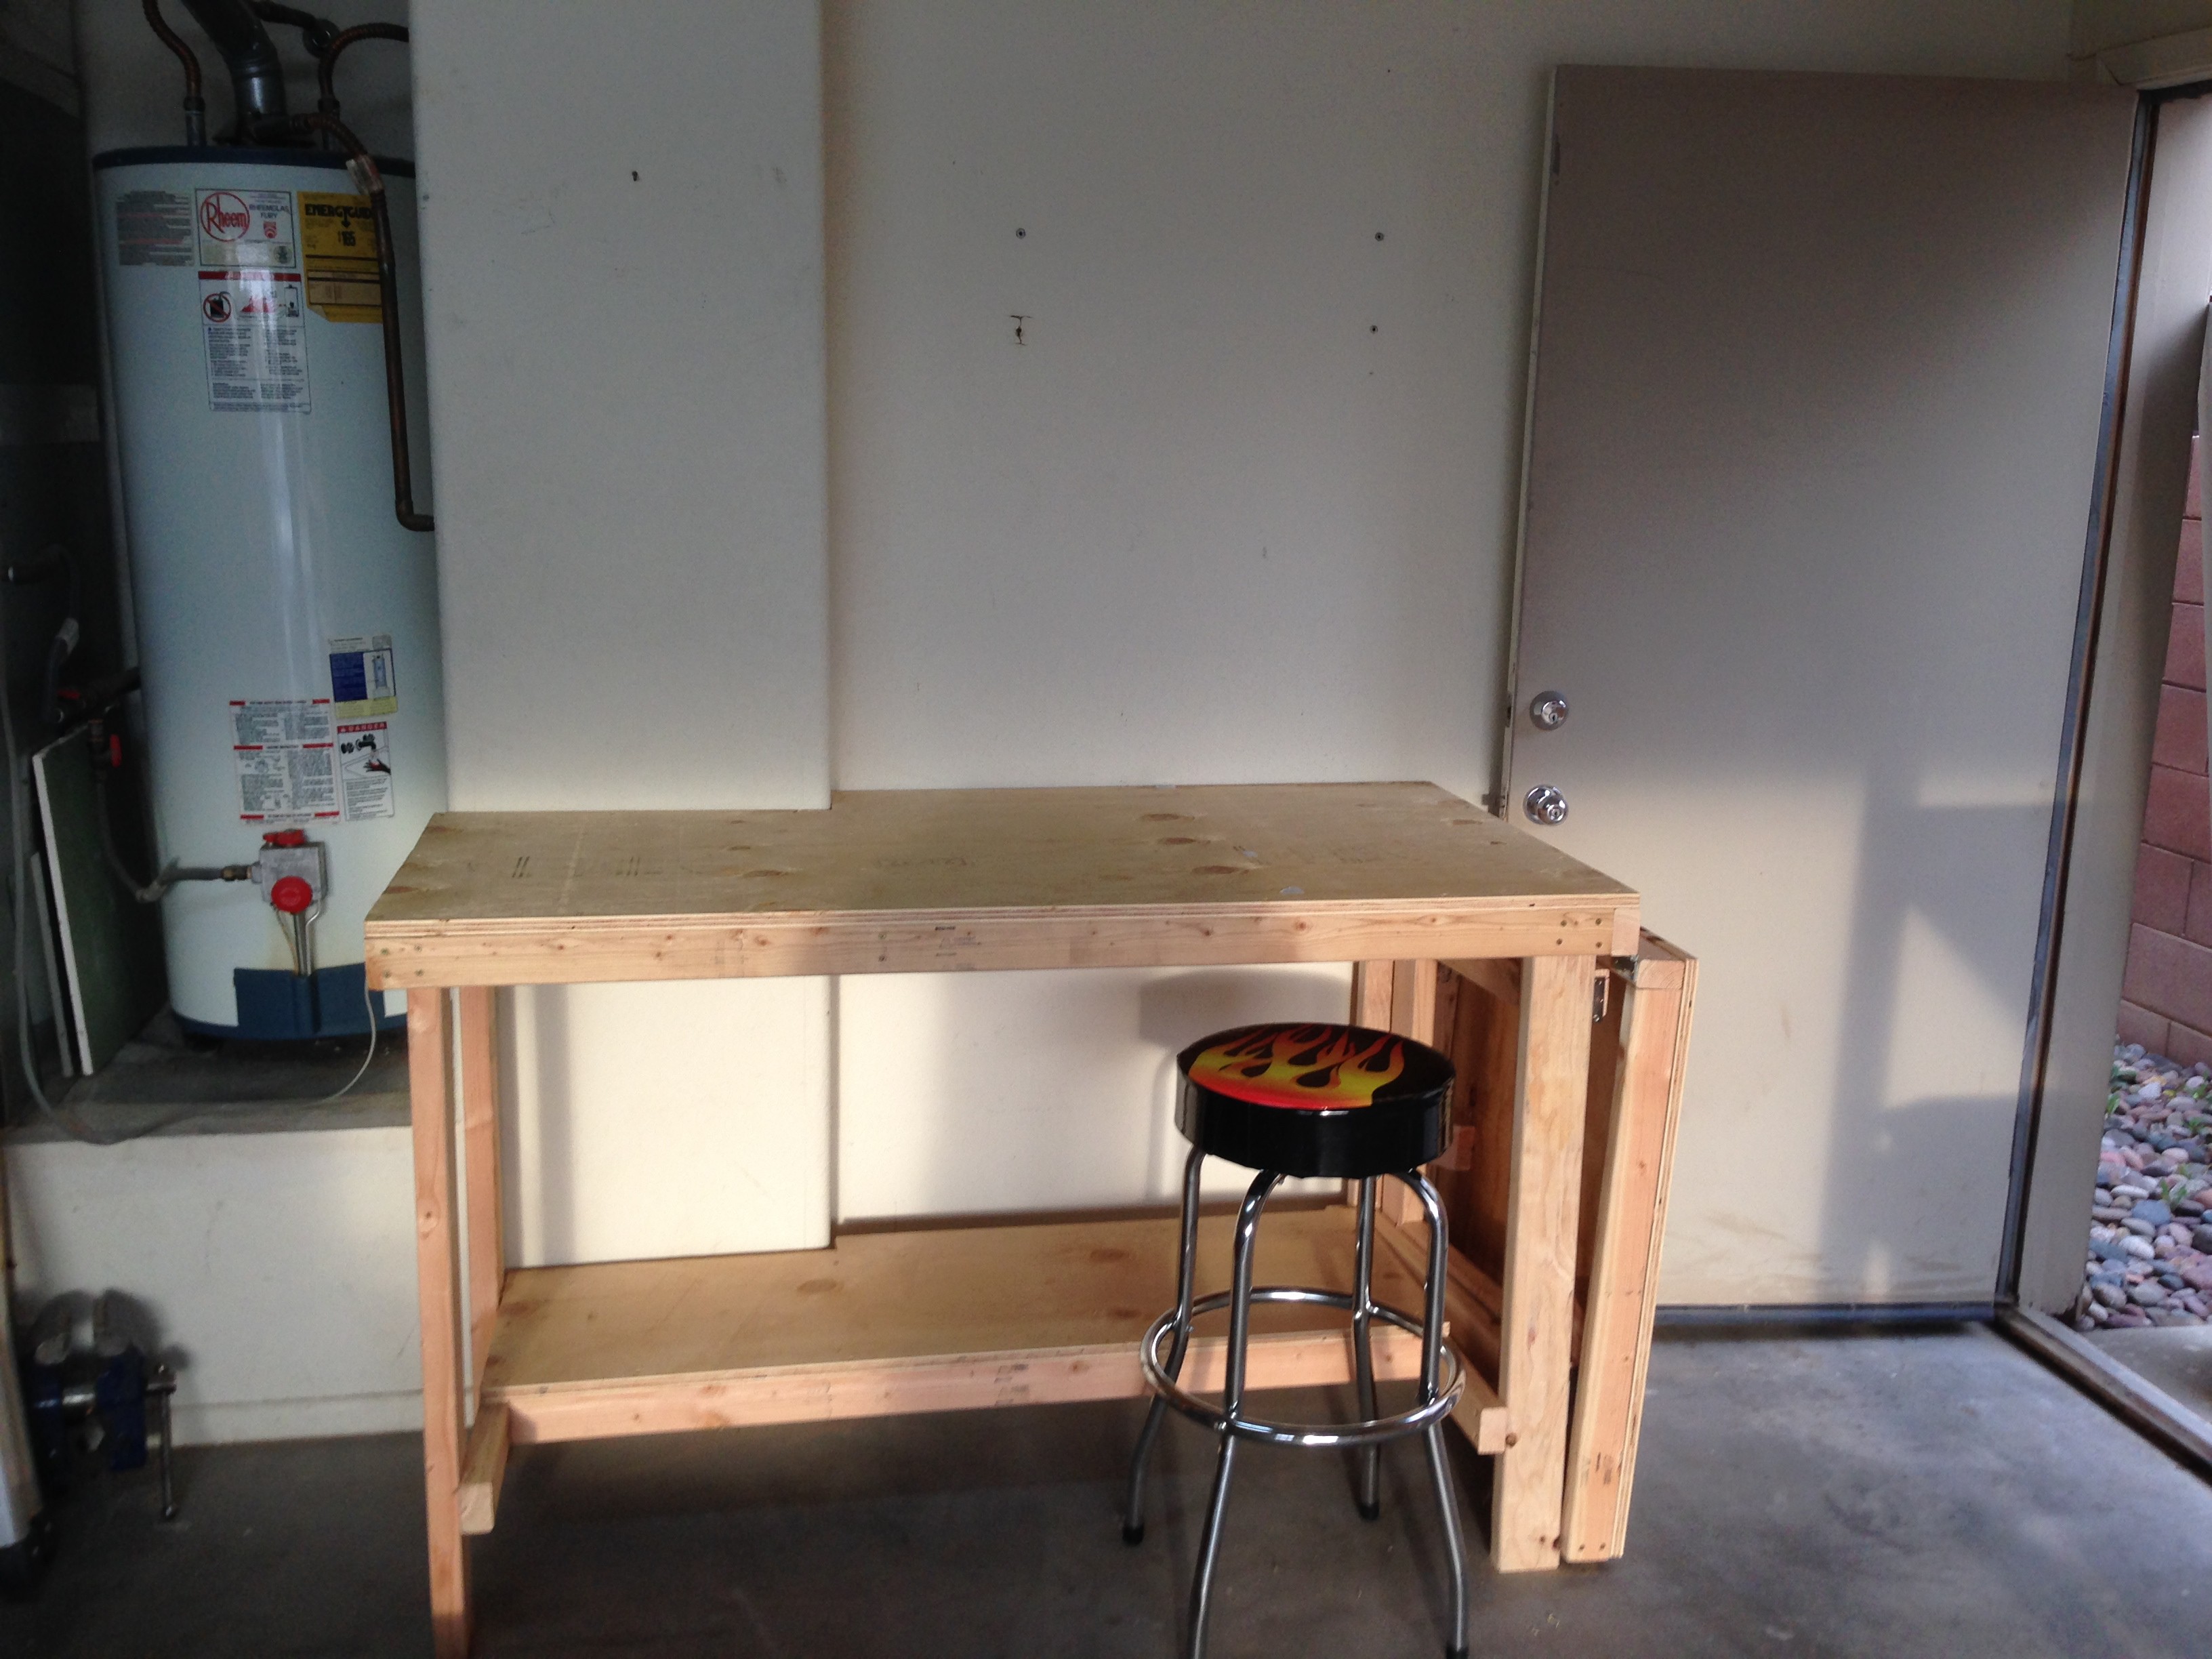
And my current workbench with the side up.
![]()
And the side down. You can see there is not much usable space on the wall because of the door. I could possibly put in one small cabinet over the worktable but the pegboard is probably the better use of space. I could go with open shelves, and I may actually cut my pegboard down a bit and add in at least one more shelf since I struggle to really reach anything at the top of the board. Honestly I really don't care for the pegboard, but I doubt that French cleats would be much better. I really want something that locks in solid to the wall but has lots of spaces. for fine adjustment.
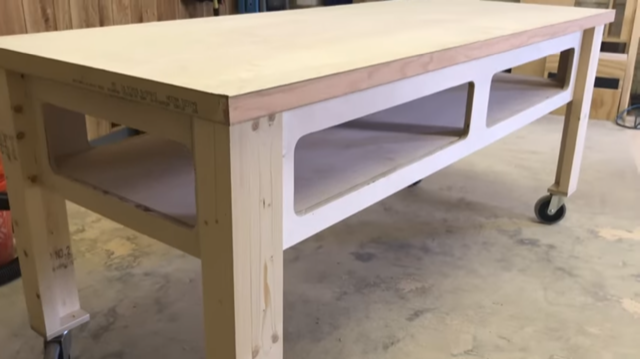
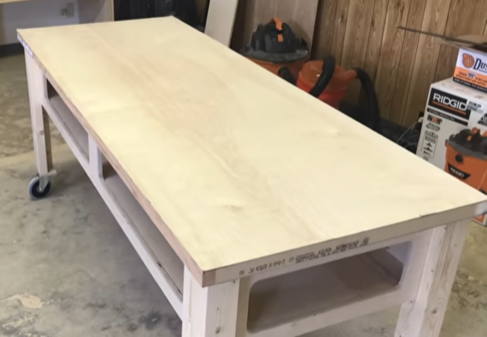
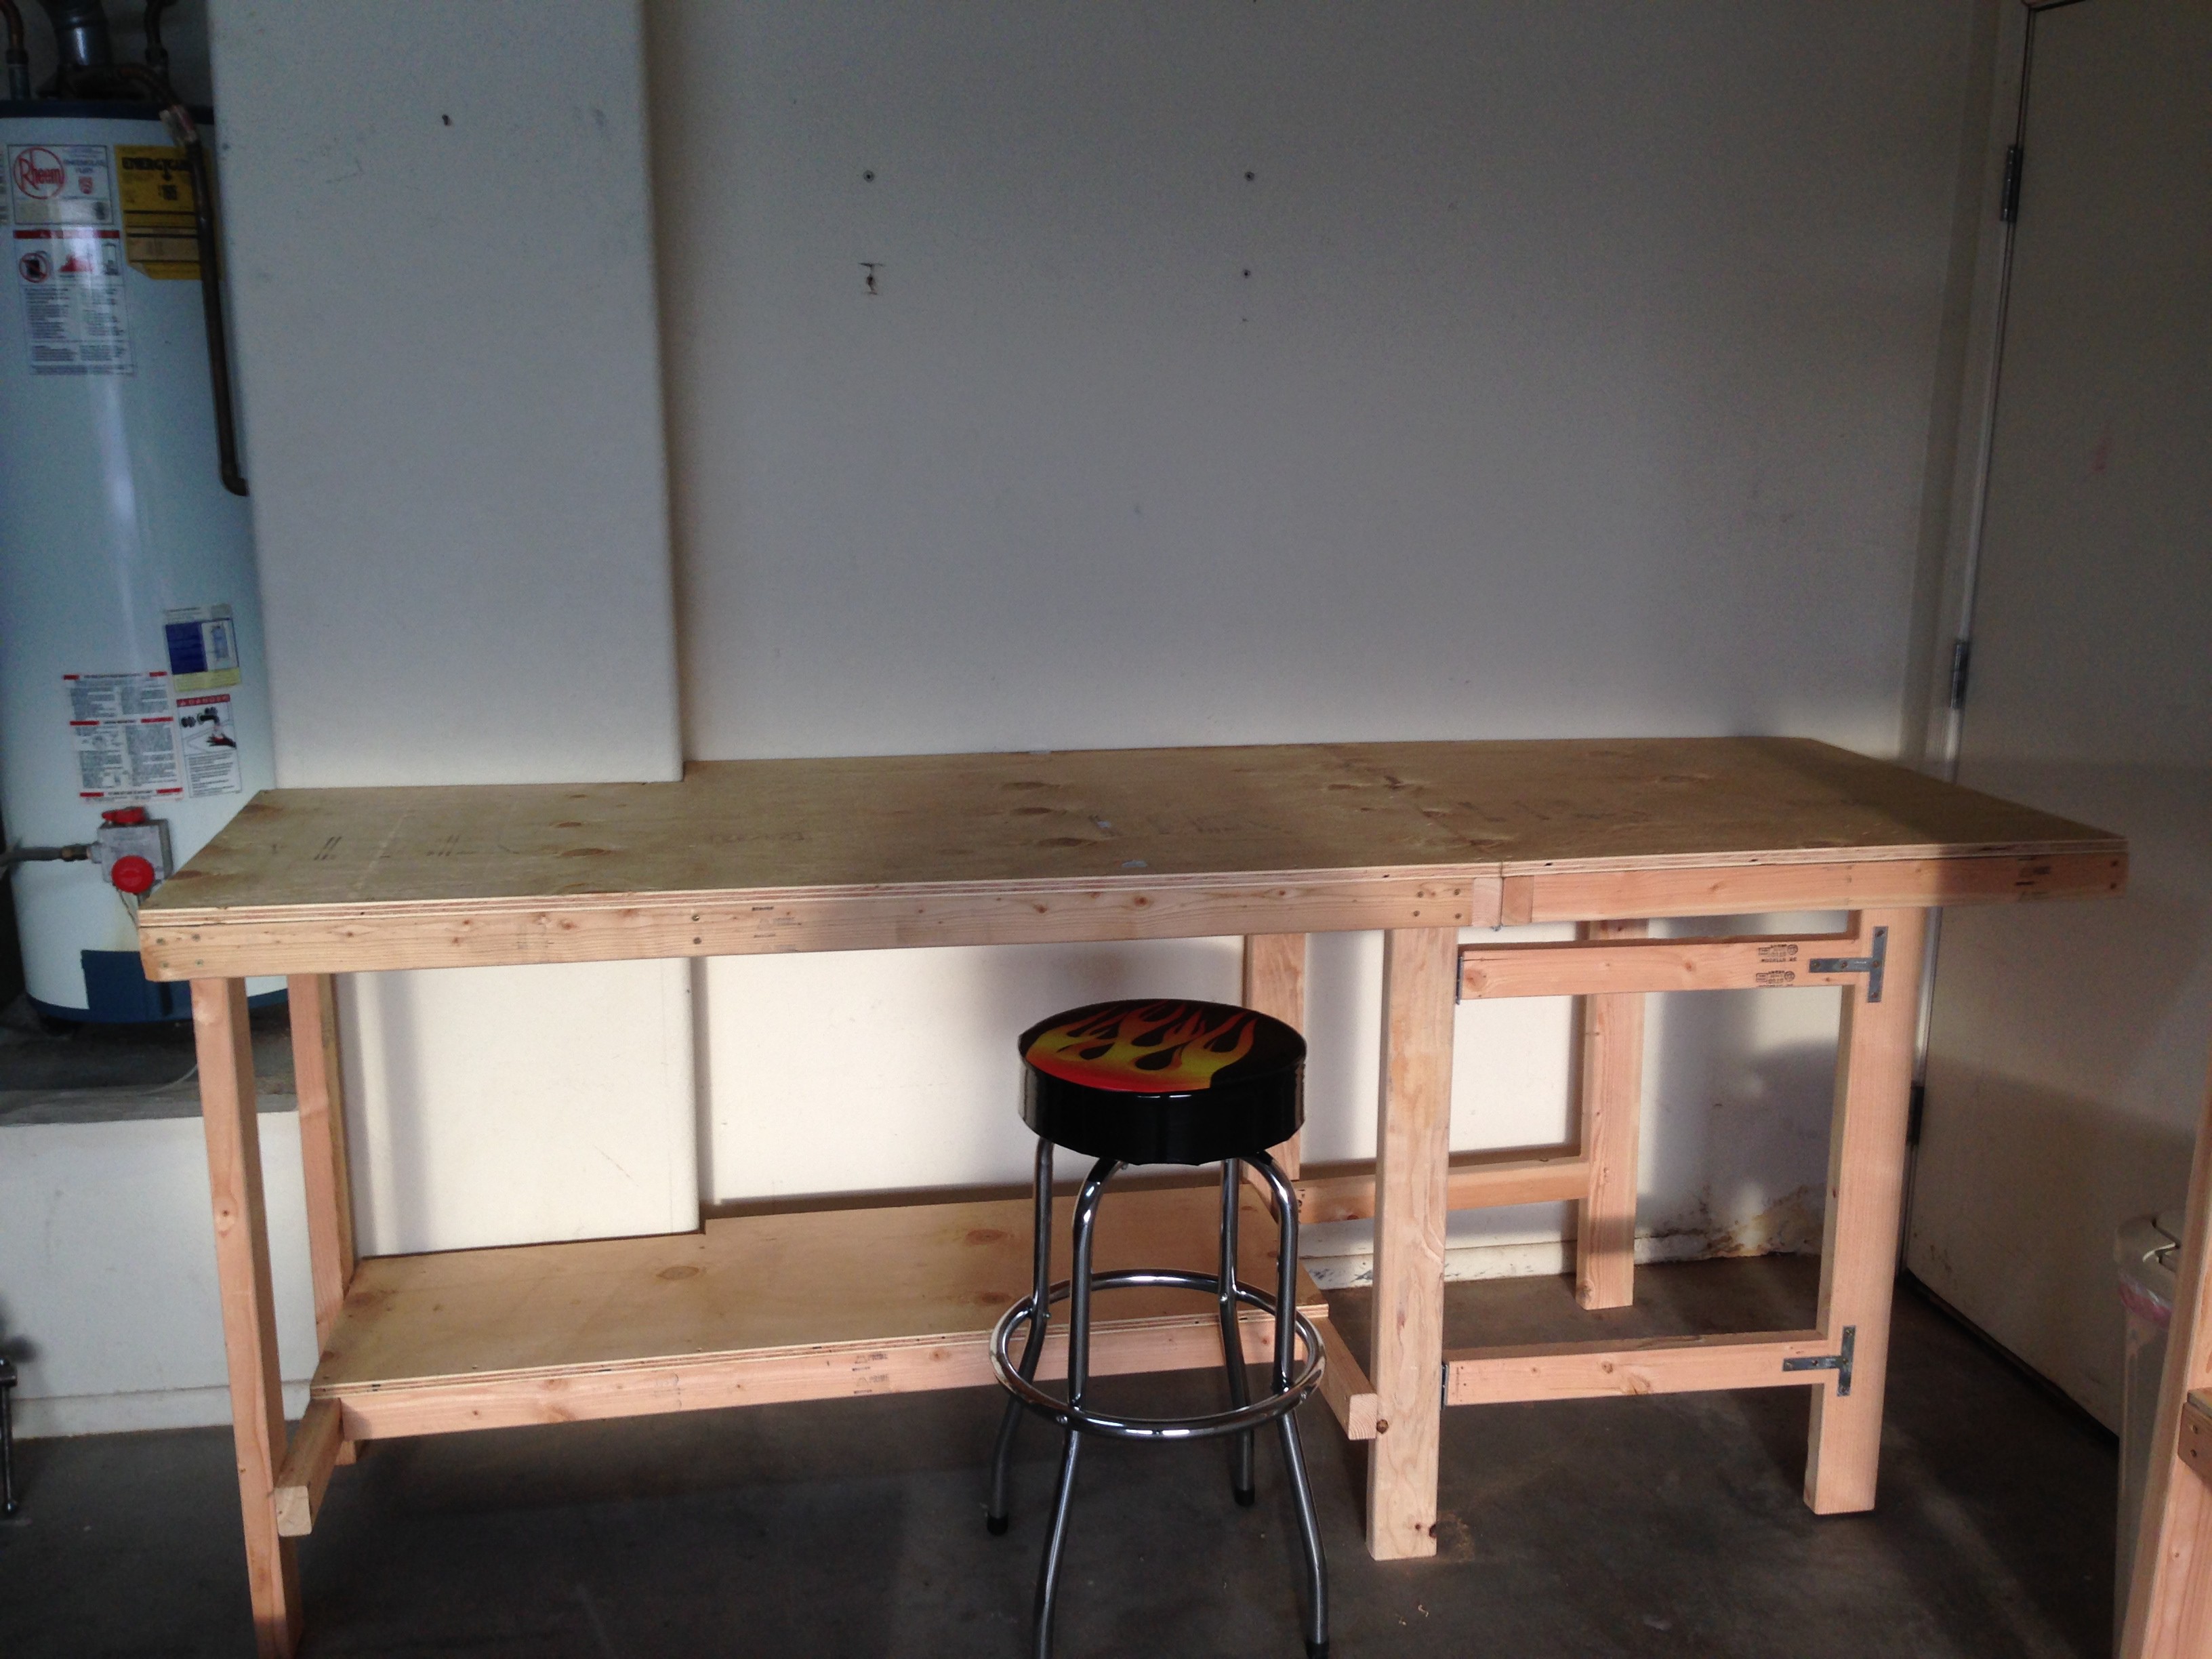
So as an initial pass my existing workbench is great but it has a few issues. First this movable section is not really as nice as I would have hoped. It is a bit less stable and flat as the main bench (I would not hammer on it) and more importantly it is not convenient to be folding it up and opening it back out since you have to completely clean the space up every time. Also it makes the right edge of the table fairly useless for sawing or really any hanging of a piece of wood off of.
The cutout in the lower shelf seemed like a good idea, and it is in fact nice when sitting at the stool, but I never sit and work on the stool and I just end up with a much too small shelf. Finally there is no real lip on the edge of the bench so it is hard to clamp things to it. The 2x4's are too tall and too skinny if you can get a clamp around it. Oh, and I currently have a lot of things stored on top of the table and that turns this into a storage space rather than a workbench.
My thought is to put the bench on wheels and make it about as wide as it is now when folded up. That way I can push it against the door but still easily roll it out when I want to work or need access to the door. I'm torn on the bottom. I want some sort of storage down there that is more space efficient, but do I want it built into the table, or separate so it can be more easily customized (say a table saw on a rolling cart someday)
-
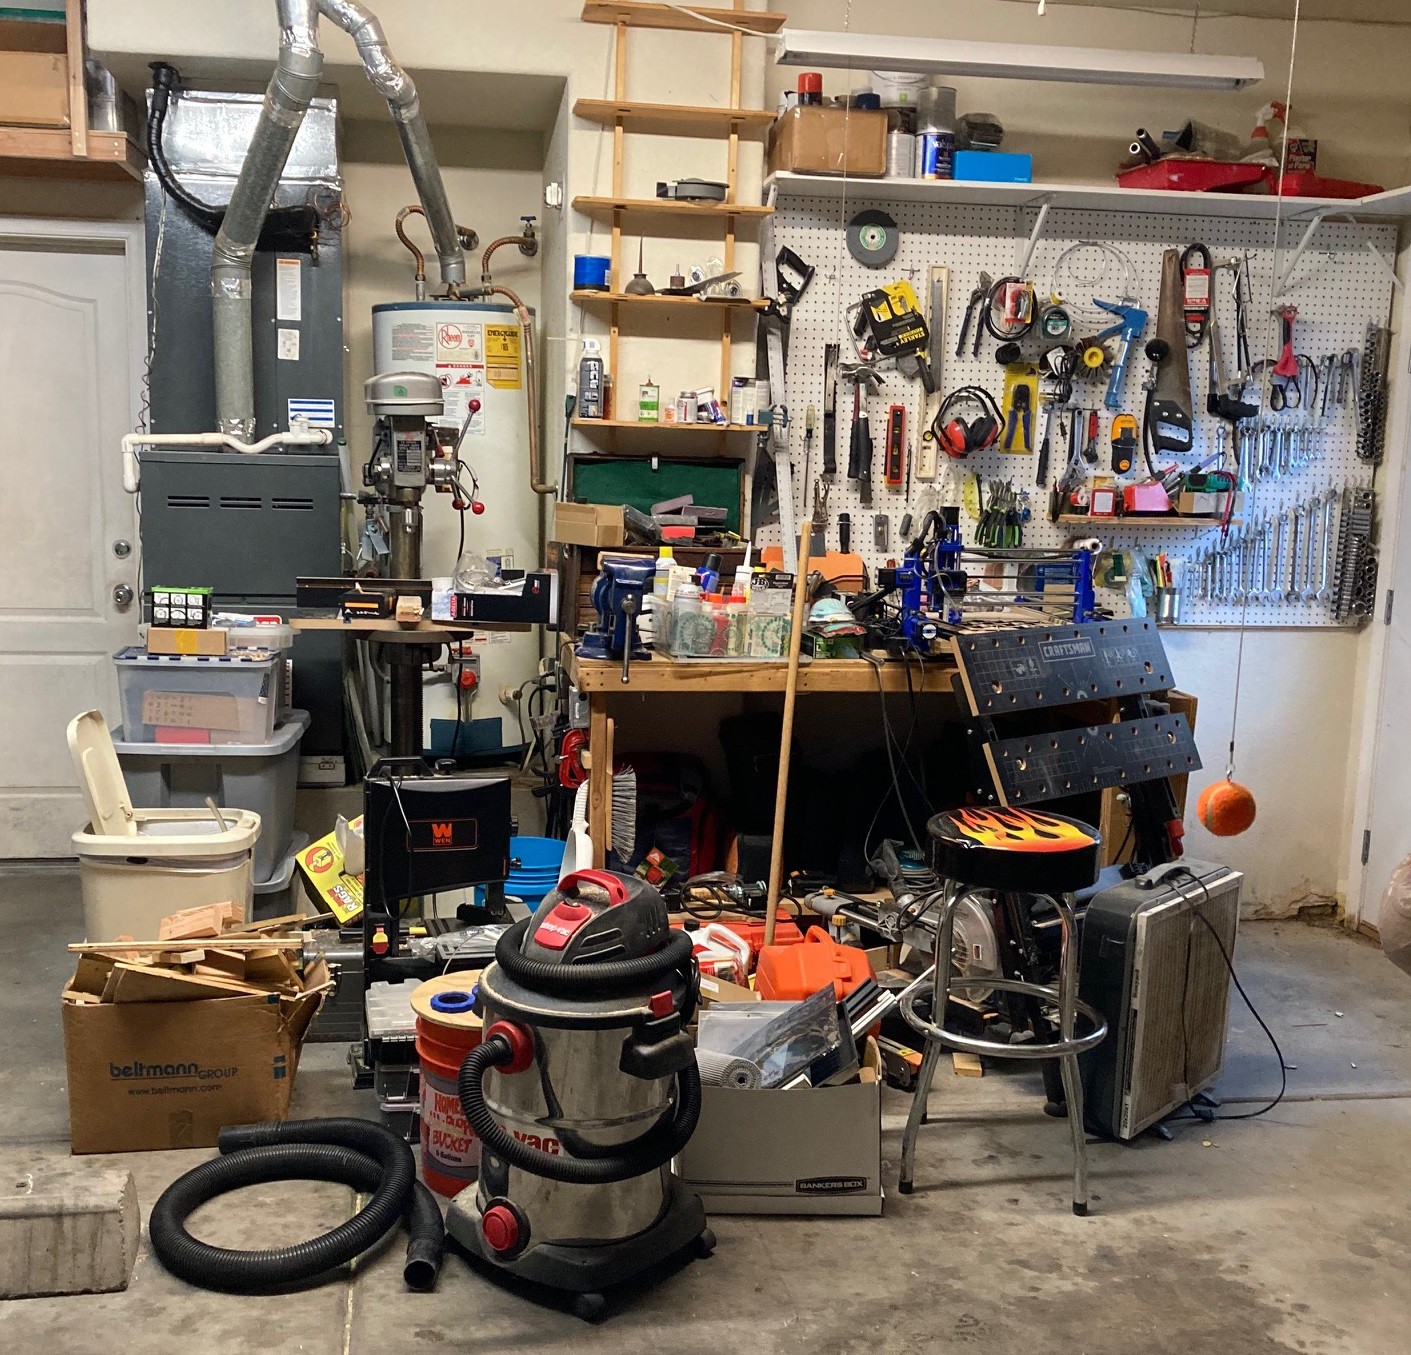
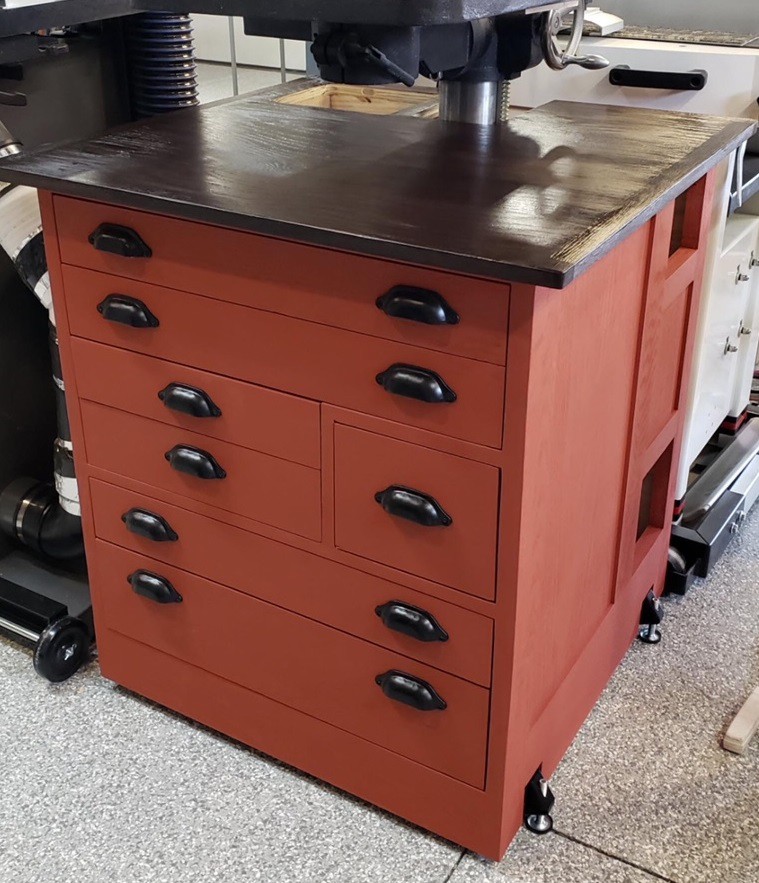
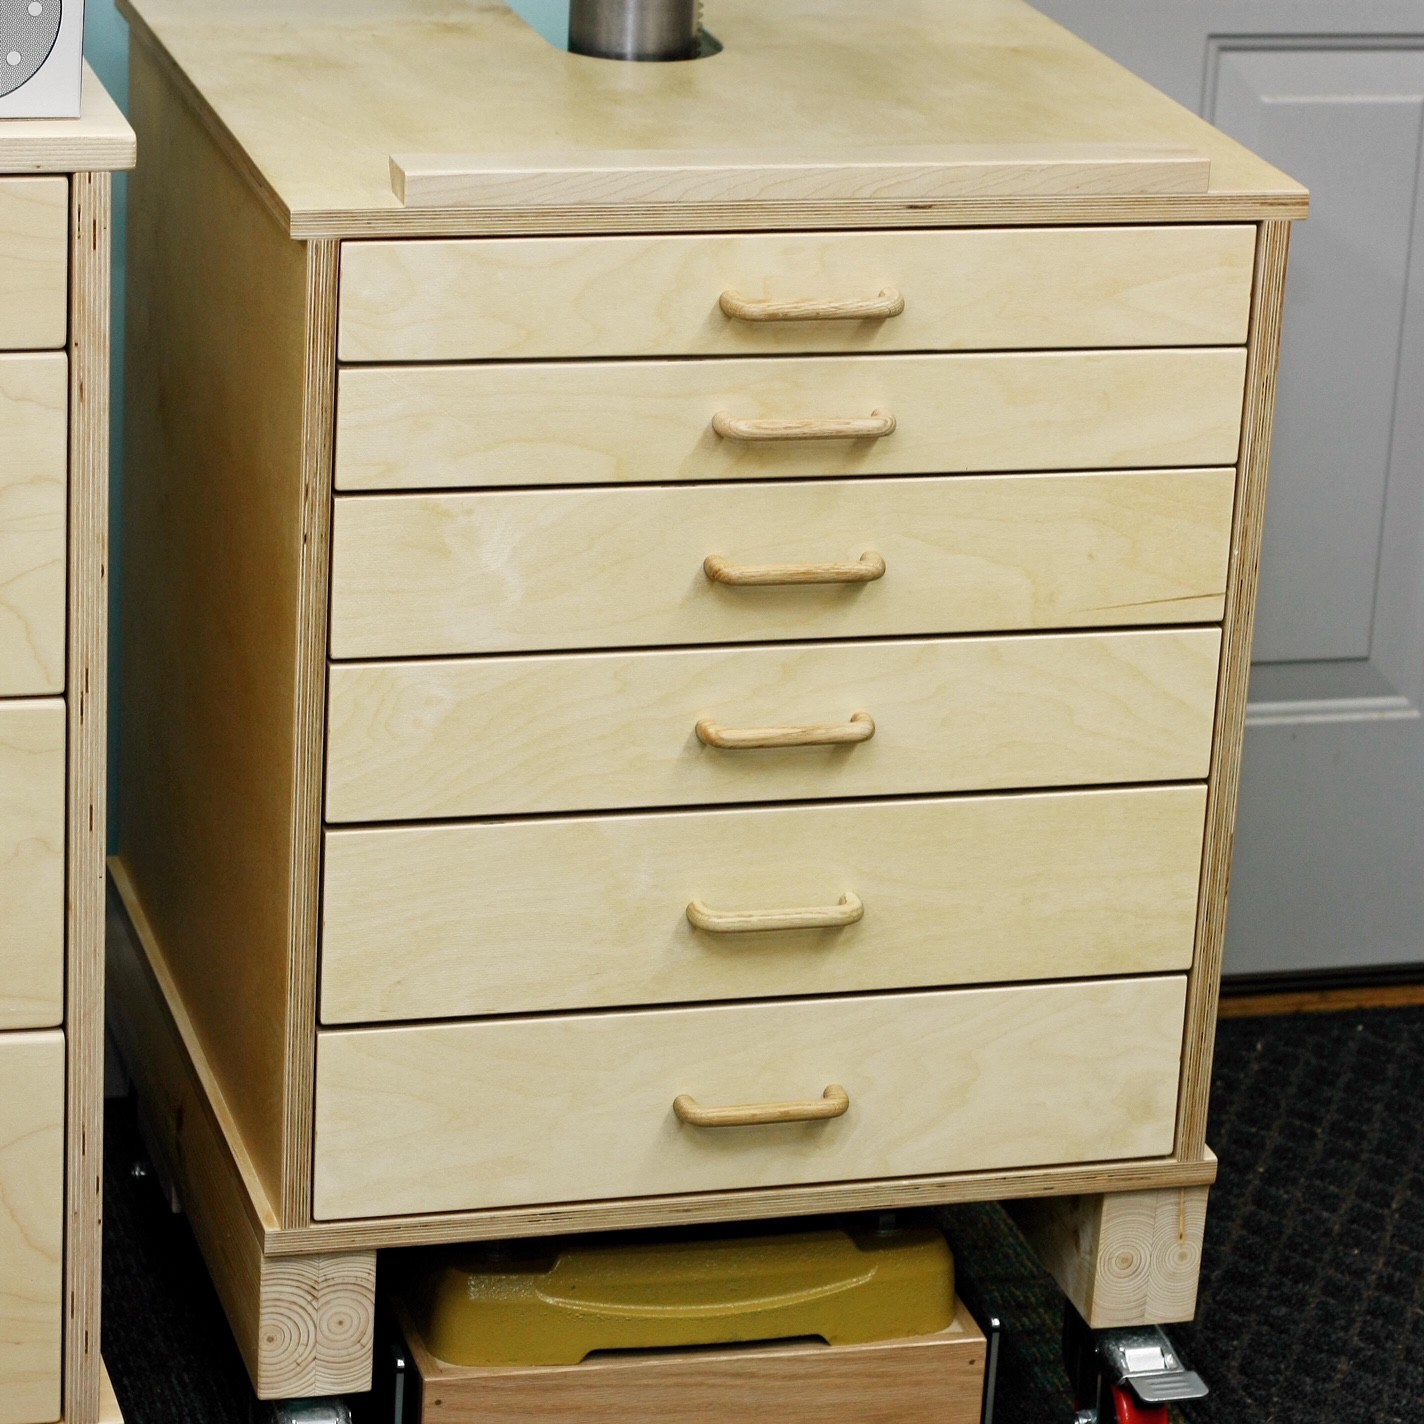
Pressed for Storage
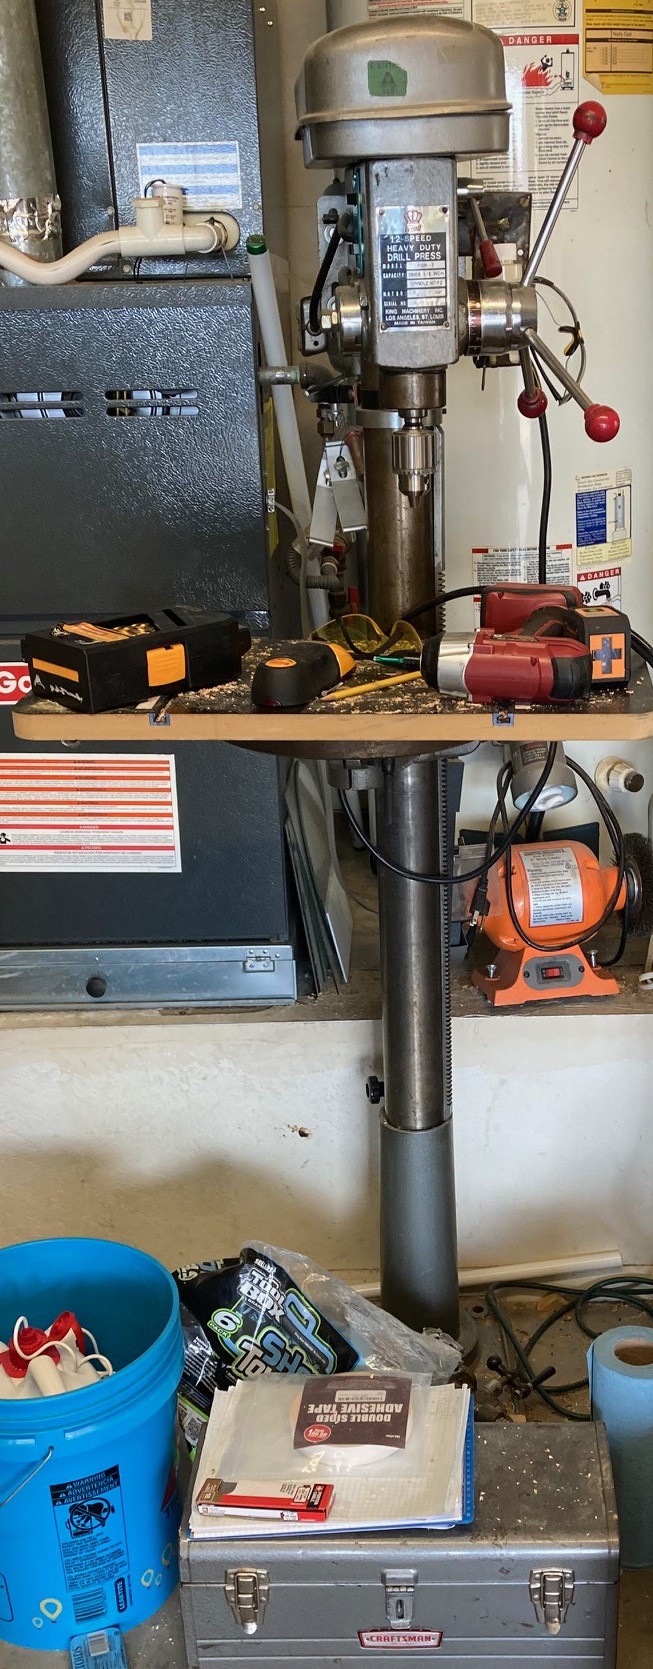
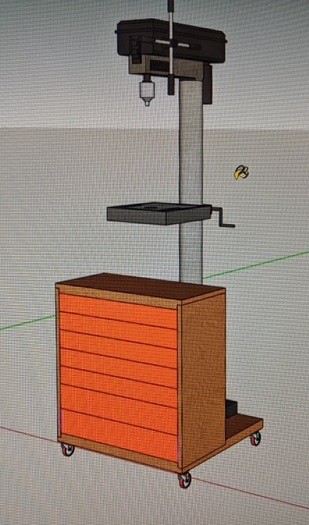
12/22/2022 at 03:18 • 0 comments![]()
So I have this full sized pillar drill press that I got from my Grandpa. It takes up quite a lot of (vertical) room in the shop, but I really don't want to get rid of it for sentimental reasons, even though I'm unlikely to ever drill something that requires the full range of the table. However I would like to recover some of the space back by building some sort of storage system that fits in around the base of the drill.
![]()
One idea is to turn the drill table itself into more storage. I certainly have the room to lower the table and it would be a convenient place to store my various drill bits. However your not really gaining a lot of storage space here, and I really don't like the idea of drilling into the top of a cabinet, even if the top layer is sacrificial.
![]()
That leaves some sort of cabinet at the base. This could be built in, as shown above.
![]()
Or just attaching some sort of tool box to the front.
![]()
Or even repurposing some old piece of furniture.
![]()
This could be directly attached to the drill press, or separate so it can be moved out of the way in case you need more vertical space to drill. And both the drill press and the cart could be on casters for easier moving.
![]()
![]()
Finally there is the annoying post to deal with. If you really want to take full advantage of the space you can add these small winglets to the drawers. Or you can add open shelves to the outside of the box and only have drawers that go back to the pillar itself.
![]()
![]()
Here are a few more shots to round out the collection.
I have a space about 24" wide, 36" tall and about 13" from the front of my table to the pillar, plus another 8-12" beside the pillar. I don't really like my table top. It is something I picked up at Harbor Freight on clearance and it works ok but it is both wider than I would like and not nearly deep enough. I have not decided if I want to replace it or not, but I should plan out the size of the cart based around a theoretical replacement table rather than the one I have now.
I also have a small bench grinder that I basically never use because I don't have a place to mount it and it is too heavy to really want to pick up and clamp to a table top for small tasks. I have always thought about making a small mount for it so it attaches to the pillar of my drill press. I could mount it to the side or back of the storage box. Even if I had to roll the drill press out to use it, it would be a lot more convenient to have it hard mounted somewhere.
![]()
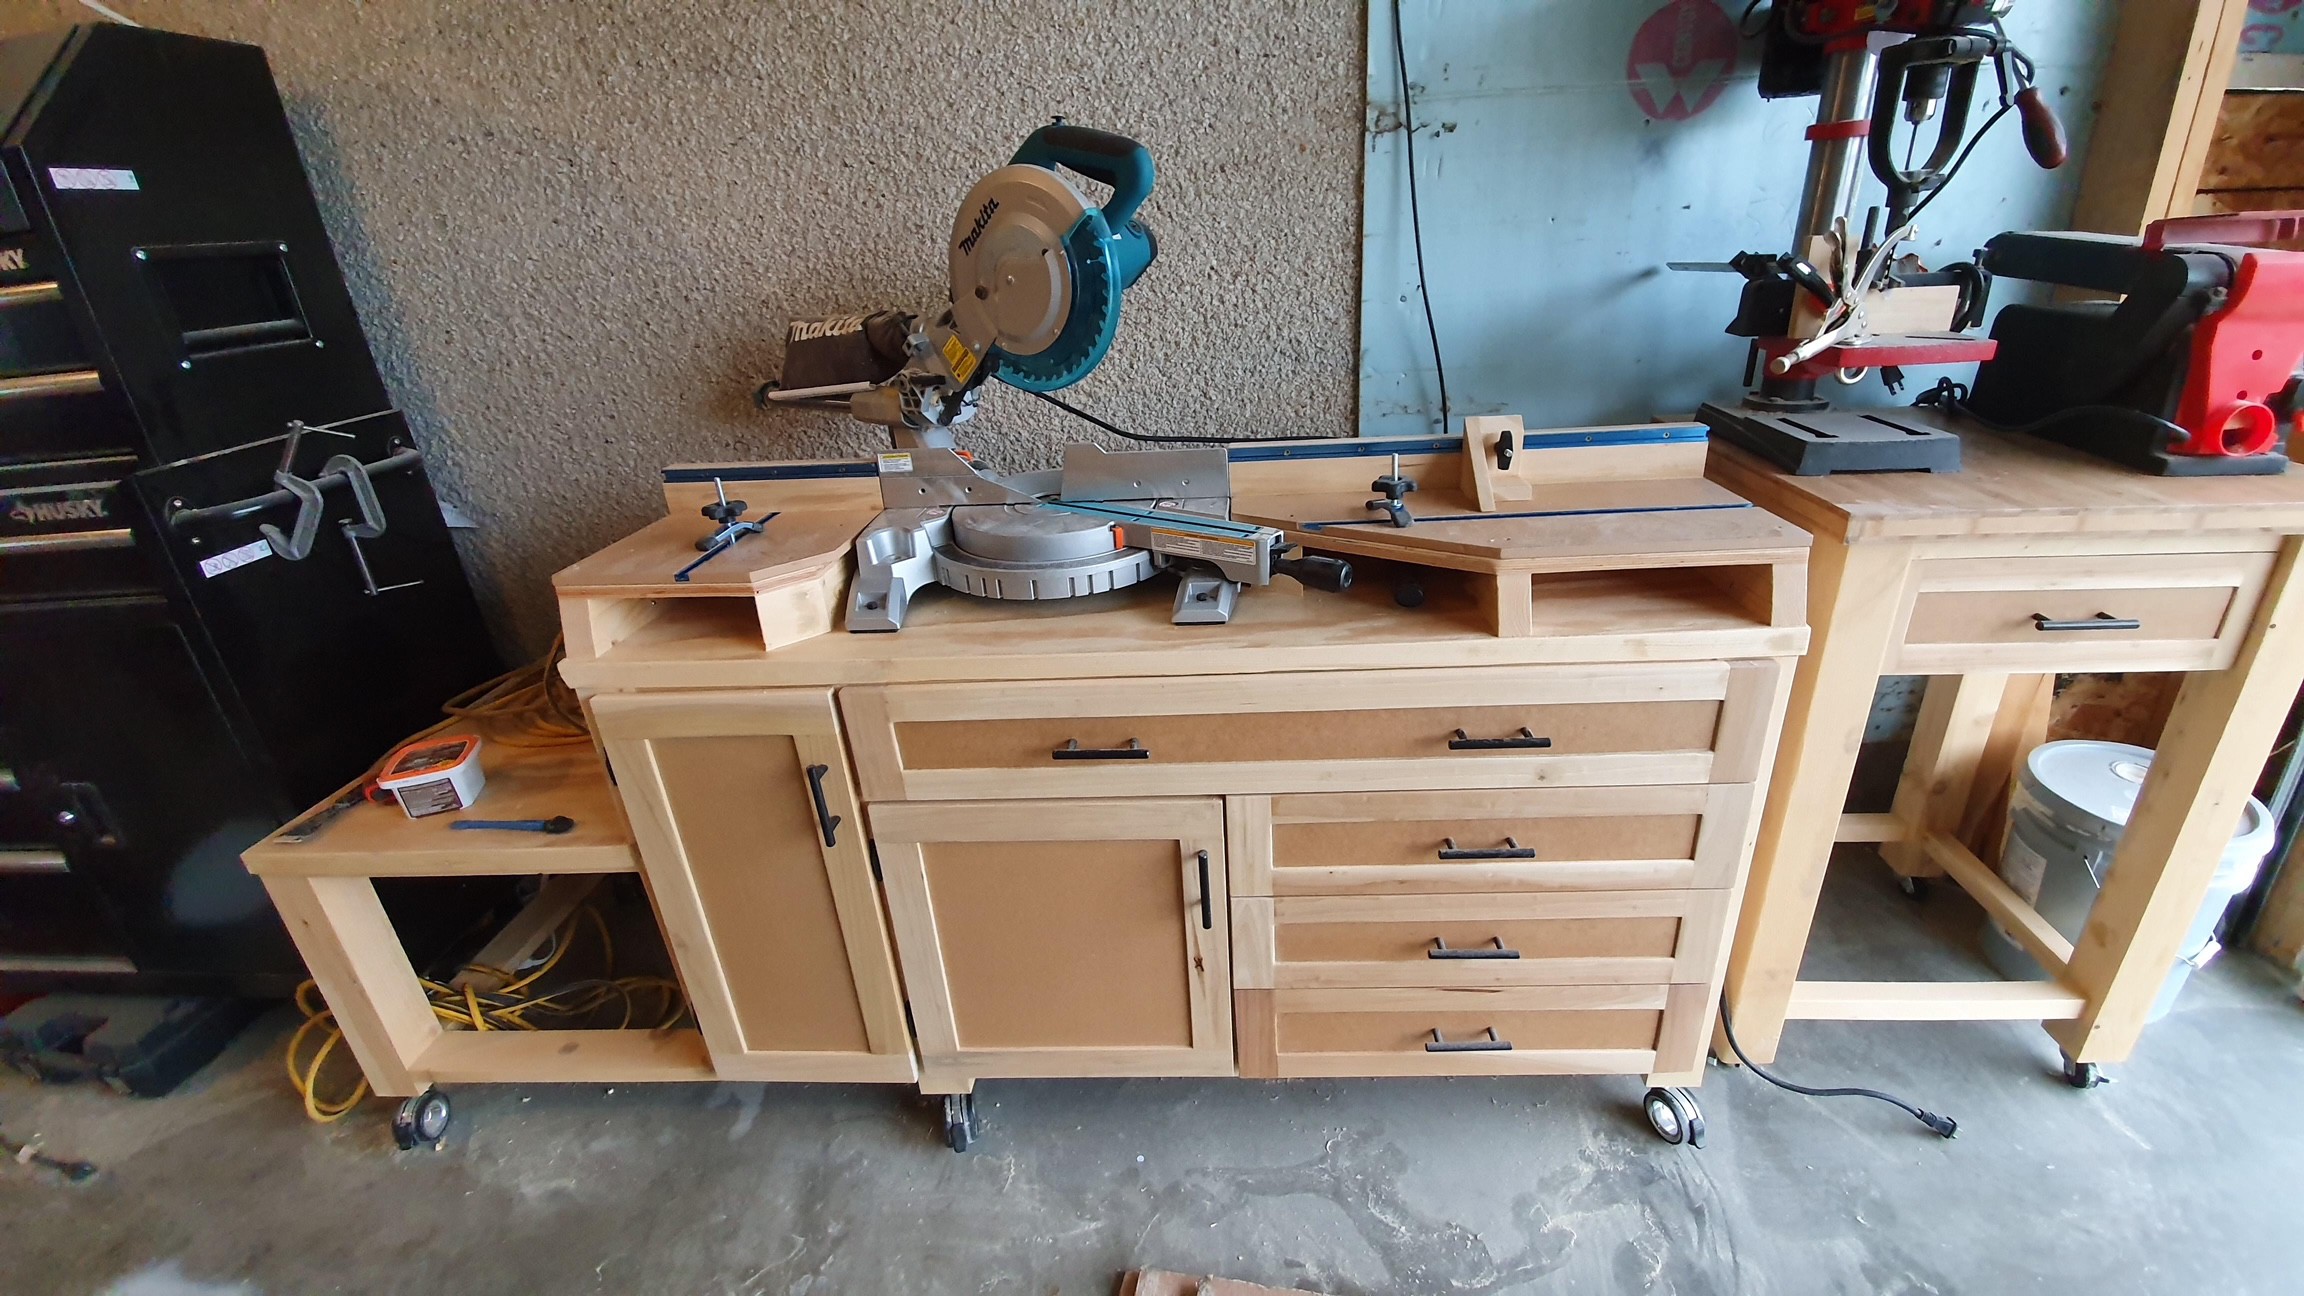
Oh, and here are some more workbenches that I really liked. This miter stand shows the potential for gaining a lot of storage while still having a usable saw.
![]()
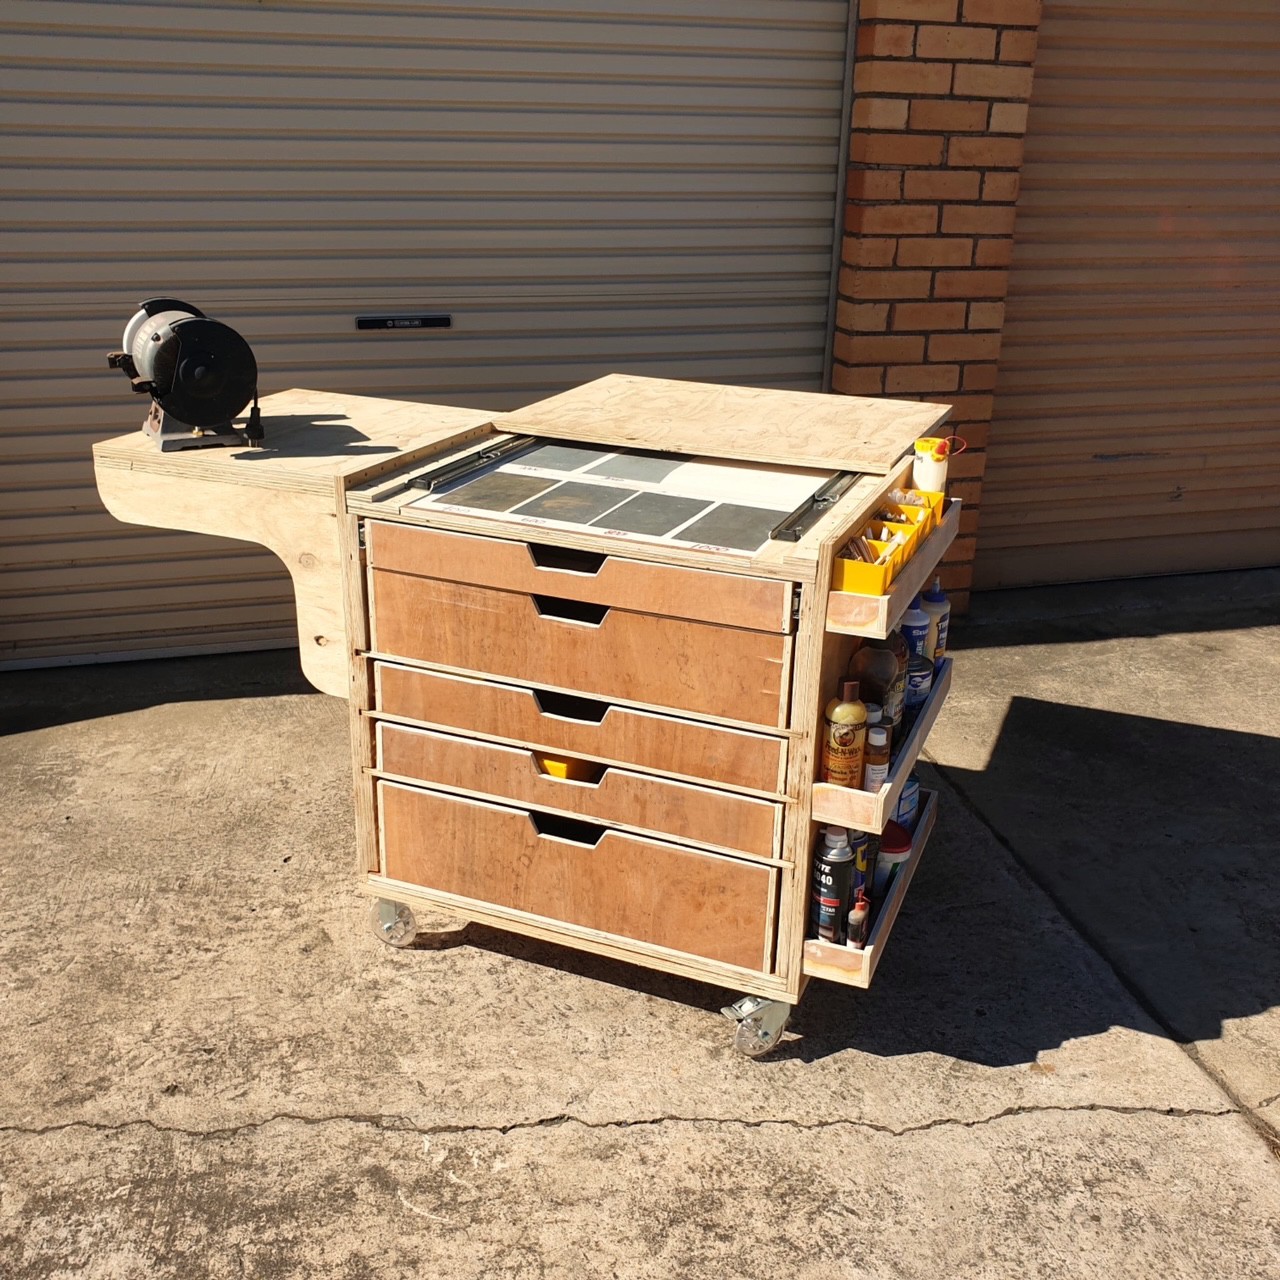
And I really liked the finish on this rolling utility cart. It is simple and inexpensive but still looks professional (enough).
-
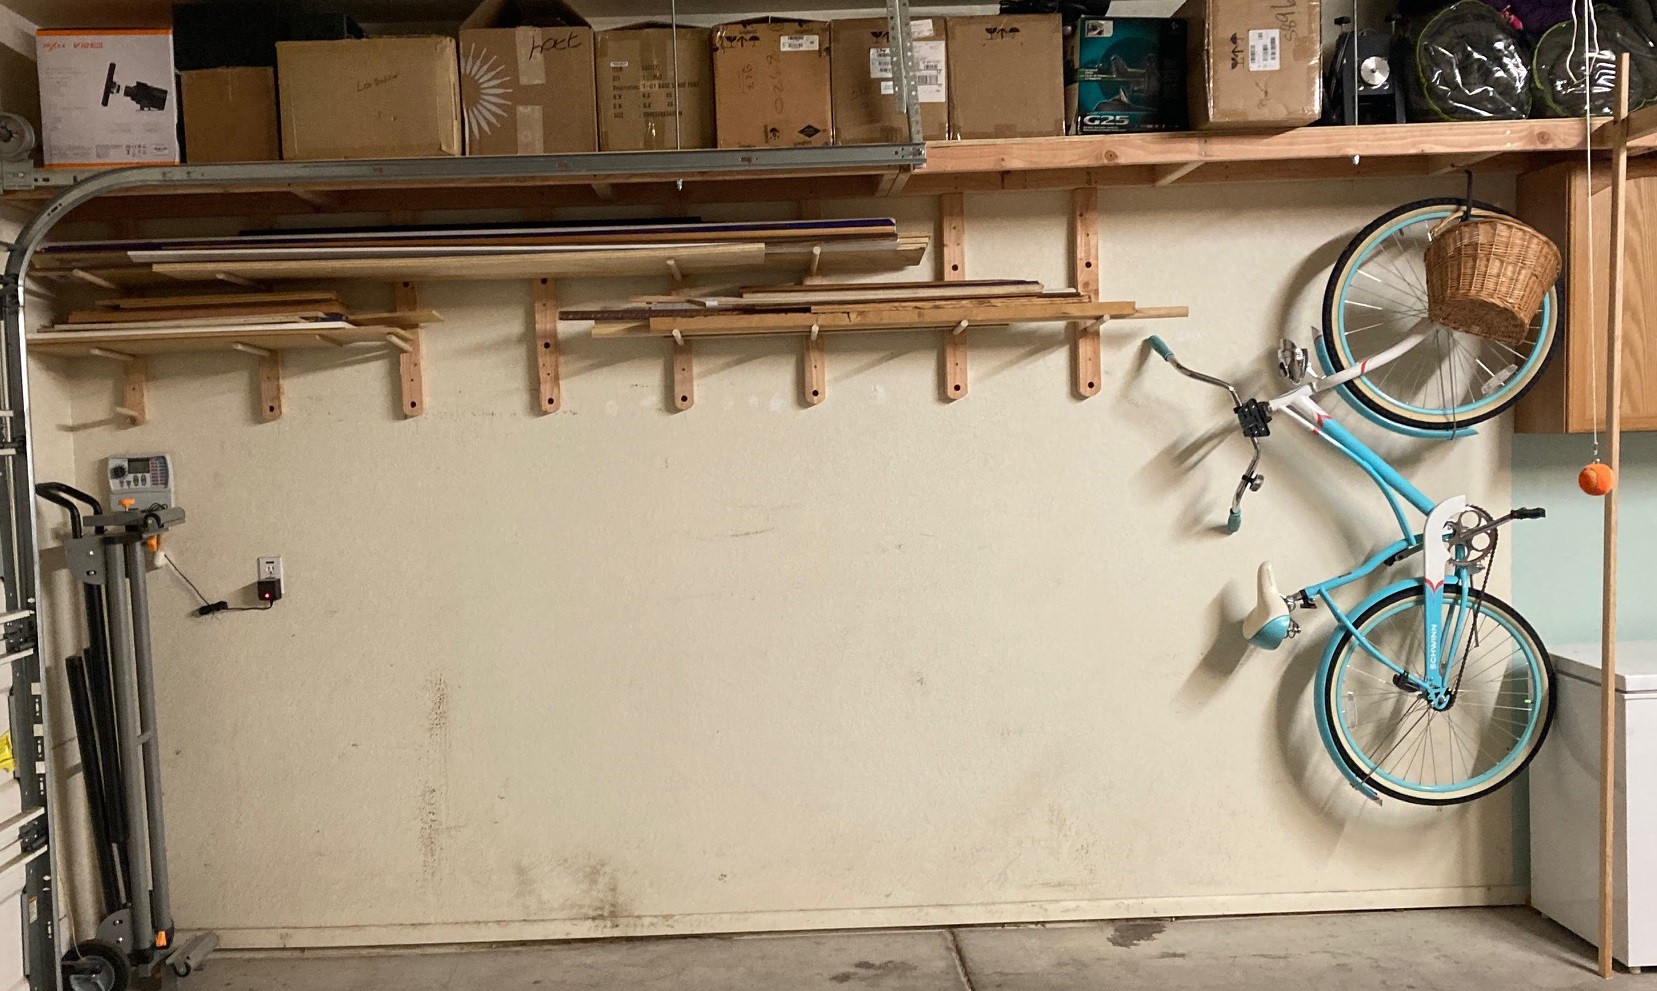
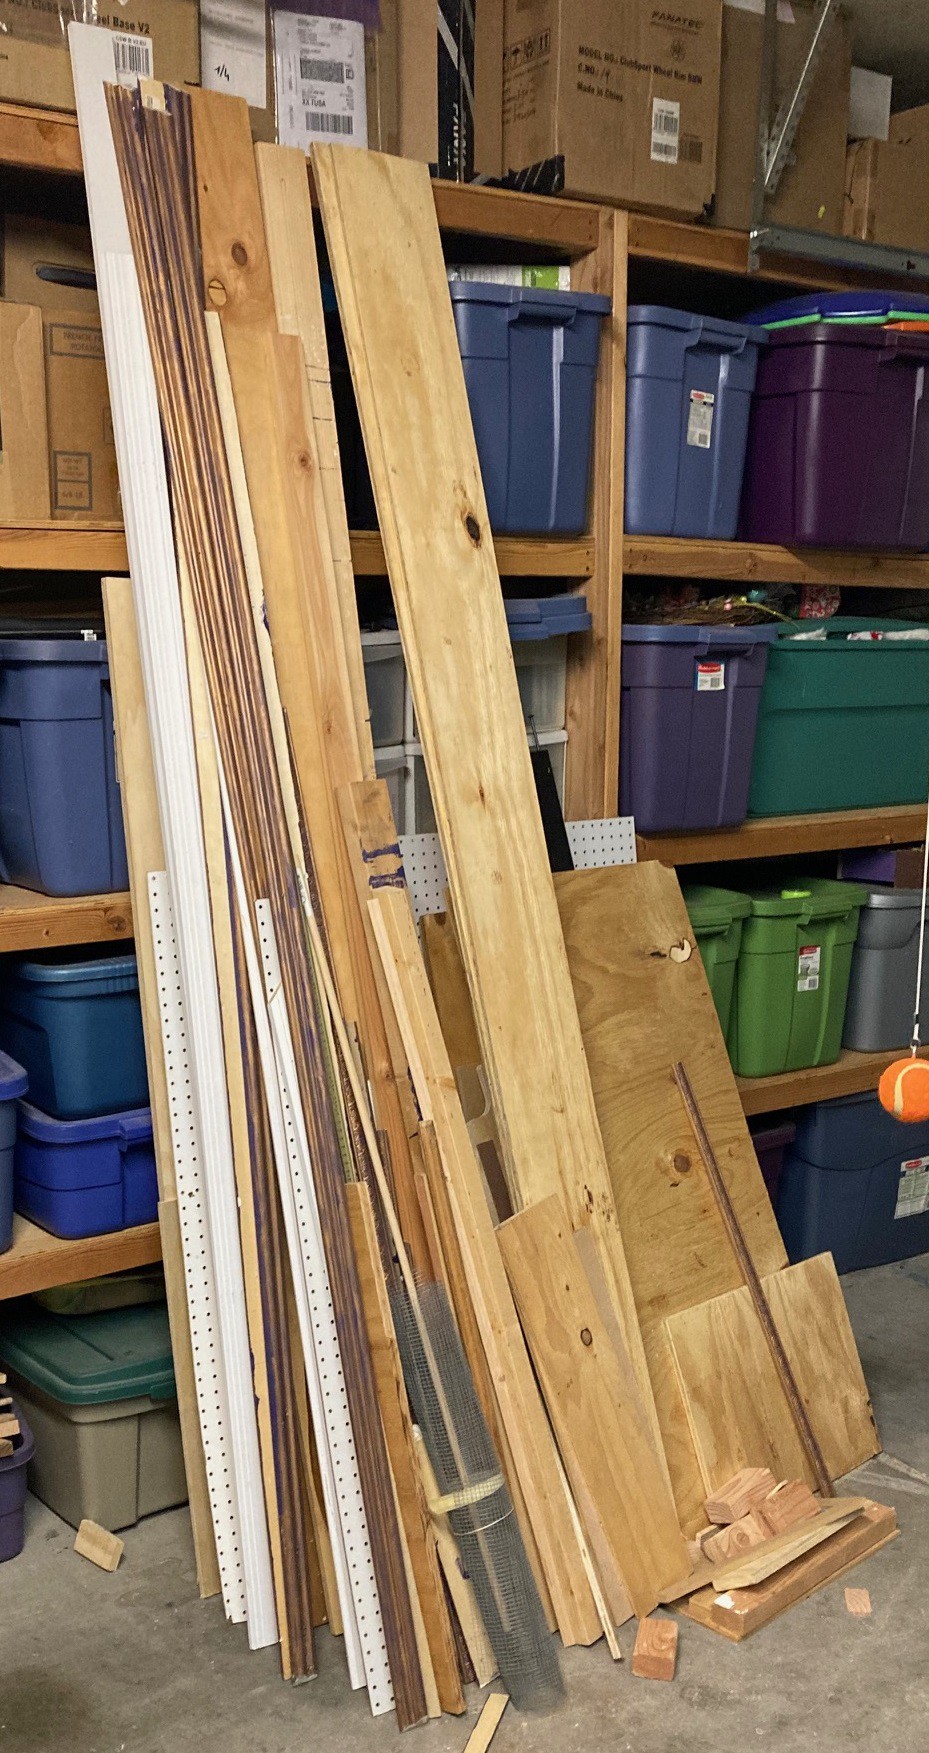
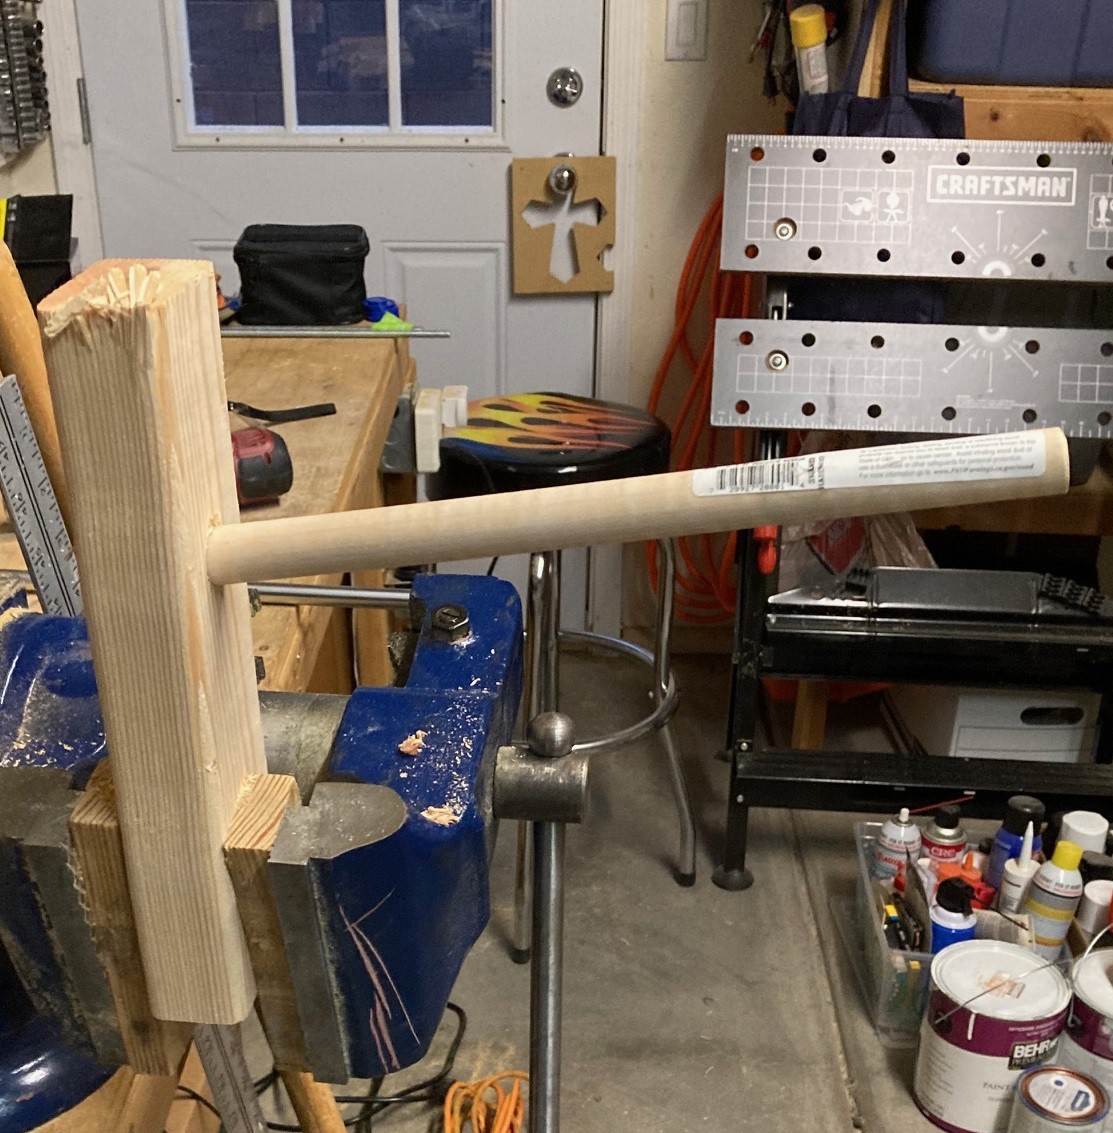
(Long) Wood Storage
12/16/2022 at 03:07 • 0 comments![]()
So I have this large pile (really piles) of wood that I had tucked in a very tiny corner of the shop. This was compact, but annoying. If I ever wanted to get a piece out I had to basically remove all the pieces to have any hope of finding it.
![]()
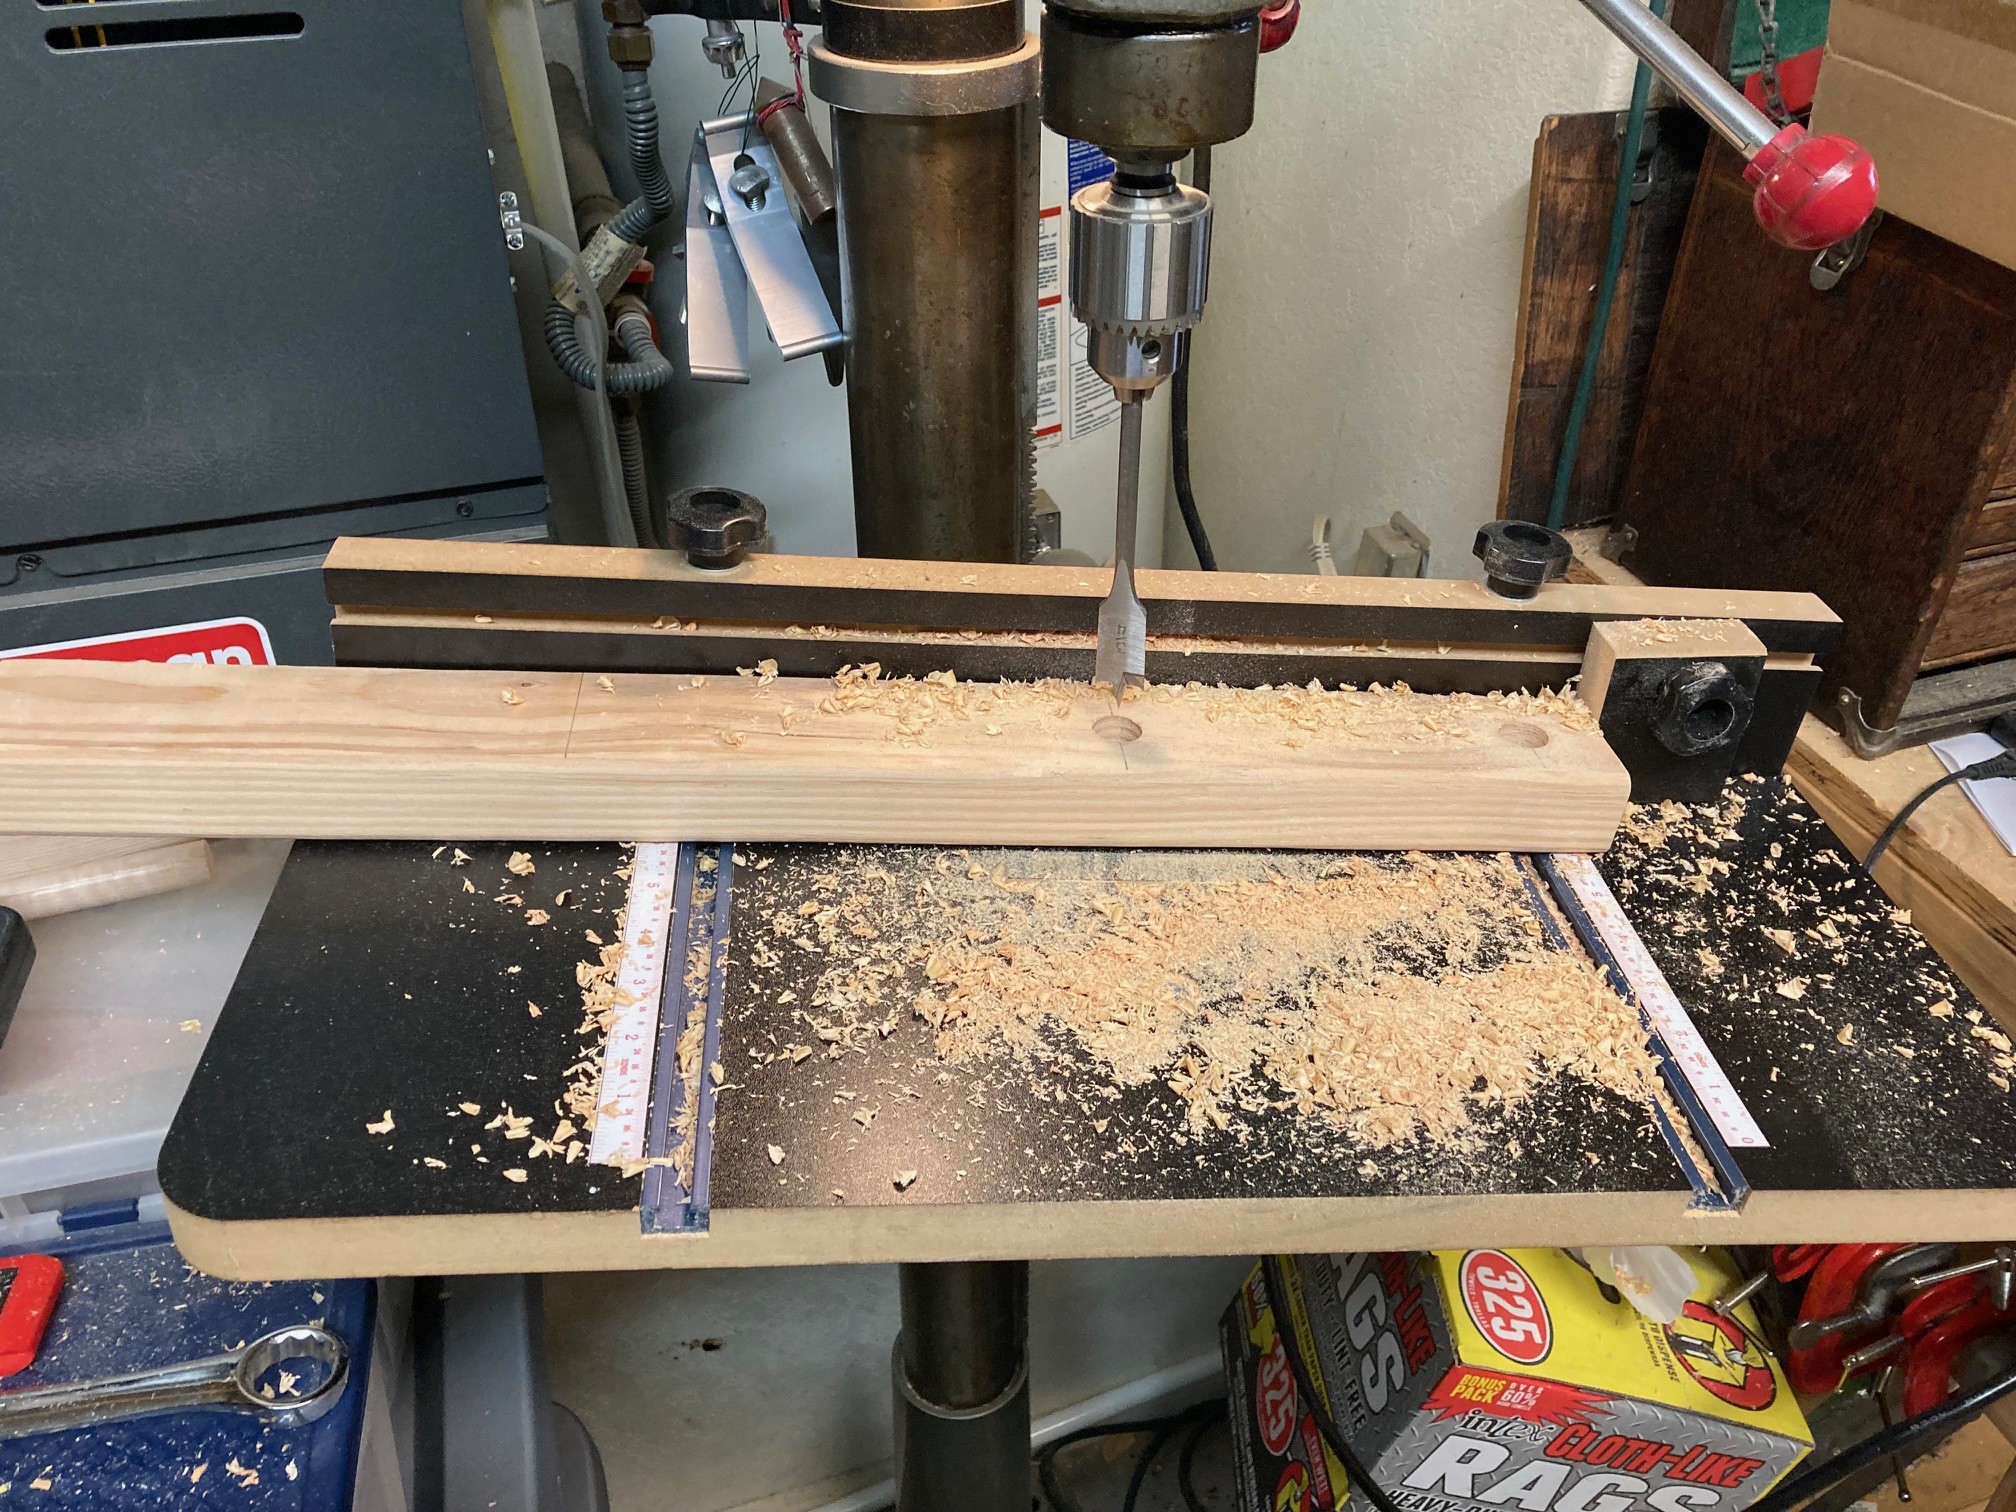
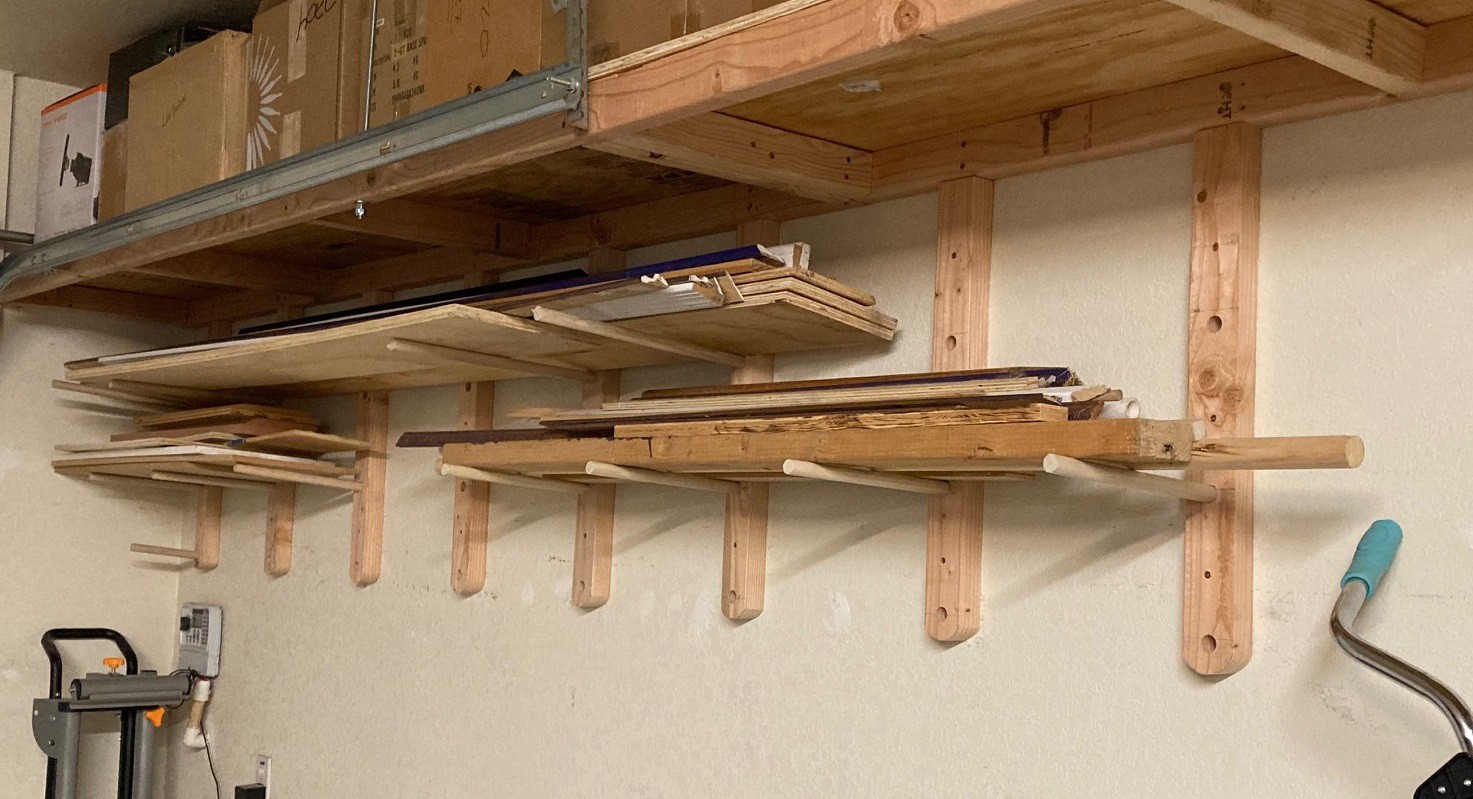
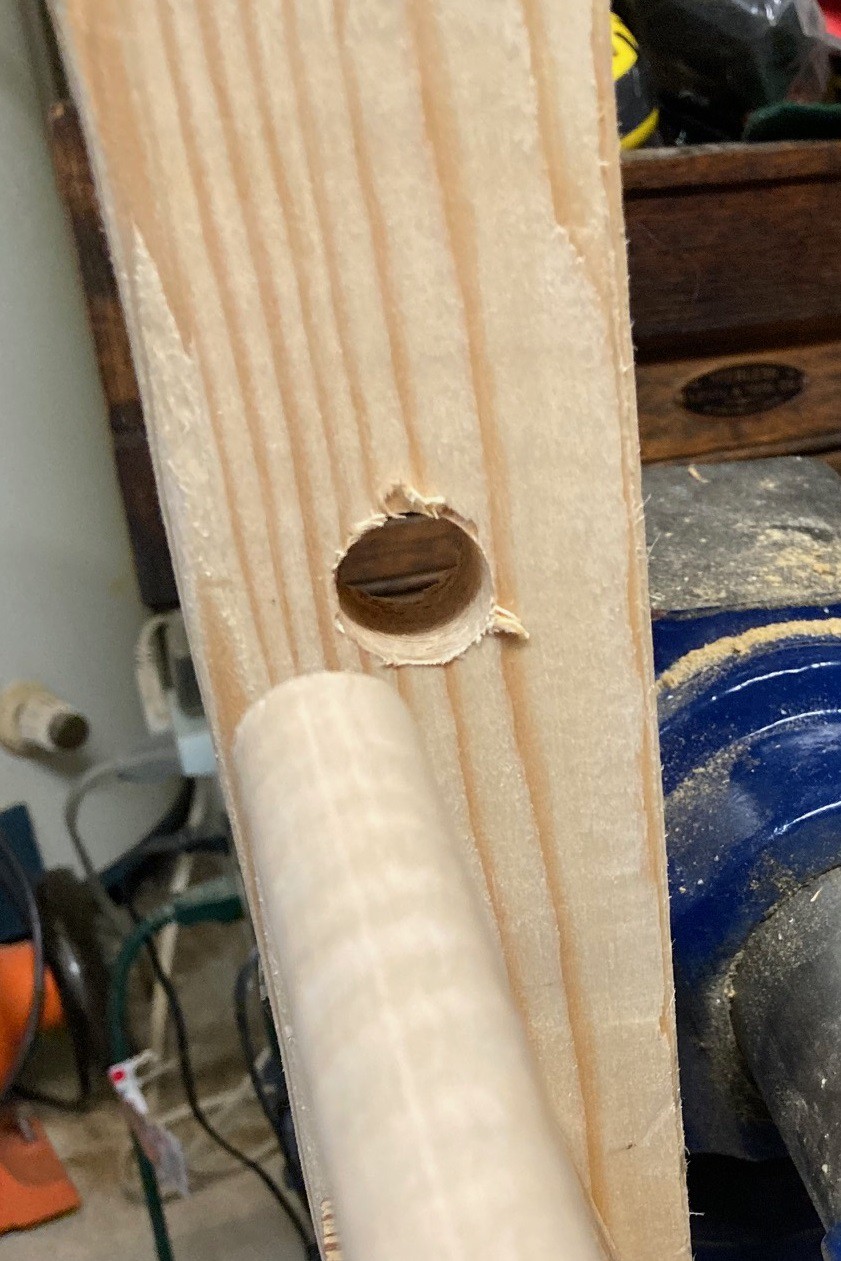
Now I have a better plan. I drilled some 3/4" holes into some 24" strips of 2x3 boards. I angled my drill press table about 8 degrees when drilling the holes. Then I mounted these boards to the wall below my new shelves and used various lengths of 3/4" dowels to form temporary shelves to hold the wood.
![]()
This is working really great. I have much easier access to the wood and have the ability to sort it by length or type now. In addition I have room to add more 2x3 boards and could easily rearrange things by drilling more holes If needed. I ran out of dowels, so I have not been able to fully organize this, but it was only around $20 to put all of this together and another stick or two should polish it up nicely.
![]()
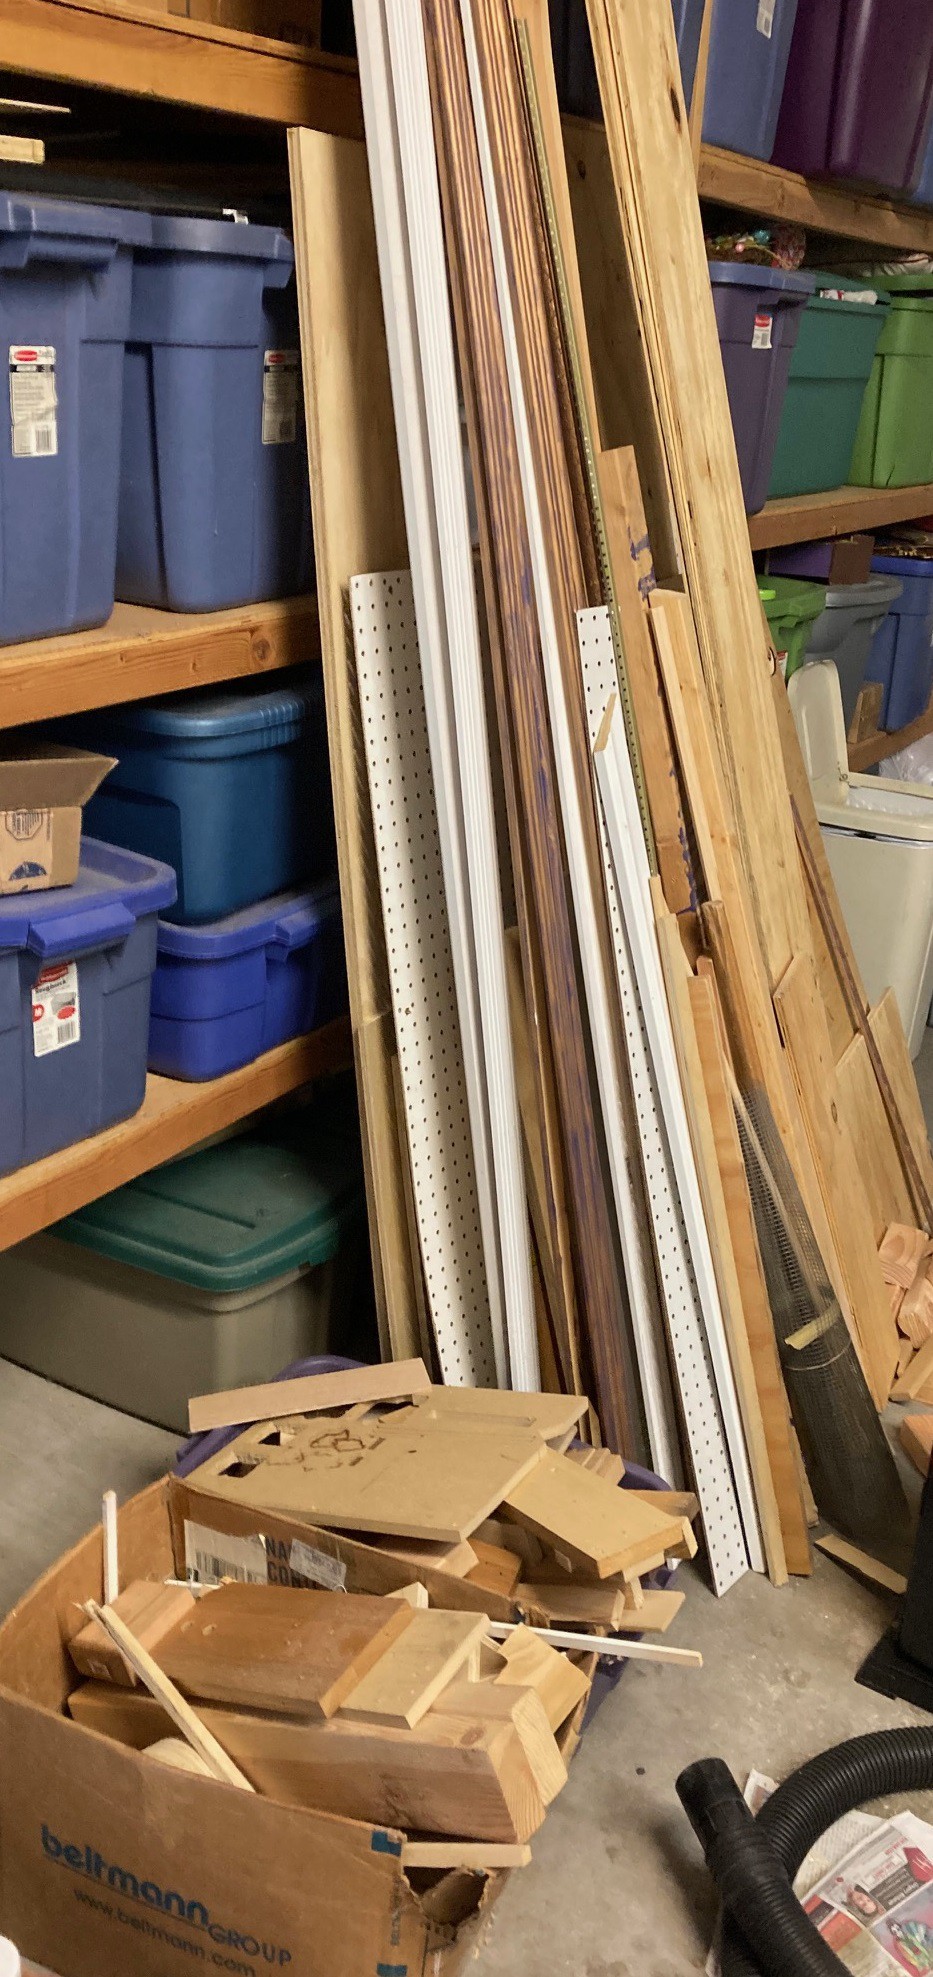
This only takes care of the longer skinnier pieces of wood, I need to come up with another way to deal with the small pieces and larger sheet goods, but it takes care of a lot of the mess.
![]()
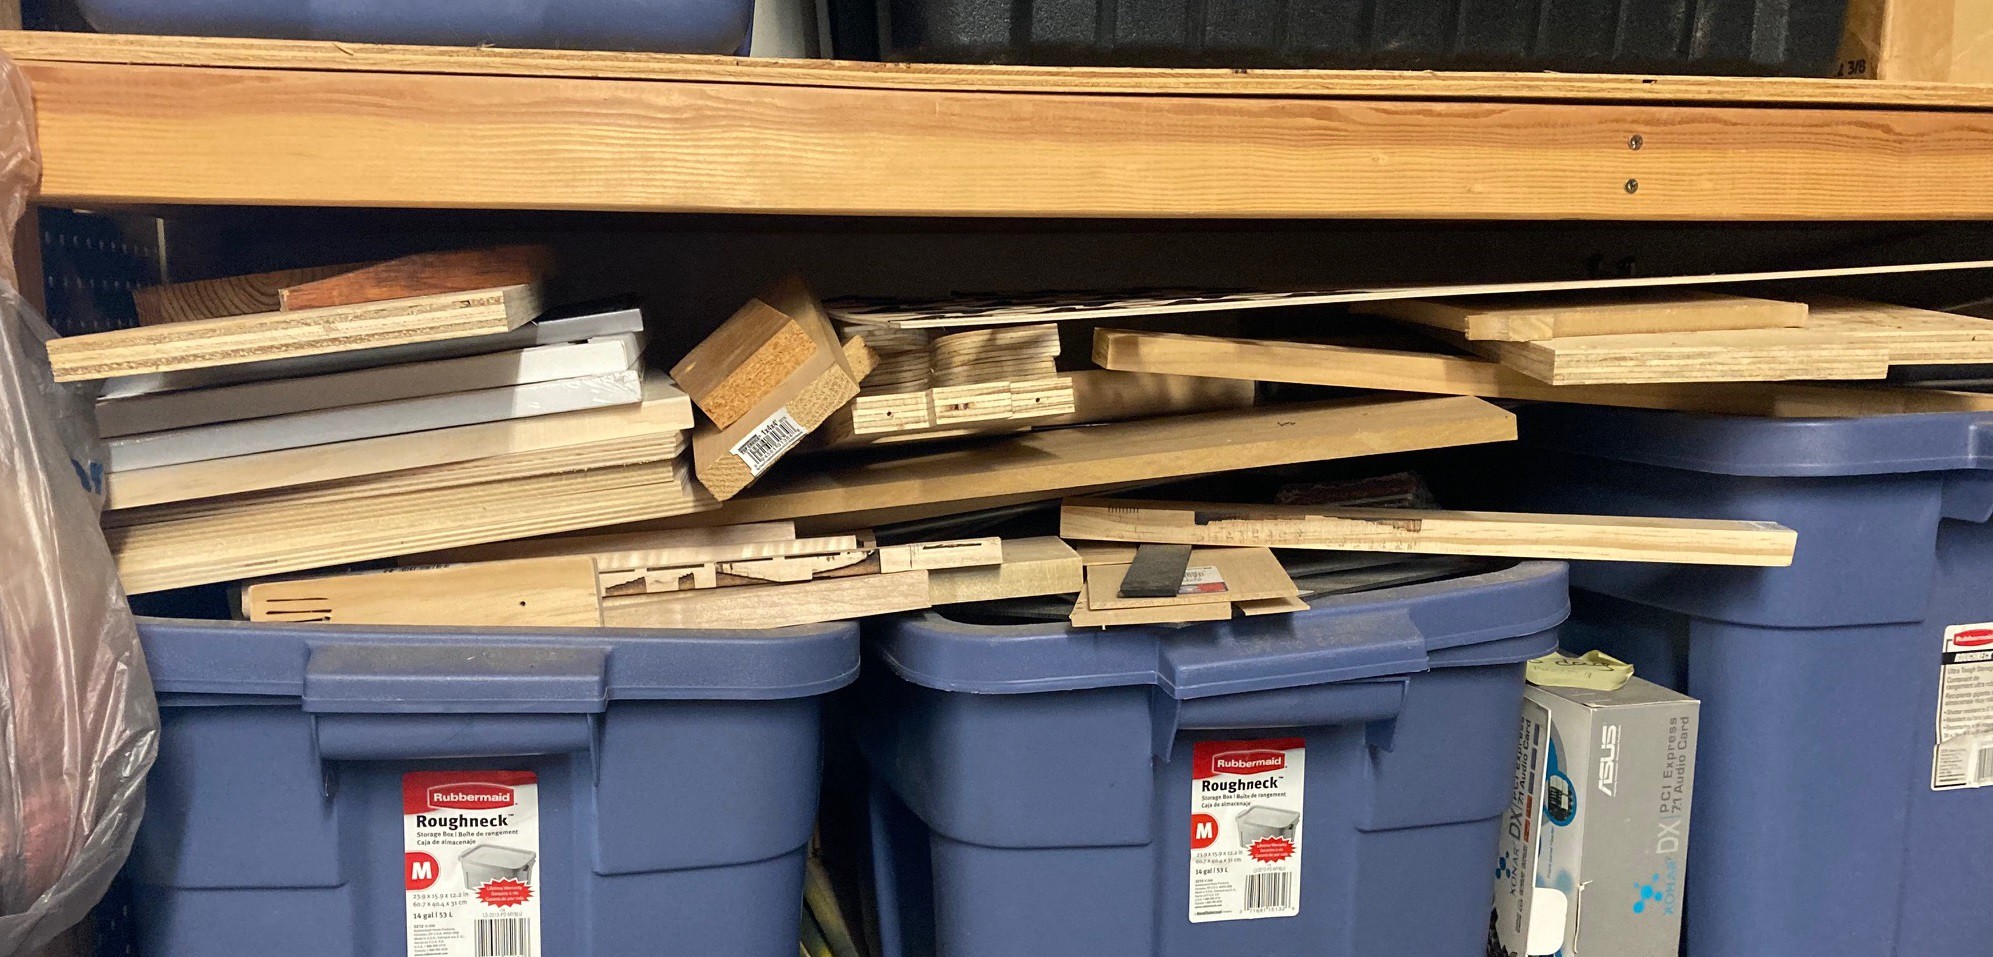
I do have a problem, I seem to be unable to throw away any wood, no matte how ugly or tiny the piece. At some point I need to go through all of this and make some sacrifices. I'm sure I can cut it in half without much trouble.
![]()
This about wraps up the left side of the garage. I may come up with a small bit of something to store a few pieces of sheet goods against the wall, but I like how clean this is. I also will likely put smaller pegs in the lower holes and hang electric cords or other items from them. And there is a bit more room by the bike to extend this system. I may pick up another board and finish that off while I still have things all setup to make these.
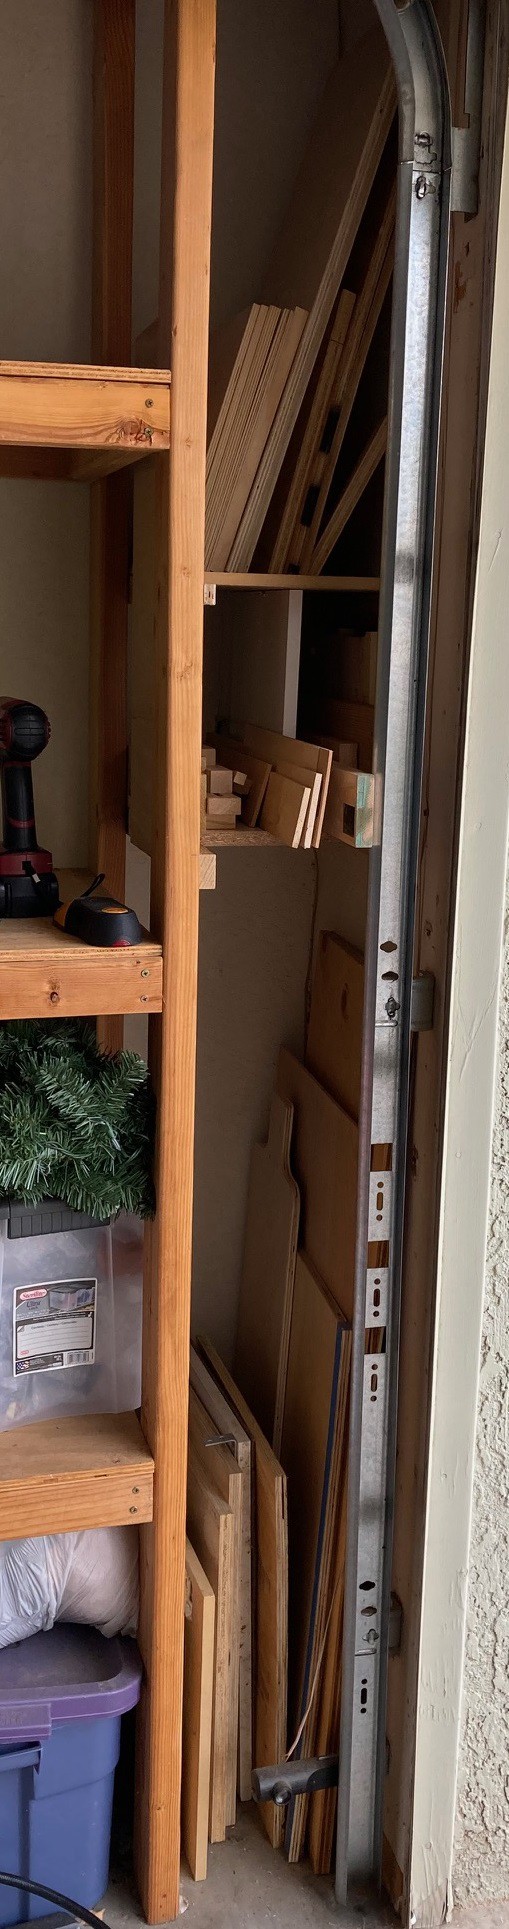
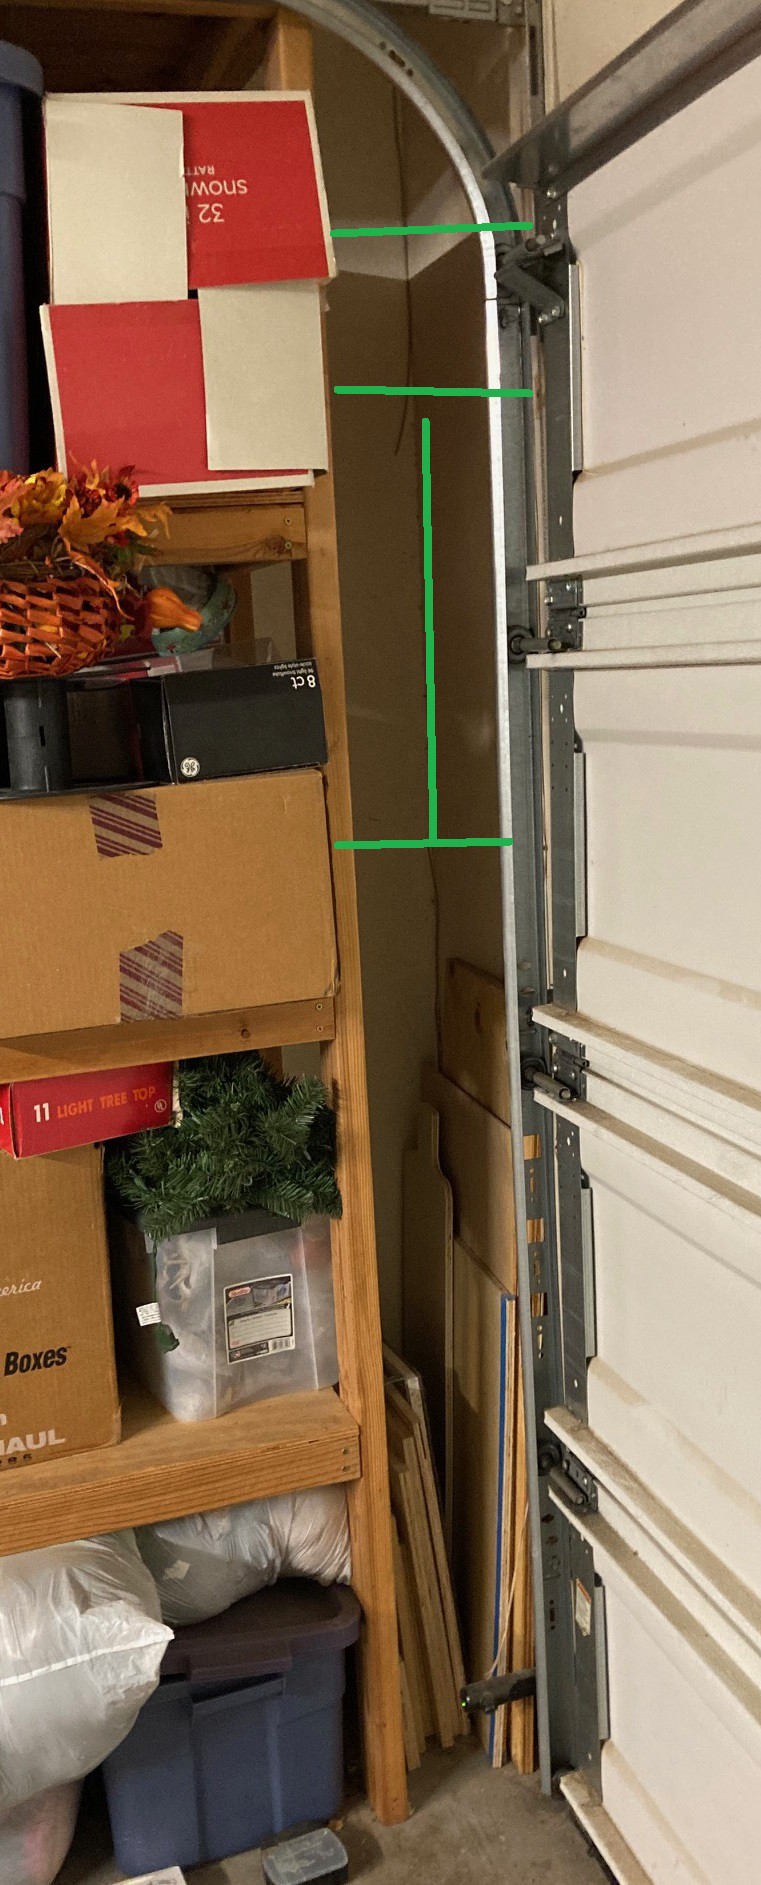
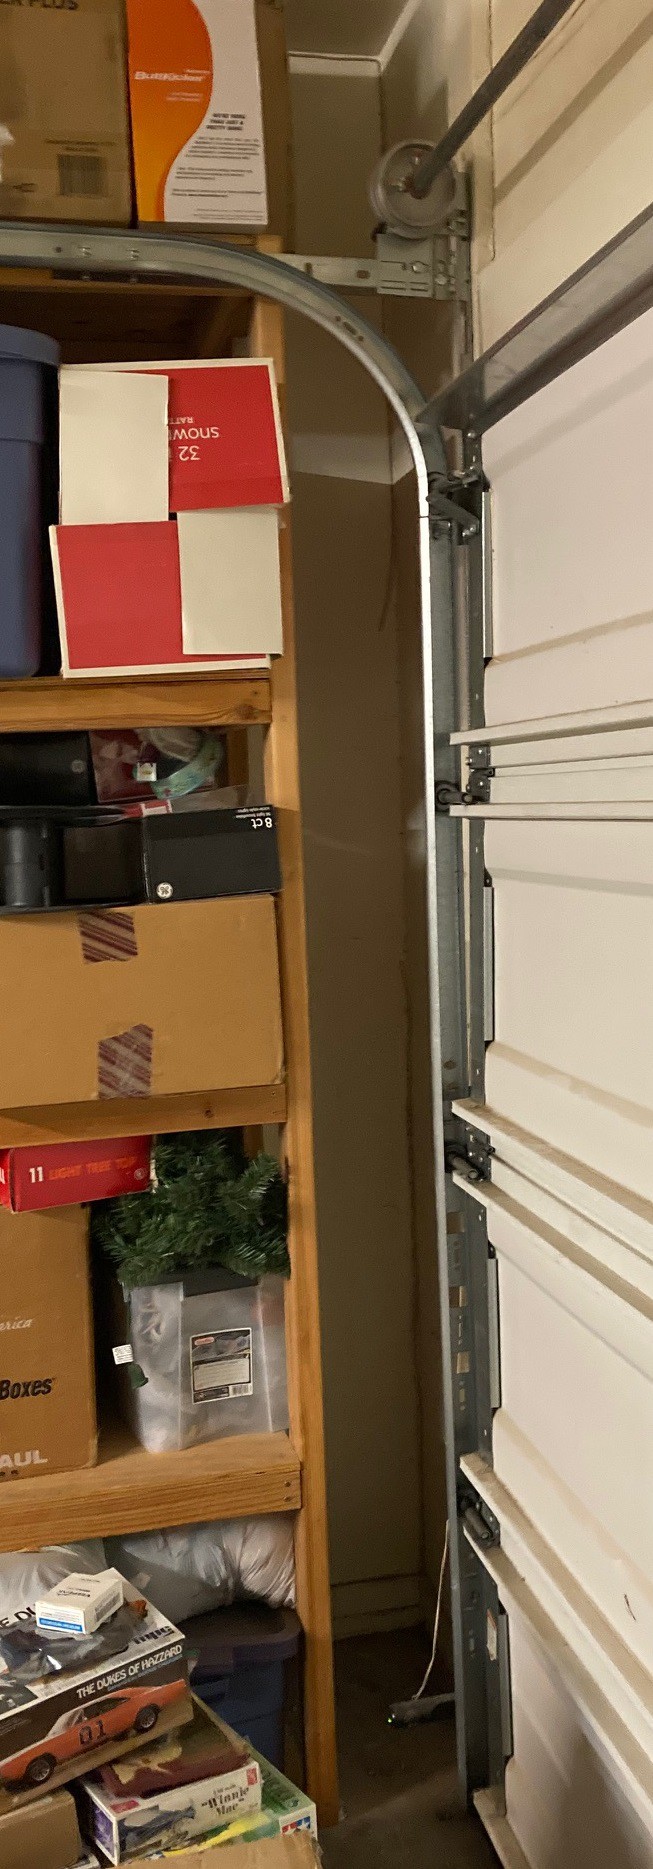
As for the small gap on the right side that is between the shelf and wall, I still need to think of something to do with that. I could continue to store wood there that I'm not as interested in accessing. It really is not wide enough to put much of anything else, even a ladder would be difficult to get in and out.
In theory I could move the shelf over and reclaim some of the space by my workbench. Potentially I could move this shelf over 10". It would take the better part of a day to do it, and the shelf would currently interfere with the sensor for my garage door, but I think that could be dealt with. 10" would be useful, but less than that is probably not worth the effort.
-
Workbench Ideas
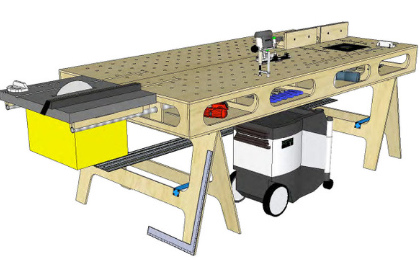
12/13/2022 at 03:38 • 0 commentsI have been looking around for some ideas on how I want to make my workbench. I enjoy the designs that Alexandre Chappel comes up with. And I really like the idea of using particle board for the cabinets. It seems relatively low cost, and good enough to get the job done. And frankly the plywood I can get locally is very poor quality at the moment.
He made this (rather large) workbench on his show and it really inspired me to tackle this project. I really like the drawers, the wheels, the torsion top and the smooth look of the whole thing.
I'm also intrigued by the Paulk workbench. Again it is using a torsion box top to get more stiffness and it seems intriguing to have loose storage under the table top. However that would probably fill up with random junk in no time.
My existing table is made up of 2x4's, I could rework it into something like this. It looks polished and should be strong enough. I could augment it with drawers. It is not as space efficient since the 2x4's take up a lot of space in all directions (compared to 3/4" particle board) but it would be cheaper, I could probably repurpose all the wood from my existing workbench with little to no expenses.
Here are some other plans that are a mix of these above ideas.
https://www.instructables.com/Workbench-With-Drawers-in-5-Days/
https://www.instructables.com/T-Track-Assembly-Table-Workbench/
https://www.instructables.com/Workbench-With-Drawers-Power-and-Wood-Vise/
Finally I was looking around at wheels. I think I will use 3" wheels just because they have much more load capacity than the smaller 2" wheels and yet plenty enough that I don't see much advantage to going larger. Here are a few wheels I'm looking at for now.
https://www.harborfreight.com/3-inch-polyurethane-swivel-caster-with-lock-96408.html
https://www.harborfreight.com/3-in-rubber-light-duty-swivel-caster-with-brake-61855.html
https://www.harborfreight.com/3-in-clear-polyurethane-light-duty-swivel-caster-with-brake-69538.html
-
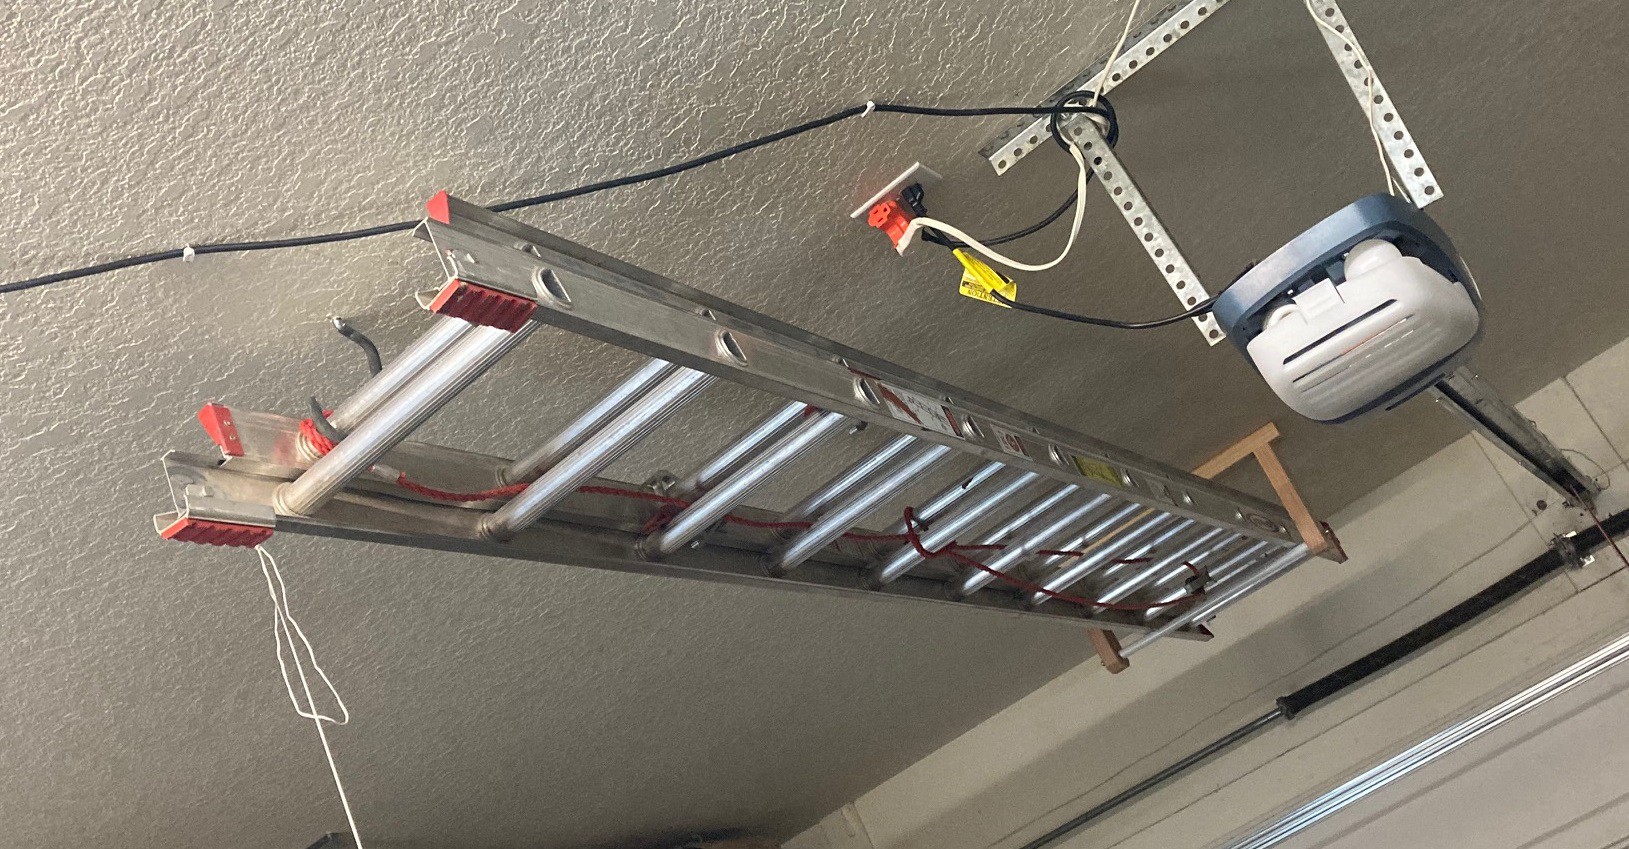
Up and Away
12/13/2022 at 02:39 • 0 comments![]()
I have been going around in my head trying to figure out what the best way is to hang wood on the wall. I could cut some sort of L shaped braces (or E shaped) from plywood. I could build a box out of 1x2's that the wood could slot into. I could do some sort of French cleat type setup.
![]()
Finally I hit on the idea of screwing a series of 2x3's to every other stud on the wall and drilling a series of 3/4" holes at a slight upward angle and using dowels to hold the wood. This is not amazingly strong, but I think it could hold 80 pounds or so without issues.
![]()
I can drill holes every 6" or so in the wood, making room for some adjustability. And I can cut the dowels to various lengths as needed. I think this will be very modular and should be quite flexible as my wood pile changes shape over time.
This only solves the problem with the longer pieces of wood. I think I will probably make a simple frame on the ground with a few dowels sticking straight up to store the larger sheets.
Anyway now that I have a plan I can finally get rid of this pile of wood. However the rear brake cylinder on my car just started leaking fluid all over the road so the shop will need to take a back burner to that. Not only do I need to fix it, but I can't really drive anywhere till I do. Fortunately I work from home, and it is a simple car that should not take long to fix.
Anyway this inspired me to do a little cleanup of the garage. I managed to get most everything put back where it was originally and other than this large pile of wood and a small pile of miscelanious junk I could actually get the car back into the garage.
-
Up and out
12/11/2022 at 22:47 • 0 comments![]()
So I got the ladder mounted up on the roof. It seems to be up there well and it was not that bad trying to lift it up there by myself. I can lift one end up and put it in the hanger, then climb a step ladder to hang the other end. No more dead lifting the ladder over my head while I try to get both sides hooked.
![]()
![]()
All that is left for large items is my scrap wood pile(s). I currently have wood tucked in just about everywhere. I'm contemplating some sort of storage system on the wall for the longer pieces (up to about 20" wide) and I will eventually have to bite the bullet and deal with larger sheets somewhere. I also have several boxes of smaller scraps that I need to go through. I may make a bin under the chop saw for off-cuts. Maybe having a small dedicated bin will keep the excess at bay!
![]()
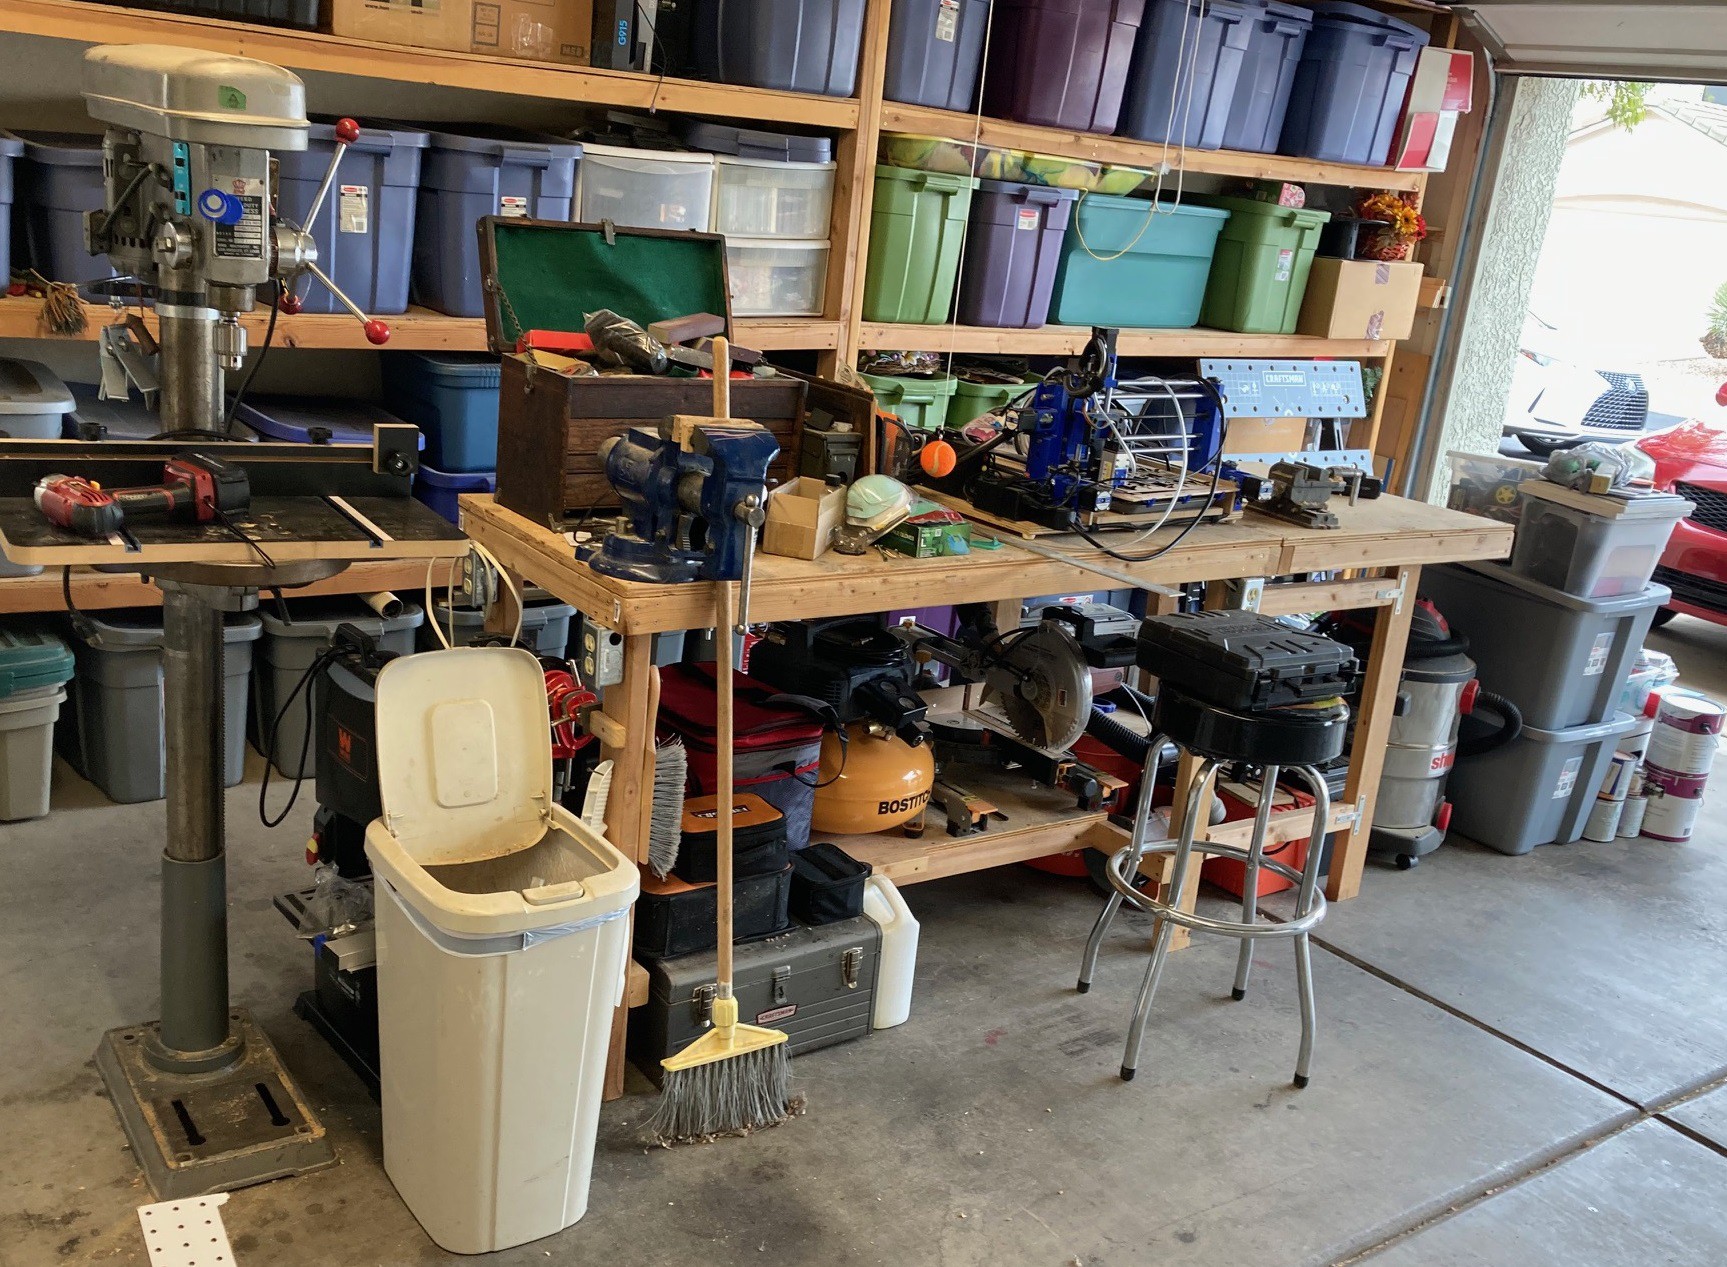
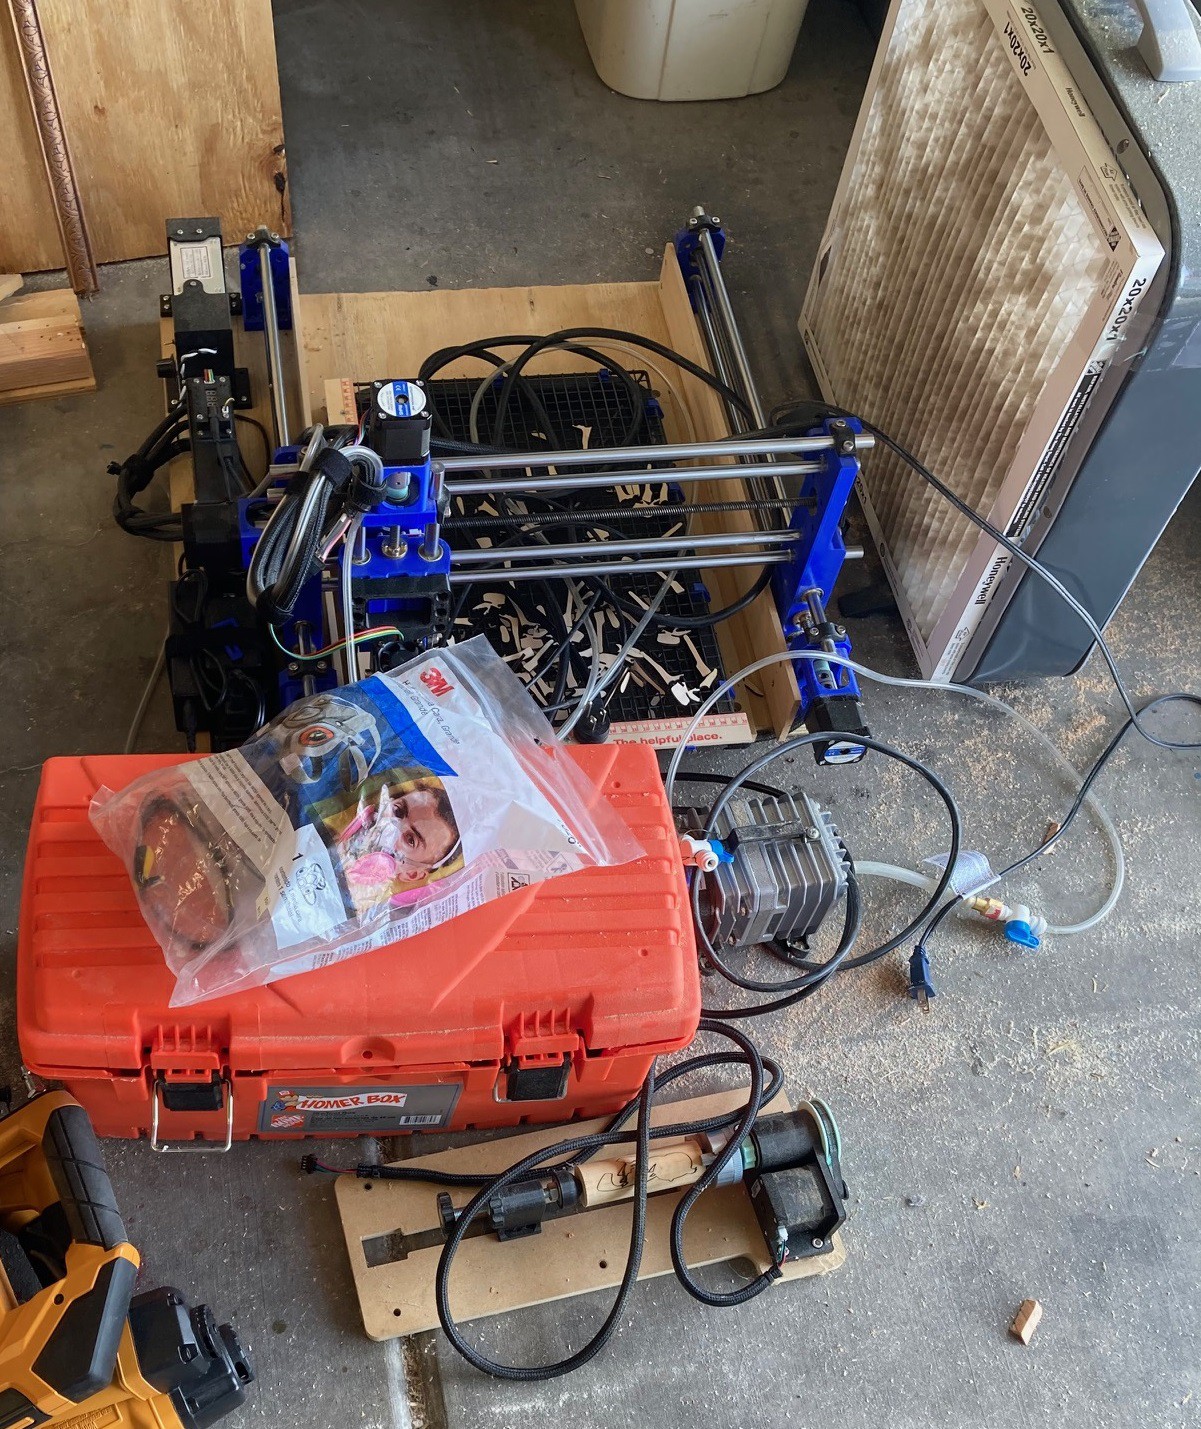
I started making piles of stuff together that would belong in each utility cart. The first up is my cnc with the various tools and filters needed to make it work. I'm hoping to add a hood to the cnc with proper air filtration for the laser so I'm not smoking up the workshop every time I use it.
![]()
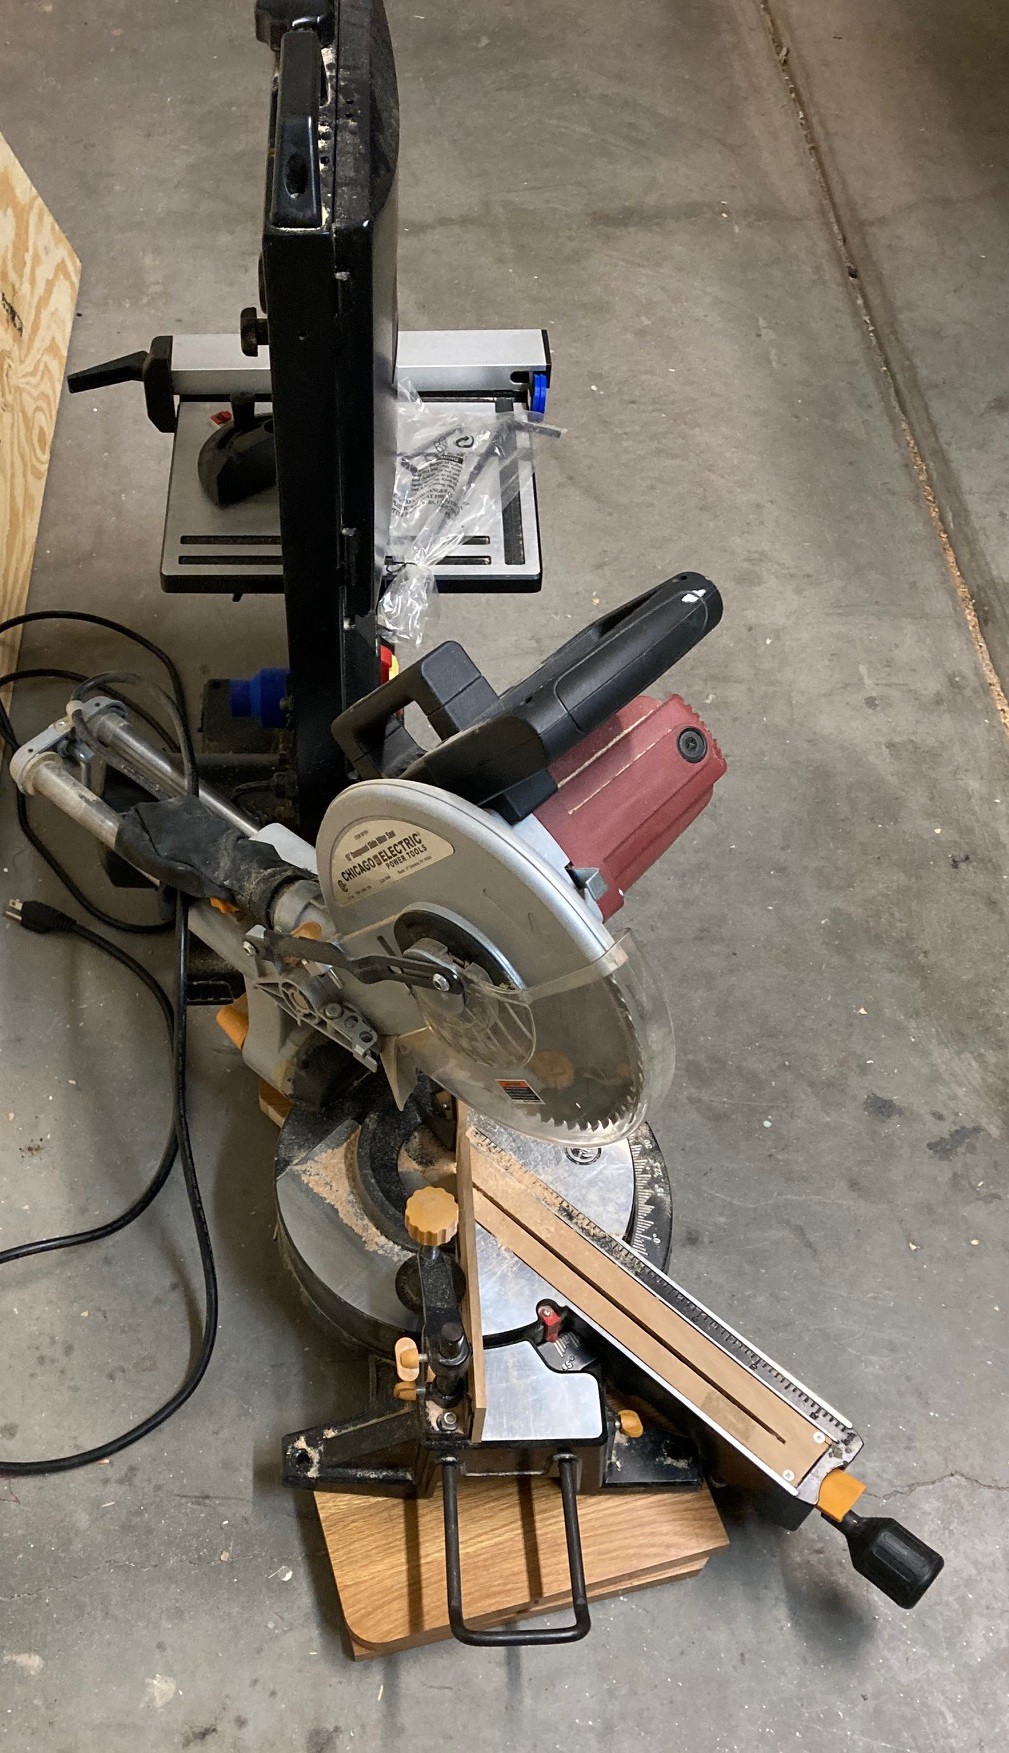
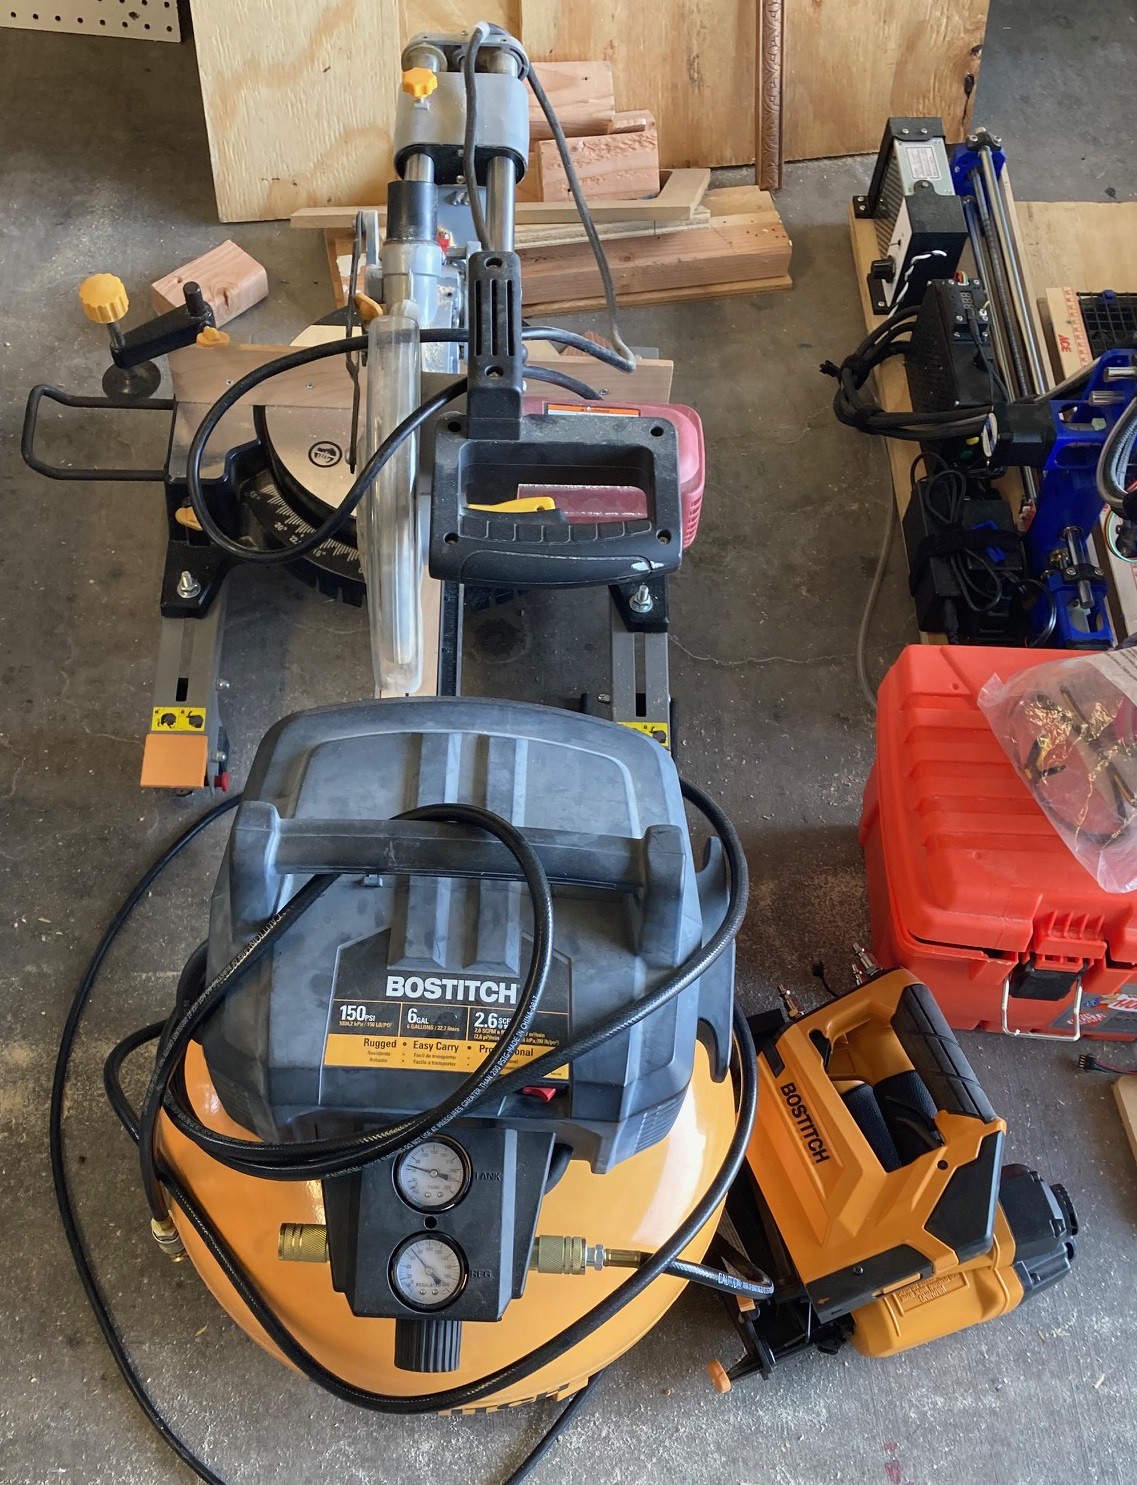
Next up is the chop saw. I threw the air compressor in with it, but they don't have to go together.
![]()
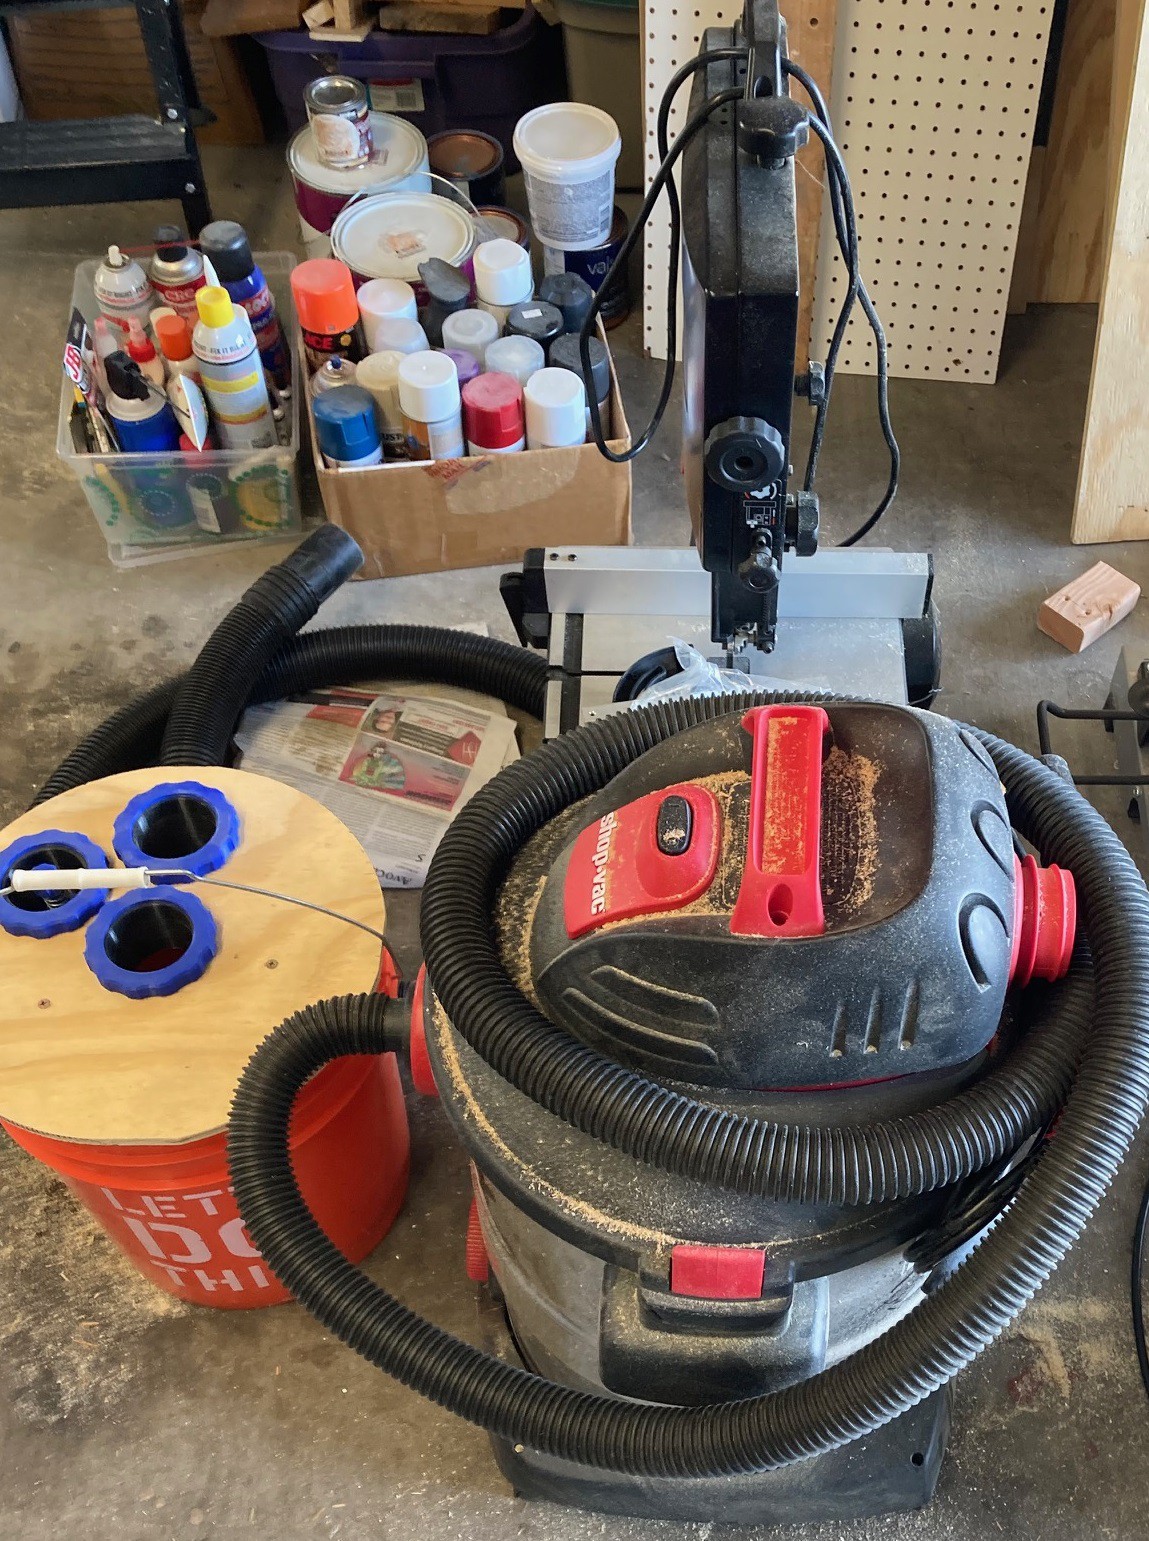
Next is the bandsaw and shop vac. The bucket on the left is a dust separator I made. I have not had a chance to really use it much, but it seems to work well. Again the vac is used for all three machines and could be paired up with any one, or even placed in the main workbench.
![]()
Last we have the drill press, and a bench grinder. I'm at least going to put the press on wheels, but it would be nice to reclaim some of the space around the base of the press in some way... Maybe I can make clamp storage or something.
Oh and I have a large pile of smaller tools hanging on the wall and scattered around the place. My hope is to add lots of drawers to the workbench to hold them all, we will see how that works out.