Please check tabs:
- COMPONENTS for materials
- STEPS for instructions
- FILES for source files
A Rubik's cube solver using a NodeMCU, Nema17 stepper motors and DRV8825 drivers.
Already have an account? Log in.
To make the experience fit your profile, pick a username and tell us what interests you.
The v-shape profiles are connected on the outer corners with 90degrees connectors you can buy but for the top/bottom and middle sections, I designed in Tinkercad some connectors you'll have to print. You can find the files also here: https://www.thingiverse.com/thing:5890181
Print 2x 4 way connectors and 4x 2 way connectors. Print 6x axe connectors that you'll later glue to the center pieces of the cube.
Frame
The frame is based on this reddit post a saw a while ago and I really liked(unfortunately no details were provided so I made my own).
Use the metal 90degrees connectors to connect the top bottom and middle.
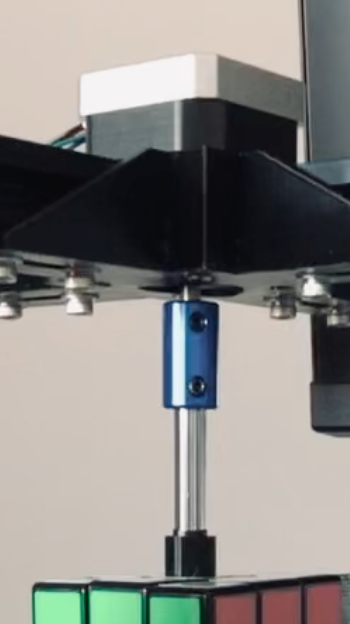
Motors
Rubik's Cube
Glue the axe's ends to the cube's centers and you'll have to make a few adjustments to get everything fit snuggly.
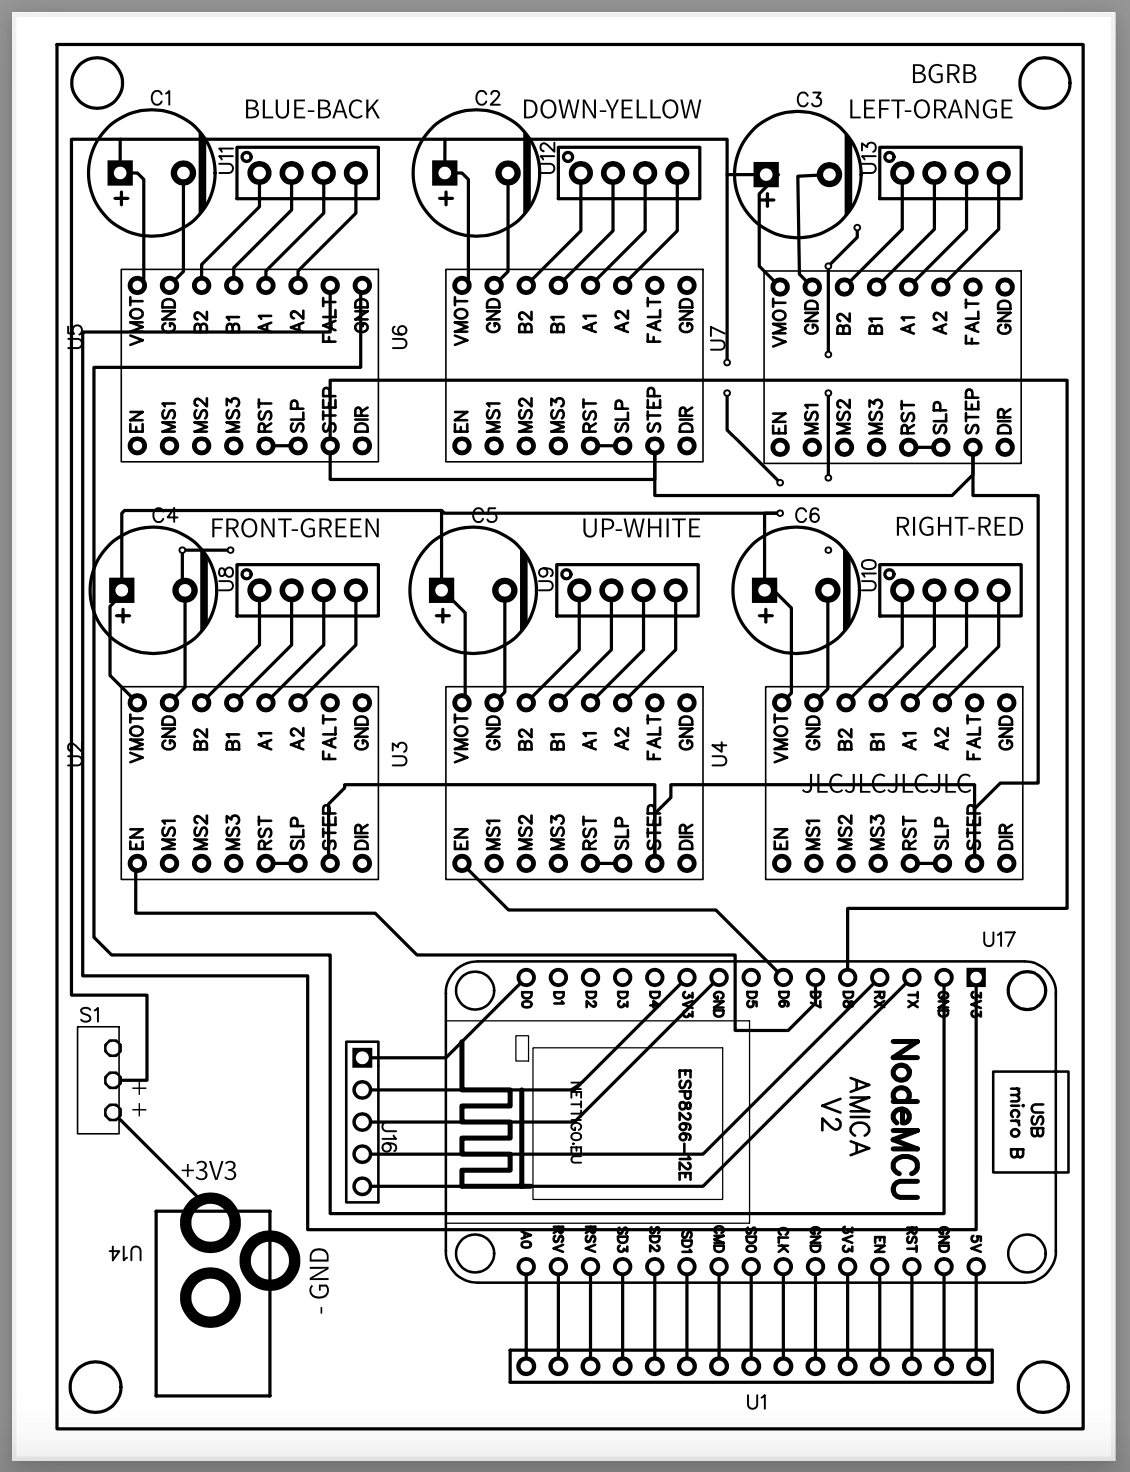
Here is a schematic that you can use to connect your development board to the motors and drivers.
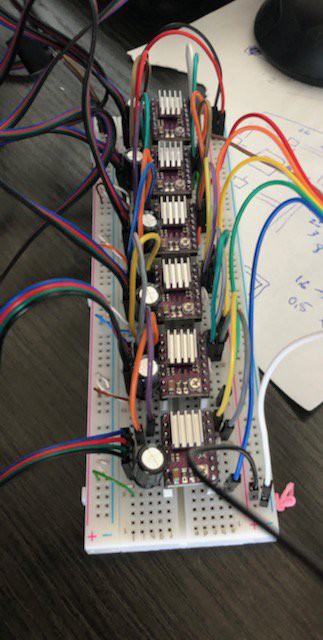
As you can see there are quite a few cables and it can get quite messy if you try to use a breadboard.
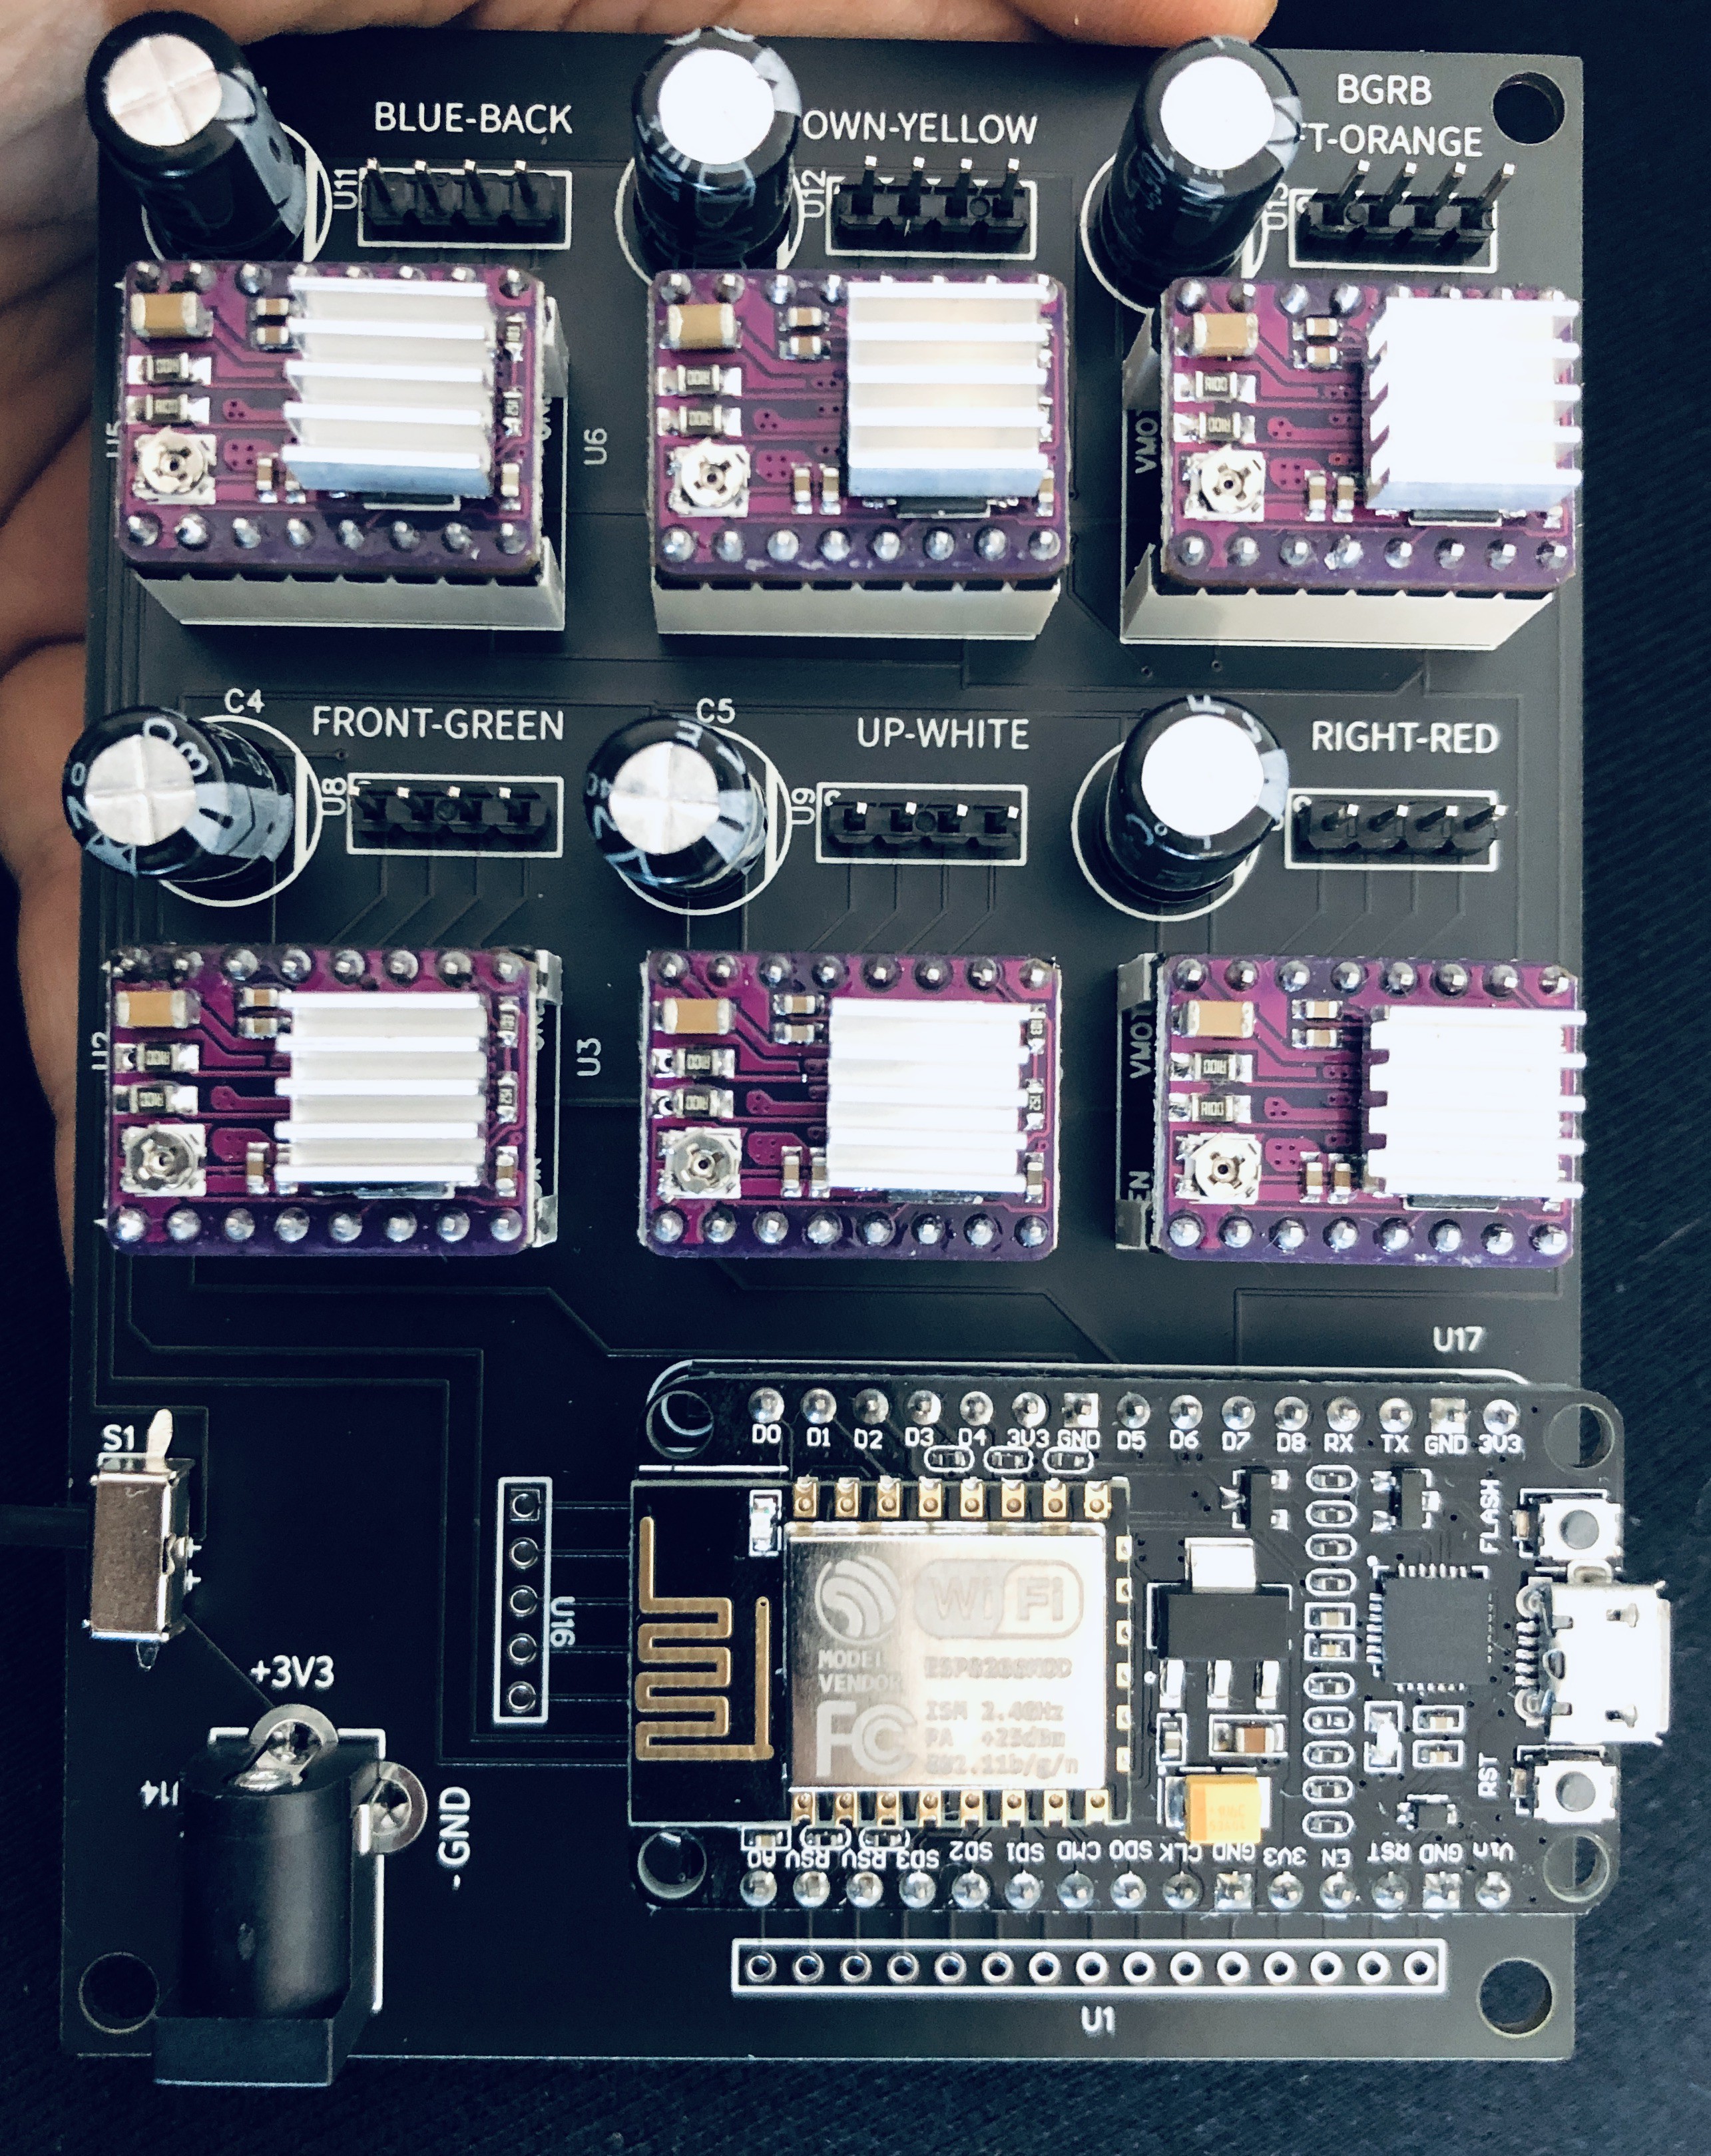
To solve this I developed a custom PCB to handle all this. Note that the PCB is designed for a NodeMCU v2 quick drop in.
The Gerber files you can find attached and you can use a service like https://www.jlcpcb.com or https://www.pcbway.com to order a custom PCB
Once you have the PCB, you'll have to solder the capacitors, pins, power connector and switch. The motor drivers and NodeMCU are dropins.
Note that each driver has a level which mentions which face/color of the cube it will connect to. Use these label to orient the cube in the frame and connect the motor cables.