 My Solar Tracker
-
11Assemble all together
Position the crosshair at the top of the panel; you can use glue to hold it in place.
Connect motors, photoresistors, viewfinder to terminal block in the correct position.
For now, do not connect solar panel. -
12First MCU programming
If you haven't already done so, install Arduino software from https://www.arduino.cc/en/software
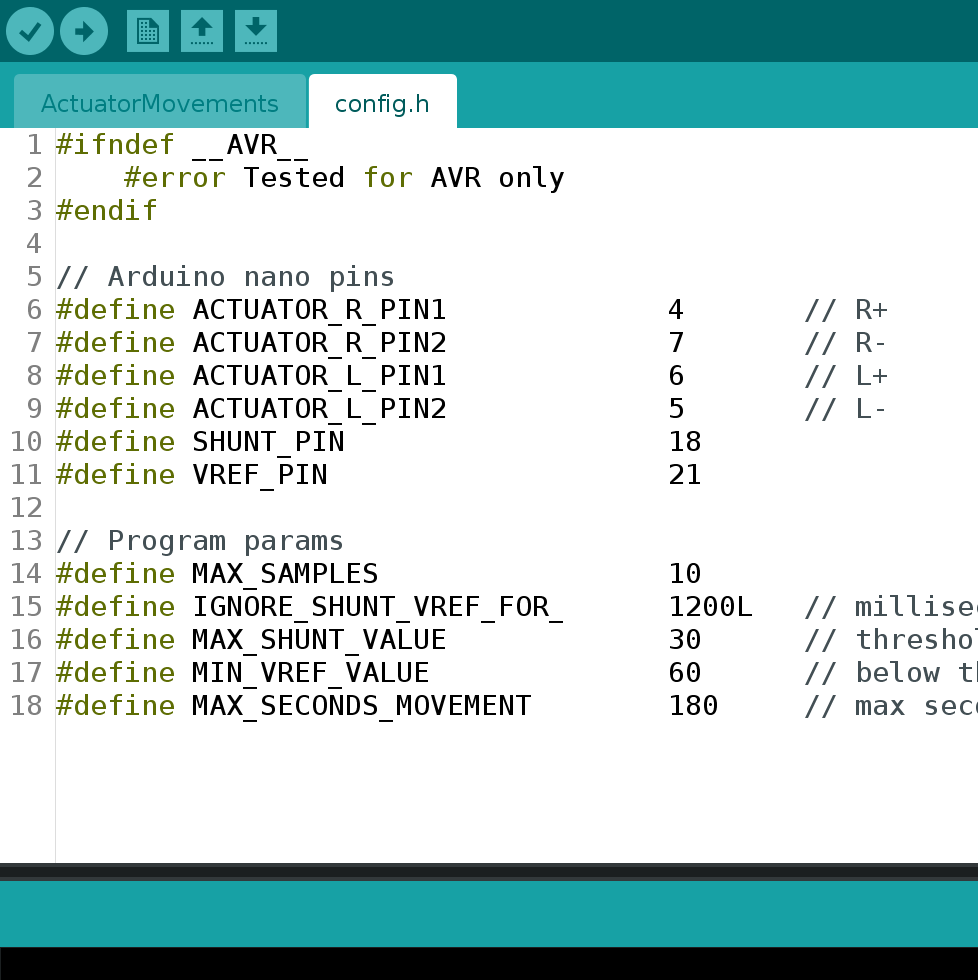
Download mysoltrk repository from github https://github.com/fulvioalessio/mysoltrk-solar-tracker/ and program MCU with ActuatorMovements.ino
This is the first program load since you have to personalize config.h code later.![]()
-
13Test movements
Using an external power, with same voltage output of you solar panel, test actuators movements.
Tweak config.h to find the best parameters for your little actuators, set correctly FWD/BCK motor pins (or invert the connection cable). -
14Assemble board with panel
Connect the solar panel to the circuit paying close attention to the polarity, otherwise you may burn step down.
If everything is in order, you can go out to your balcony exposed to the sun and check that the motors start to work.
Check the photoresistor connections so that they are consistent with the configuration in the config.h file.
Using the Arduino serial console, you can read the debug lines and you can verify that the photoresistors are being read correctly. -
15Troubleshooting ?!
Check the correctness of the assembly of the printed circuit and related external connections.
It is usually necessary to work on the configuration file to get the best performance from your new solar tracker.
mysoltrk - a solar tracker, reinvented
A different approach for a solar tracker, alternative movements, to be installed on the outside, to optimize the efficiency of solar panels
Discussions
Become a Hackaday.io Member
Create an account to leave a comment. Already have an account? Log In.