 Yuta Suito
-
11Assemble the crawler
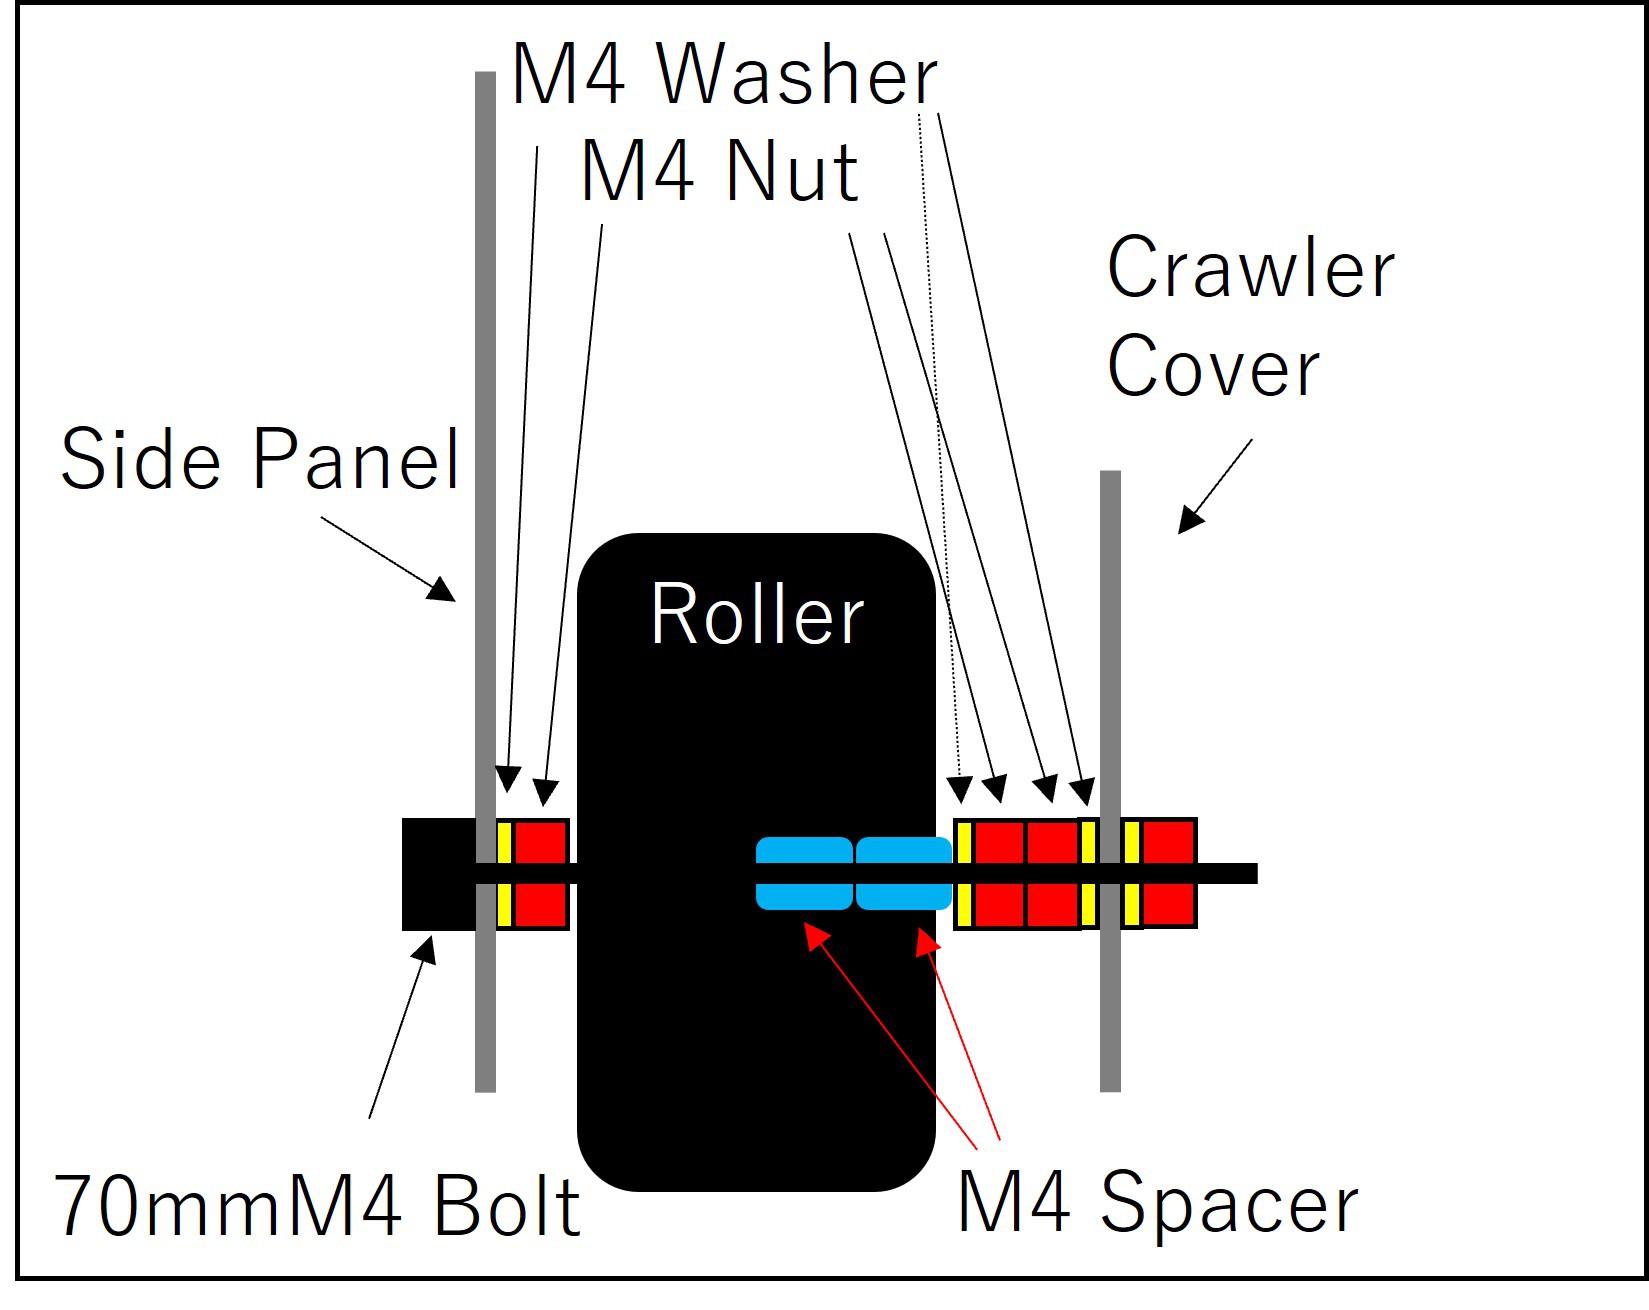
Fix the sprocket to the gear motor shaft using a 1.5 mm hex wrench. It is recommended to apply thread-locking compound to the thread locking screws to prevent them from loosening. Install the roller, spacer, washer, 2 nuts, washer, crawler cover, washer, and nut on the greased roller shaft in this order. See the illustration for details. The specifications of the available crawler components may change from time to time, so you may need to adjust them accordingly with washers and spacers. Once the rollers and sprockets are installed, the crawler should be attached.
![]()
![]()
-
12Make the blade
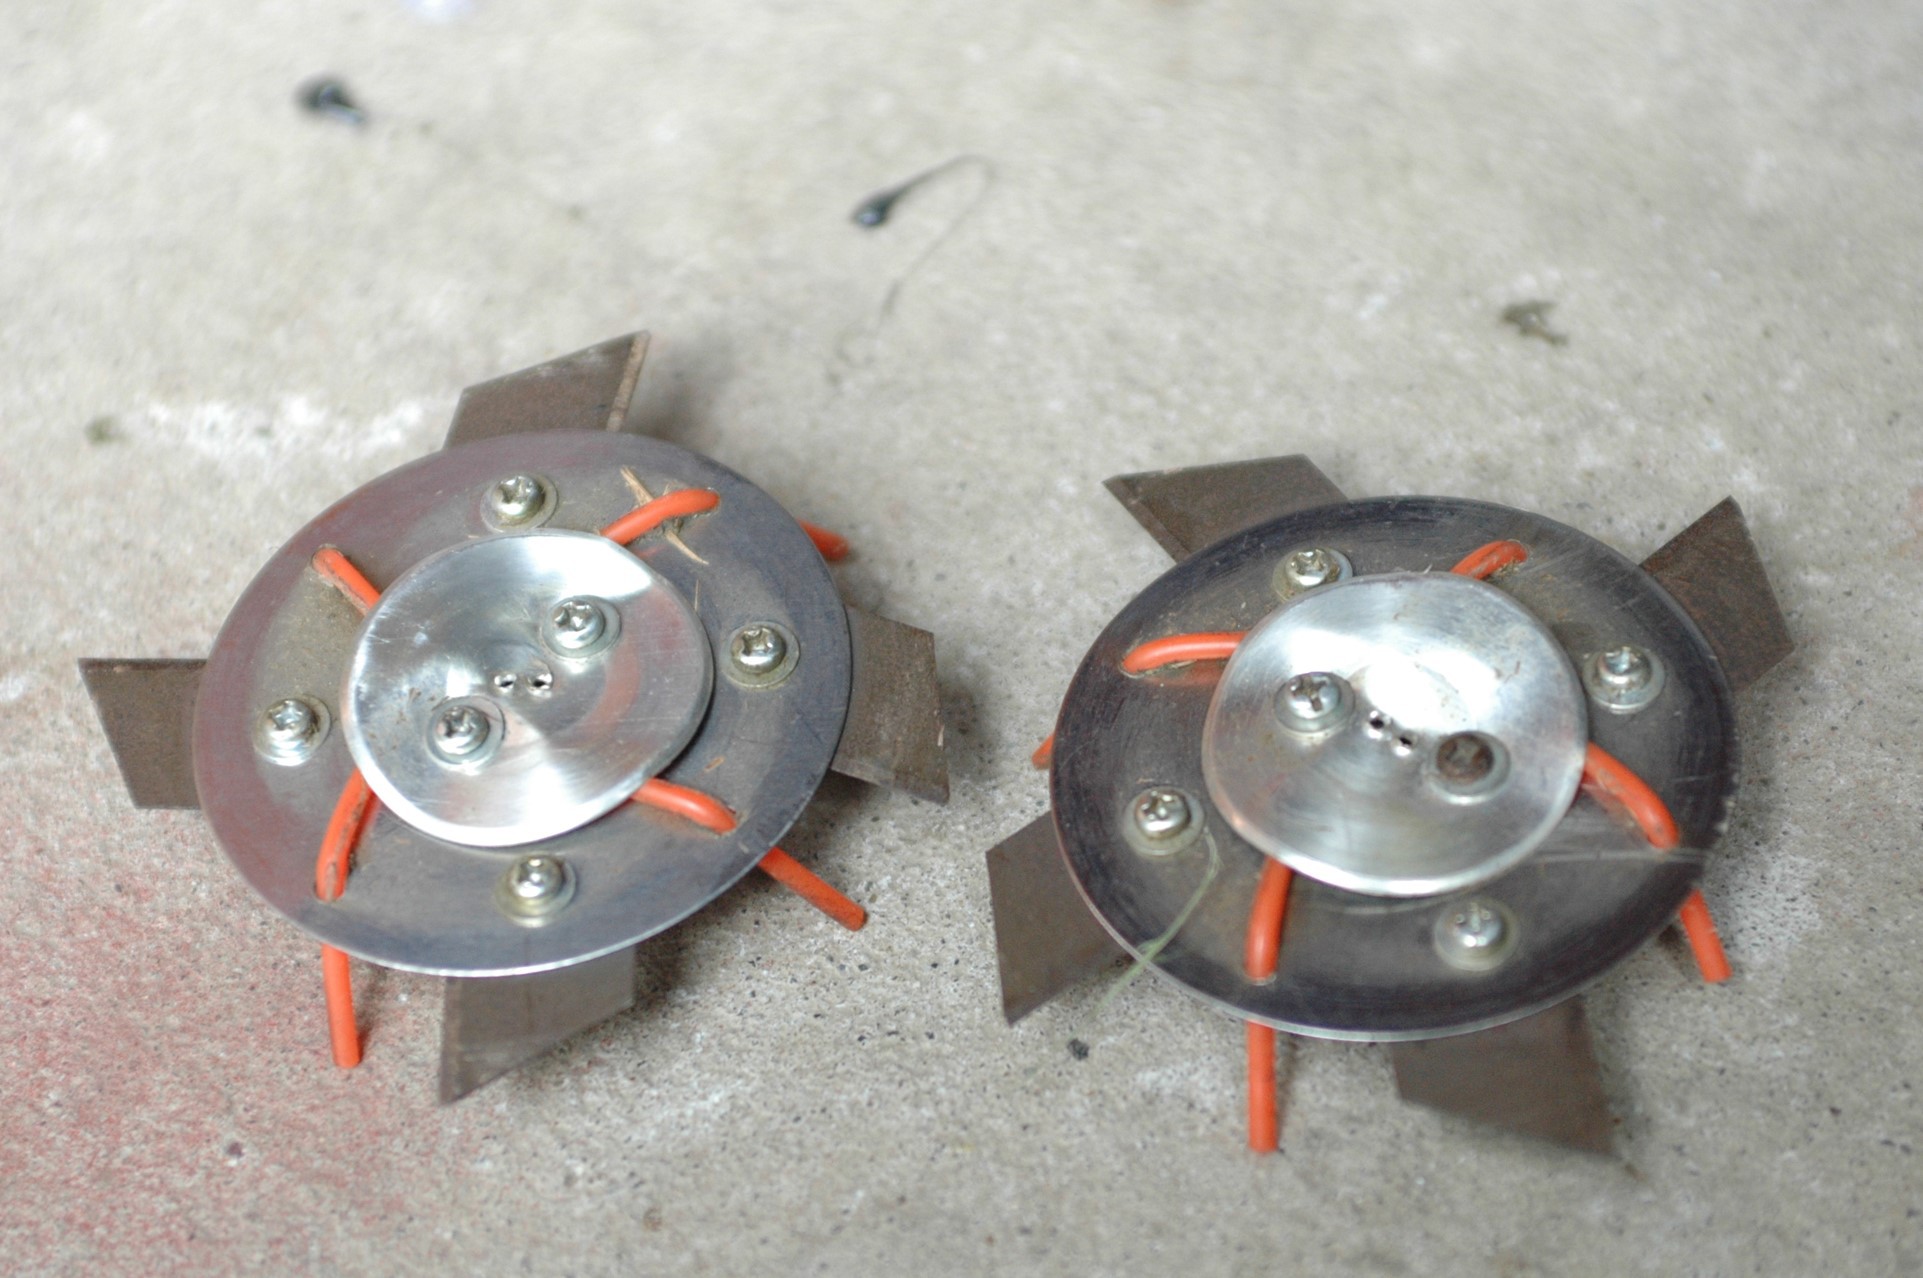
First, a stainless steel disk must be prepared. I used an inexpensive 65mm diameter pizza cutter that I disassembled. Print a full size dxf of BLADE in the 2d cad data in the repository and drill holes in the stainless steel disk as per the drawing. First attach the base of the cutter blade to the outermost side with M3 screws. (Note that the direction must be reversed on the left and right blades.) Next, pass the nylon cord through the hole on the inside so that it points upward. Finally, fix the flange coupling in the innermost hole to complete the blade. Let's attach it to the robot body as soon as possible.
![]()
![]()
The flange coupling should be secured with the 3mm hexagon socket set screws supplied with the flange coupling, but a 1.5mm hex wrench cannot be used to tighten it in earnest. If the blade hits a stone or something, it will fall off immediately. Therefore, it is tightened with a short M3 screw. Of course, I recommend using thread locker here as well. The unevenness around the shaft may make it easier for weed to wrap around it, but other measures have prevented it from wrapping around
-
13Splash Guard
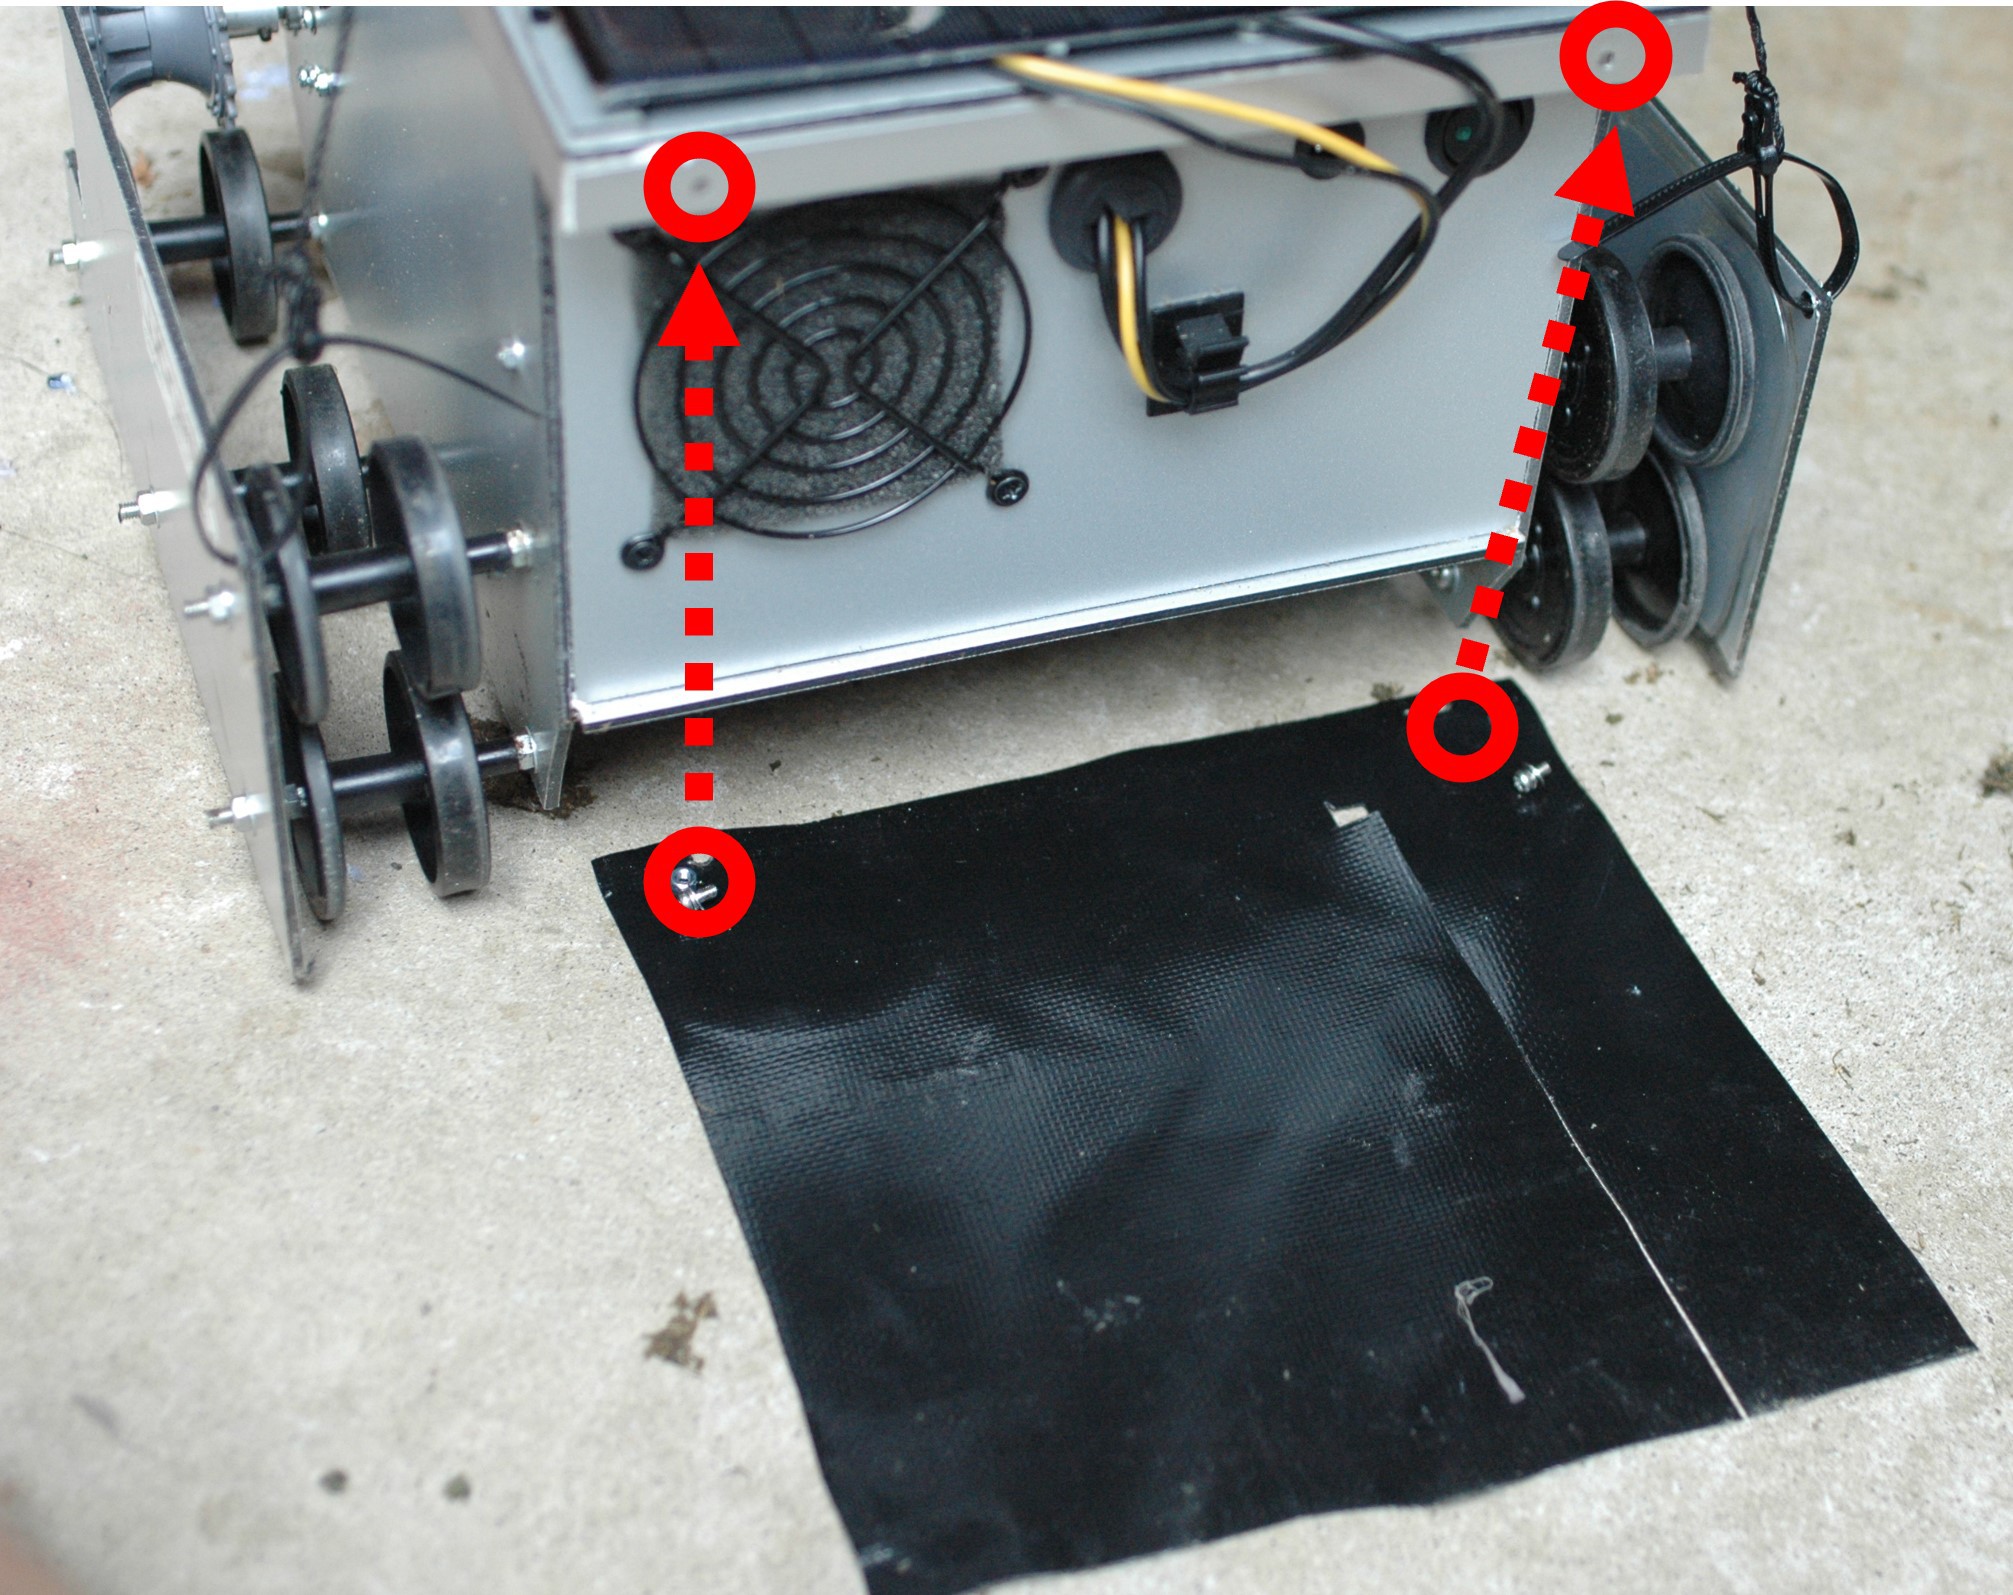
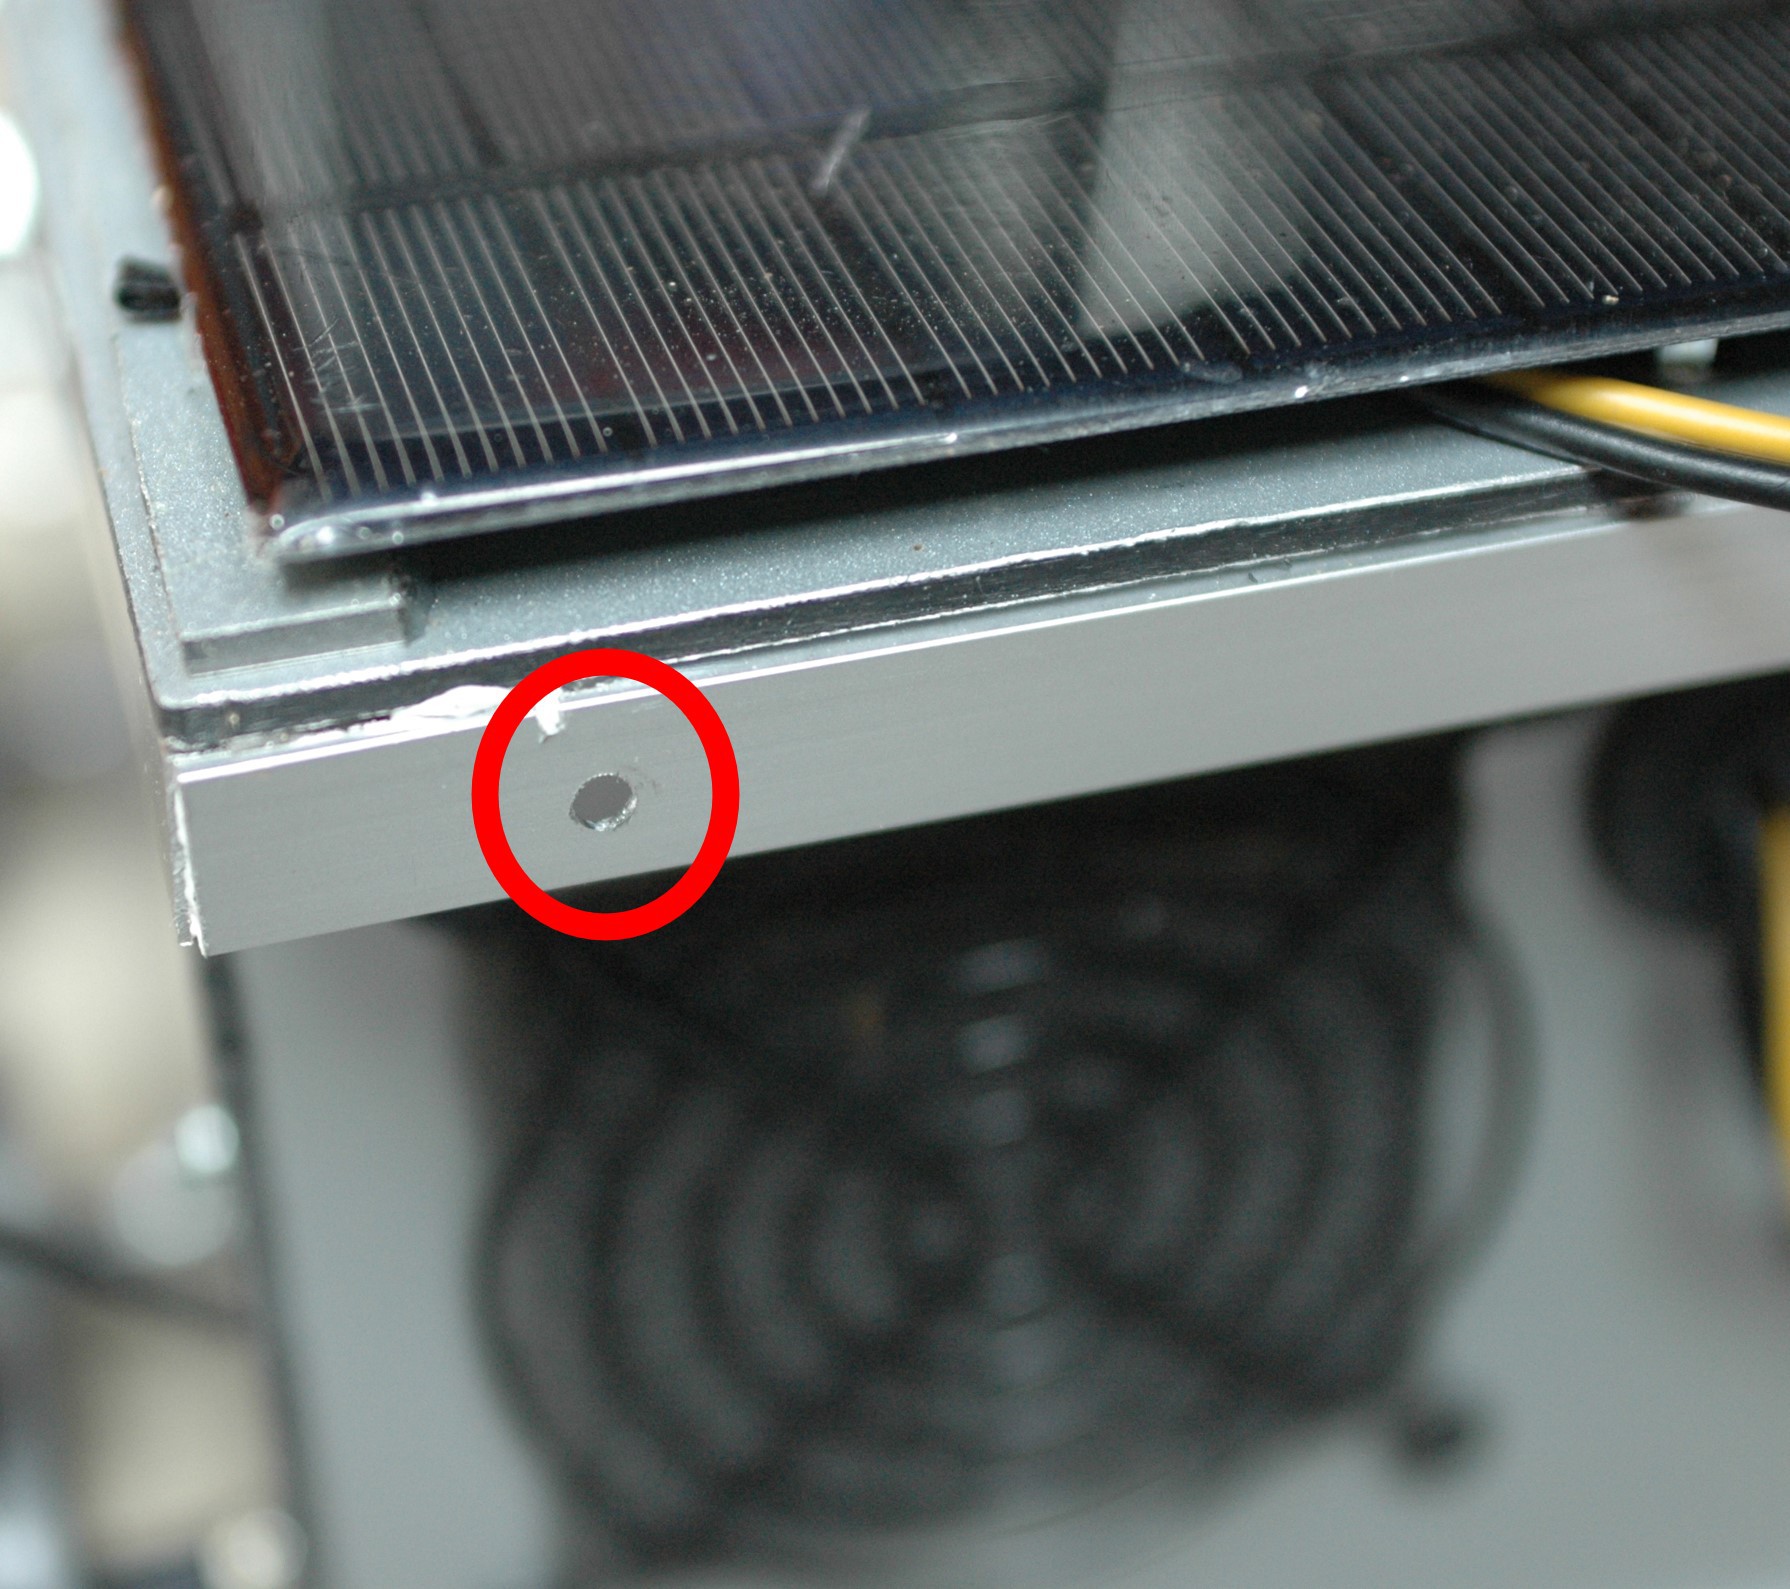
Create a splash guard with waterproof cloth and drill two holes at the top. Drill two holes at the same interval in the angle attached to the top panel and secure the guard with bolts and nuts.
![]()
![]()
-
14Install the software.
Install Raspberry Pi OS Lite 64bit on the sd card using Raspberry Pi Imager. After connecting power and booting, login with ssh and install according to the project's Github page. The commands for installation are very simple as follows,
sudo apt install -y libv4l-dev libssl-dev mpg123
curl --proto '=https' --tlsv1.2 -sSf https://raw.githubusercontent.com/ysuito/roktrack/master/installation.sh | sh
To run the program, do the following,
cd roktrack
sudo ./roktrack
If you want to start it at the same time as system startup, create a file with the following contents as /lib/systemd/system/roktrack.service.
[Unit]
Description = roktrack

[Service]
ExecStart=/home/pi/roktrack/roktrack
Restart=always
Type=simple
WorkingDirectory=/home/pi/roktrack

[Install]
WantedBy=multi-user.target
Load it and activate it.
sudo systemctl daemon-reload
sudo systemctl enable roktrack.service
Finally, set the Raspberry Pi to Read Only.
sudo raspi-config nonint enable_overlayfs
sudo systemctl reboot
NOTE: If you are using a Raspberry Pi3A+, please refer to the log to reserve memory.
Roktrack - Pylon Guided Mower
A mower not only for your yard, but also for your community.


Discussions
Become a Hackaday.io Member
Create an account to leave a comment. Already have an account? Log In.