 Mx. Jack Nelson
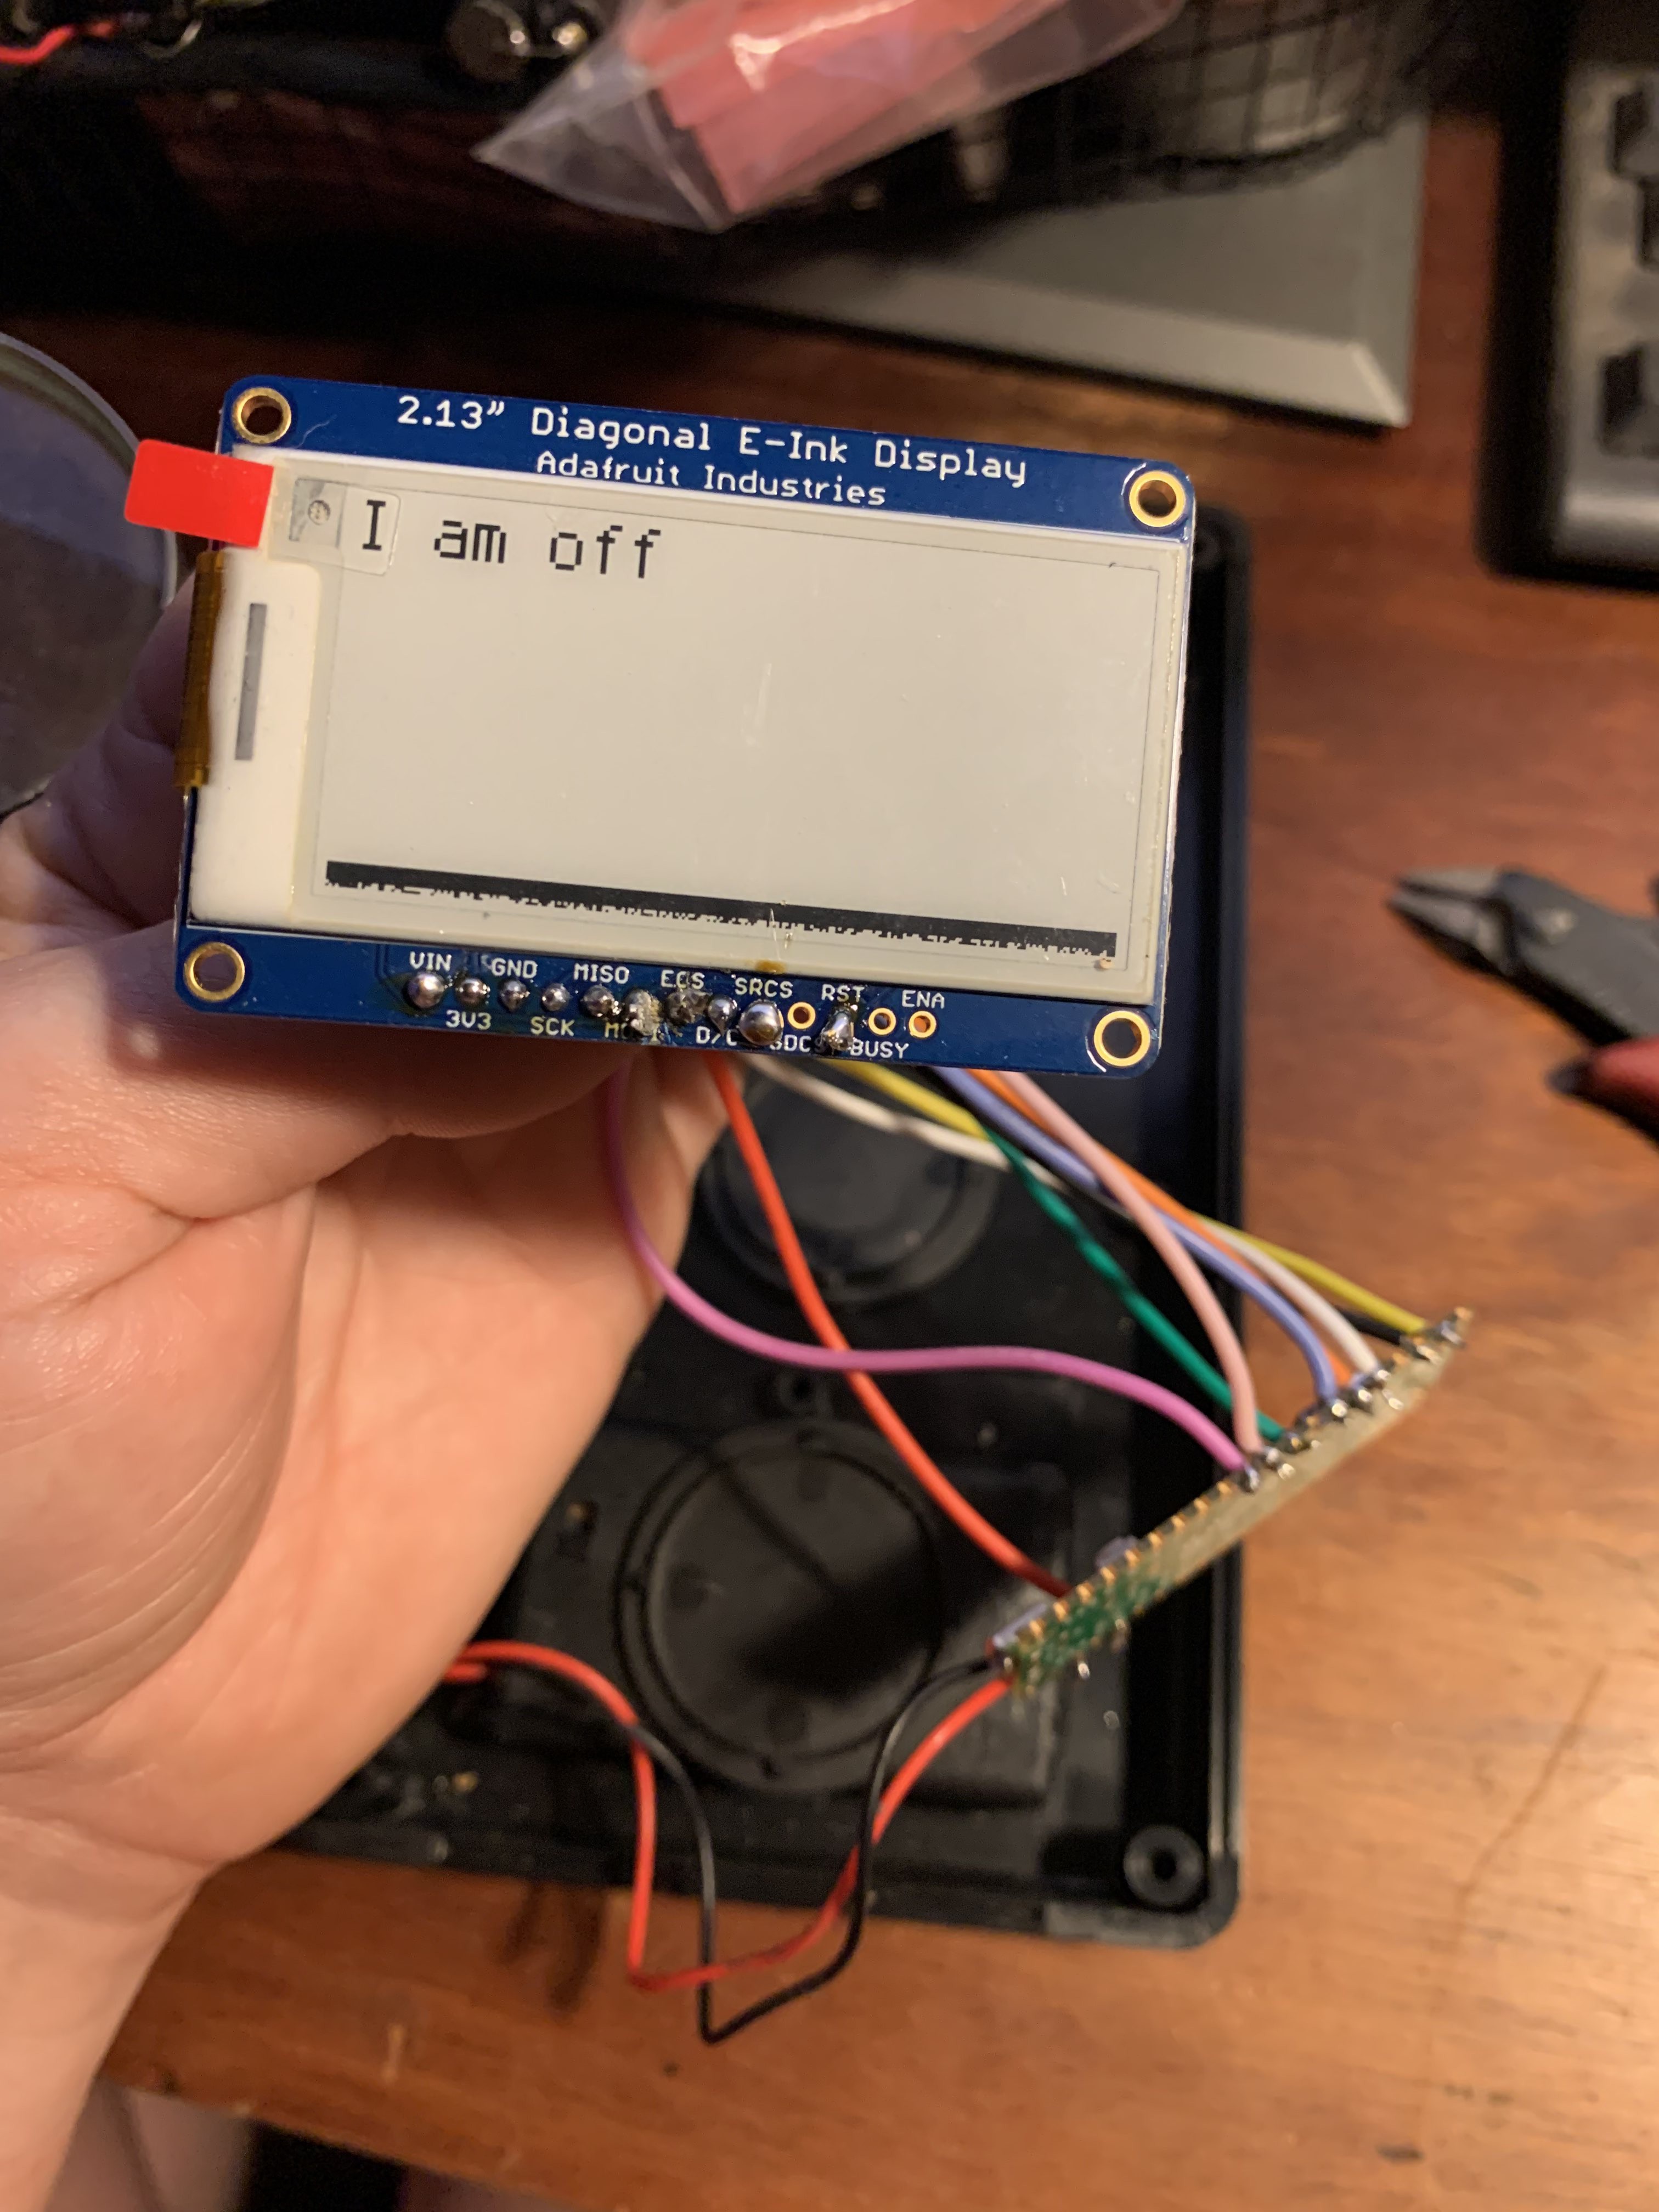
The Scrobble Box has evolved. Instead of a Raspberry Pi with a block of headers soldered on and a bunch of jumper wires connected to the headers on an Adafruit FeatherWing e-ink display, it now has a new Pi with no headers and a new regular Adafruit e-ink display, without all the hard-to-map-connectors featured on the FeatherWing. This simplified the wiring and gave me an opportunity to practice my soldering.
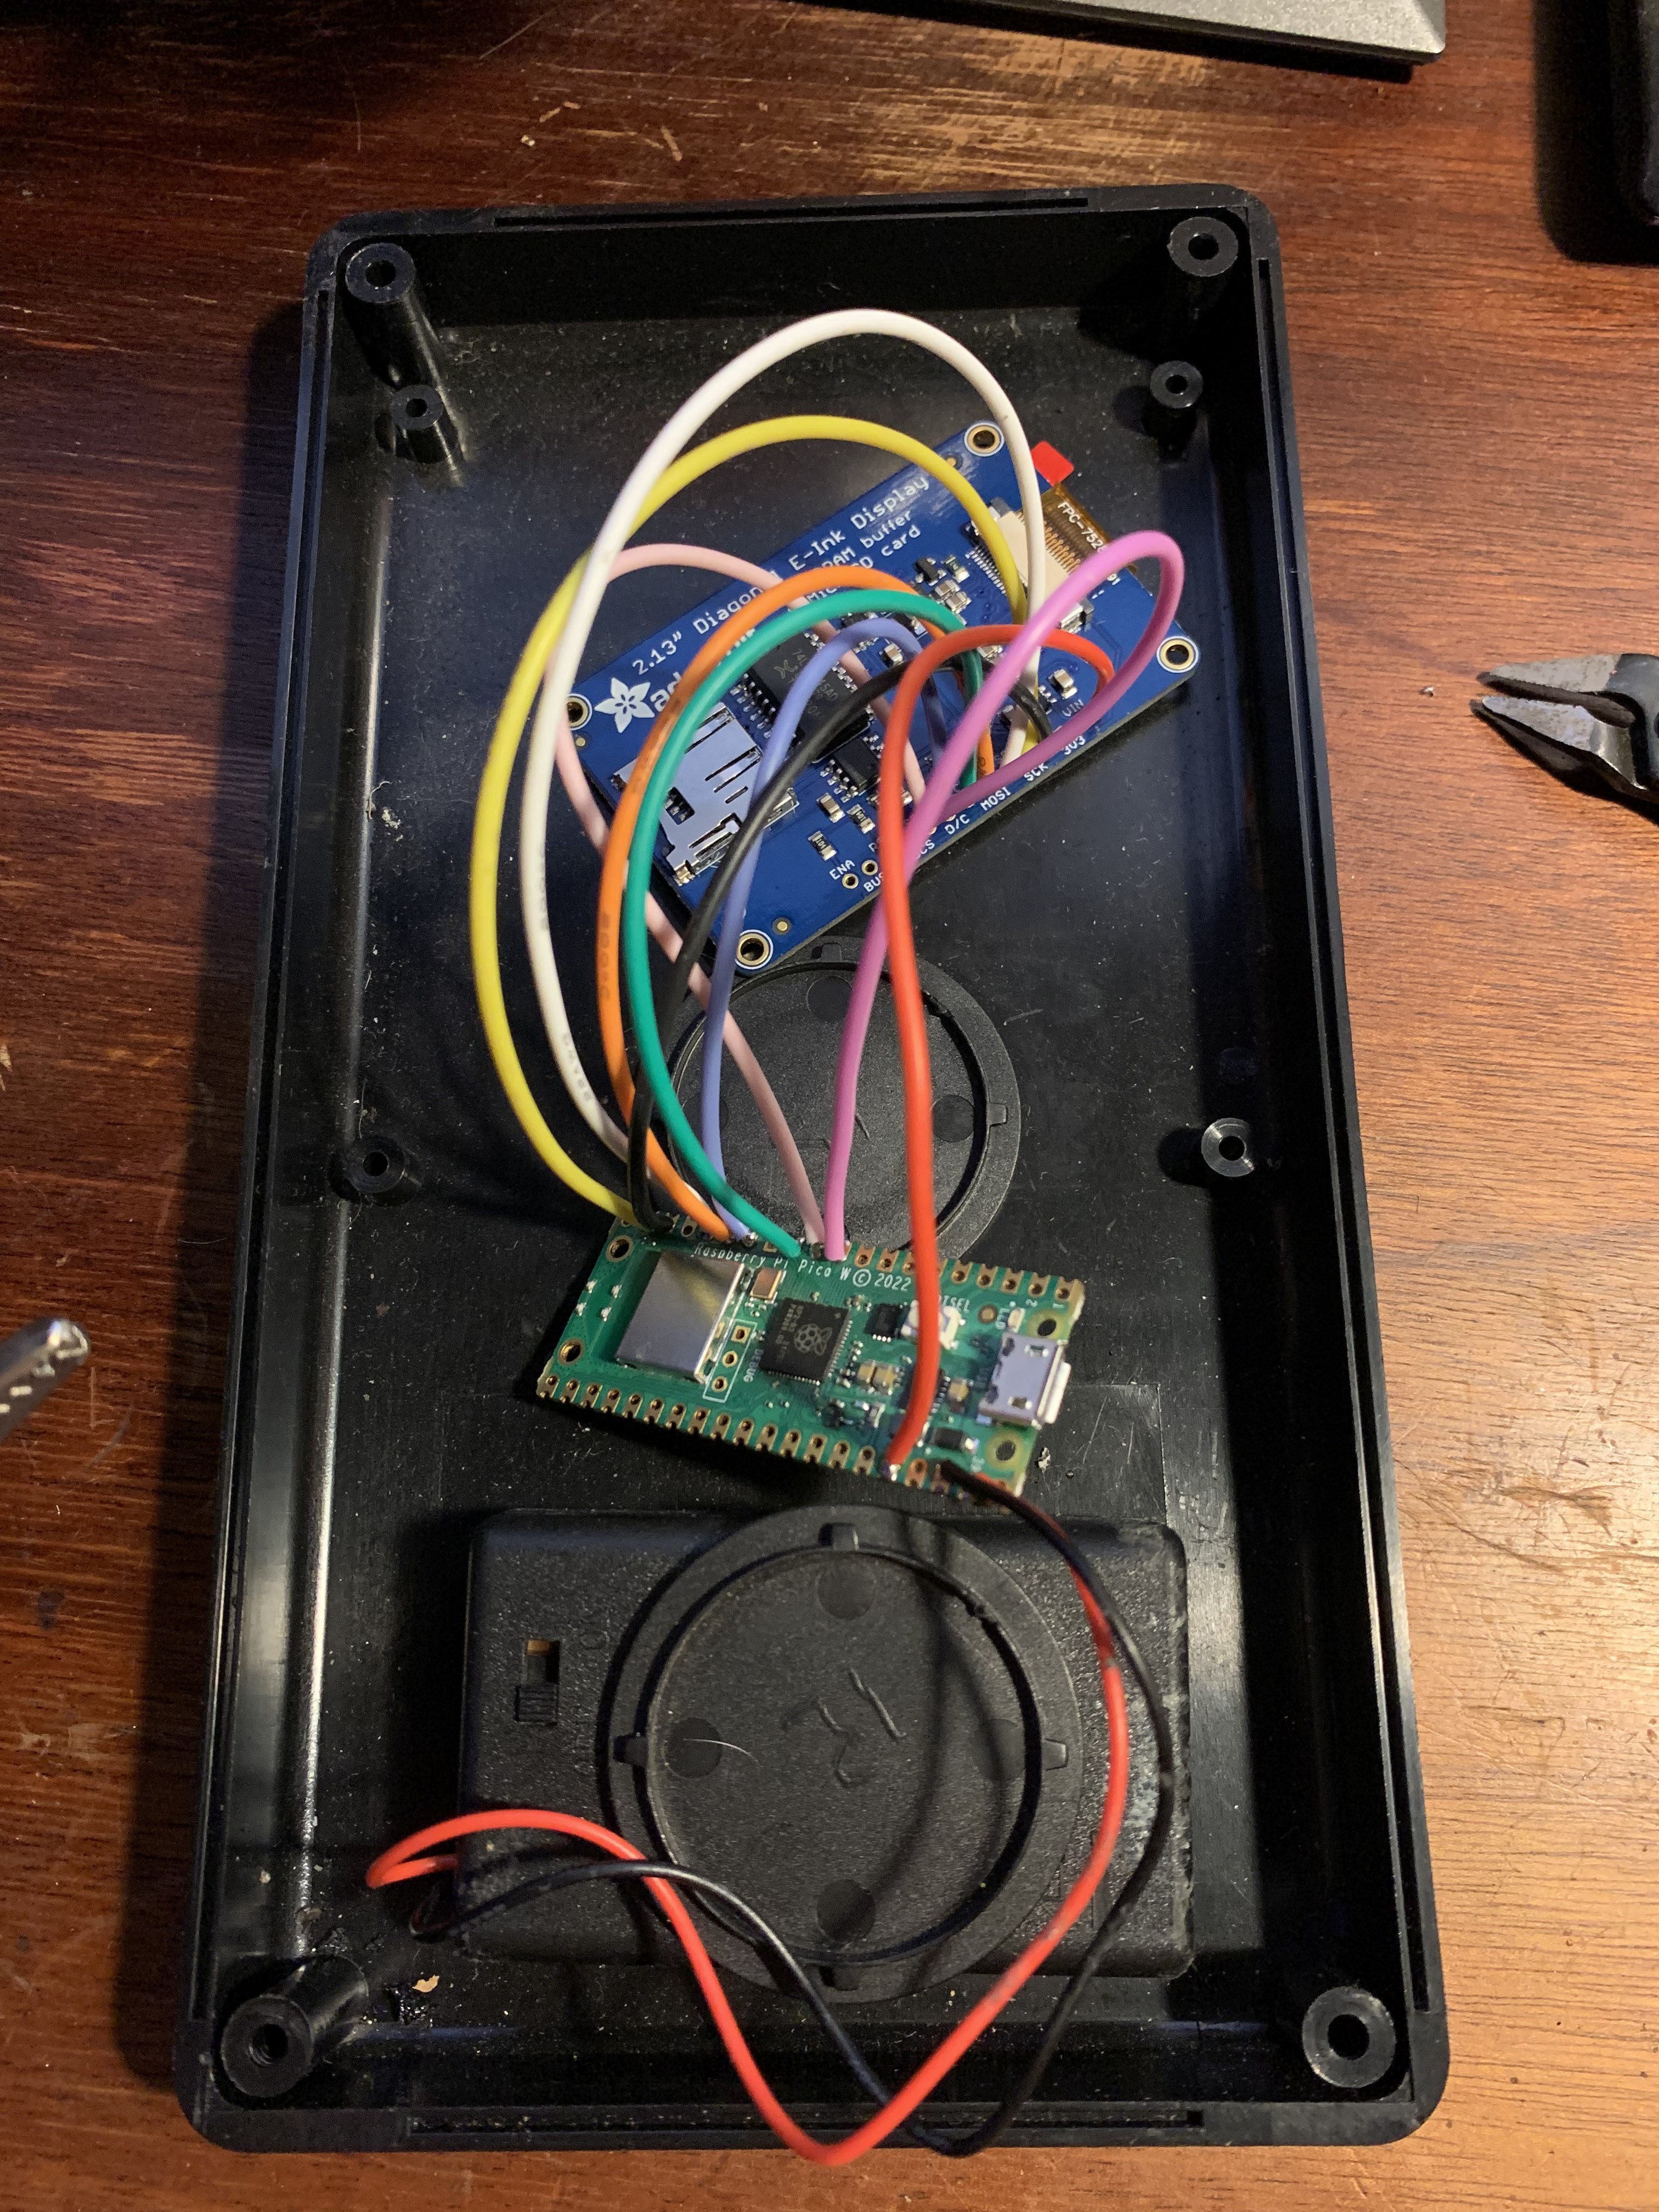
I made an image of the last Pi and moved that over to the new one. Pleasingly and surprisingly when I rebooted, the screen displayed the "I am off" message from my code, so I know that all the solder points worked. They are a beginner's soldering attempt, but they worked. That was satisfying.
Next I hooked up the love button, the KXLU switch, and the GUSH switch (which required a new addition to the code as well).

And just like that she's back and scrobbling! Next will be some aesthetic updates, and wiring the third switch in the middle to control the power, so I don't have to open the box to turn off the batteries.
Discussions
Become a Hackaday.io Member
Create an account to leave a comment. Already have an account? Log In.