In this chapter we learn how to setup the Raspberry Pi and how to detect the peripheral of the sensor.
Configuring the Pi
To get started with your Qwiic pHAT, simply plug it into the headers on the Raspberry Pi with the letters facing you. We'll use the Qwiic pHAT v2.0 in the following image to connect a Qwiic device.
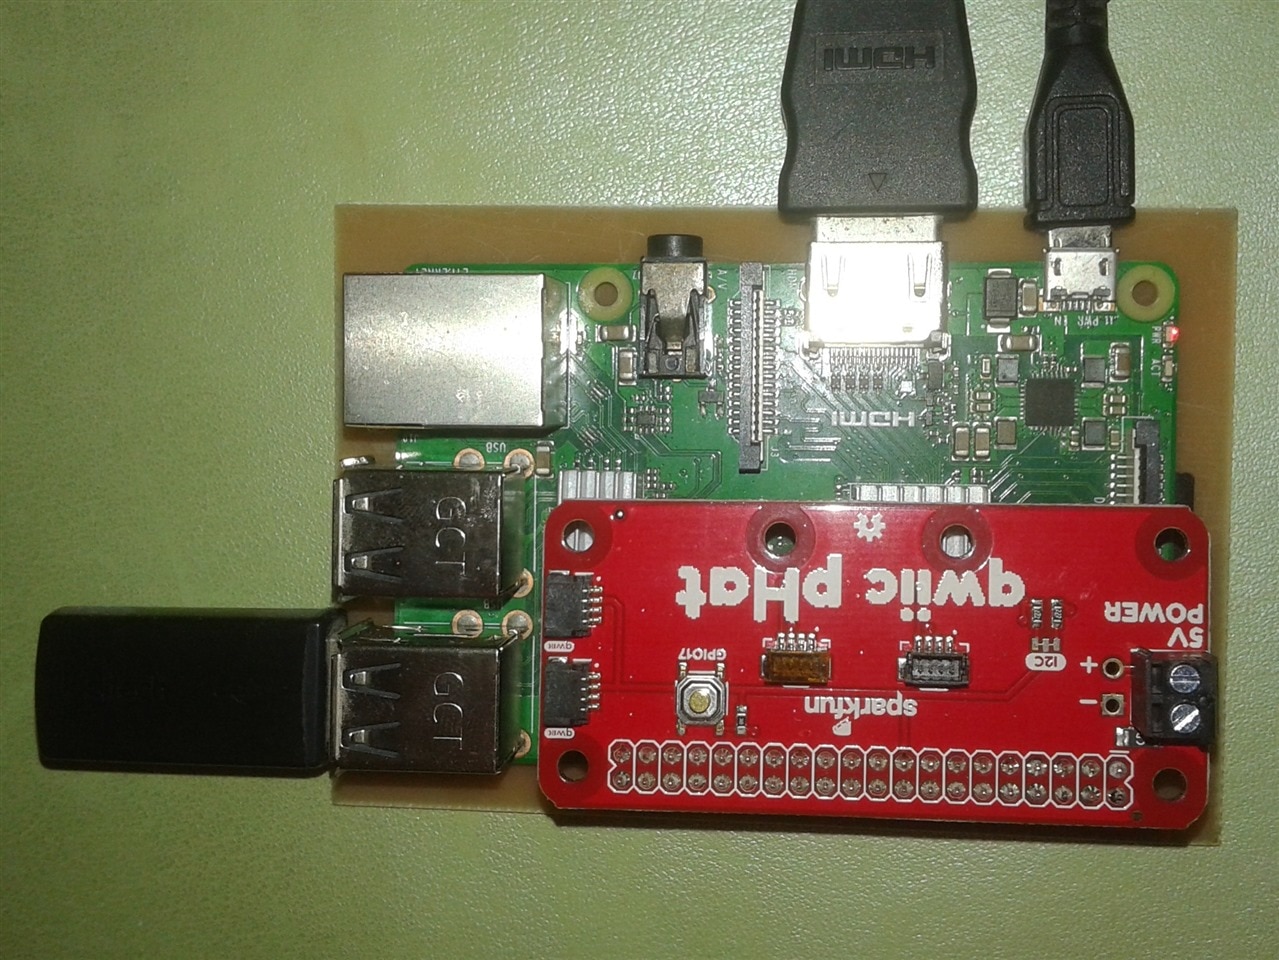
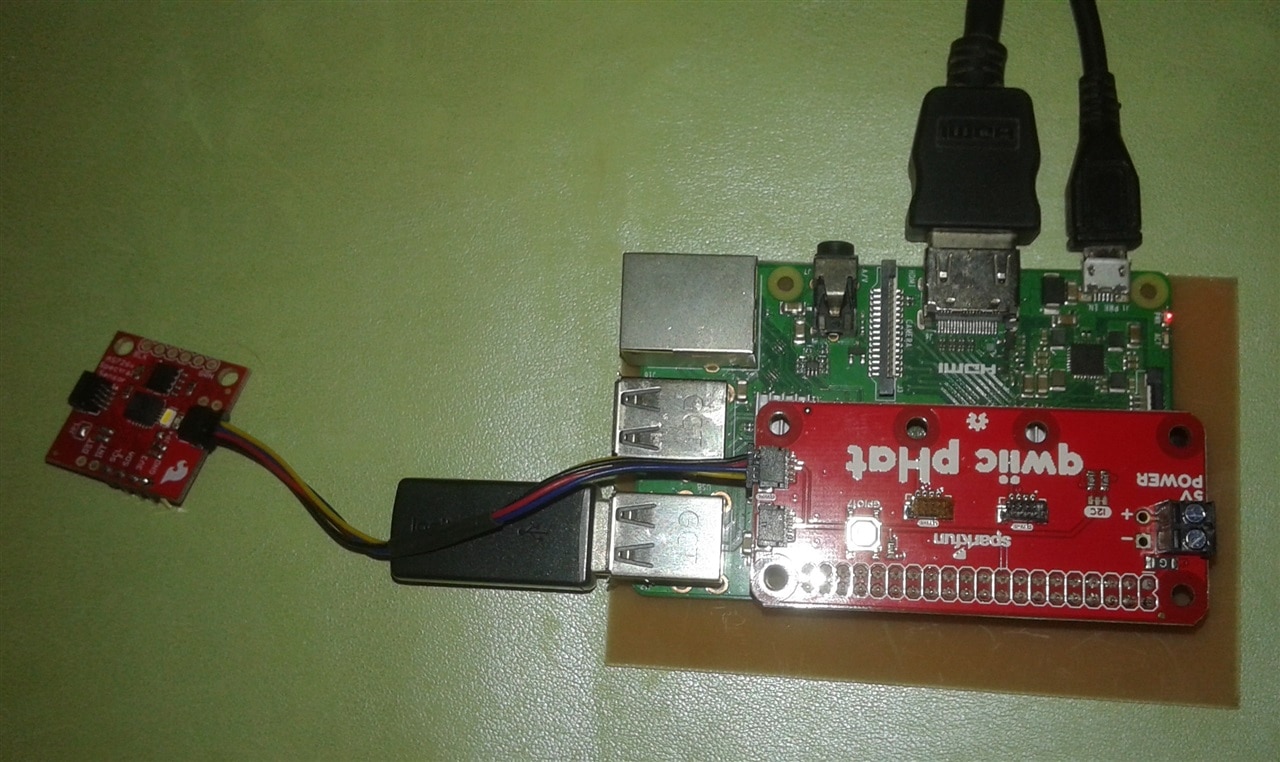
Once the pHAT is plugged in, you can start plugging in AS7262 6-channel Visible Light Sensor.
The Raspberry Pi Configuration via Desktop GUI
You can use the Desktop GUI by heading to the Pi Start Menu > Preferences > Raspberry Pi Configuration. A window will pop up with different tabs to adjust settings. What we are interested is the Interfaces tab. Click on the tab and select Enable for I2C. Click on the OK button.
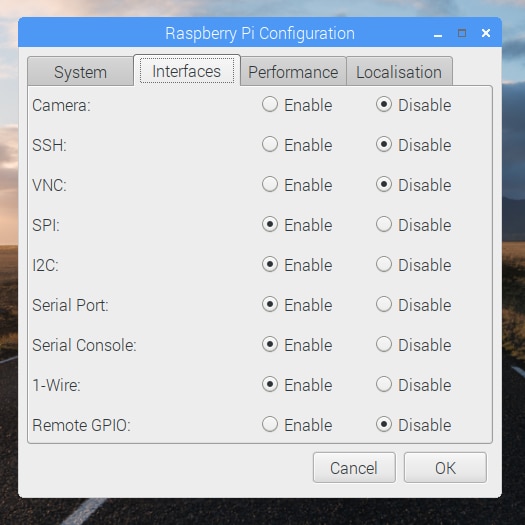
It's recommend restarting your Pi to ensure that the changes to take effect. Click on the Pi Start Menu > Preferences > Shutdown. Since we just need to restart, click on the Restart button. The system will reboot. When it comes back up, log in and enter the following command
ls /dev/*i2c*
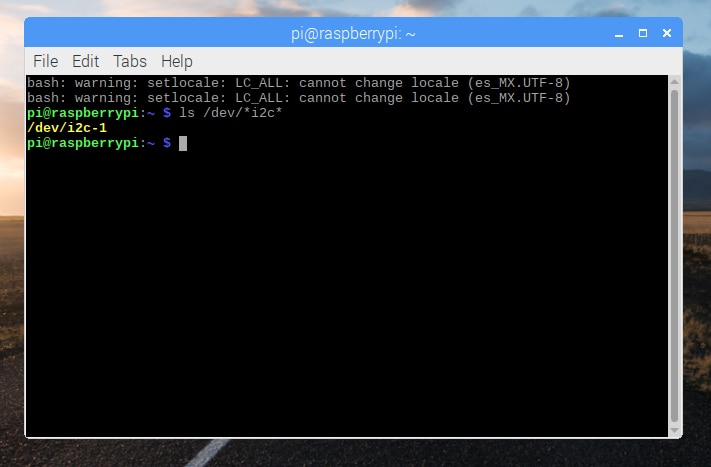
The Pi should respond with
/dev/i2c-1
Which represents the user-mode I2C interface. There is a set of command-line utility programs that can help get an I2C interface working. You can get them with the apt package manager. Enter the following command
sudo apt-get install -y i2c-tools
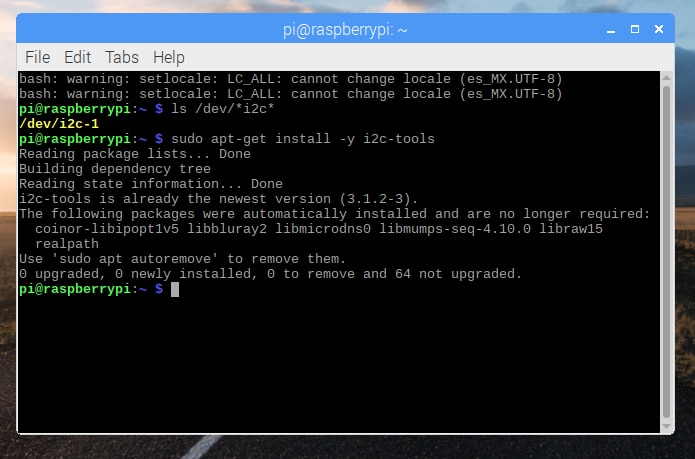
In particular, the i2cdetect program will probe all the addresses on a bus, and report whether any devices are present. Enter the following command in the command line. The -y flag will disable interactive mode so that you do not have to wait for confirmation. The 1 indicates that we are scanning for I2C devices on I2C bus 1.
i2cdetect -y 1
You will get an output from your Raspberry Pi similar to the output below.
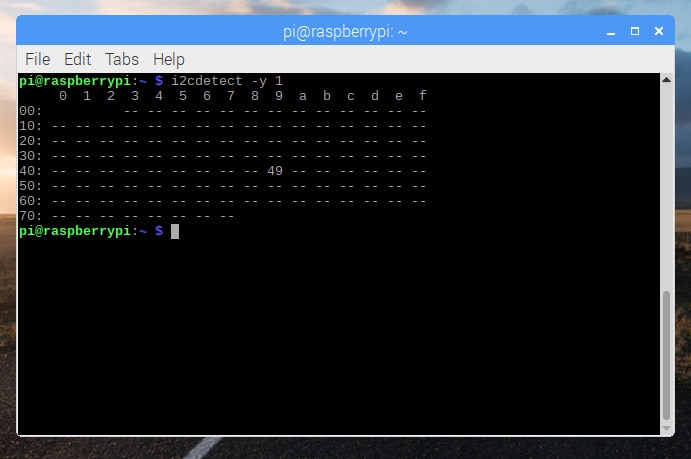
This map indicates that there is a peripheral at address 0x49, and according to the AS7263 datasheet, device address is 49 hex.
 Guillermo Perez Guillen
Discussions
Become a Hackaday.io Member
Create an account to leave a comment. Already have an account? Log In.