EDIT: Tl;dr skip to the last part, there is a working method
Last images I did are not sharp. I was not able to make qPlus tips but using very thin wire of 0.05mm. The problem with 0.05mm wire is that I was not able to etch it to make very thin cone instead I just cut it with scissors and hoped for the best. The 'best' was blurry images.
I've re-read articles about making sharp tips one of the ideas was to add wire on the other side also to counter weight.
Indiana Jones counter weight type.... (Sorry no GIFs here)
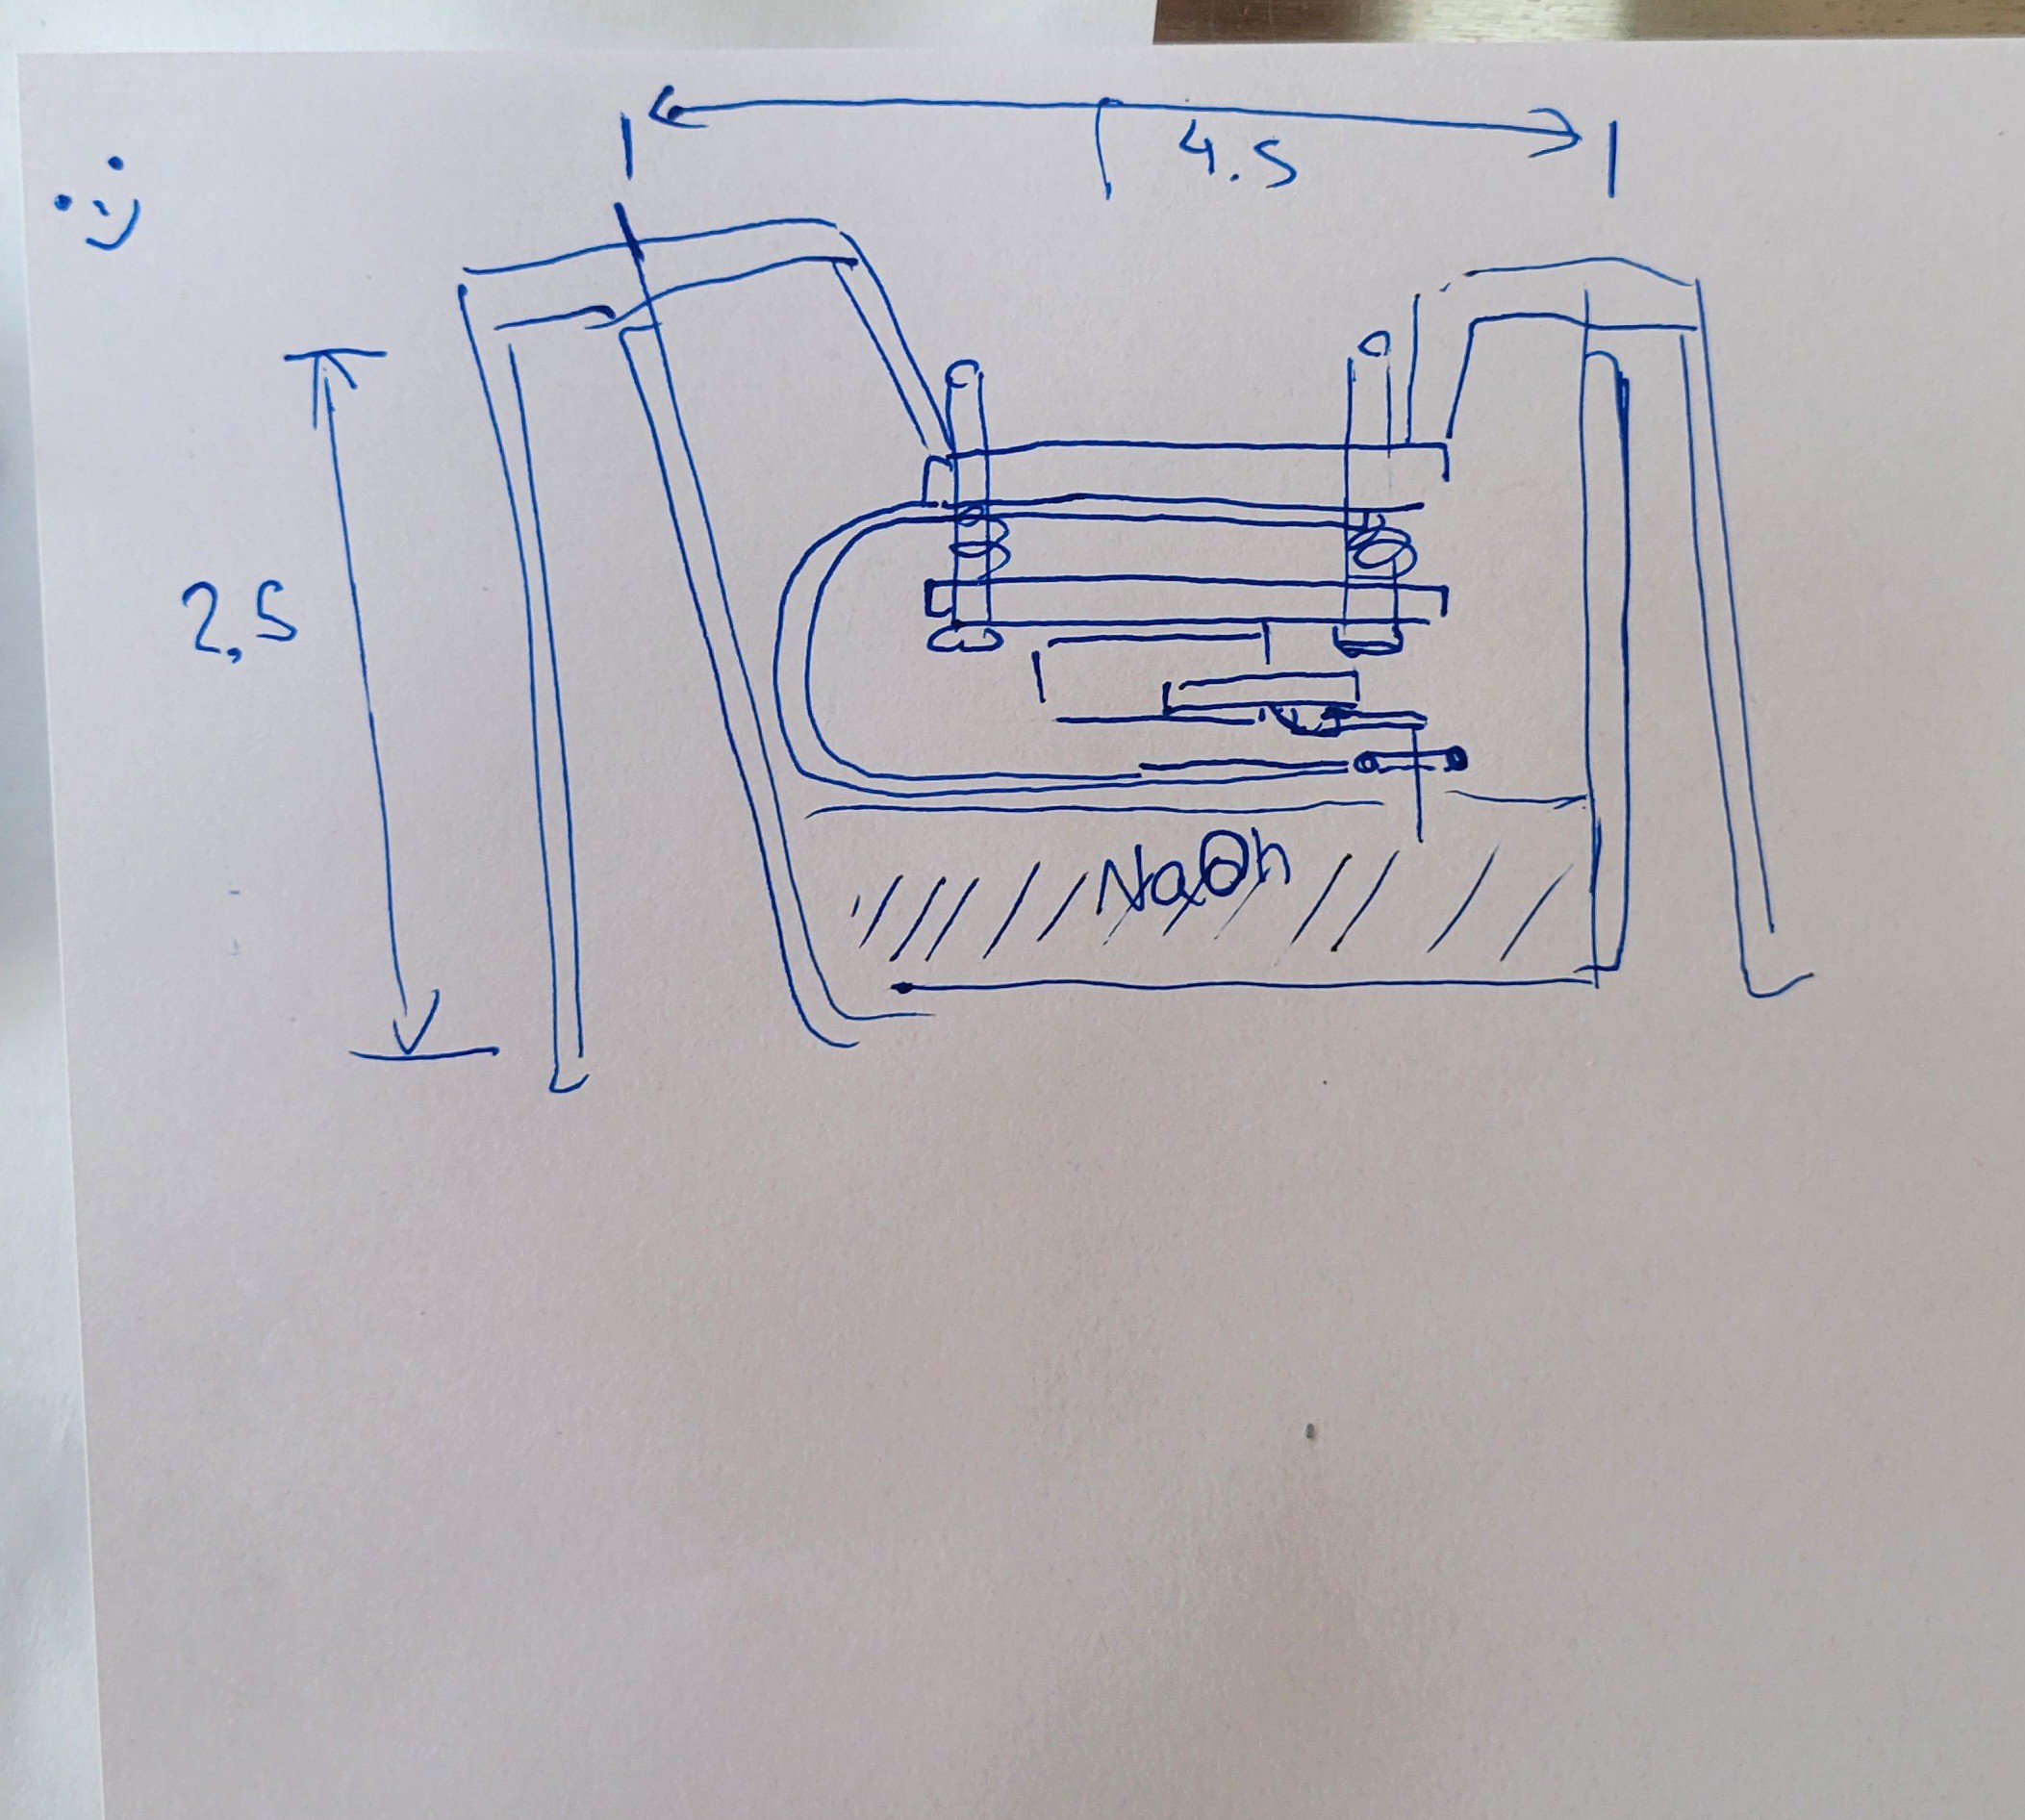
So I started with making mechanism to be able to etch Tungsten wire very close to fork's edge. This is the schematic/idea
And this is what I made...
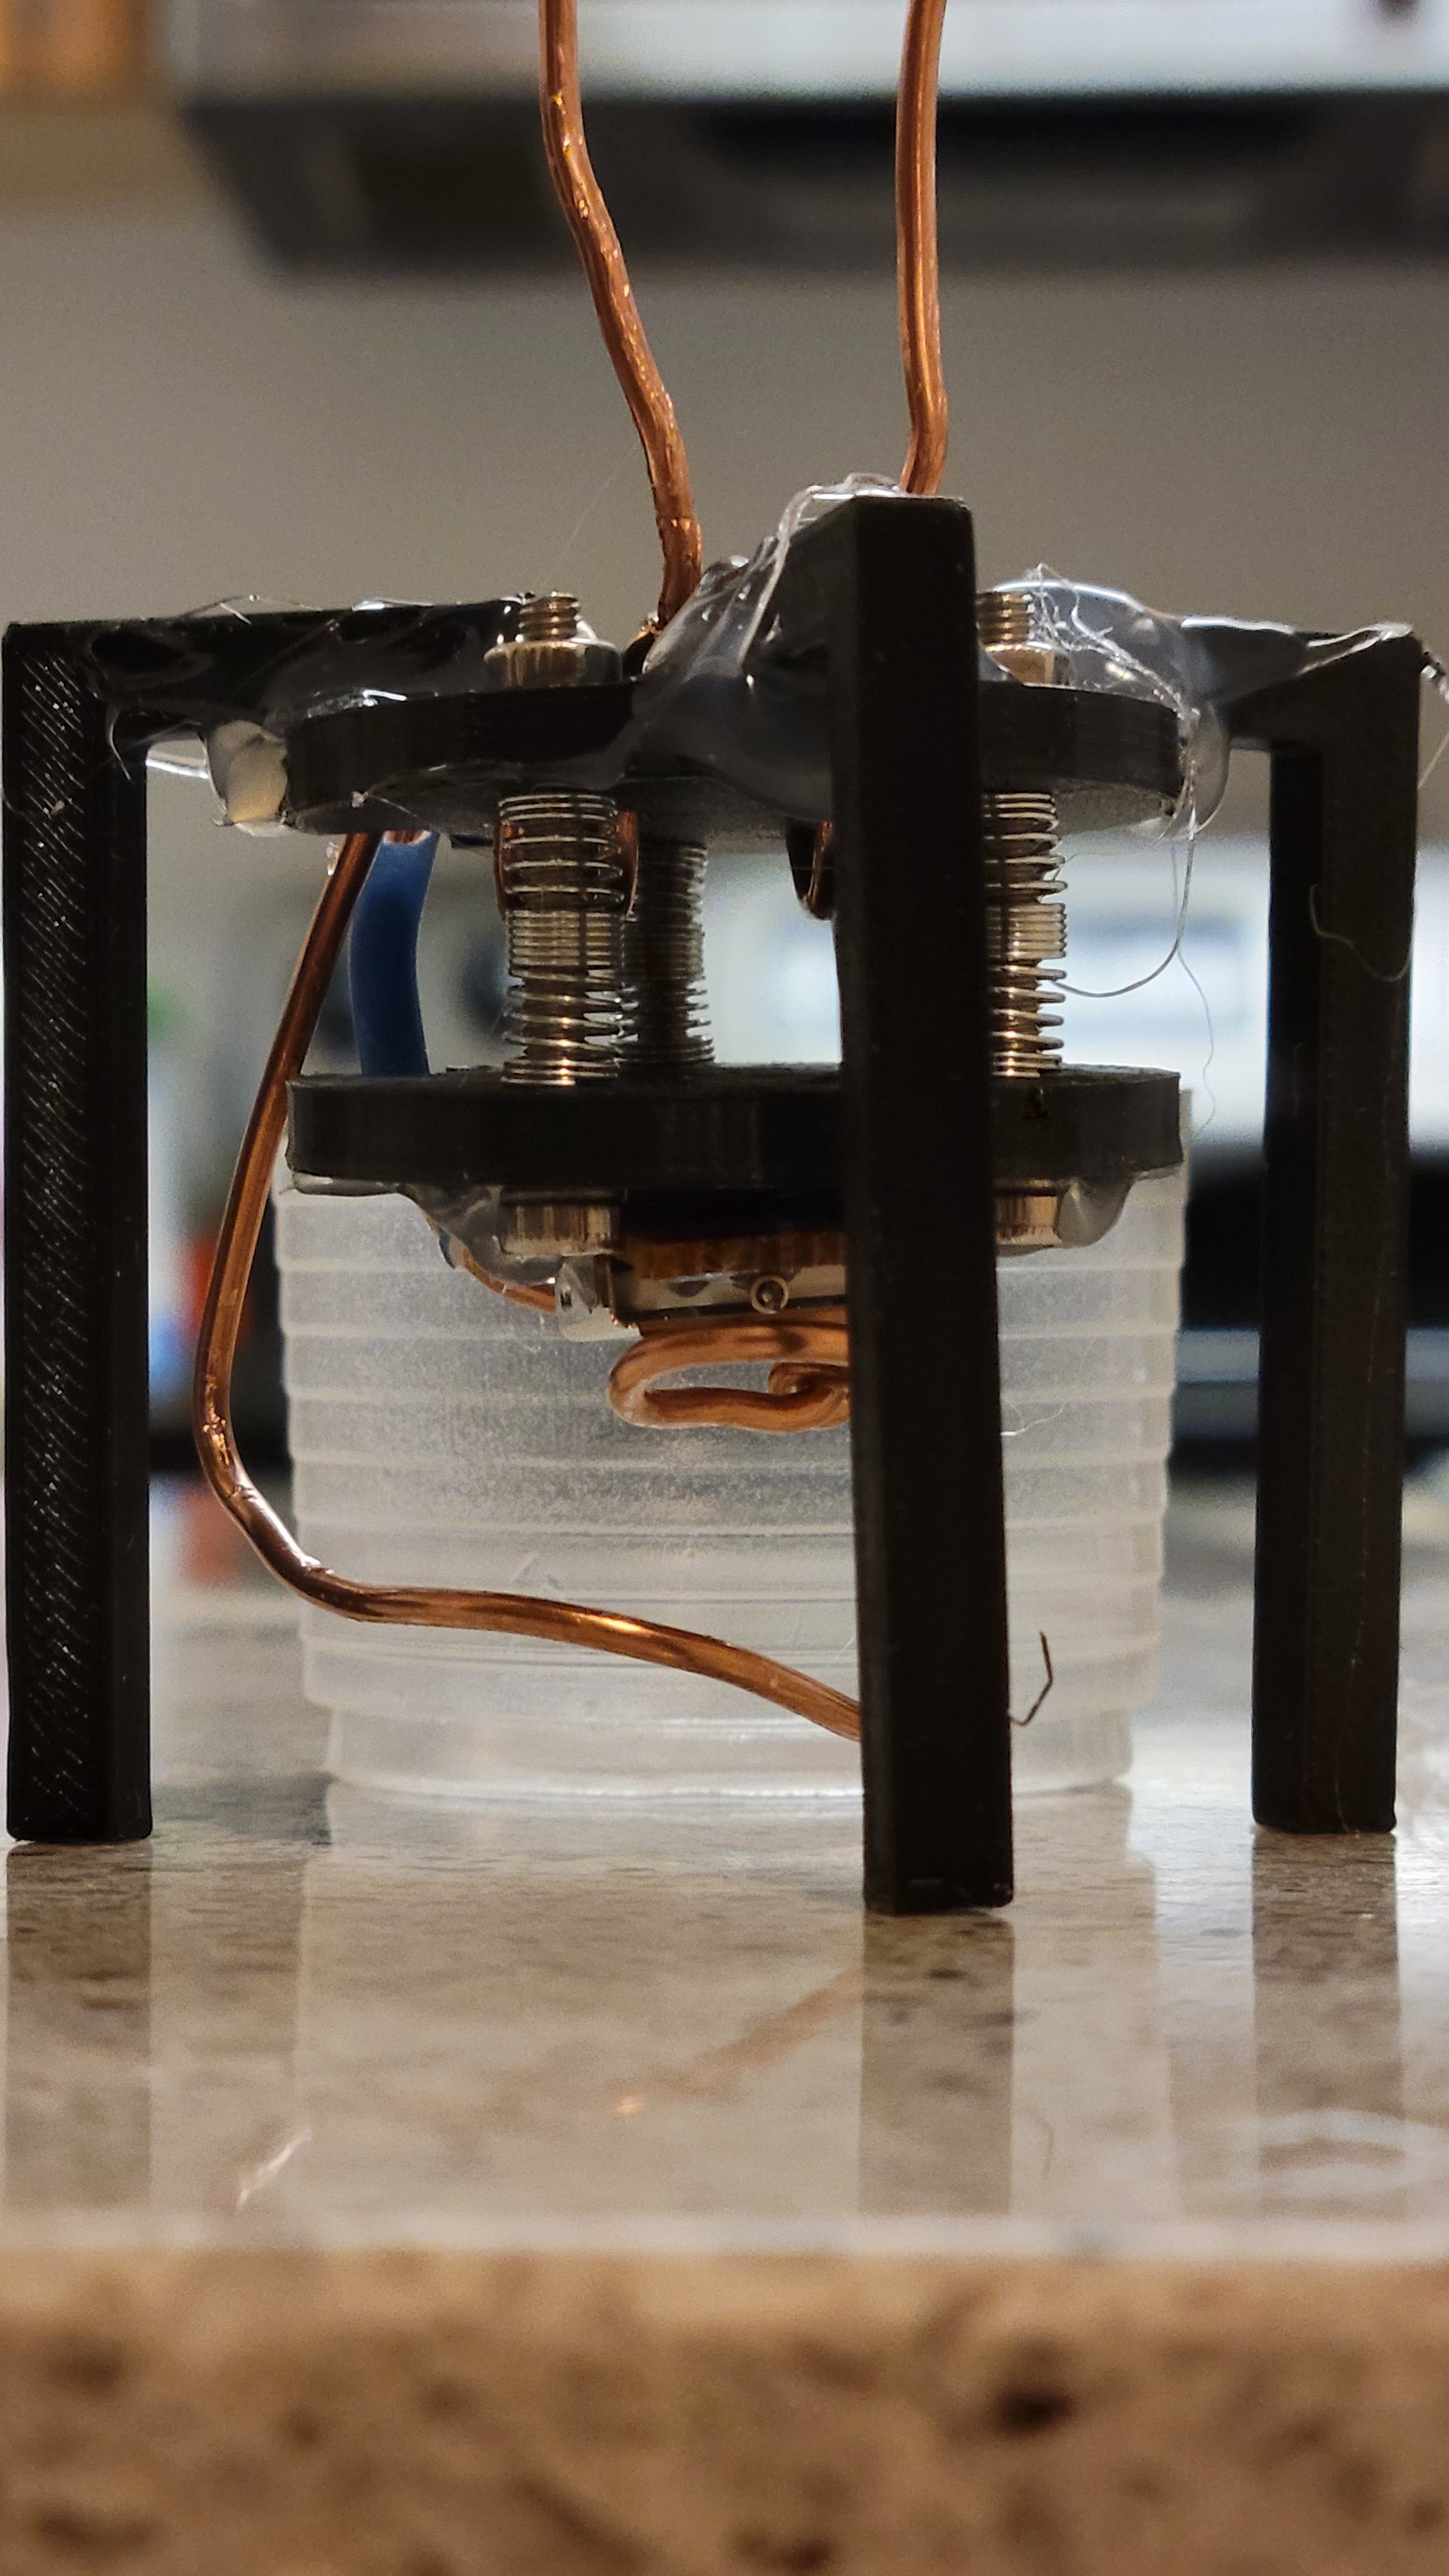
Well, it's not as perfect as I wanted it to be but it will do as a first prototype.
Ok, this prototype was not good enough. To get sanple I had to bend thick copper wires. In the process the loop was not aligned with horizon as a result all the bubbles would pop few seconds after they formed.
Another thing was the line of sight I couldn't easily see the length of the result wire. In the end I made tips of 1mm length which was not bad for begining but now I need something much smaller to keep high Q factor for my quartz fork.
And most annoying thing that both tips were broken I don't know if I just clumsy or super glue was destroyed by concentrated alkaline.
So, I went back to drawing board and redesign something which will solve all those problems and keep my fingers away from this material as it takes ten minutes to remove it from me.
New design (ver 0.3)
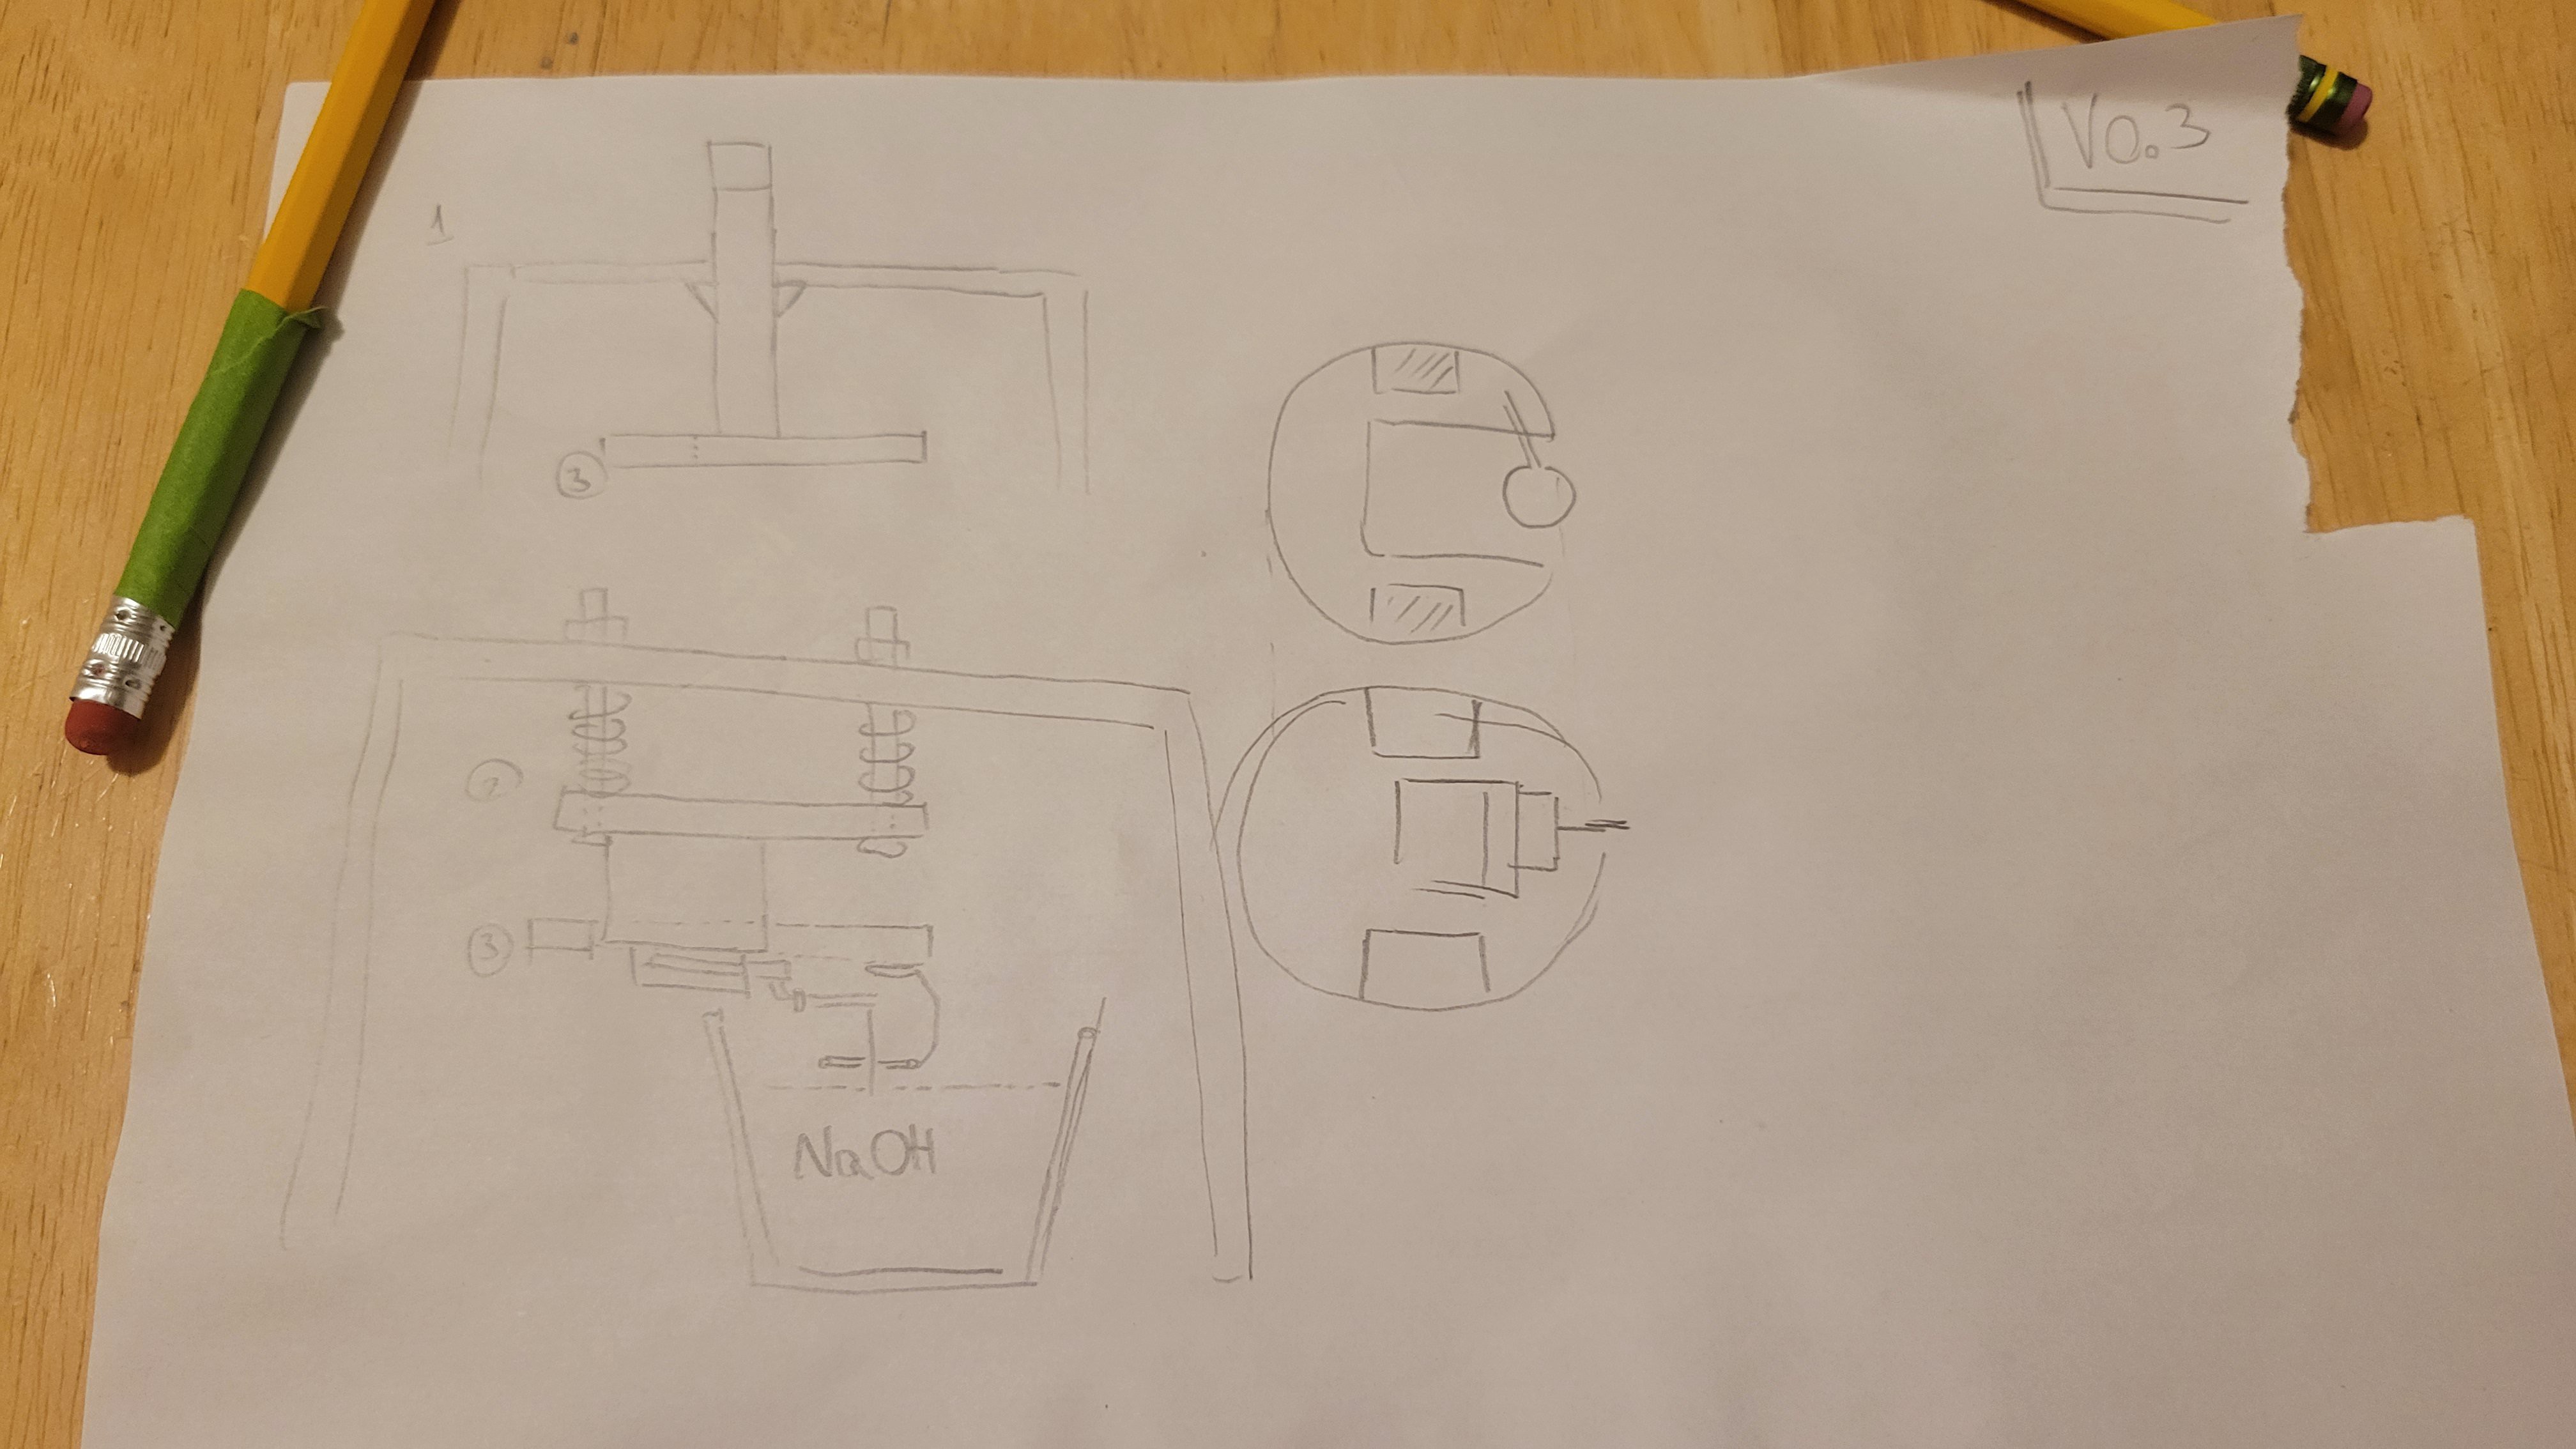
Will make components bigger to make my life easier
Another prototype, although still not perfect it much better.
Now let's try to make sharp tips...
Another change was software both upper layer (written in Python) and lower layer (C on Arduino). In upper level I change the way components communicate, now all the commands to serial are going through queue. This way we can scan and control up/down. It's important when we want to make corrections in real time.
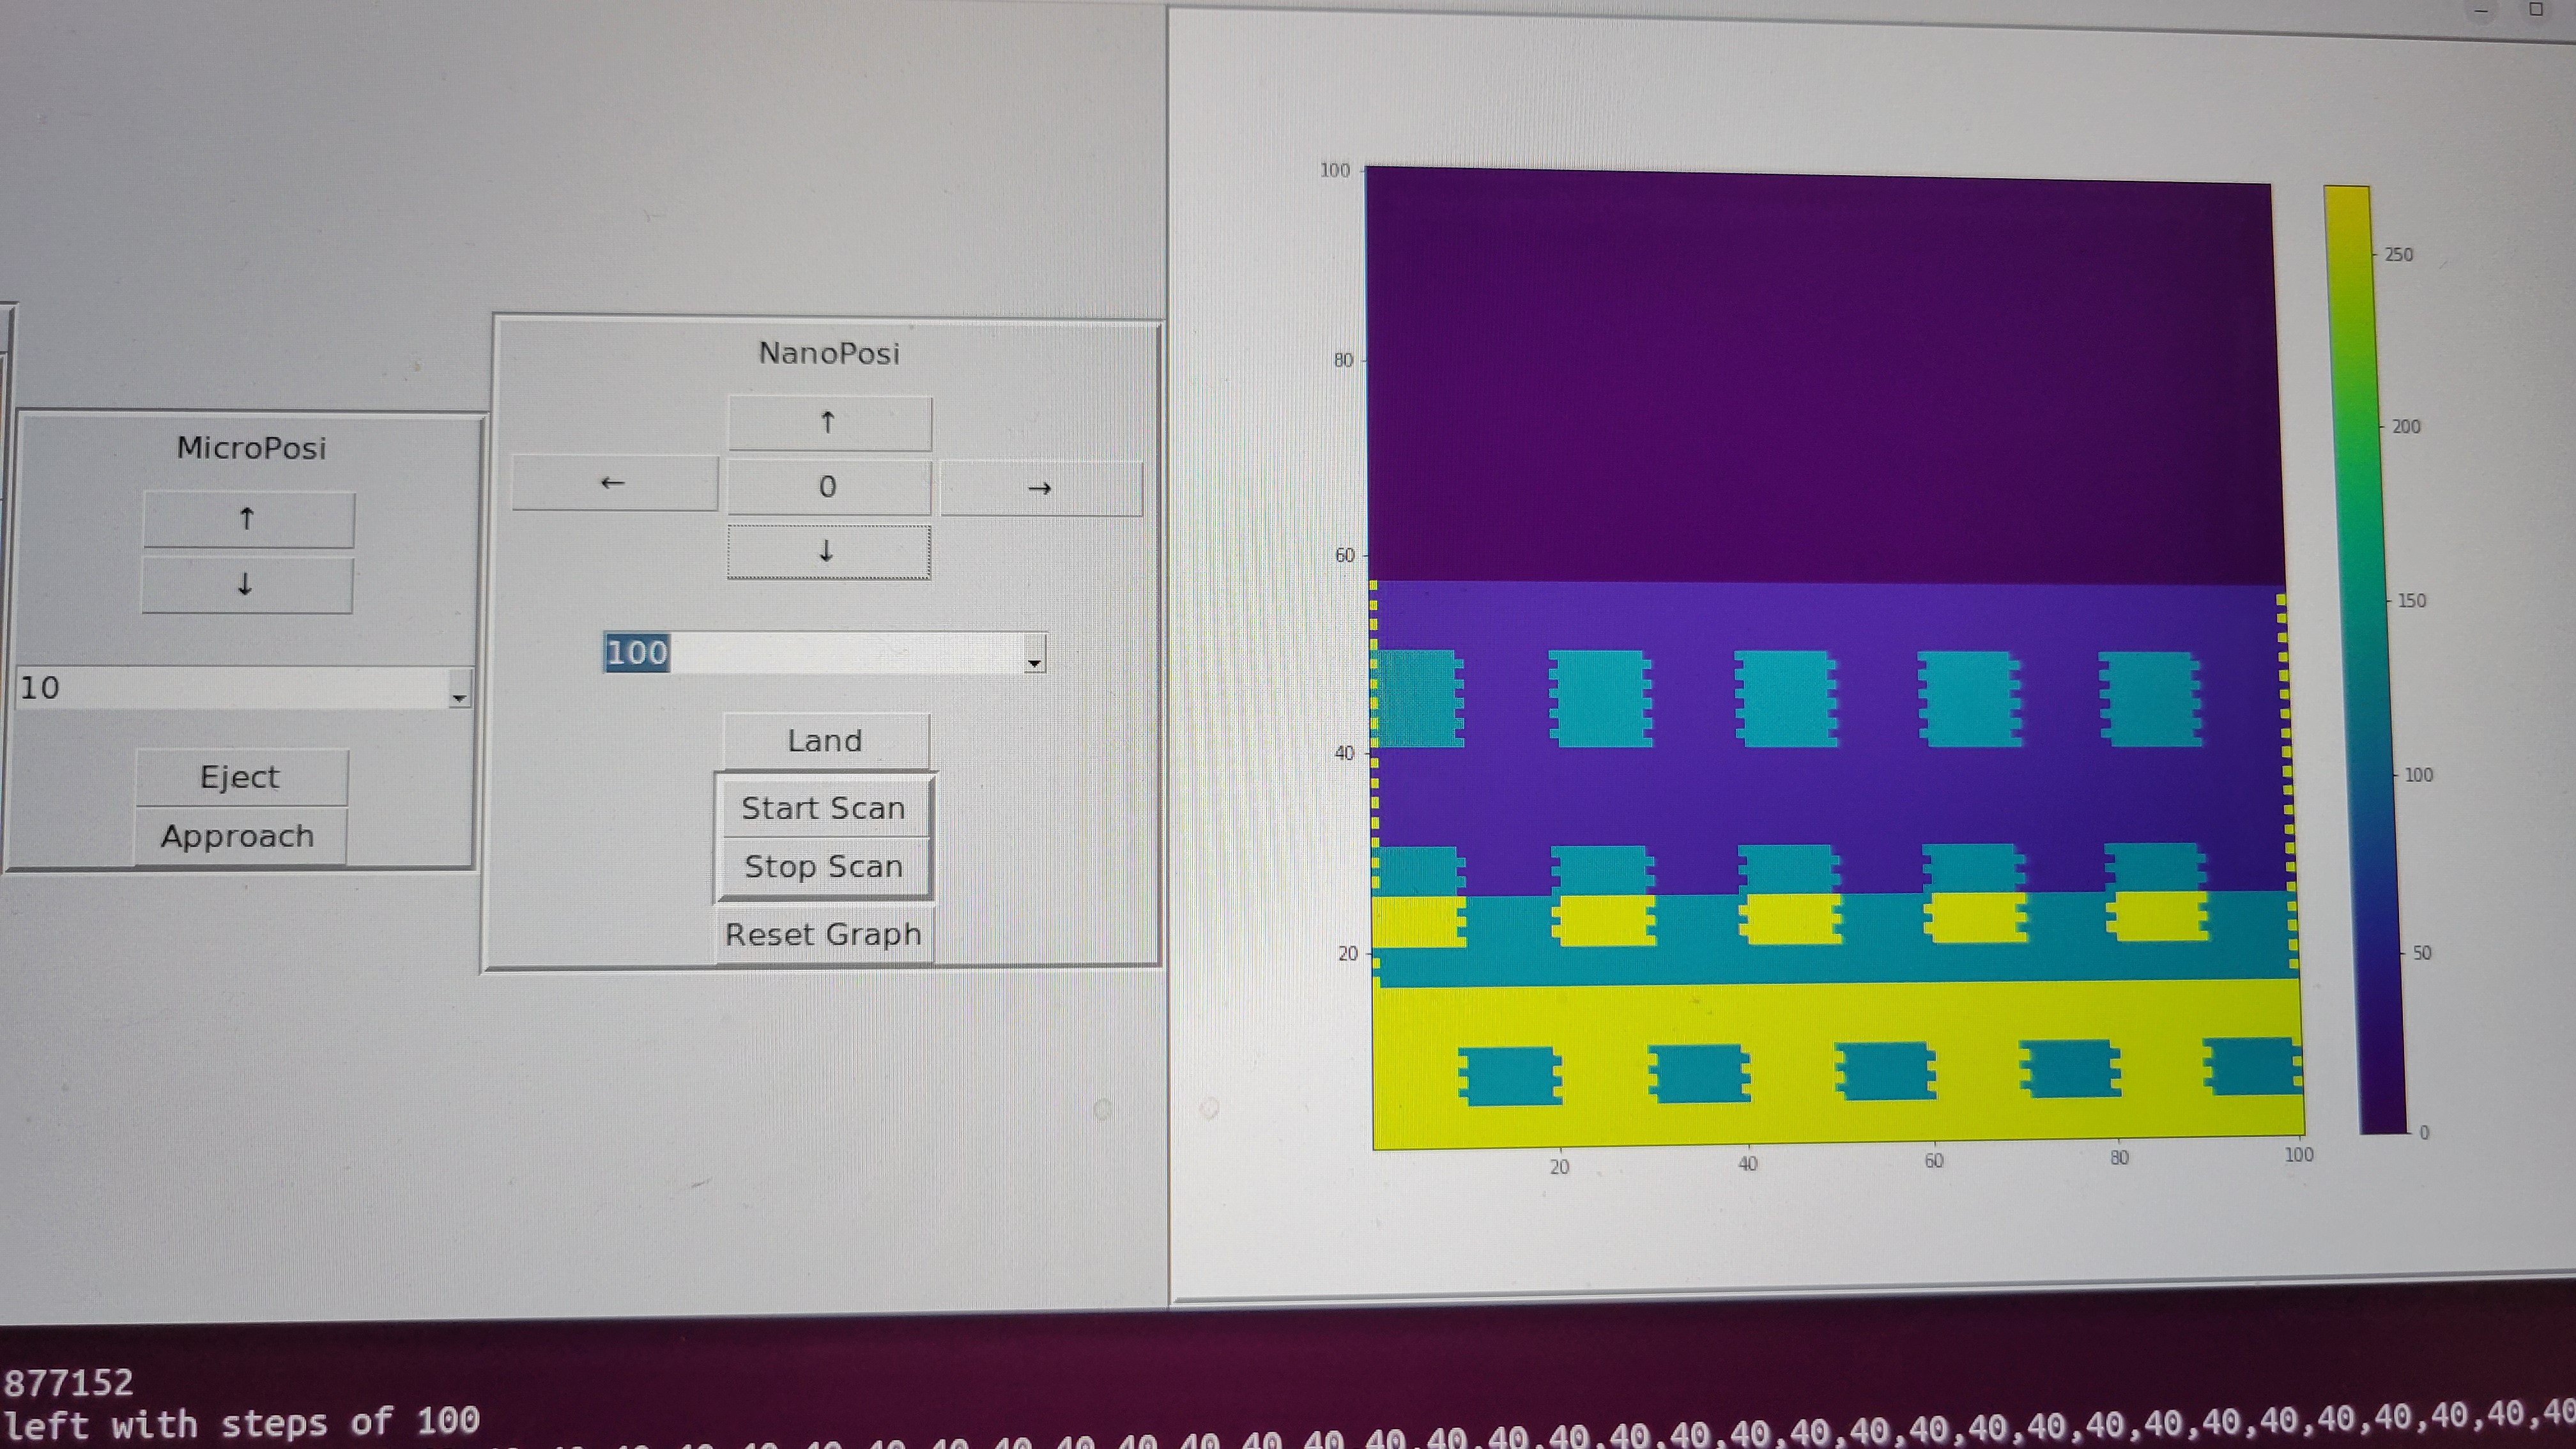
(By the way, it's not real image just a demo mode for faster development)
On the lower level I change the way, how we trace height. Previously the Z component was predetermined and we only checked the response from surface. It caused problems as surface is not flat usually. Now I am tracing the surface to some extent.
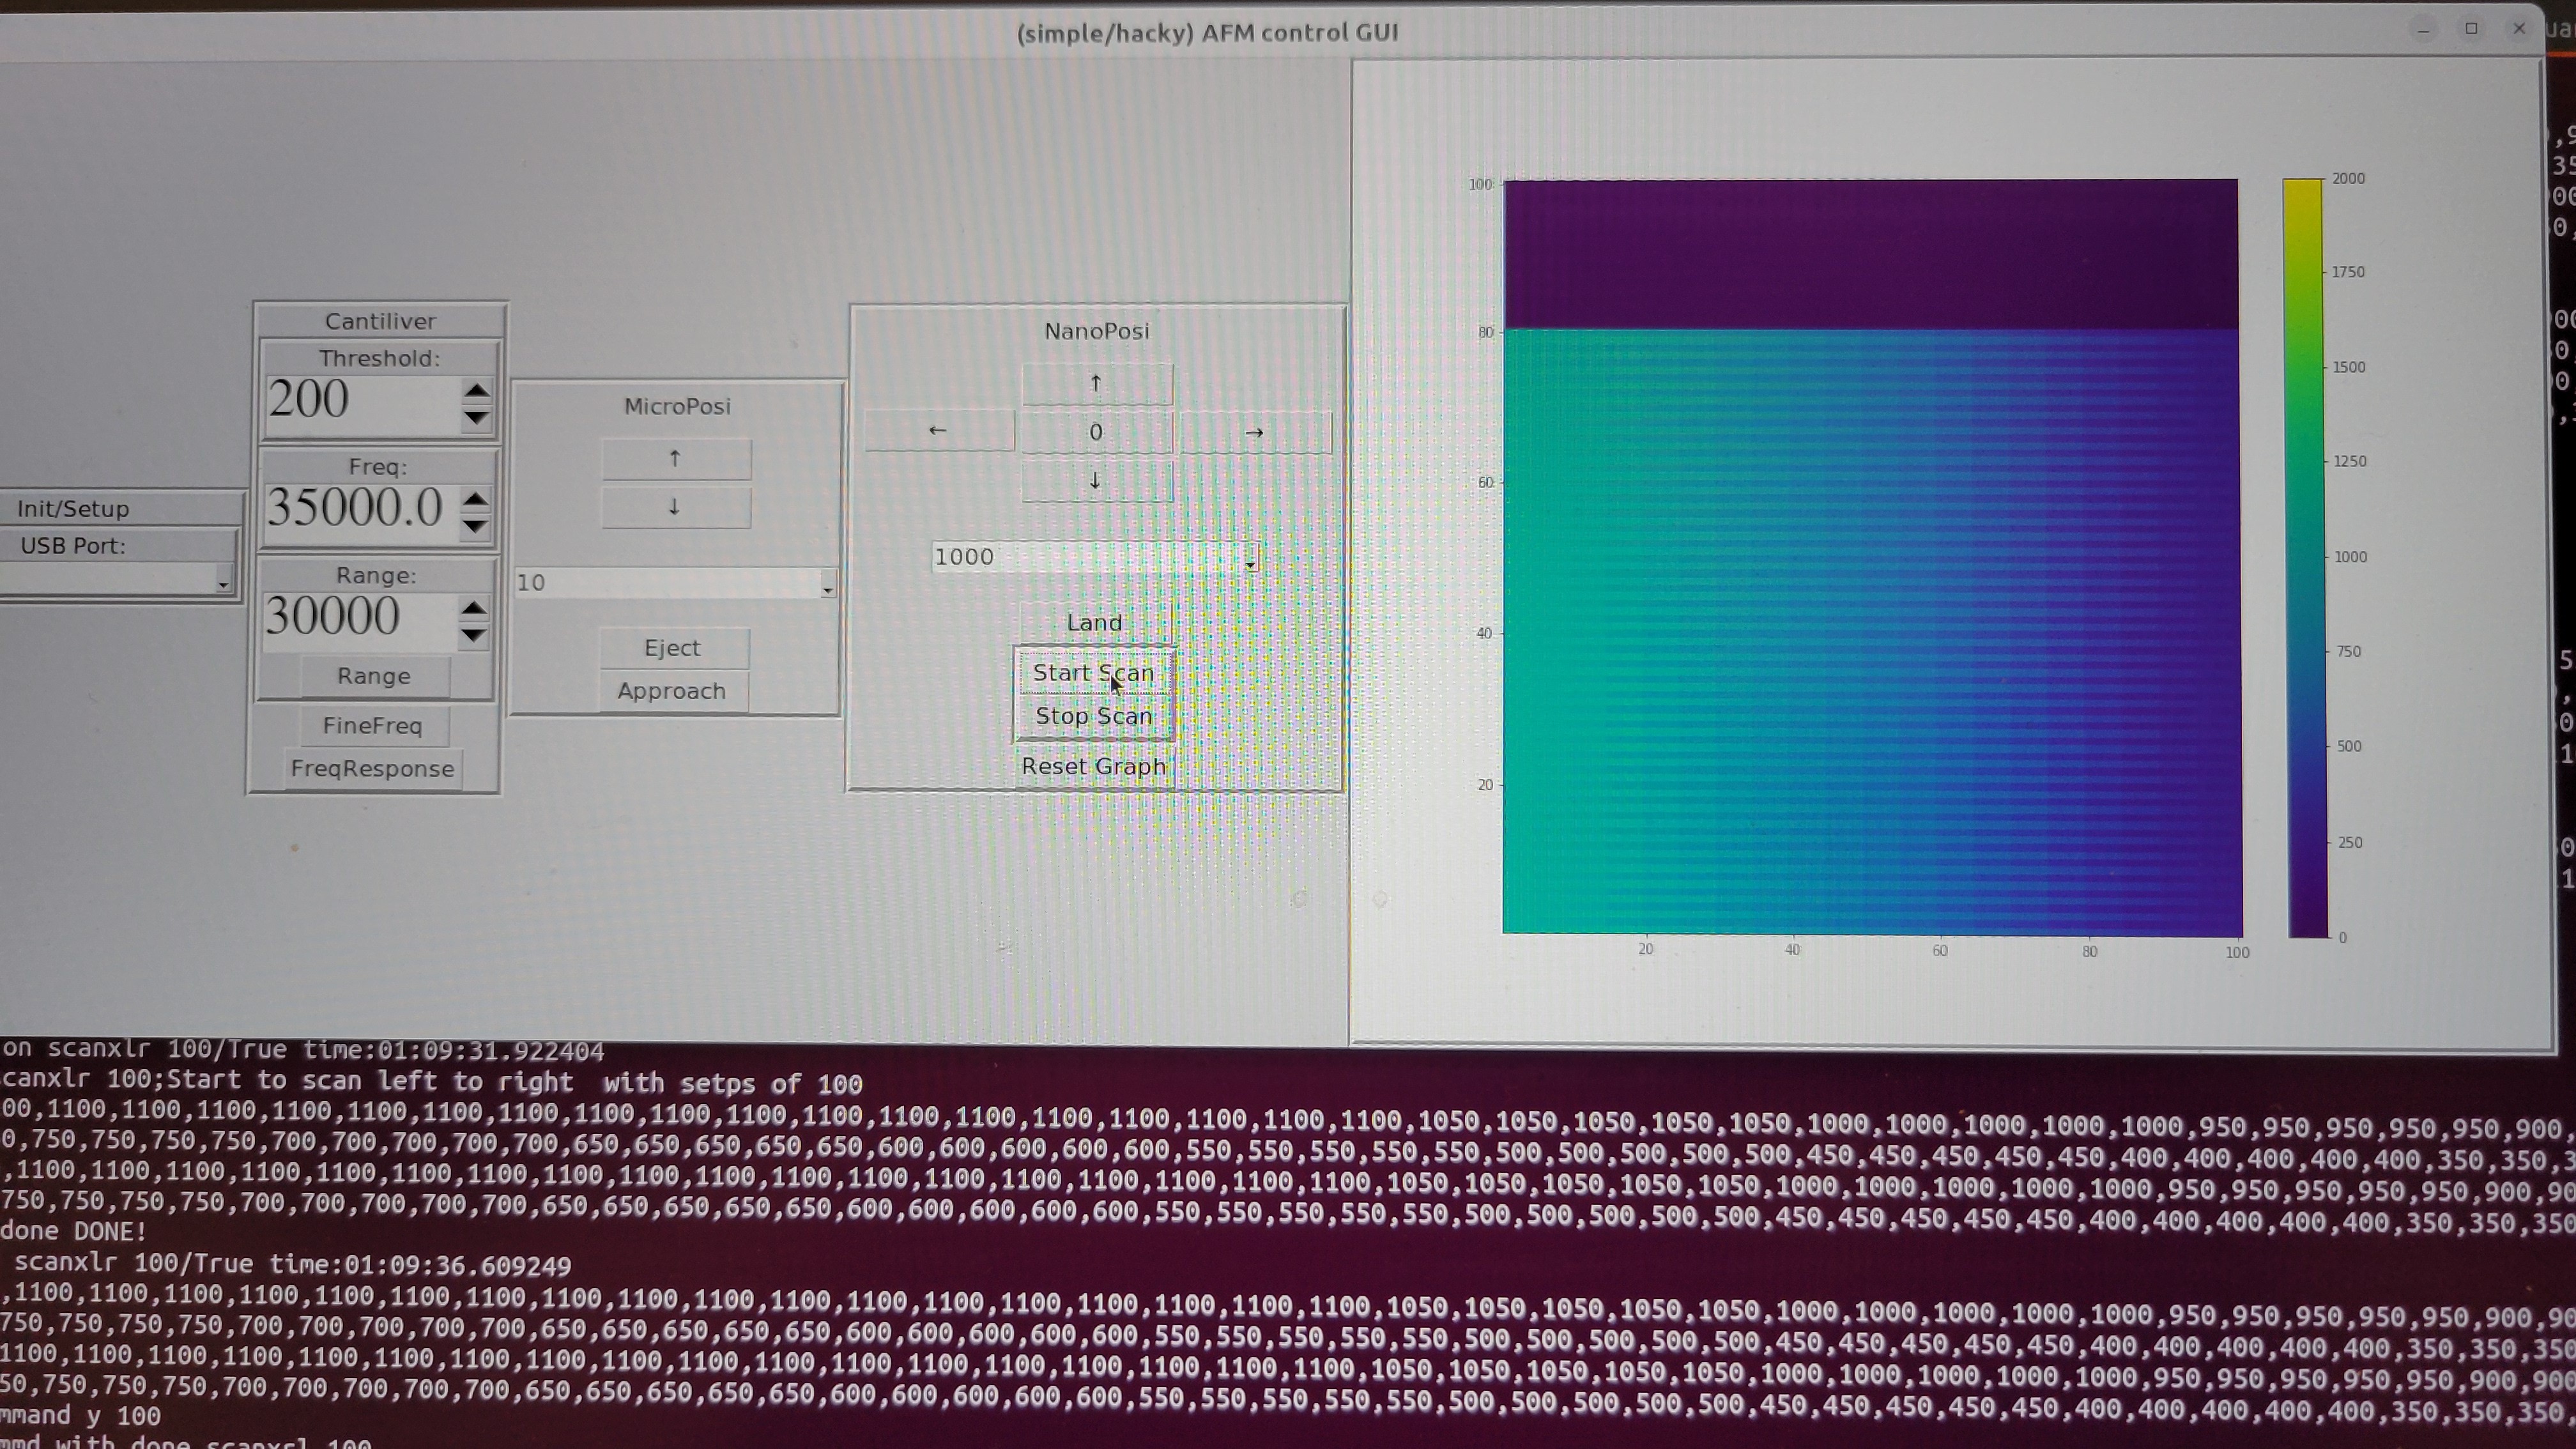
Now we can see a huge difference between previous with 2-3 colors to what we have now
(Again it's not real image it demo surface)
Another upgrade was serial communication. I've used one that was way to wasteful for poor Arduino Uno. I made something simple by myself as my comm. are very limited in structure. (Command name and one parameter).
Now communication running much smoother.
Ok, back to making sharp tips... I've decapped six quarts forks, three 8x3mm and three 6x2. Using microscope I've glued Tungsten wire 6mm once the glue was broken once I've moved it. Once 8mm broke as I touched it. So Ive left with two 8mm. One I was able to etch, and dropped from 1cm which made it glue break. The other once broke as the copper loop felt from it's place.
The main problem now is that it takes so much time to glue each Tungsten wire, plus, it takes 24 hours for glue to fully cure.
Now I've tried to glue with magnifying glass of soldering station. Although magnification is only x3 it was still possible to glue quite easily and there was almost no restriction on how many I can do in parallel

Although I used to much glue, the method works really fine. Now, when process is cheap and fast I can do many hopefully some will be successful I need only few.
Run another bunch with four quartz forks

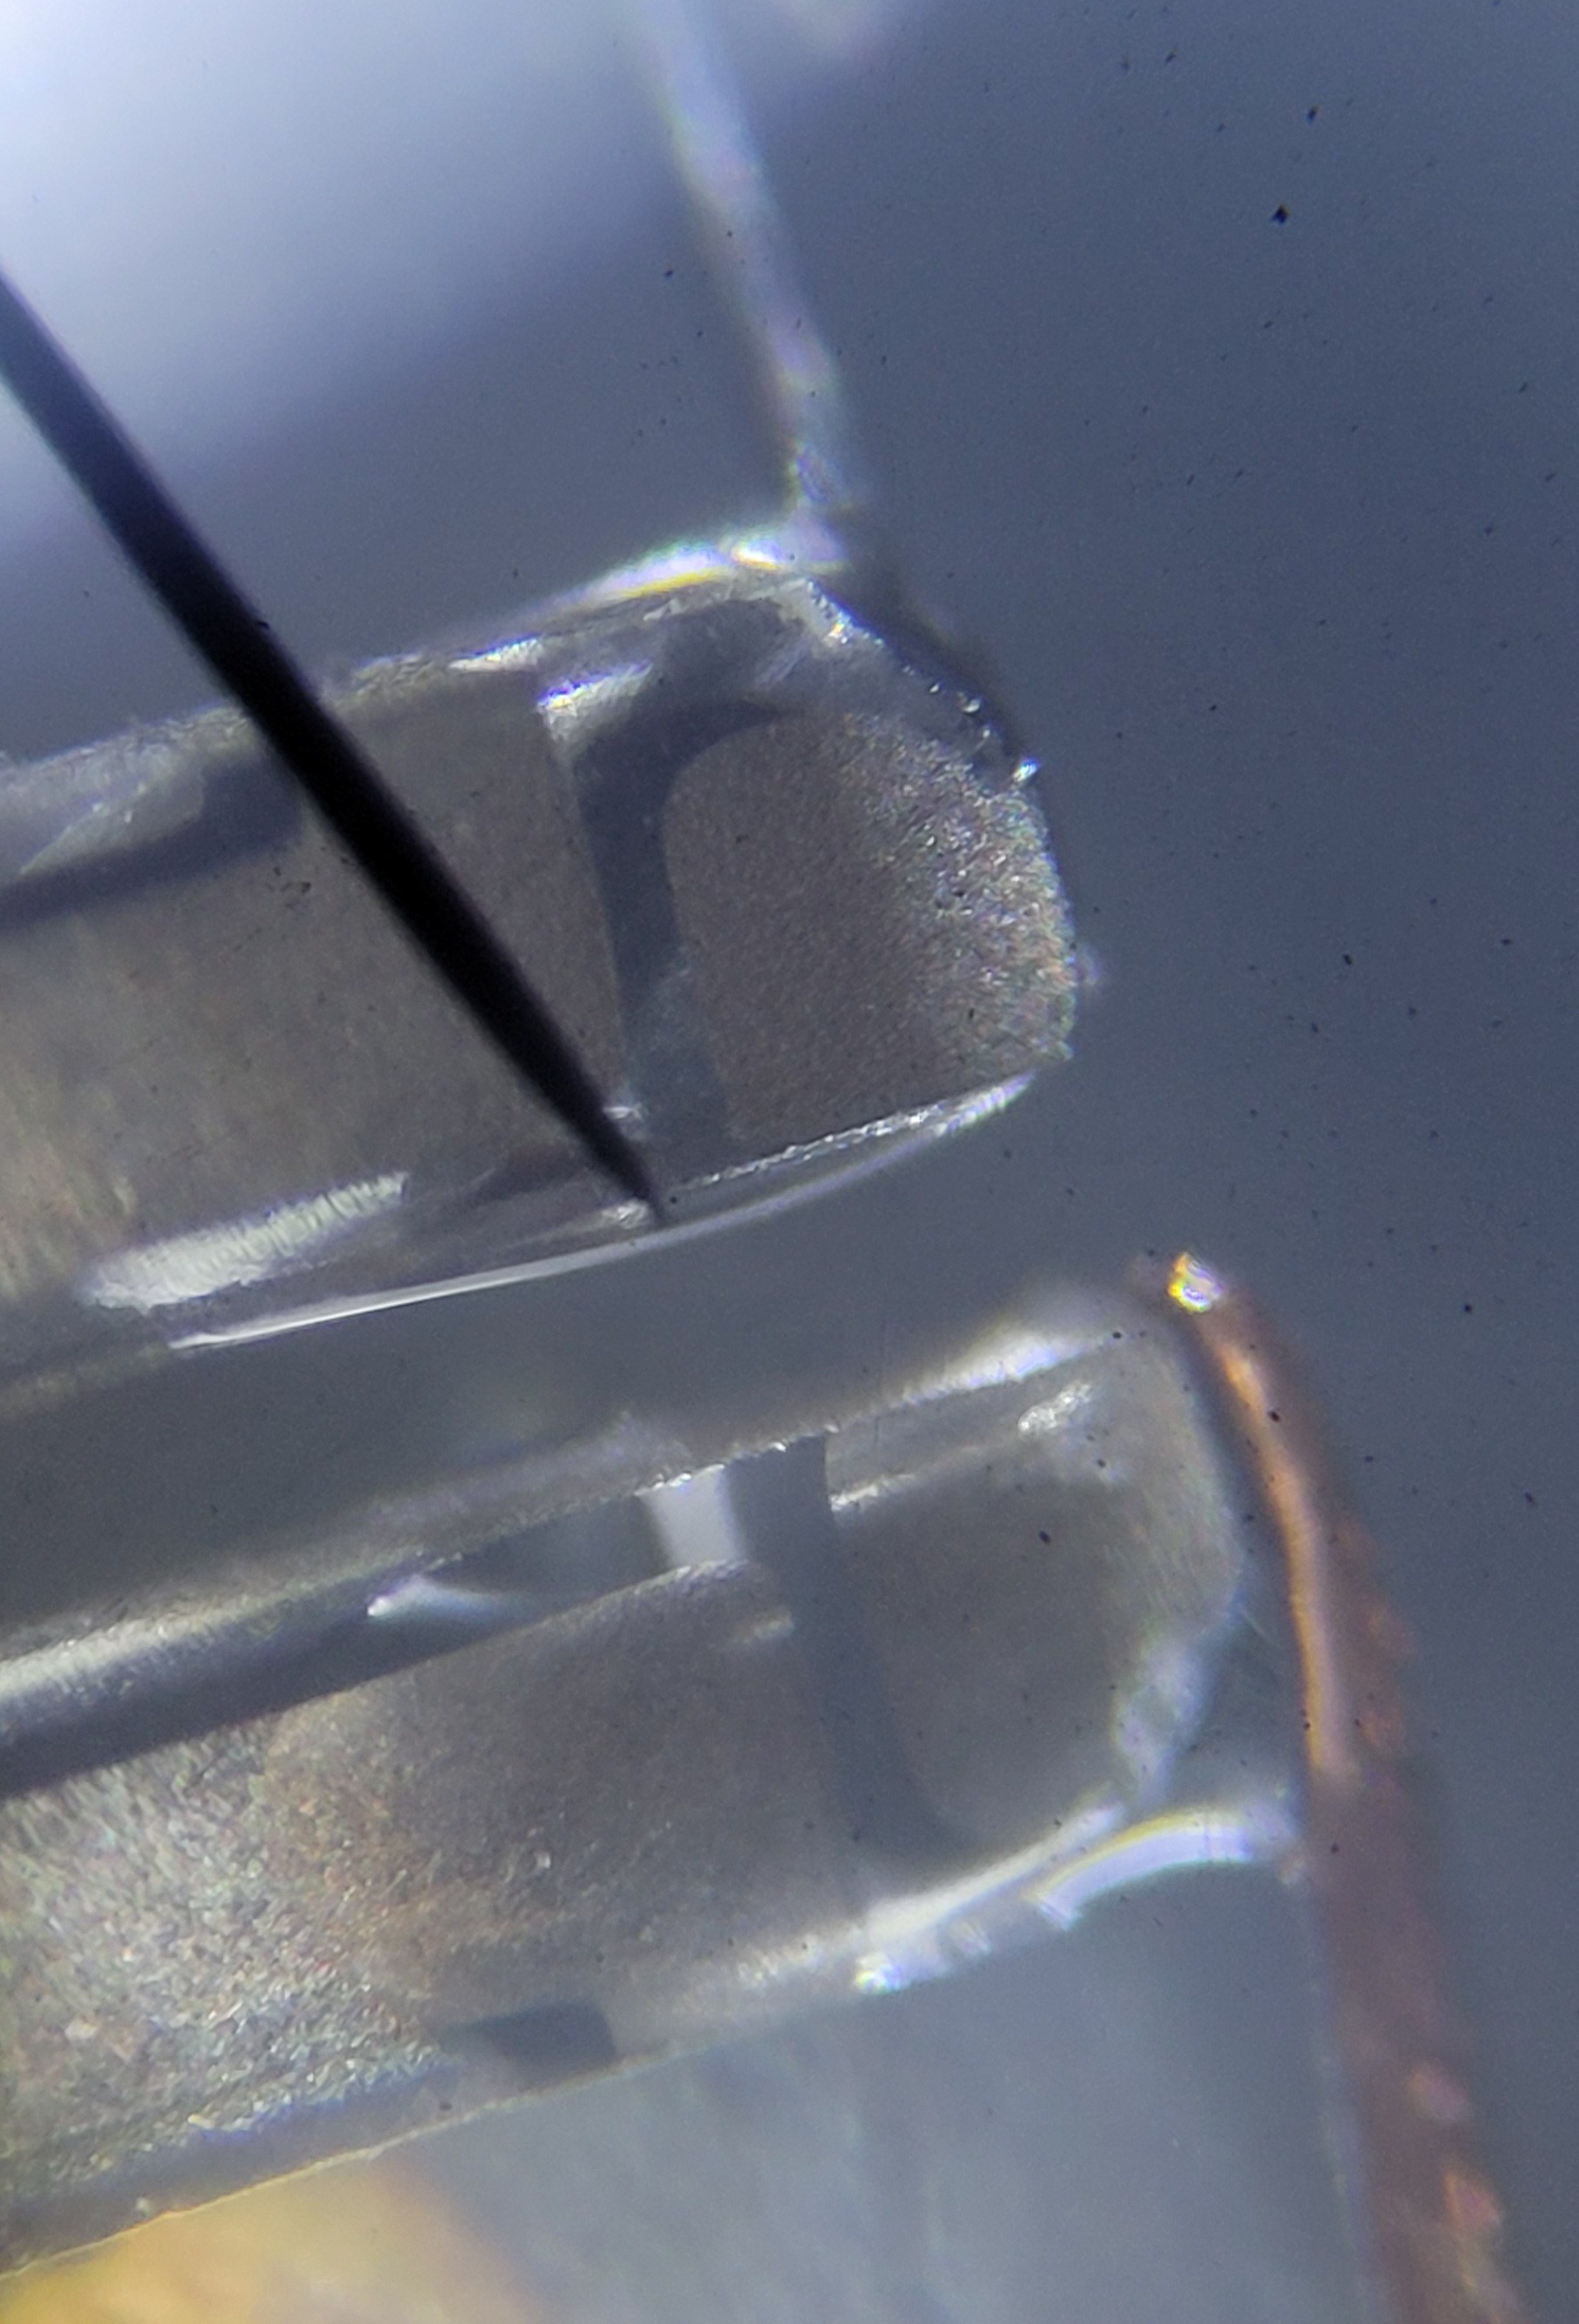
When looking under the microscope you can see issues
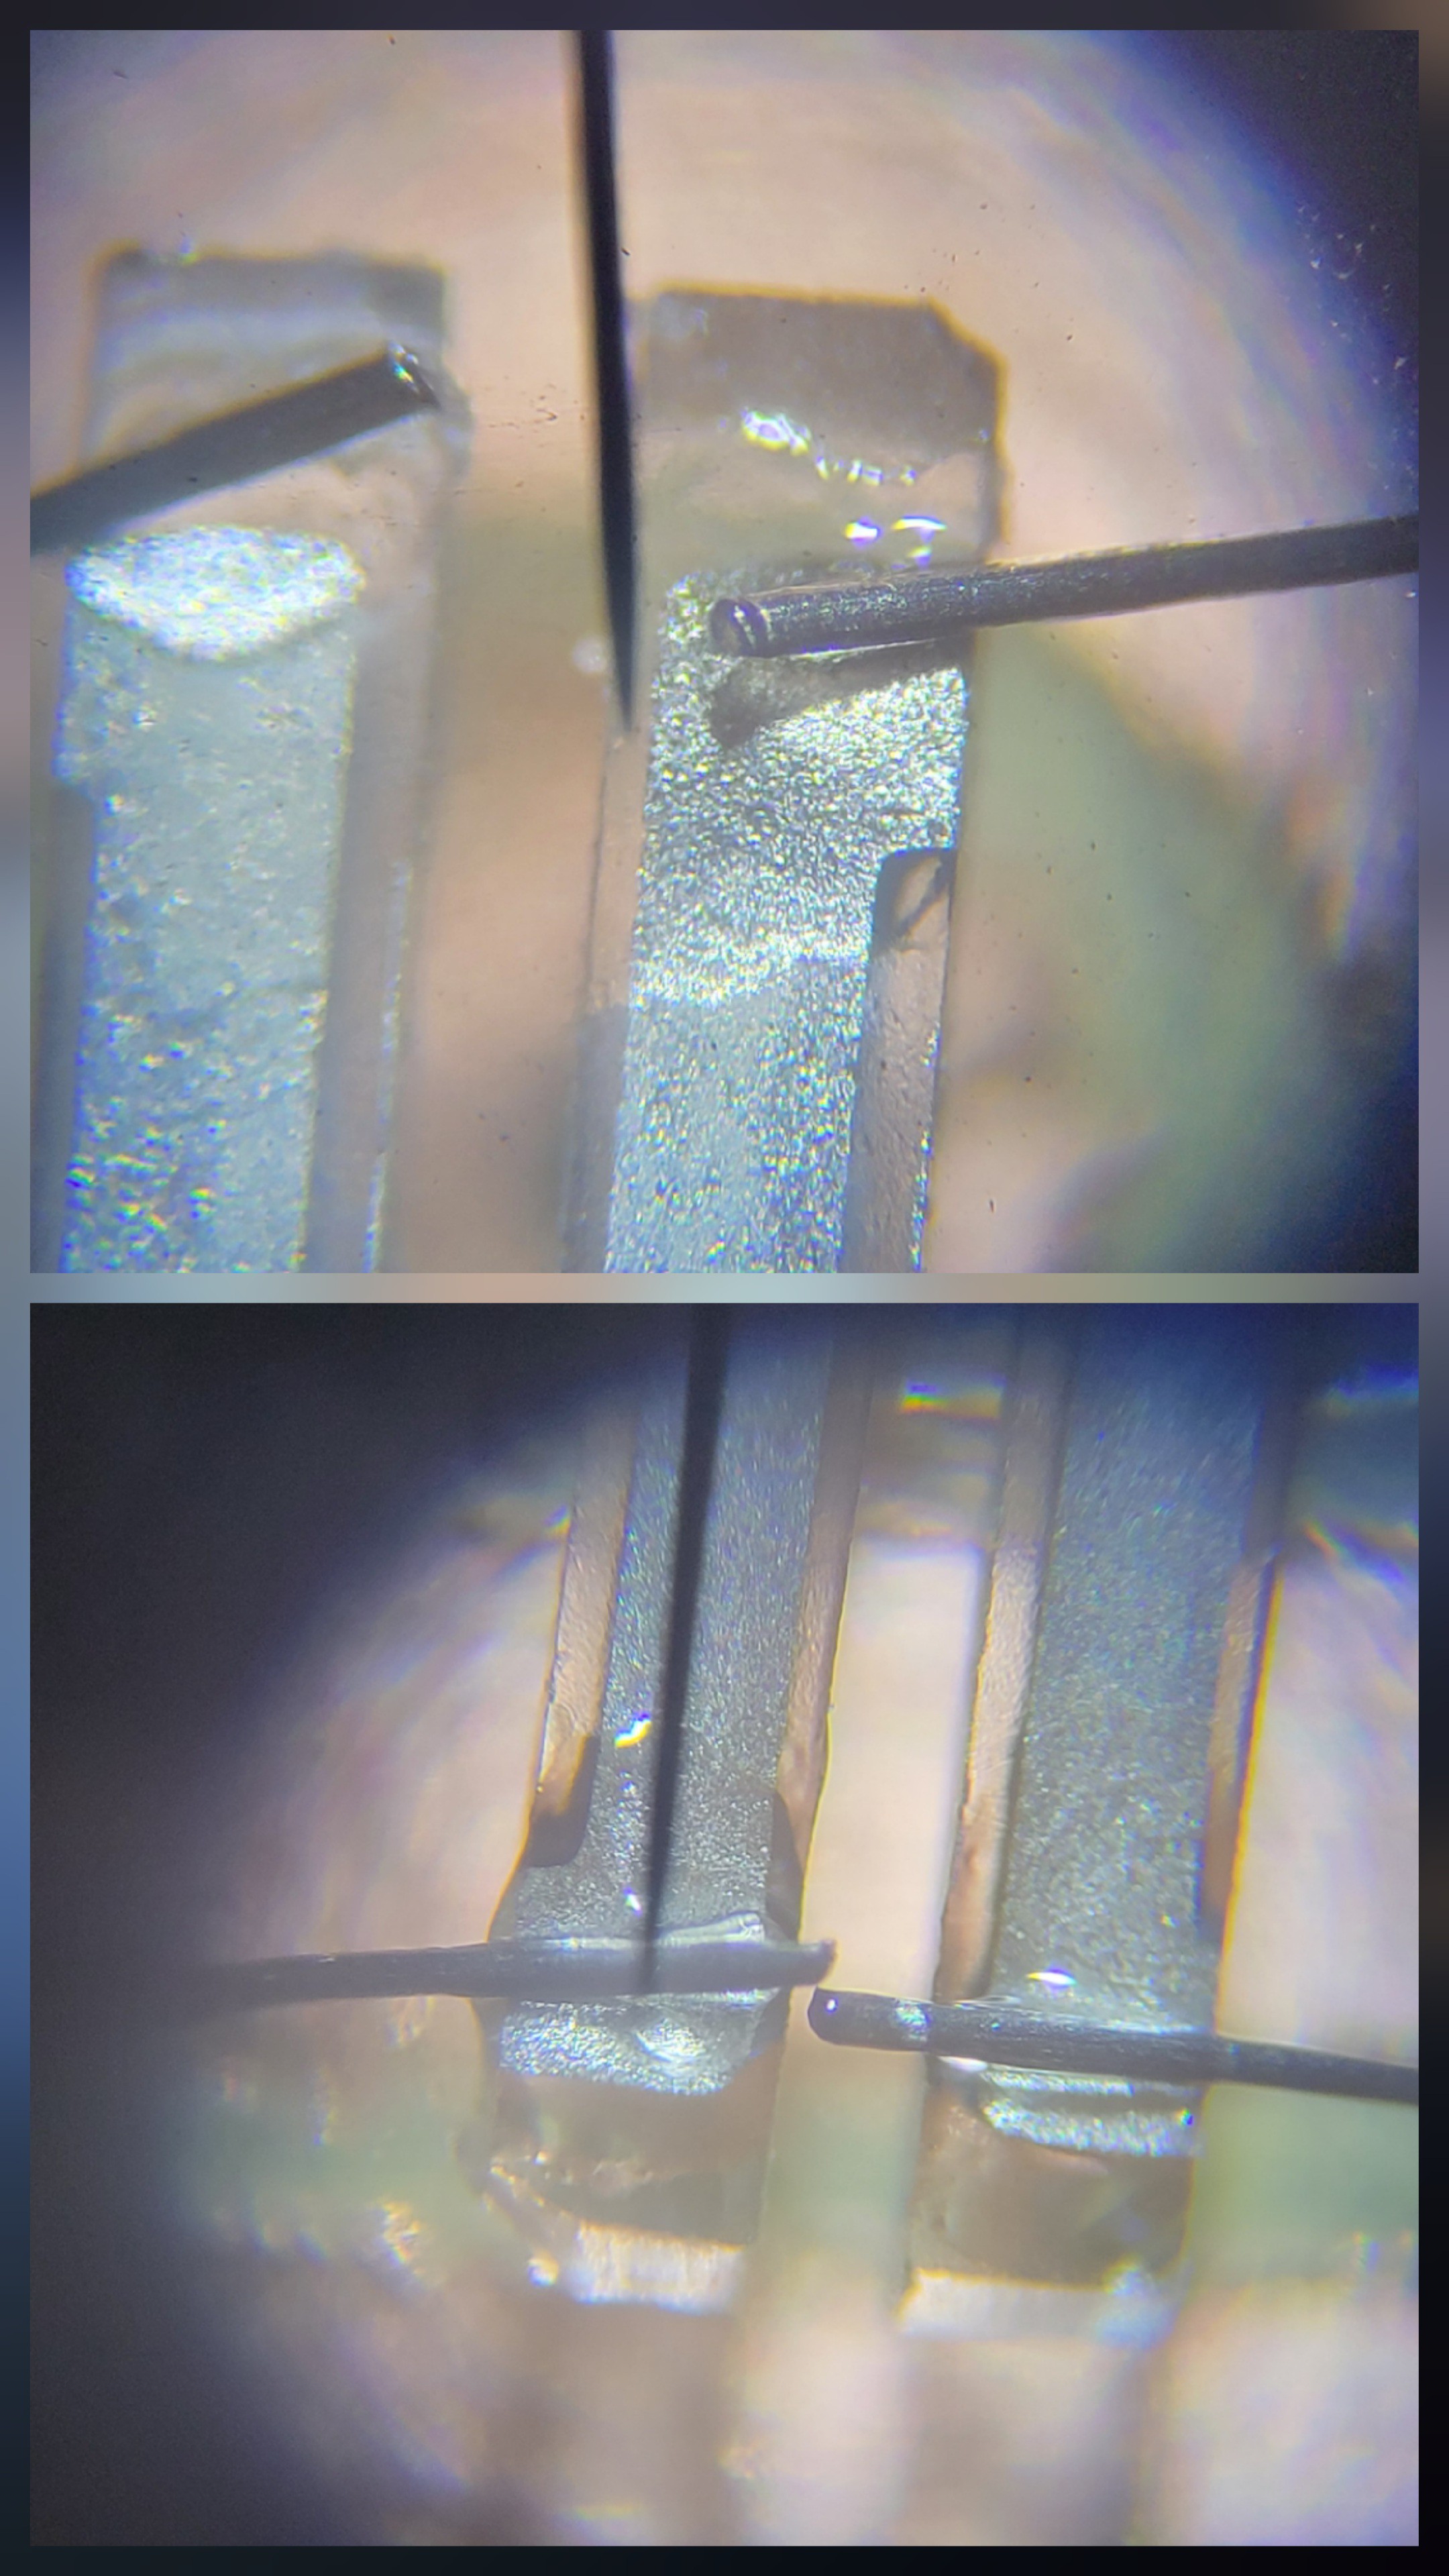
So some of quartz fork irreversible, except this it works really good. Although quality is worse it will be smoothed out be quantity.
Another idea is to use glue bulb instead of opposite wire, it will be much easier to construct and fix if necessary
I've just discovered that NaOH not just destroying super glue but also quartz fork itself.
It took me few etching tries just to realize that Tungsten wire was covered with glue, therefore I didn't get nice cone form.
To fix this problem quartz fork must be below so glue will go towards the fork and not spill down towards Tungsten wire.
Also managed to remove quartz fork from it's base but could solder it properly (it was soldered but short circuit)
I've destroyed dozen of quartz forks but was not able to make one properly. It's not easy as I thought it would be. I guess I was very lucky to get those beautiful cones in the begging of the project.
I've just realise how can I continue from this point. My problem is that super glue curing very fast. I don't have time to set everything correctly. The perfect would be doing under a microscope but it's almost impossible with time frame of super glue. Now, I've realize I can try UV glue, this way I don't have to hurry up. Set everything as I want only then shine some UV light to cure it.
Ok, connected small LED to USB. Looks good
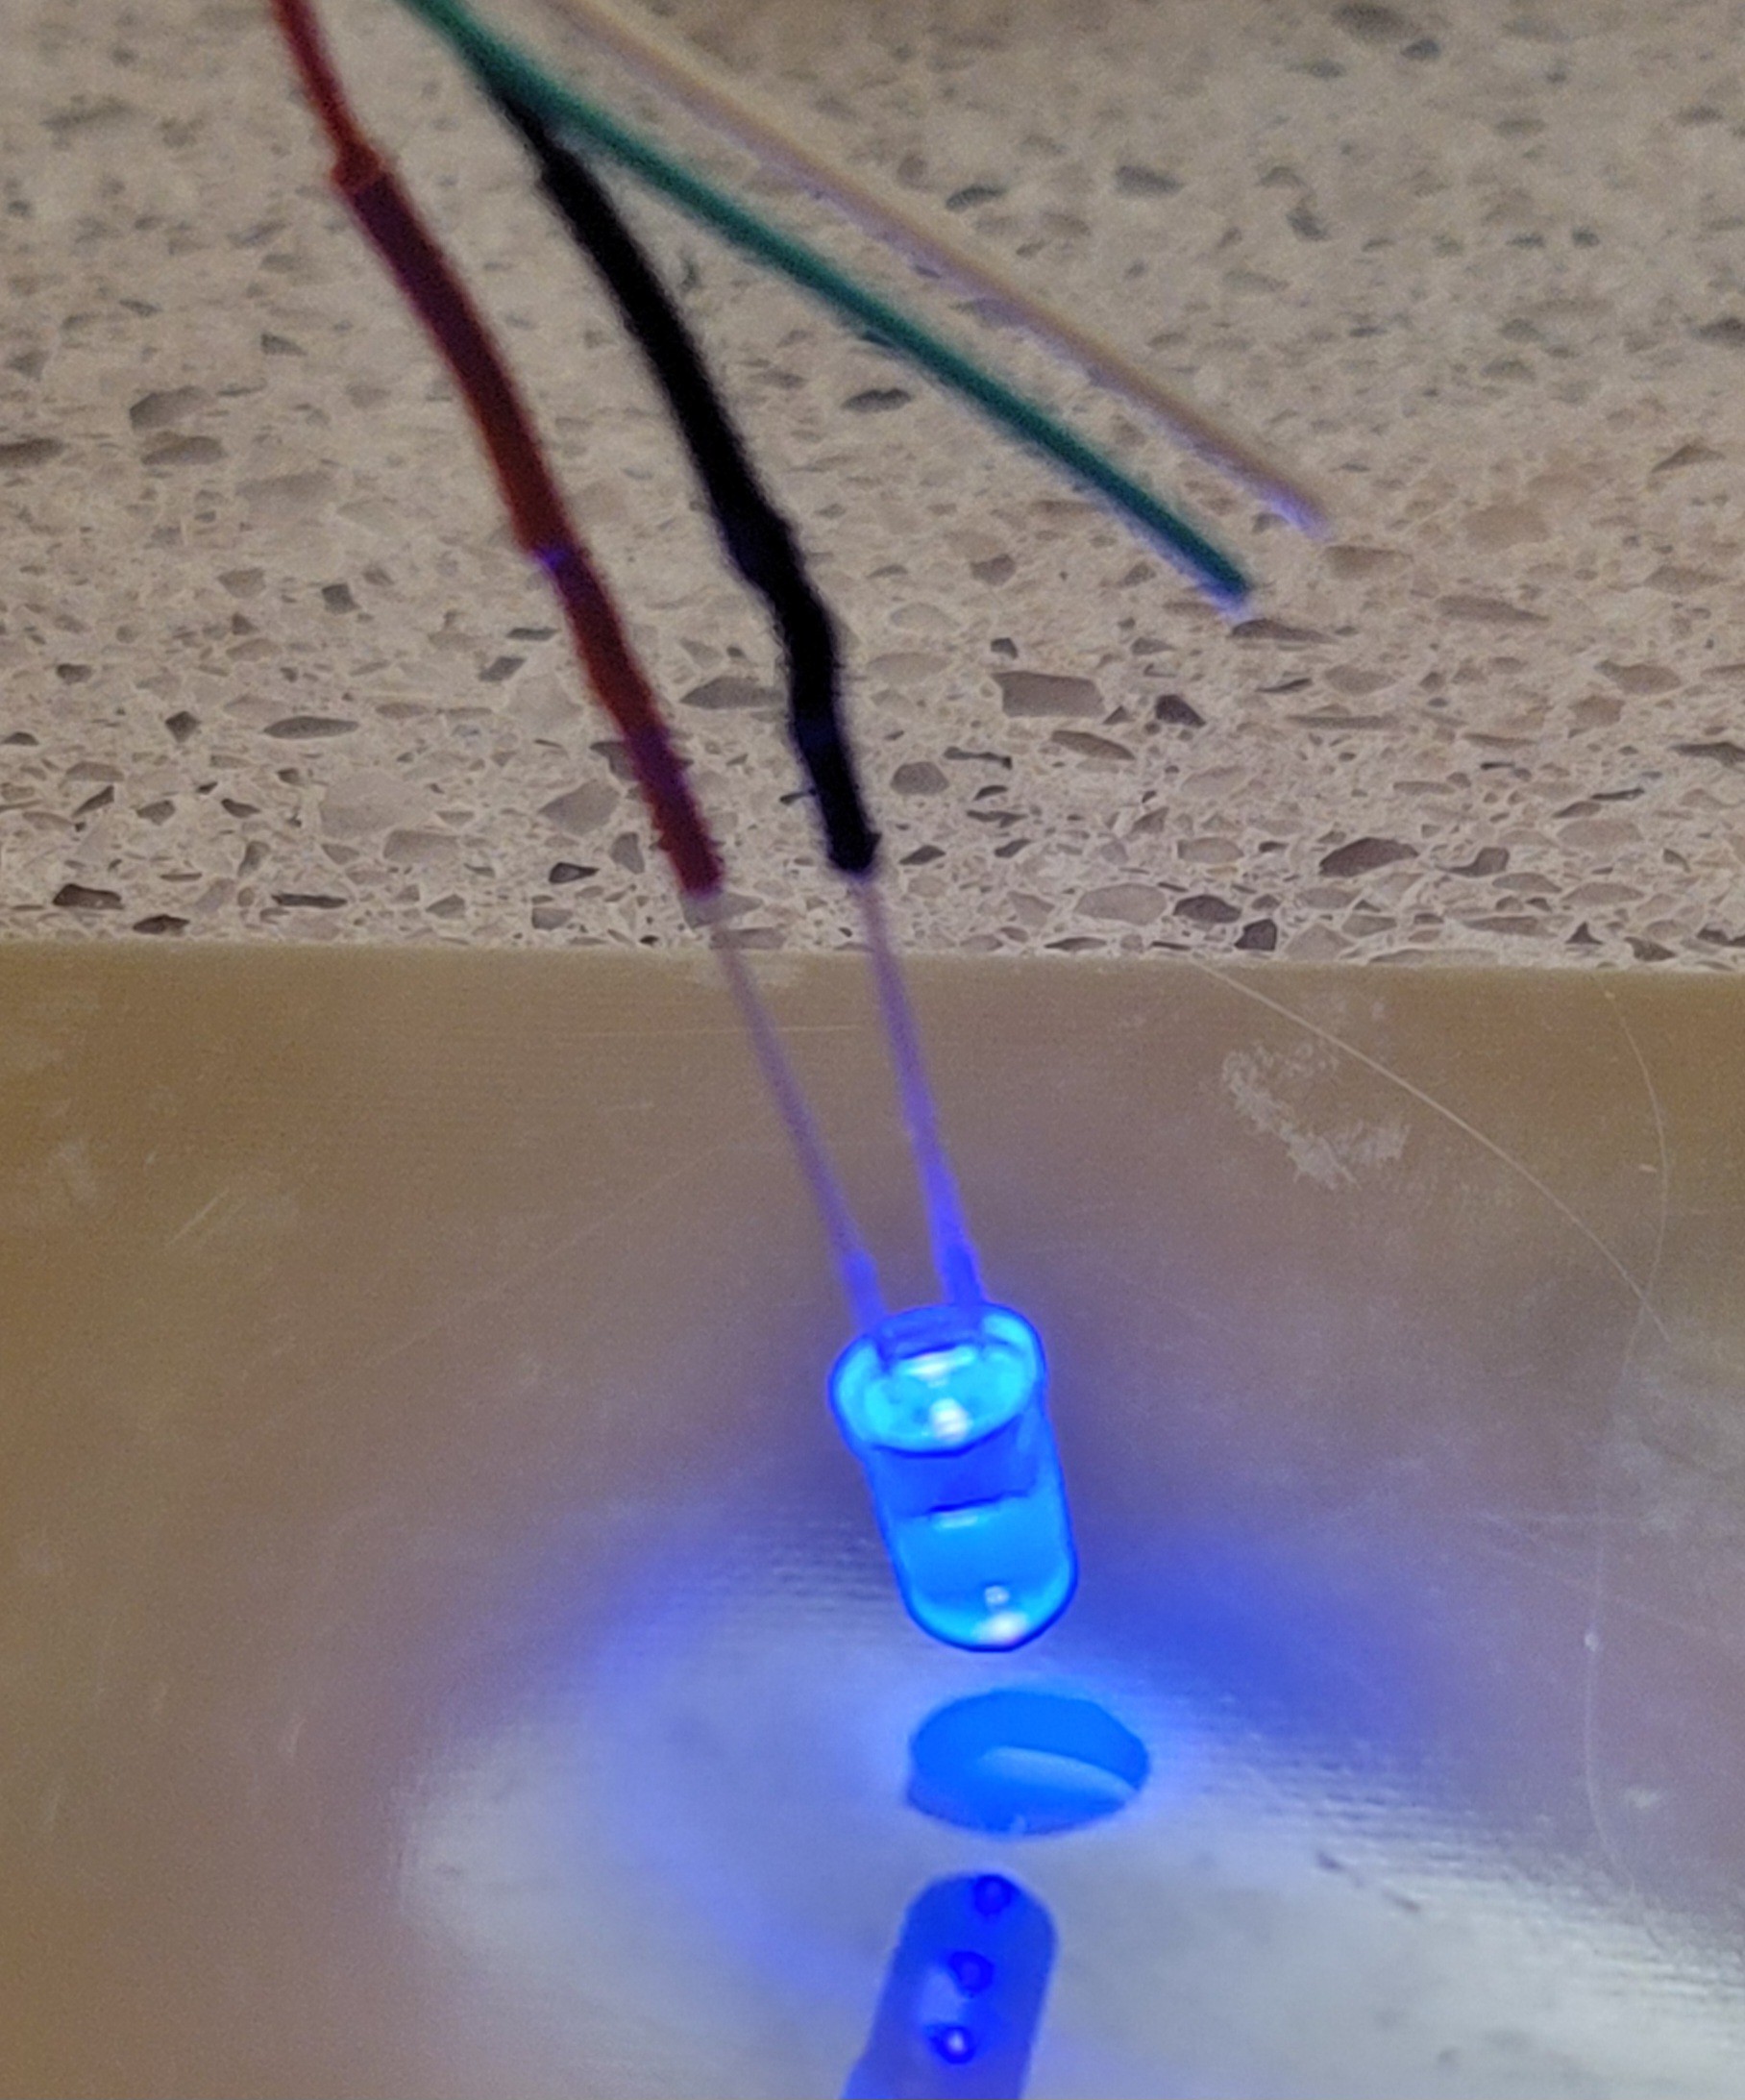
After only five minutes the bulb became hard the other bulb that was not exposed to UV was still liquid. It's working more than I was expecting. Tomorrow I will try to connect Tungsten wire to quartz fork, using microscope and finish with UV light.
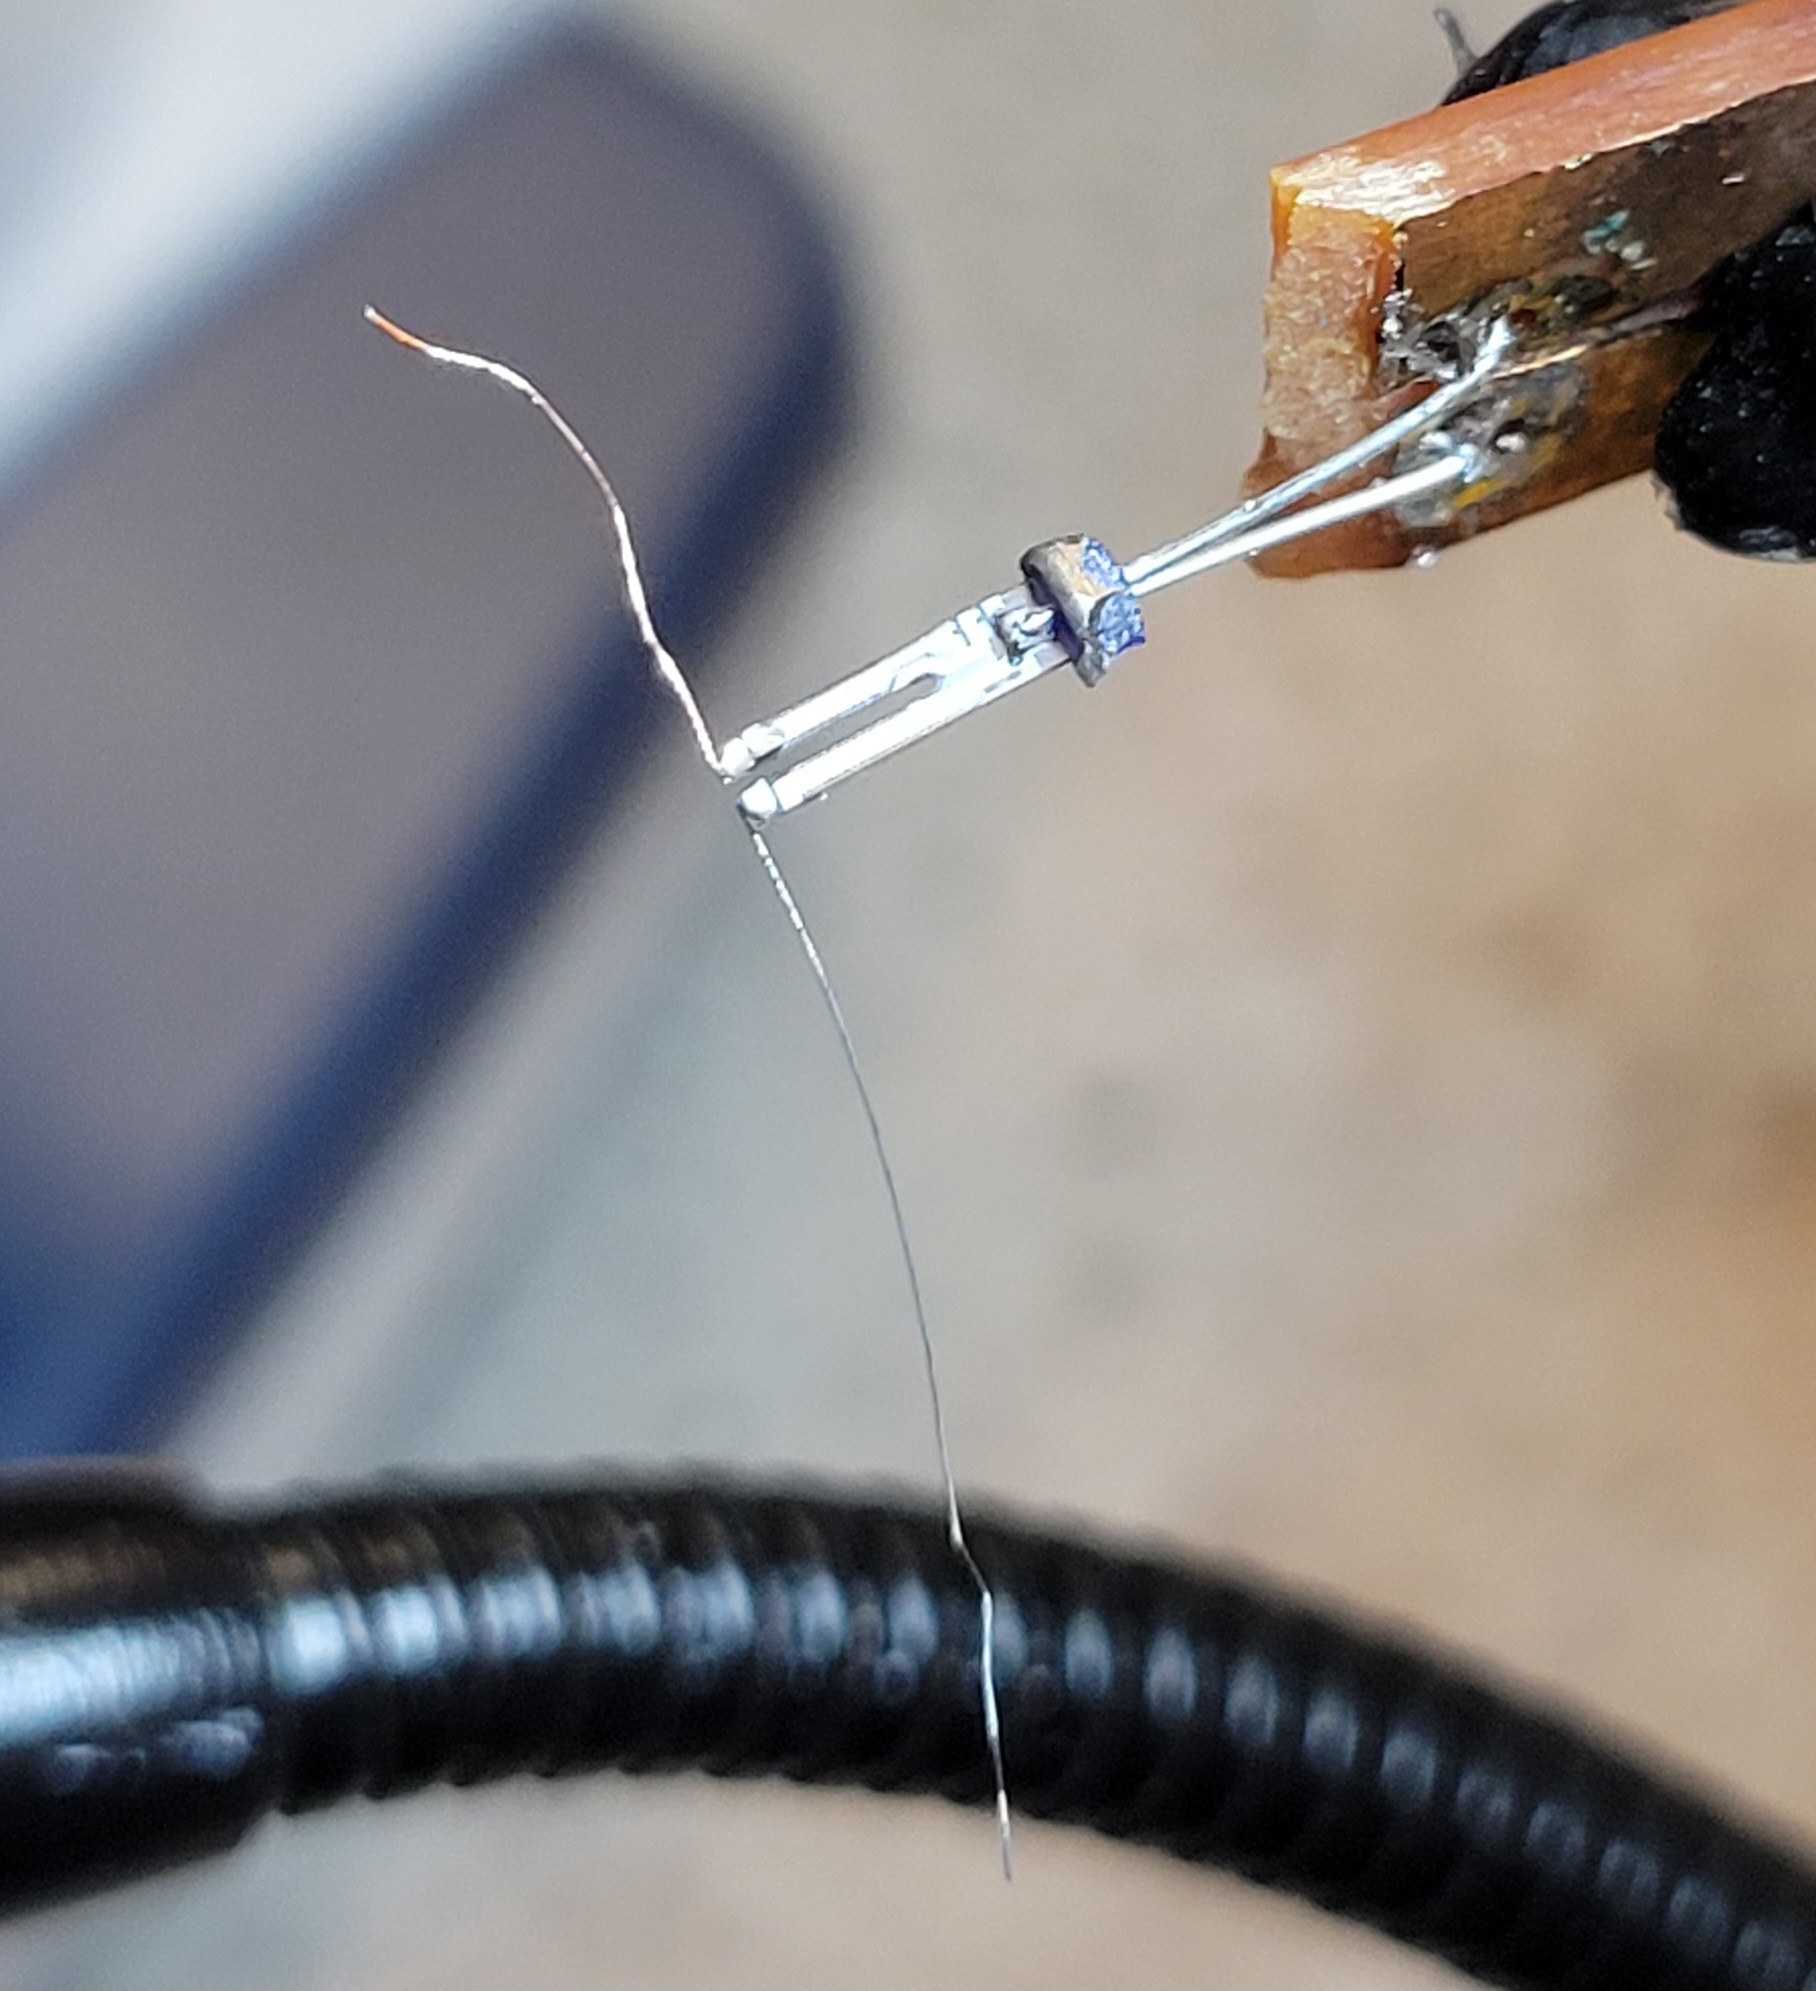
Working with UV glue is so easy. I've managed to connect Tungsten wire to quartz fork without any issue.
Here is my setup:
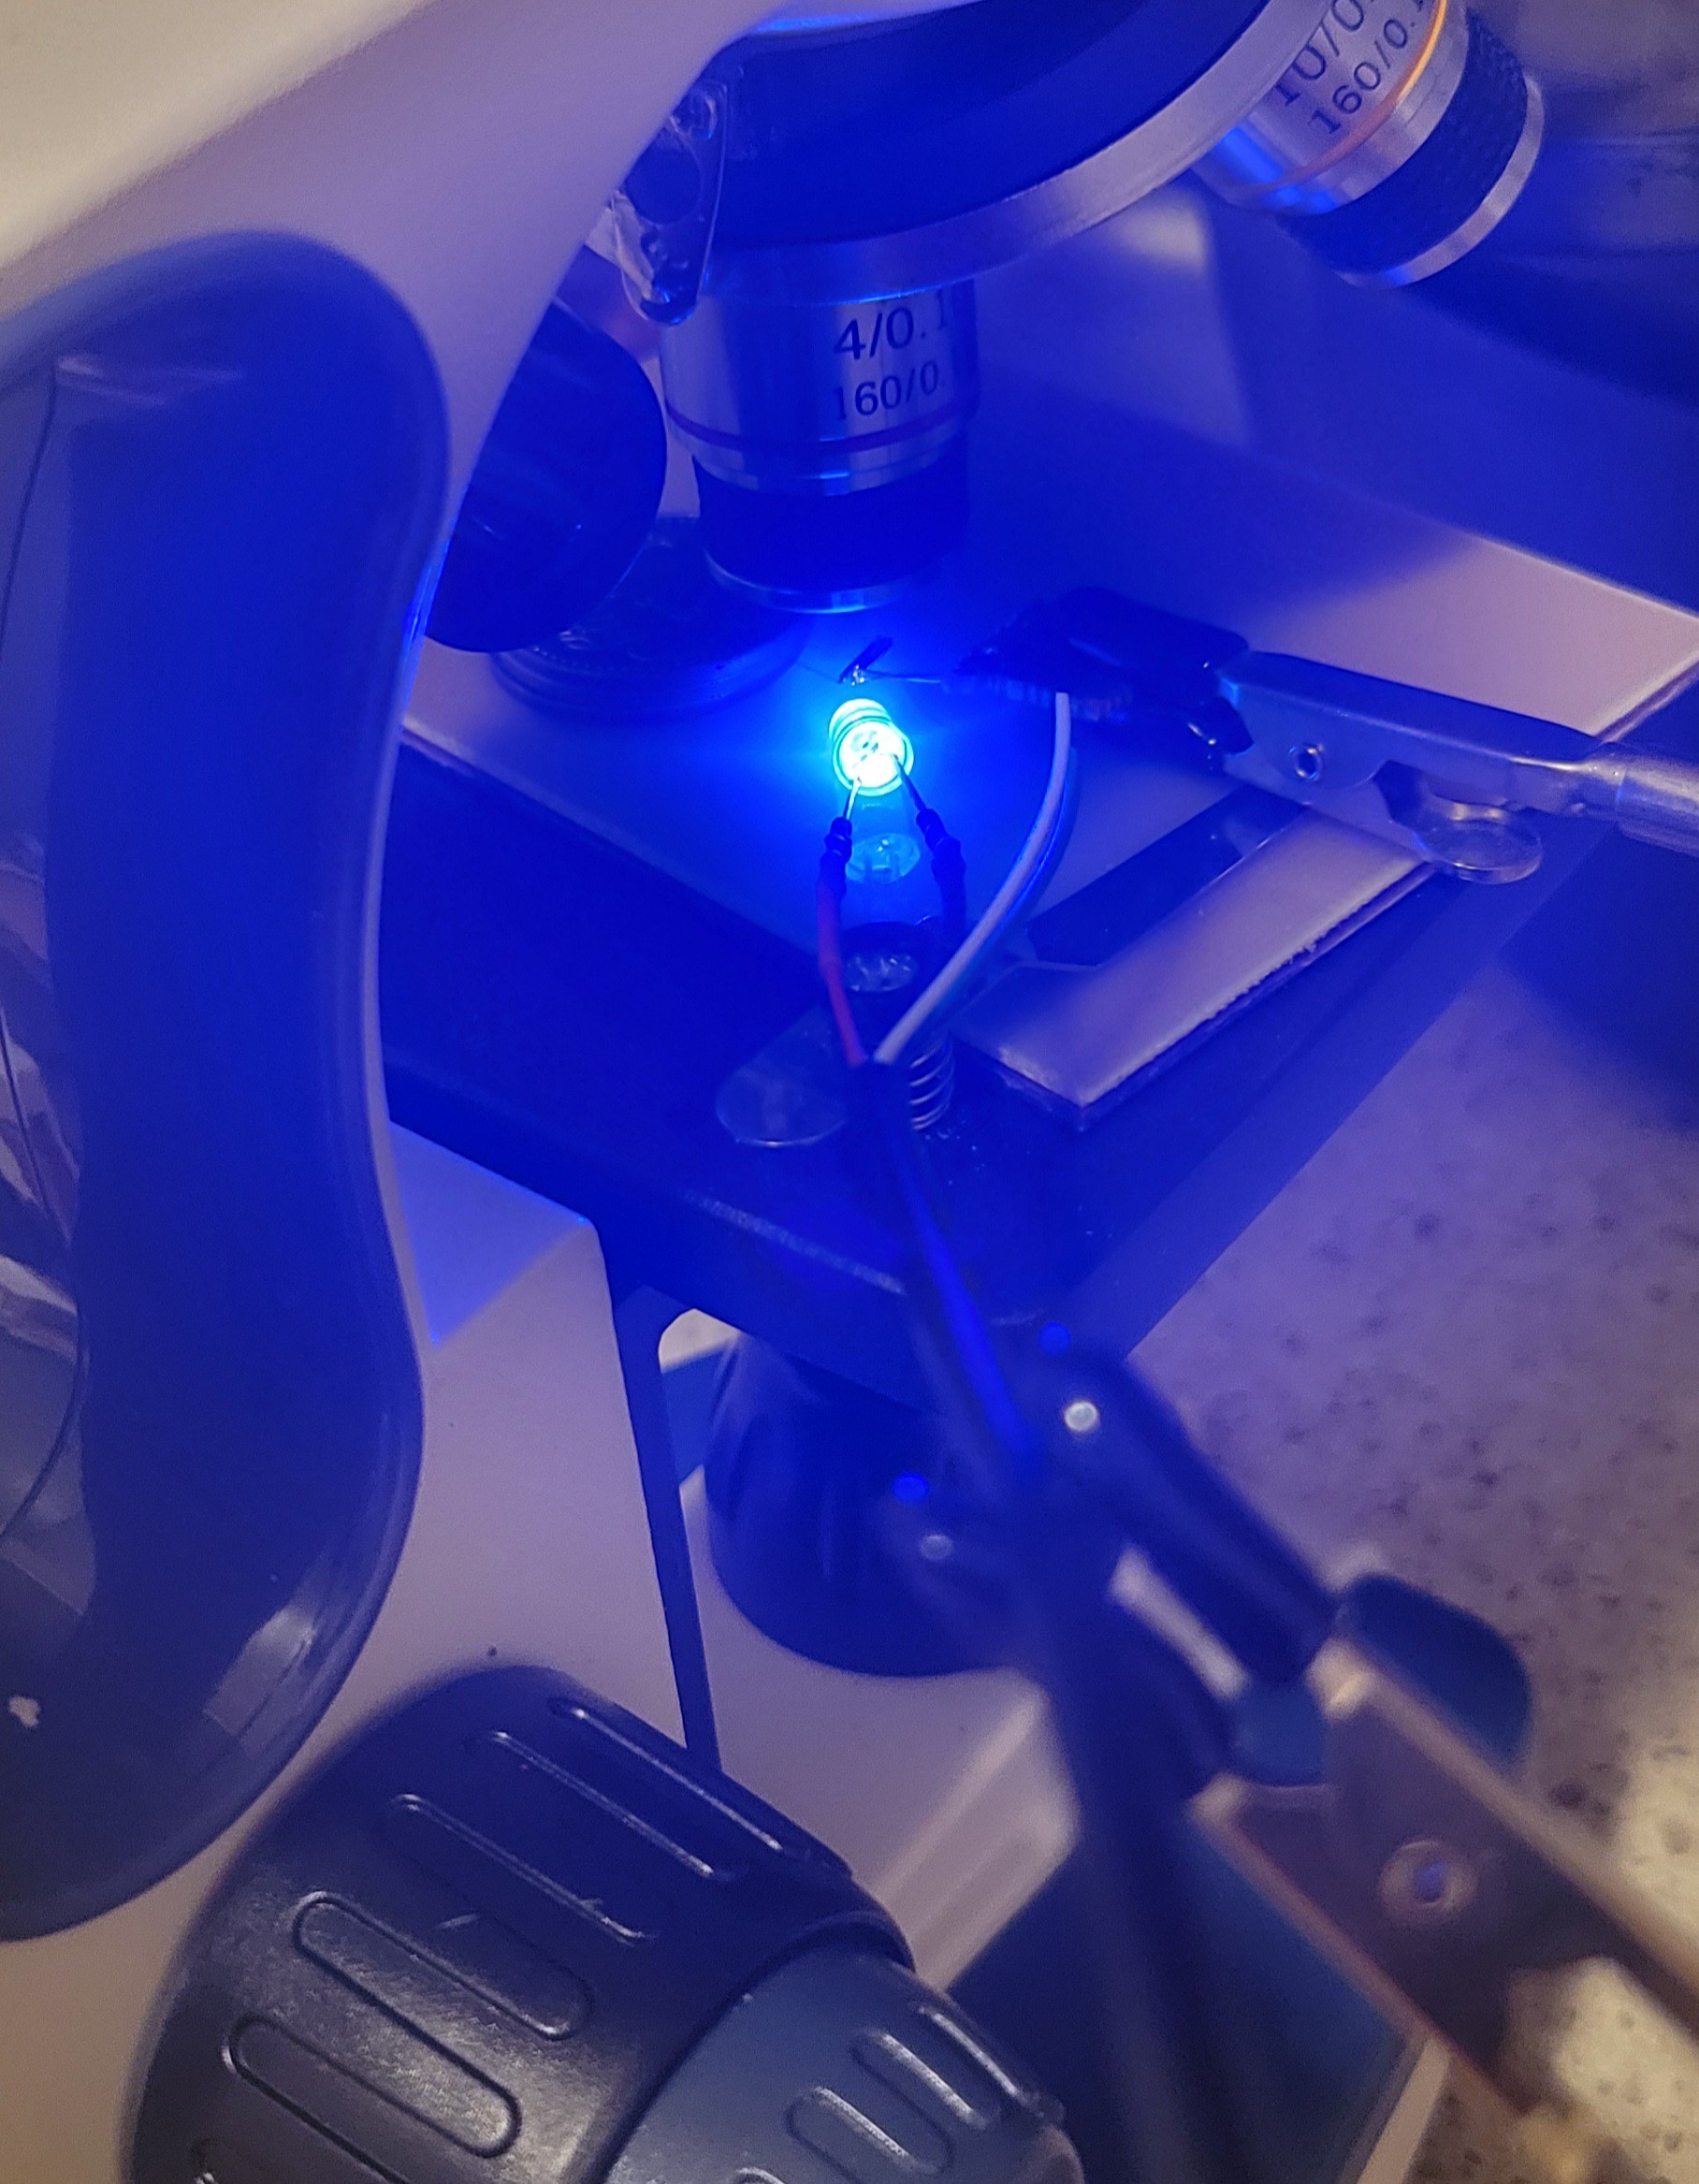
After few minutes of UV currying. The connection looked very strong much better than supper glue after same period of time.
I've learned how to use UV glue in this microscopic environment. Got pretty good connections.
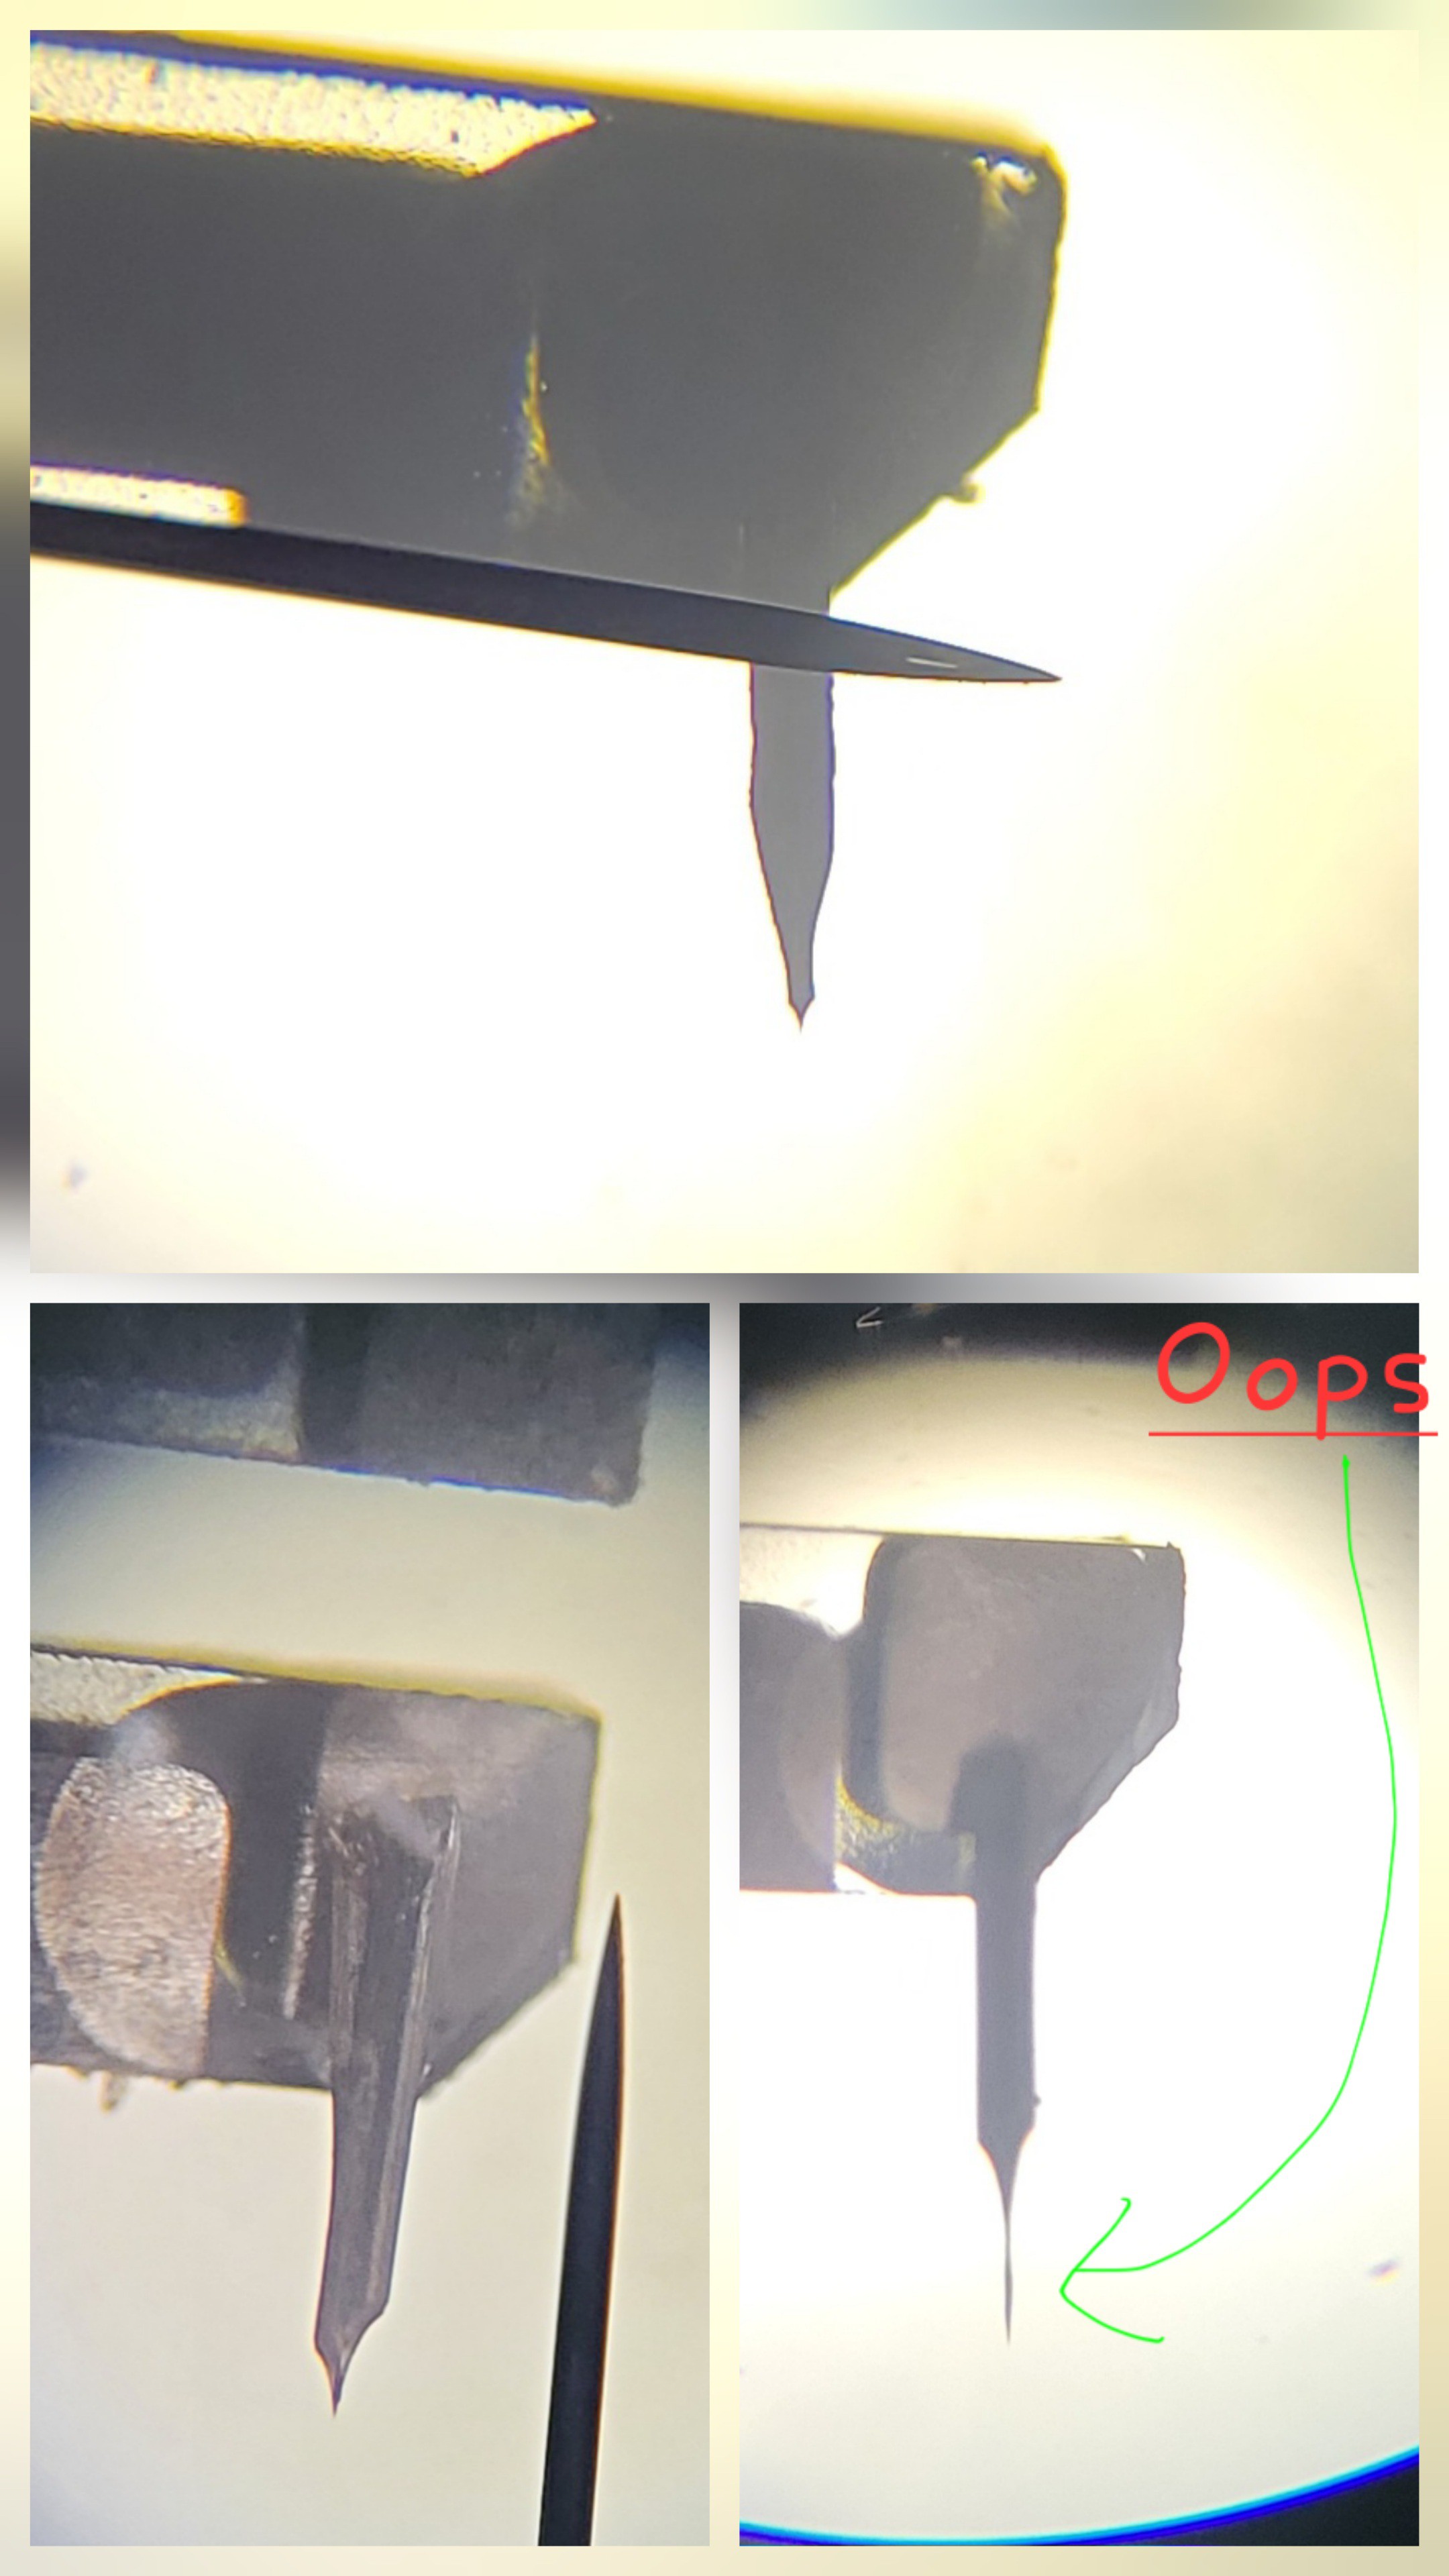
Finally I was able to make double sided connection

Just to realize that I have connected to the same wire from both sides. I've connect one from top and other from the side.
But no worries, it's still a test since I am out of 3x8mm quartz fork. While waiting I am trying my technique on 2x6mm which I am not sure would be able to work.
Made another copy, this time electrically it's looks ok.
I will run just on case, but I don't believe it's going to work this time as glue covered much of one forks prongs.
I will run it tomorrow see if it's working.
Well, it took me about a week... I am really busy this days...
Long story short it didn't work, for some reason the first connection (which I've checked and it was conductive) was disconnected maybe it moved with time... sad...
Just realized I could add Tungsten wire on one side and copper wire on other side of Quartz Fork. To remove material from copper just place it in Ferric chloride or Sulfuric acid for a bit.
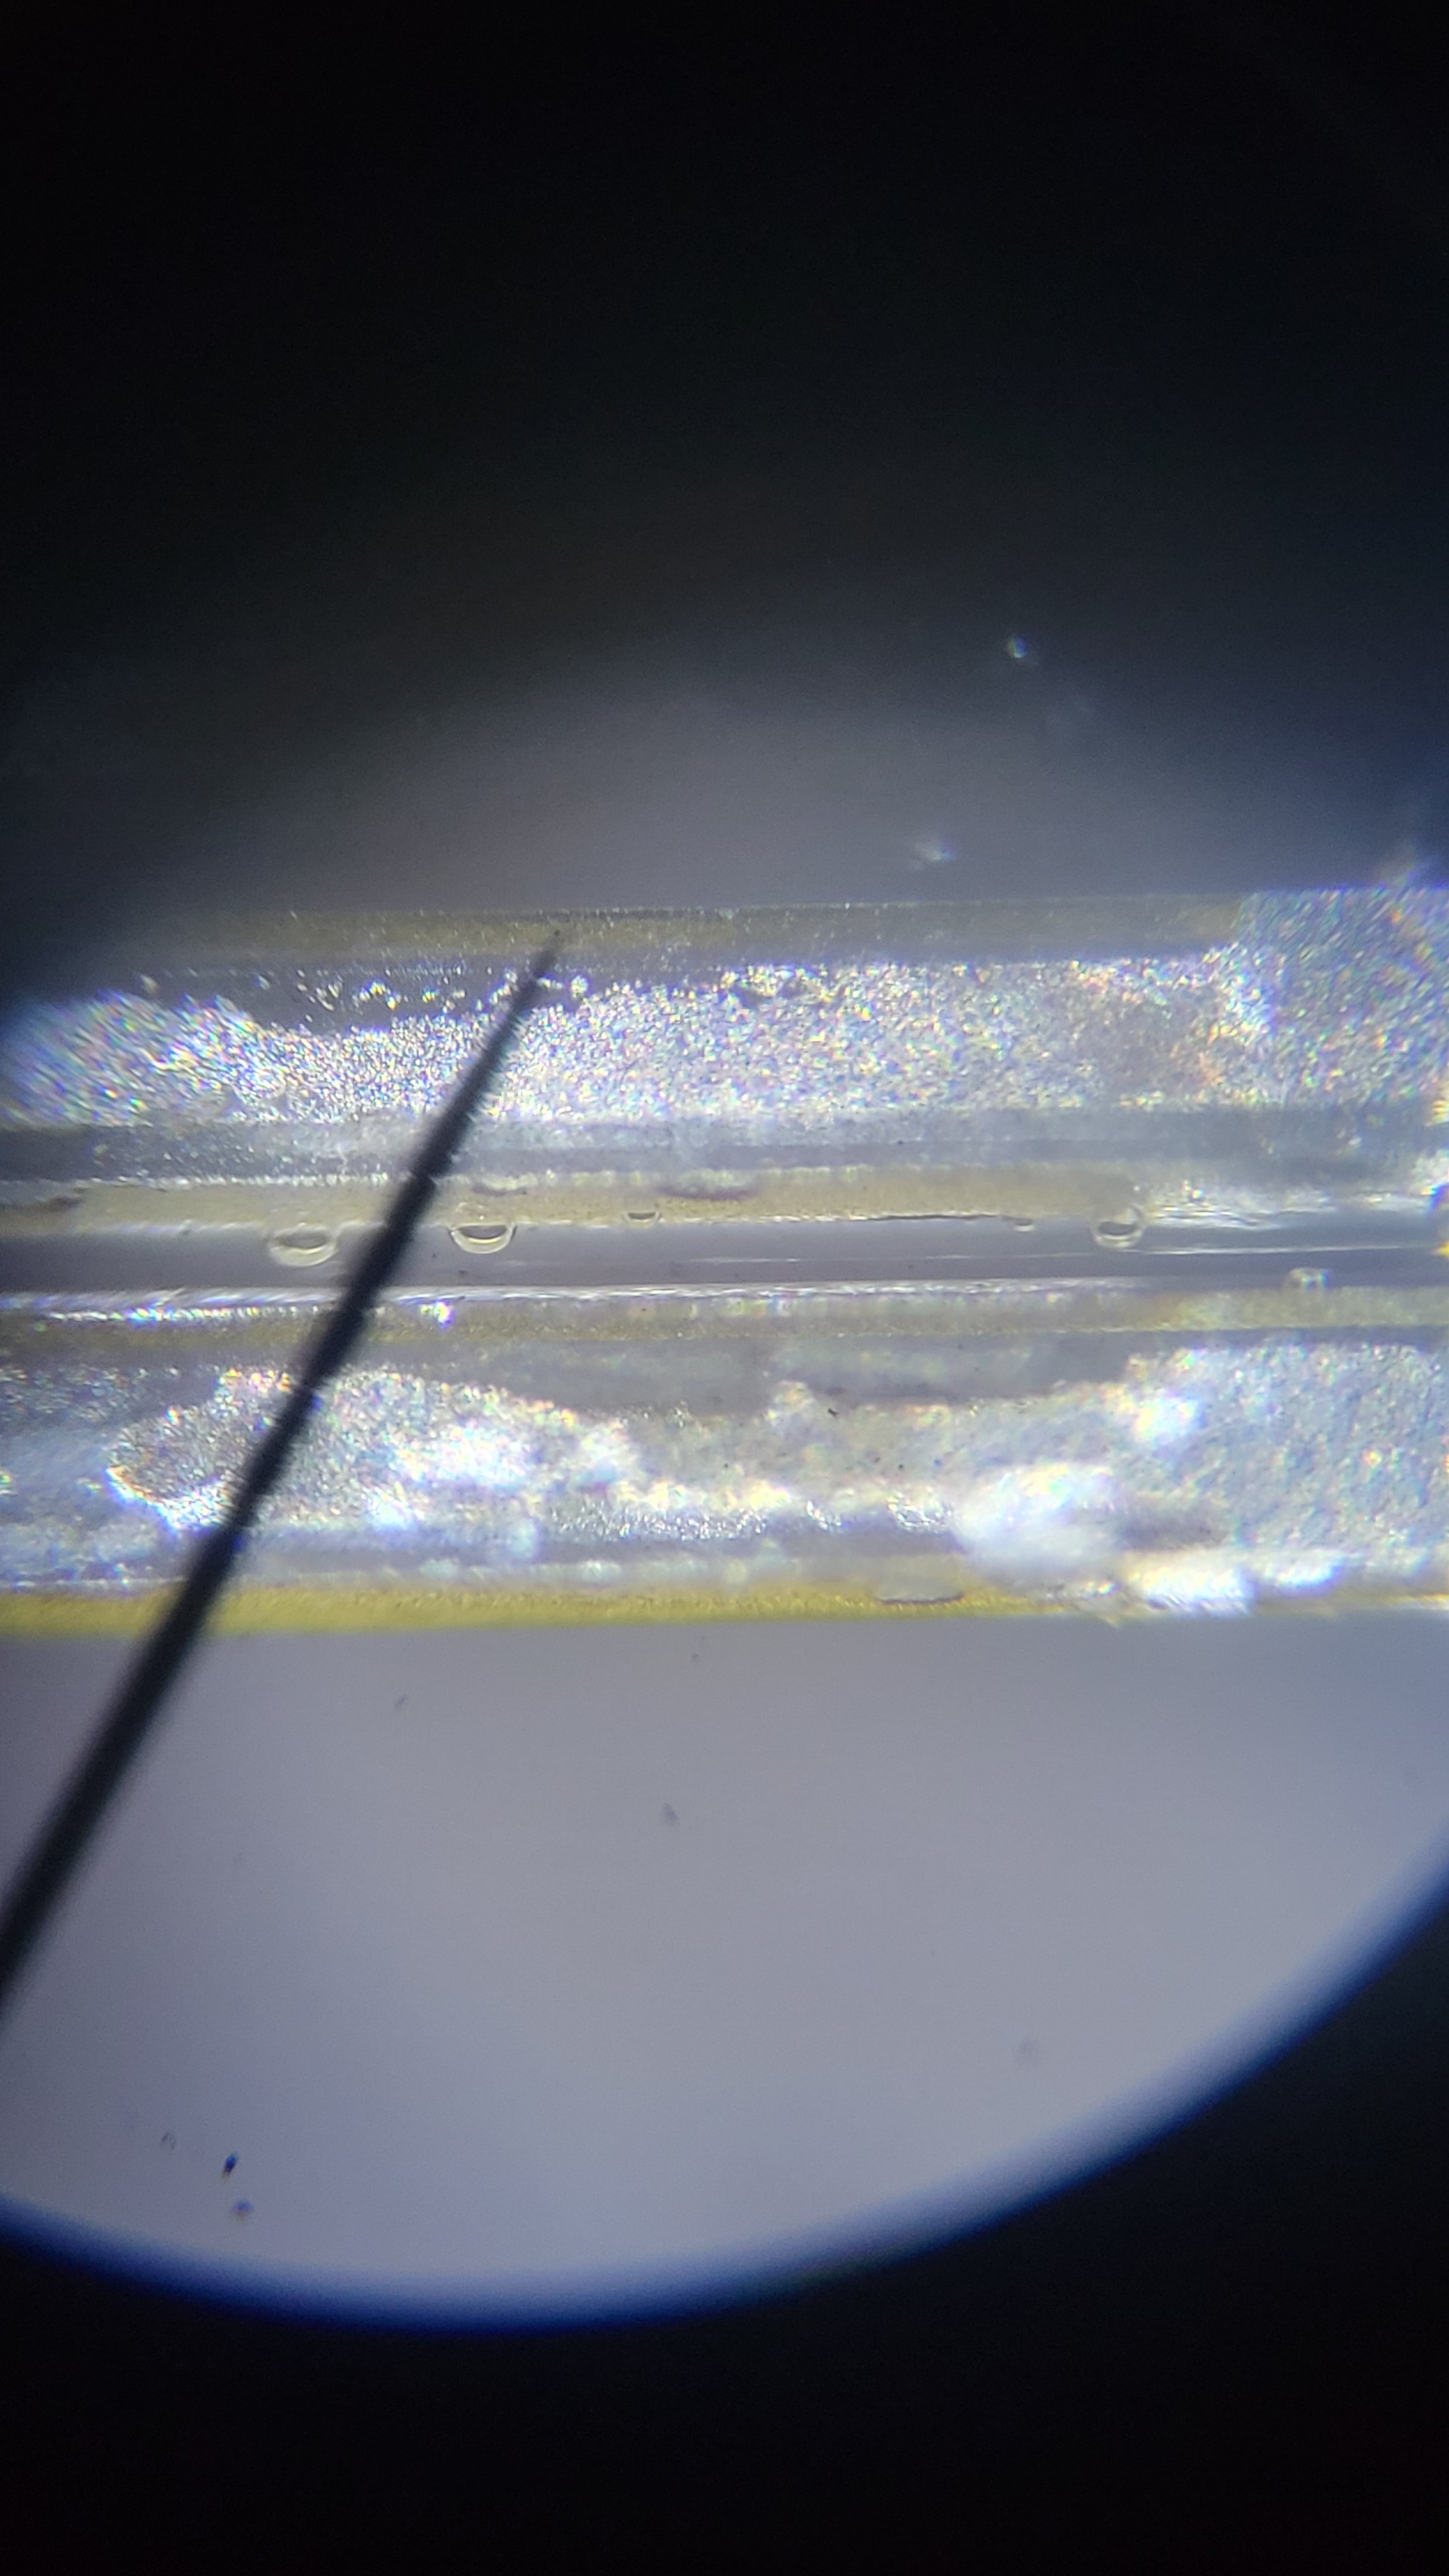
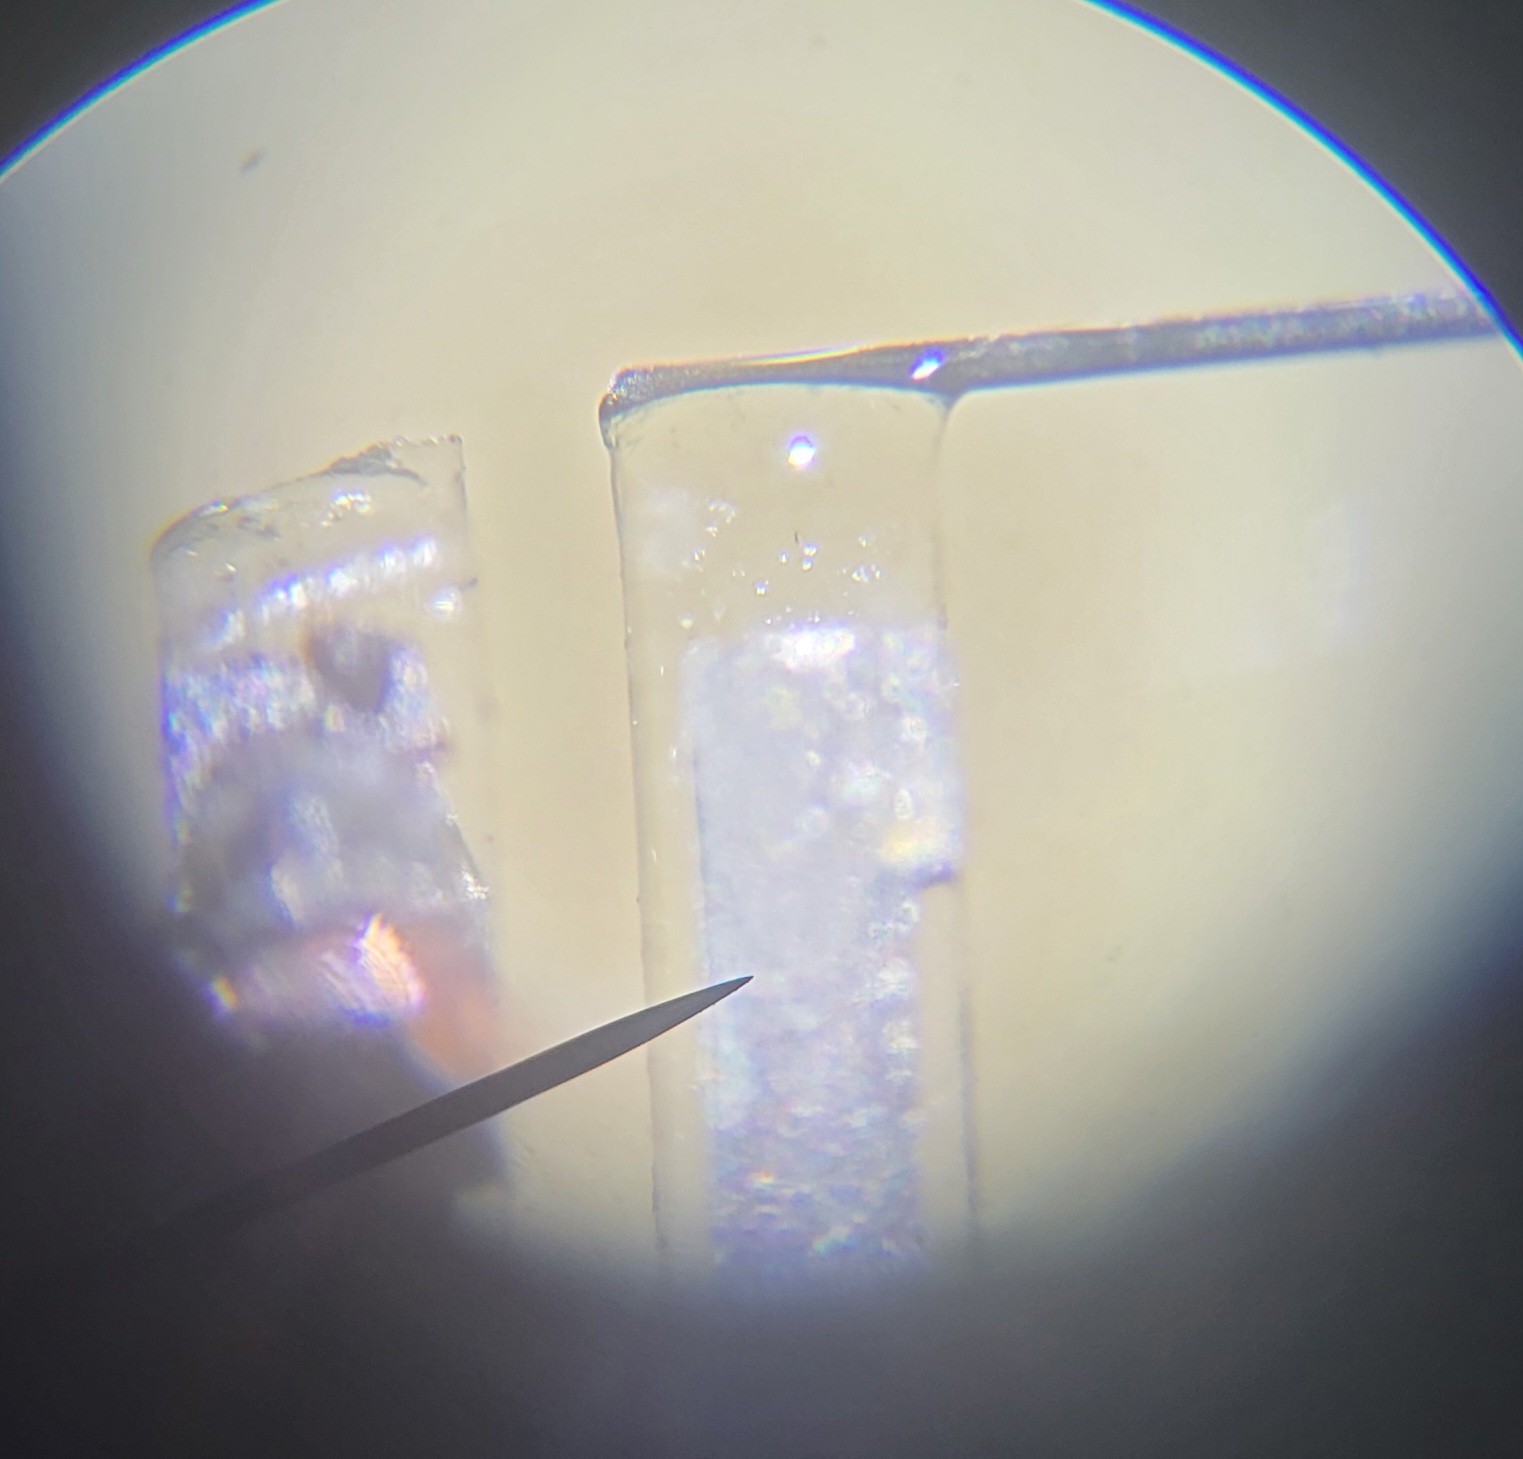
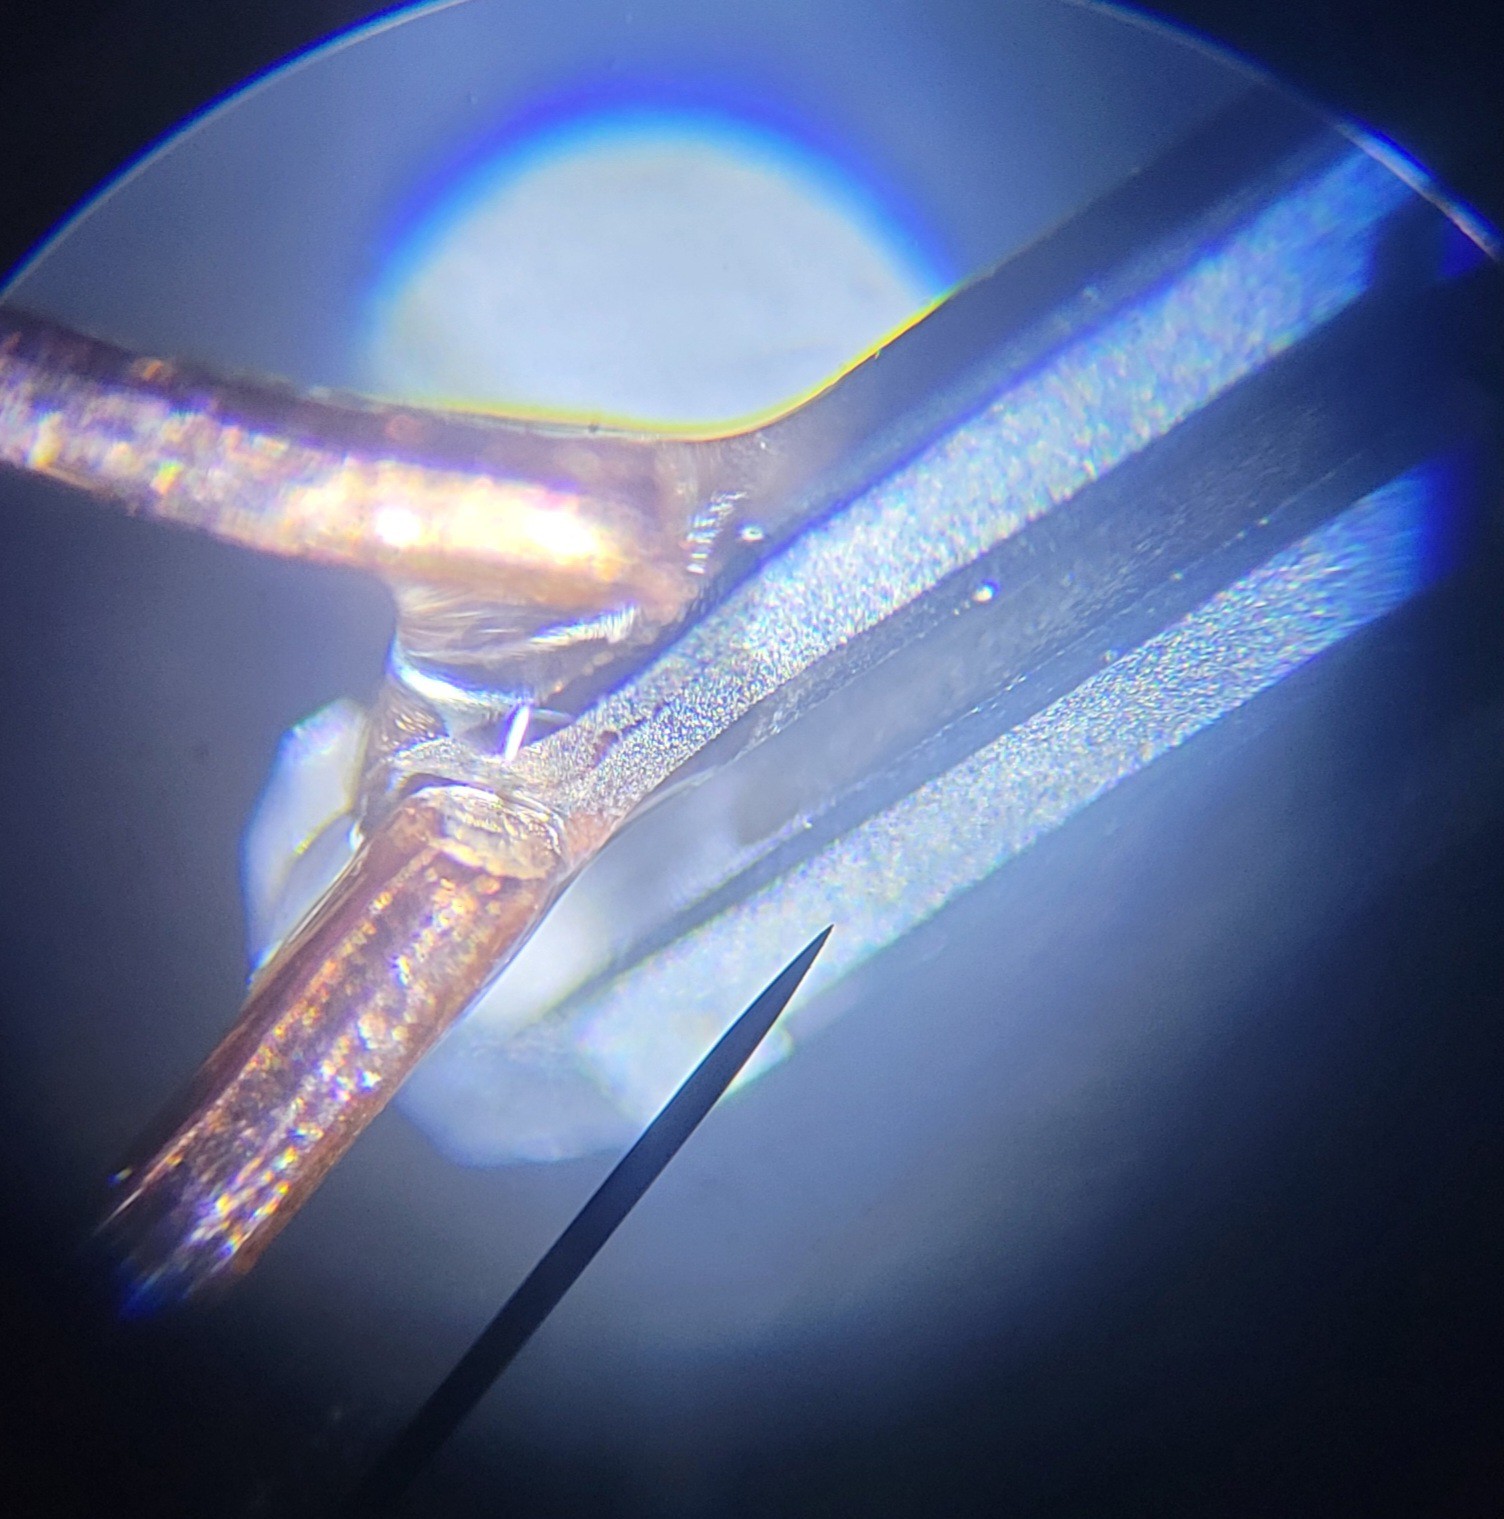
Ok, got quartz fork with Tungsten on one end and copper on the other.
On microscopic level it's looks like
I will make another pair of those and will learn hot to etch. The tricky part would be to find the right length of copper wire to counter weight Tungsten.
Made another two copies, it's quite easy to build those with UV glue.
Let's hope it's also easy to etch and balance. (Otherwise I don't get a clean frequency) [Low Q ]
Let me stare the obvious, copper wire is not enameled. I've just cut a 5mm standard electric wire. (Otherwise we will not be able to etch it)
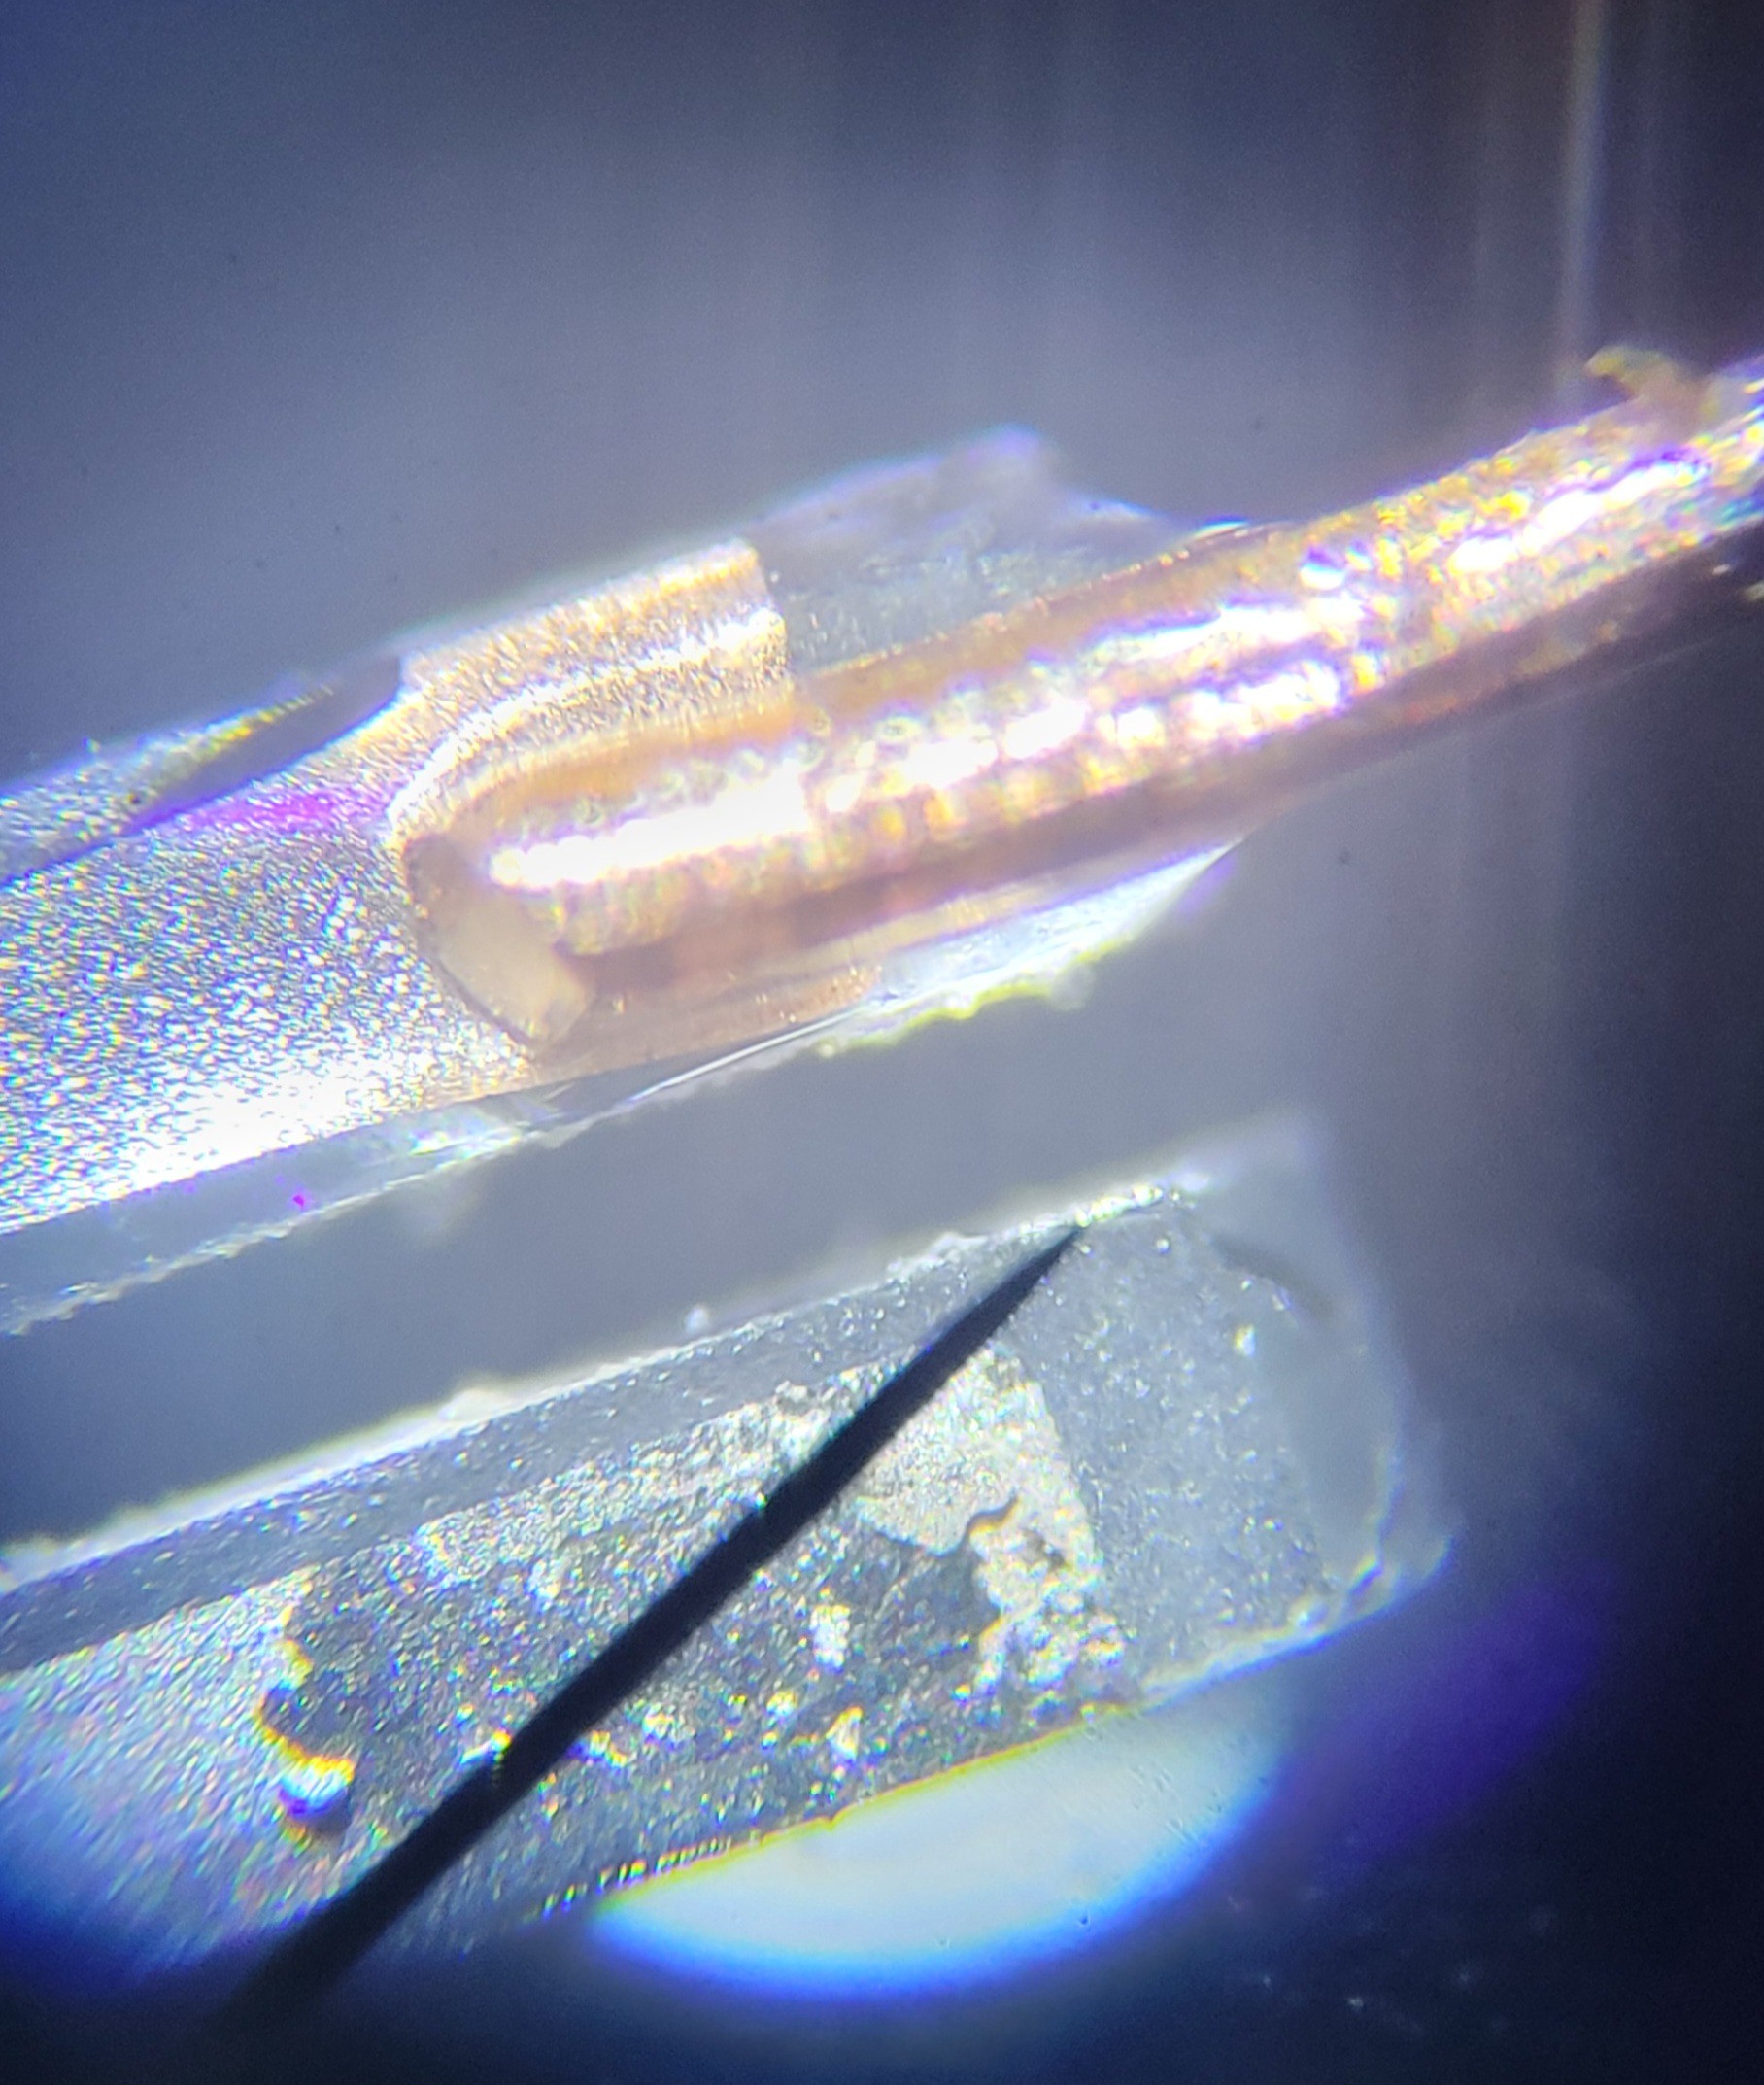
From three I was able to etch only one. Other were broken in the process. I should revise the etching device, unfortunately I don't know how to improve it yet.

With more magnification
Now let's etch the copper side and hope to get high-Q (oscillation)
Etching copper seems to be a good idea as it easy to control the length of the copper to a high degree

I've used a drop of ferric chloride literally. With pipette we can accelerate the process even more.
Although it seems very good it might not work as I managed to drop all this quartz fork into drop of ferric chloride [Yeah I know clumsy me]. I don't know if it's going to work. One thing for sure I know now how to prepare dozens of those. With 2$ for ten forks and UV glue I am not worried so shouldn't be you.
I will test it tomorrow, fingers crossed
Nope, not working...
Removed Tungsten and Copper and searched for resonant frequency I turned out that all yhe glue and removed 2kHz but still going strong.
So the problem was unmatched lengths or heavy Tungsten/Copper 'needles'.
I will give another try to 0.01 mm wire, it's the only that worked so far. Let's try to glue it and etch it.
0.01 mm looks tiny even under microscope
I was successful with gluing 0.01 mm wire. The trick is to use powerful light source and magnifying glass. ( Or maybe I need glasses 🤓)
I've found out that tiny drop of glue can break the symmetry between the prongs and kill oscillation. I still didn't find a reliable method to apply glue to maintain oscillation.
Another attempt this time I've glued Tungsten wire from side instead of the top.
In the past I've used to connect from the top to make a better grip of Tungsten to quartz prong. With UV glue it was not necessary as it much stronger than supper glue for some reason.
Plus, I've used smaller Tungsten wite. If in the past I would use 2.5cm (inch) length wire. Now I am trying 8mm. Shorter wire means easier to etch. I do afraid it will negatively effect form of etch as there will be no enough weight to pull Tungsten wire down when etching.
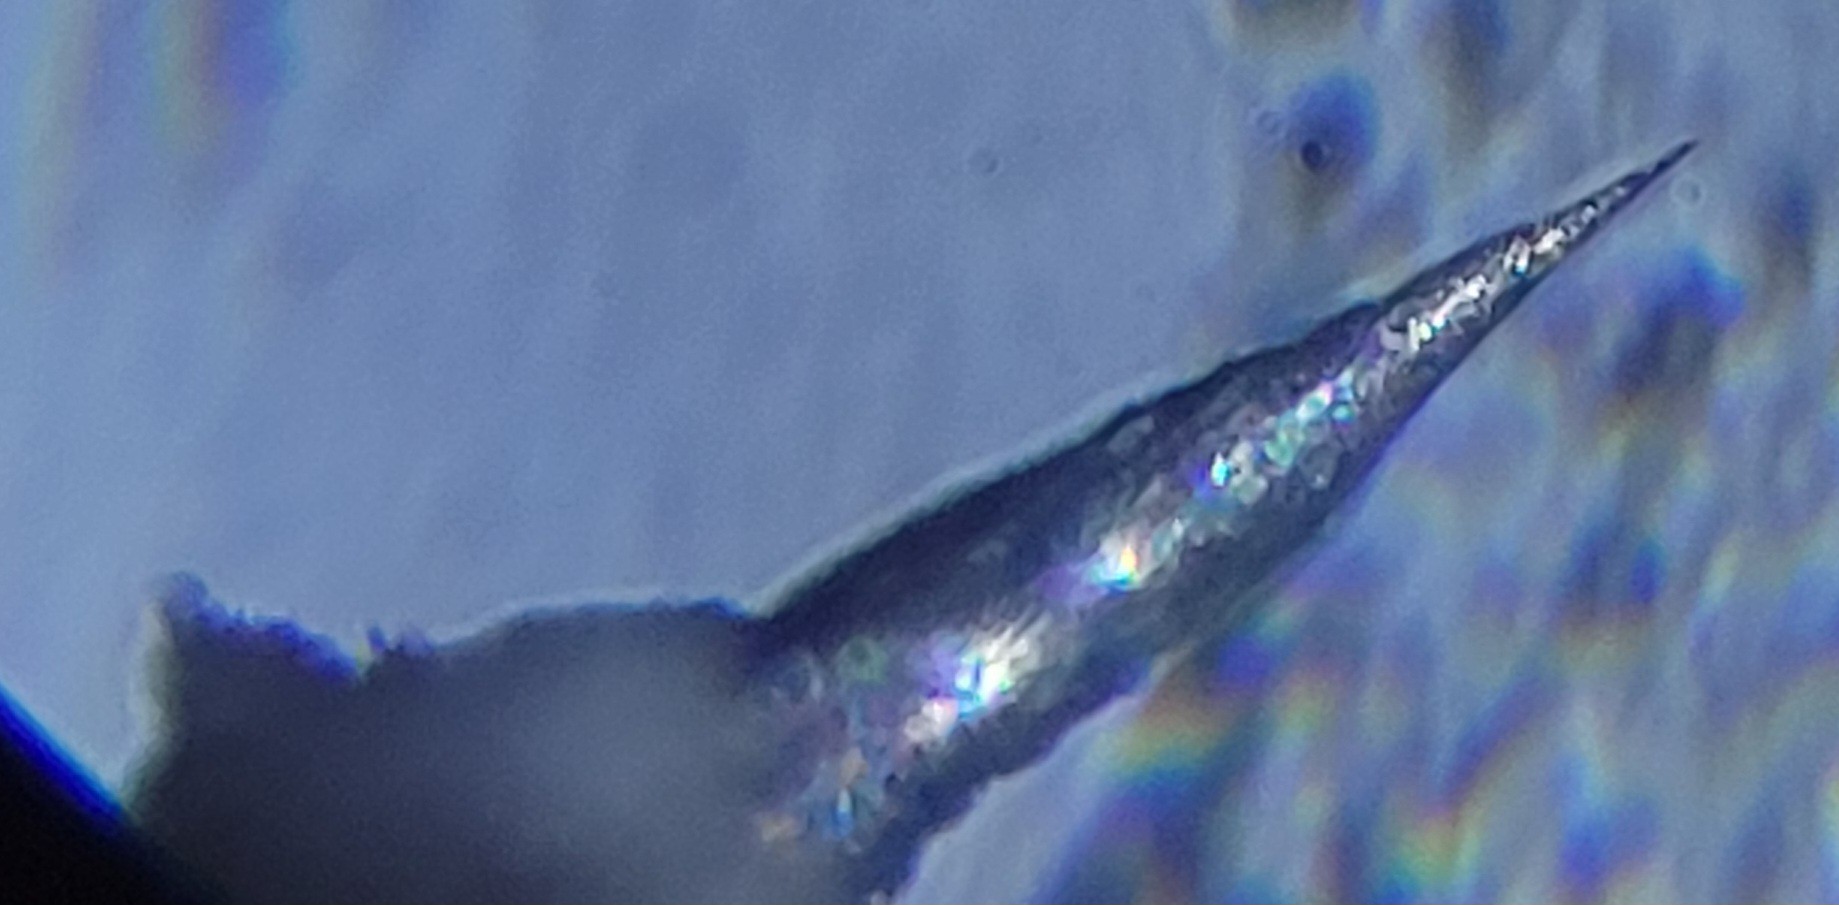
Etching with smaller Tungsten wire turned out to be a beter solution.
Was able to make the best tip so far
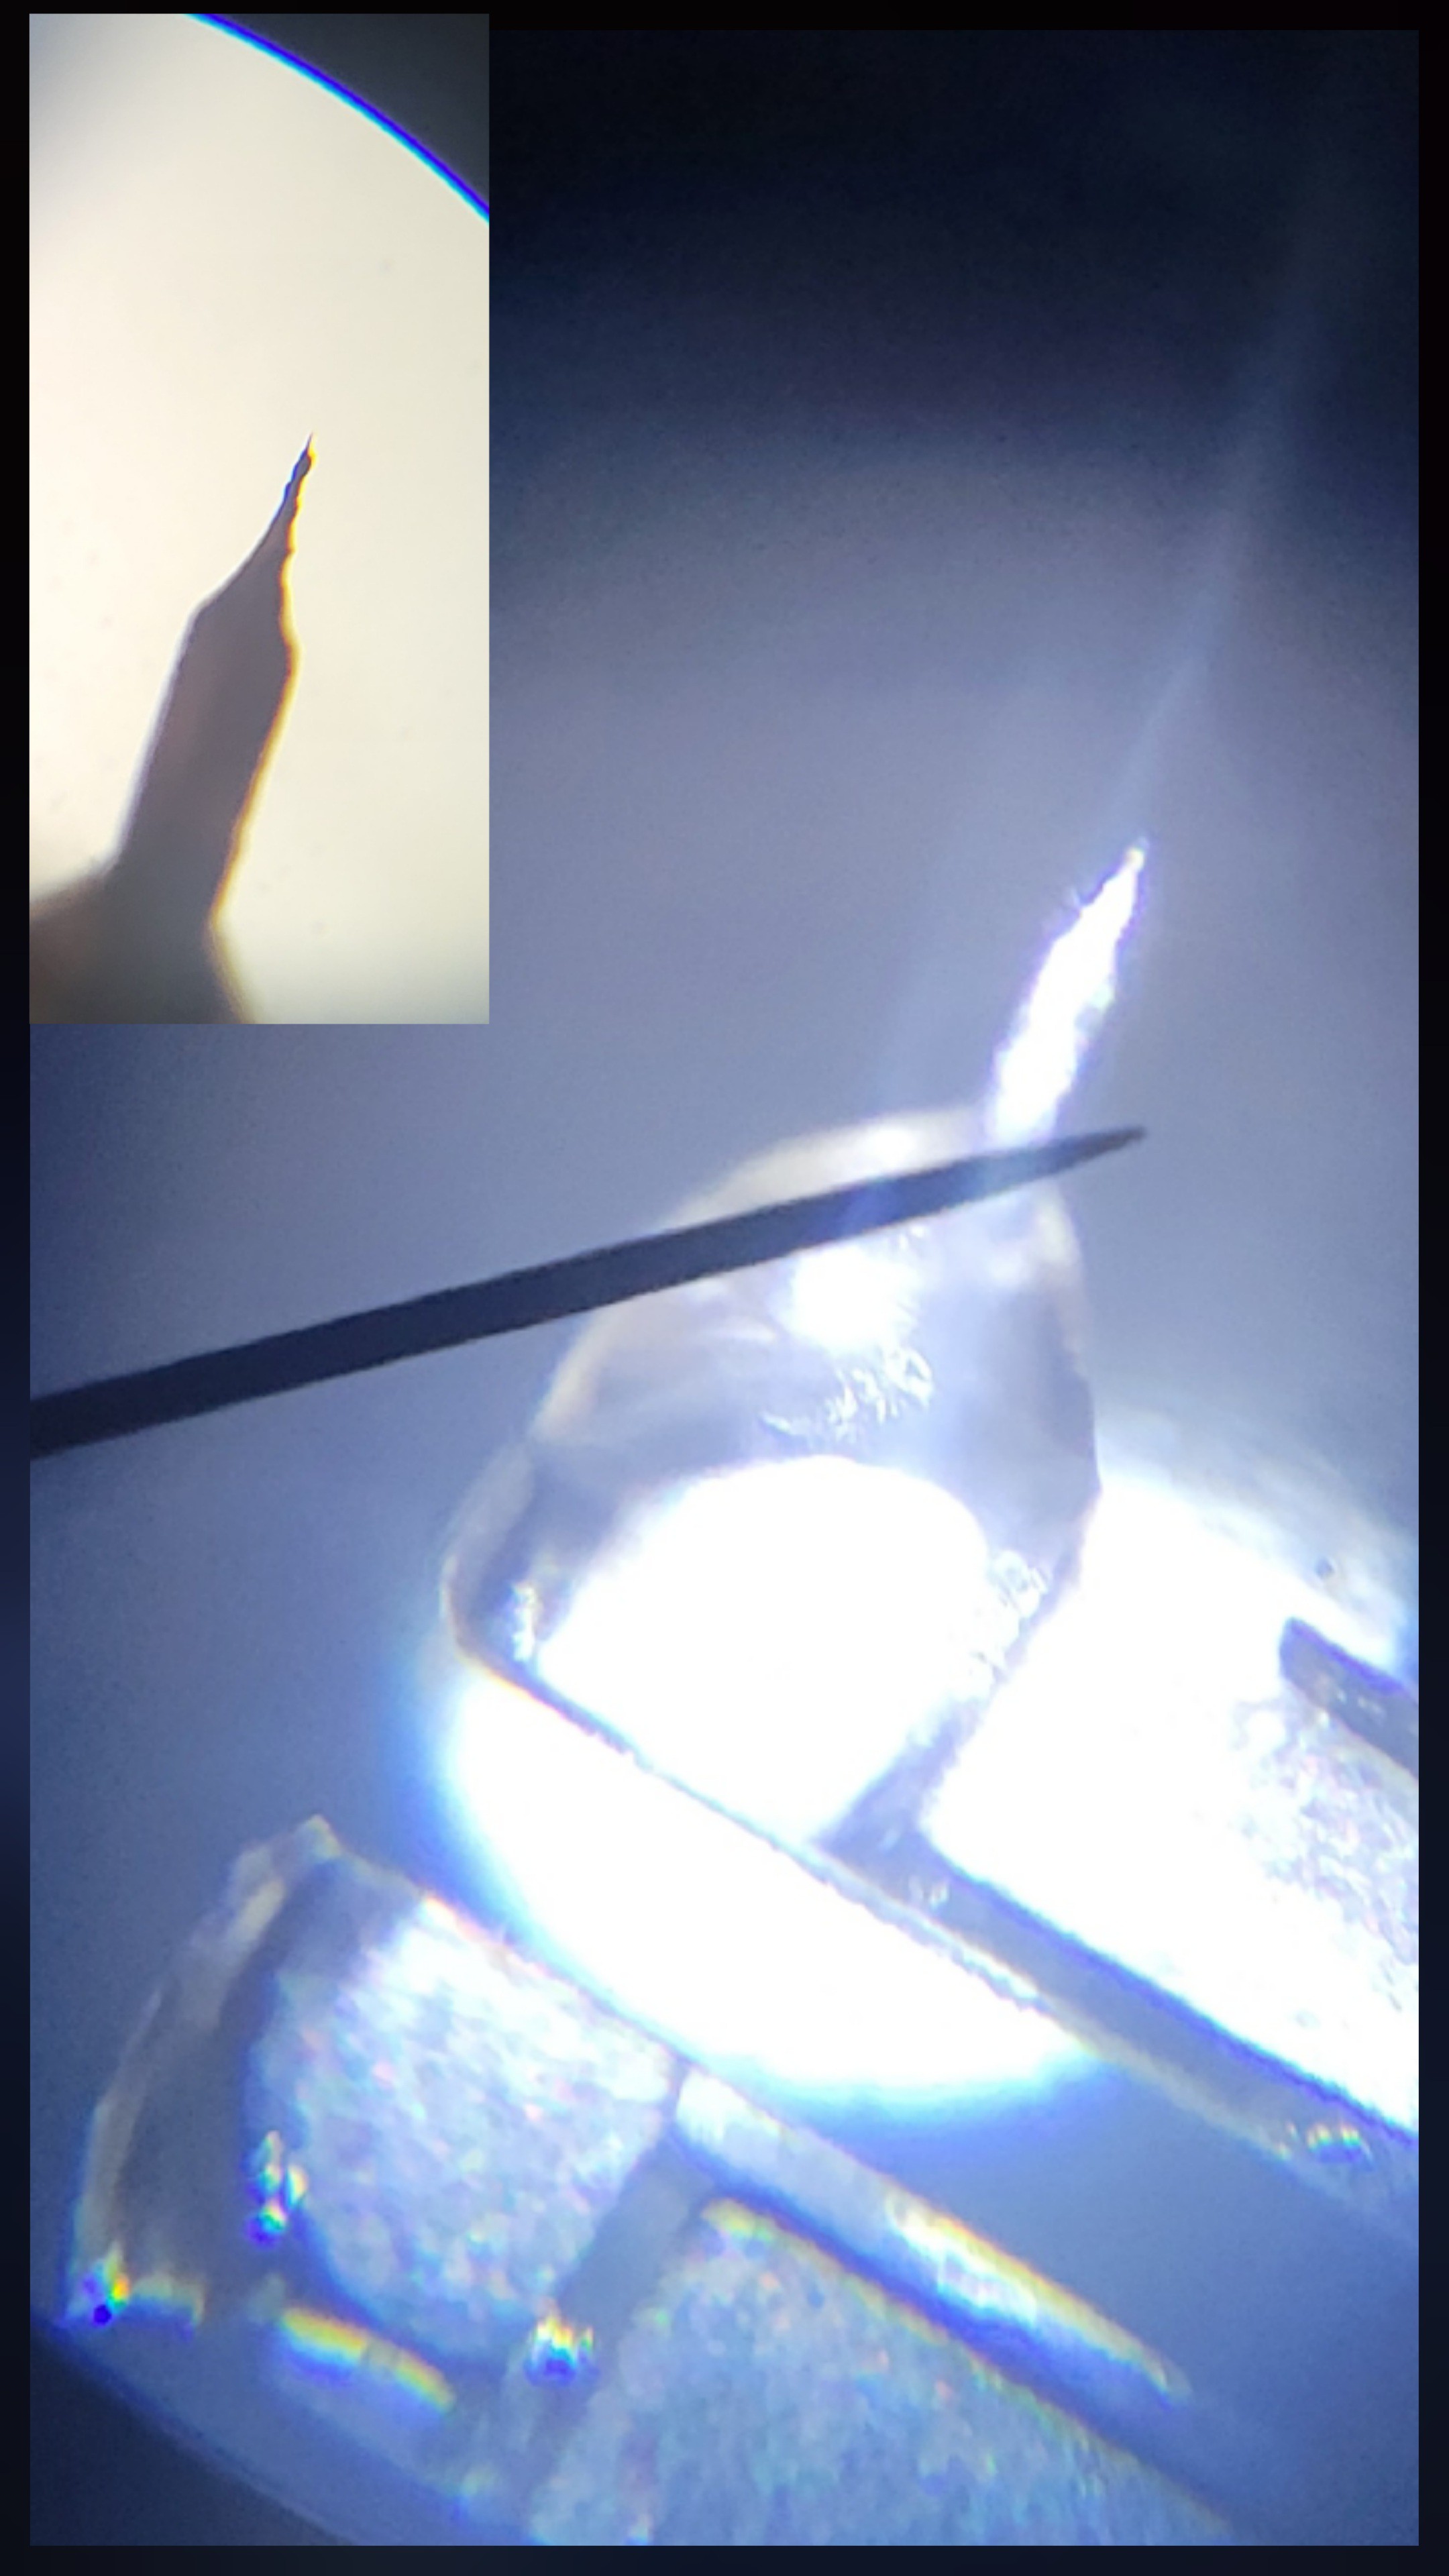
By the way 0.01mm wire was not successful. Probably because of low weight, the form was not a sharp.
I am having trouble with making those tips. I wasn't able to produce qPlus, using Tungsten and Copper is problematic since ferric chloride is powerful enough to destroy the glue and quartz fork tiny wires. Building two sided Tungsten is problematic in a sense of how to control exact size of each wire. I mean you start something and it ends up with different length.
Ok, I will try now to add a piece of Tungsten to counter weight the sharp Tungsten wire.
The idea is to glue Tungsten wire sharpen it using NaOH. The tricky part is to find a tiny piece of Tungsten the size of etched one amd gently glue to the other prong.
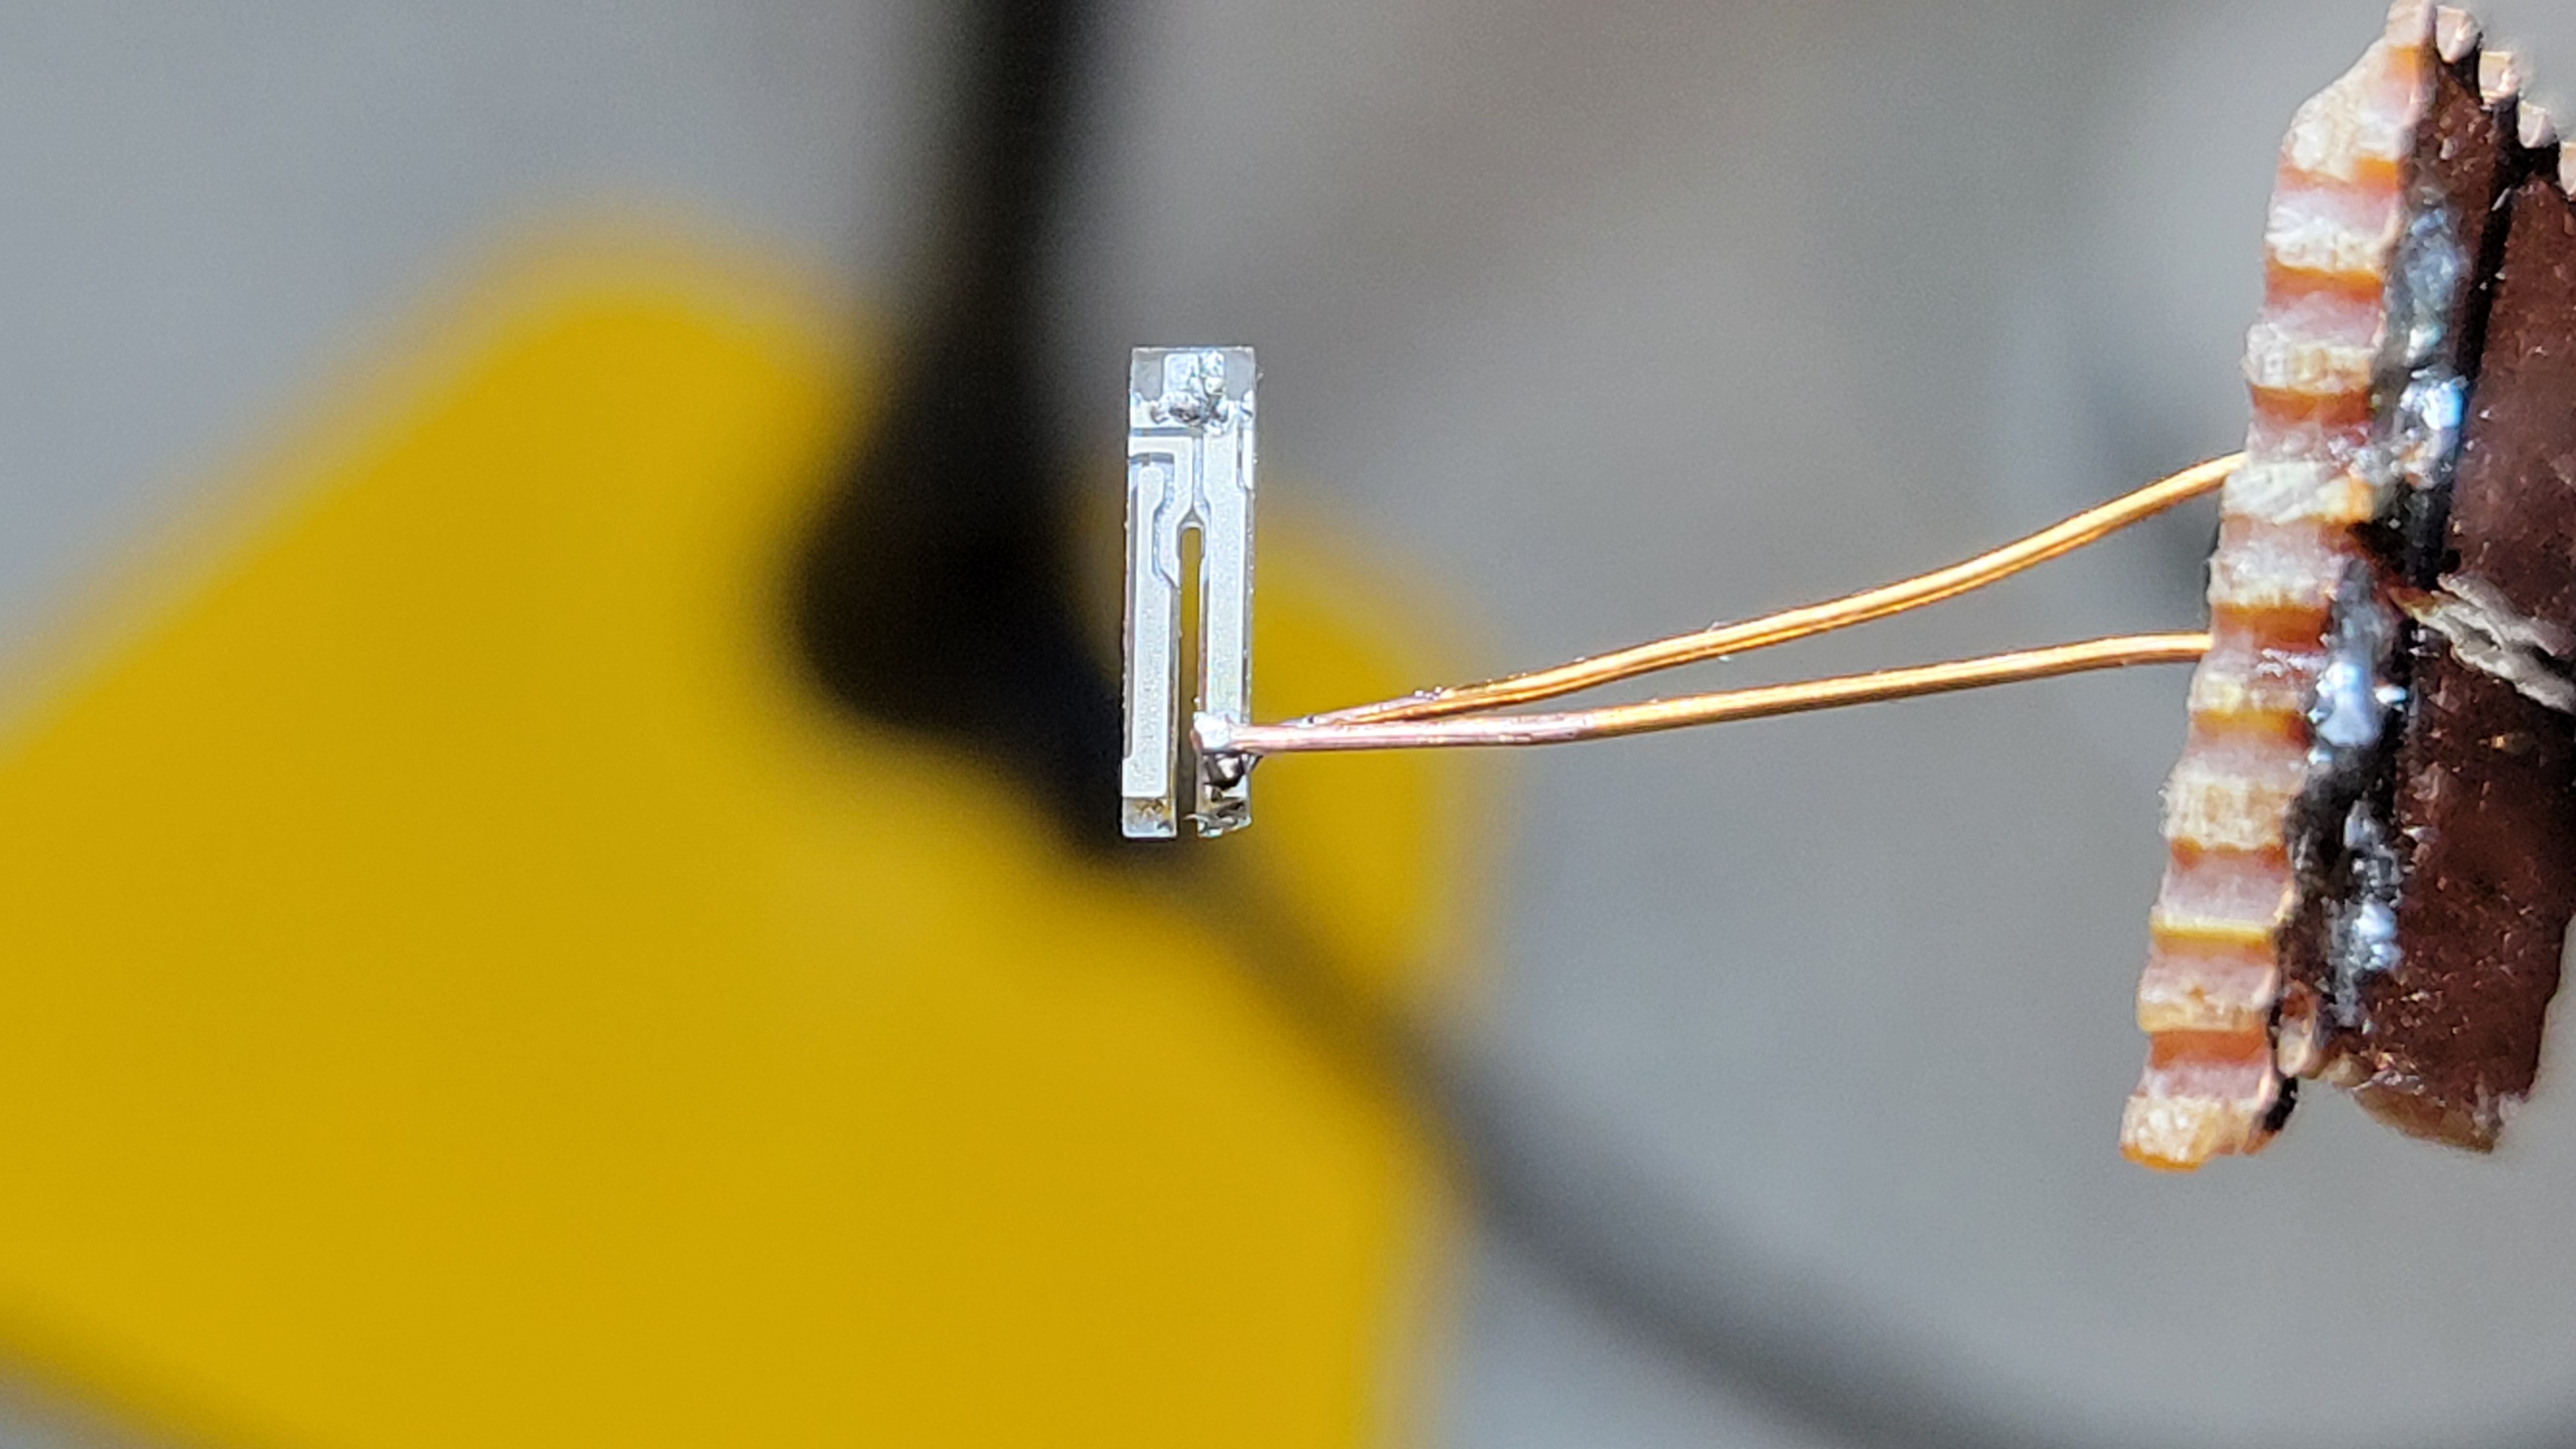
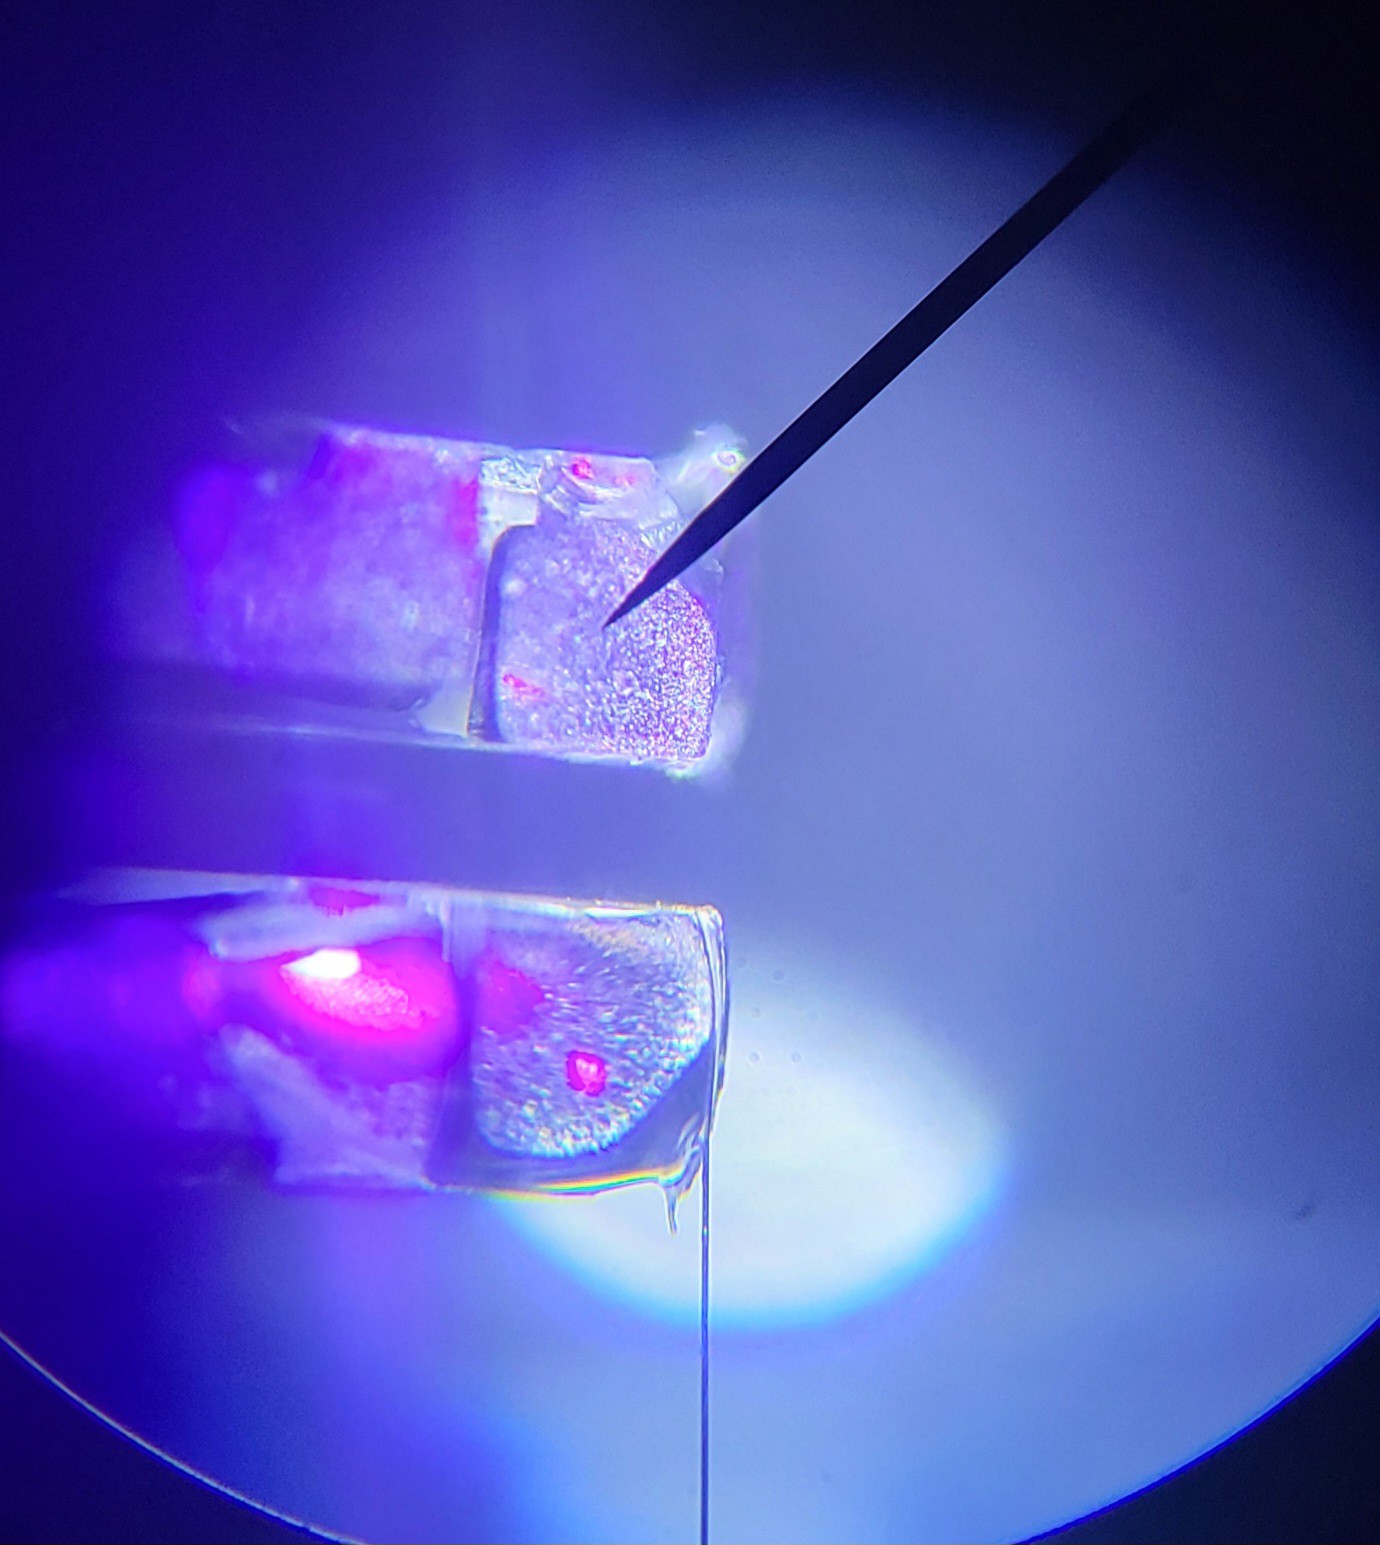
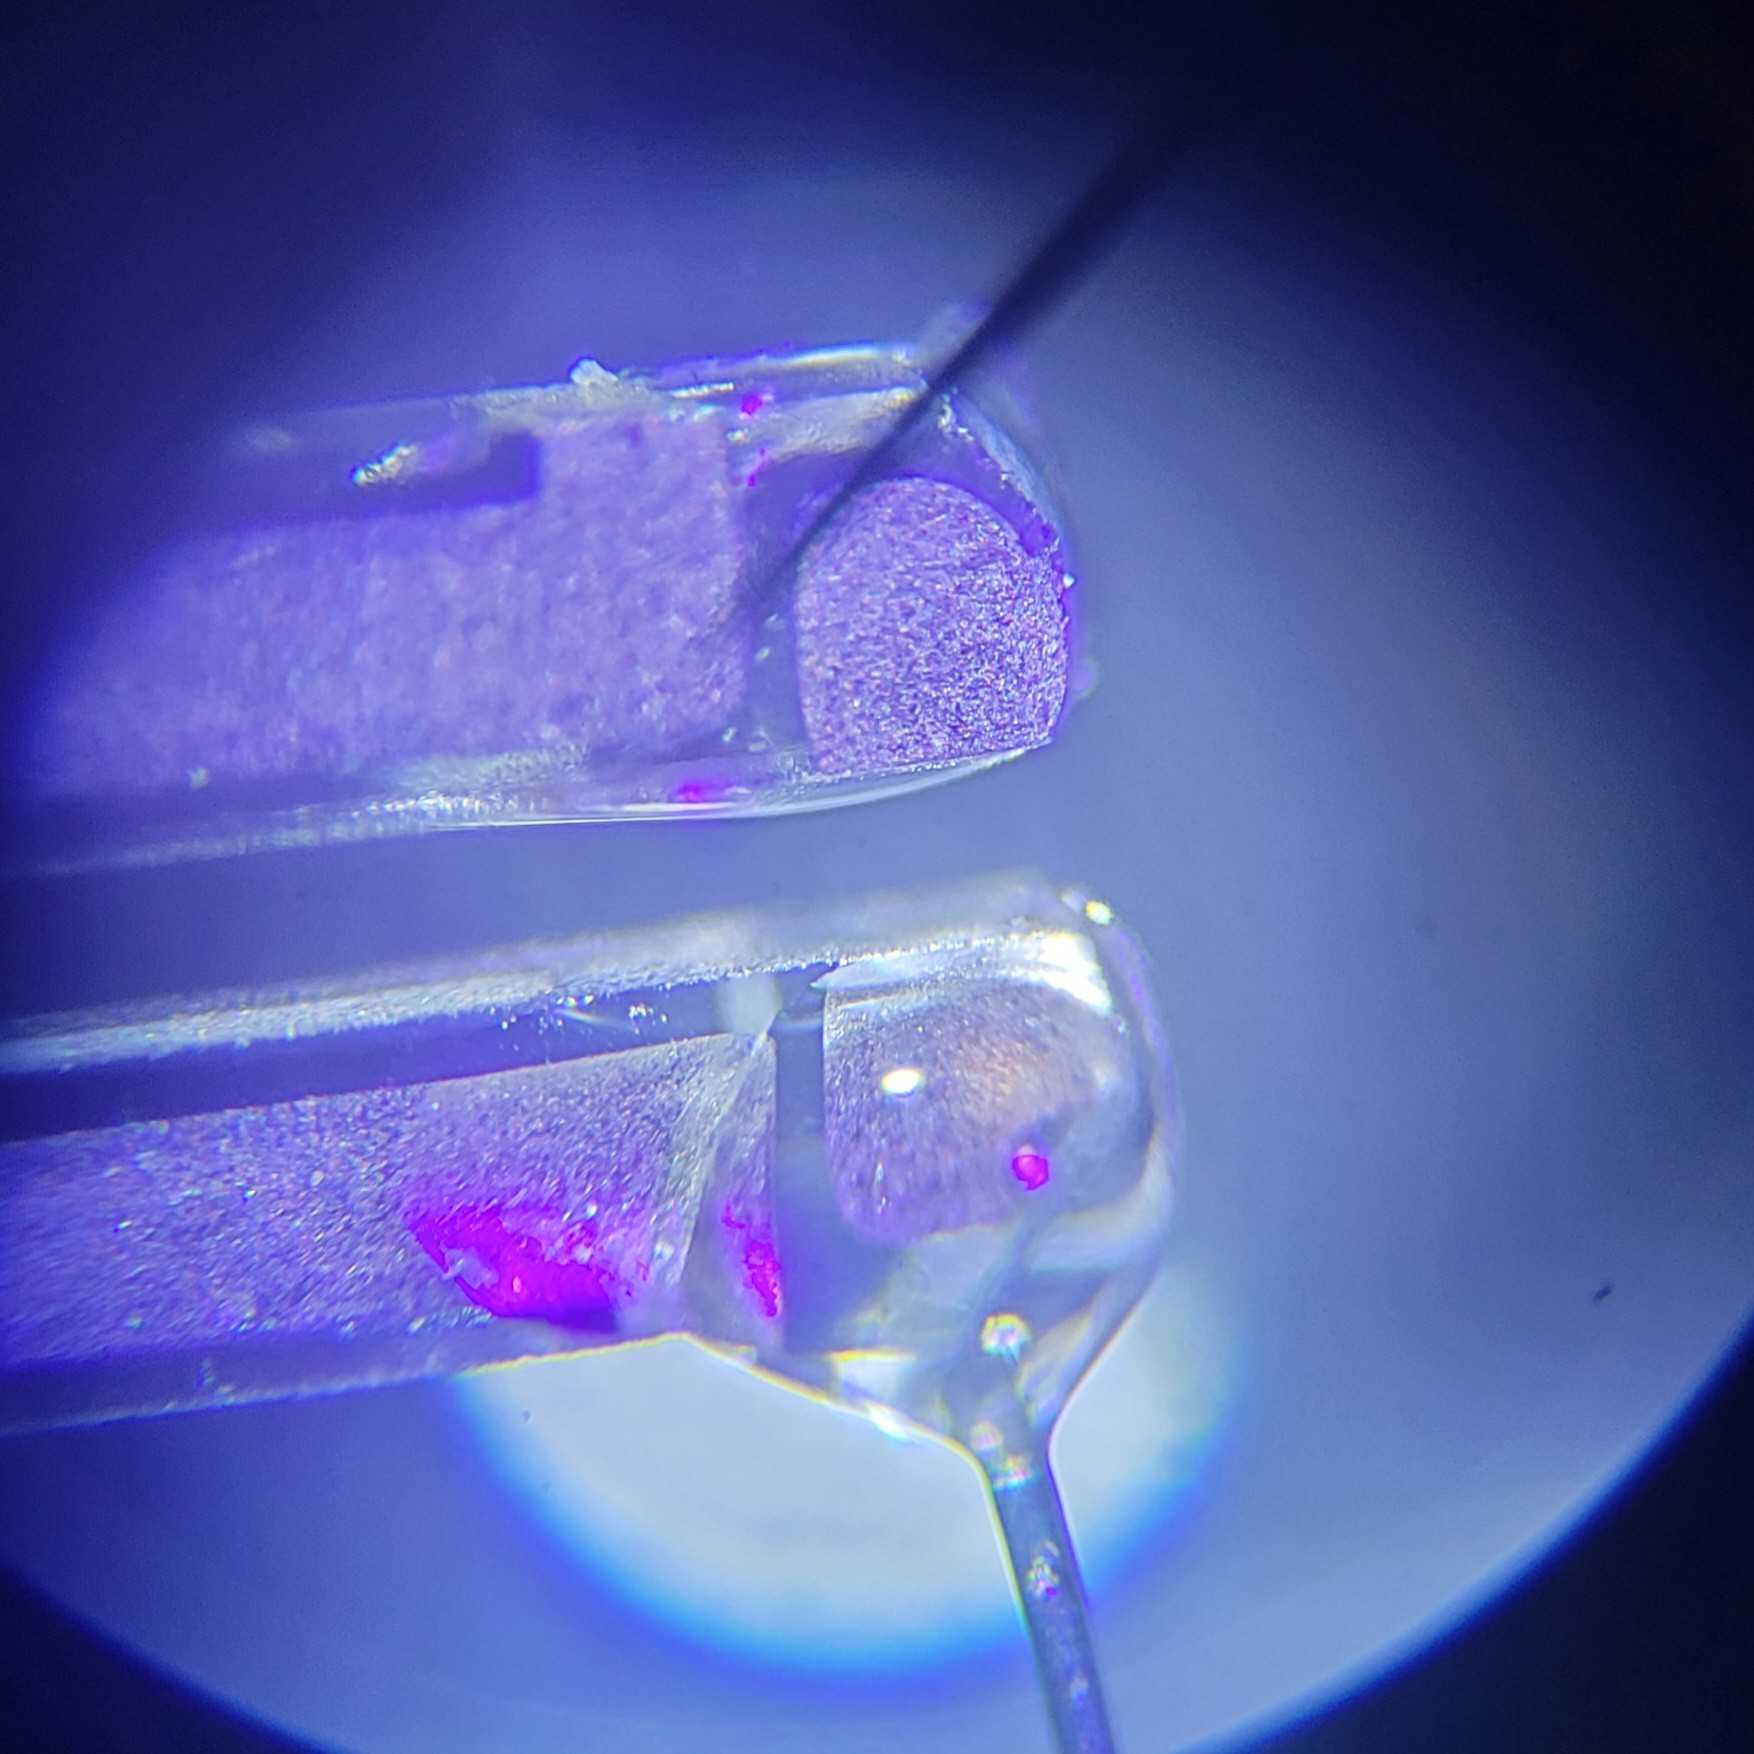
I found a working method,
The idea was just adding counter weight
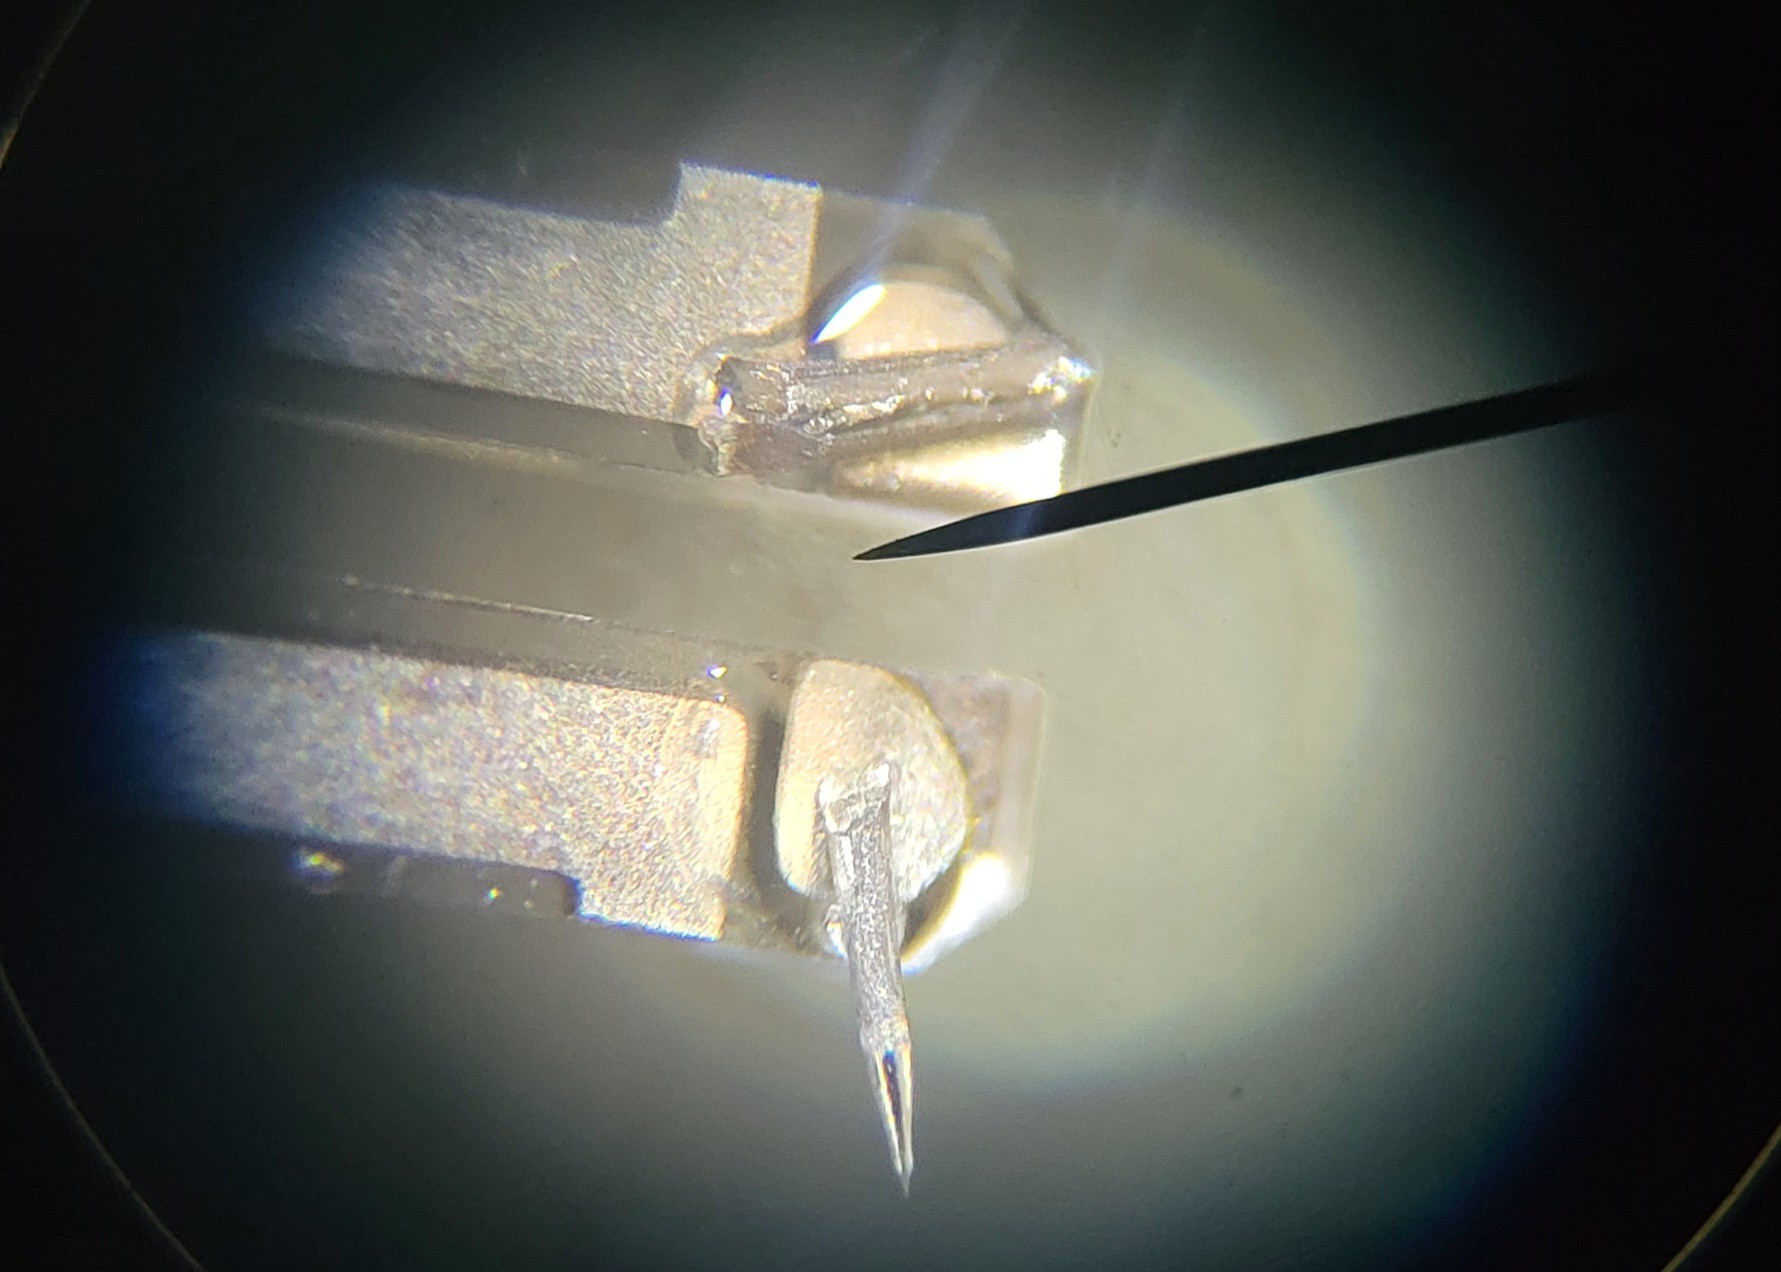
From four I got three working which is amazing compared to other methods.
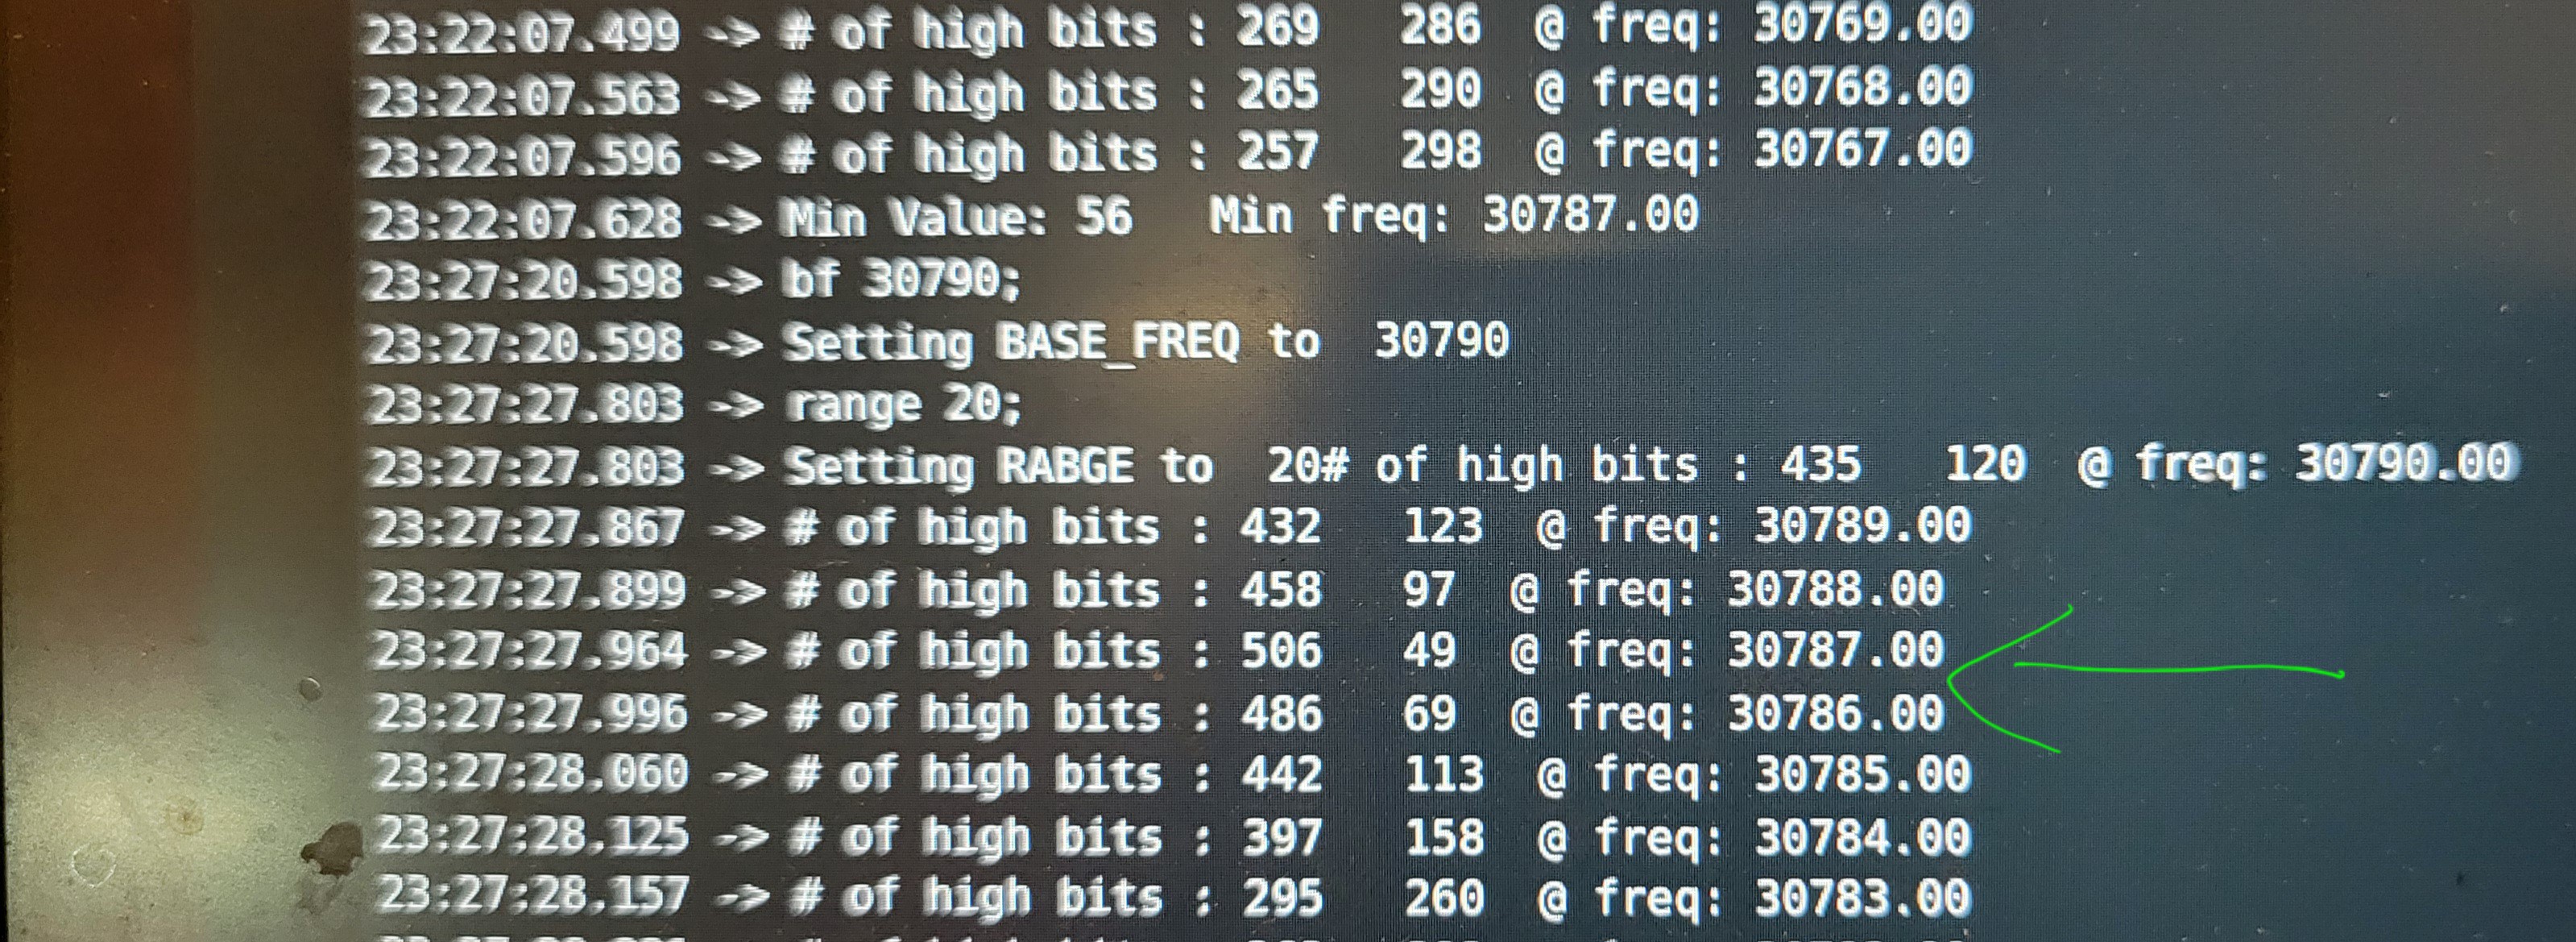
Got clean response at about 30,000Hz (low was 29700 and highest was 30700).

Wanted to share what I've changed to make it work: Instead of gluing from side I am gluing the Tungsten wire on side. It makes connection stronger and it's much easier to glue. Using UV glue you can do it slowly as it will not dry out. Don't use gloves when working with NaOH, gloves makes me clumsy. Instead I clean alkaline solution before I touch it (never touch NaOH with bare hands, you get cracked skin for a week). Shorter Tungsten wire, brakes less much easier to work with. Lower voltage I've switched to 4-5v from 7-8v. It's slower a bit but the form is much better. And MOST IMPORTANT do everything under magnifying glass, that is the secret for success. I use 3x magnification glass for soldering station. Last but not least I applying glue using 0.3mm wire and perform under microscope to put glue in the right spot and right amount. In order to make Tungsten wire stay still I use double sided tape. (I touch the tape multiple times to make it less sticky [almost not sticky at all] otherwise it will break the glue once disconnected.
Discussions
Become a Hackaday.io Member
Create an account to leave a comment. Already have an account? Log In.