 RobsonCouto
Some major events happened in my personal life this week and I had very little time to spend on the project. Last time I worked on this, I got a little frustrated with truing to bind the Raspberry PI spi 0 or 1 and respective chip select pin to my driver, and arrived at the conclusion that I need to study more. A brute force approach does not work here.
Meanwhile, I wondered every now and then how I'm gonna fit the shell in my 3d printer. First of all, I need to be able to open the case, so no whole body prints or glueing. Before I showed this image, which has the keyboard support posts.
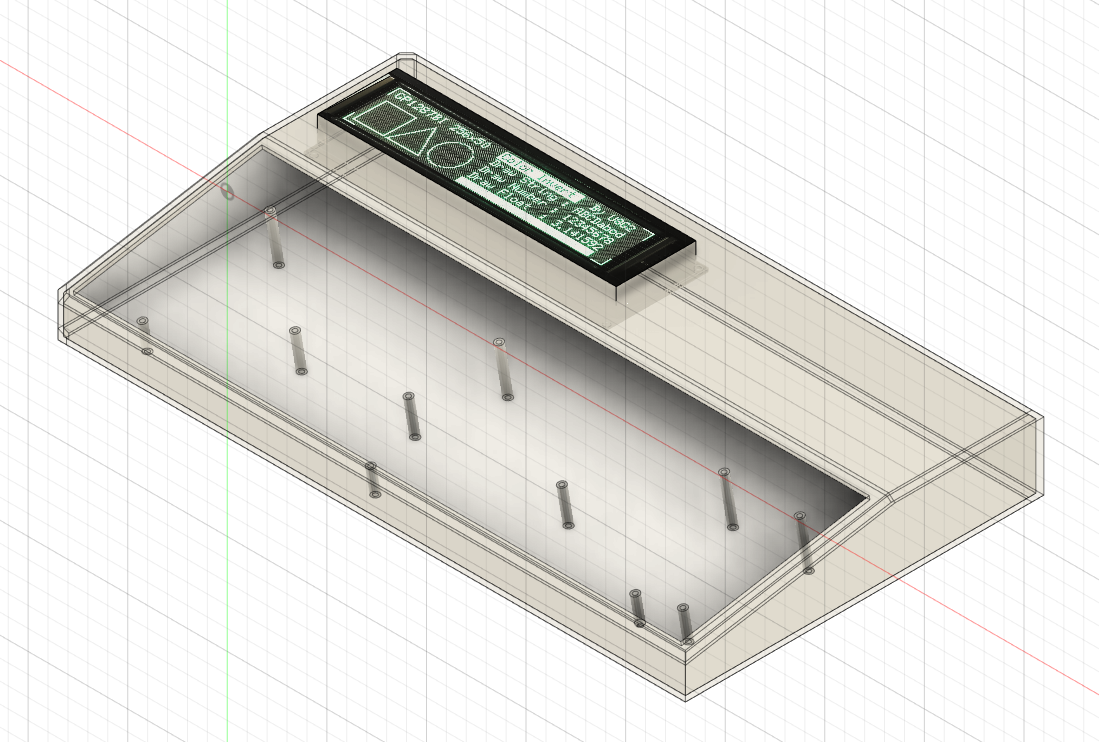
Since I'm planning to print the body on its side, these posts would be a huge pain to support. So, yesterday I got to cut them from the main shell and add them to a plate.
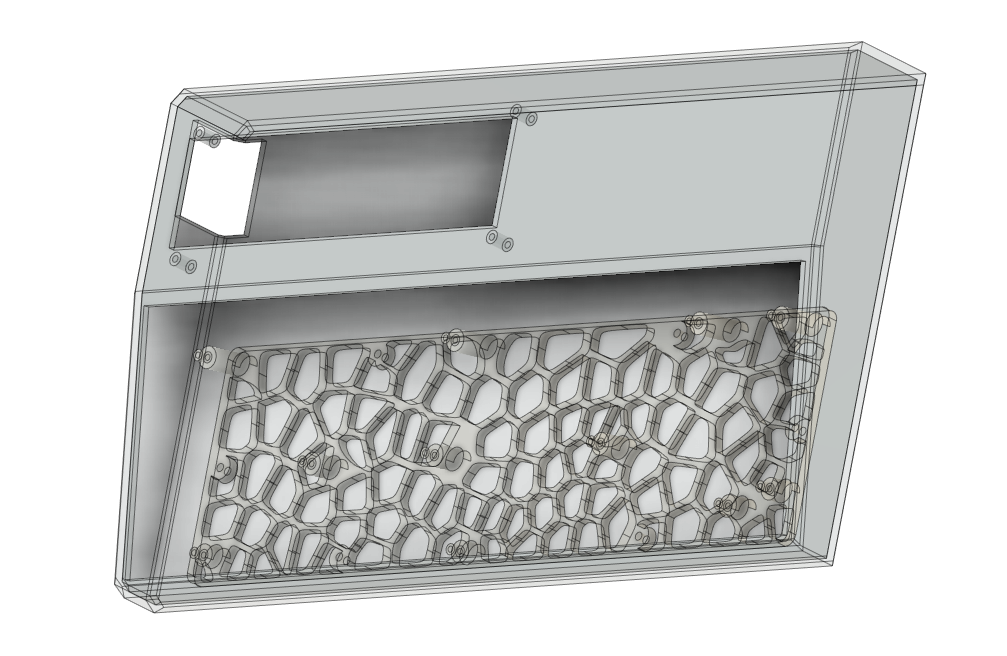
Notice the voronoi pattern? I have been wanting test it and since this will be hidden anyway, I used it here. Thus, I got to print the support plate with only 50g of PLA.
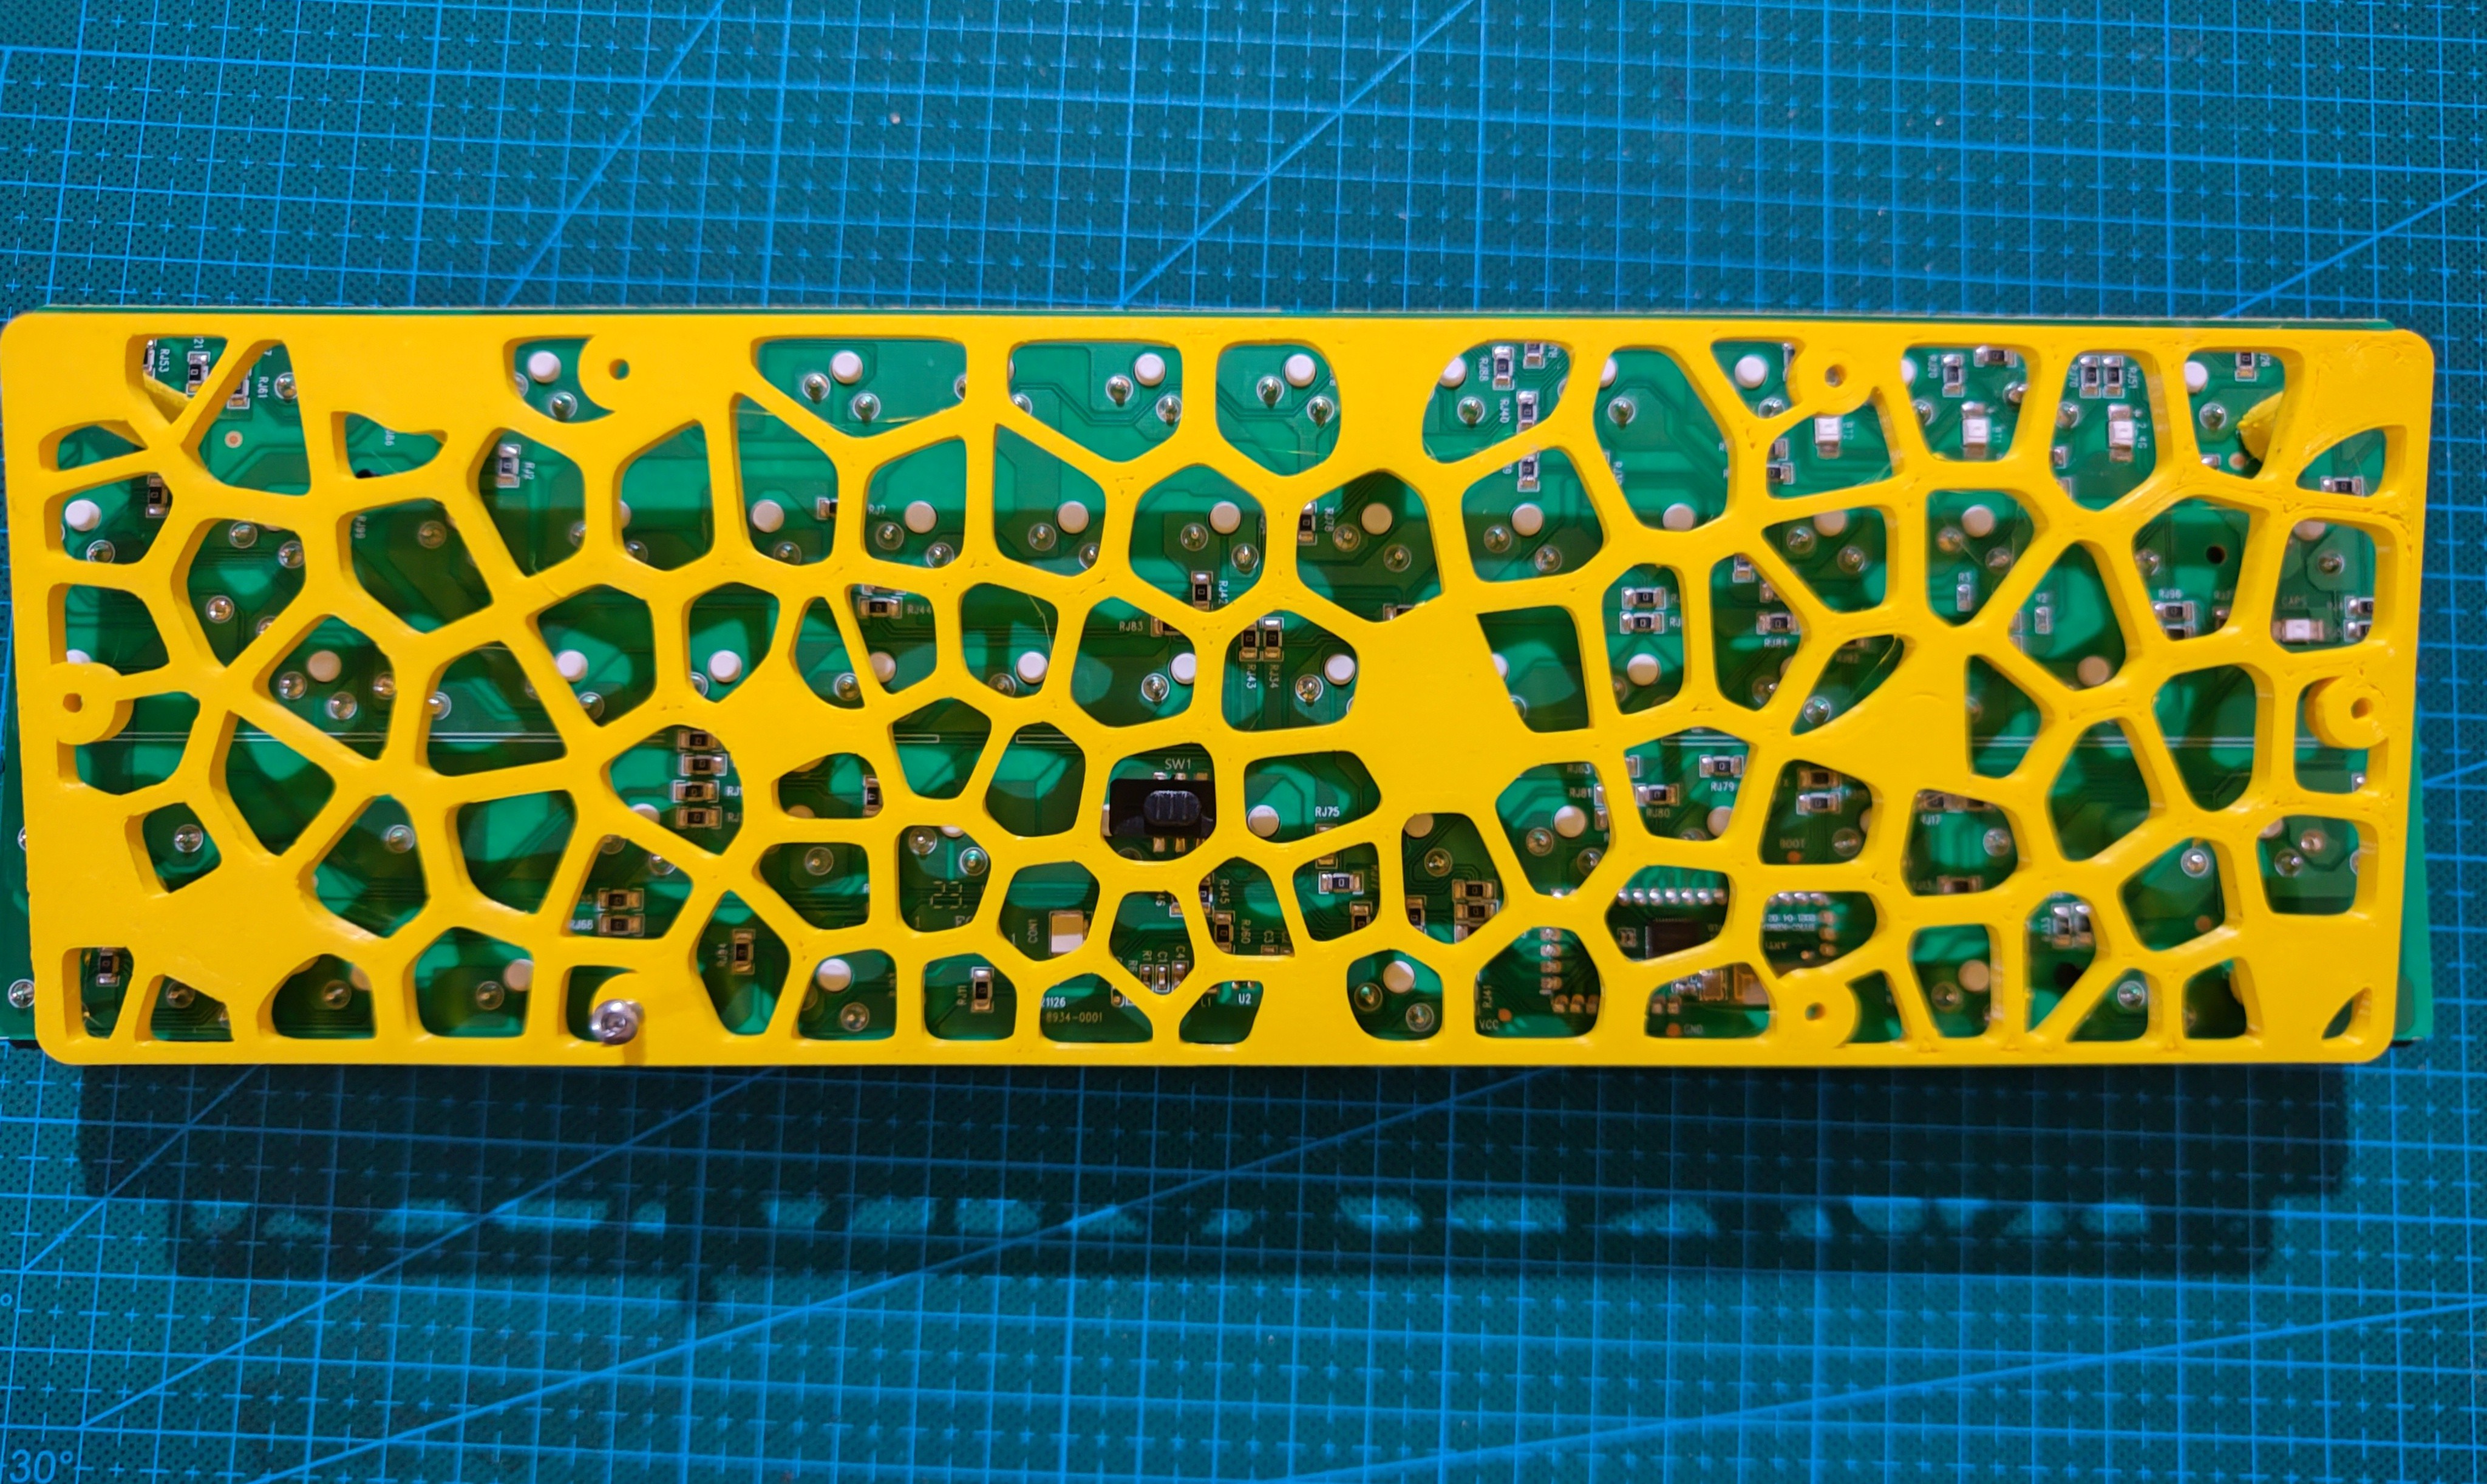
I guess this is officially the first printed part that will be in my cyberdeck. Now to figure out hot to break the shell in two parts for printing.
Discussions
Become a Hackaday.io Member
Create an account to leave a comment. Already have an account? Log In.