Close
0%
0%

Spark erosion: Detailed view, simple machinery

Have a close look at how Electrical Discharge Machining (EDM) works and what can be achieved with a simple setup

Similar projects worth following
Spark erosion is entering more and more tinkerer workshops. time to have a very close look on the processes that are capable of eroding extremely hard metals without putting any mechanical load on a workpiece.
With a methodical approach, a simple, working setup is to be created step by step.

Going from a working, but horrible EDM setup to a useful machine step by step is the aim of this project. With that, all processes running, when eroding metals with sparks will be treated chapter by chapter. Main questions are:

- What happens when a spark hits the workpiece

- The importance of cooling and flushing

- The properties of a spark (plasma)

- Minimum electronic circuits required

- Better electronic circuits

- Electrode materials / what materials can be eroded

- Difference in software control of a CNC machine compared to milling

- All the other questions that will rise when diving deeper into the project...

  • Engraving with 12V works!

    Norbert Heinz01/15/2024 at 16:33 0 comments

    Besides changes in wire feeding, the new clamp for connecting the 0.2mm electrode wire to the 12V of the supply voltage are the major upgrades:

  • Machines don't alway work as planned...

    Norbert Heinz01/07/2024 at 16:17 0 comments


    ...but meanwhile the 12V engraving works fine. More on that, soon.

  • 'Active Hammering' is the next step

    Norbert Heinz11/22/2023 at 14:11 0 comments

    Adding active control over the hammering process will open the door to better engraving, even if the results aren't better with the first version of my mechanics:

    The bugs are known, so let's improve the design...

  • Convert DC Motors into a Wagner Hammer

    Norbert Heinz11/05/2023 at 09:00 0 comments

    A Wagner Hammer must lift the electrode whenever a current flows through it's windings. So what about using a DC motor to do exactly this?

  • Current, lifting force and more engraving

    Norbert Heinz10/28/2023 at 11:33 0 comments

    I have developed another type of Wagner Hammer and did some measurements to get a better understanding of the engraving process:

  • Engrave conductive materials with a "Wagner Hammer"

    Norbert Heinz10/14/2023 at 10:09 0 comments

    A "Wagner Hammer" or "Neeff Hammer" is quite simple and essentially consists of an electromagnet and a breaker switch. The electromagnet pulls the hammer inward as soon as a current flows through the coil. If that current is interrupted, the hammer falls back down. The trick is to let the current through the coil flow via this hammer so that it acts as a breaker switch for the coil. Now, connect one terminal to the coil and one to your workpiece and you are ready to do spark erosion.


    It is a simple add-on for any CNC or 3D printer and a great way to teach numerical control. You can engrave a piece of metal for your students without sharp, rotating tools or dangerous laser light.

  • Closer look at the electronics and how to improve the design

    Norbert Heinz09/08/2023 at 06:39 0 comments

    This video of the series takes a closer look at how the electronics works and points to improvements that should be implemented in future versions:

  • Video on my experiments with sparks

    Norbert Heinz08/05/2023 at 08:24 0 comments

    Knowing the properties of sparks is essential before starting to talk about the electronics that controls their energy. A first video with some experiments is online:


    Enjoy!

  • Properties of sparks

    Norbert Heinz08/03/2023 at 07:57 0 comments

    I am currently working on a video that examines the properties of sparks.

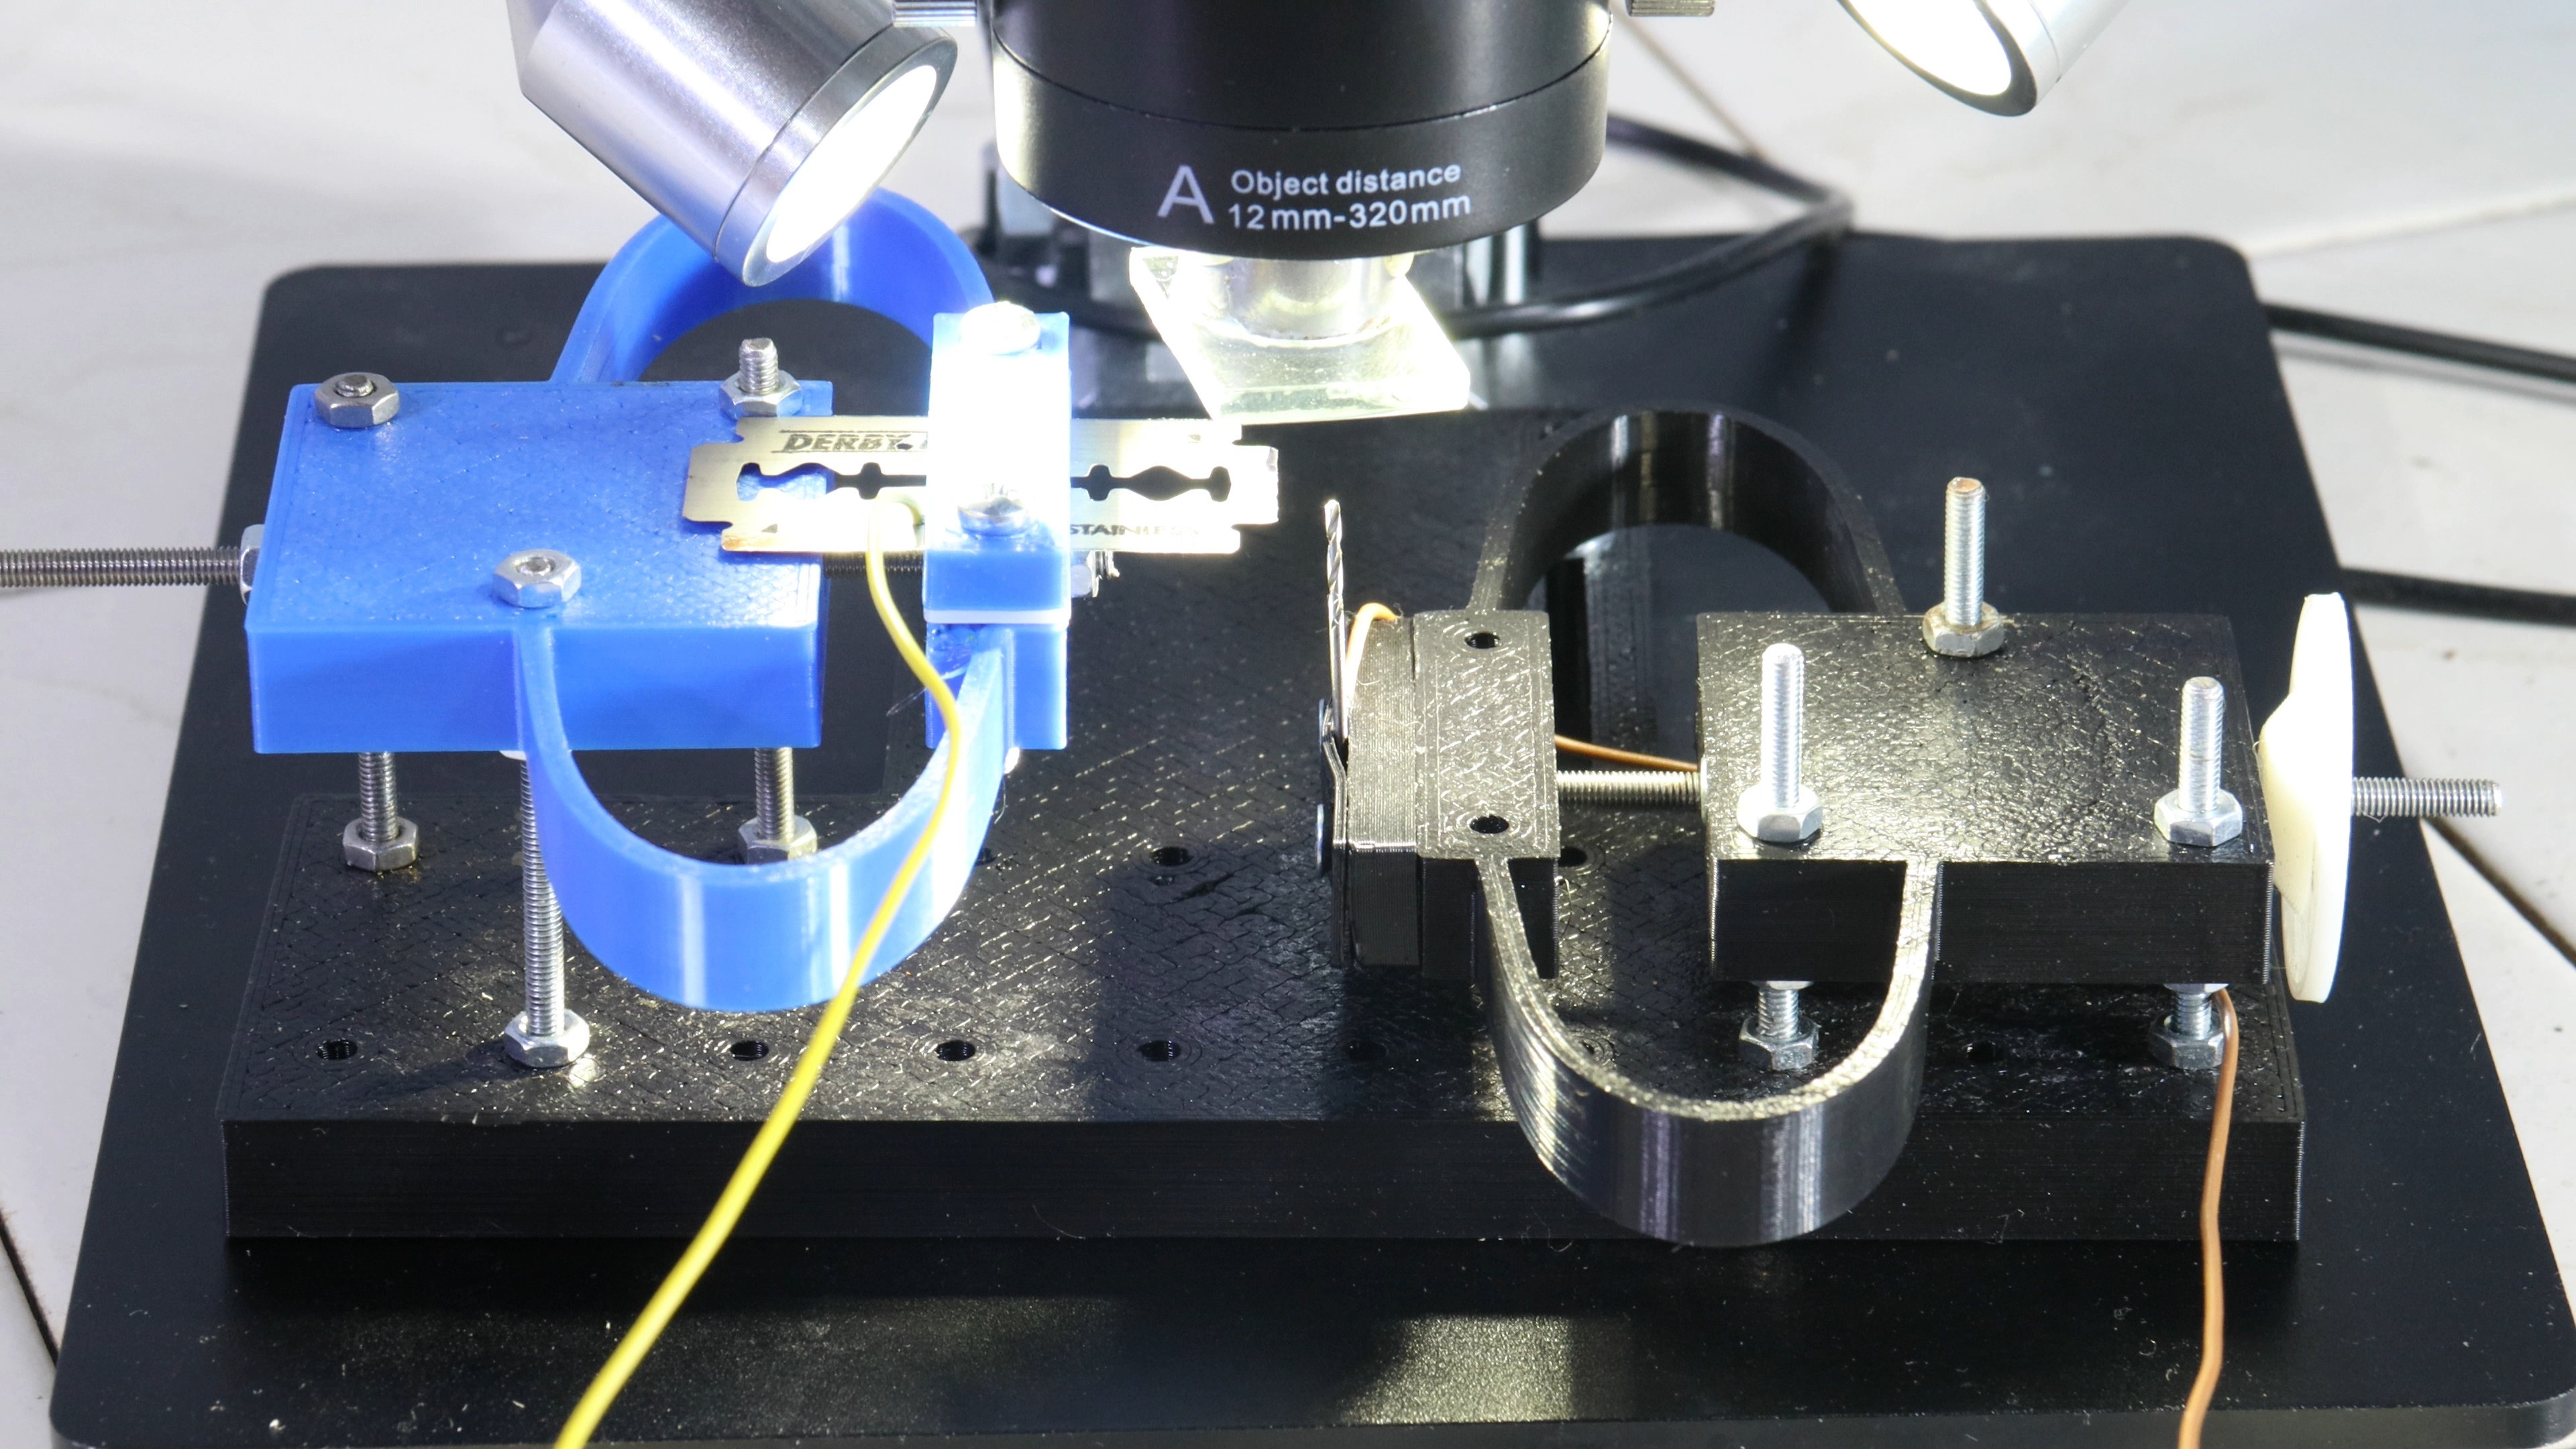
    Even though I could not really see a spark jump over under my microscope, the magnification gives a better idea of how spark erosion works.

    Luckily I found my almost forgotten high-voltage generator in my spare box with which I can demonstrate some core properties of sparks:

    Amongst other sequences, I could record a close up of eroding a wire:

  • Flushing with deionized water makes a huge difference

    Norbert Heinz07/29/2023 at 05:45 0 comments

    The video demonstrating the effects of cooling and flushing is done and it indeed makes a huge difference! By cooling the workpiece and by removing the ripped out particles quickly, the "deep drill" is done more than 10 times faster and the result looks better. Enjoy watching the video:

View all 14 project logs

Enjoy this project?

Share

Discussions

Peter Sikora wrote 07/29/2023 at 11:33 point

A fantastic effort on your part. I always wanted to build my own EDM and had some plans on the drawing board for years but it turned out to be low priority so kudos to you for making a start and writing up a great detailed project. The fun is in the doing and learning along the way. There is no substitute for that. If I can be of help in some way let me know. I am relatively new to Hackaday so I am not sure how members get in touch with each other.

Cheers

  Are you sure? yes | no

Norbert Heinz wrote 07/29/2023 at 12:23 point

Thanks! Yes, the fun is in learning by doing. I haven't built an EDM machine before, but the theory in chemistry and physics behind the process is no real secret to me. Also fast switching MOSFETs or microcontroller programming is what I have dealt with for some years. Time to combine it all in one machine. However, the devil is in the detail and that's where I am learning new things with each chapter.

The new chapter I am working on is about plasma and things do not work as intended. Observing 30V sparks through a microscope? Not as planned, yet.

About getting in contact: If you follow my project, simply leave a comment if you have a question or a remark on what to do better.

  Are you sure? yes | no

Peter Sikora wrote 07/29/2023 at 01:00 point

Wire EDM uses distilled, filtered and de-ionized water because the wire is very thin and you need to get rid of heat rapidly on the surface. If you want to drill holes, a fluid similar to Diesel with a high flammable point is better. The goal is to flush the debris caused by the spark away. Most electrodes used in EDM have small flushing holes drilled into them. The hole you tried to drill has too much current applied, not enough voltage and the frequency is probably too low. The trick is to maintain a constant gap between work piece and electrode. I spent a lot of time running a CNC EDM machine. Make sure the return flushing fluid into the electrode is well filtered.

  Are you sure? yes | no

Norbert Heinz wrote 07/29/2023 at 05:54 point

Thanks Peter for sharing your knowledge!

This project is meant to go from horrible to better step by step and so to give tinkerers a deeper understanding of the physics and chemistry running in the EDM process.

Right now I have added a blog entry that clearly shows the importance of flushing. As this Project is dedicated to hobbyists, deionized water is the fluid of choice. I will have a deeper talk on the fluids and filter systems in a later chapter.

The electronics is also in a "just working" stage for now and I will have talks on that in coming blog entries. Same is for electrode materials and all the other things to know.

 Stay tuned!

  Are you sure? yes | no

Similar Projects

Does this project spark your interest?

Become a member to follow this project and never miss any updates