Guyrandy Jean-Gilles
Paying Bills

PCBWay graciously offered to sponsor this project. They are quite thorough with their file approval process to avoid any surprises once boards ship. Thanks PCBWay!
Introduction
The goal of this project is simple: democratize e-books. instead of repeating what I've already written, read the first project log to understand the ethos of the project. I'm writing this nearly a year after publishing that project log and I can happily say I now have a proof-of-concept for a cloud-to-hardware open source e-reading solution. For granular details take a look at the project's repository.
Hardware
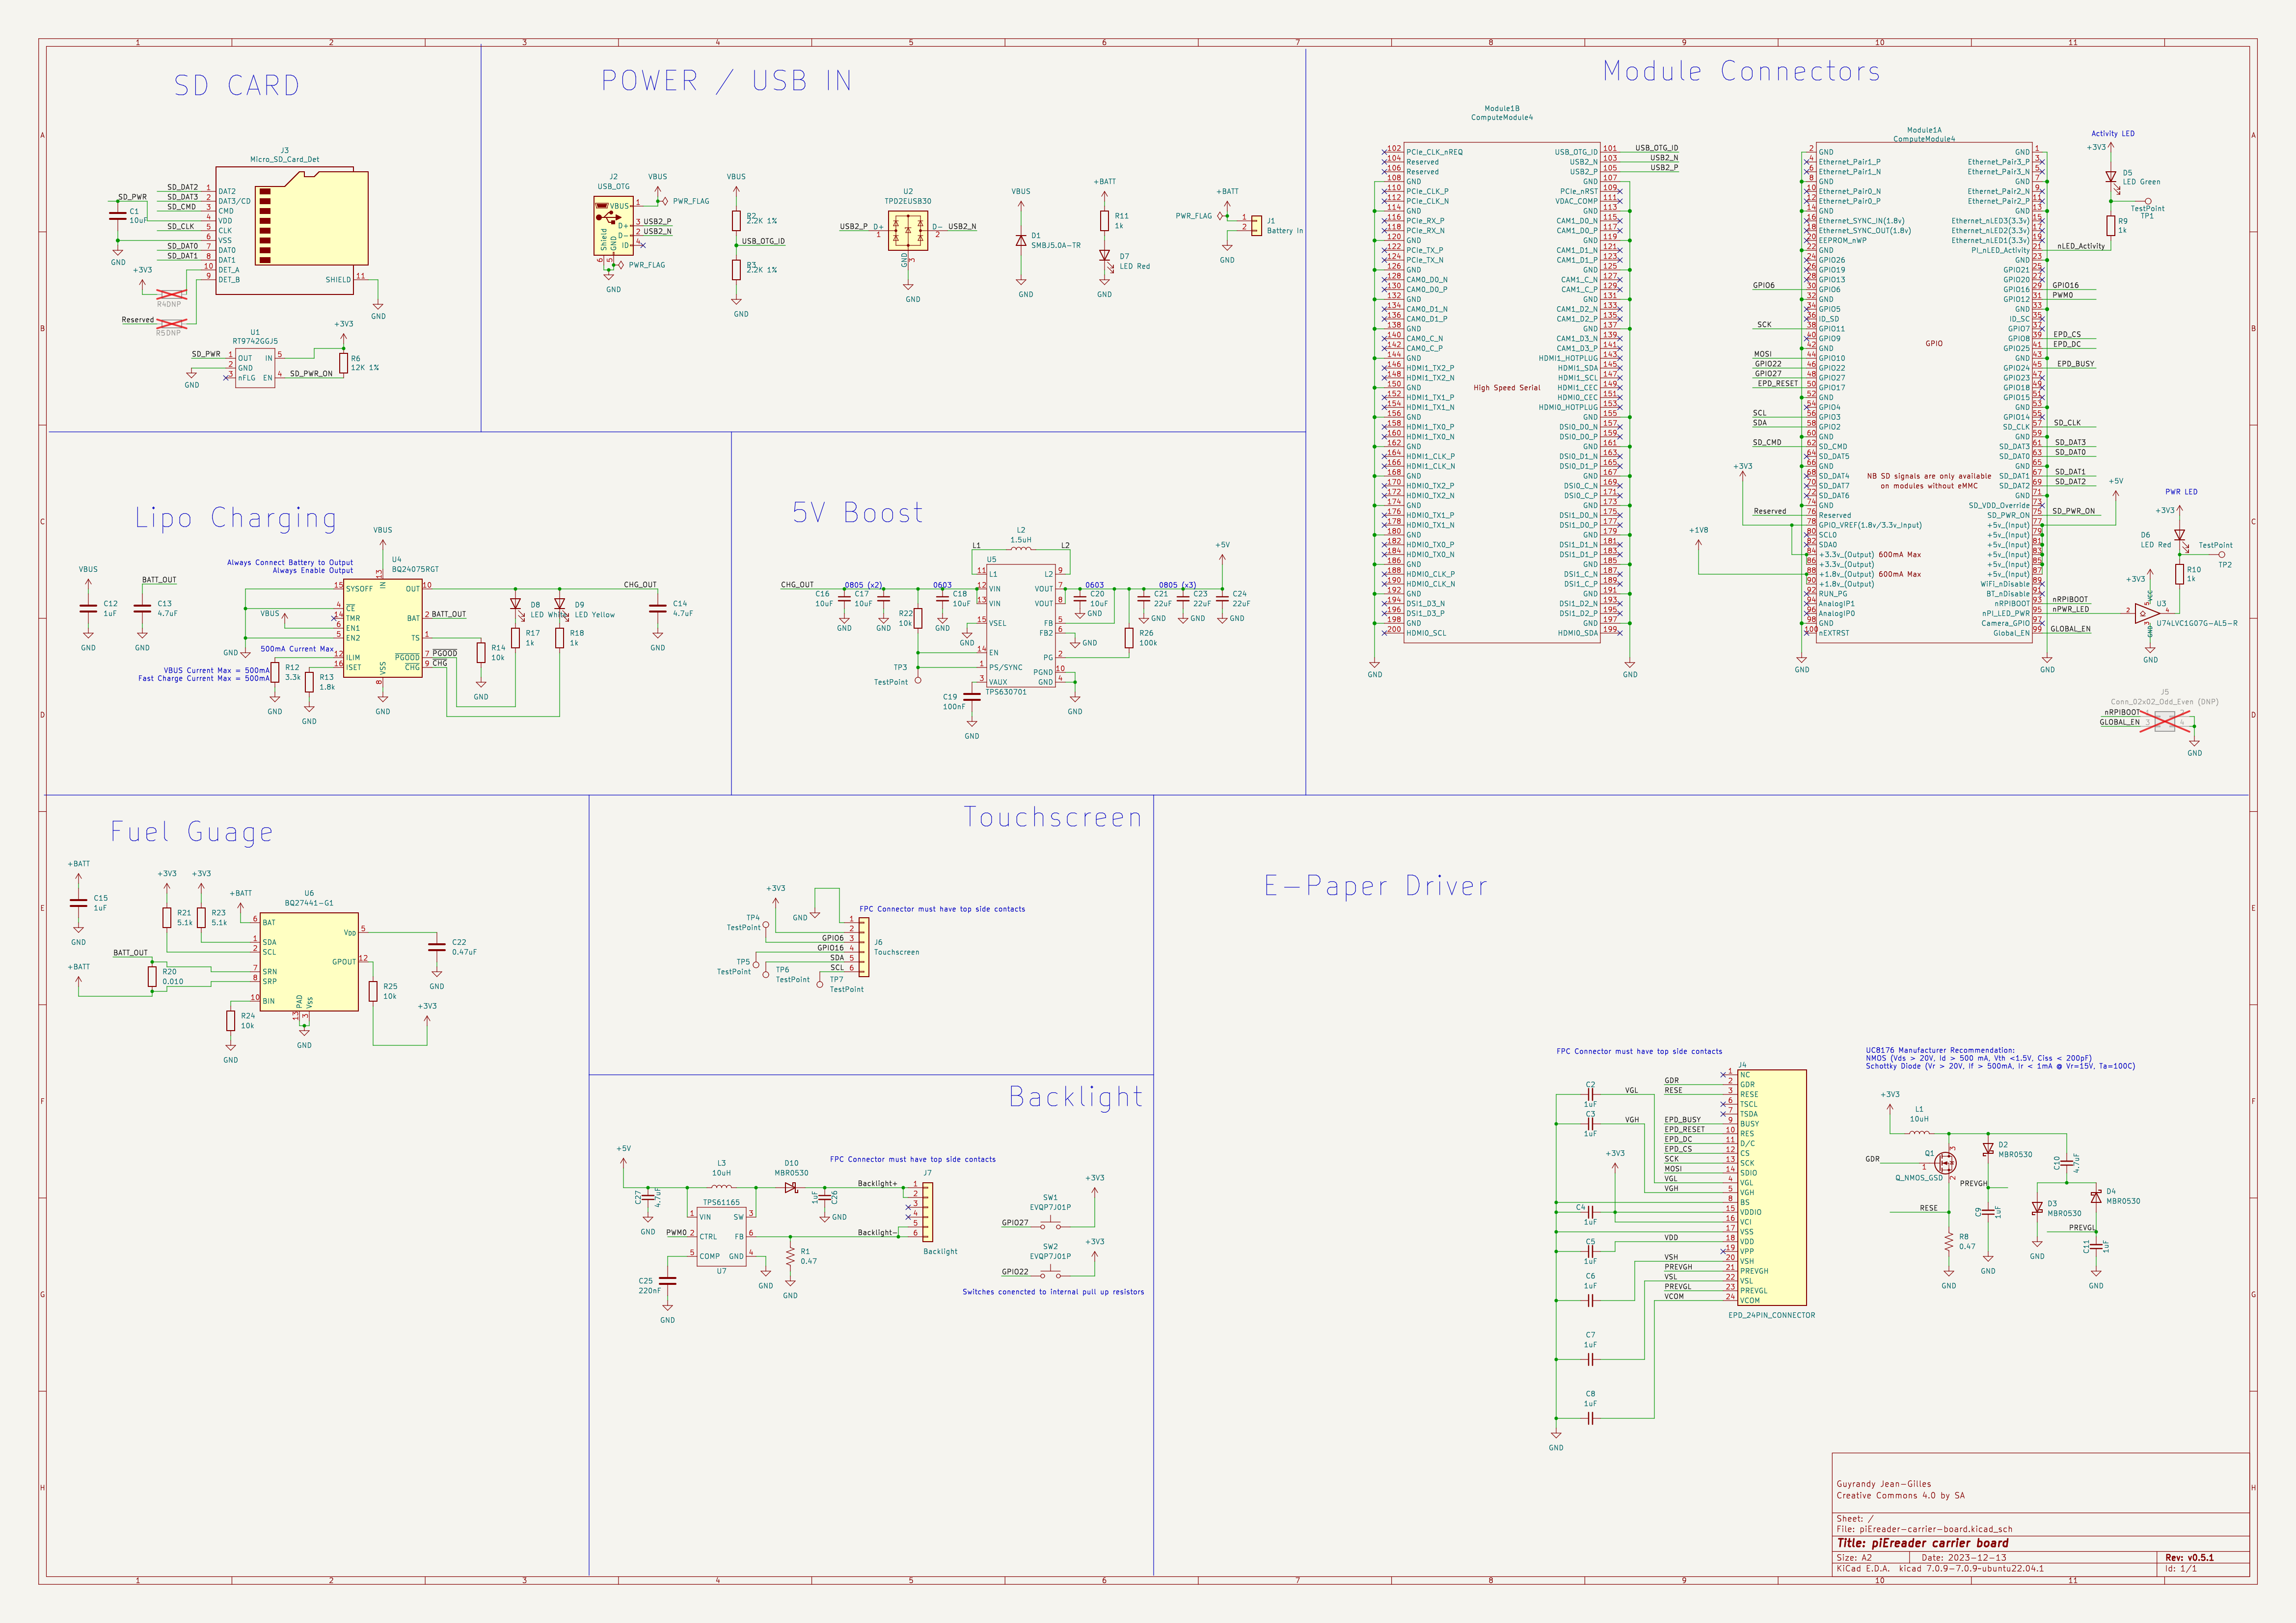
Below is a high level system diagram and schematic of the project.
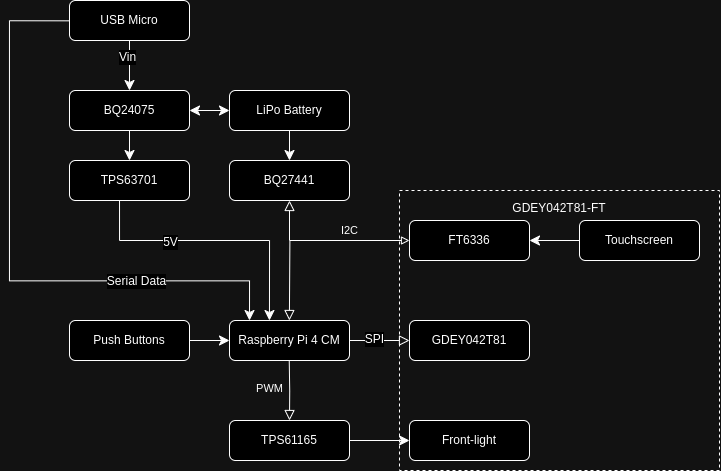
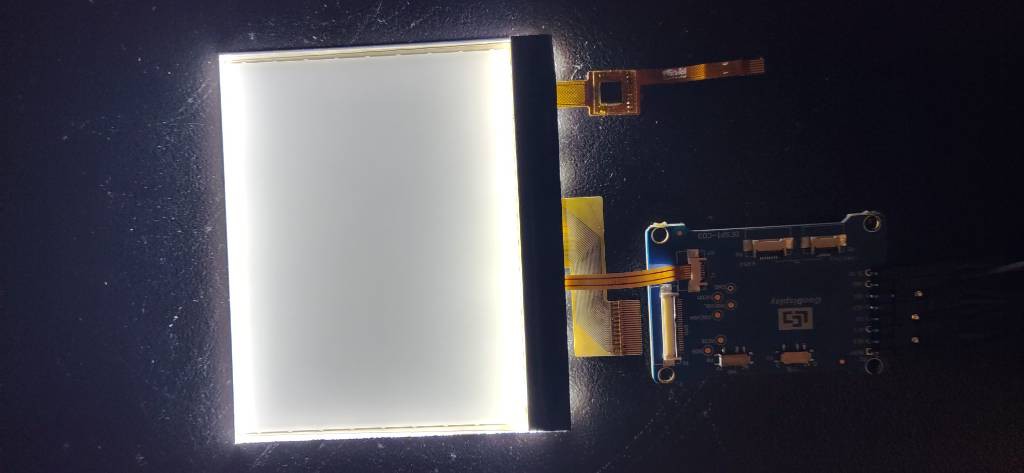
The heart of the e-reader's hardware is the Raspberry Pi Compute Module 4. The e-paper is GDEY042T81-FT02 from Good Display, which includes a front-light and a touchscreen. The e-paper communicates to the Compute Module via SPI. The TPS61165 from Texas Instrument's drives the front-light and the Compute Module controls brightness via PWM. A 1250 mAh lithium polymer battery powers the project. BQ24075 charges the battery, BQ27441 monitors the battery's status and reports to the Compute Module via I2C, and the TPS63701 boosts battery voltage to 5V.
Now, I would be remiss if I did not mention The Open Book by Joey Castillo. The e-paper driver he released is copy-and-pasted in this project and largely reduced the hardware hurdles nee
There is also a Raspberry Pi Hat (pre Pi 5 form factor) as well, but the carrier board is the true form factor.
Software
Below is a high level system diagram for the software

I mentioned in the intro that this project is a proof-of-concept and I'd say the most proof-of-concept-y component is the software. It's pretty meh honestly. One of the reasons I stopped updating the project was I effectively was writing an e-reader OS from scratch. The firmware for the peripherals in the hardware section (i.e driving the e-paper, reading the touchscreen, etc.) can be used as a known-good working example. The UI and application code... maybe don't use.
A would go into detail about the each software file but again... it's not very good so instead I'll talk about the major libraries and tech stacks used.
MuPDF
The heart of this project's application code is MuPDF. A comprehensive document rendering library that supports just about every e-book format. It reads documents from the filesystem, lays out the document for the screen dimension, and outputs a pixel map. The library also compiles to 60+ MB so centering this project on a microcontroller is out of the question. This leads us to the next part of the technical stack.
LVGL
Light and Versatile Graphic Library is designed for embedded systems. I could've used the Linux frame buffer to drive the e-paper display, but writing the GUI with LVGL allows me to easily port to a microcontroller if I can squeeze down MuPDF capabilities to a flash chip. Also, sending LVGL widgets to the e-paper display was much more straight forward than the frame buffer device.
Calibre
Just about every e-book lover reading this has heard of Calibre, an all in one e-book management software. You can read e-books, edit metadata, purchase e-books, and even self-host a book server. The latter is how Calibre comes into this project. The software allows one to run a web server that makes a book library available on a local network or on the world wide web with port forwarding. Put you don't need Calibre to serve books. In fact, there's an open spec for digital distribution.
OPDS
The Open Publication Distribution System is an open, decentralized way to present machine-readable catalogs to e-reader clients. If that went over your read, OPDS is to e-books as RSS feeds are to podcasts. That's an oversimplification, but it's my laymen explanation. OPDS is how the project fetches books from Calibre, and thus, the project can fetch books from any OPDS compatible server.
Quick Reference Guide
Front-light
There are only two physical buttons on the e-reader meant to control the front-lighter. By pressing these side actuated buttons you can set the front-light to 10 different levels of brightness.
Adding Books
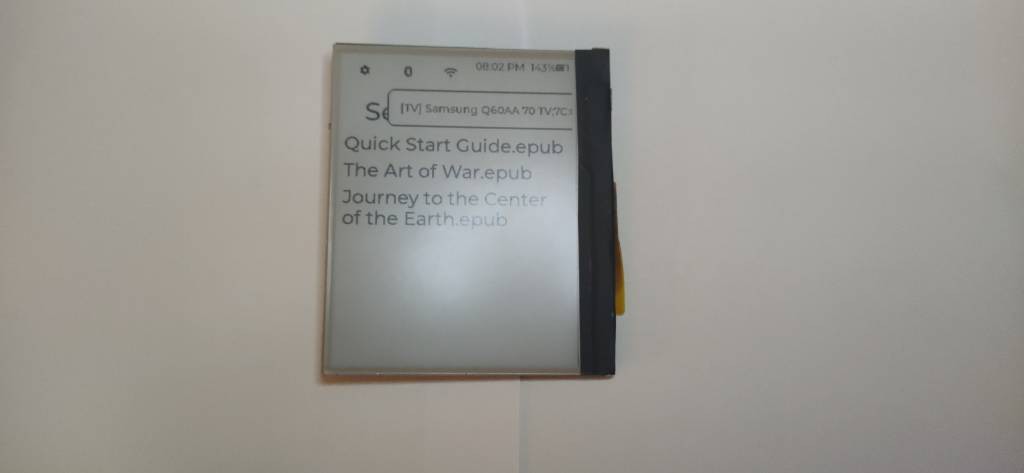
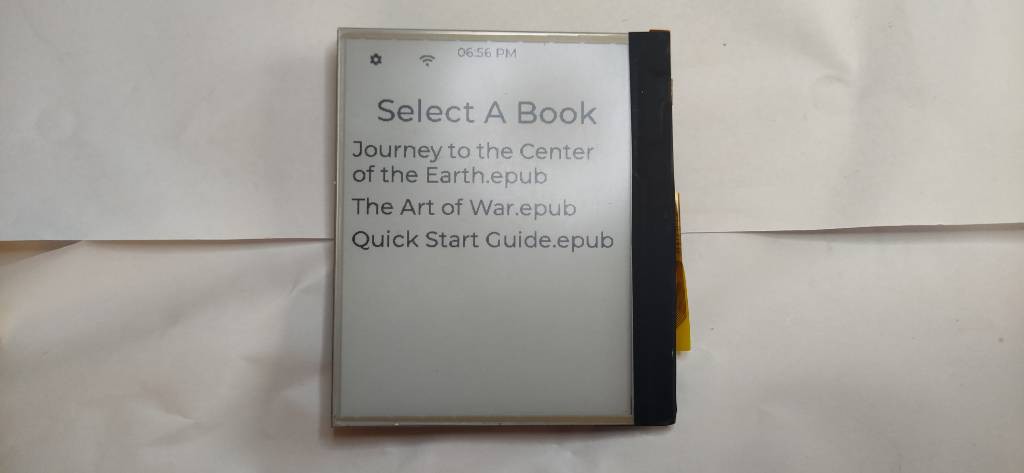
When the software first boots up, you'll be greeted with a book menu and a status bar.
The default location of books is ~/Bookshelf/. The end-user can change this by modifying the config JSON file for the e-reader which is default stored at ~/.config/piereader/config.json. The schema is:
{
    "version": <float_of_version>,
    "book_directory": "<string_of_book_absolute_path>",
    "bookservers": [
        {
            "type": "<string_of_server_type>",
            "url": "<string_of_server_url>"
        }
    ]
}
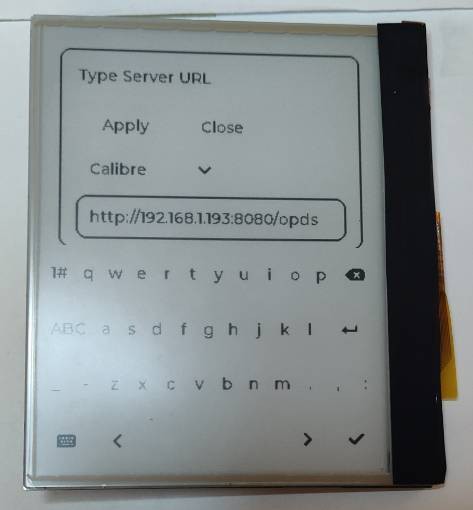
I go over code details and UI of adding a book server in this project log. In short, you can add an OPDS-compliant URL to list of servers that the e-reader continuously checks and downloads books from.
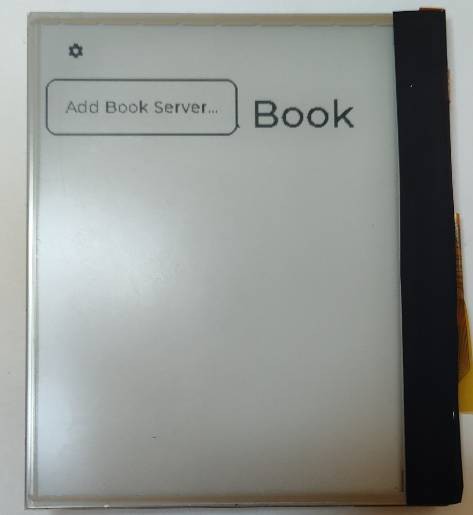
After entering a server, you'll return to the book menu.
Reading
The e-reader will present a one-time tutorial screen before displaying the first e-book after boot. Tap anywhere to make the tutorial go away. You can also play audio-books from the book menu, but the UI for the player is not done as of writing this.
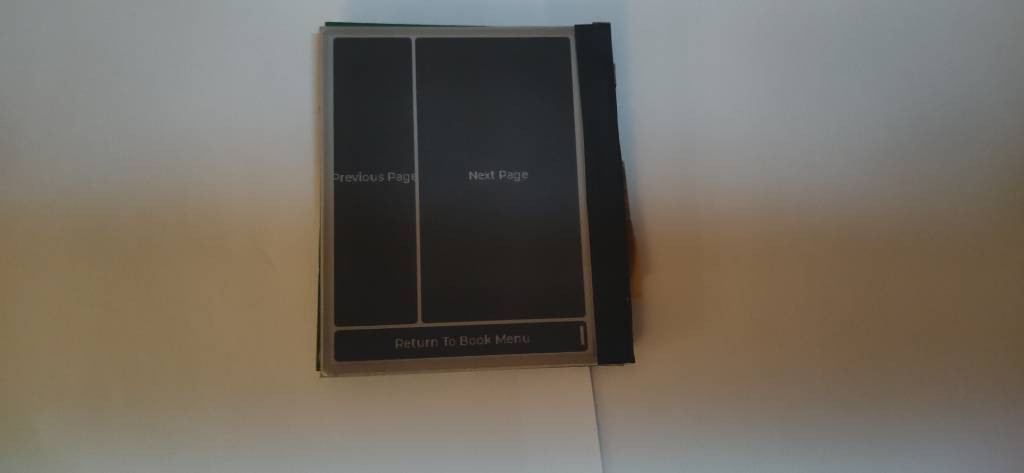

Press the right 2/3s of the screen to go to the next page of an e-book. Tap the right third of the screen to go to the previous page, and press the bottom tenth of the screen to return to the book menu.
Progression is saved in a plain text JSON file by default located at ~\.local\state\piereader\progression\<ebook_file_name>.locator. The e-reader automatically updates progression files while reading, but the end user can manually edit them as well. The schema is:
{
    "href": "<absolute_path_to_book>",
    "locations": {
        "position": <book_page_integer>,
        "totalProgression": <percent_completion_of_book_as_float>
    }
}
Note, that neither the carrier board nor the HAT have explicit audio out peripherals. The preferred method to listen to audiobooks is connecting to a Bluetooth audio device. There are GUI elements to facilitate this.