 Mukesh Sankhla
-
11SimplePetPot
To begin coding SimplePetPot with the Mind+ software, please follow these detailed steps:
- Visit the Mind+ download page at https://mindplus.cc/download-en.html.
- Download the Mind+ software for your computer's operating system (Windows, macOS, Linux) and follow the installation instructions.
- After installation, launch the Mind+ software on your computer.
- Go to the "Extensions" menu in Mind+.
![]()
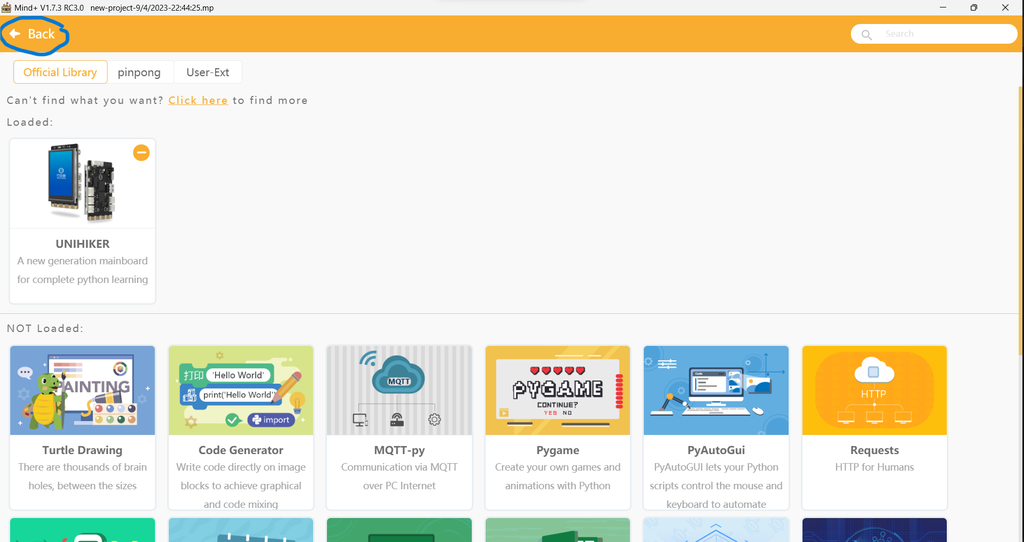
- Select "Unihiker" from the available extensions.
![]()
- Ensure your Unihiker board is connected to your computer using the 90-degree Type-C cable.
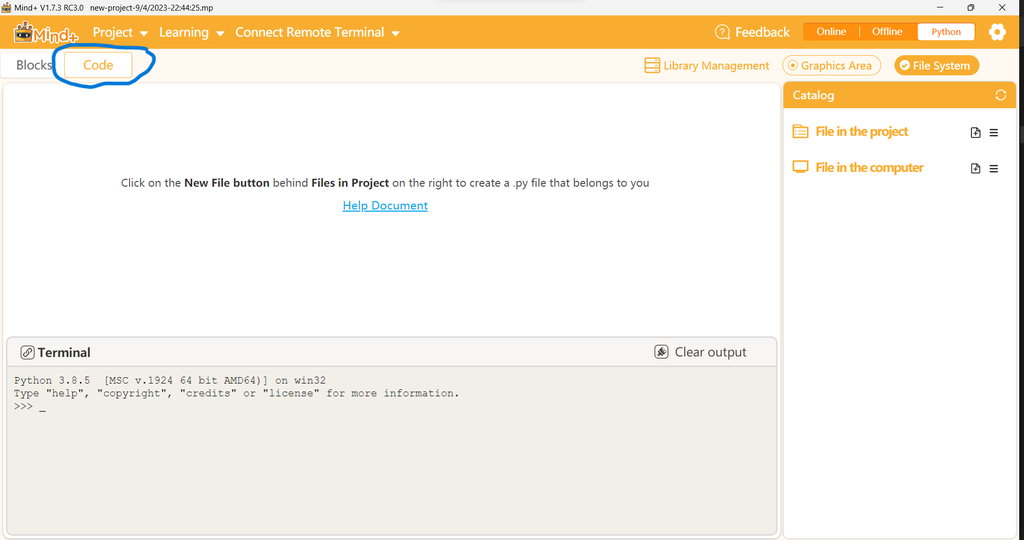
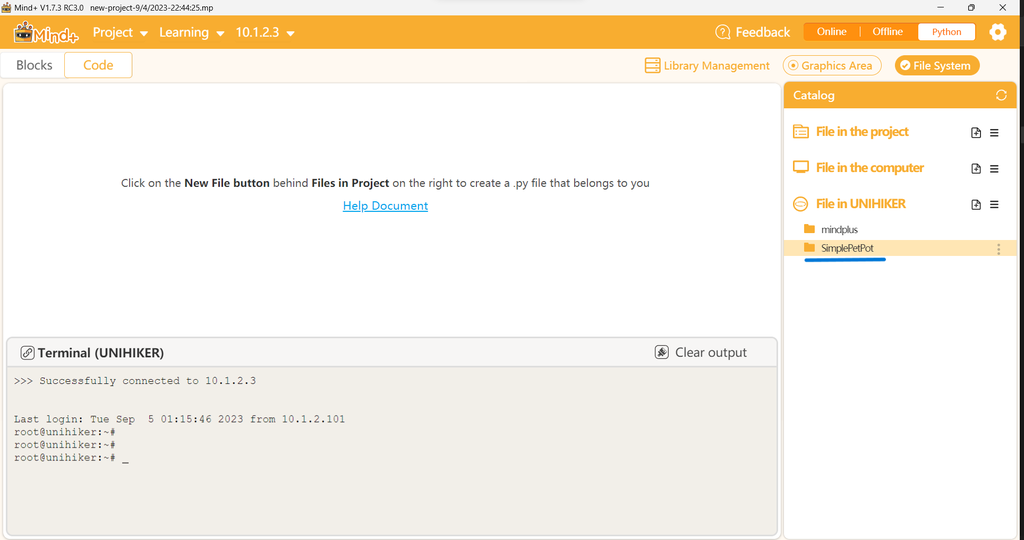
- In Mind+, click on the "Code" menu.
![]()
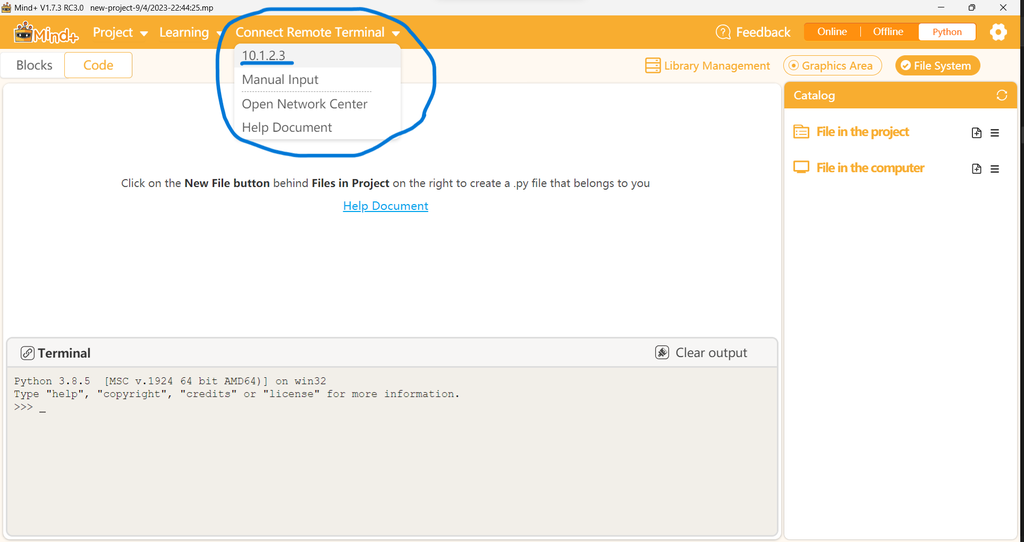
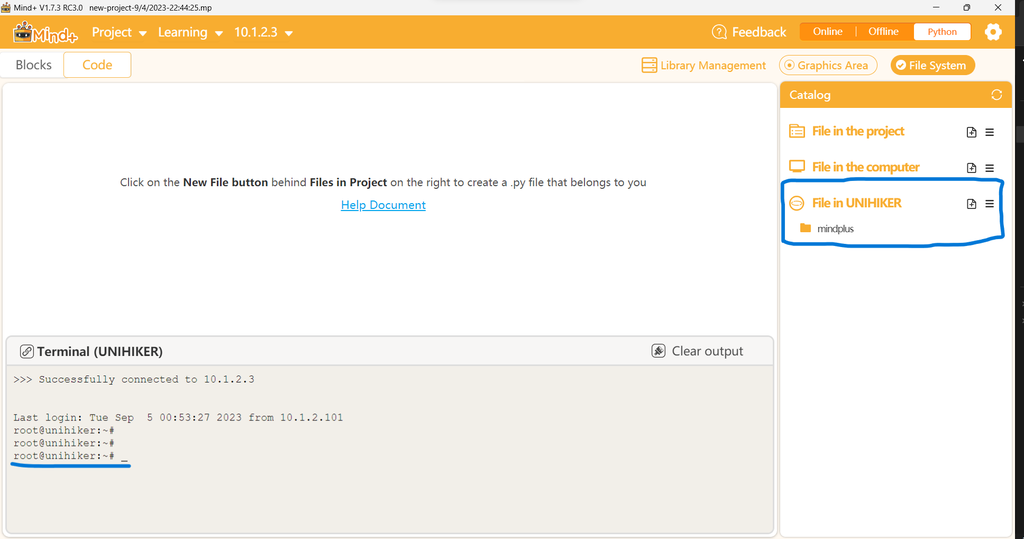
- Look for an option to connect to the Unihiker, typically displayed as "@10.1.2.3."
![]()
![]()
- Once connected to the Unihiker, open the directory where your SimplePetPot code is stored. It should be in a folder you've downloaded, likely named "SimplePetPot."
- Drag and drop the entire "SimplePetPot" folder from the downloaded zip file into the appropriate location within the Mind+ software.
![]()
![]()
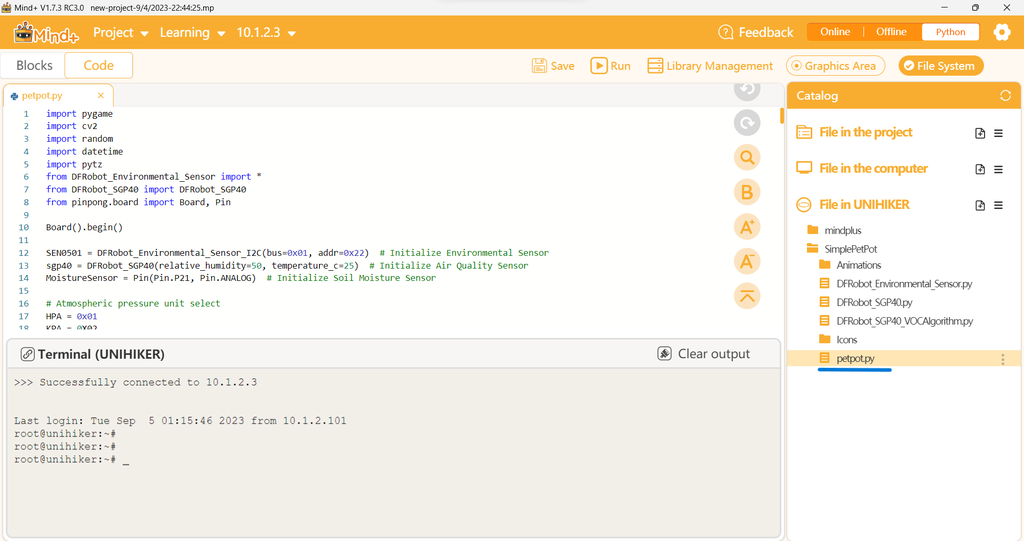
- In Mind+, locate and open the "PetPot.py" code file from the "SimplePetPot" folder.
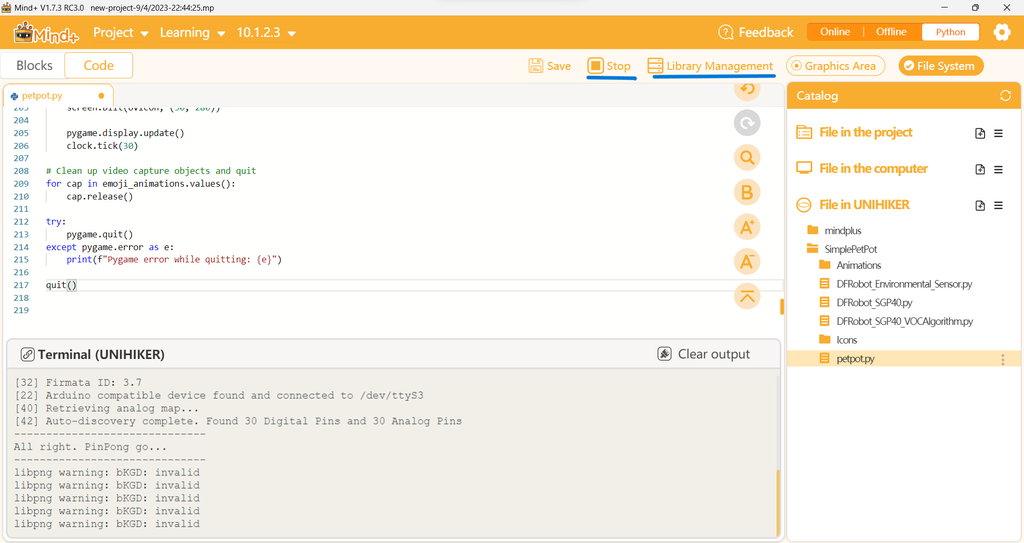
- Run the code within the Mind+ environment.
![]()
- If you encounter any errors or missing libraries while running the code, you can download and install the required libraries from the Mind+ Library Management.
![]()
Following these steps will allow you to code and run SimplePetPot using the Mind+ software, creating a user-friendly interface for your Pet Pot project.
-
12AdvancePetPot
- Follow the same above instructions for setting the Mind+ software.
- Drag and drop the AdvancePetPot folder into unihikers directory.
- Follow this tutorial for Setting Up The SSH For Unihiker.
- After you setup the SSH follow the below steps.
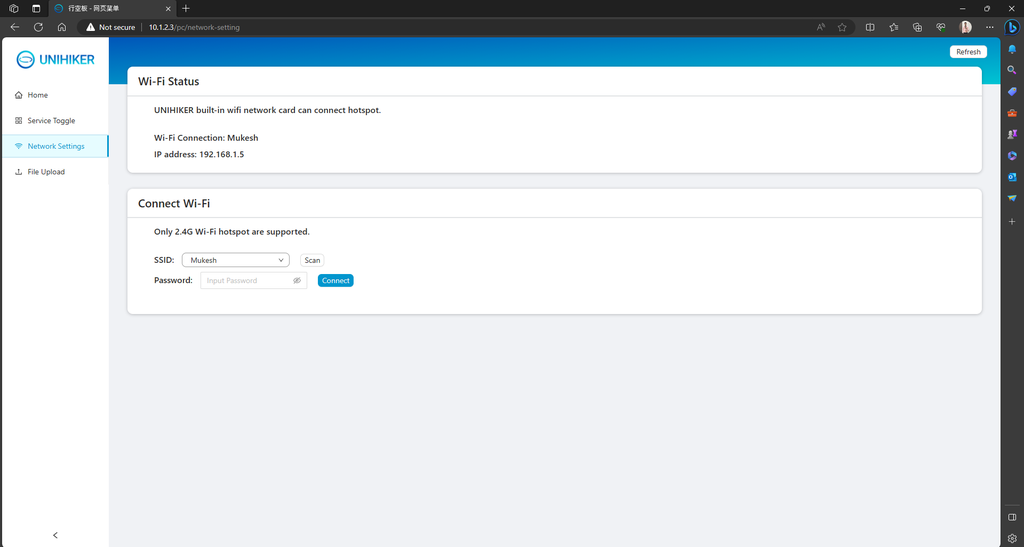
Connect Unihiker To Home WiFi:
- Follow Unihikler tutorial and connect the Unihiker to your home WiFi.
![]()
Installing Node-Red:
- Use the below command to install Node-Red
bash <(curl -sL https://raw.githubusercontent.com/node-red/linux-installers/master/deb/update-nodejs-and-nodered)
- Use the below command to start Node-Red
node-red-start
- Once Node-Red is installed, you can start it by opening a web browser and entering the following URL:
http://{your_pi_ip-address}:1880Installing My SQL:
- Run the following commands
apt-get update
- Install MySQL server on unihiker
sudo apt install mariadb-server
- Check and start MySQL terminal
sudo systemctl status mariadb
- Create MySQL user and password
username-u password-p
- Grant user remote access permissions
GRANT ALL PRIVILEGES ON *.* TO 'root'@'%' IDENTIFIED BY 'your_password' WITH GRANT OPTION;
- Grant user local access permissions
GRANT ALL PRIVILEGES ON unihiker.* TO 'root'@'localhost' IDENTIFIED BY 'root';
FLUSH PRIVILEGES;
EXIT;
- Install MySQL python module
pip install mysql-connector-python
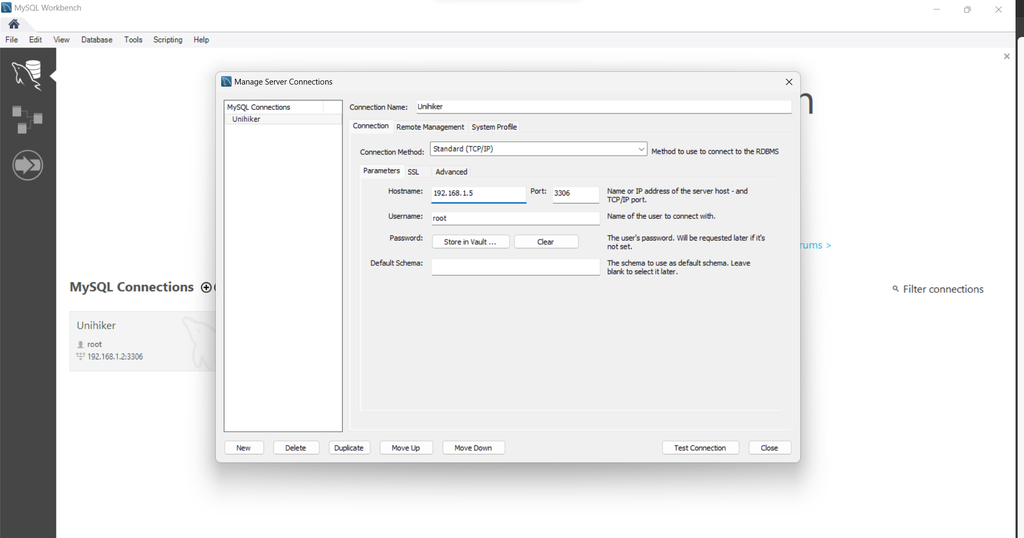
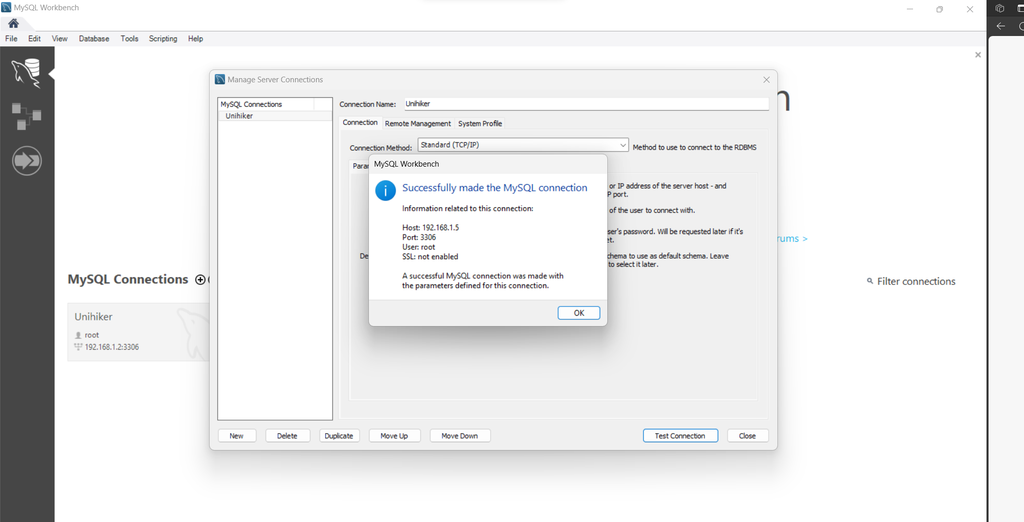
- Download and install MySQL Workbench software and connect to the unihikers MySQL server using username and password.
![]()
![]()
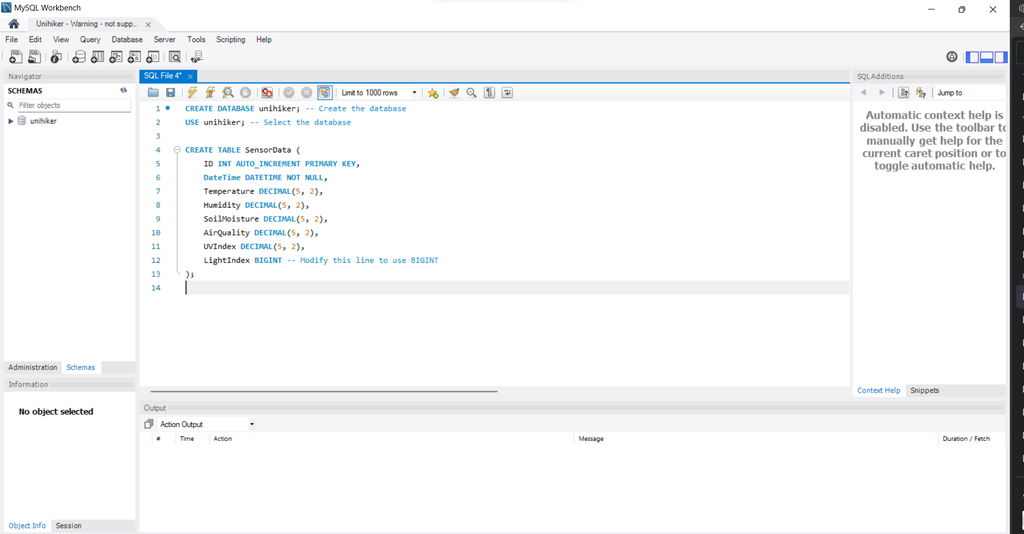
- Run the following query to create schema, table, columns of the database.
CREATE DATABASE unihiker; -- Create the database USE unihiker; -- Select the database CREATE TABLE SensorData ( ID INT AUTO_INCREMENT PRIMARY KEY, DateTime DATETIME NOT NULL, Temperature DECIMAL(5, 2), Humidity DECIMAL(5, 2), SoilMoisture DECIMAL(5, 2), AirQuality DECIMAL(5, 2), UVIndex DECIMAL(5, 2), LightIndex BIGINT -- Modify this line to use BIGINT );![]()
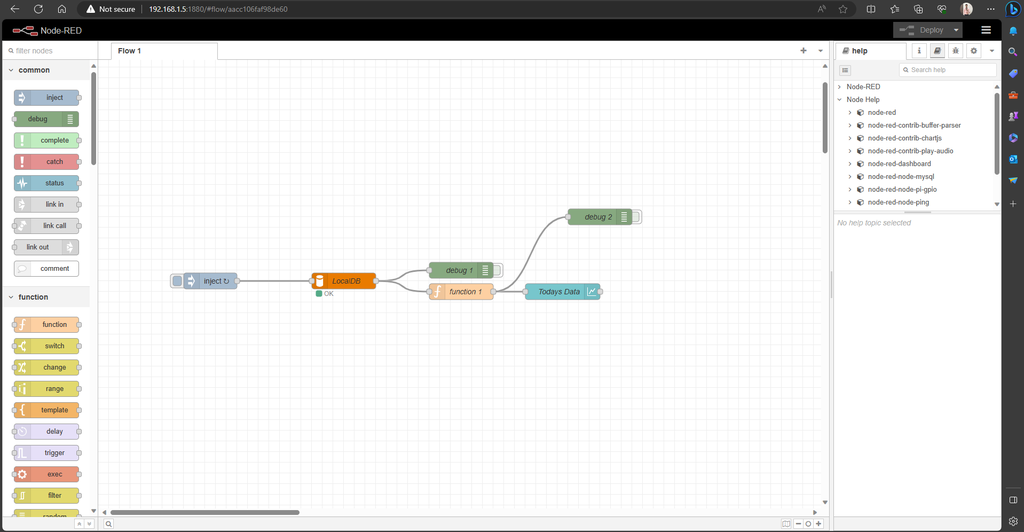
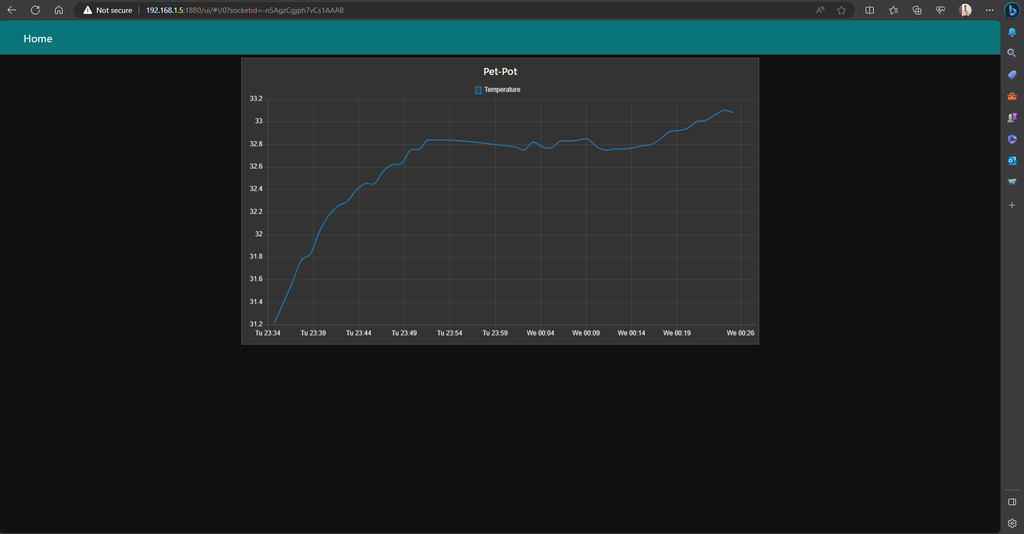
- Now setup the NodeRed flow:
- Use my example as reference
[ { "id": "aacc106faf98de60", "type": "tab", "label": "Flow 1", "disabled": false, "info": "", "env": [] }, { "id": "d453abaa9eb10f4c", "type": "mysql", "z": "aacc106faf98de60", "mydb": "3abdbb72c33a6b69", "name": "LocalDB", "x": 460, "y": 540, "wires": [ [ "960879a0ca162189", "fb2a7cea7a74674c" ] ] }, { "id": "960879a0ca162189", "type": "debug", "z": "aacc106faf98de60", "name": "debug 1", "active": false, "tosidebar": true, "console": false, "tostatus": false, "complete": "false", "statusVal": "", "statusType": "auto", "x": 680, "y": 520, "wires": [] }, { "id": "c48a950e9a14216f", "type": "inject", "z": "aacc106faf98de60", "name": "", "props": [ { "p": "topic", "vt": "str" } ], "repeat": "300", "crontab": "", "once": true, "onceDelay": 0.1, "topic": "SELECT * FROM SensorData WHERE DATE(DateTime) = CURDATE();", "x": 210, "y": 540, "wires": [ [ "d453abaa9eb10f4c" ] ], "info": "{\r\n \"id\": \"d8ed62266b22607d\",\r\n \"type\": \"inject\",\r\n \"z\": \"aacc106faf98de60\",\r\n \"name\": \"\",\r\n \"props\": [\r\n {\r\n \"p\": \"payload\"\r\n },\r\n {\r\n \"p\": \"topic\",\r\n \"vt\": \"str\"\r\n }\r\n ],\r\n \"repeat\": \"\",\r\n \"crontab\": \"\",\r\n \"once\": \"false\",\r\n \"onceDelay\": \"0.1\",\r\n \"topic\": \"SELECT * FROM SensorData WHERE DATE(DateTime) = CURDATE();\",\r\n \"payload\": \"\",\r\n \"payloadType\": \"date\",\r\n \"x\": 180,\r\n \"y\": 360,\r\n \"wires\": [\r\n [\r\n \"21b9594edb0307ce\"\r\n ]\r\n ]\r\n}\r\n" }, { "id": "fb2a7cea7a74674c", "type": "function", "z": "aacc106faf98de60", "name": "function 1", "func": "var result = msg.payload;\n\n// Prepare data arrays for each parameter\nvar temperatureData = [];\nvar humidityData = [];\nvar soilMoistureData = [];\nvar airQualityData = [];\nvar uvIndexData = [];\nvar lightIndexData = [];\n\nfor (var i = 0; i < result.length; i++) {\n var row = result[i];\n var dataPoint = {\n x: row.DateTime, // Assuming DateTime is the x-axis value\n y: row.Temperature // Change this to the desired y-axis value\n };\n temperatureData.push(dataPoint);\n\n dataPoint = {\n x: row.DateTime,\n y: row.Humidity\n };\n humidityData.push(dataPoint);\n\n dataPoint = {\n x: row.DateTime,\n y: row.SoilMoisture\n };\n soilMoistureData.push(dataPoint);\n\n dataPoint = {\n x: row.DateTime,\n y: row.AirQuality\n };\n airQualityData.push(dataPoint);\n\n dataPoint = {\n x: row.DateTime,\n y: row.UVIndex\n };\n uvIndexData.push(dataPoint);\n\n dataPoint = {\n x: row.DateTime,\n y: row.LightIndex\n };\n lightIndexData.push(dataPoint);\n}\n\n// Prepare the chart data for each parameter\nmsg.payload = [\n {\n series: [\"Temperature\"],\n data: [temperatureData]\n },\n {\n series: [\"Humidity\"],\n data: [humidityData]\n },\n {\n series: [\"Soil Moisture\"],\n data: [soilMoistureData]\n },\n {\n series: [\"Air Quality\"],\n data: [airQualityData]\n },\n {\n series: [\"UV Index\"],\n data: [uvIndexData]\n },\n {\n series: [\"Light Index\"],\n data: [lightIndexData]\n }\n];\n\nreturn msg;\n", "outputs": 1, "noerr": 0, "initialize": "", "finalize": "", "libs": [], "x": 680, "y": 560, "wires": [ [ "5aad53cea1da48b0", "5e7142074dbb81f7" ] ] }, { "id": "5aad53cea1da48b0", "type": "ui_chart", "z": "aacc106faf98de60", "name": "Todays Data", "group": "f1f3f08af11de6bf", "order": 0, "width": 0, "height": 0, "label": "Pet-Pot", "chartType": "line", "legend": "true", "xformat": "dd HH:mm", "interpolate": "cubic", "nodata": "No Data", "dot": false, "ymin": "", "ymax": "", "removeOlder": 1, "removeOlderPoints": "", "removeOlderUnit": "86400", "cutout": 0, "useOneColor": false, "useUTC": false, "colors": [ "#1f77b4", "#aec7e8", "#ff7f0e", "#2ca02c", "#98df8a", "#d62728", "#ff9896", "#9467bd", "#c5b0d5" ], "outputs": 1, "useDifferentColor": false, "className": "", "x": 870, "y": 560, "wires": [ [] ] }, { "id": "5e7142074dbb81f7", "type": "debug", "z": "aacc106faf98de60", "name": "debug 2", "active": false, "tosidebar": true, "console": false, "tostatus": false, "complete": "false", "statusVal": "", "statusType": "auto", "x": 940, "y": 420, "wires": [] }, { "id": "3abdbb72c33a6b69", "type": "MySQLdatabase", "name": "LocalDB", "host": "localhost", "port": "3306", "db": "unihiker", "tz": "IST", "charset": "UTF8" }, { "id": "f1f3f08af11de6bf", "type": "ui_group", "name": "Default", "tab": "16fae9a9b6ae5482", "order": 1, "disp": false, "width": "18", "collapse": false, "className": "" }, { "id": "16fae9a9b6ae5482", "type": "ui_tab", "name": "Home", "icon": "dashboard", "disabled": false, "hidden": false } ]![]()
![]()
- You may face few challenges in this step, you have to debug the issue, use internet, ask AI as did. Once everything is connected you are good to record and visualize the data on your fingertips.
-
13Conclusion
![]()
![]()
![]()
![]()
![]()
![]()
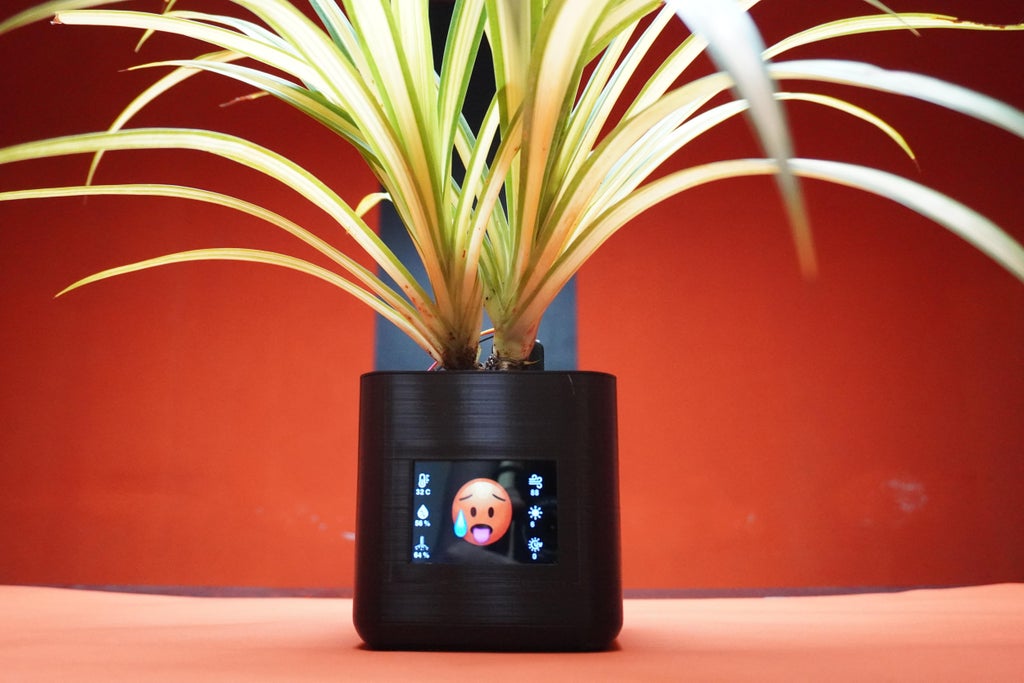
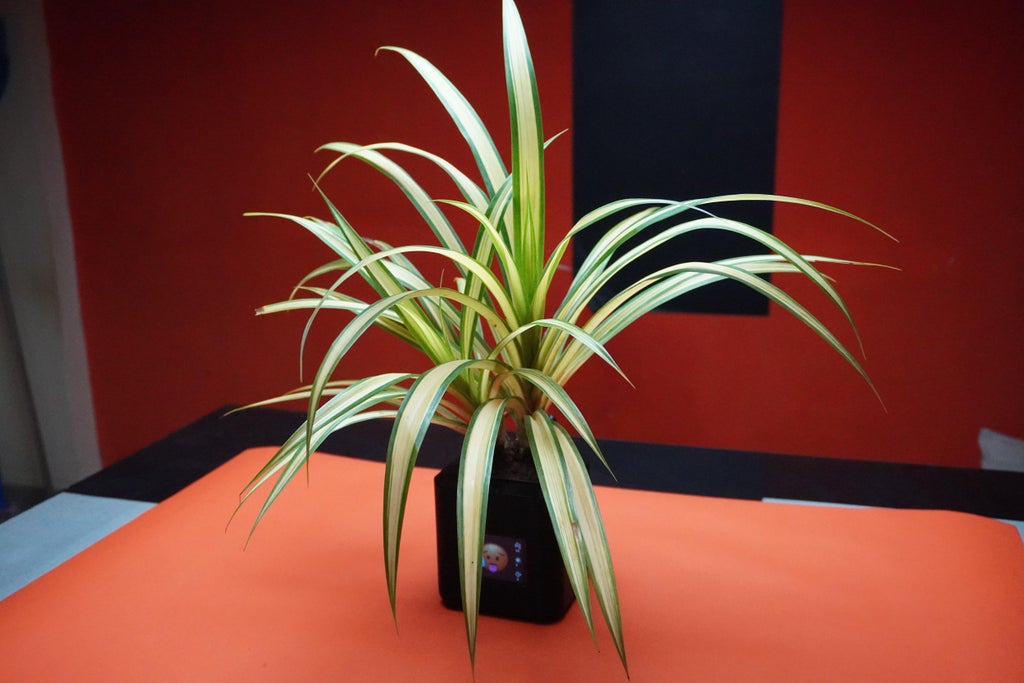
Pet Pot is not just a planter; it's a living, breathing ecosystem. It's a testament to human ingenuity and the desire to nurture the natural world in our digital age.
If you found this project enjoyable and inspiring, please consider giving it a like and sharing your thoughts in the comments. Your feedback is a great source of motivation for me. If you've undertaken this project yourself, don't hesitate to share your own version in the "I made it" section below. Thank you, and I look forward to sharing more exciting projects with you in the future! 😊🌱


Discussions
Become a Hackaday.io Member
Create an account to leave a comment. Already have an account? Log In.