 BastelBaus
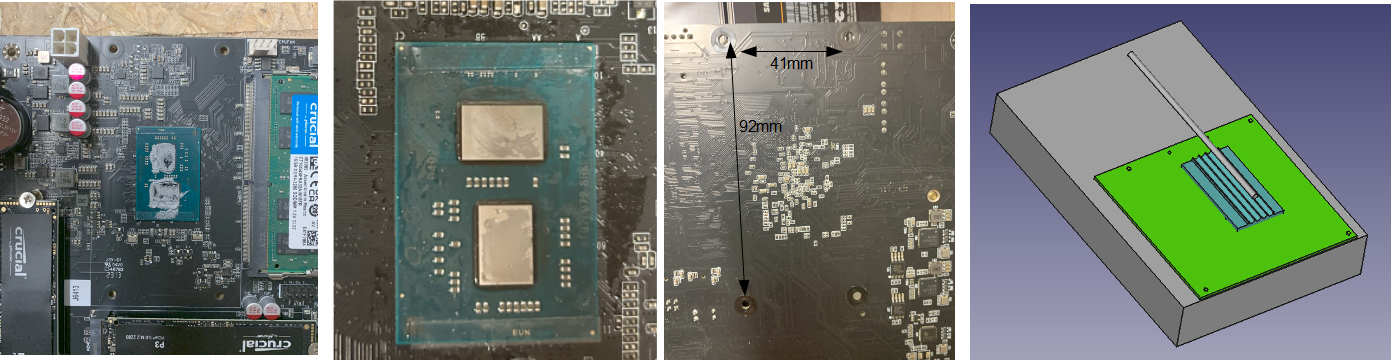
I did not find any dimenions of the mainboard cooler mounting holes in the internet so I was wuite interessted how they axactly look like. So the next step was to dismantle the default cooler and removing the thermal paste. I did a small sketch how I planned to mount he cooper block to the bare die CPU and connect the heat pipes to the alluminium cooler.
all
 My initial plan was to mill the upper and lower copper blocks at ones with my quite simple 18x30 CNC but this significantly failed this time (it worked not to bad for my passive PC build). Also the initially planmned 4 pipes had been to close together to cope with my mechanical skills so I had to reduce to three (which is still sufficient as I found out with the final build).
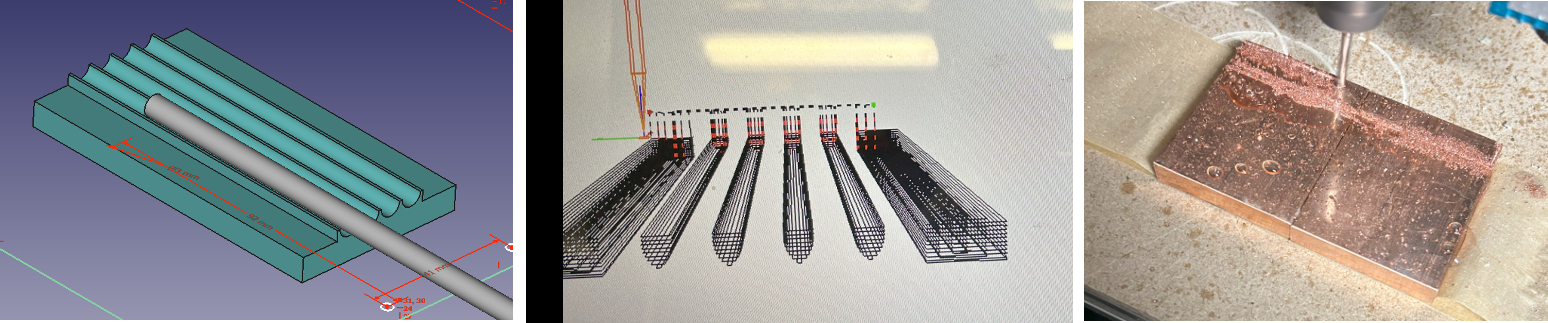 Since I had only milled about 1 or 2 mills when I gave up my initial plan, I used the same copper blockes, drilled holes (and threads) and mounted them together. Then with a good 6mm drill bit I drilled 3 holes. From my past experiences I knew that it was important to fix the copper blocks quite tightly together before drilling a hole in the interface of both.
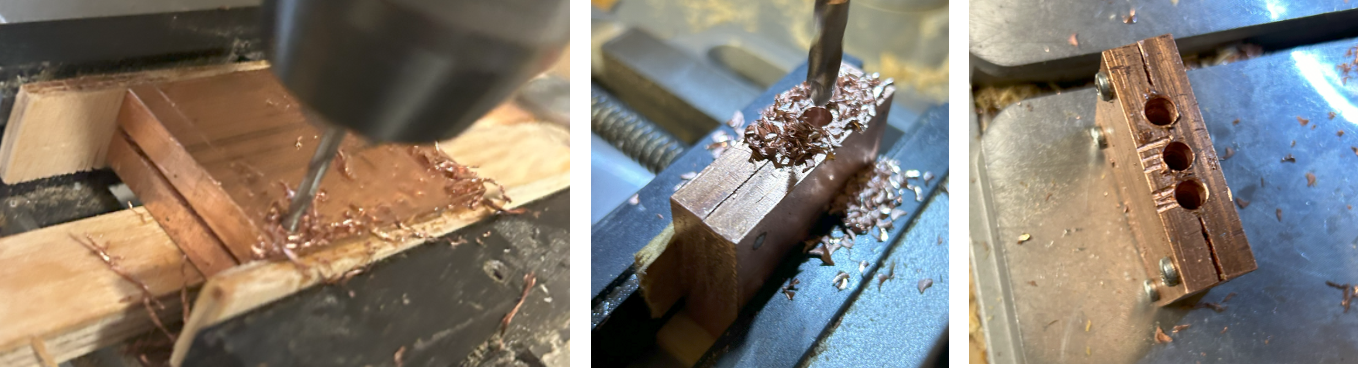 Then it was quite some manual effort to create space for the alluminium mounting brackets by first filing and finally using a metal saw.
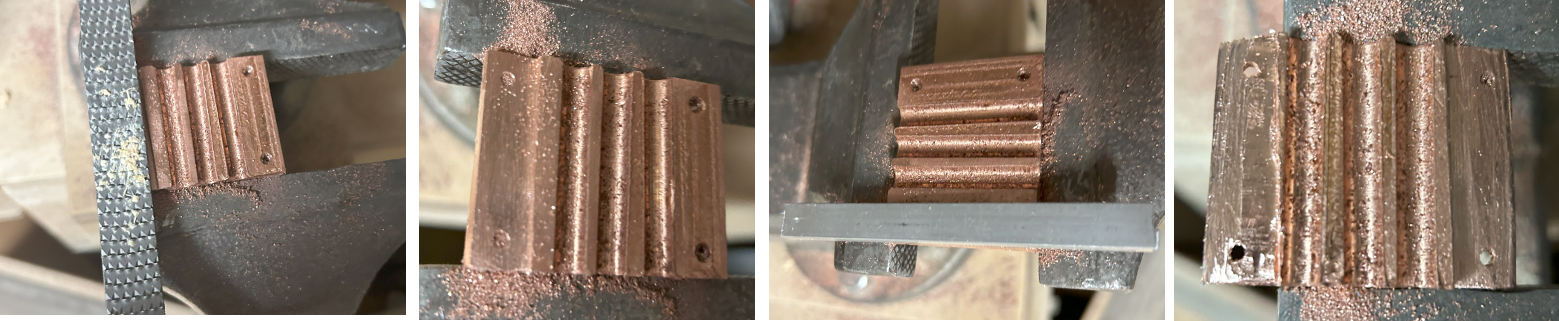 I drilled holes and threads in the alluminium mounting brackets and sanded the copper bottom to be mounted to the bare die CPU chips.
 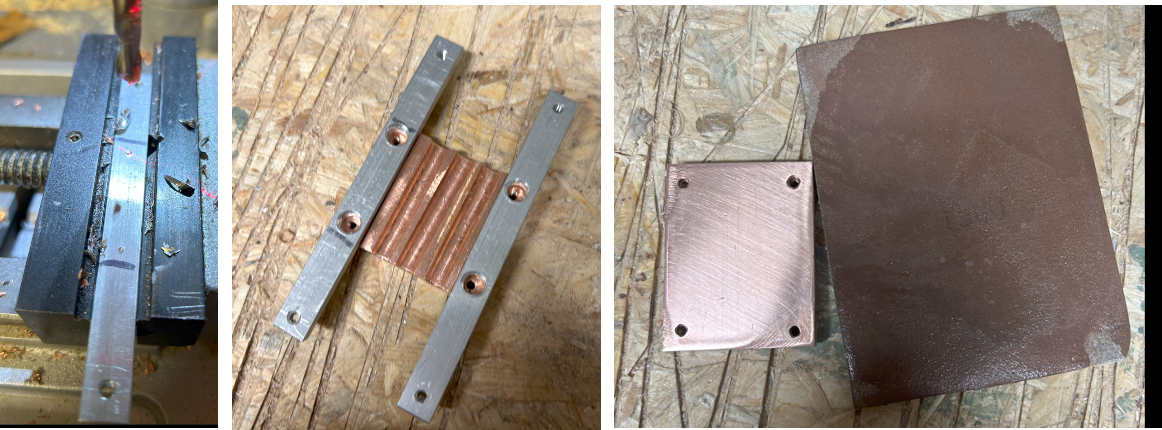 Finally I cut 6 copper bars, clammed them very tightly together and drilled three holes into them. And yes, I did not take care enough to drill the hole very straight but this should not harm the function.
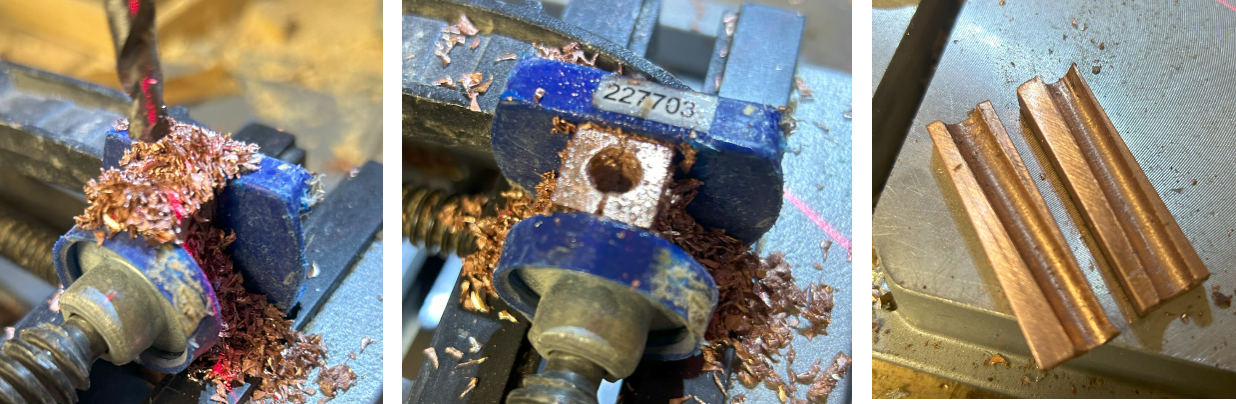
Discussions
Become a Hackaday.io Member
Create an account to leave a comment. Already have an account? Log In.