 Jaydeep
While numerous development boards exist in the market, the Raspberry Pi stands as the go-to device for hobbyists and tinkerers. And why not? It's remarkably straightforward to connect a Raspberry Pi to an HDMI display, attach a keyboard and mouse, and voilà! You have a functional setup. When lacking a display, keyboard, and mouse, you can still remotely access the Raspberry Pi via SSH by connecting it over Ethernet or Wi-Fi. But what if you lack both Ethernet and Wi-Fi connections, rendering SSH inaccessible?
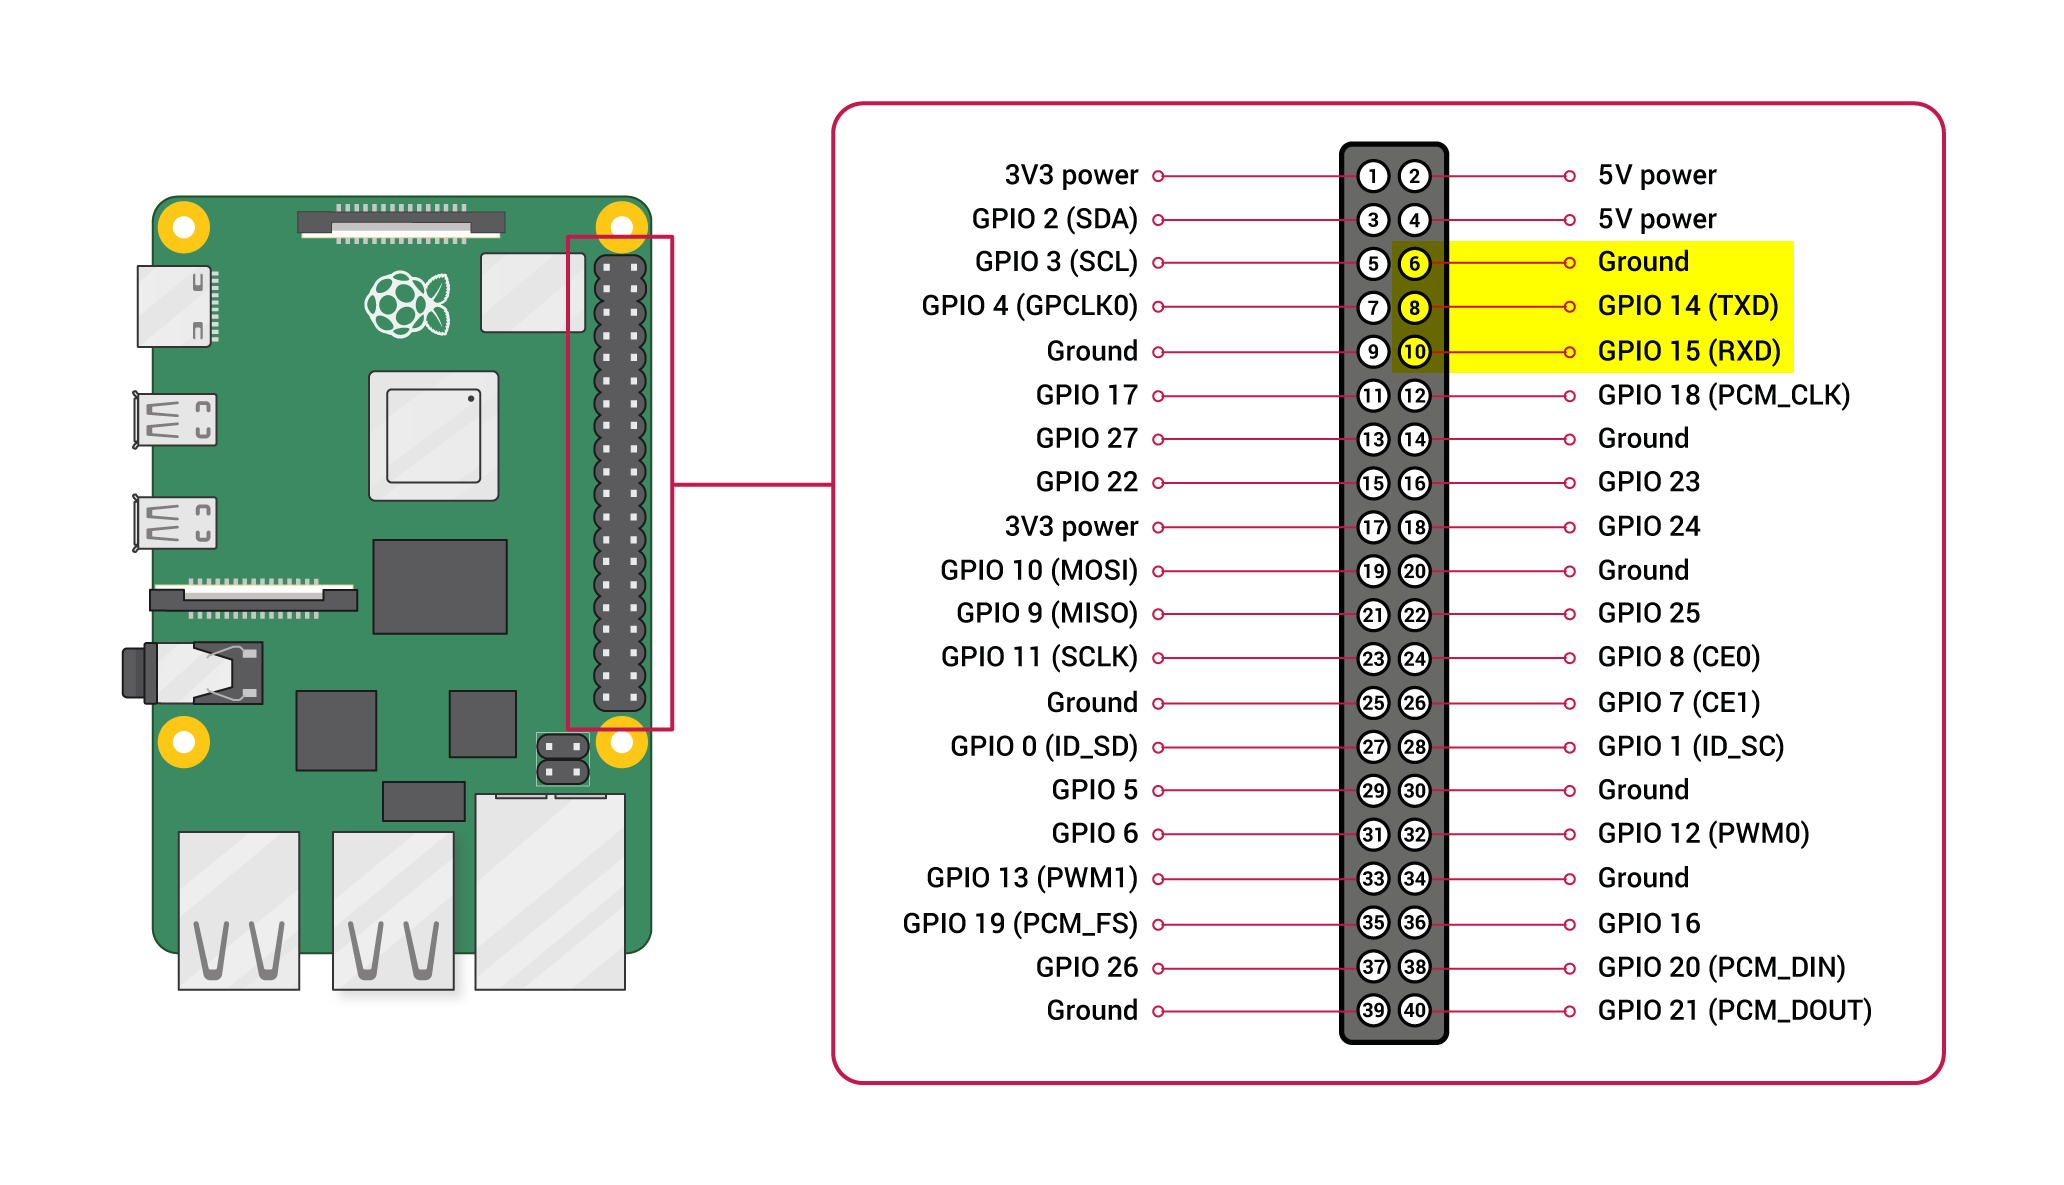
Fear not, for there is an alternative method to access the Raspberry Pi — the Serial Console. Utilizing the serial console also offers a way for users to view boot logs, providing insight into the boot-up process should users wish to tweak it. The serial console of the Raspberry Pi is accessible on the GPIO header, as depicted in the image below.
SETUP REQUIREMENTS
- PC running Windows 10 (or later)
- Raspberry Pi 3B+ (or later)
- WiSer WS-UT-EN or WS-UT-BM SKU variant (For more info about SKU variants, please refer this link)
STEPS
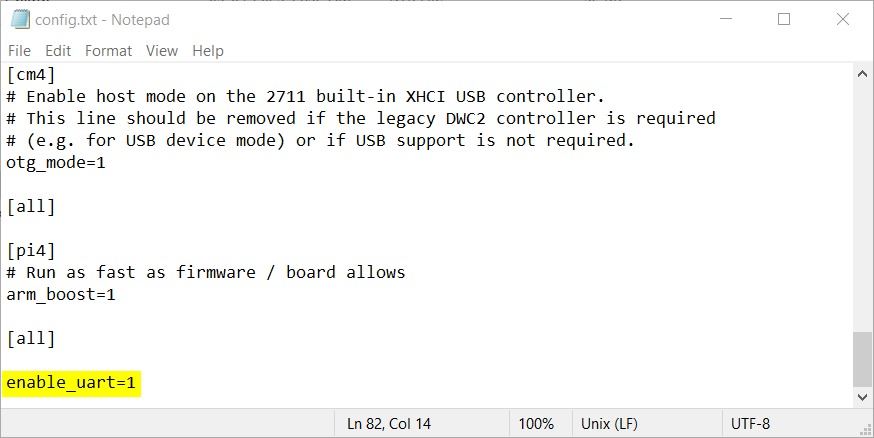
- On the Raspberry Pi, the serial port is not enabled by default. Thus, a few configuration files need editing. Insert the SD card of the Raspberry Pi into the SD card reader and connect it to the PC. Locate the config.txt file within the boot partition and add enable_uart=1 at the end of the file, as illustrated in the image below.
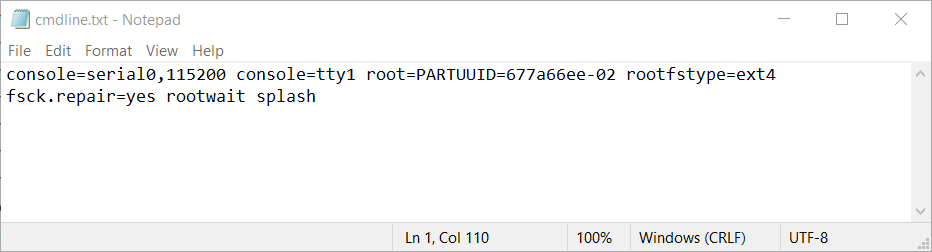
- By default, boot logs are suppressed due to settings in the cmdline.txt file within the boot partition. To view boot logs, remove quiet and plymouth.ignore-serial-consoles from the cmdline.txt file. It should resemble the example shown in the image below.
- The next step involves connecting the WiSer-TTL device to Raspberry Pi's UART pins, as outlined in the table below.
| WiSer-TTL | Raspberry Pi |
| GND | Ground (Pin 6) |
| RXD | TXD (Pin 8) |
| TXD | RXD (Pin 10) |
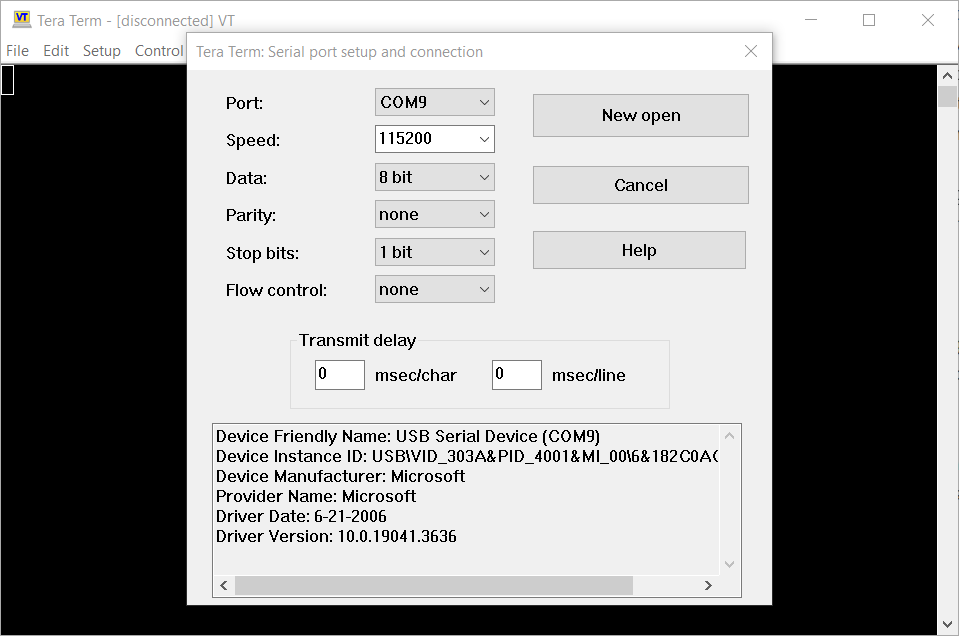
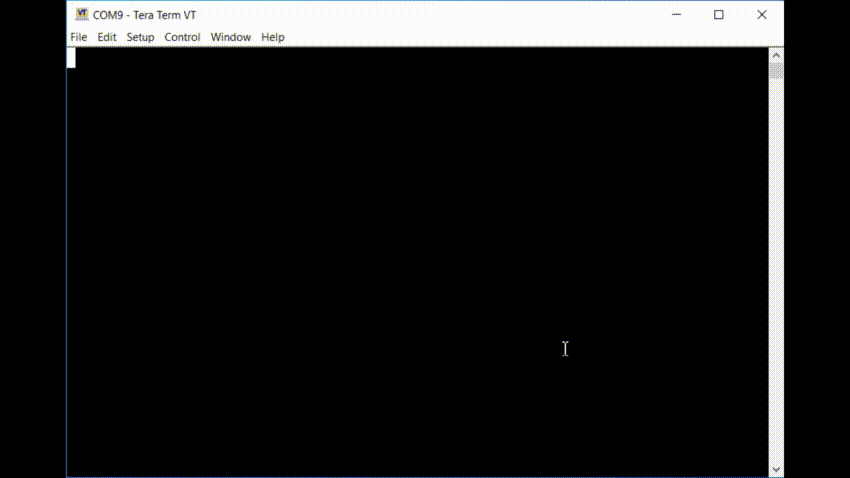
- To access the Serial Console, you'll need TeraTerm or a similar serial port tool. Connect the WiSer-USB device to the PC and open TeraTerm. Navigate to Setup->Serial port..., select the port corresponding to your PC's COM port name, set the speed to 115200, and click on the New Open button.
- Power up the Raspberry Pi, and the boot logs should now appear in TeraTerm.
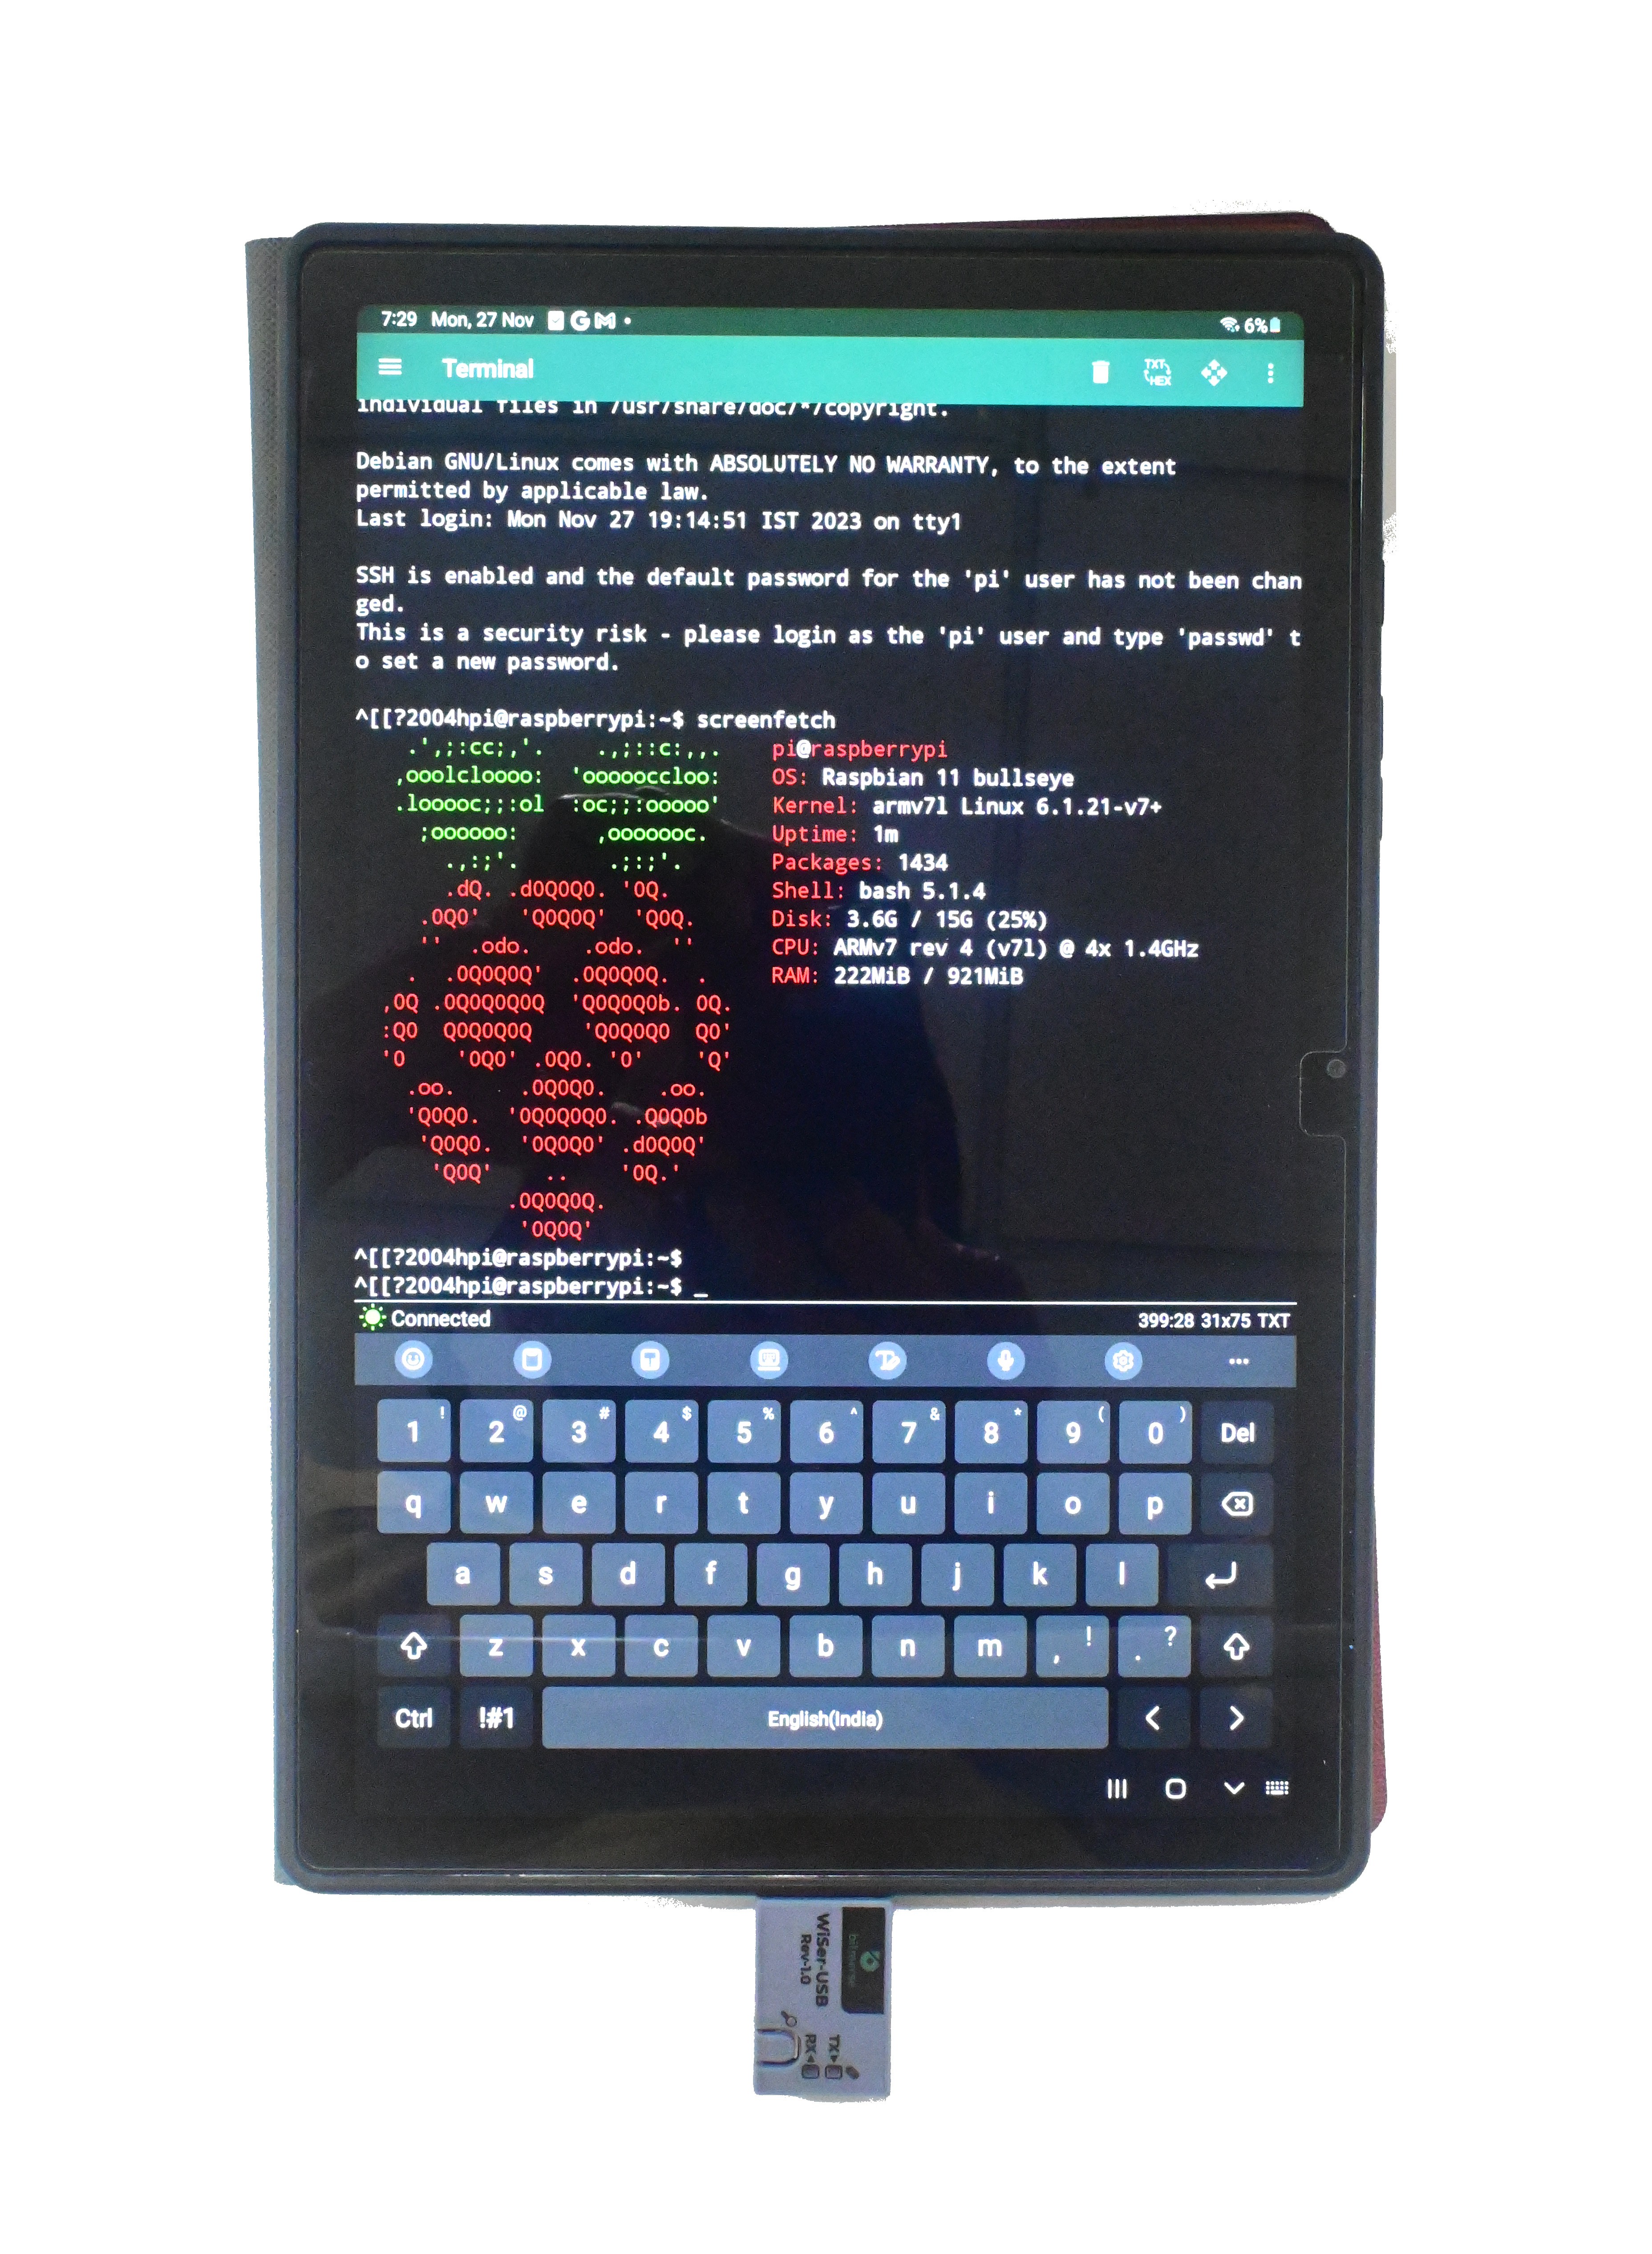
- Having successfully accessed the Serial Console on a Windows PC using TeraTerm, for Linux distributions, GTKTerm could be employed, while Mac users may opt for SerialTools. Android phones/tablets can utilize UsbTerminal app to access the Serial Console, as depicted in the image below.
Discussions
Become a Hackaday.io Member
Create an account to leave a comment. Already have an account? Log In.