 Michael Gardi
To open the case remove the 4 screws marked in the photo below.

You should then be able to separate the top and bottom pieces of the case.
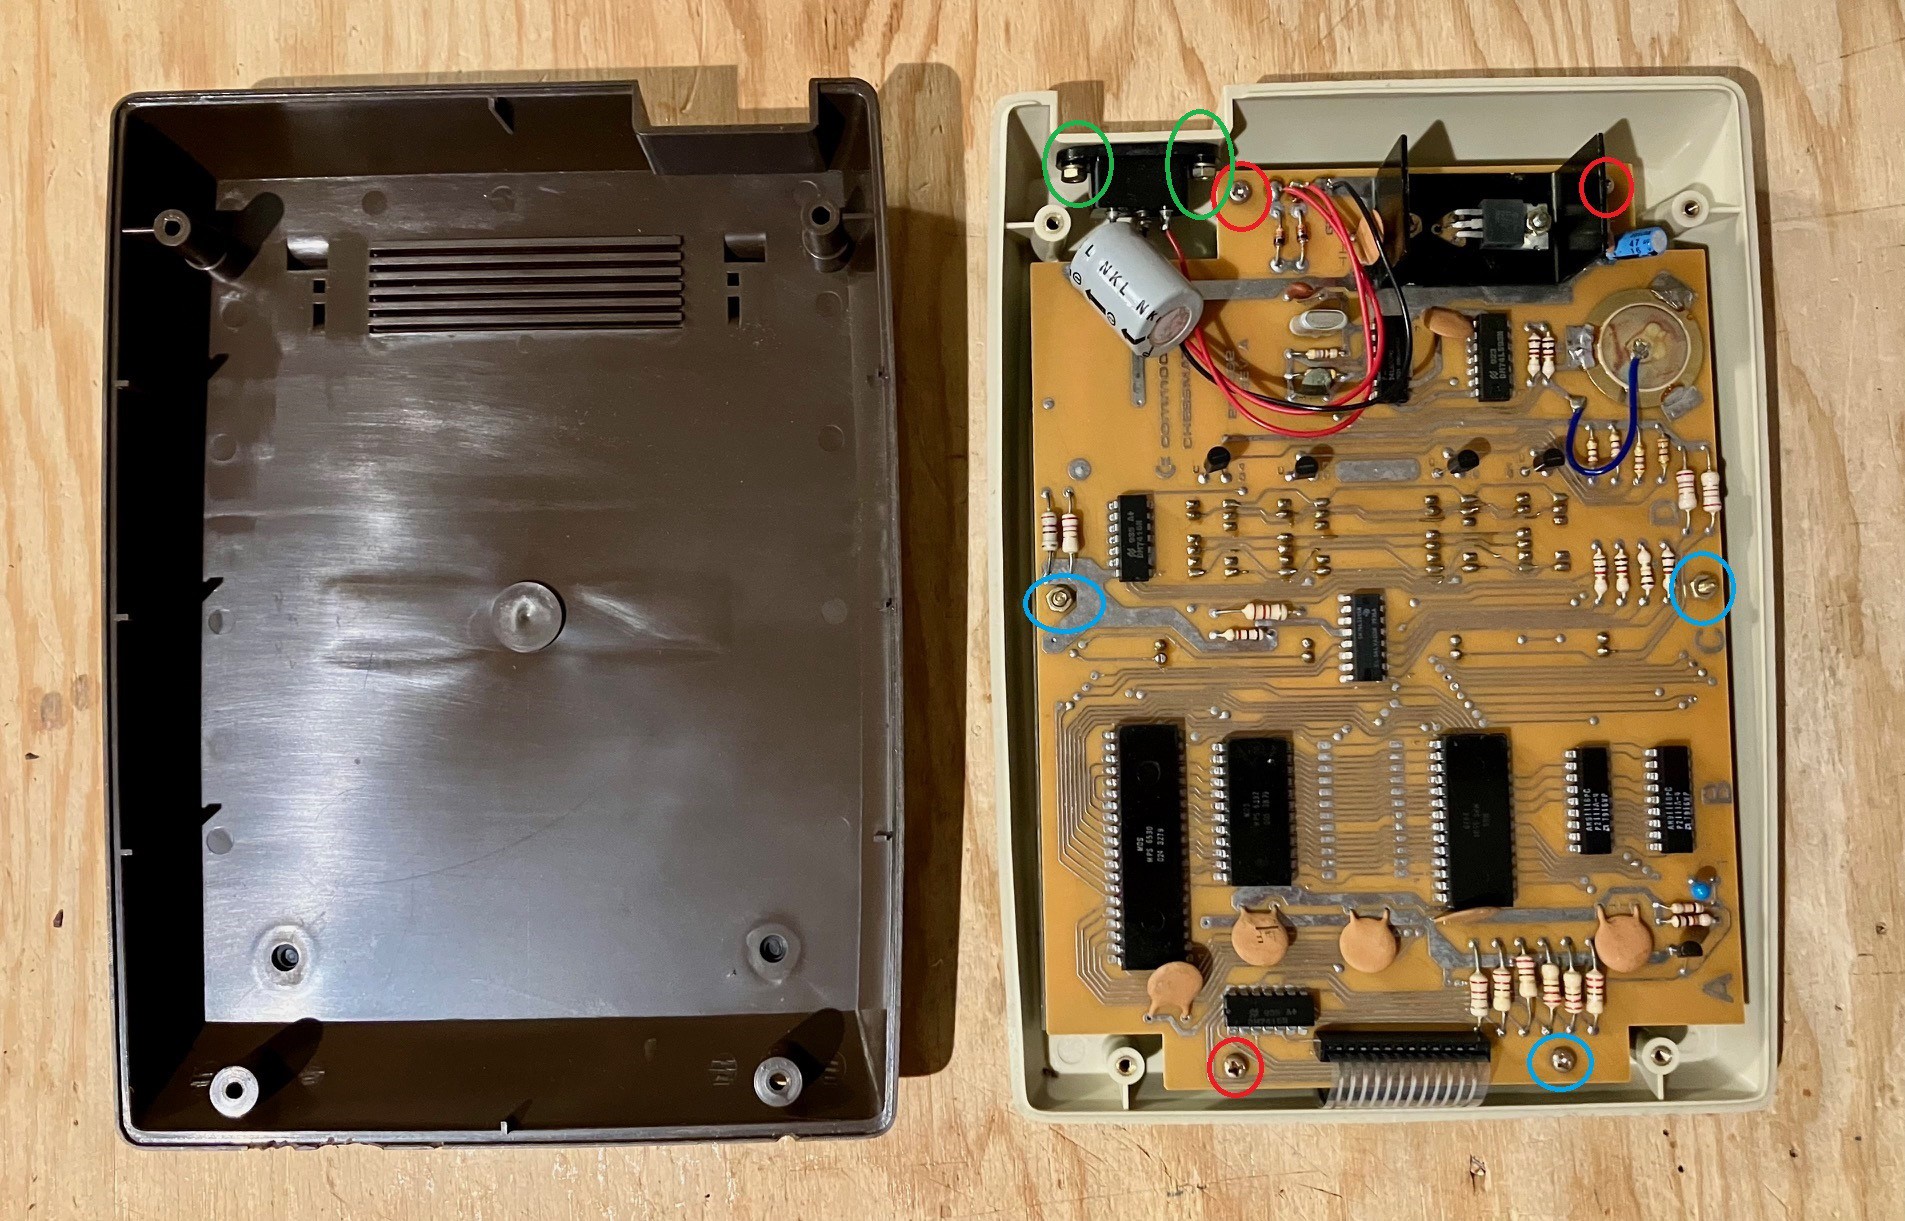
Setting aside the bottom for the moment, remove the four screws (red circles), two nuts (blue circles), and the two bolts holding the power connector on (green circles) then lift out the PCB, being very careful not to damage the ribbon cable between the PCB and membrane keyboard.
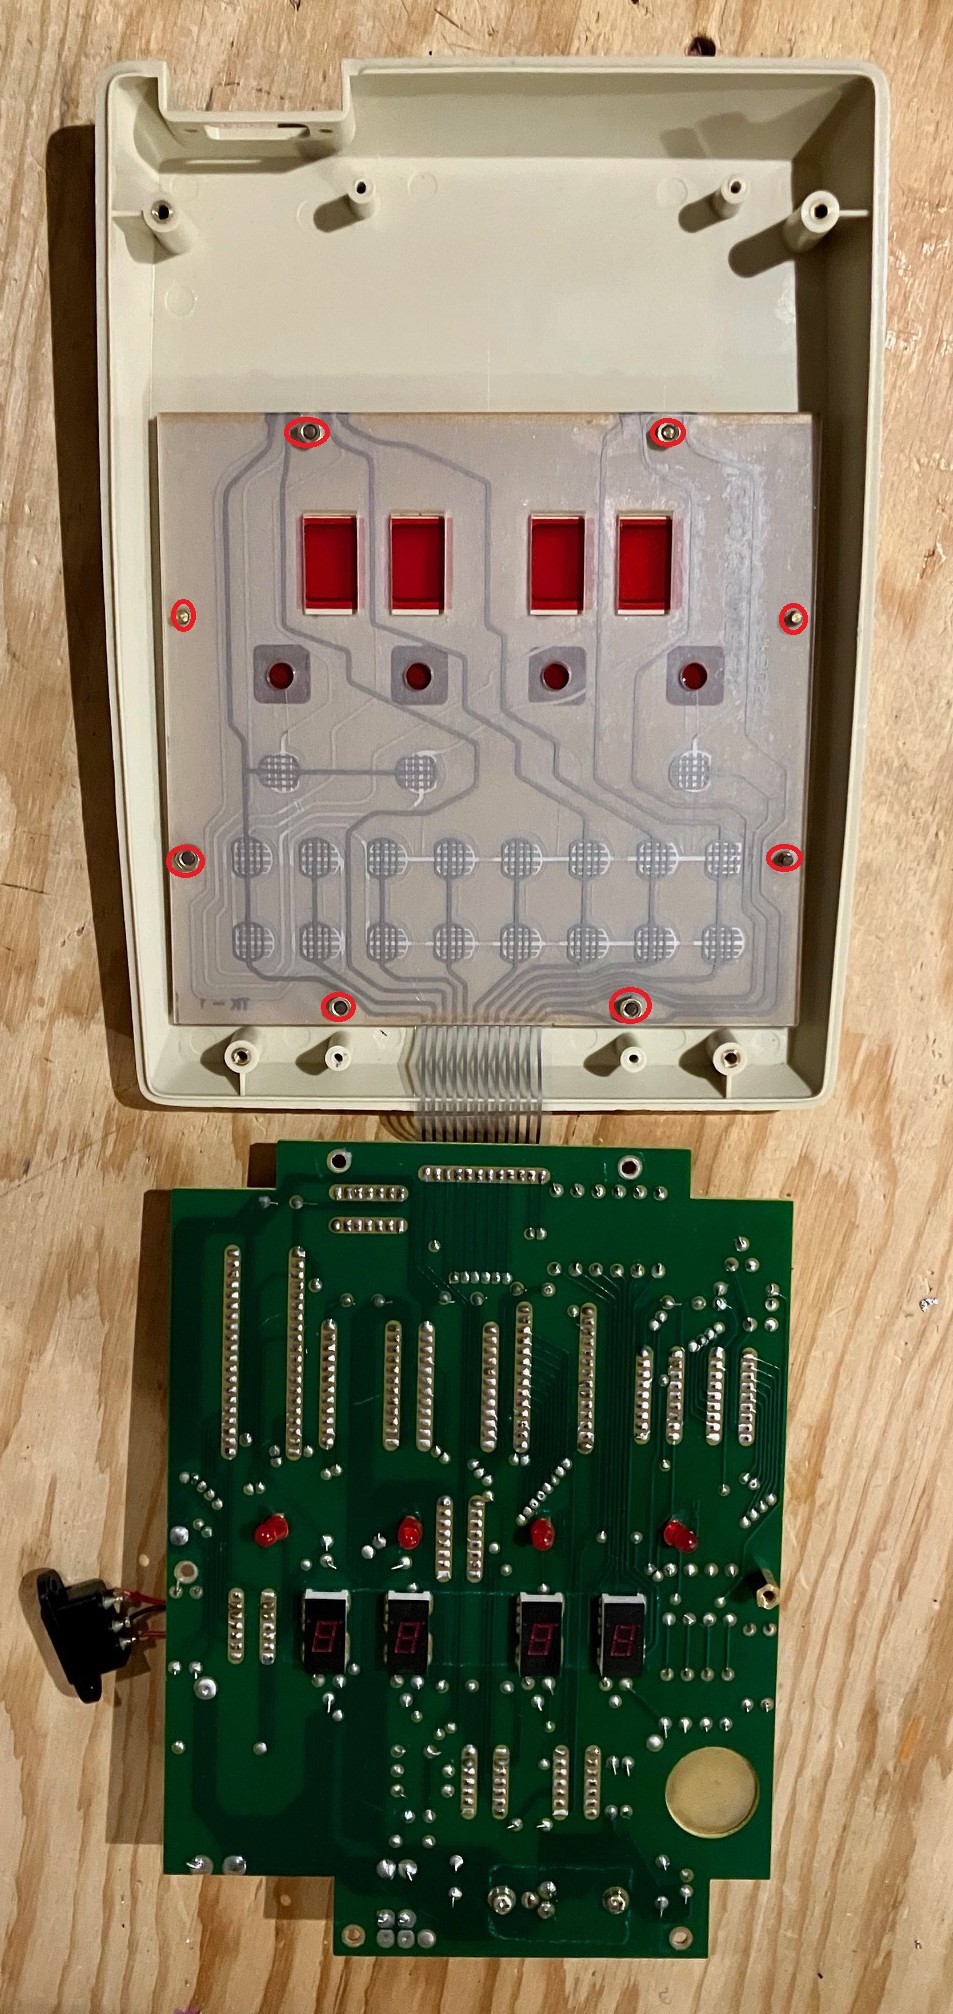
To detach the membrane keyboard from the top of the case, remove the 8 nuts highlighted in red.

And that's about it. Only four major parts, case top, case bottom, PCB, and membrane keyboard, and one minor part the attached power connector.

Now with the case pieces completely free of components, they can serve as the basis for the 3D models I will need for my reproduction.
In virtually every other reproduction I have done I have never had an original to work from. This is a rare treat for me. I get to use my calipers for a change. Nice.
Discussions
Become a Hackaday.io Member
Create an account to leave a comment. Already have an account? Log In.