Second update of the project (01/07/2024 (DD,MM,YYYY))
(first update see further down)
This is the second part of the Full scale flying Delorean project where I finish up some mechanisms on the car like the front hood louvres and automatic doors. I also build an initial test frame for the drone out of some spare aluminium profiles I had lying around from a previous project. Second part video of the project can be found here:
Building the airframe
As mentioned above, I recently build an initial test frame for the drone out of some spare aluminium profiles I had lying around from a previous project. The frame is being held together by 3D-printed parts made from PLA plastic. Weighing in at around 8-9 kg this frame will probably to heavy to carry the Delorean body but it's main purpose is to function as a test base to see if this configuration could even fly and find some initial PID values.
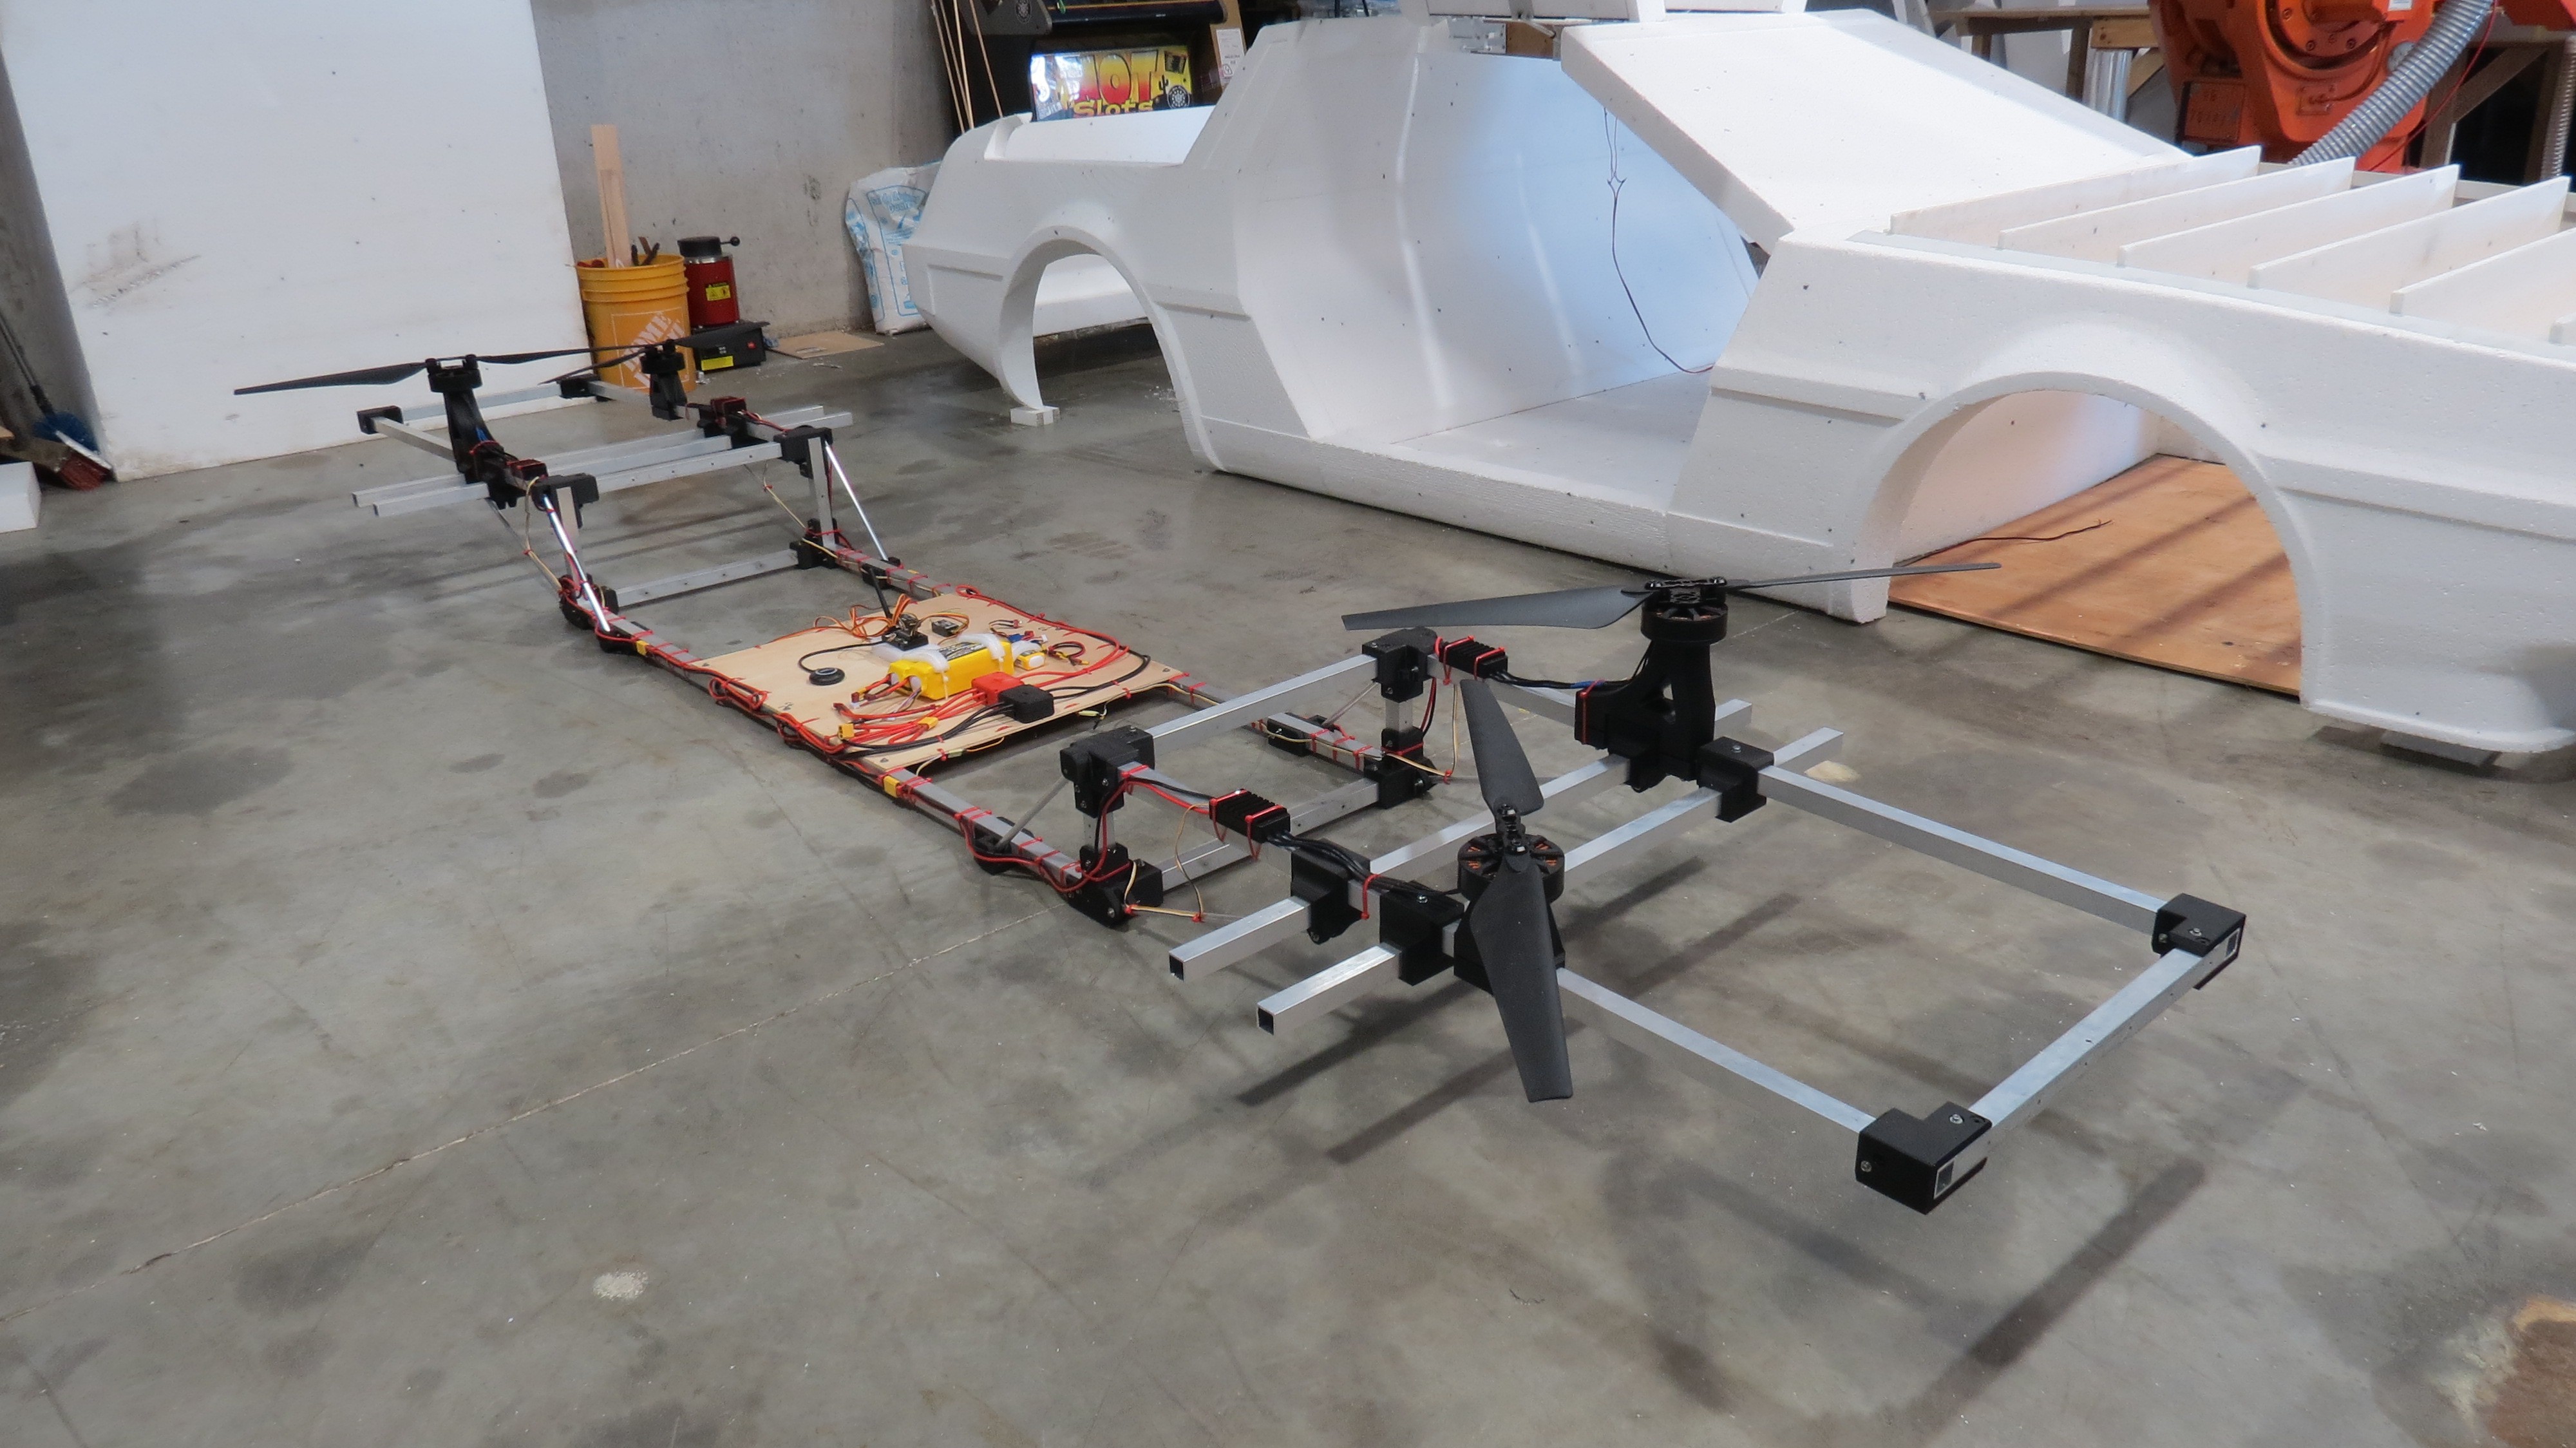
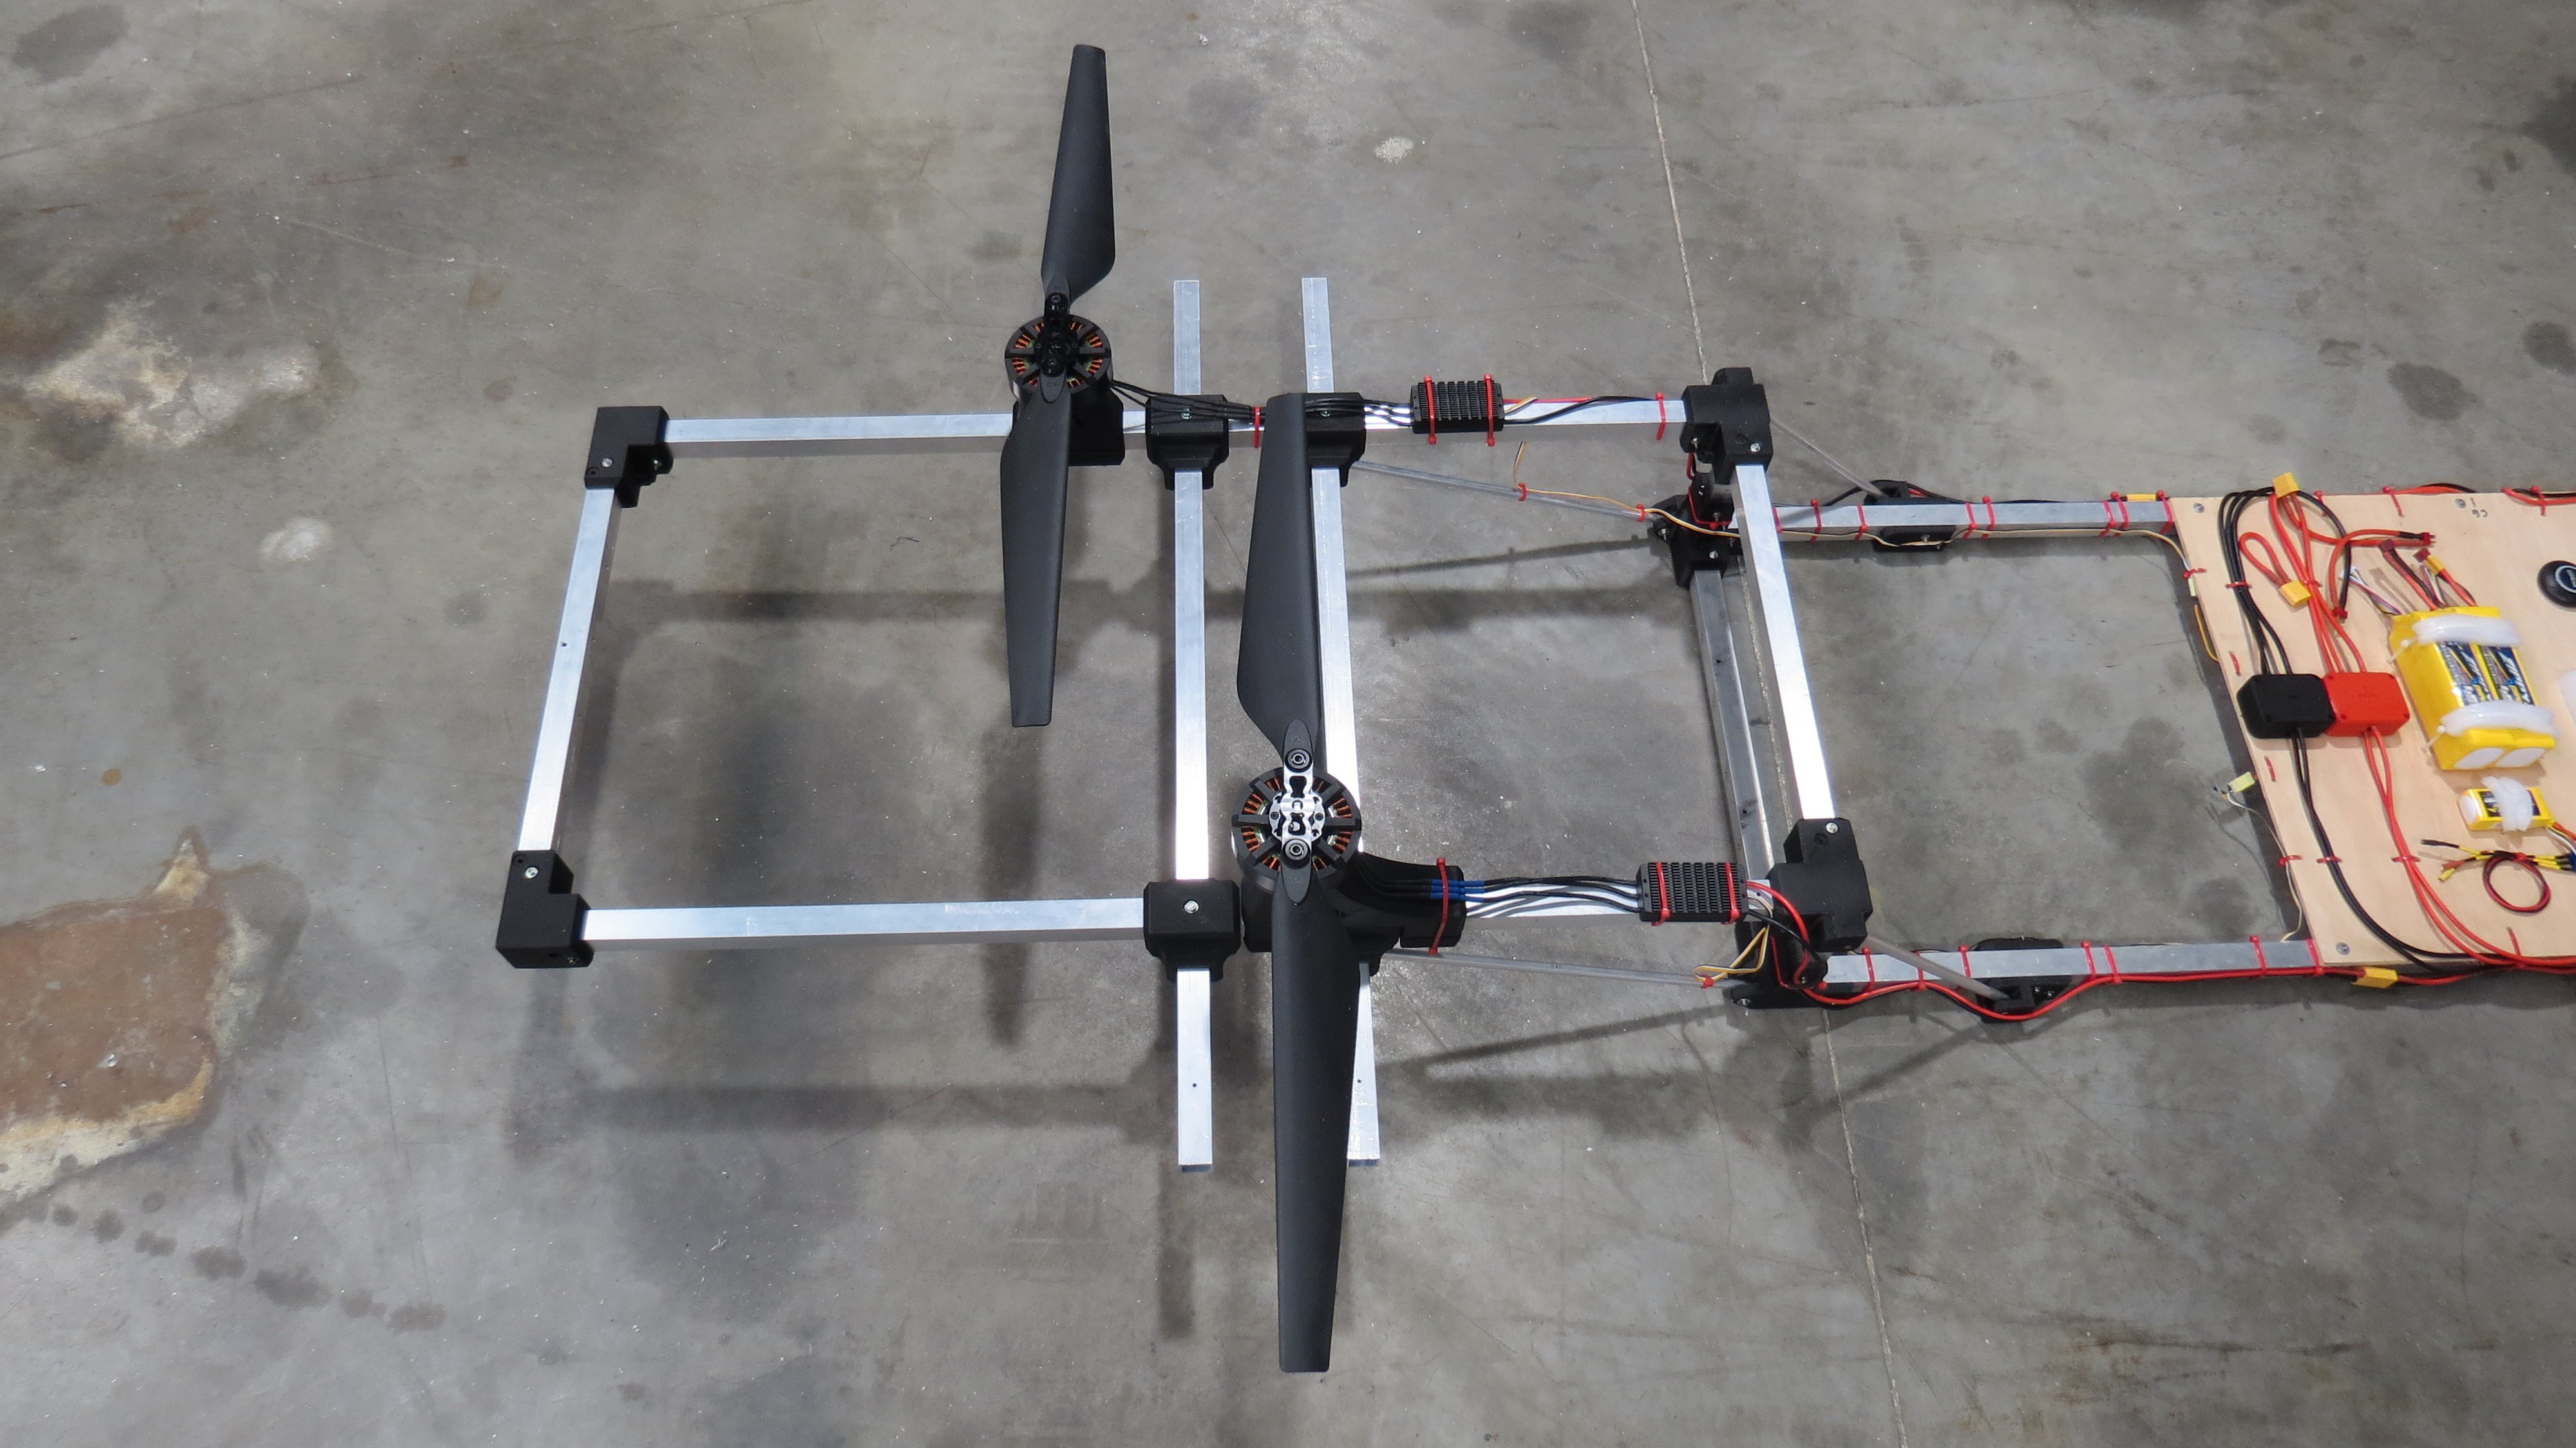
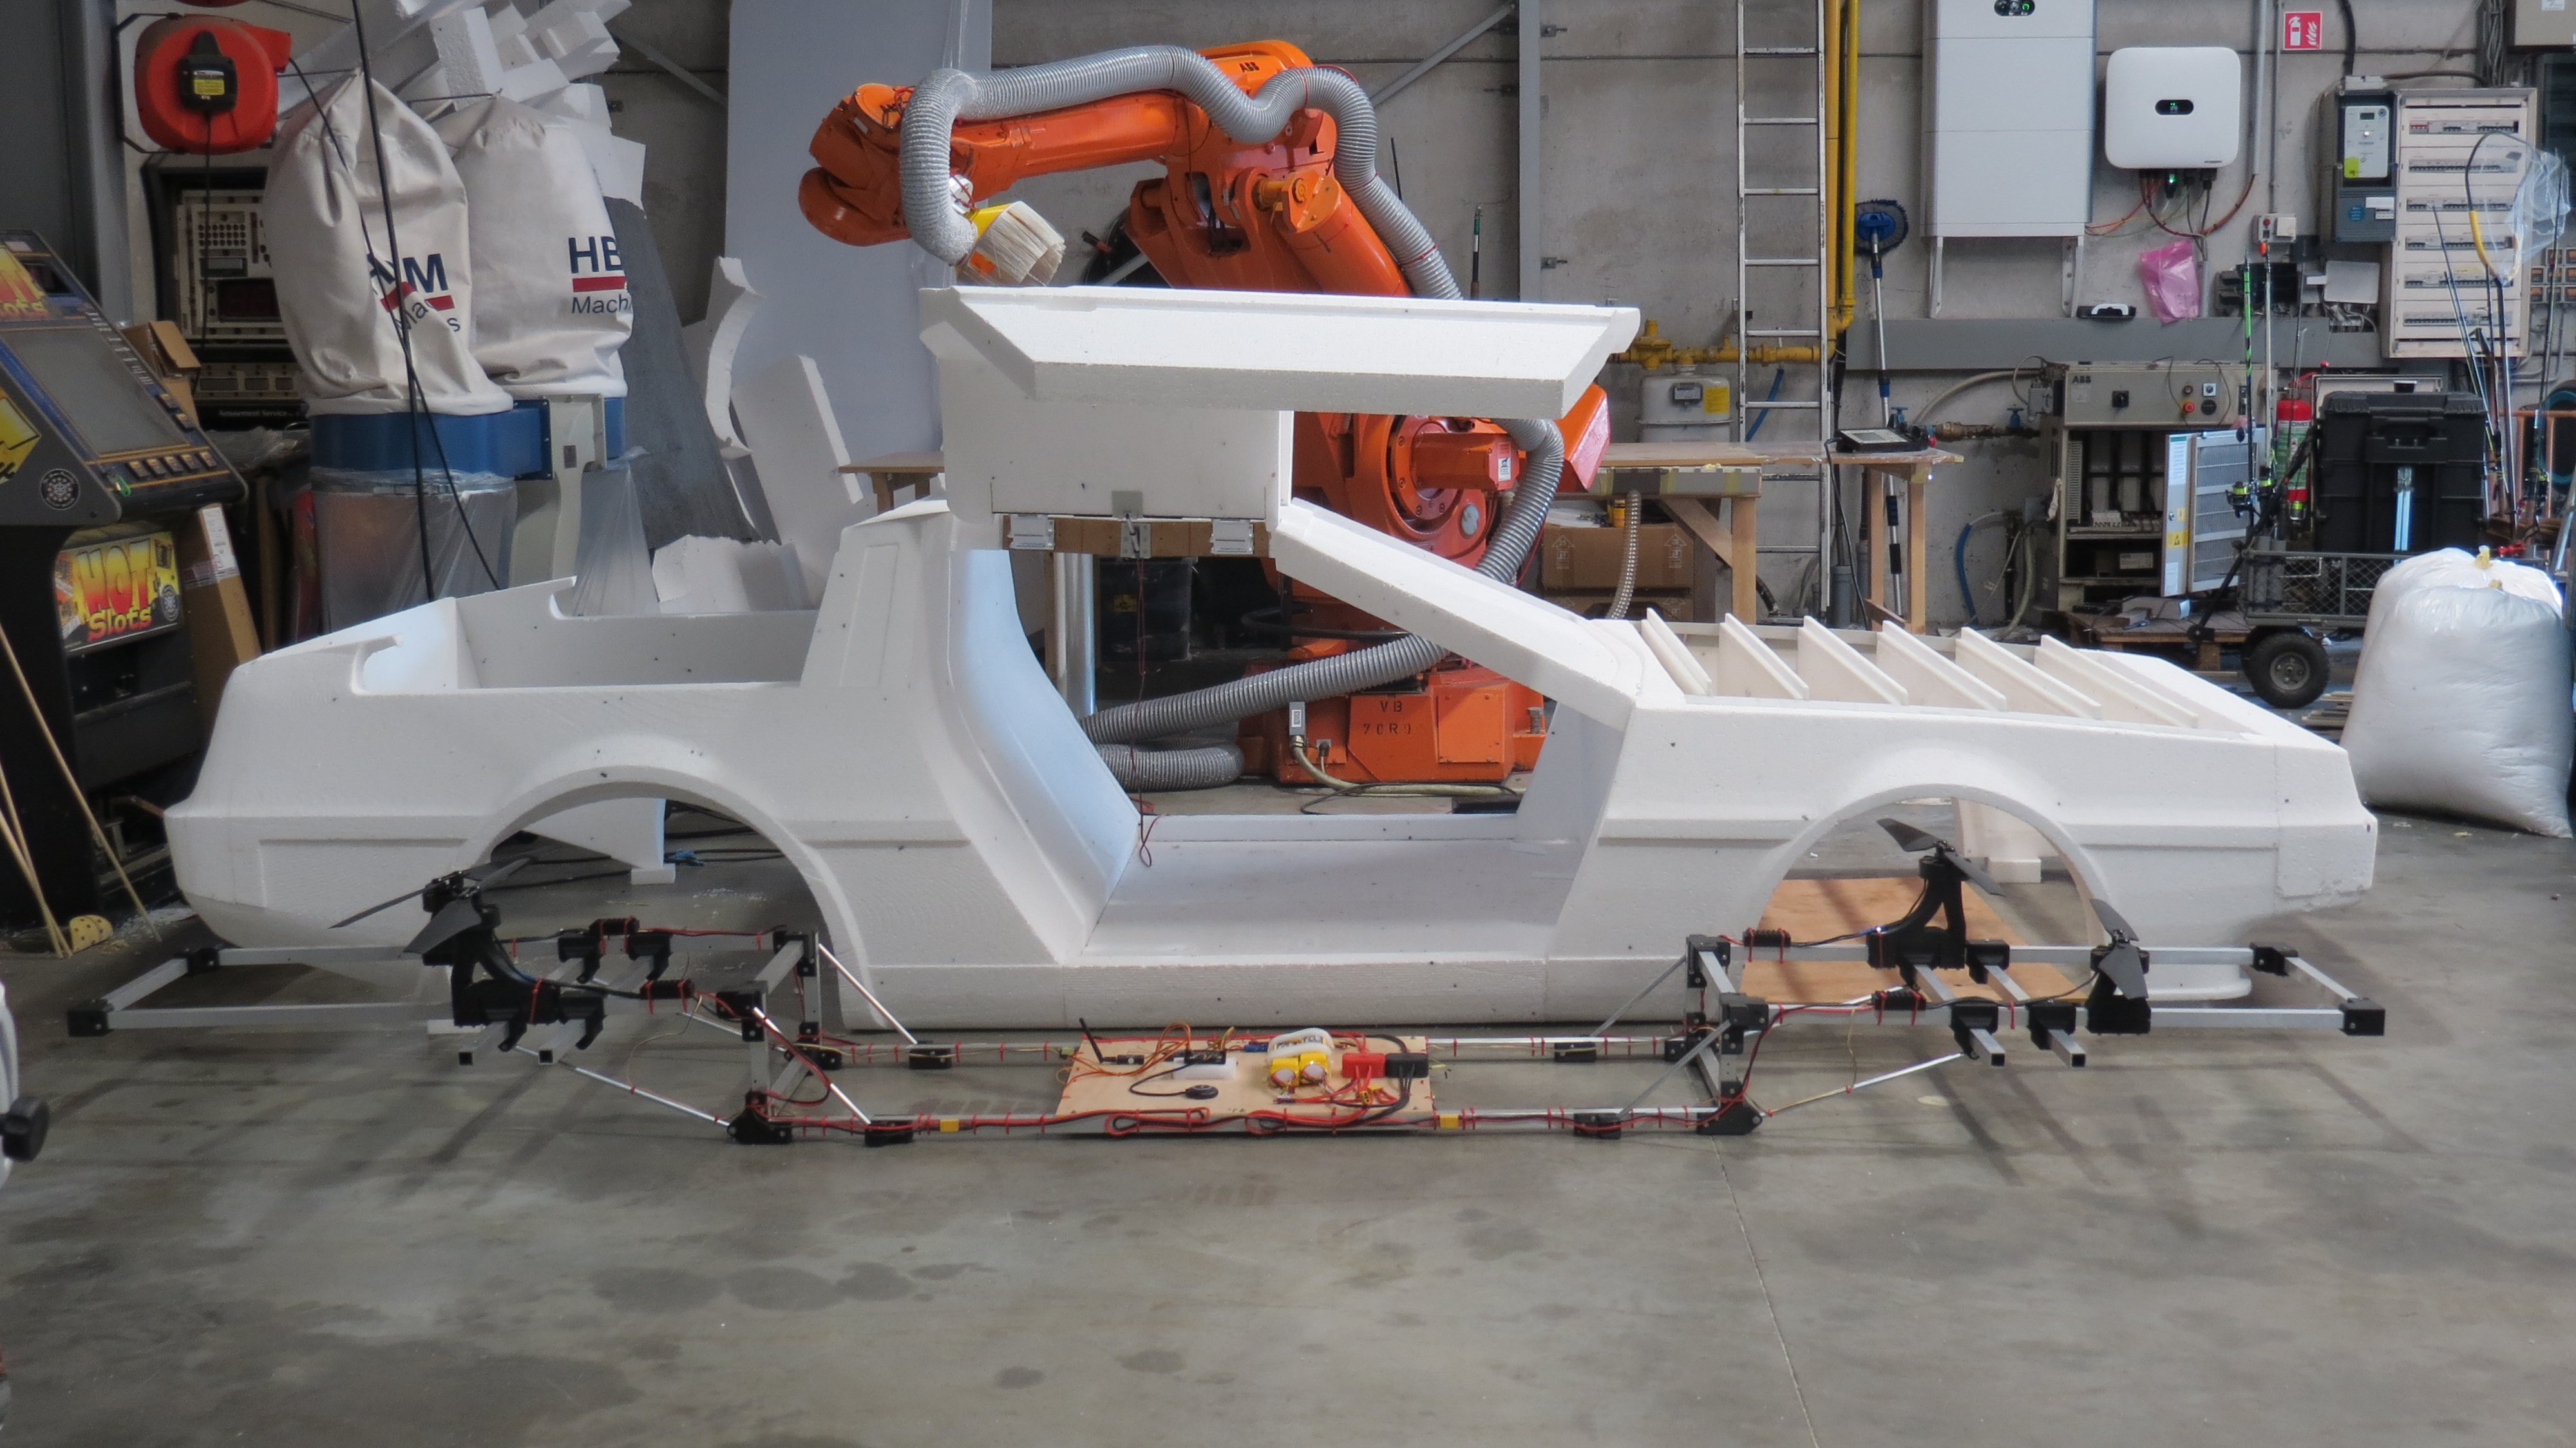
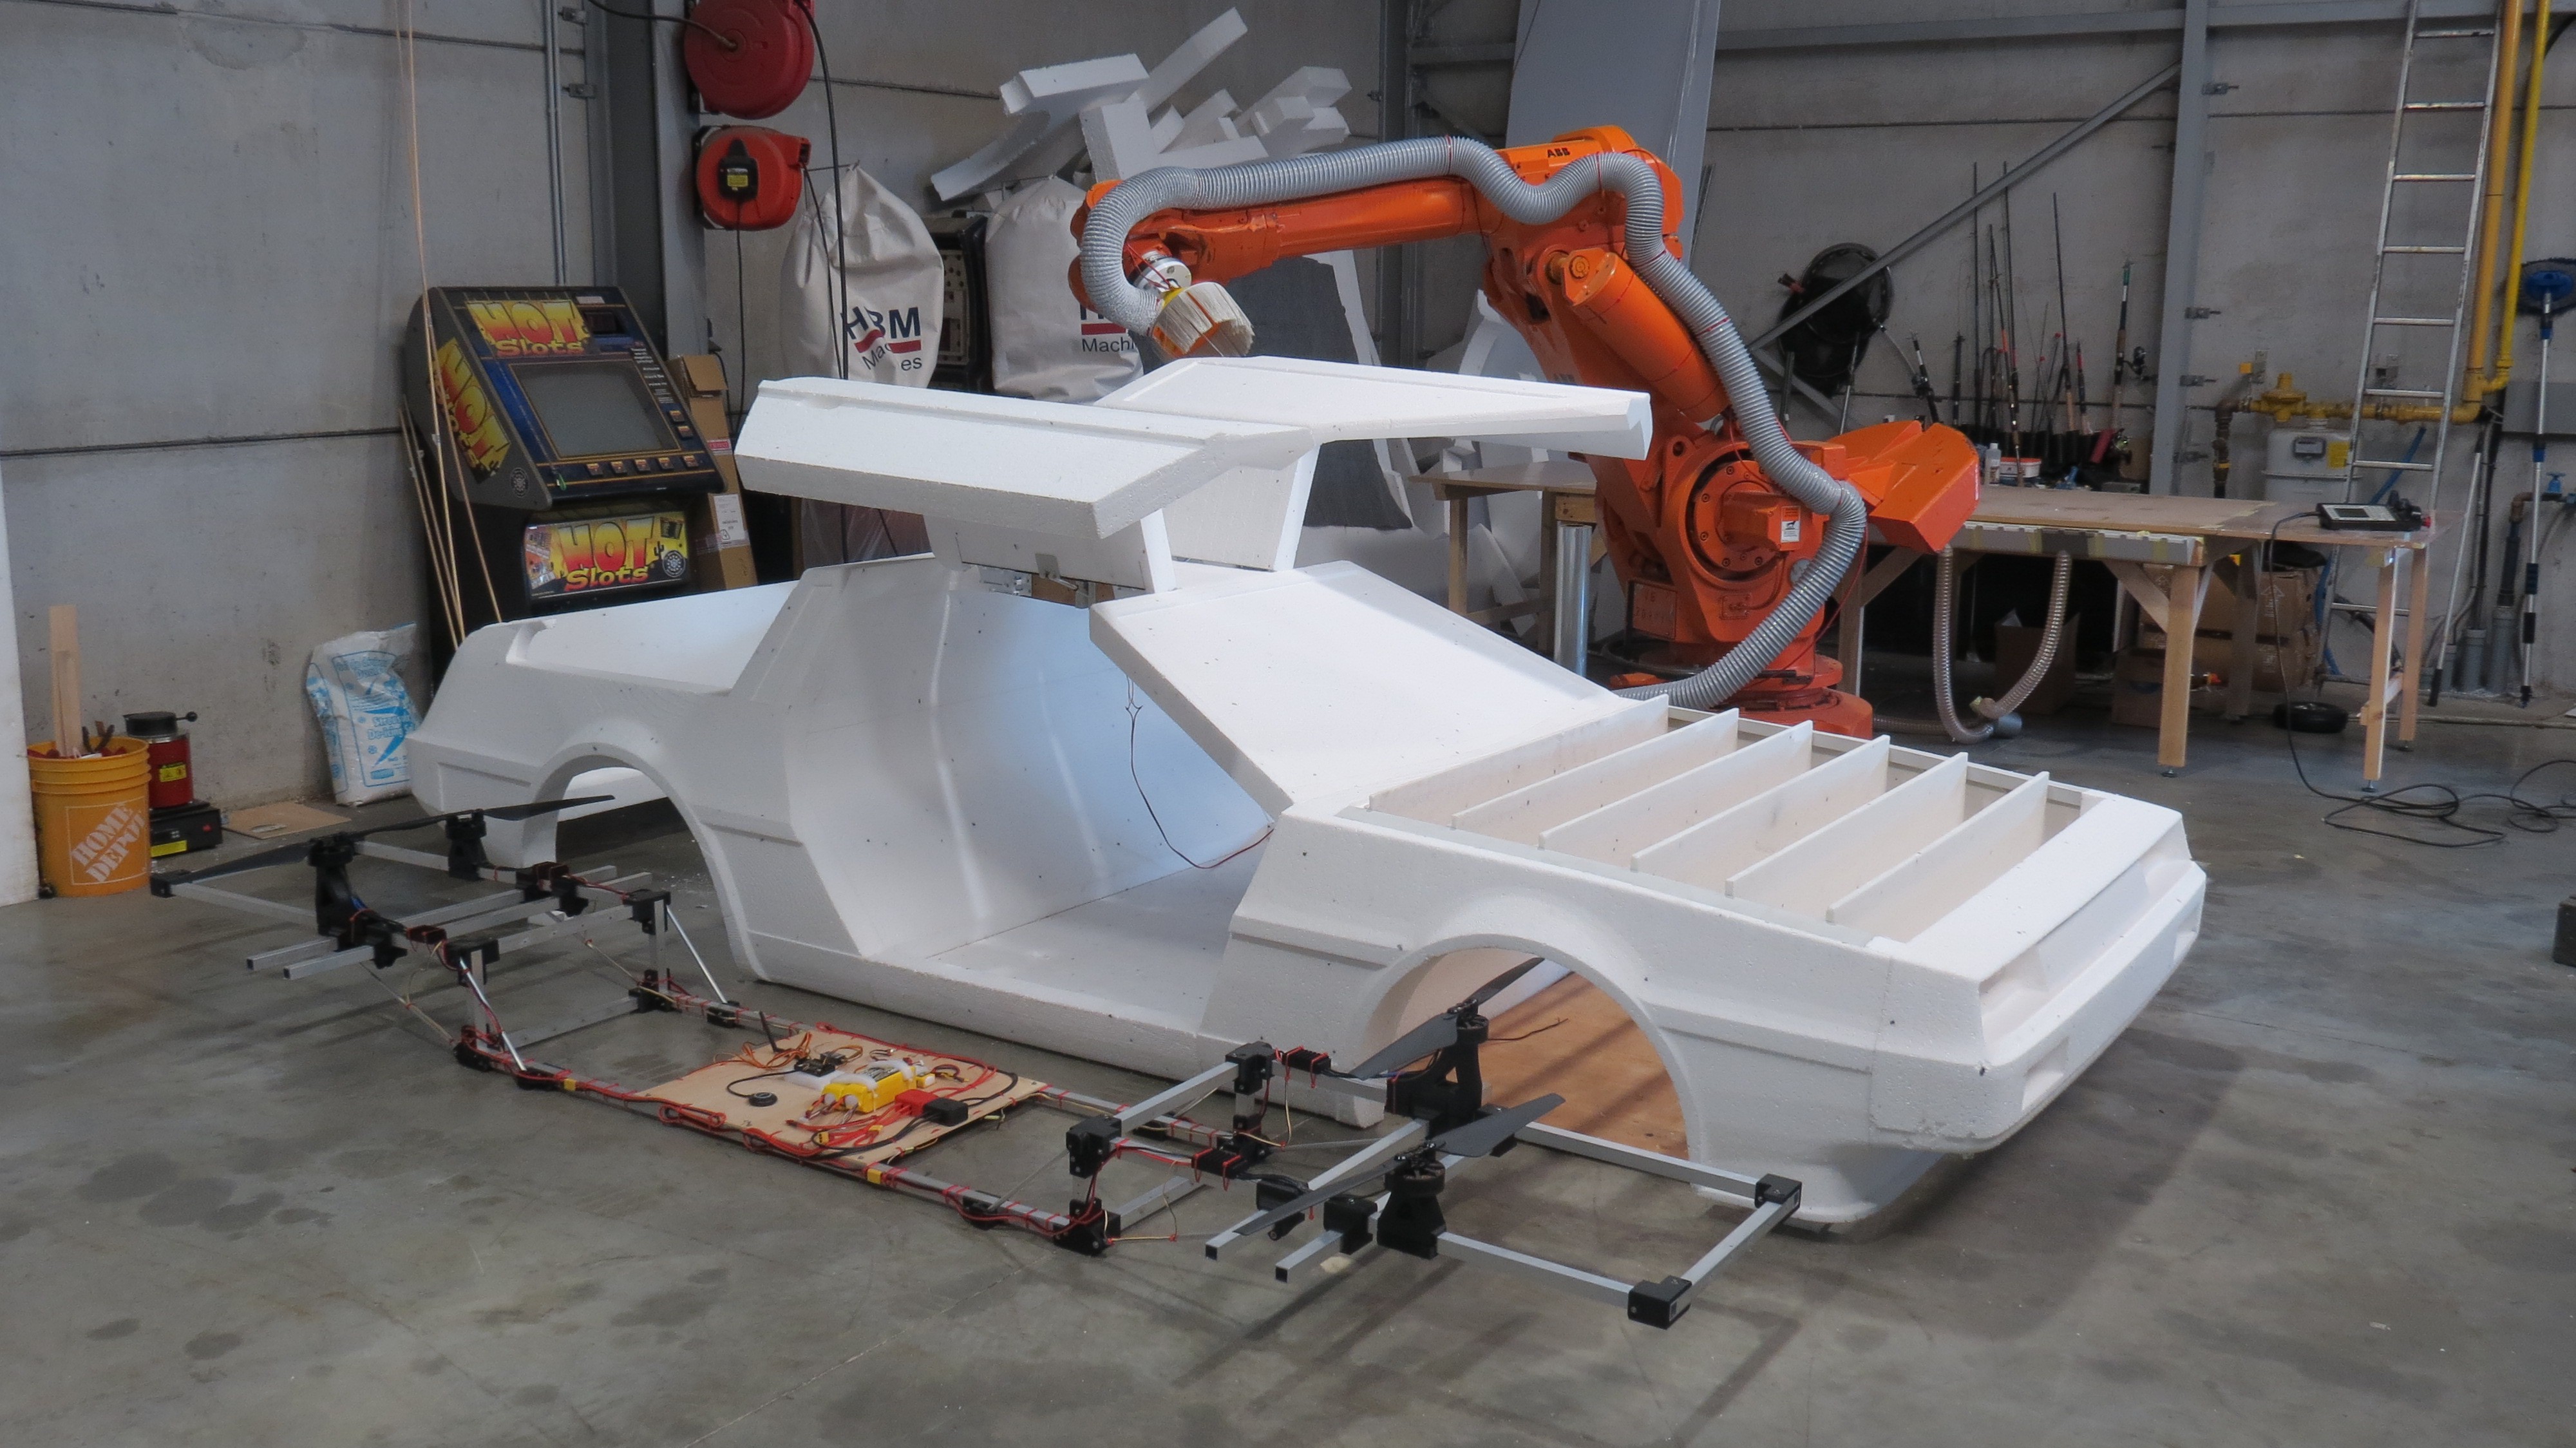
The motors itself are way overpowered to lift the frame on it's own with each motor capable of lifting around 14kg. The main issue of this initial frame is the flexibility of the aluminium. When trying to yaw left, the left front motor and right back motor will spin faster, twisting the front of the frame to the right and the back of the frame to the left, making the thrust of the 4 motors point in the opposite direction of the yaw motion that was intended. the weight and twist issues will probably be solved with the next frame made from carbon fiber. Estimated weight for this would be around 2kg.
How to make it fly?
The original plan was to use 8 MP8318 100kv 3000W motors with each a 30 inch propeller to be on the safe side as I didn't know if the thrust numbers of the manufacturer of the motors were correct and what the final weight of the body would be. We now know the weight of the body is around 14kg and I ordered 1 motor to do some testing. The graph below shows the results of the test:
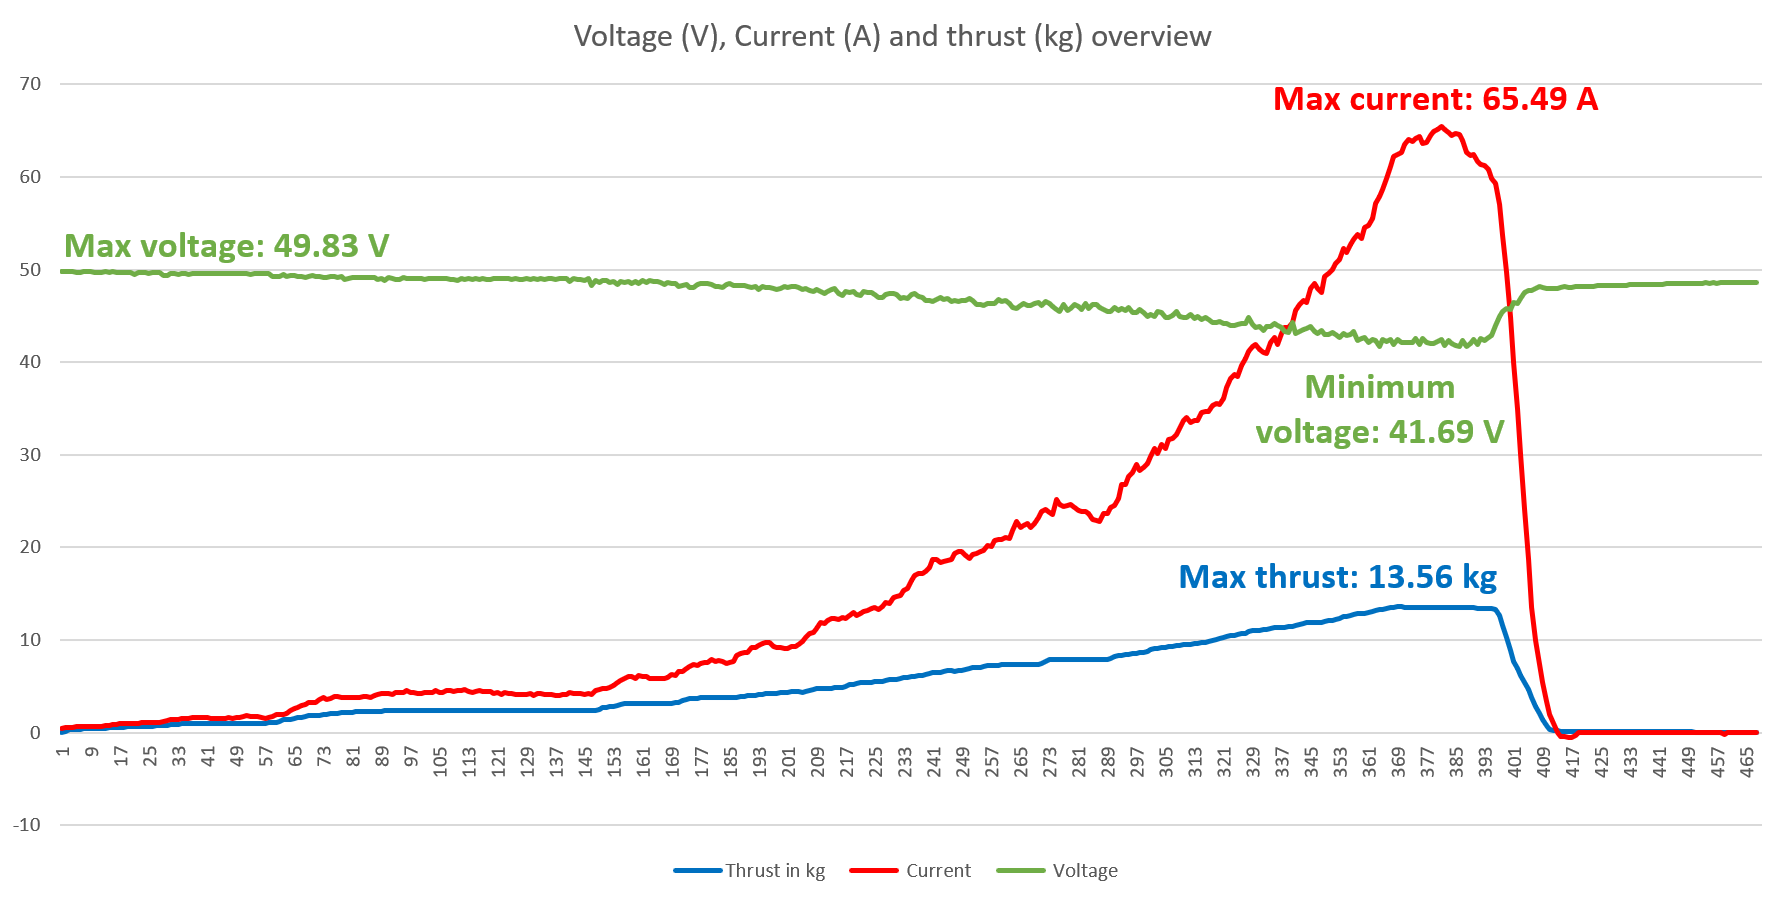
At 100% thrust we were able to achieve 13.563 kg of thrust which is more than the manufacturer of the motors advertised (12.5kg). The goal is to keep the takeoff weight at around 50% of the max thrust of the quadcopter which would be 4 x 13.5kg = 54kg * 50% = 27kg. which is almost twice the weight of the body currently. Worst case scenario we could go to 75% thrust takeof weight which would be 54kg x 75% = 40.5kg. If this would still not be enough, we go back to the original plan, I buy 4 more motors and make it an octocpter.
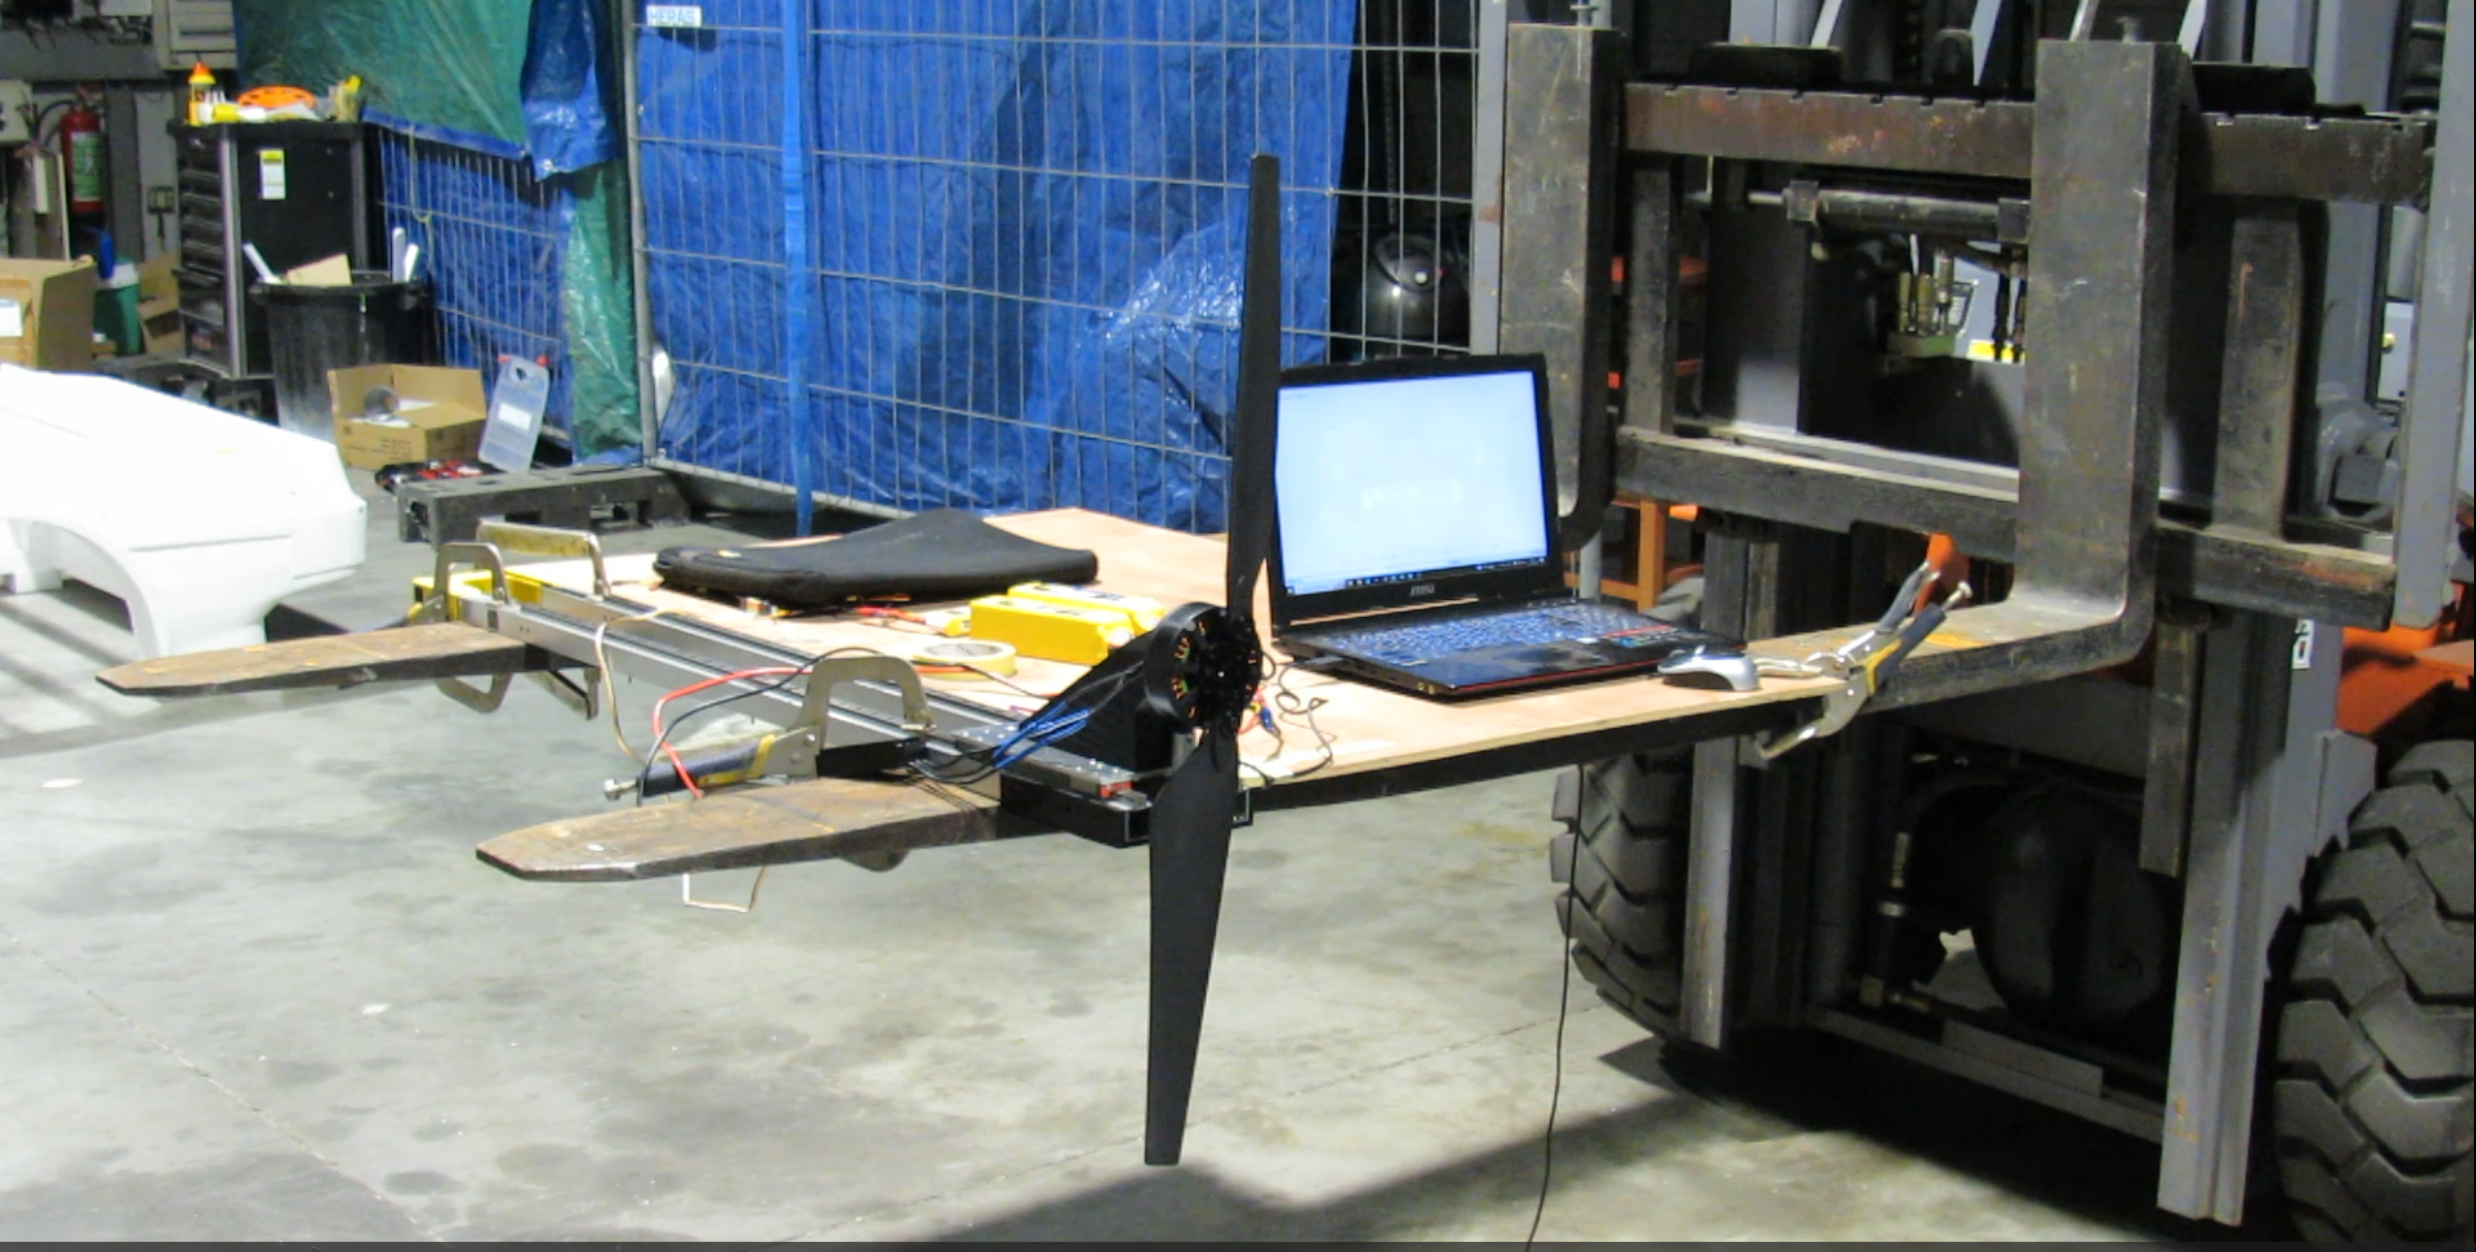
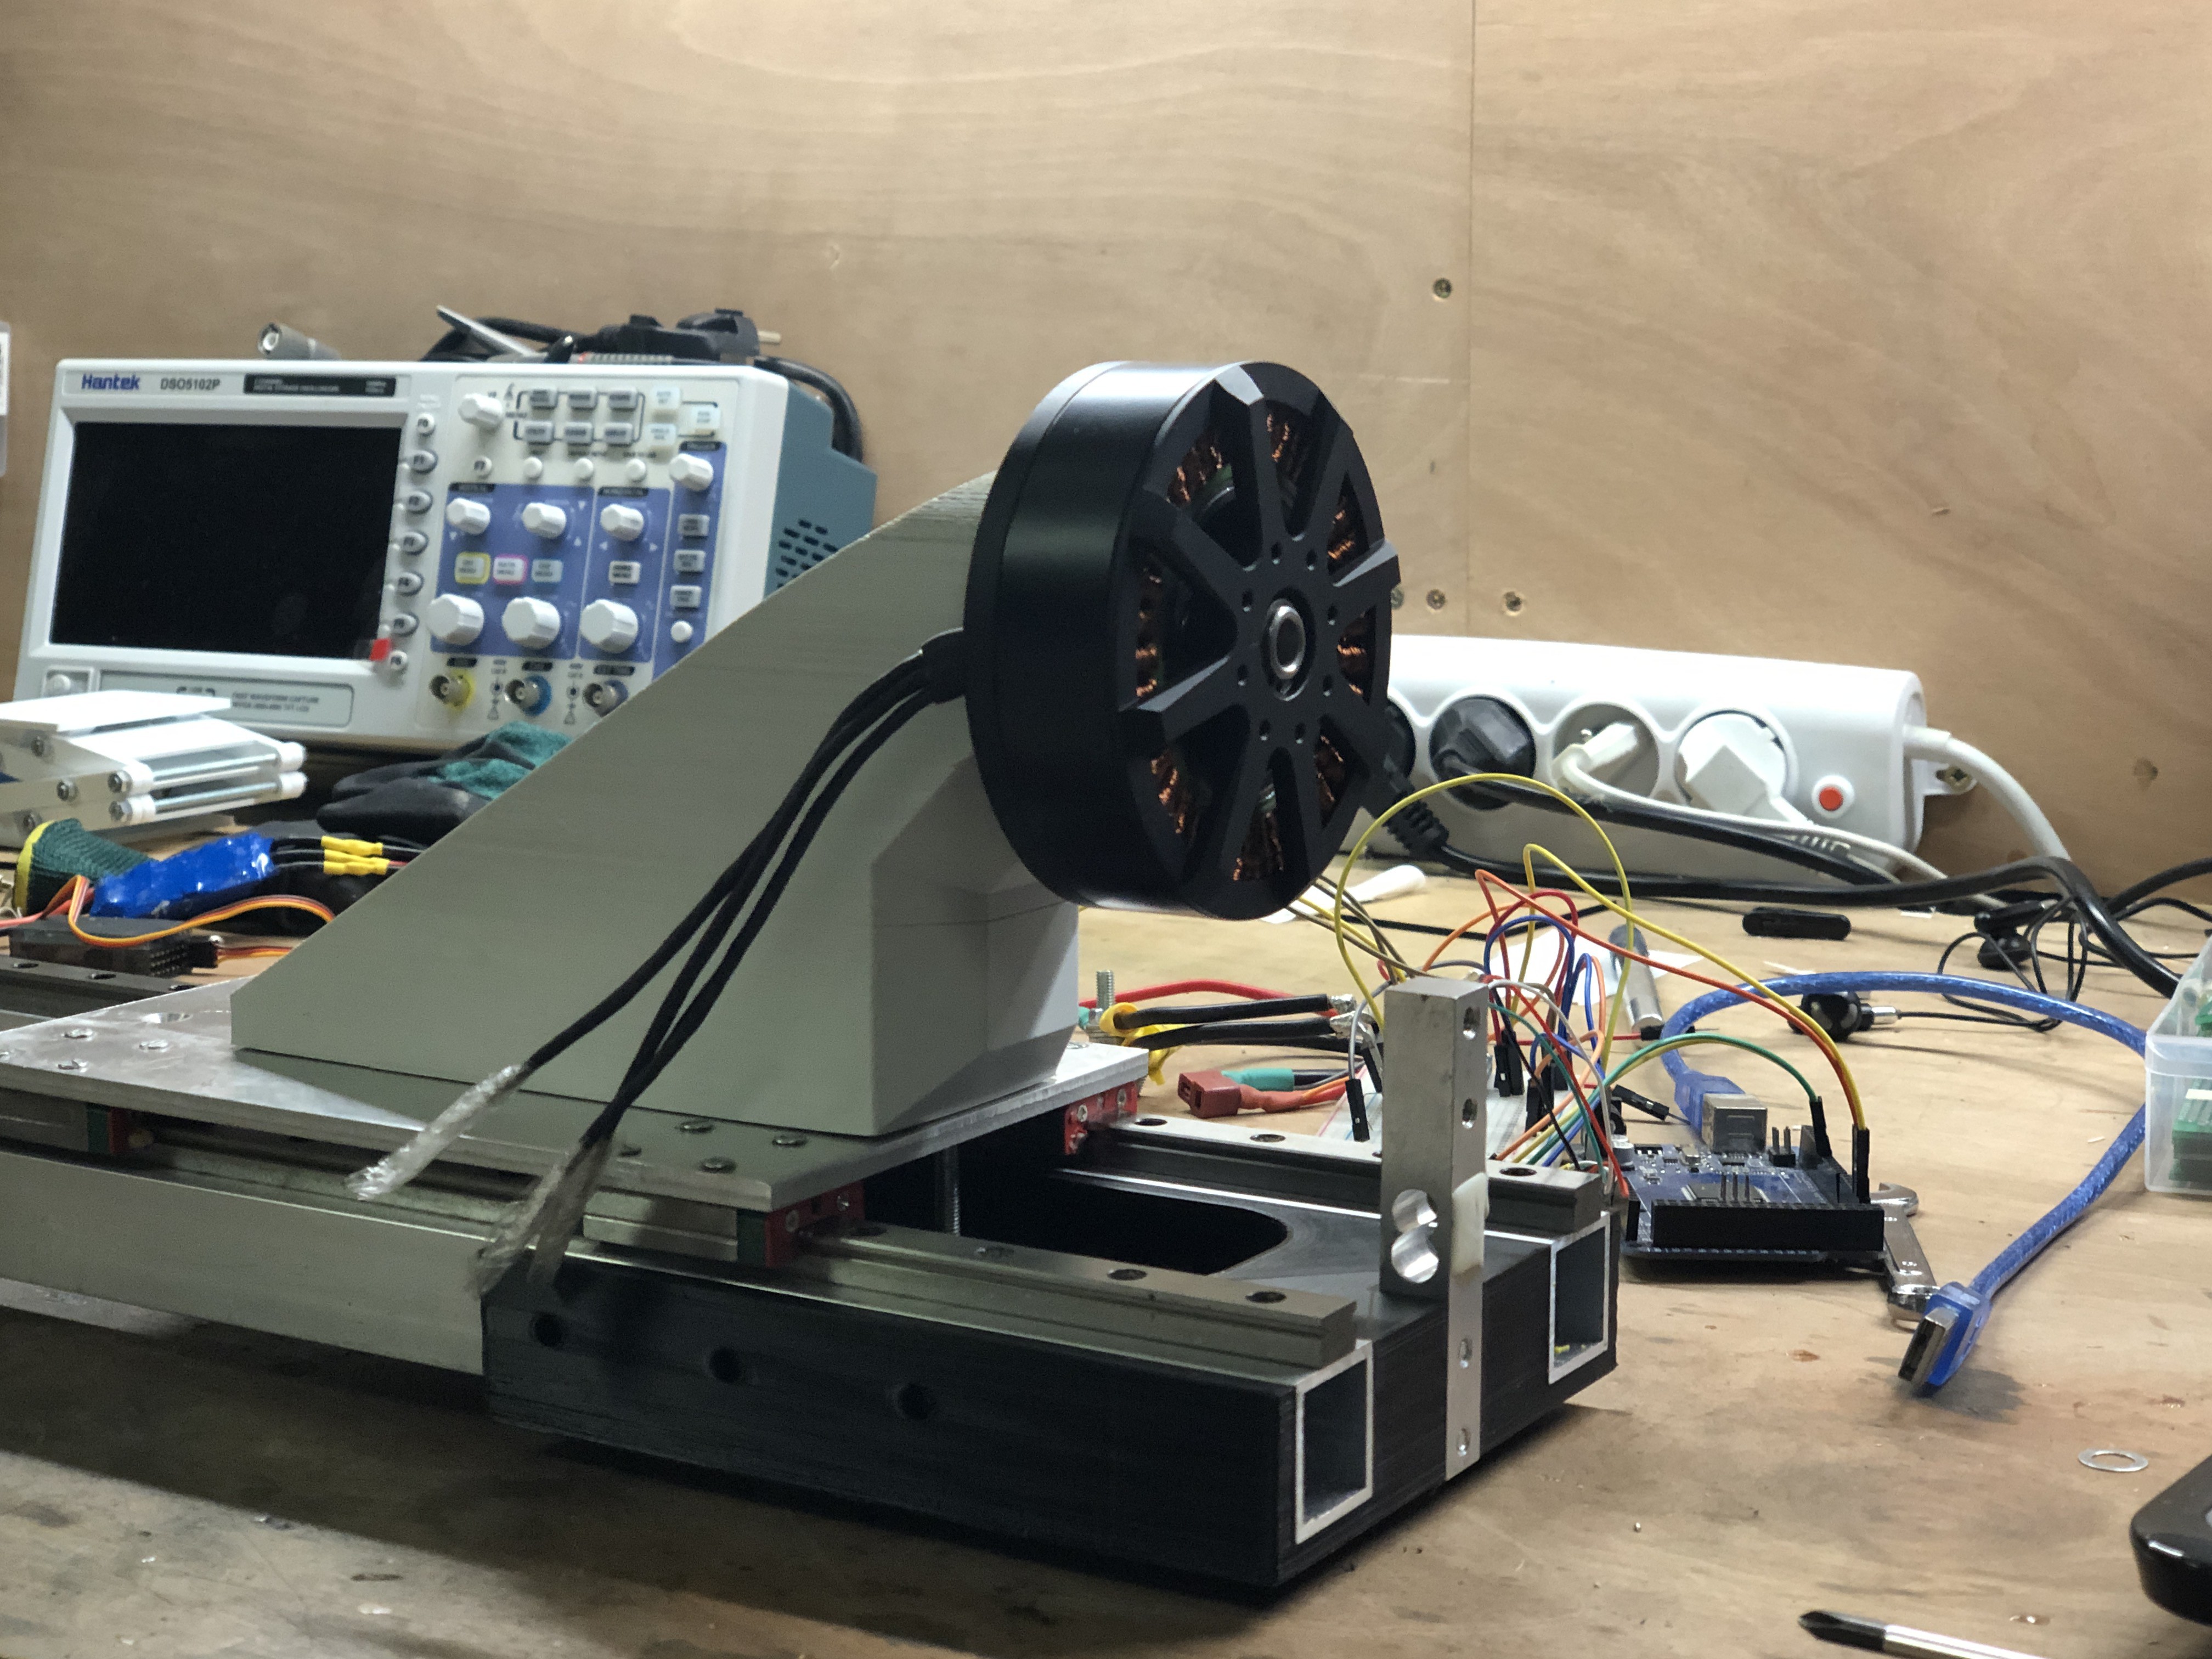
Here is an overview of the test stand. It uses an arduino nano, a 20kg Load cell to measure thrust, an ACS770 ECB-200B Bidirectional 200A hall-effect current sensor (which is really great for measuring higher currents reliably) and a simple voltage devider to measure voltage. The frame and linear rails were originally the Z-axis on a 5-axis cnc I build a while back but this project got replaced by my robot (In case you're interested: https://hackaday.io/project/181021-3d-printable-1x1x1m-5-axis-machine-3d-printer). I think i'll cover the build of this test stand in another article and the video of the test will be published in the next YouTube Video.
Hood flaps/slats/blades
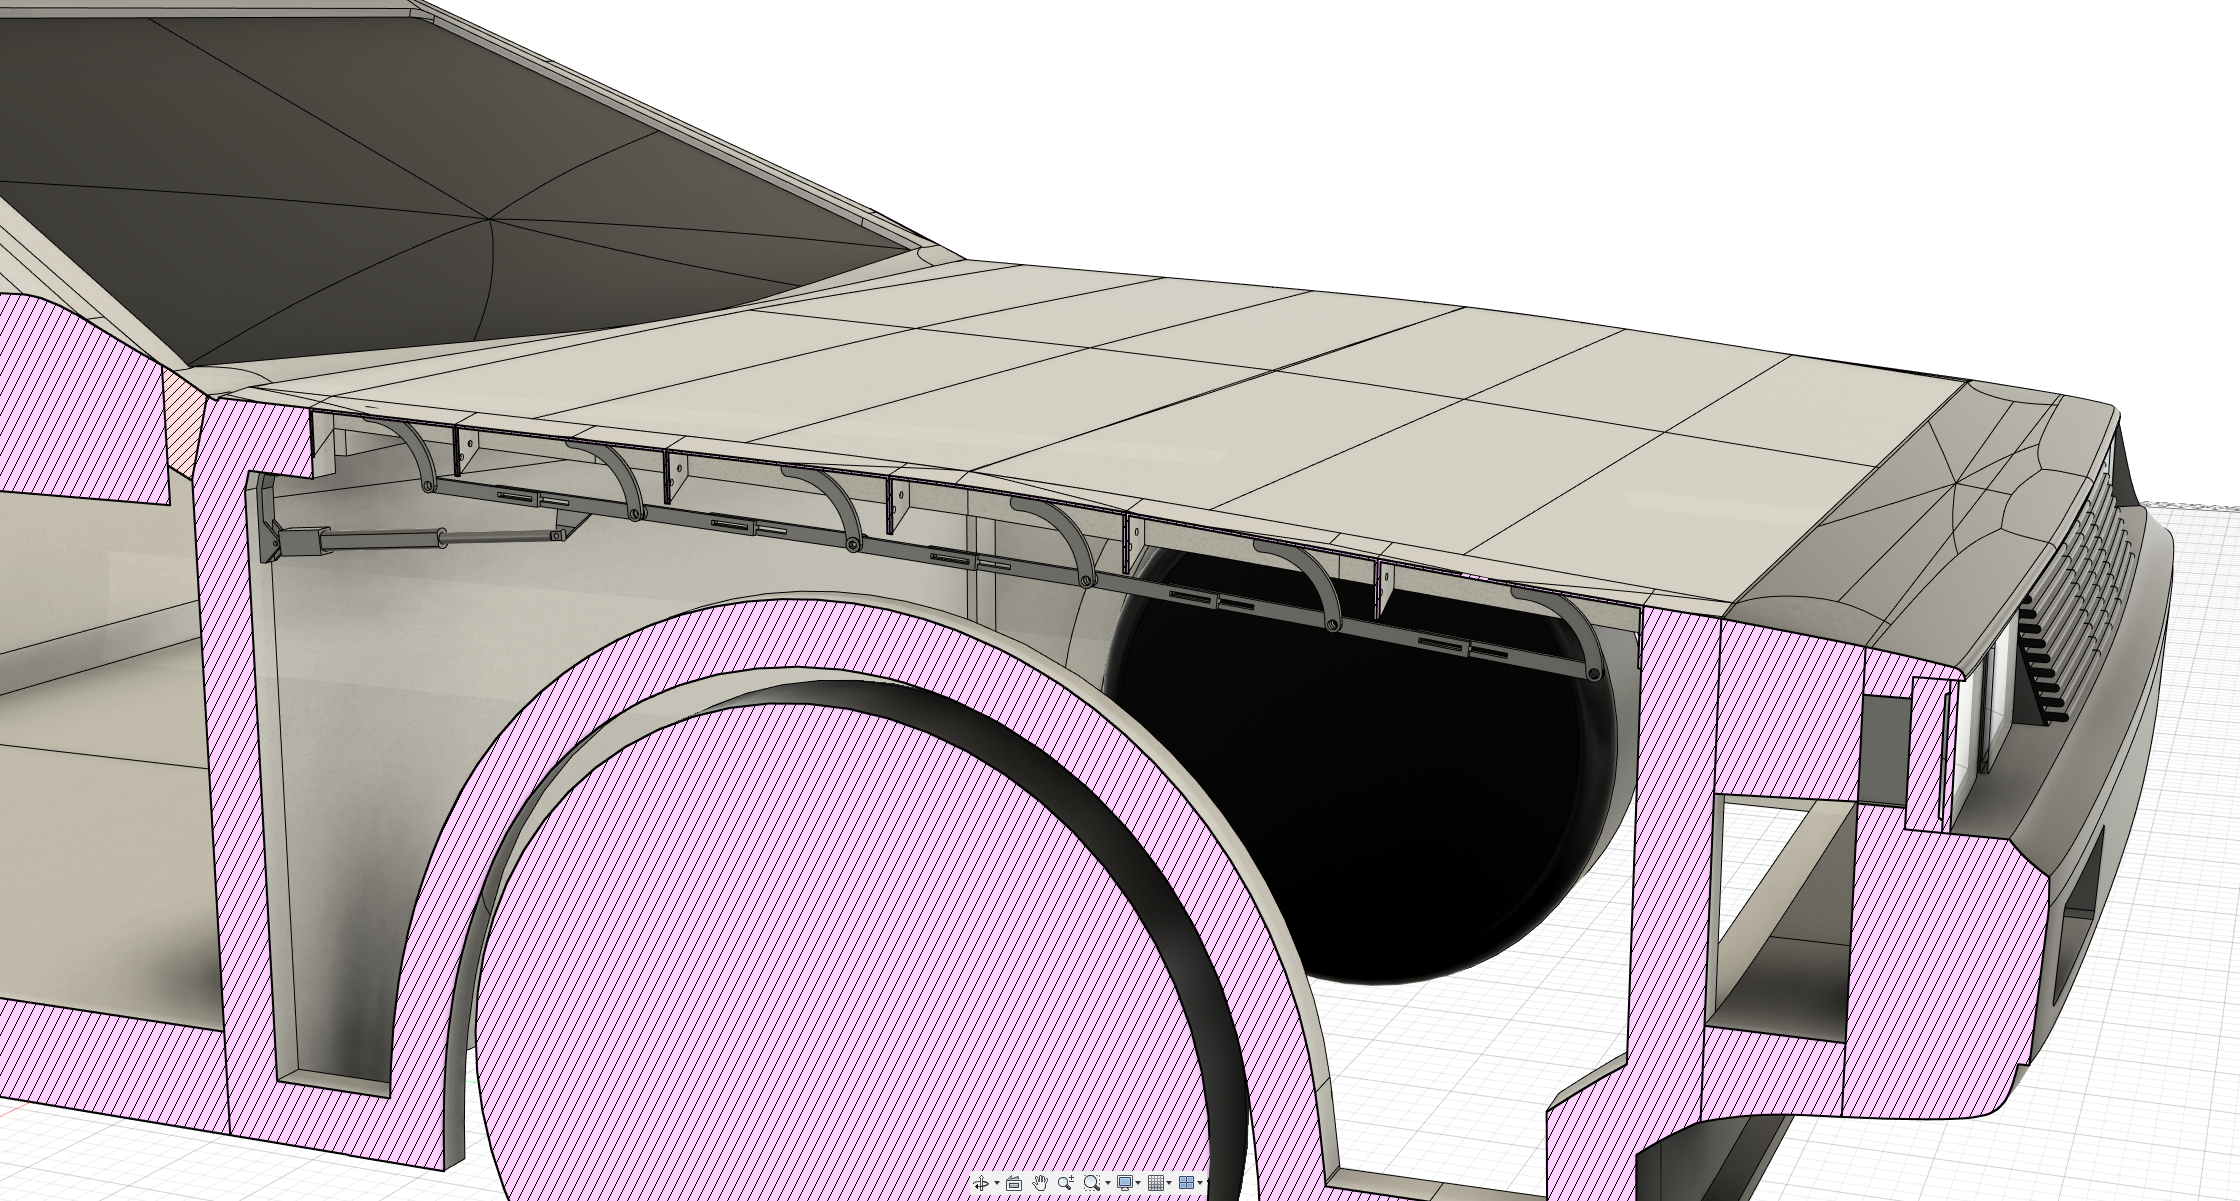
To allow air to enter the propellers the front and back of the car needed to be hollow and the top needed to be open. This is all great but I didn't want 2 gaping holes in the front and the back so i made a flap-system connected to a linear actuator through mechanical linkages. This way the blades are conceiled when the flaps are closed and allow air to enter inside when they are open.
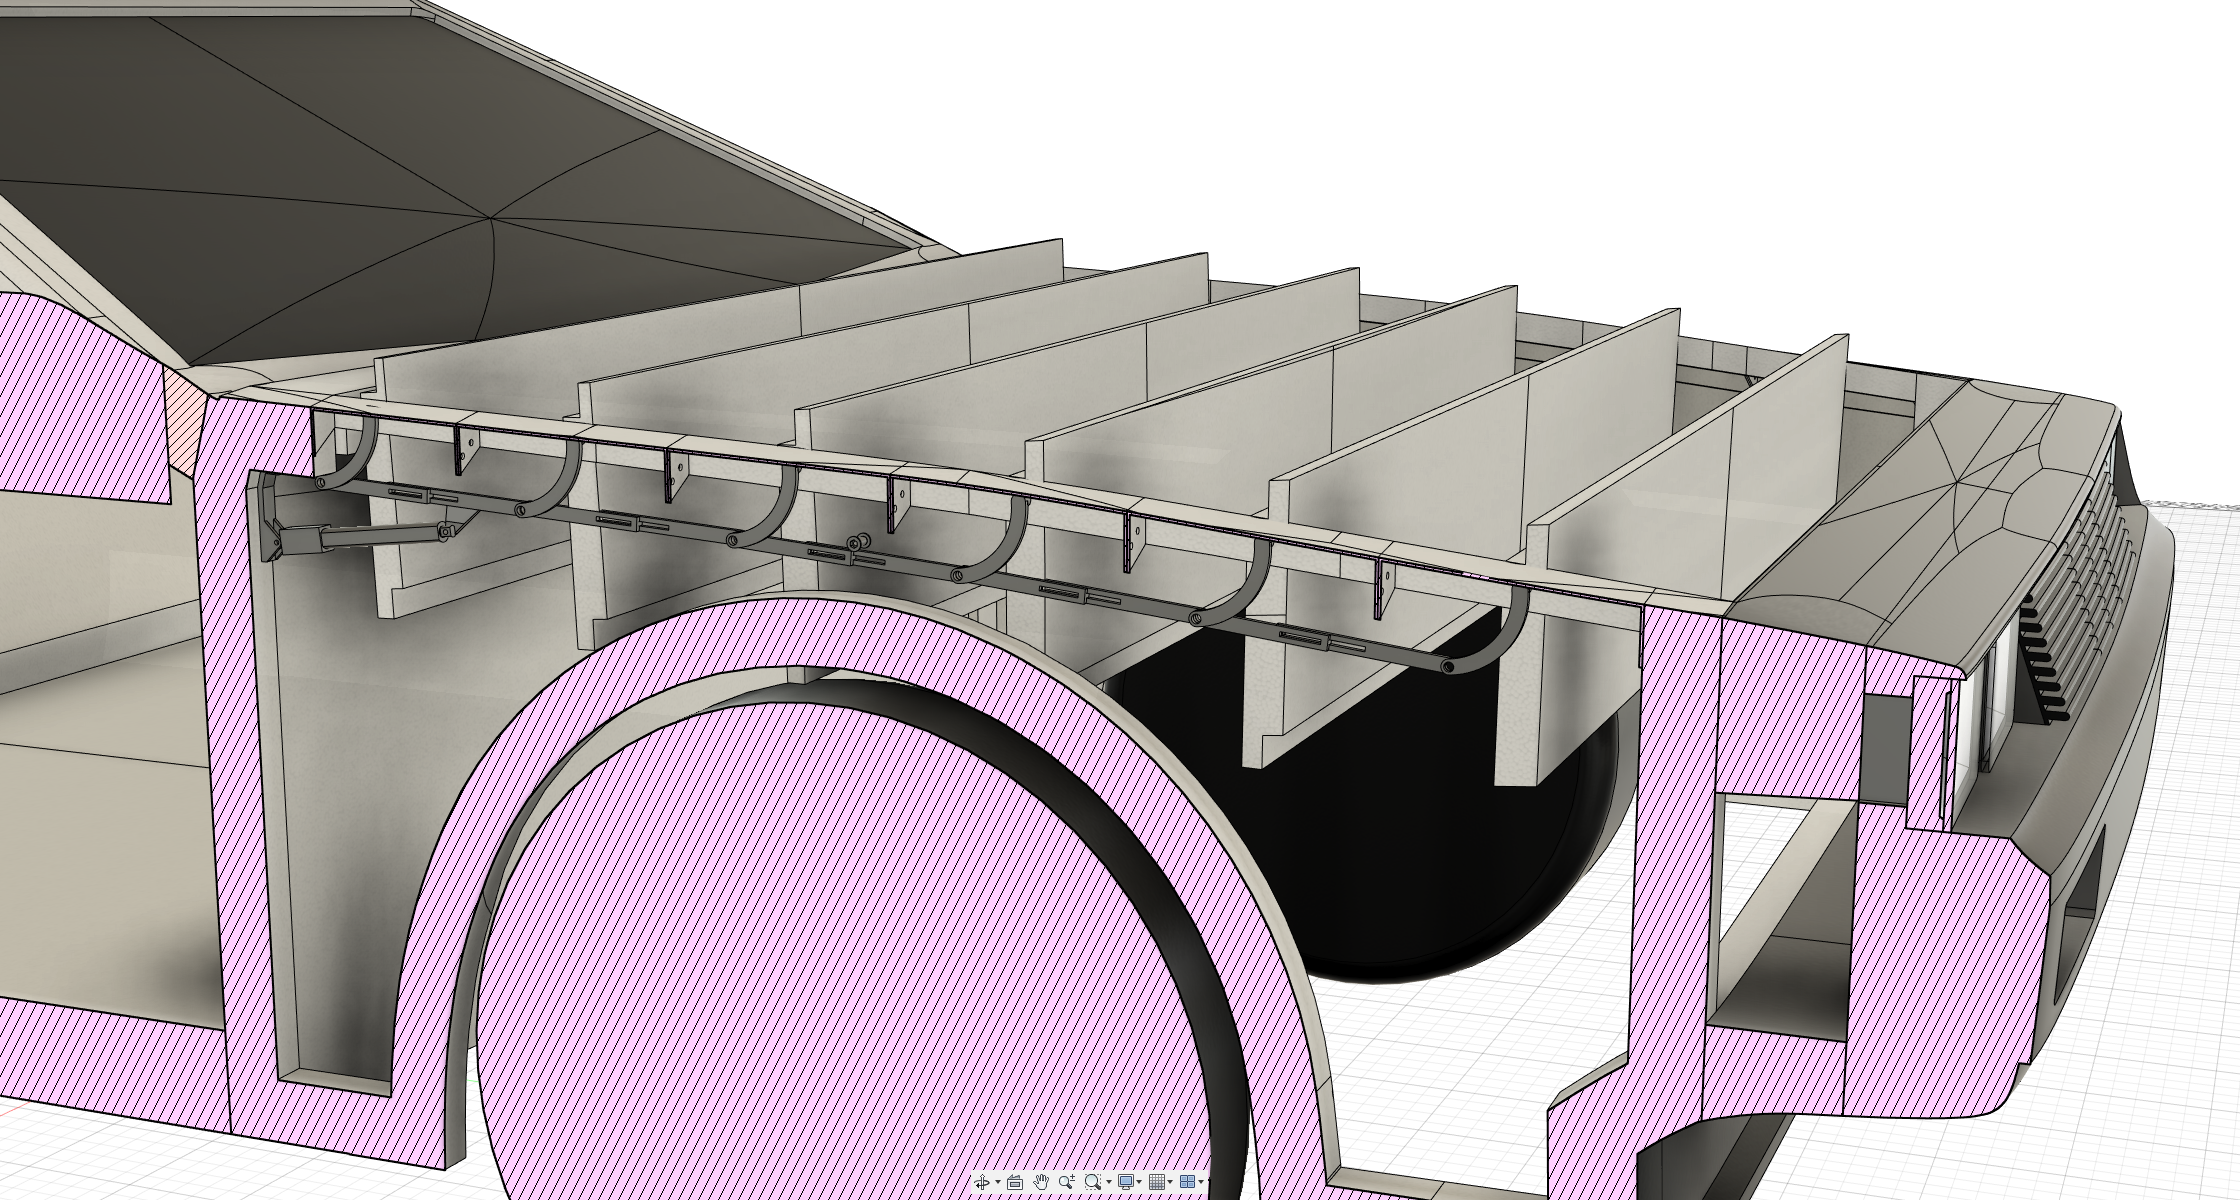
Automatic door hinge design
The automatic door hinge design for the gulwing doors was probably the most complicated design part of the whole build (so far). This is the part I spend the most time on. I didn't want the hinges to show on the roof of the car, I wanted an off-center hinge that's completely conceiled inside the roof and door itself, similar to real car doors.
In the picture below you...
Read more » Brian Brocken

 Maximiliano Palay

 Andrea Piccinno
 Sergio Gugliandolo
Hi Brian -- really looking forward to this! Wrote it up for the blog, should publish soon. Great stuff!