With my Interak now booting into CP/M, I needed a keyboard to actually use it. Fortunately, when I visited the derelict Greenbank Electronics shop, I had been given an LKP-1 kit by the owner. Inspecting the kit, I found it had the PCB, the mounting hardware, and the ICs with appropriate sockets – all that was missing were the discrete components - which were easily sourced, if I didn’t have them in stock.
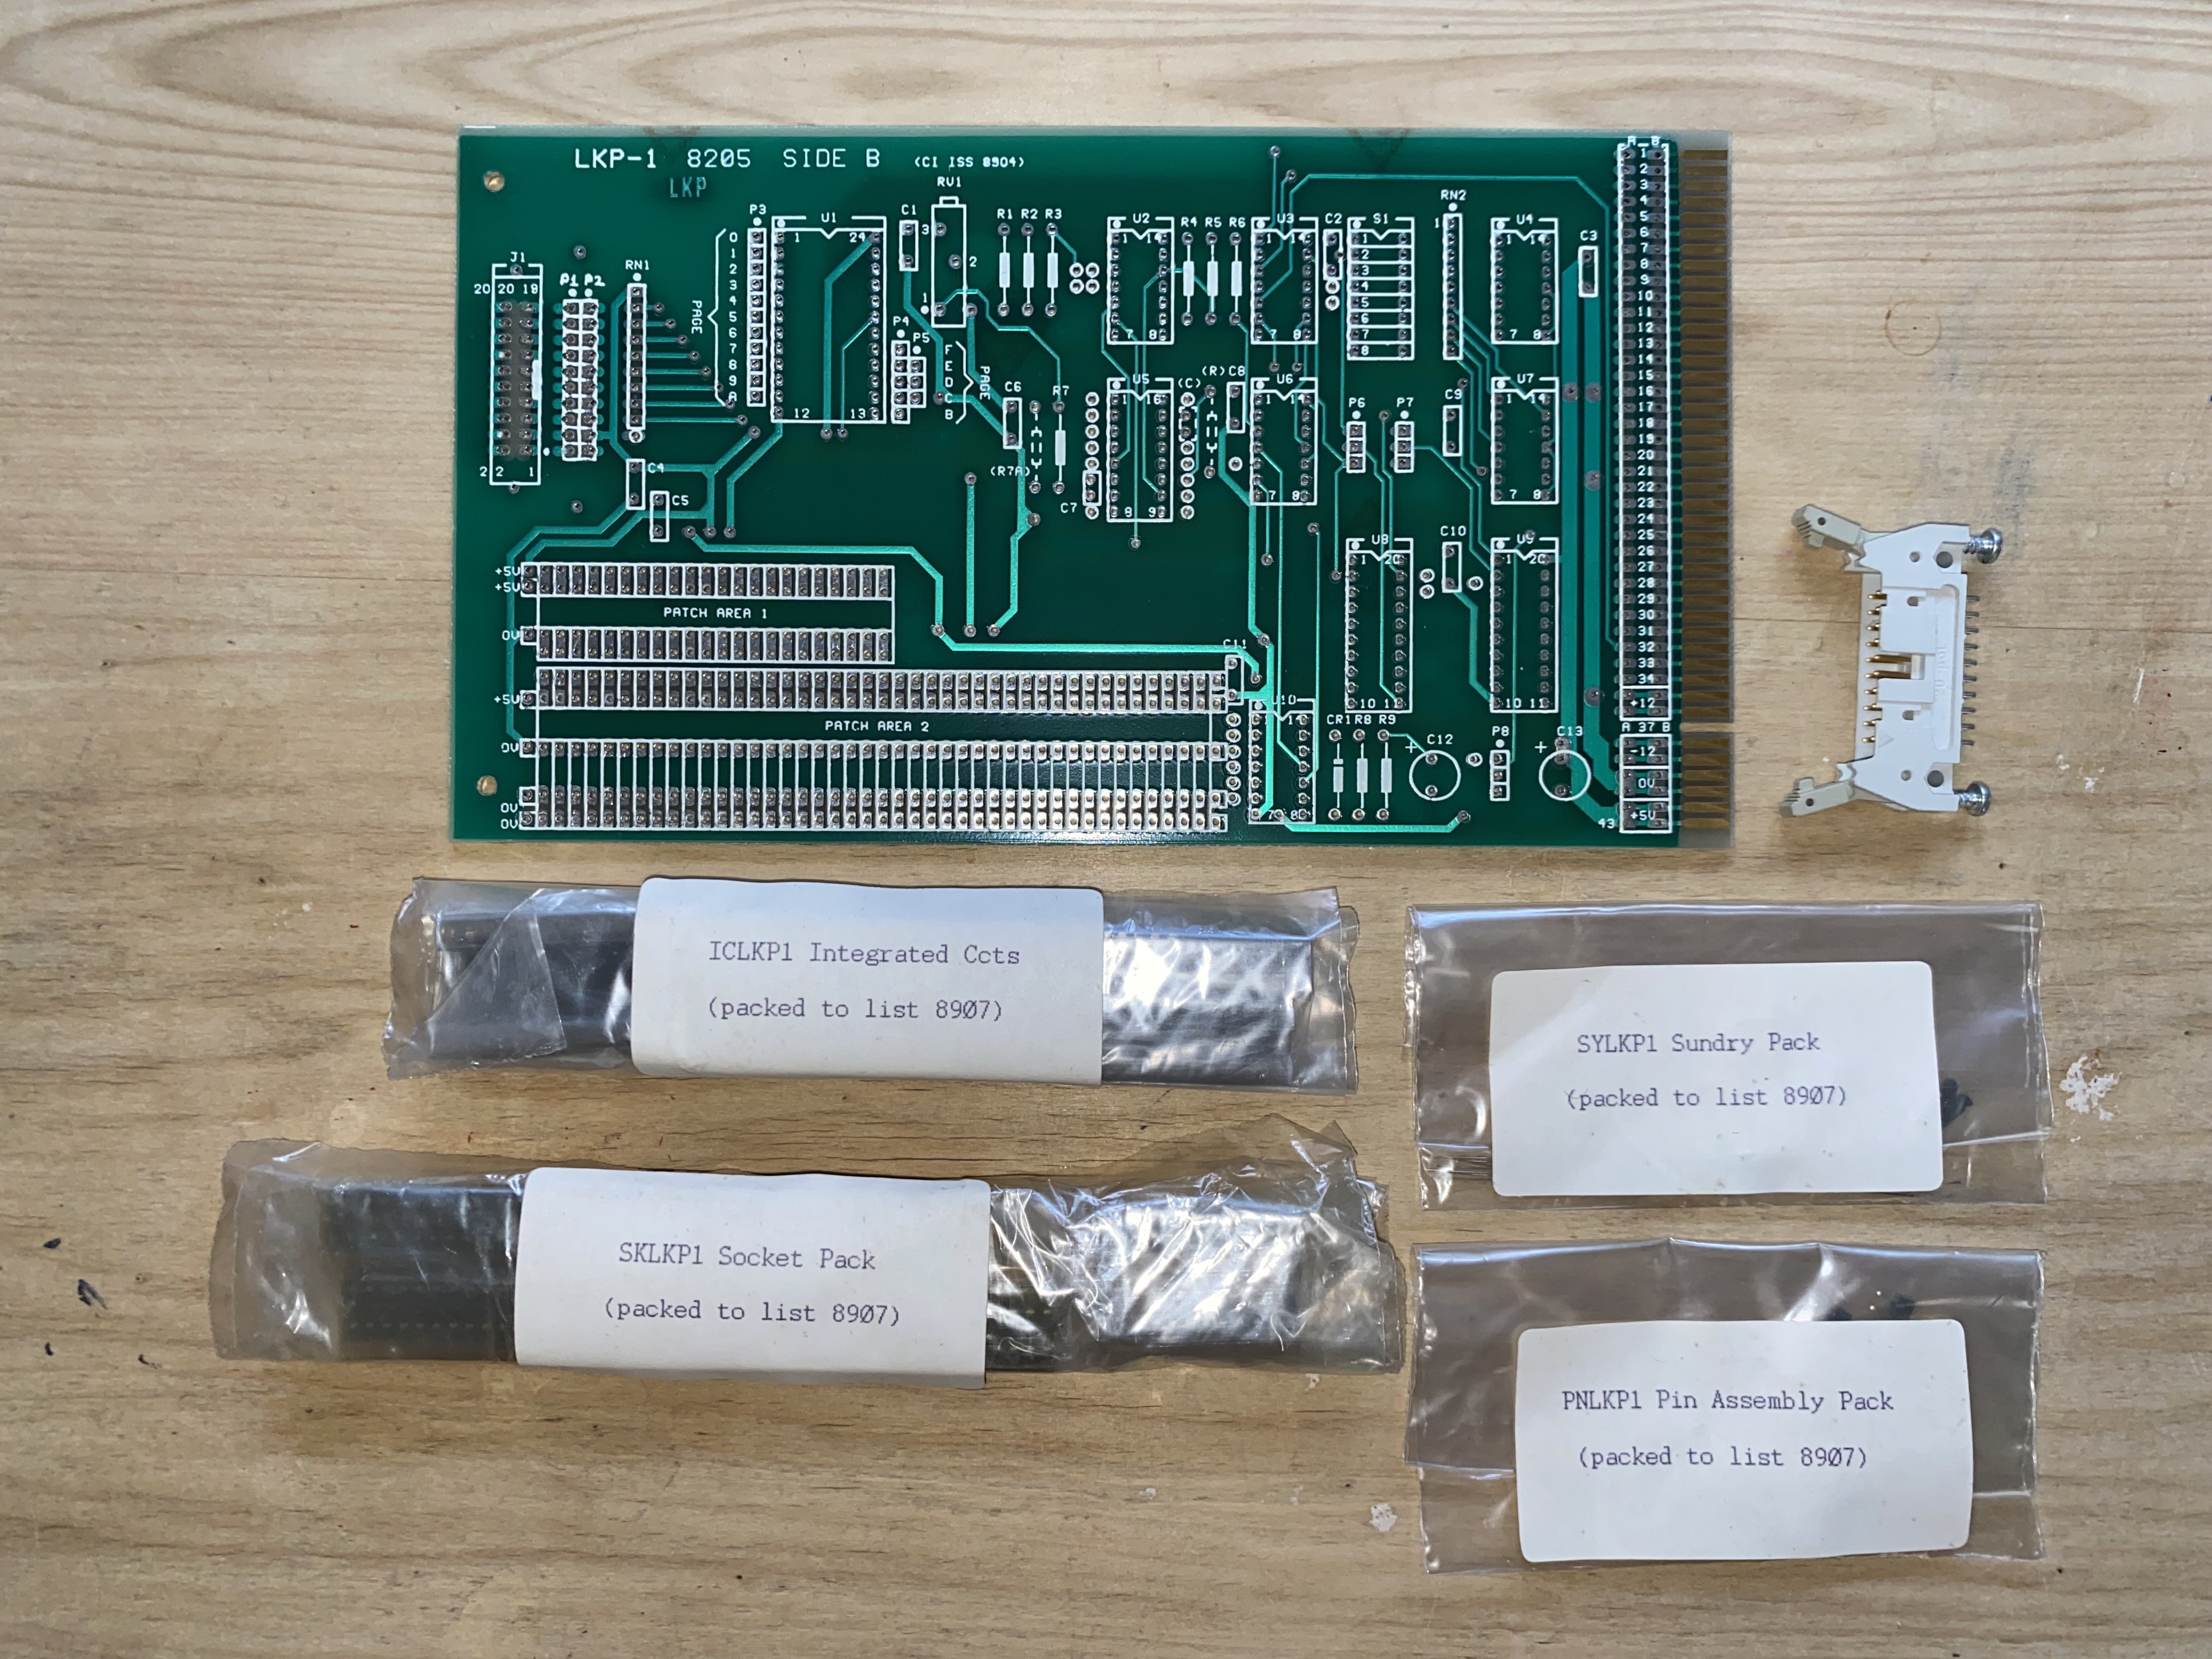
It seemed almost sacrilege assembling the pristine, vintage kit of parts – but I needed a keyboard interface more than a museum exhibit, and it was fun reliving a time some 40 years ago, soldering up an Interak board.
With an assembled LKP-1 card, I met the next problem. The LKP-1 interface is designed for an ASCII keyboard. These are now hard to find, and commensurately command ridiculous prices. I needed an alternative.
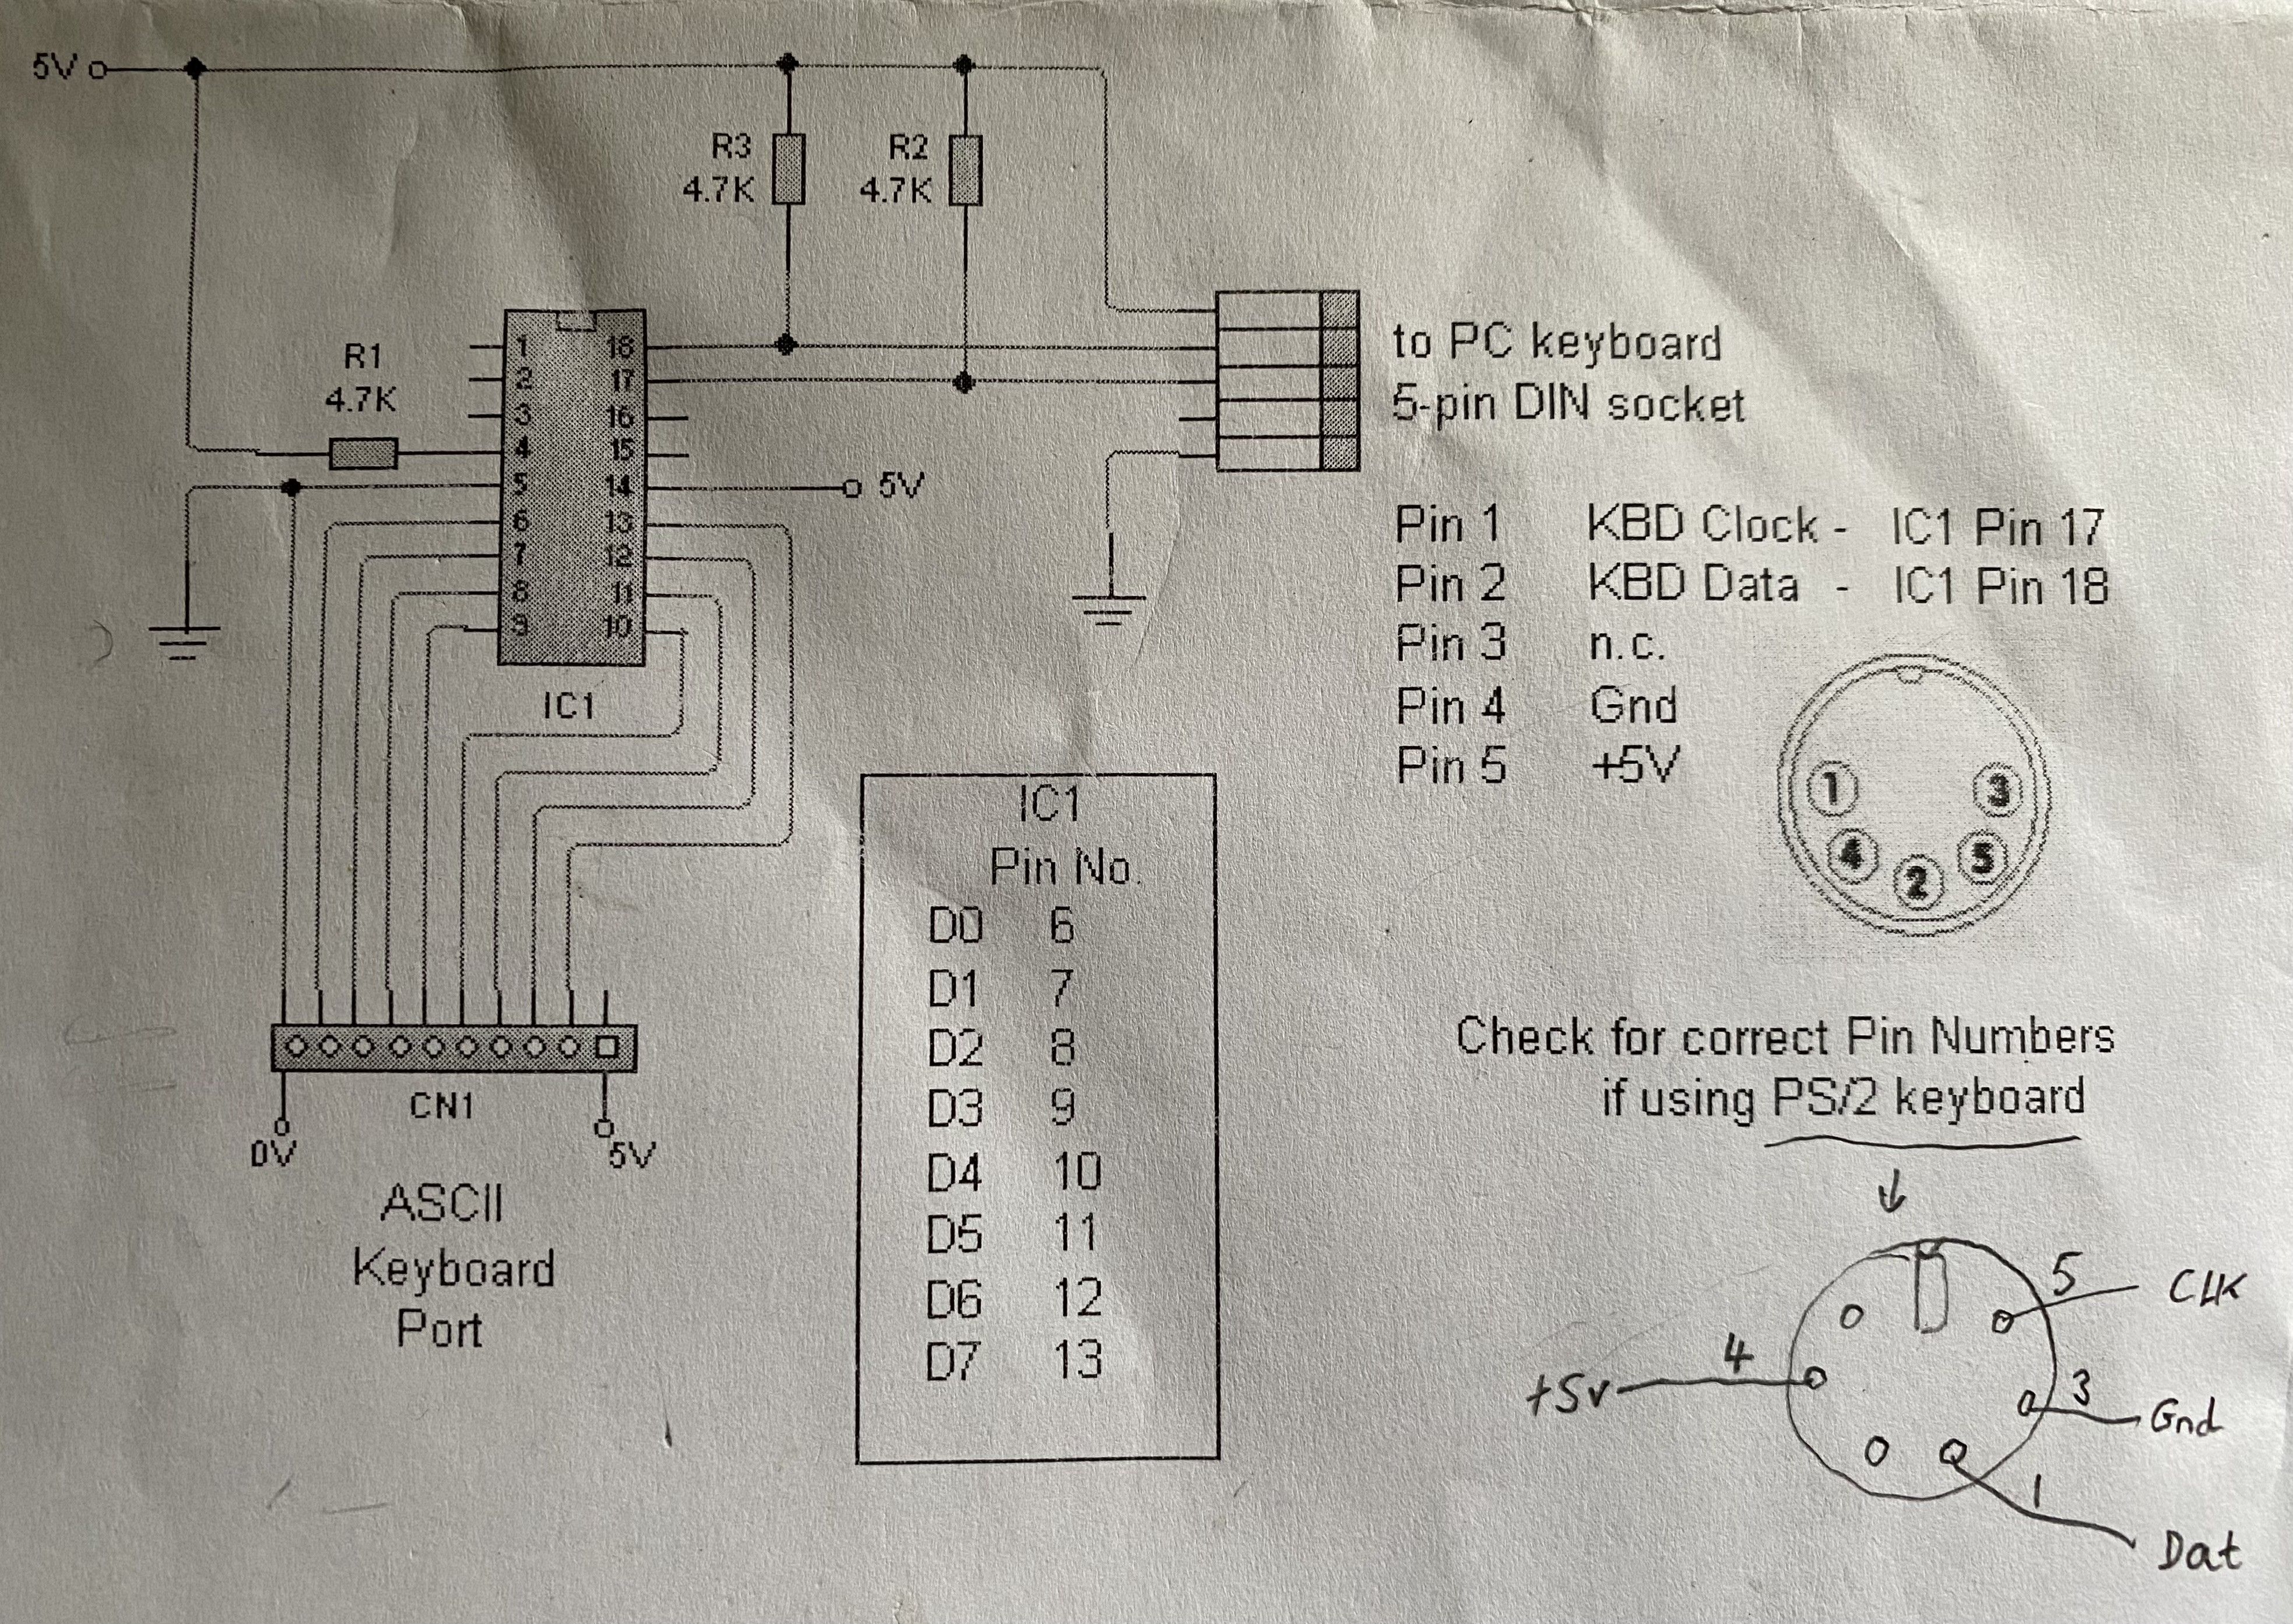
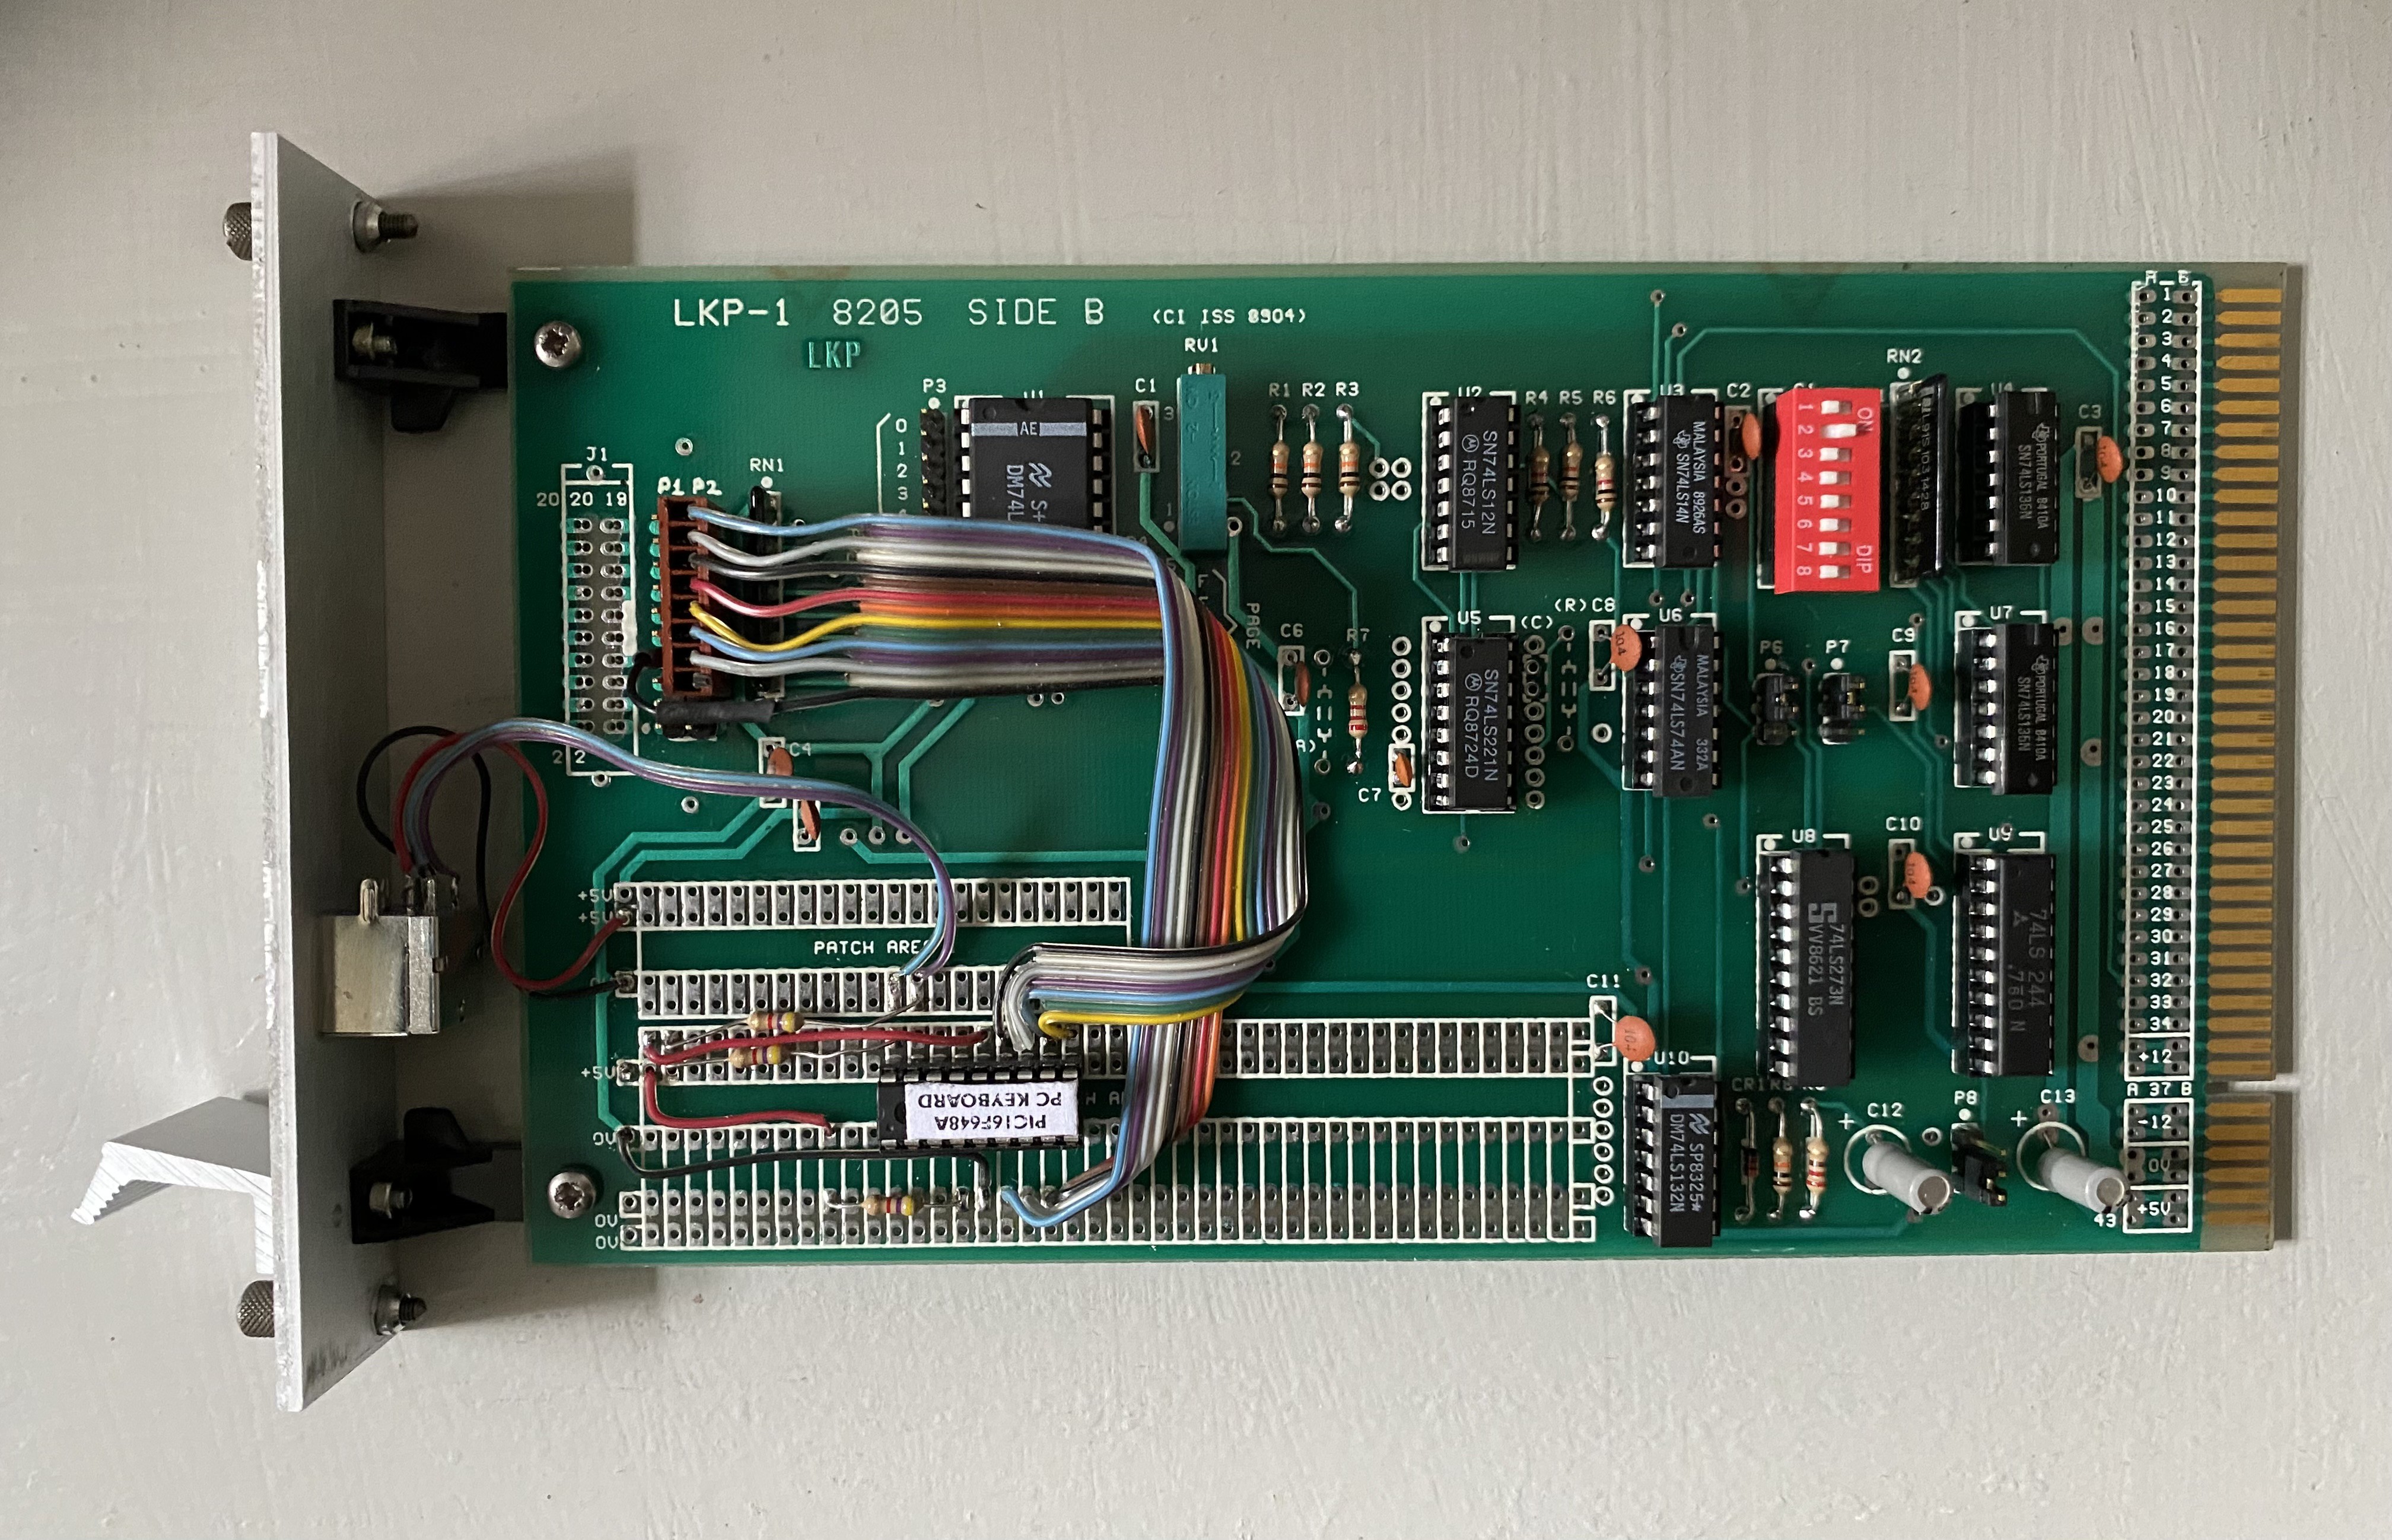
Fortunately for me, Interak guru Alan Paton has programmed a PIC microcontroller to act as an interface to modern day ‘PC’ keyboards – translating from AT or PS/2 to ASCII format. Perfect! I sourced a PIC from Alan, gathered the handful of required ancillary components, and built the interface circuit on the patch-area of the LKP-1 card.
Other than a minor issue with a defective PIC which had to be replaced, both the keyboard interface and the LKP-1 card worked perfectly.
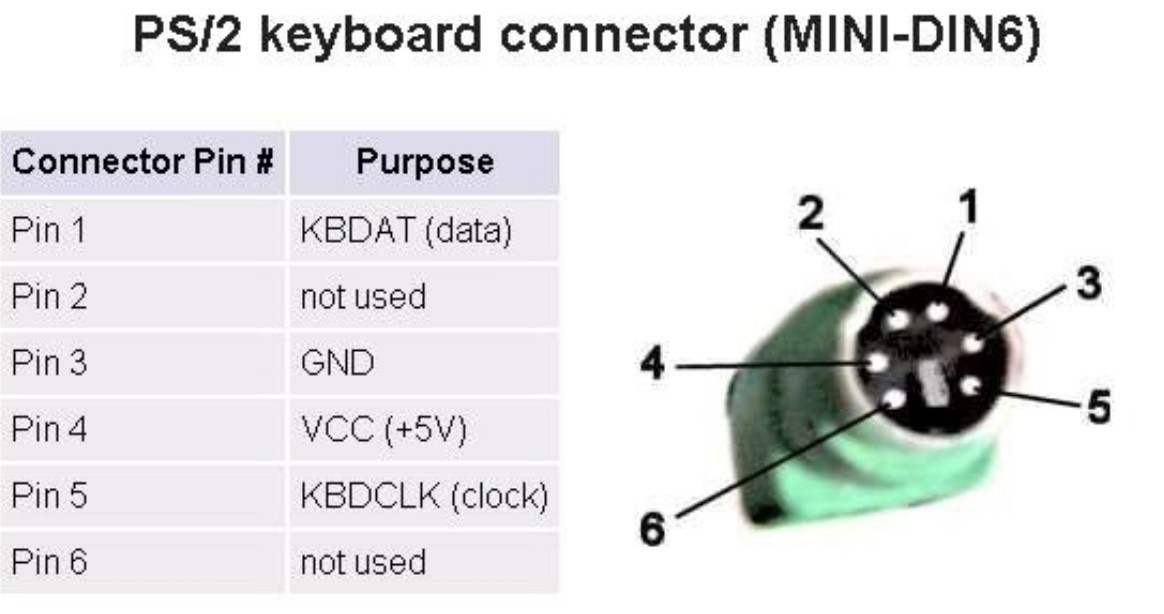
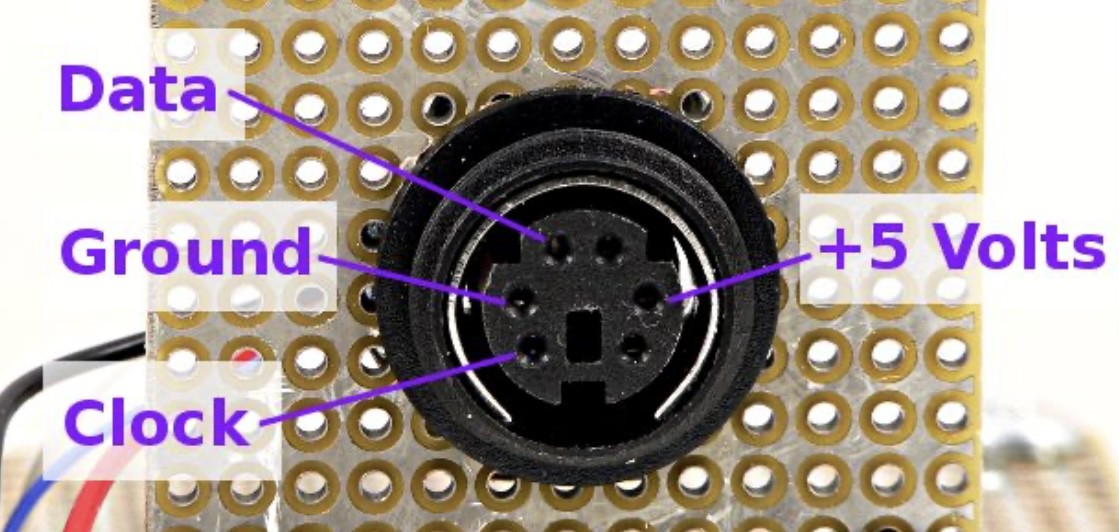
The hardest part of the whole endeavour was determining the pinout of the connector for my PS/2 keyboard. Though there is a great deal of information online, few people bother to say if they are viewing the plug or the socket, the front or the back, or how the pins are numbered. Plus, for good measure, some diagrams are just wrong! For reference, I have a included a couple of known-good examples here.
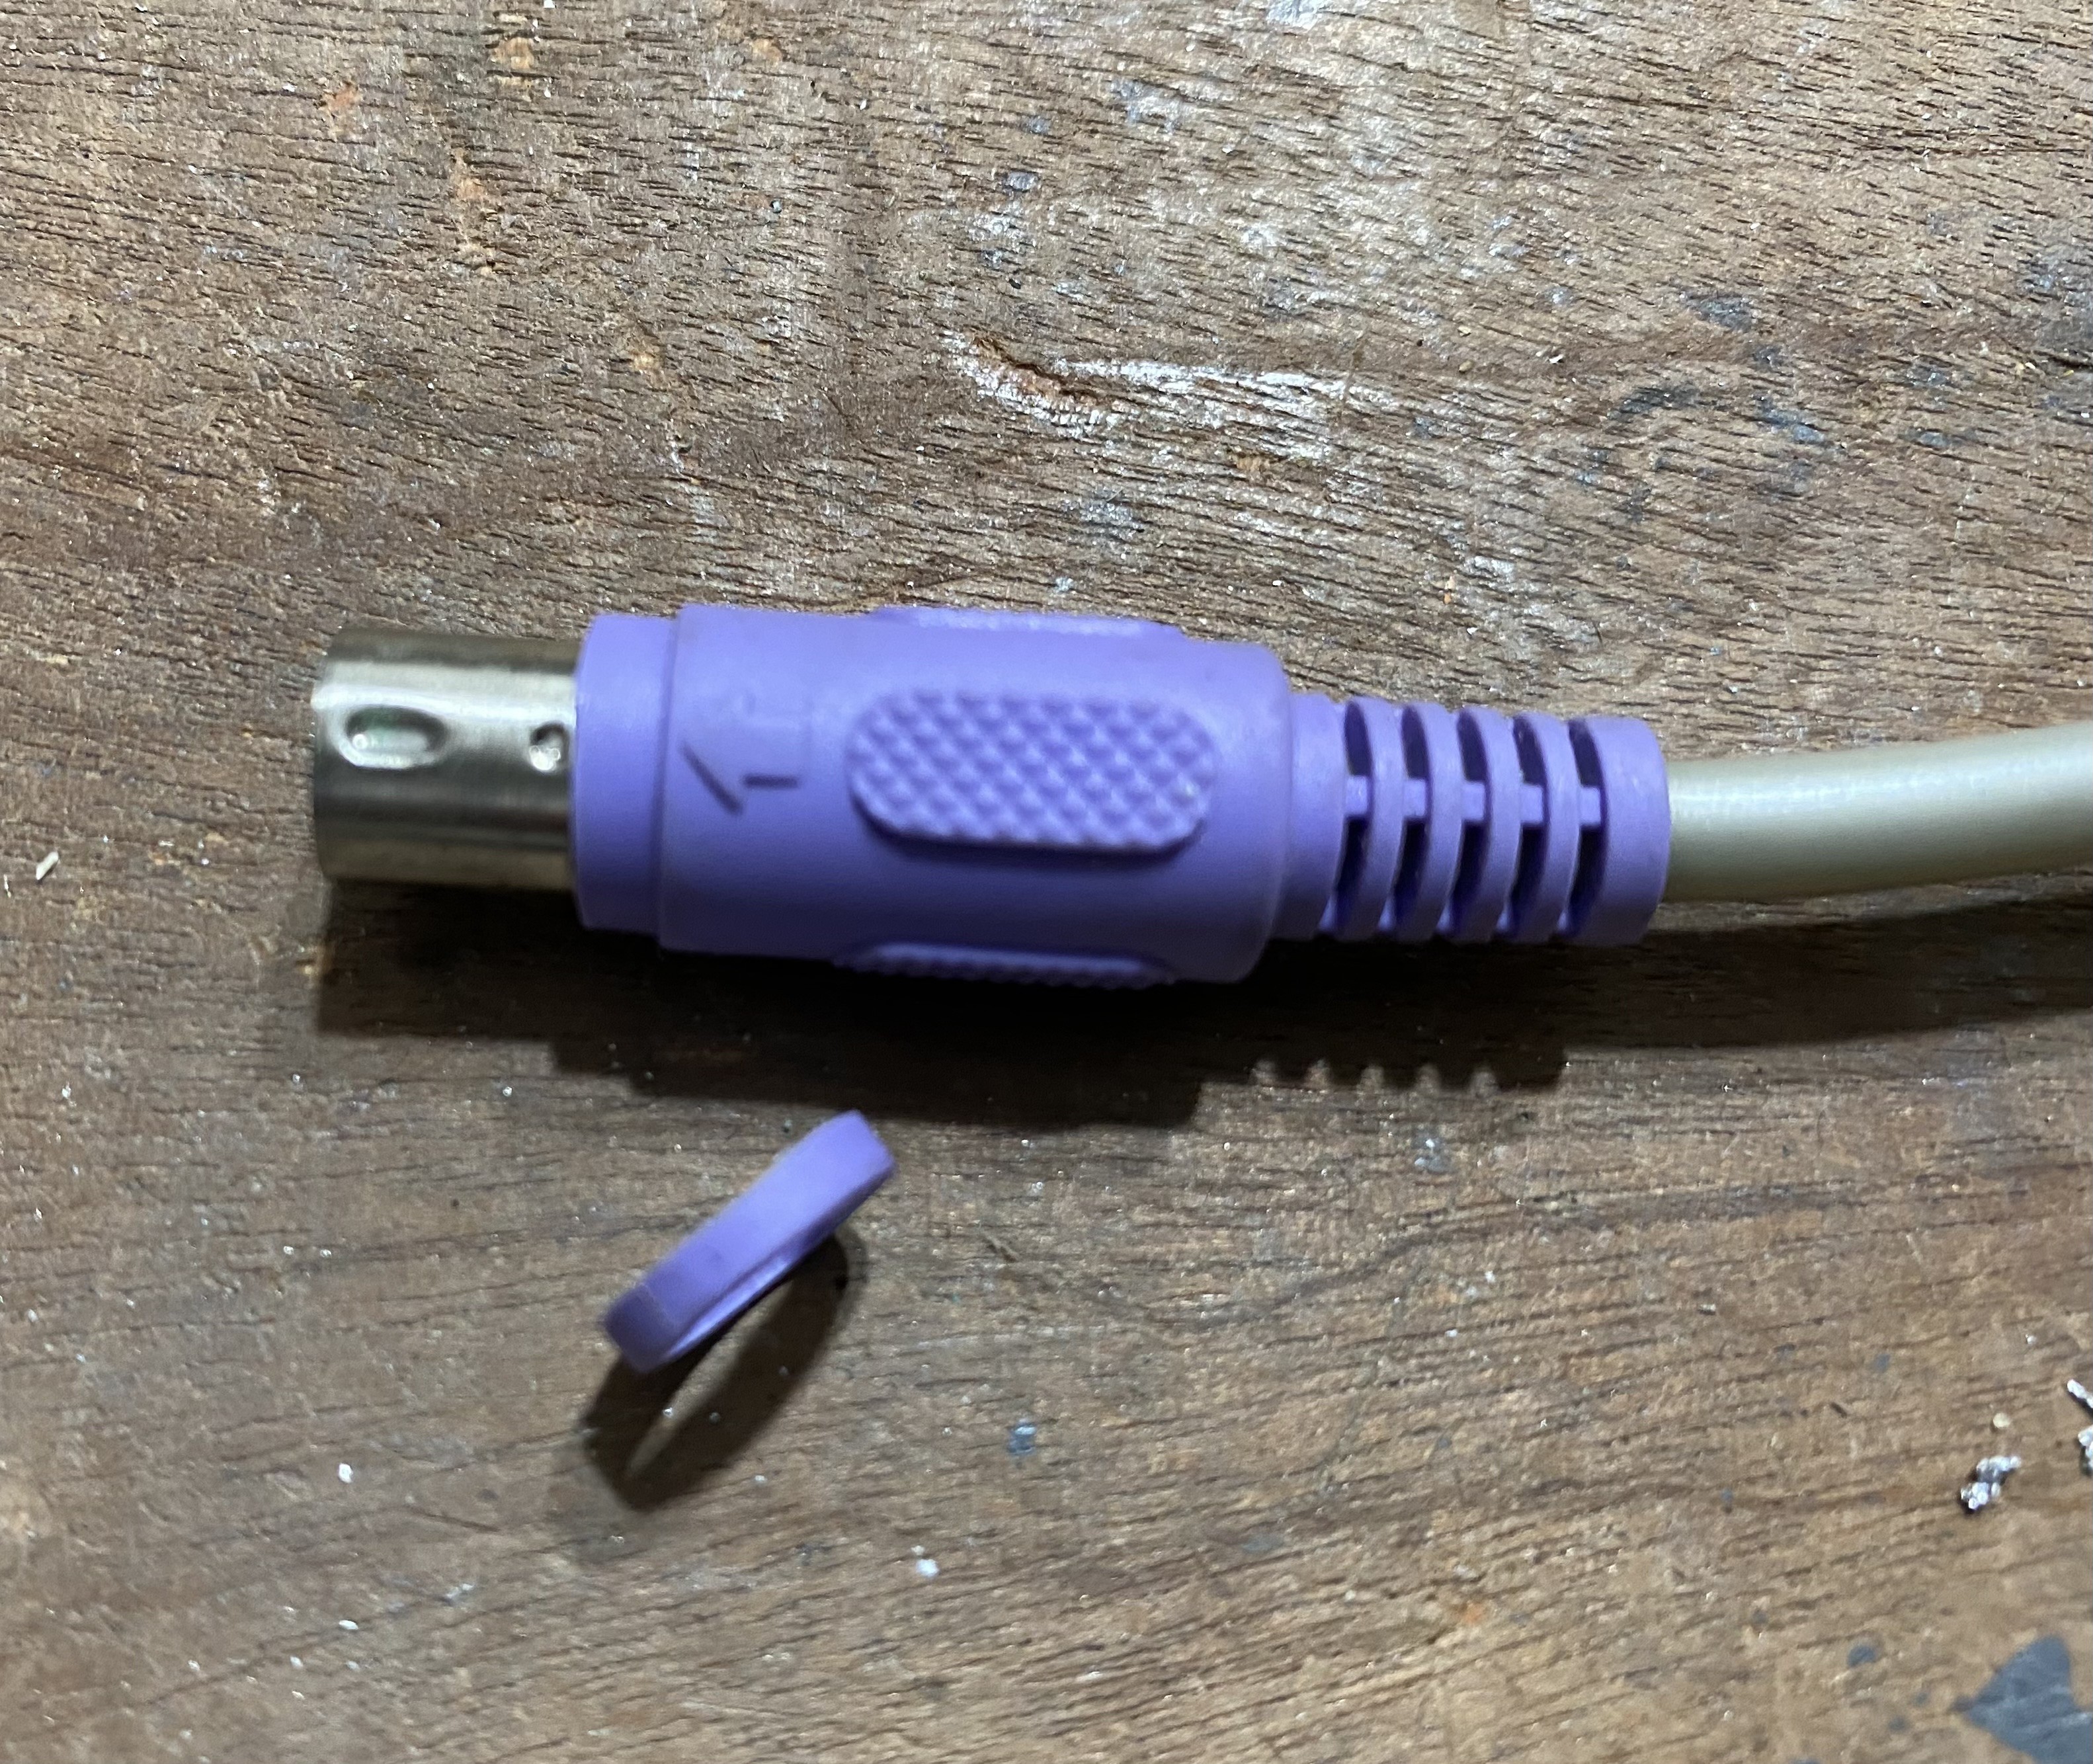
One small modification I made to my PS/2 keyboard connector, was to remove a couple of mm of the plastic sheath that covers the connector barrel. As I drilled only a small hole in the panel in front of the PS/2 connector (which is expoxied to the rear of the front panel) - the plastic sheath prevented the PS/2 connector from pushing securely home. I could have drilled a larger hole to provide clearance, but I felt a modified connector looked neater.
And that's it. A fully working Interak using a PC style keyboard.

Now to decide what to do with it. Or what add-ons to build/restore next!
TBC...
(An Interak is never finished!)
Discussions
Become a Hackaday.io Member
Create an account to leave a comment. Already have an account? Log In.