In this session, we ensured that all the necessary parts were printed for the proper assembly of the watch and arranged them in the correct order as depicted in the image below. Furthermore, we made a study of how they will be assembled and the complex mechanism that the cam followers execute in order to allow the movement of the digits.
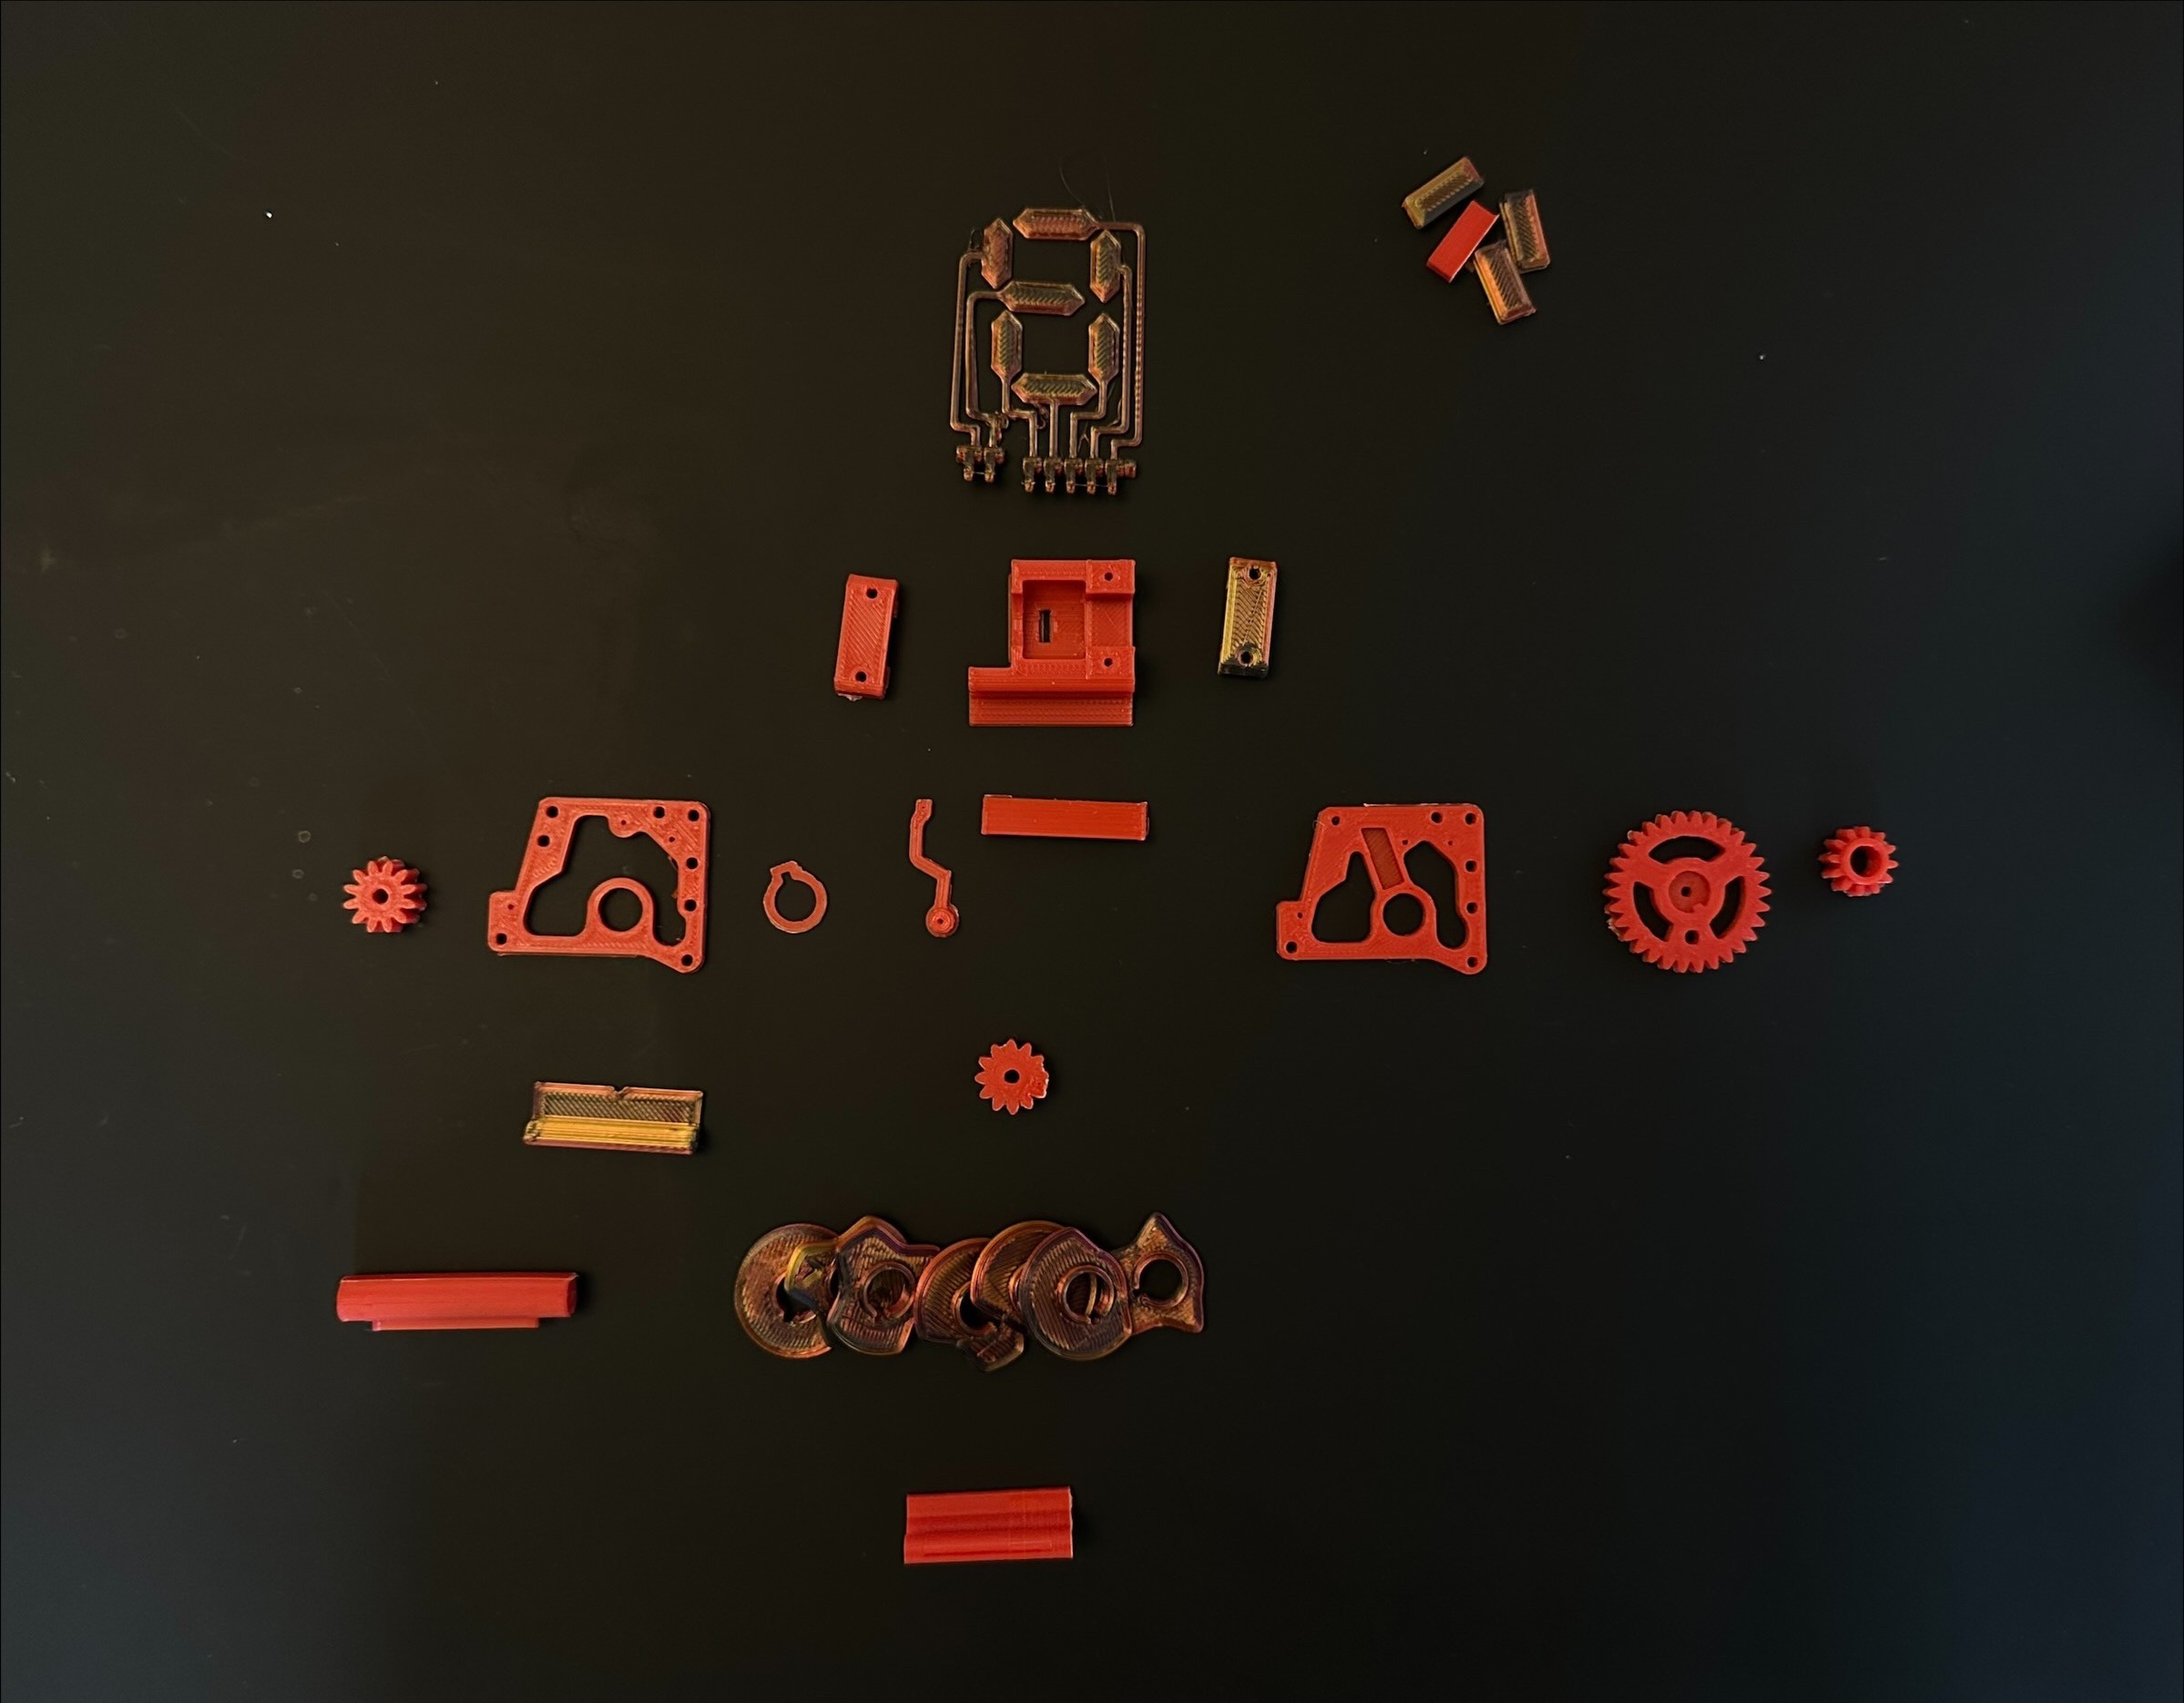
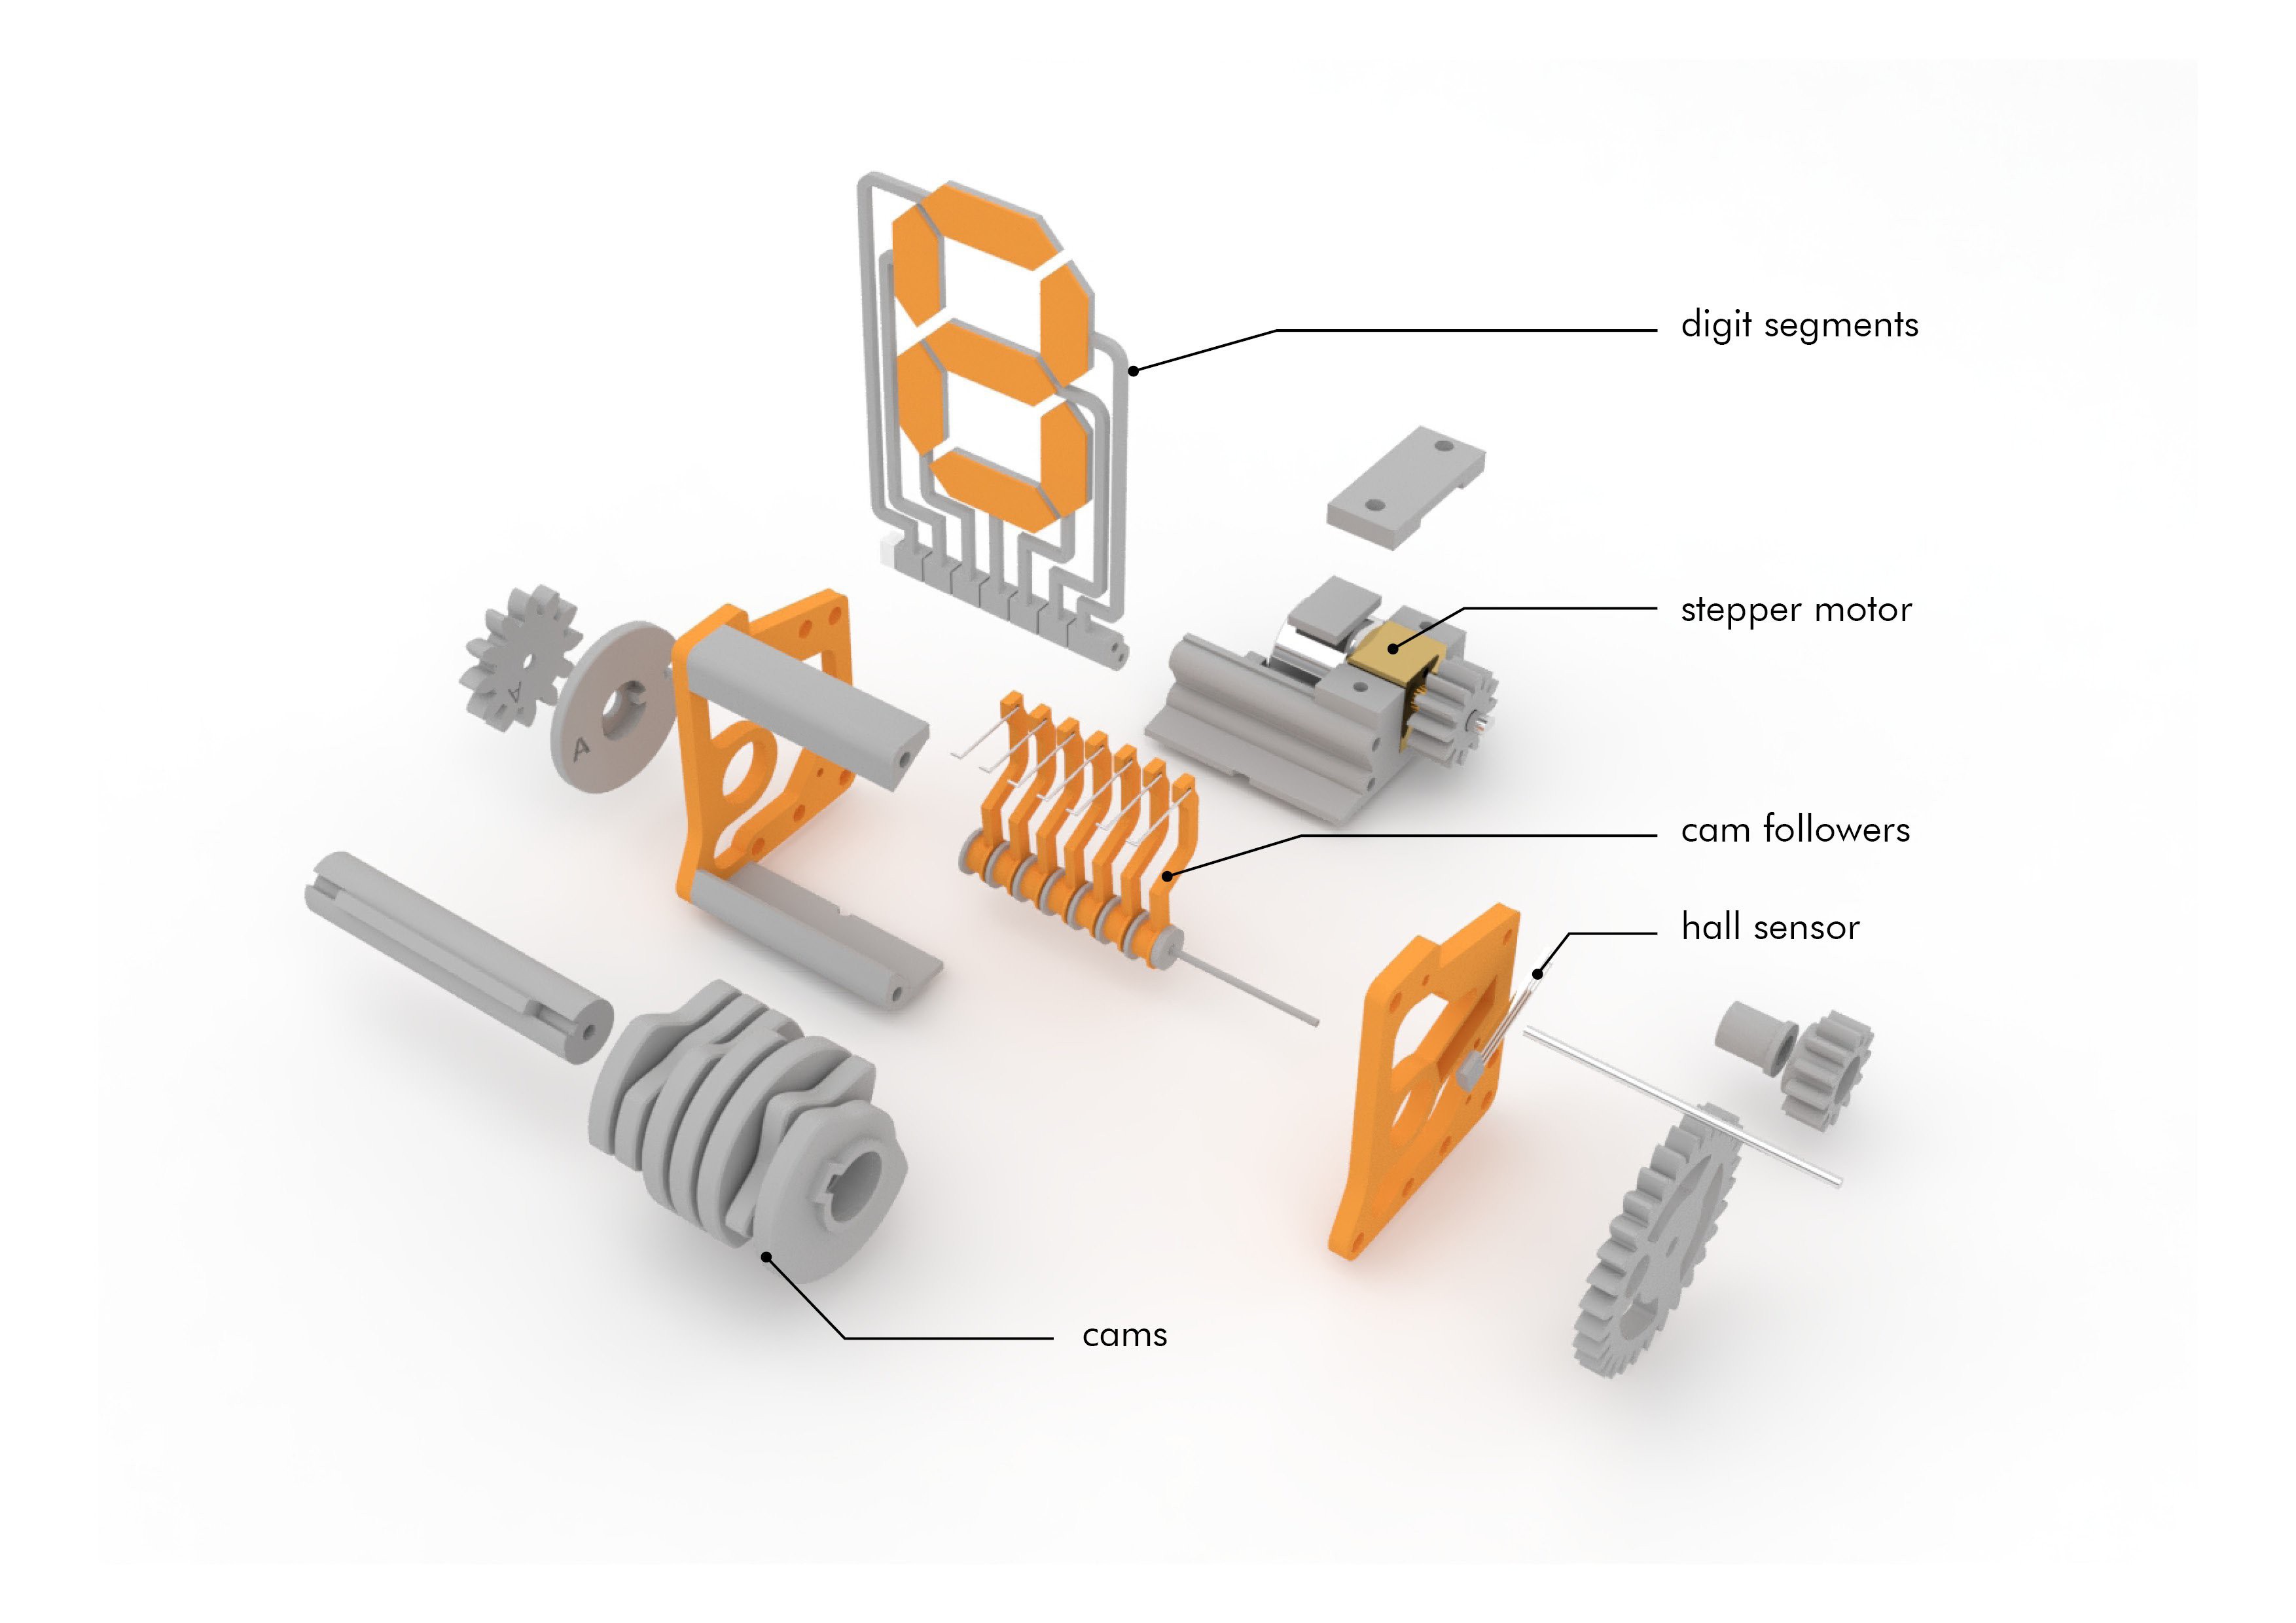
*Image of the inventory of pieces and exploding of how they would be assembled
Furthermore, during this session, we also delved into the intricacies of designing cams. Below is a photo accompanied by an explanation. As depicted, a cam follower comprises an initial circumference to which various curves are added. These curves facilitate different movements to ensure that the intended message is not constant over time but rather displays different letters/numbers along the path. In a linear perspective, starting from 1, if we desire a constant display for a few seconds, we assign a straight line from 1-3. This means that the cam's circumference maintains a constant geometry during this time interval. Subsequently, from 3-5, we introduce a peak. This action prompts the cam to push the cam-follower, resulting in a change in the displayed message on the clock. This sequence continues accordingly. It is crucial to emphasize that, to ensure proper cam functionality, these peaks should have zero derivatives. In other words, between a straight line and a peak, a curve should be incorporated to prevent the cam mechanism from jamming due to a potential collision in that area.
Explanatory drawing
 Explanatory drawing
Discussions
Become a Hackaday.io Member
Create an account to leave a comment. Already have an account? Log In.