 Dylan Brophy
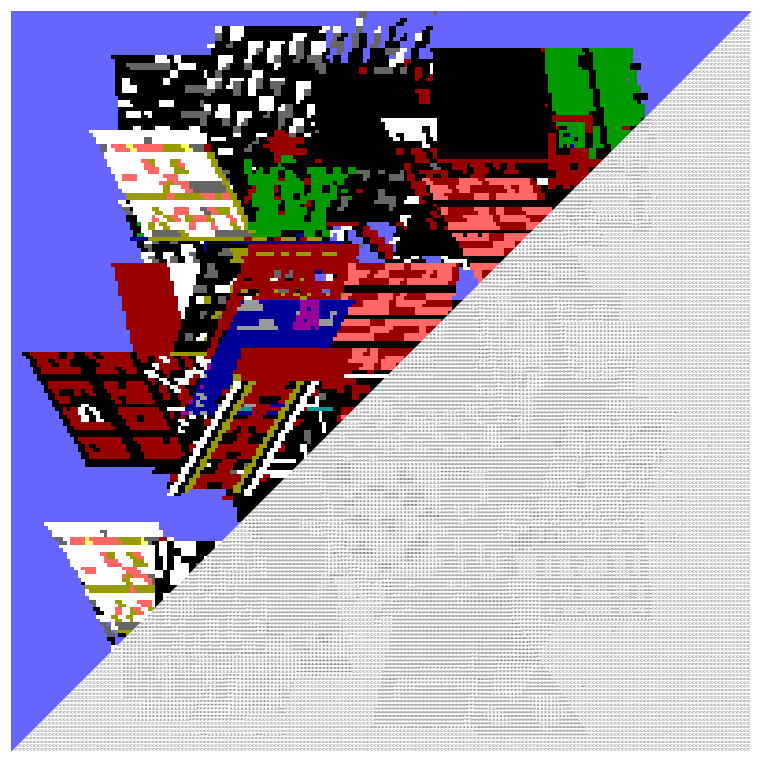
Background
I found out about the Teensy 4.0 shortly after it came out, and it quickly became my favorite MCU due to the wide range of capabilities, incredible horsepower, and low price. I think that MCU marked a huge change for the Arduino platform, because it was such a leap forward in processing power - it opens up some interesting avenues in the Arduino environment that just weren't open before. Since then I've hacked together a few interesting devices with the Teensy 4.1, but I haven't done much on these devices. They haven't really done anything cool. Part of the issue, is that I didn't build any great devices to run anything on. Everything sorta had problems or was hacked together. So, in the latest iteration of the #Arduino Desktop project, I designed a new platform that I can actually build some cool stuff on. We also have a new #uPD7220 Retro Graphics Card (and VGA hack) which I designed, which goes with the new Teensy system. With these in mind, I can contemplate a lot more interesting software to load to the Teensy: Namely, a 3D game.
Is the Teensy fast enough?
This is the first big question. With speeds approaching old phone processors, which ran Minecraft Pocket Edition, it feels like there's a chance; but I imagine those phones had hardware to accelerate graphics. We don't have that. So, I've translated some of my Java LWJGL code into something arduino compatible, and ran some speed tests:
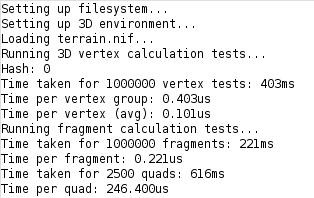
Considering the above numbers, we can draw about 65 30x30 pixel quads every frame, if we want to hit 60hz. That's not much, but it's certainly something to work with. Each block is drawn with 3 quads, but at least one quad is almost always very small, so we can call it 2 quads - this gives us about 32 blocks we can render each frame at 60hz. I'm sure there's some optimizations or hacks I can do to improve this - it's a work in progress. Nonetheless, this is certainly enough to run a (small) 3D game, no?
Other math: I want a display with about 192000 pixels. If about 2/3 of the screen is to be rendered on average, then this gives us 128k pixels to render every frame. Each pixel is rendered as one or more fragments, so we have a minimum of 128k fragments to render. Each fragment takes about 0.3us to render when including quad processing, so the minimum render time should be approximately 38.4ms, or 26 FPS. That's actually not that bad, all things considered; I expected it to be much lower. I mean, I wouldn't notice that FPS; I used to play Minecraft at 14 FPS when I was a kid :)
Display Limitations, Color, and Loading Minecraft's old terrain.png File
To make things extra fun, I'm going to run this with a uPD7220 GDC to handle the video output. Due to limitations of graphics memory size and bandwidth, we only get 16 colors. We can't use 24 bit color anyway, as the Teensy 4.1 would run out of memory. Also, for textures and the framebuffer, the Teensy 4.1 has to track transparency along with the color. Thus:
- The Teensy uses an 8-bit format for textures and framebuffers - 4 bits of alpha and 1 bit for each color channel, including a brightness channel.
- To load terrain.png, it must be converted to that 8-bit color format first
I'm using the odd 8-bit format above because it's simpler to implement, and because having more colors is of no advantage since I cannot display more than 4 bits of color anyway.

Without a Display
I don't actually *have* any of the Teensy hardware I want to run this on yet, so I'm actually running all the tests only through the Arduino serial monitor: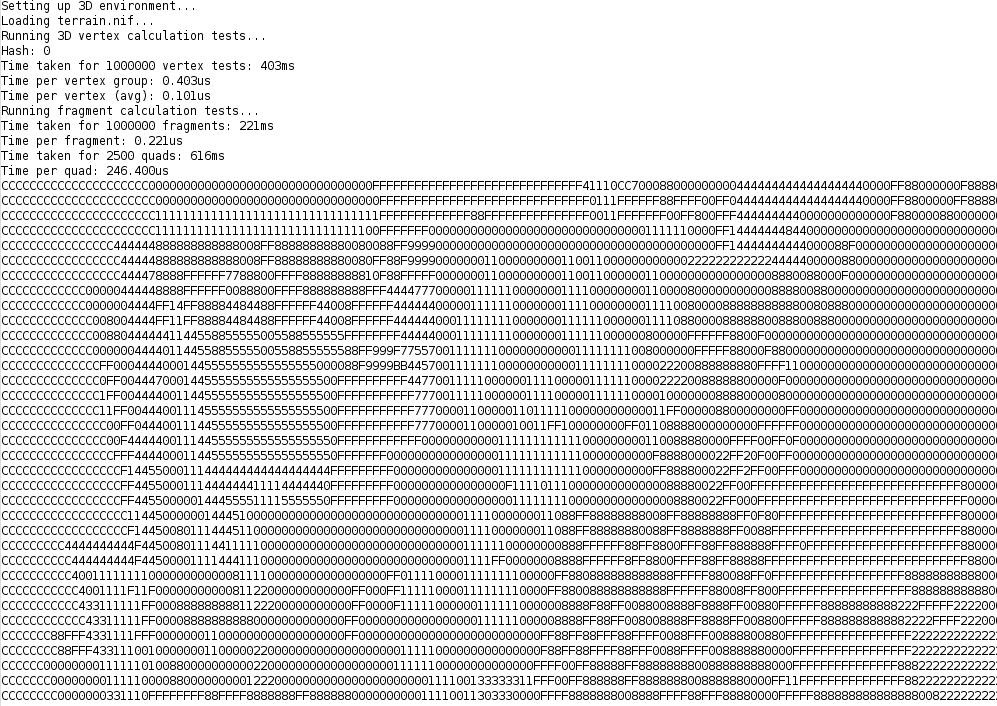
Well, I hope you found this at least interesting, and stay turned for further developments. I'll be working on getting an actual render pipeline working, with a camera and scene. At some point we'll get very basic worldgen too.
Discussions
Become a Hackaday.io Member
Create an account to leave a comment. Already have an account? Log In.