Close
0%
0%

Linamp

Your favorite music player of the 90s, but in real life

Similar projects worth following
A physical music player inspired by Winamp 2.91 and retro hi-fi gear

Features

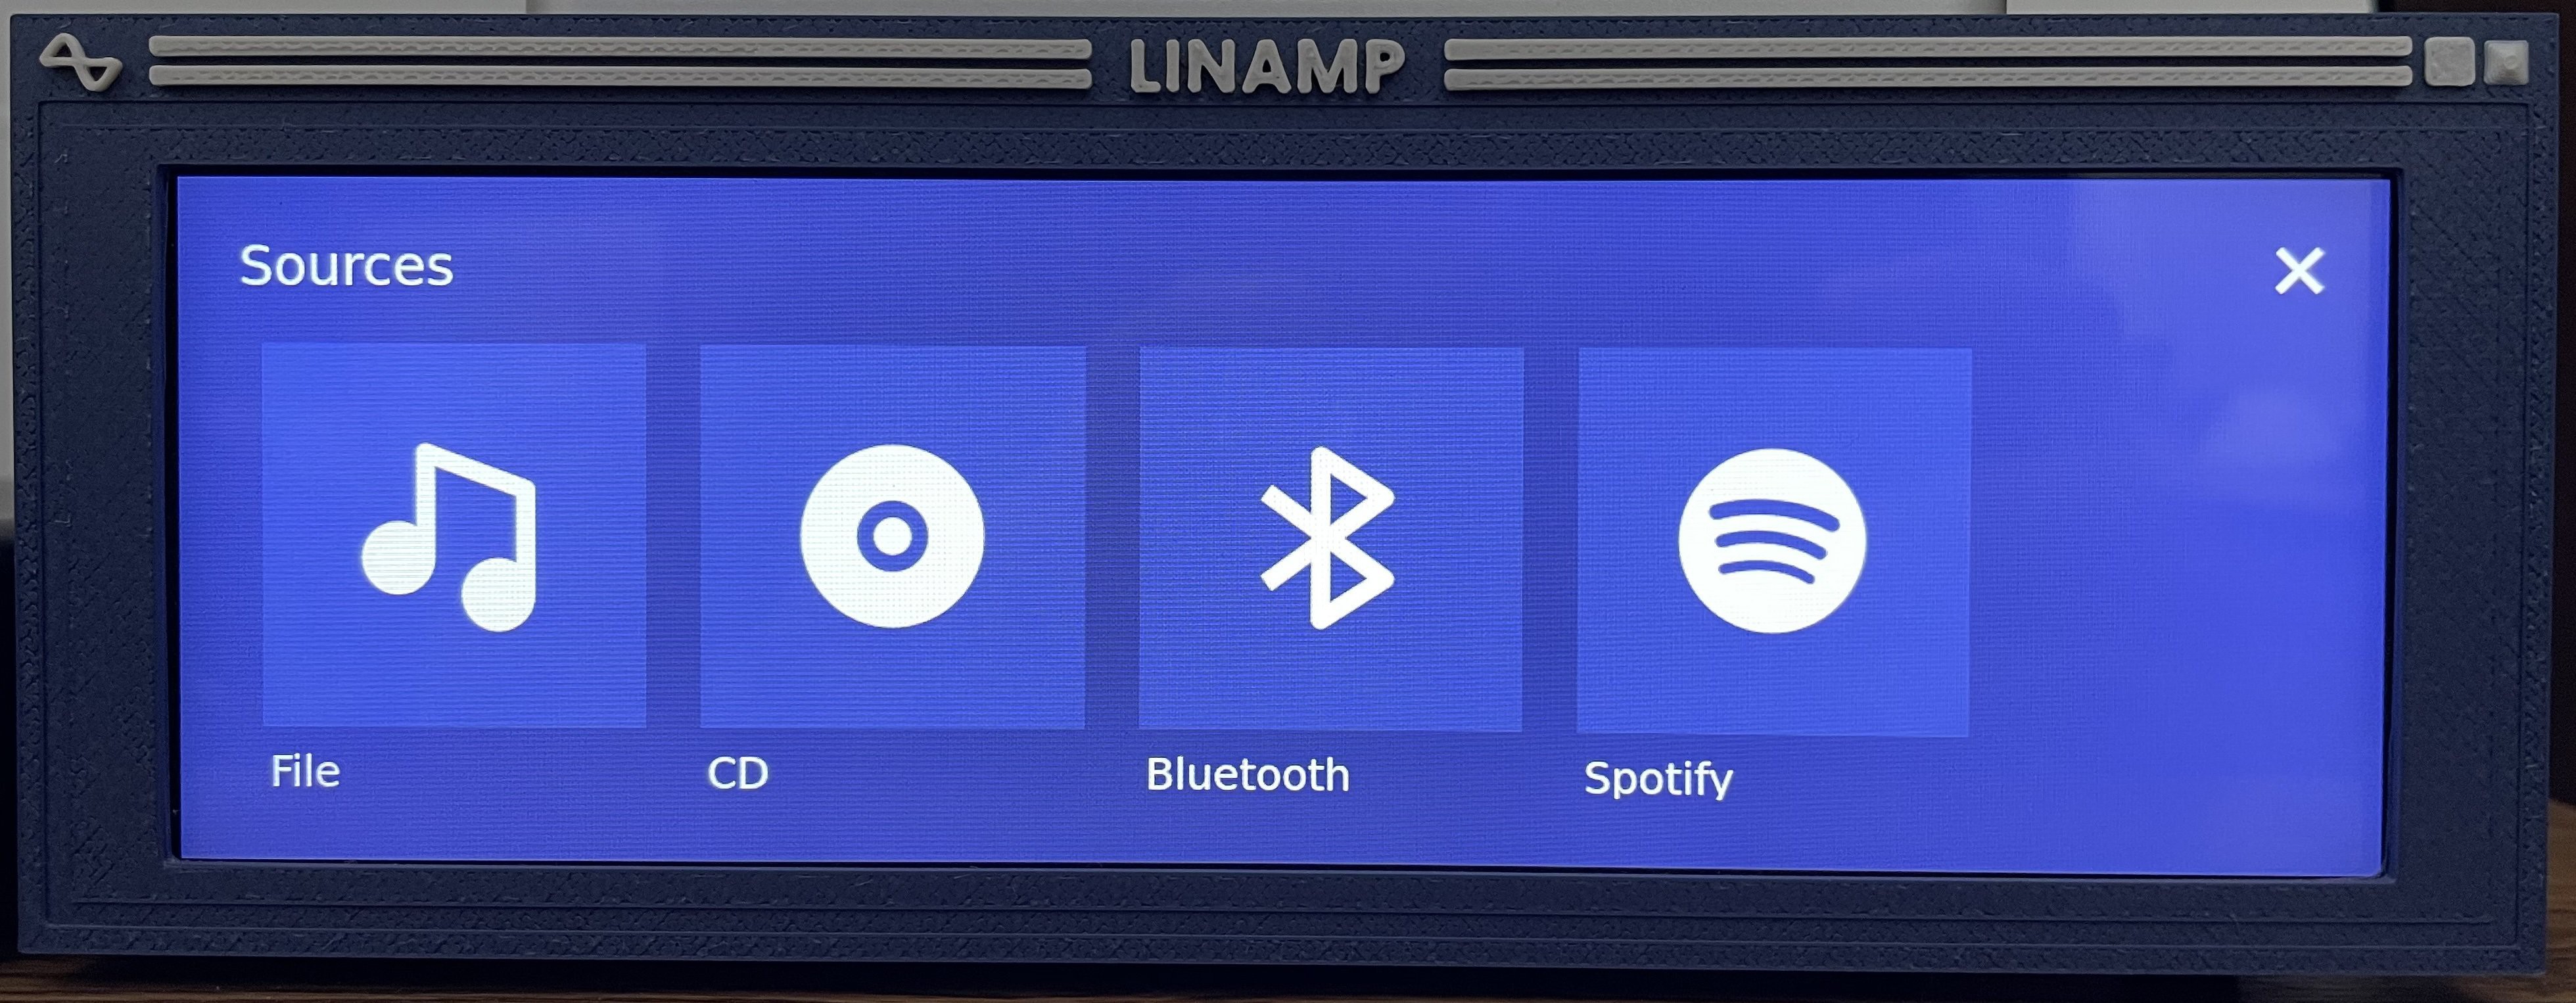
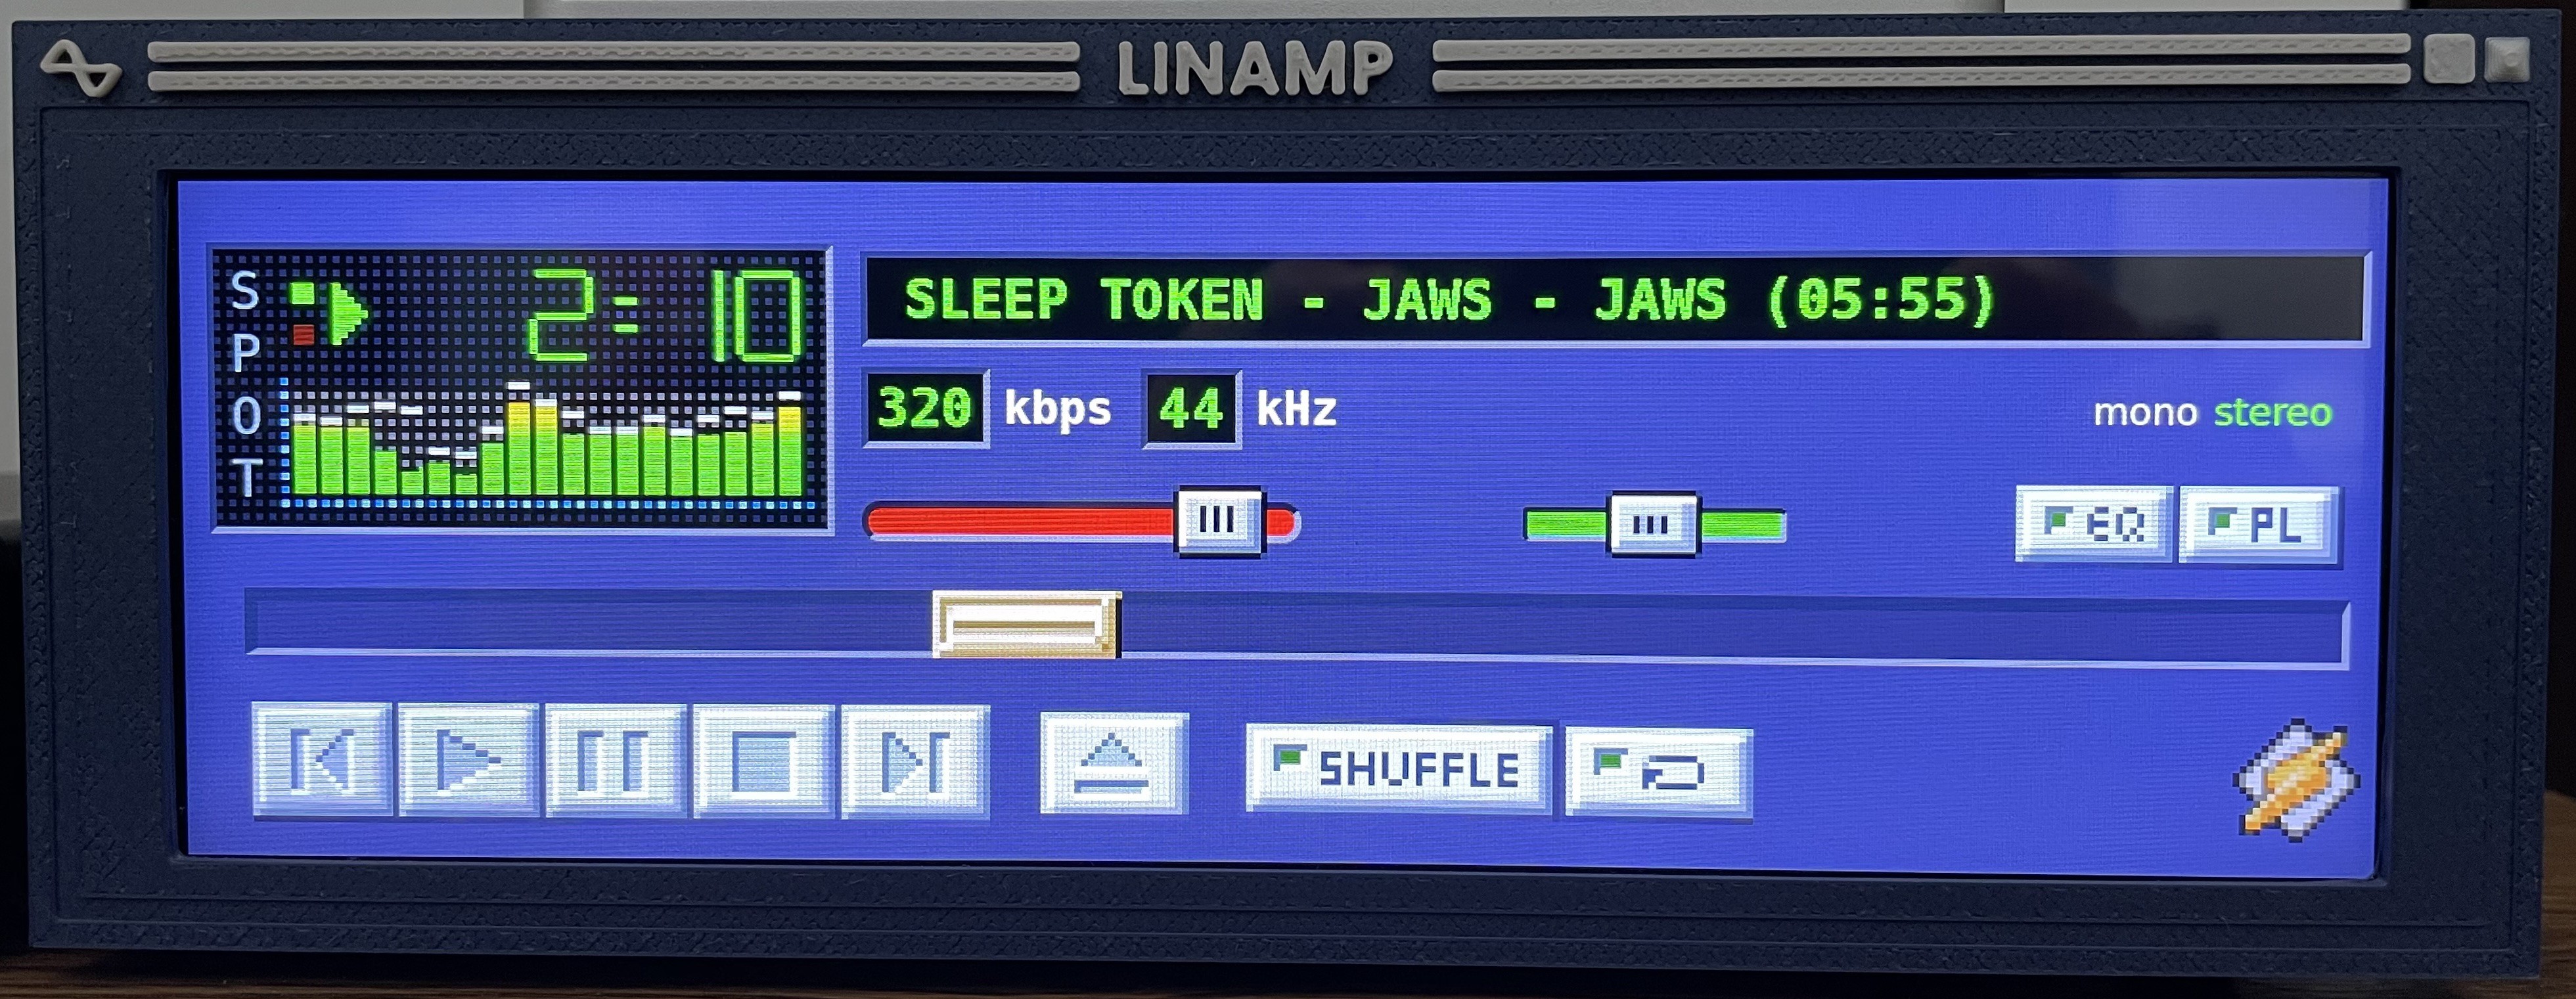
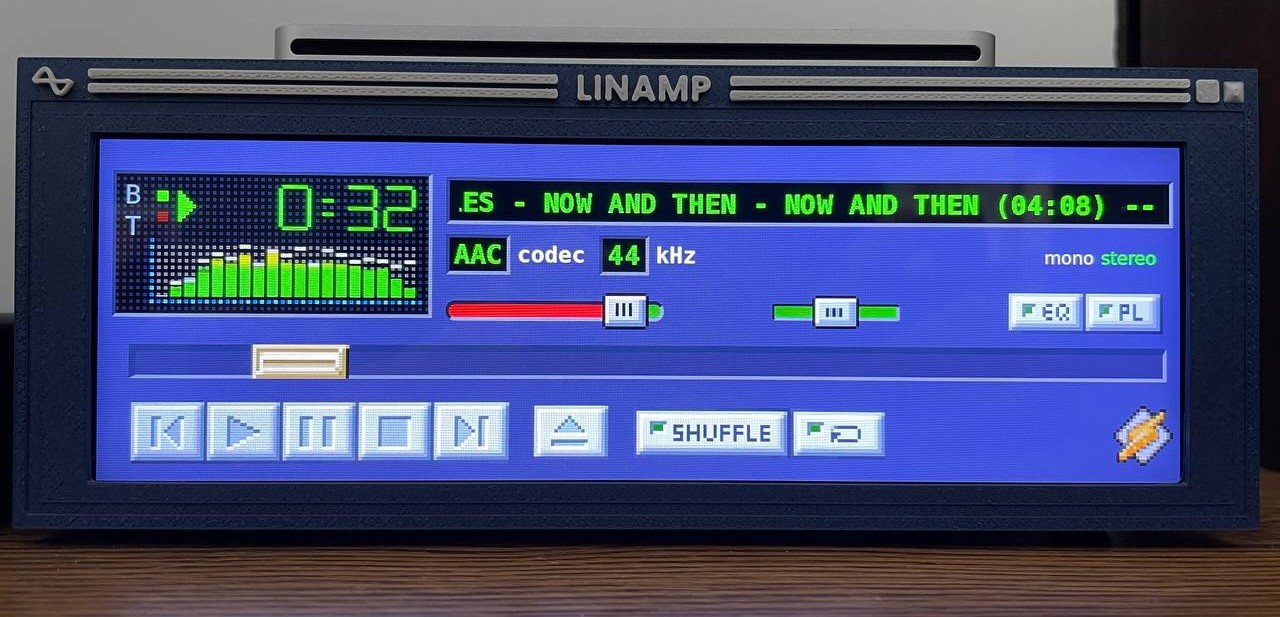
Linamp is a stand alone music player that aims to be easy to use, have great sound quality and look good.

Currently, Linamp has the following features:

  • Play music files from the file system (mp3, m4a, FLAC, etc.), including from SMB network mounts.
  • Playlist management for file playback
  • Display a real time bar spectrum analyzer
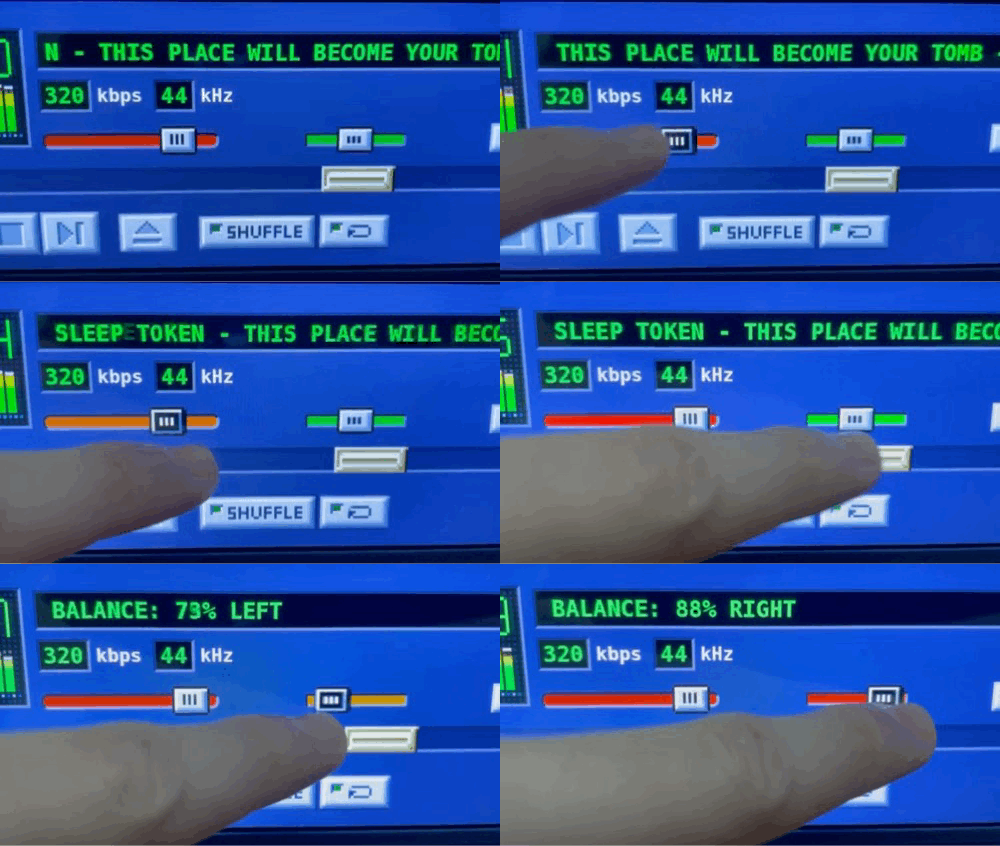
  • Display track information, including bitrate and sample rate
  • Control the output volume and balance
  • CD Playback (when connecting an external CD drive), including getting the track information from MusicBrainz
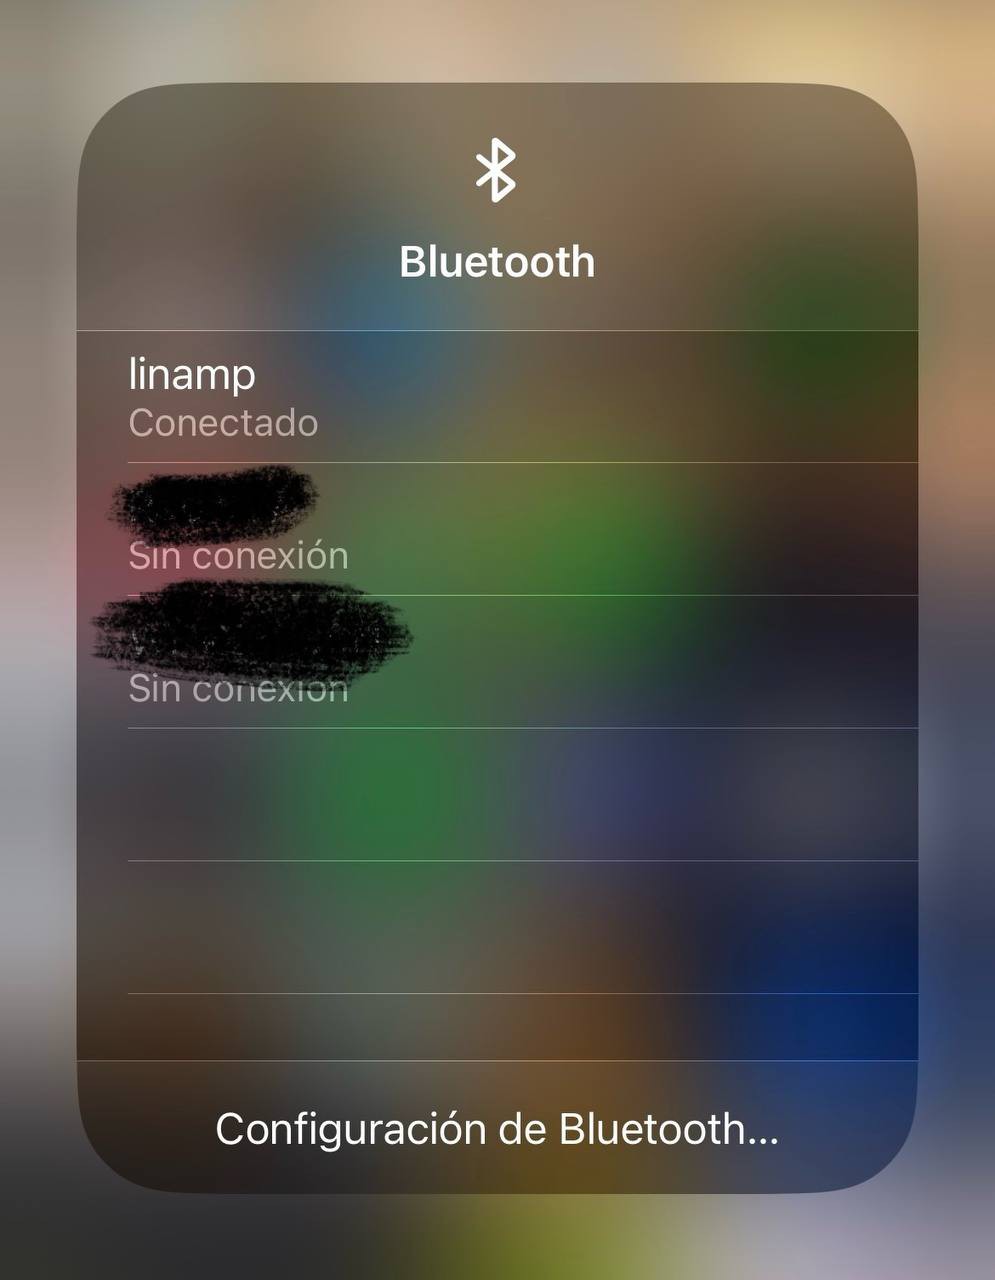
  • Bluetooth and Spotify playback (This is a Work in Progress)
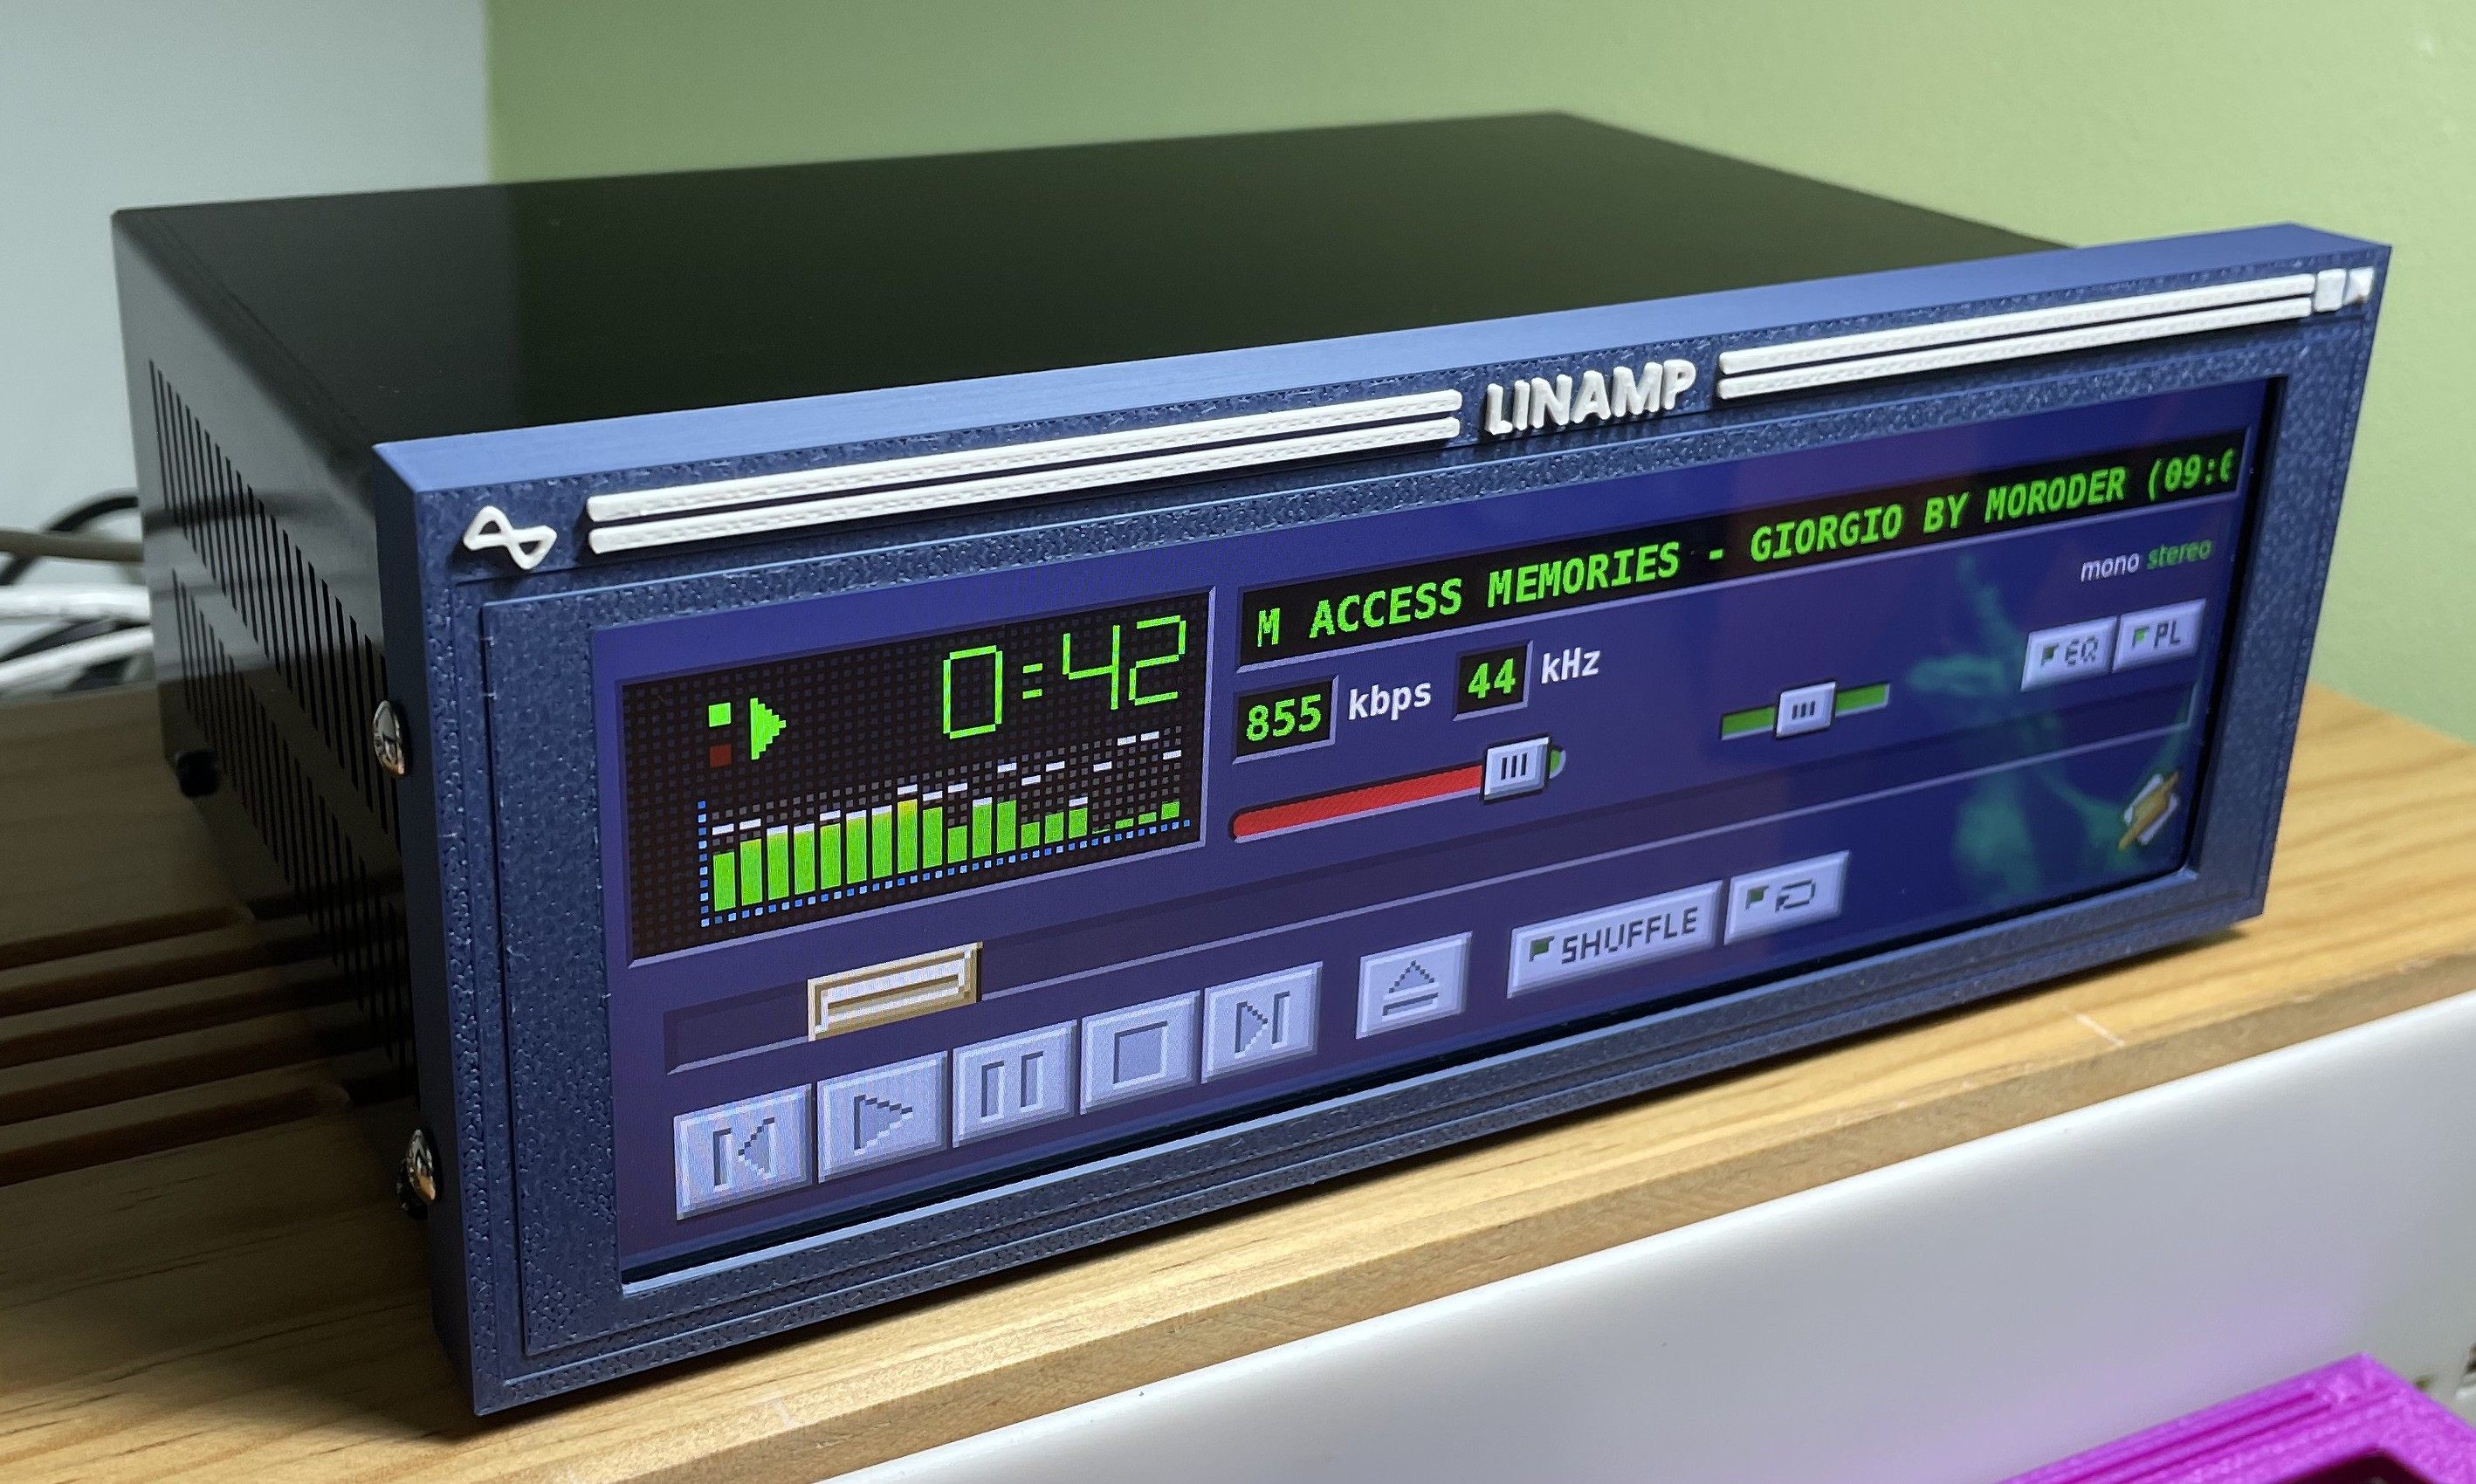

Inspiration

Winamp was one of my first exposures to music on computers. (the first one was probably the Mac OS 7 CD Audio Player, which had a similar look and feel).

Since then, I've always liked the default skin that came with Winamp, and loved the bar spectrum analyzer.

One day I was checking my email and got to the hackaday newsletter and saw the AIRAMP MP3 project, which inspired me to do my own take on how Winamp would look if it was part of a hi-fi mini system.

Specifically this image from the post stood out:
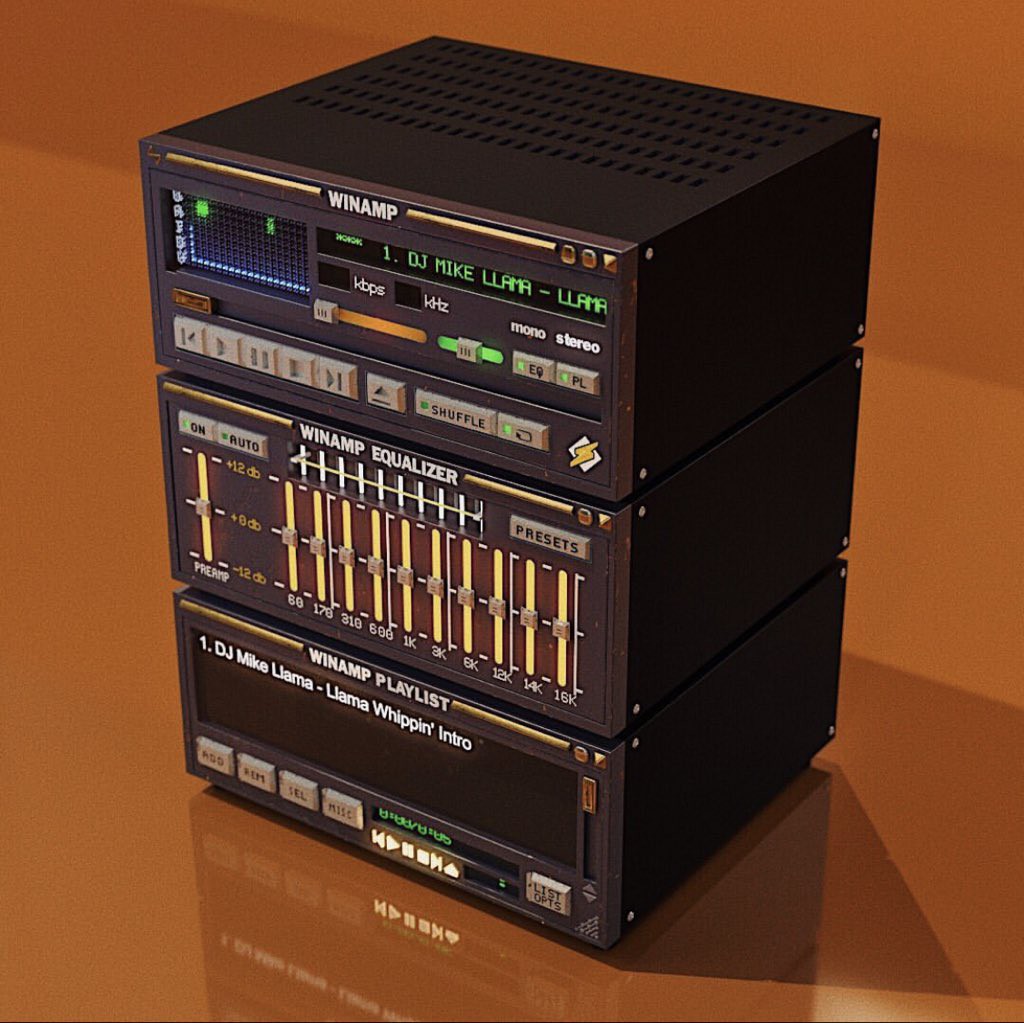
This render looks kind of similar to a mini system my dad used to own (and now I own), a circa 1983-1984 AIWA mini system:
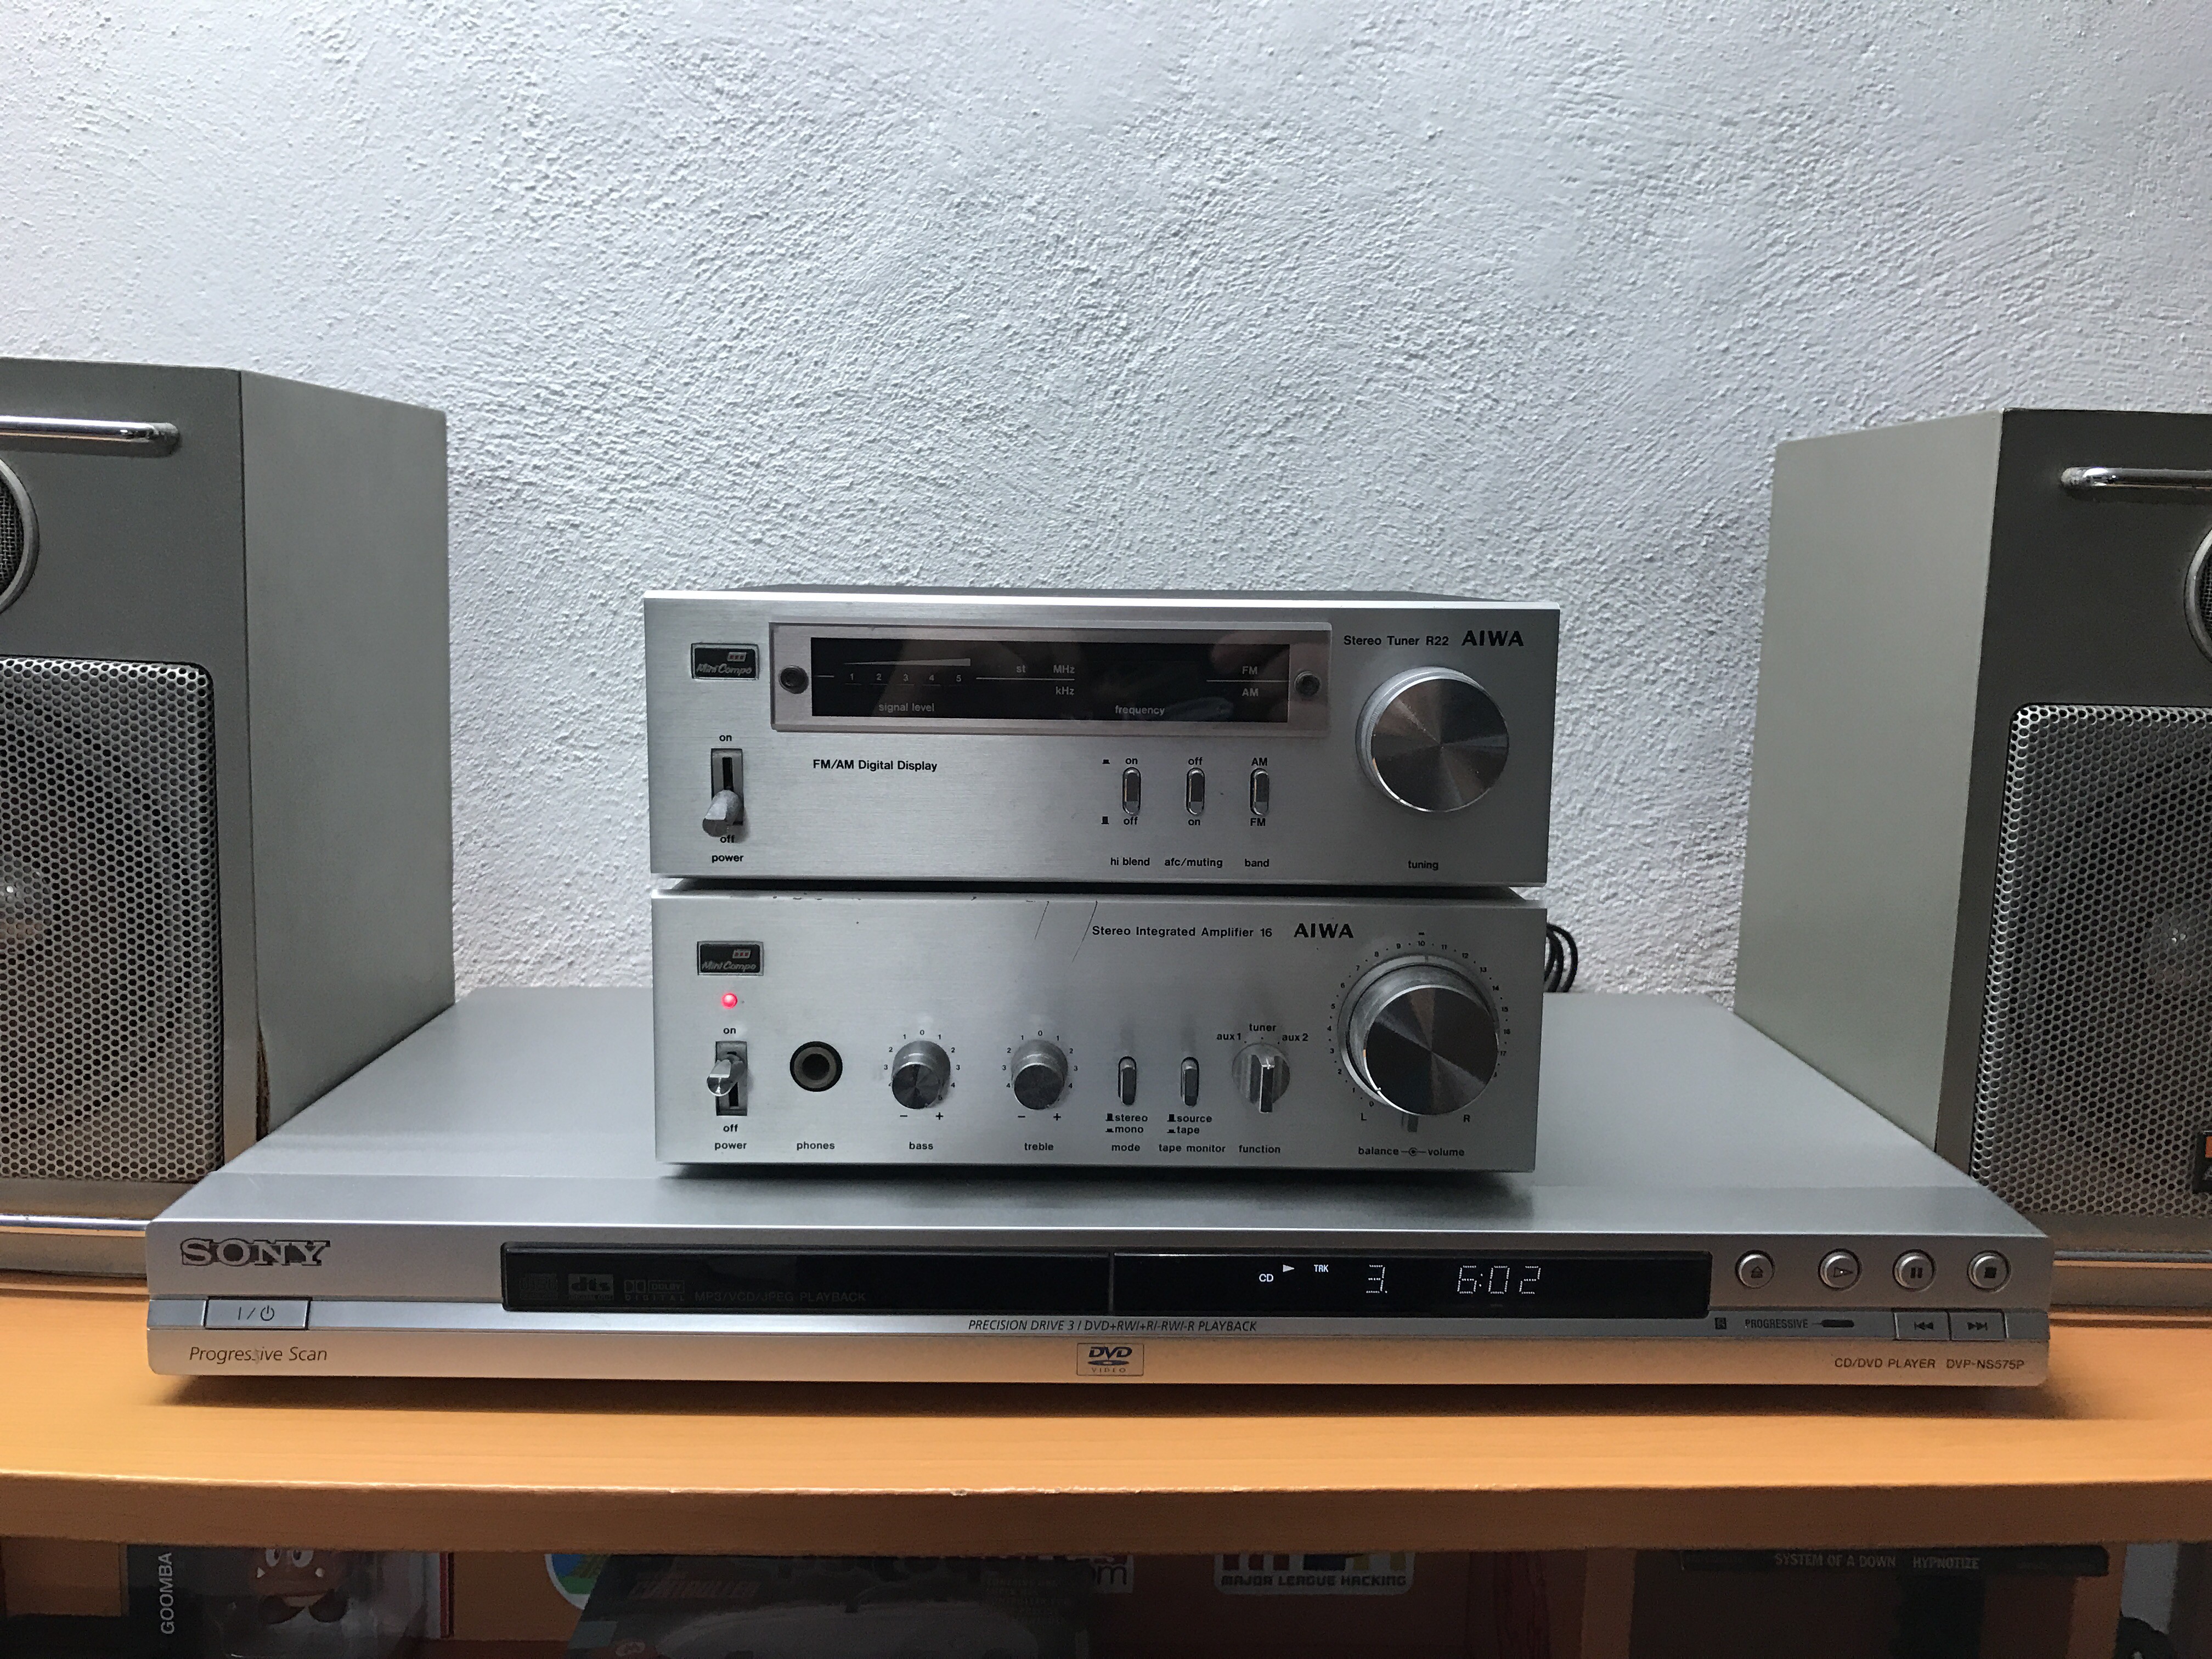
(That AIWA Stereo today. Both the amplifier and the radio works, we used to have the cassette player but unfortunately it broke and got discarded in the early 2000s. I removed the side handles sometime in the 2010s because they were a little corroded. The Sony DVD player is being used as a CD player for this stereo)
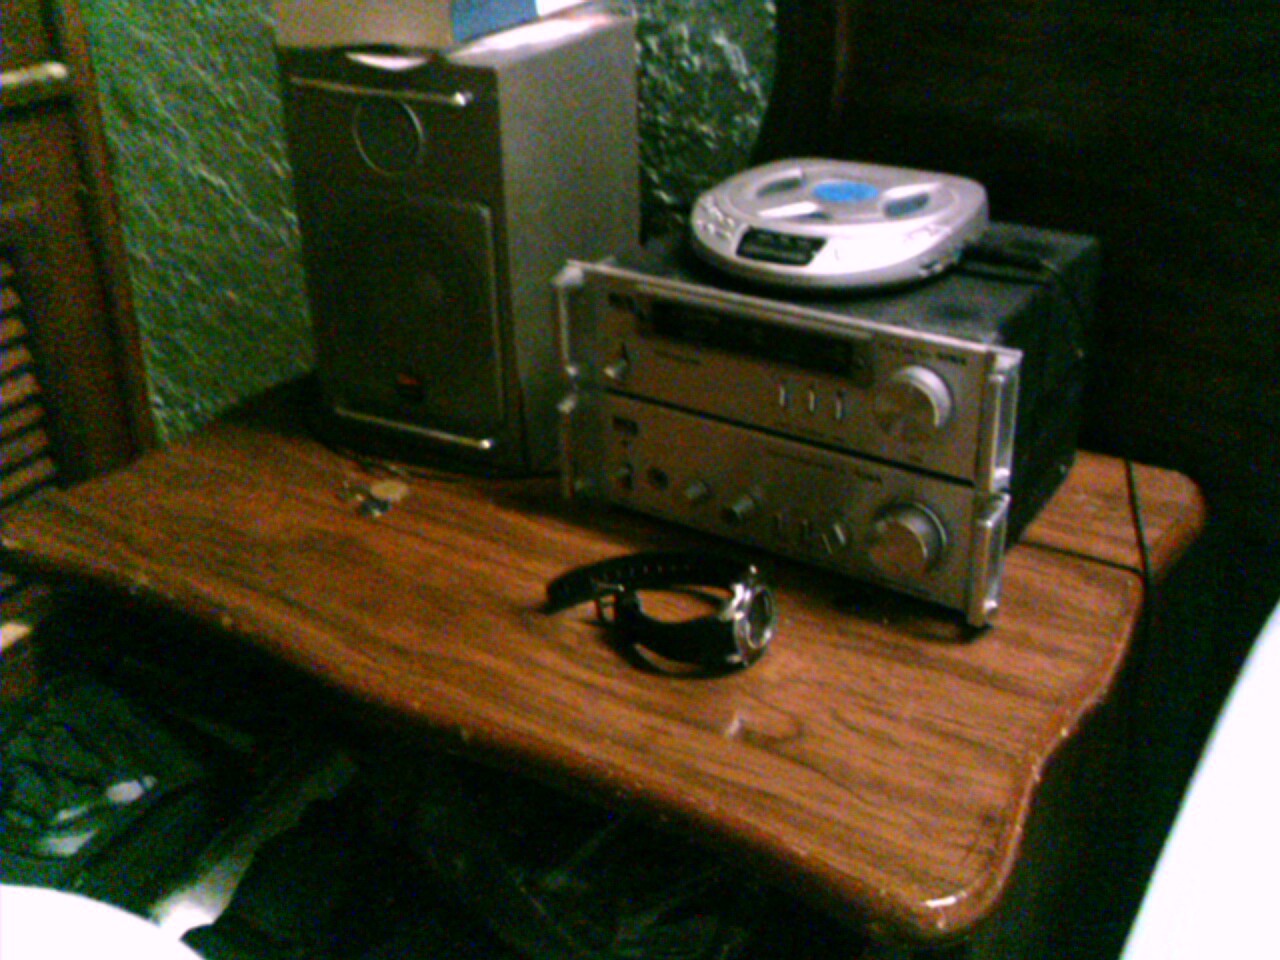
(That AIWA Stereo in my teenage room in 2005, picture taken with a Palm Zire 72)
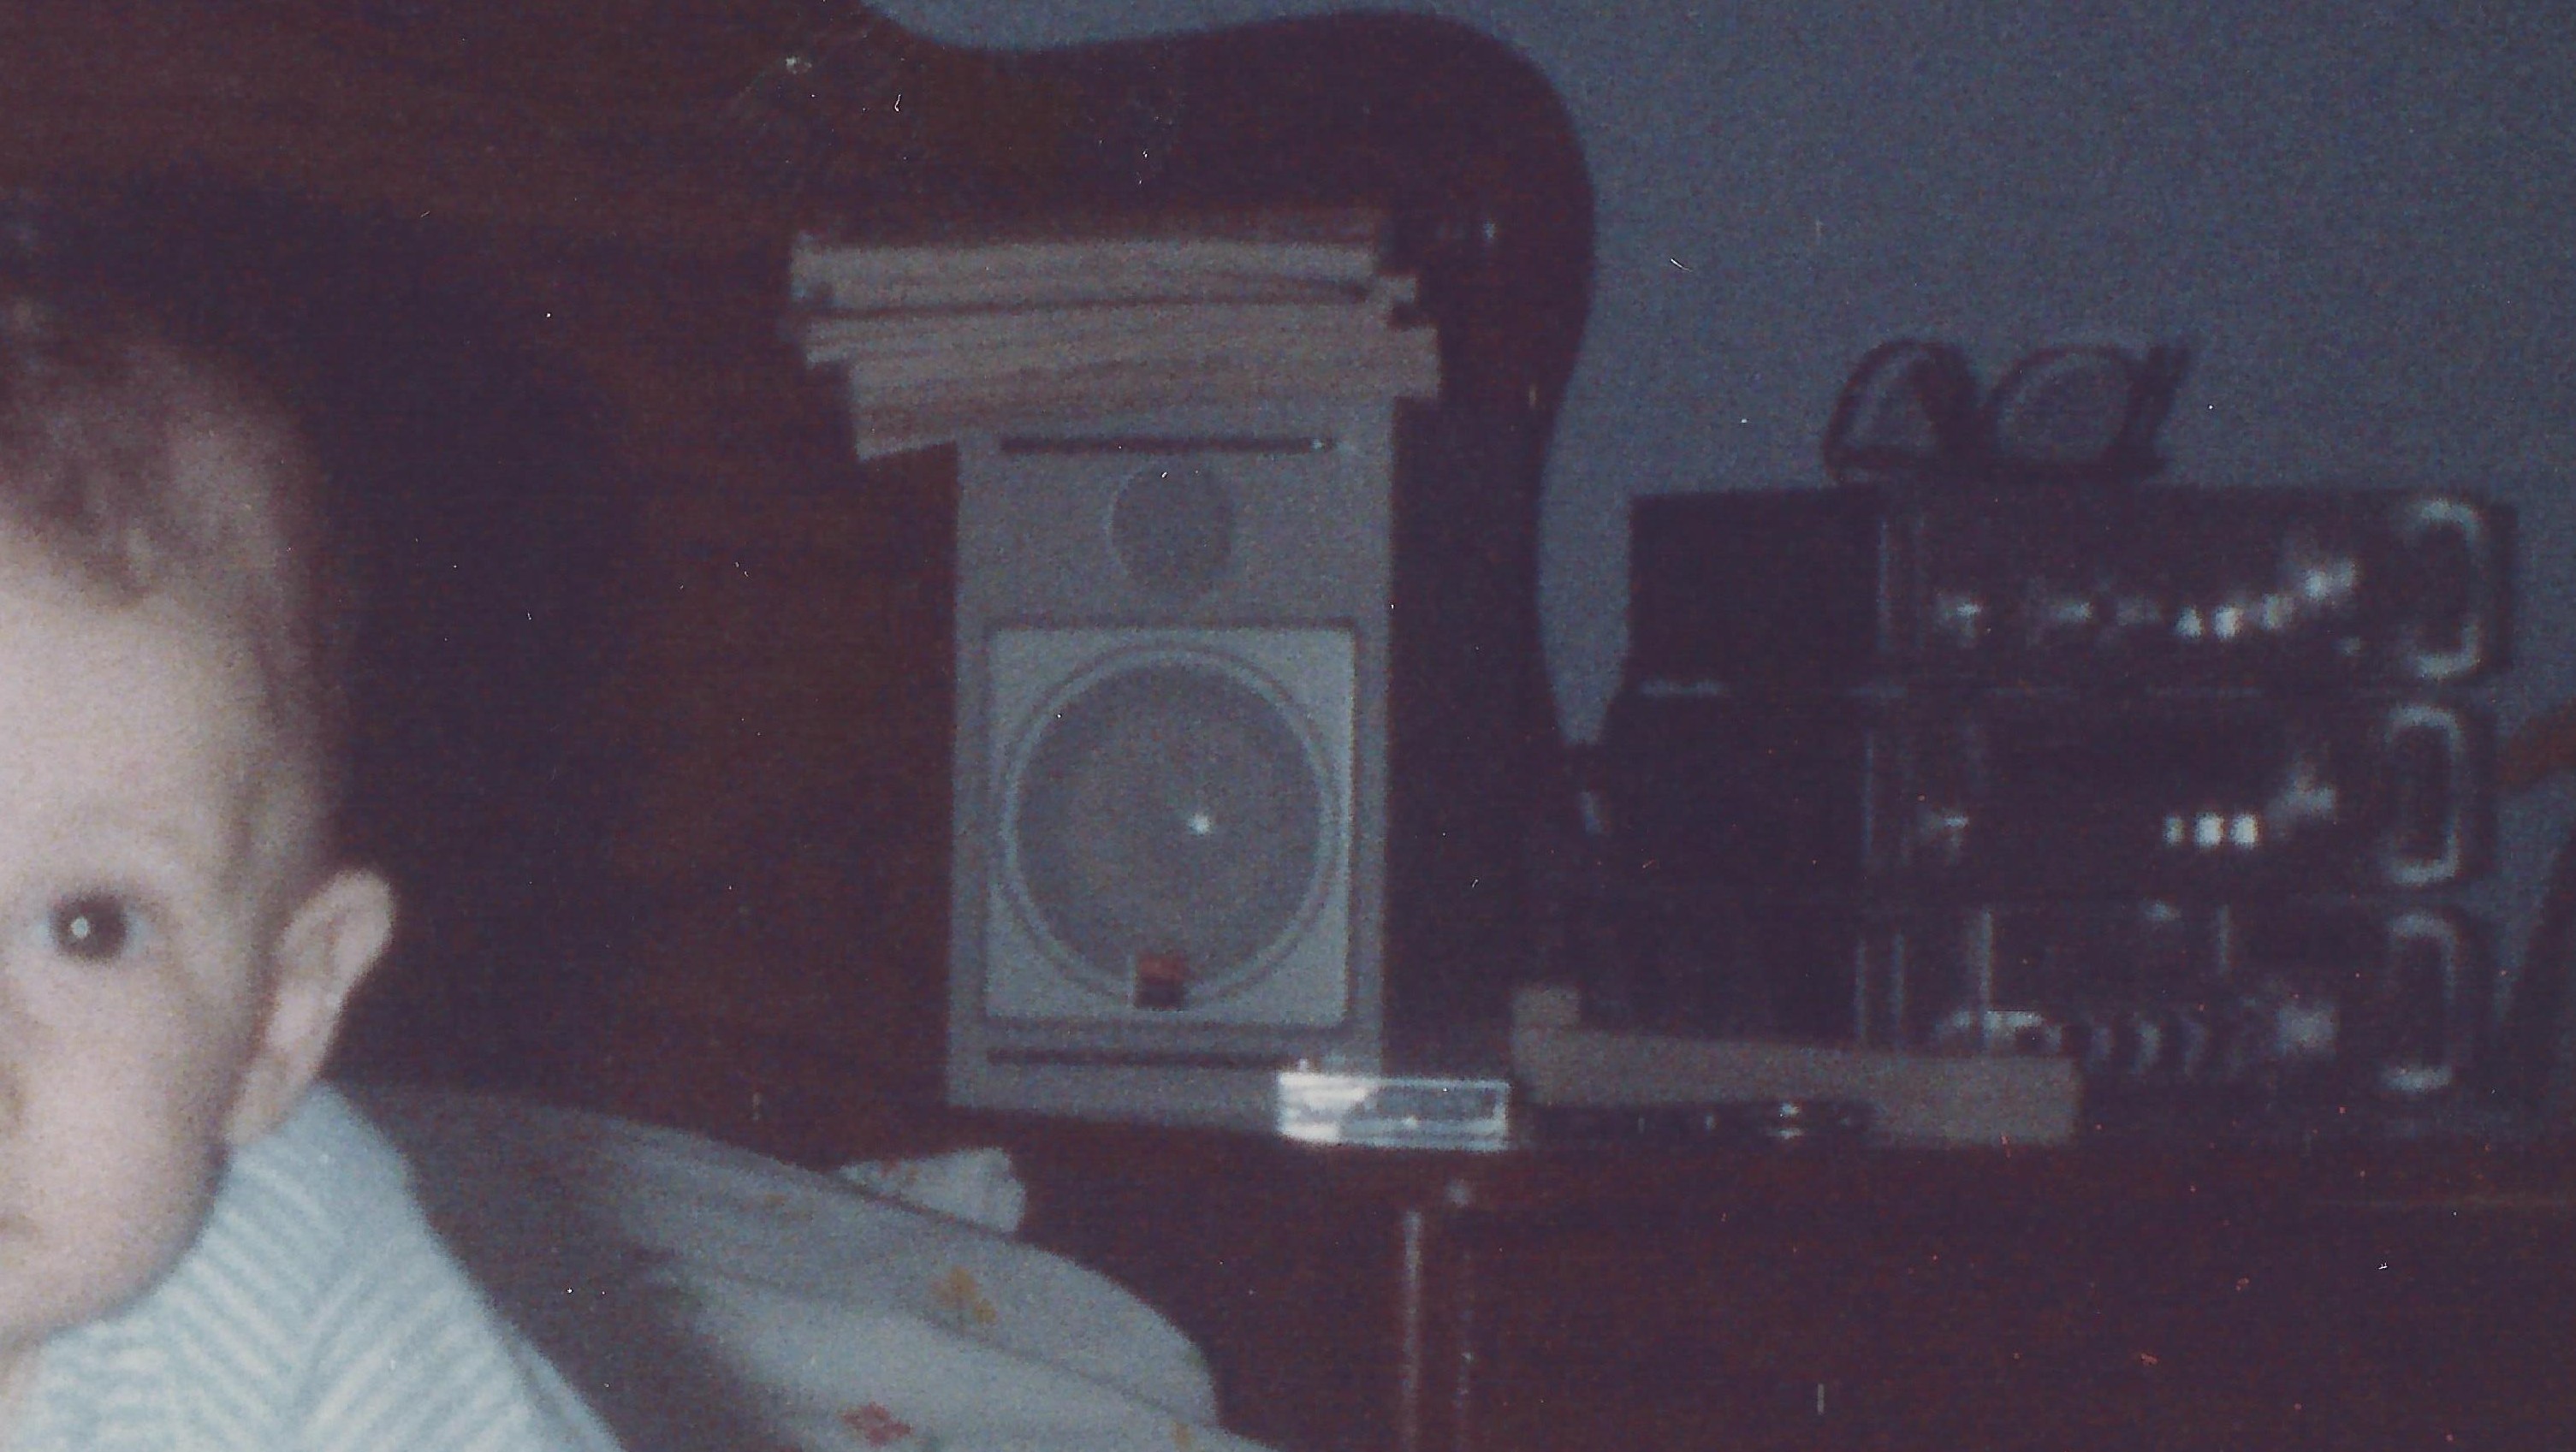
(Myself and the AIWA stereo, circa 1991, it still had the tape player)

The Youtuber Techmoan reviewed a similar system here:  

As you can see I have a long story with that stereo and always liked how it looks, so that gave me enough inspiration to do my own rendition of a retro hi-fi gear + retro audio software.


Design

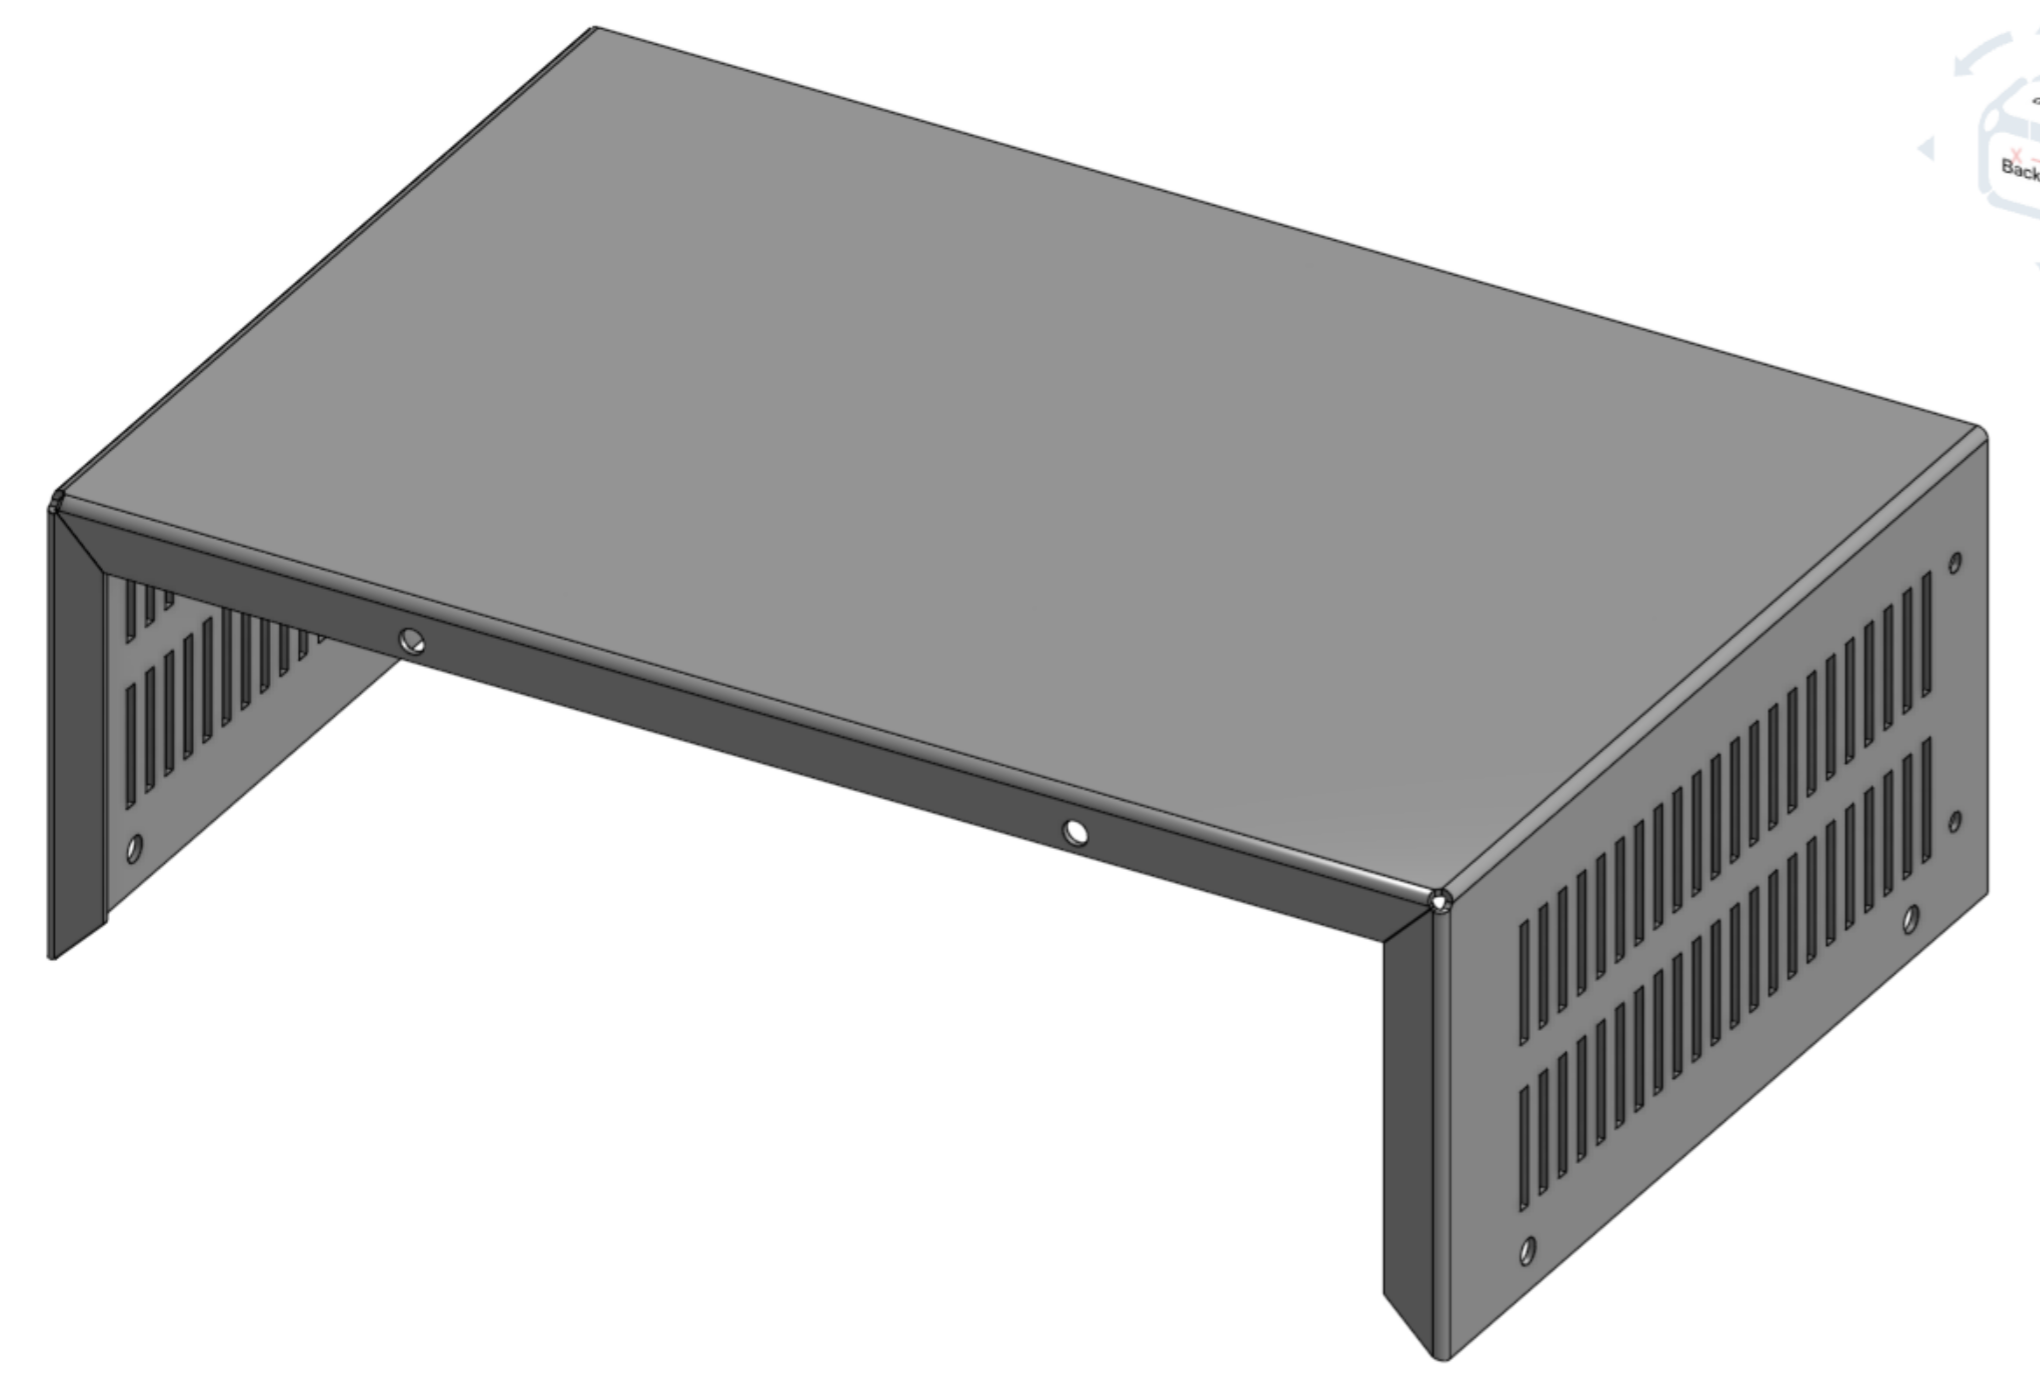
I wanted to learn how to design sheet metal parts, so I tore down the AIWA radio and took pictures and measurements of the sheet metal case. I used that as inspiration for my own design and as reference dimensions.
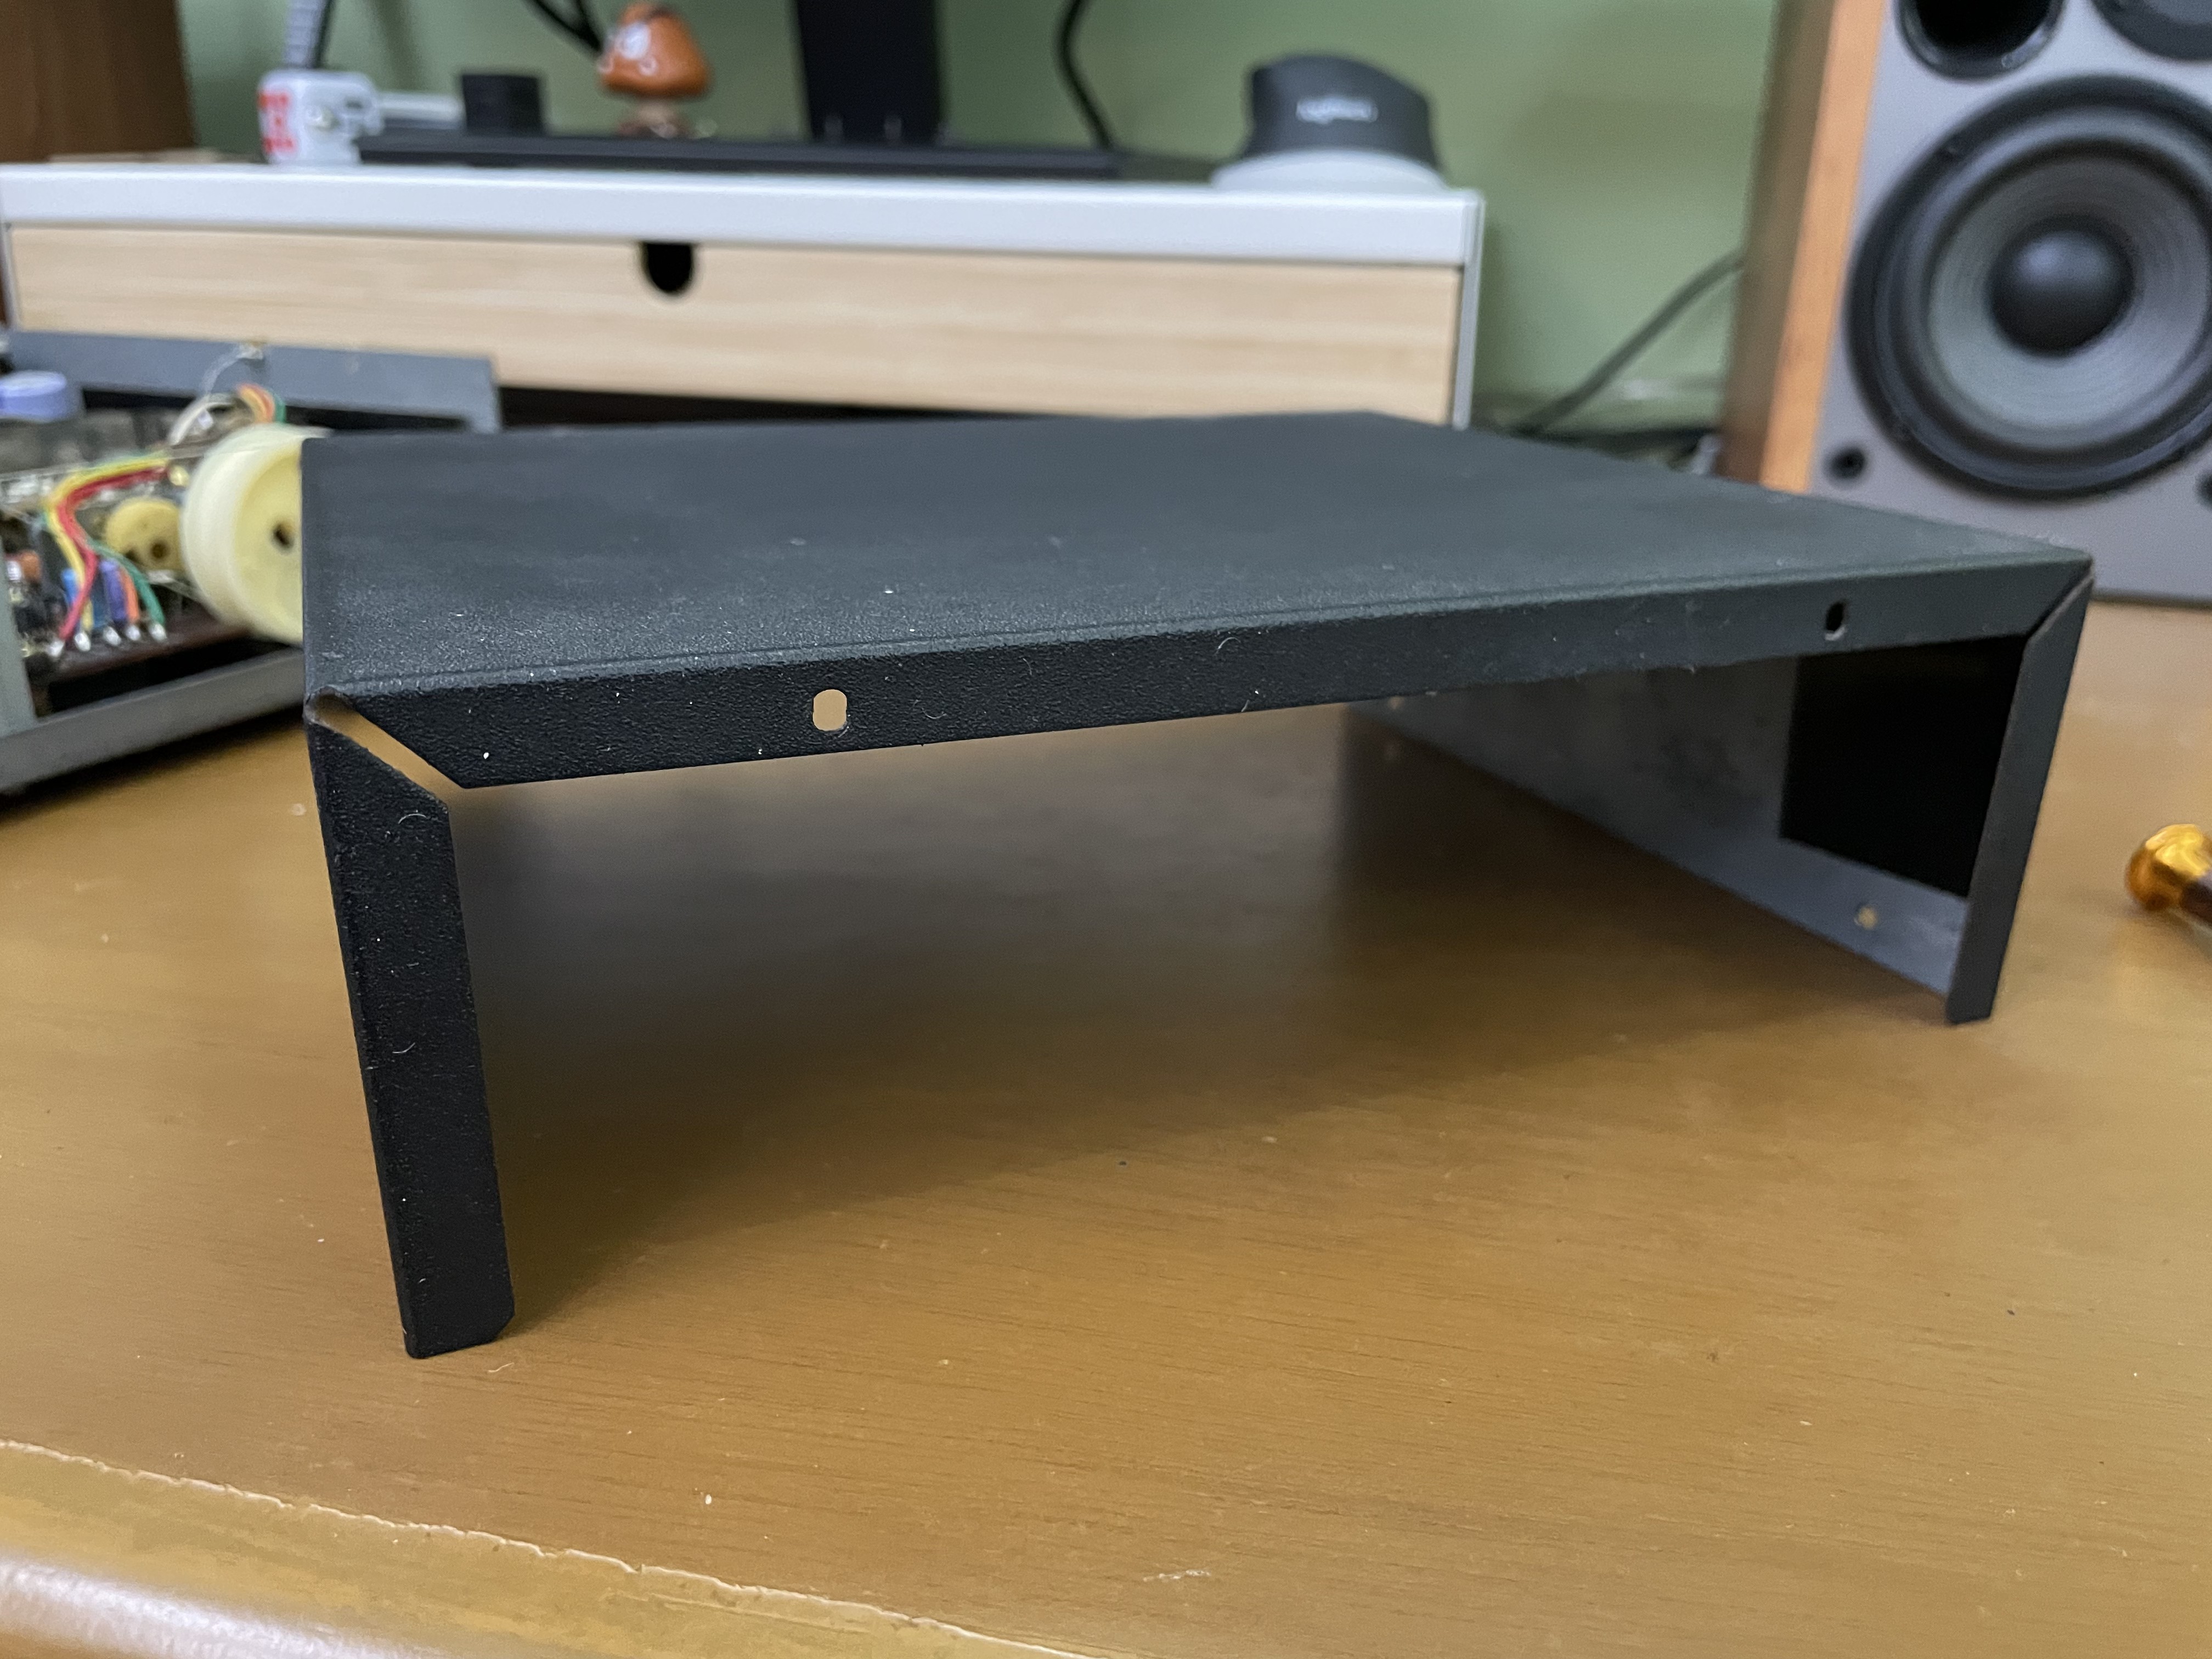
(AIWA Stereo Tuner R22 top cover)

I used Onshape to design the sheet metal case and the front cover.

For manufacturing, I researched several providers including SendCutSend and Ponoko, but because some of those options didn't ship to my country or were too expensive, I ended up going with PCBWay.

I also ordered a version of the front cover 3D printed in Nylon from PCBWay, as I didn't have a good 3D printer at that time and wanted to experiment with different 3D printing technologies.
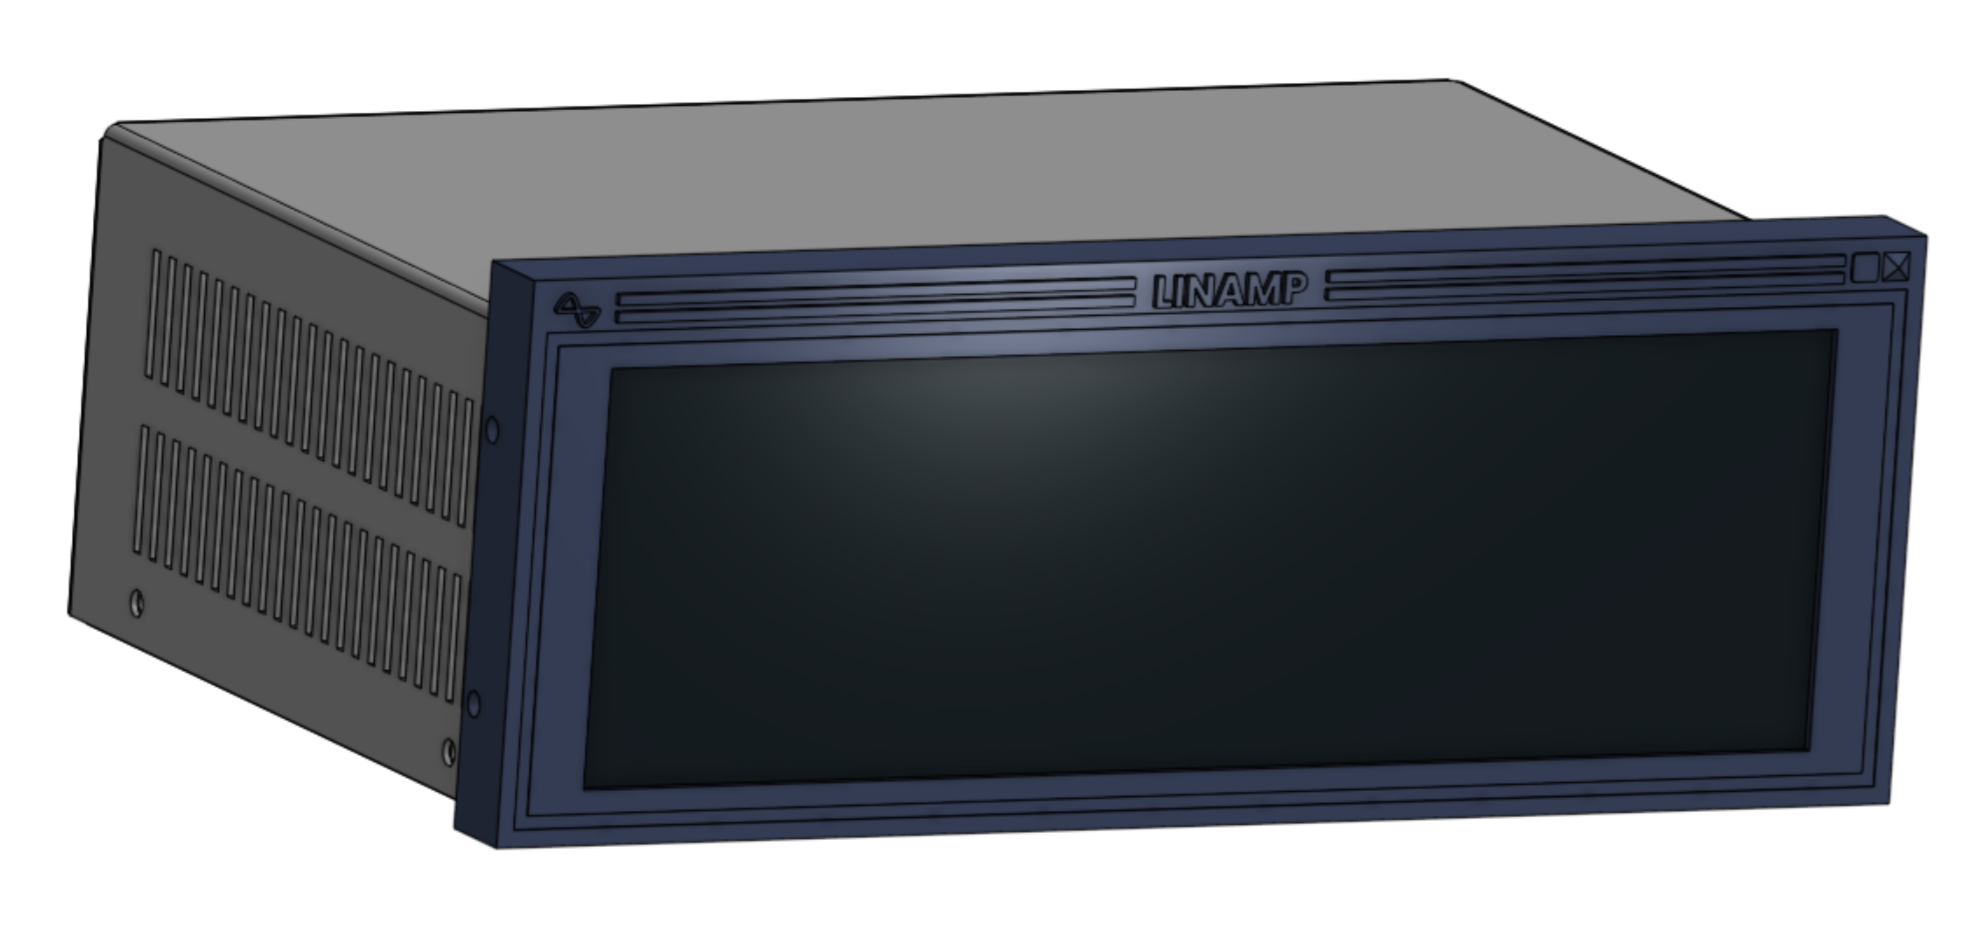
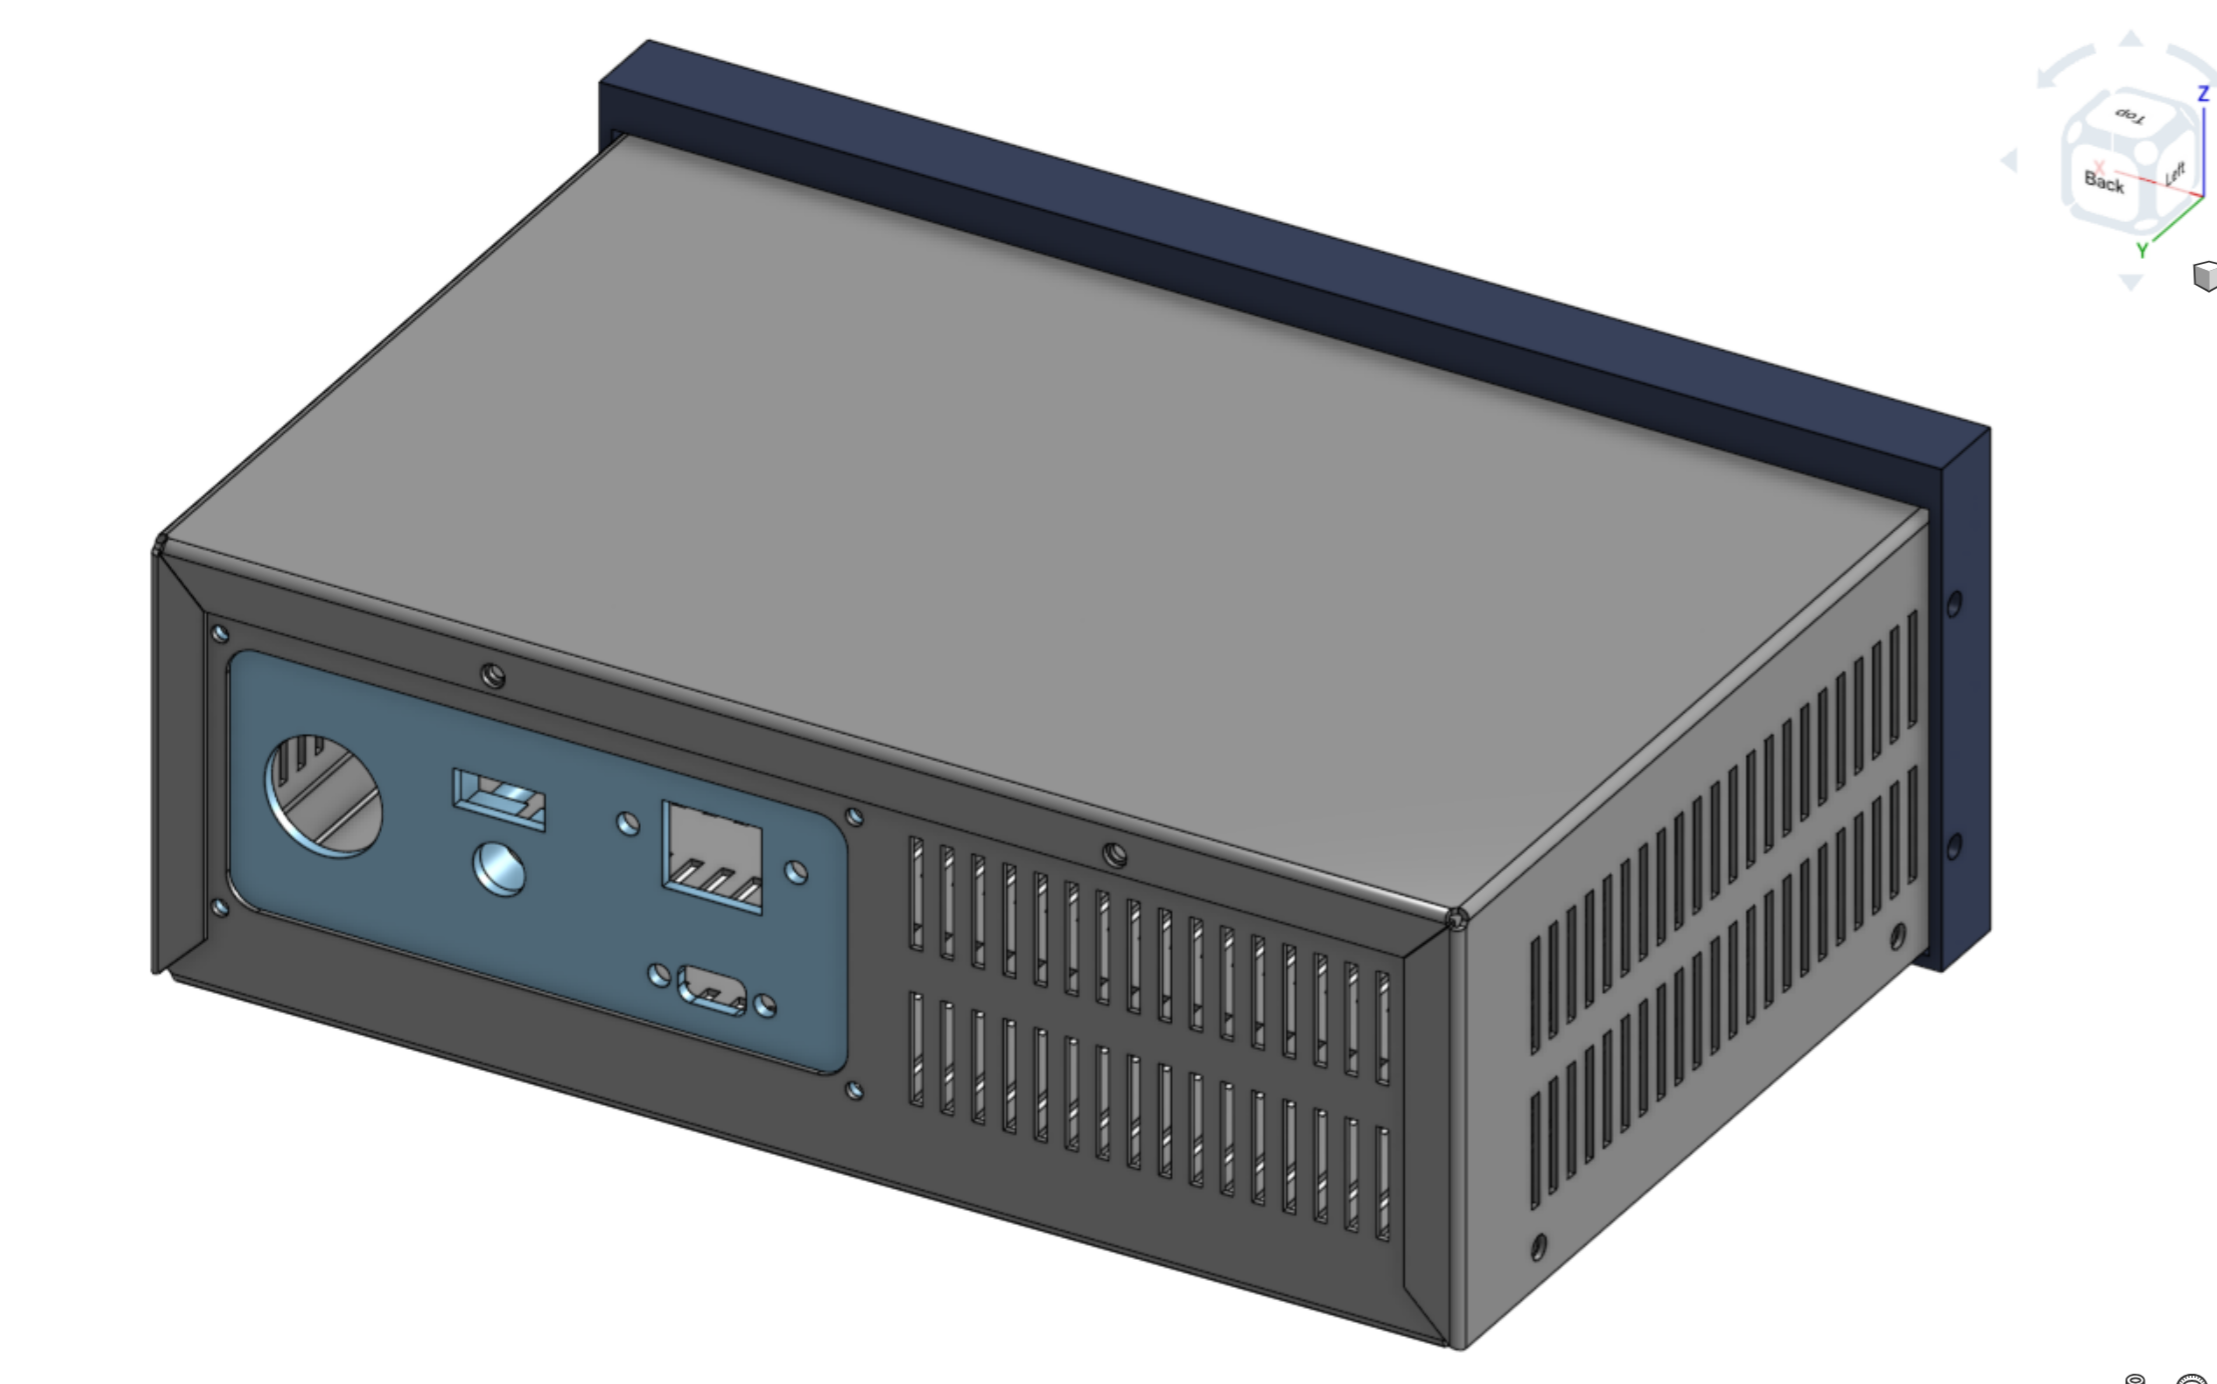
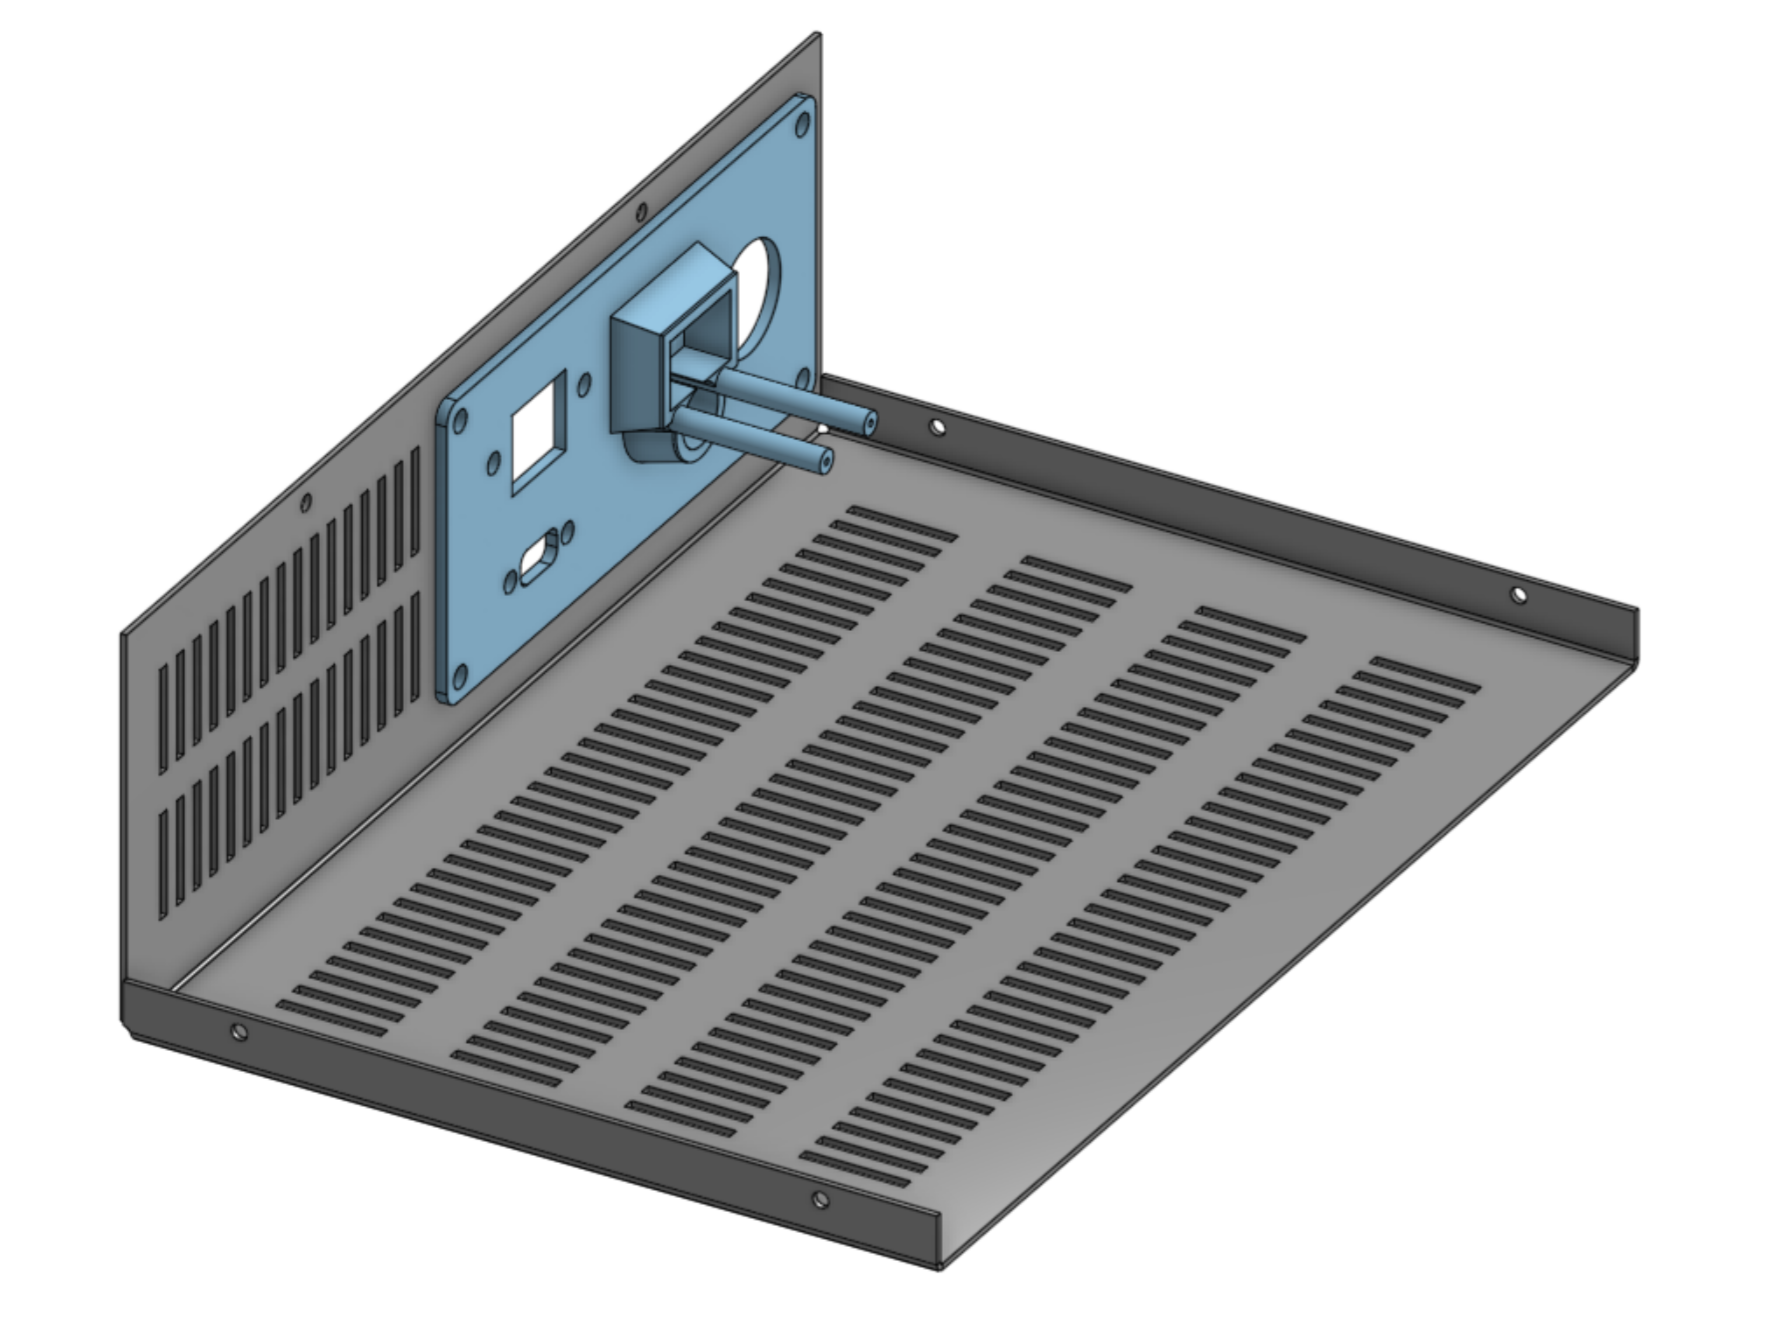
(The design as created in Onshape)
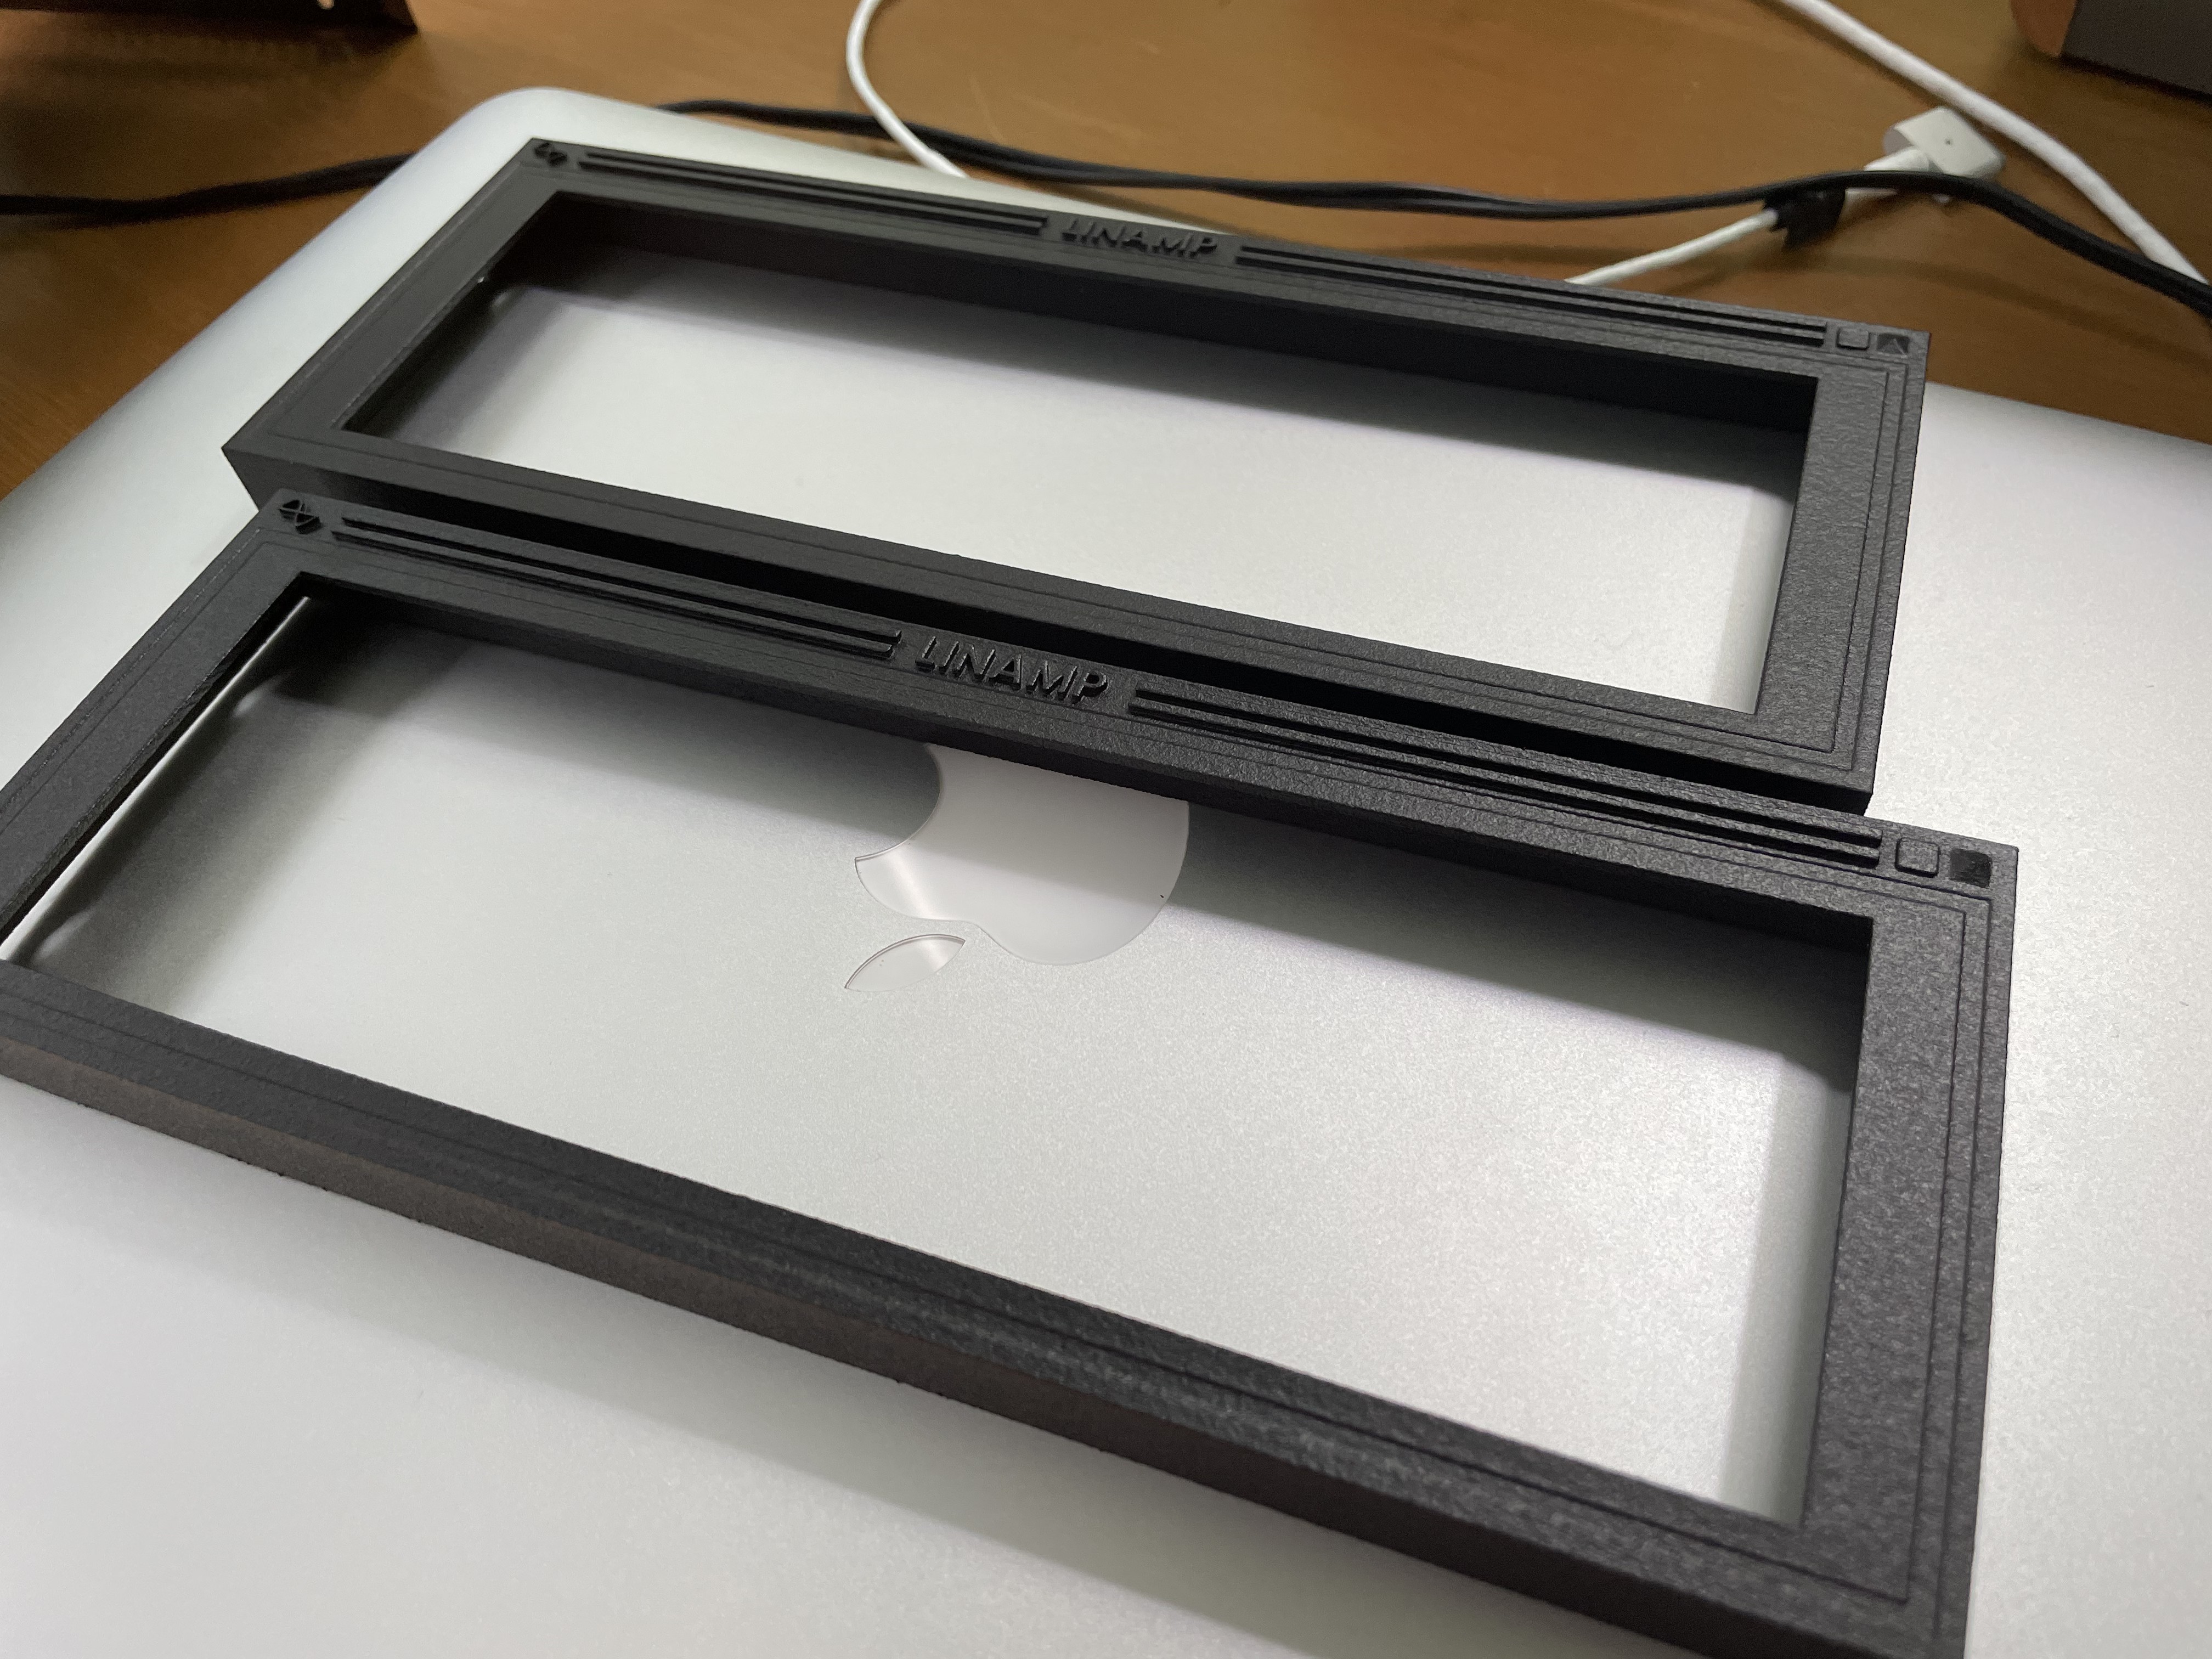
(The MJF 3D printed Nylon front covers from PCBWay. On the final build I ended up using a multi color 3D print I did on my Bambulab P1S instead.)
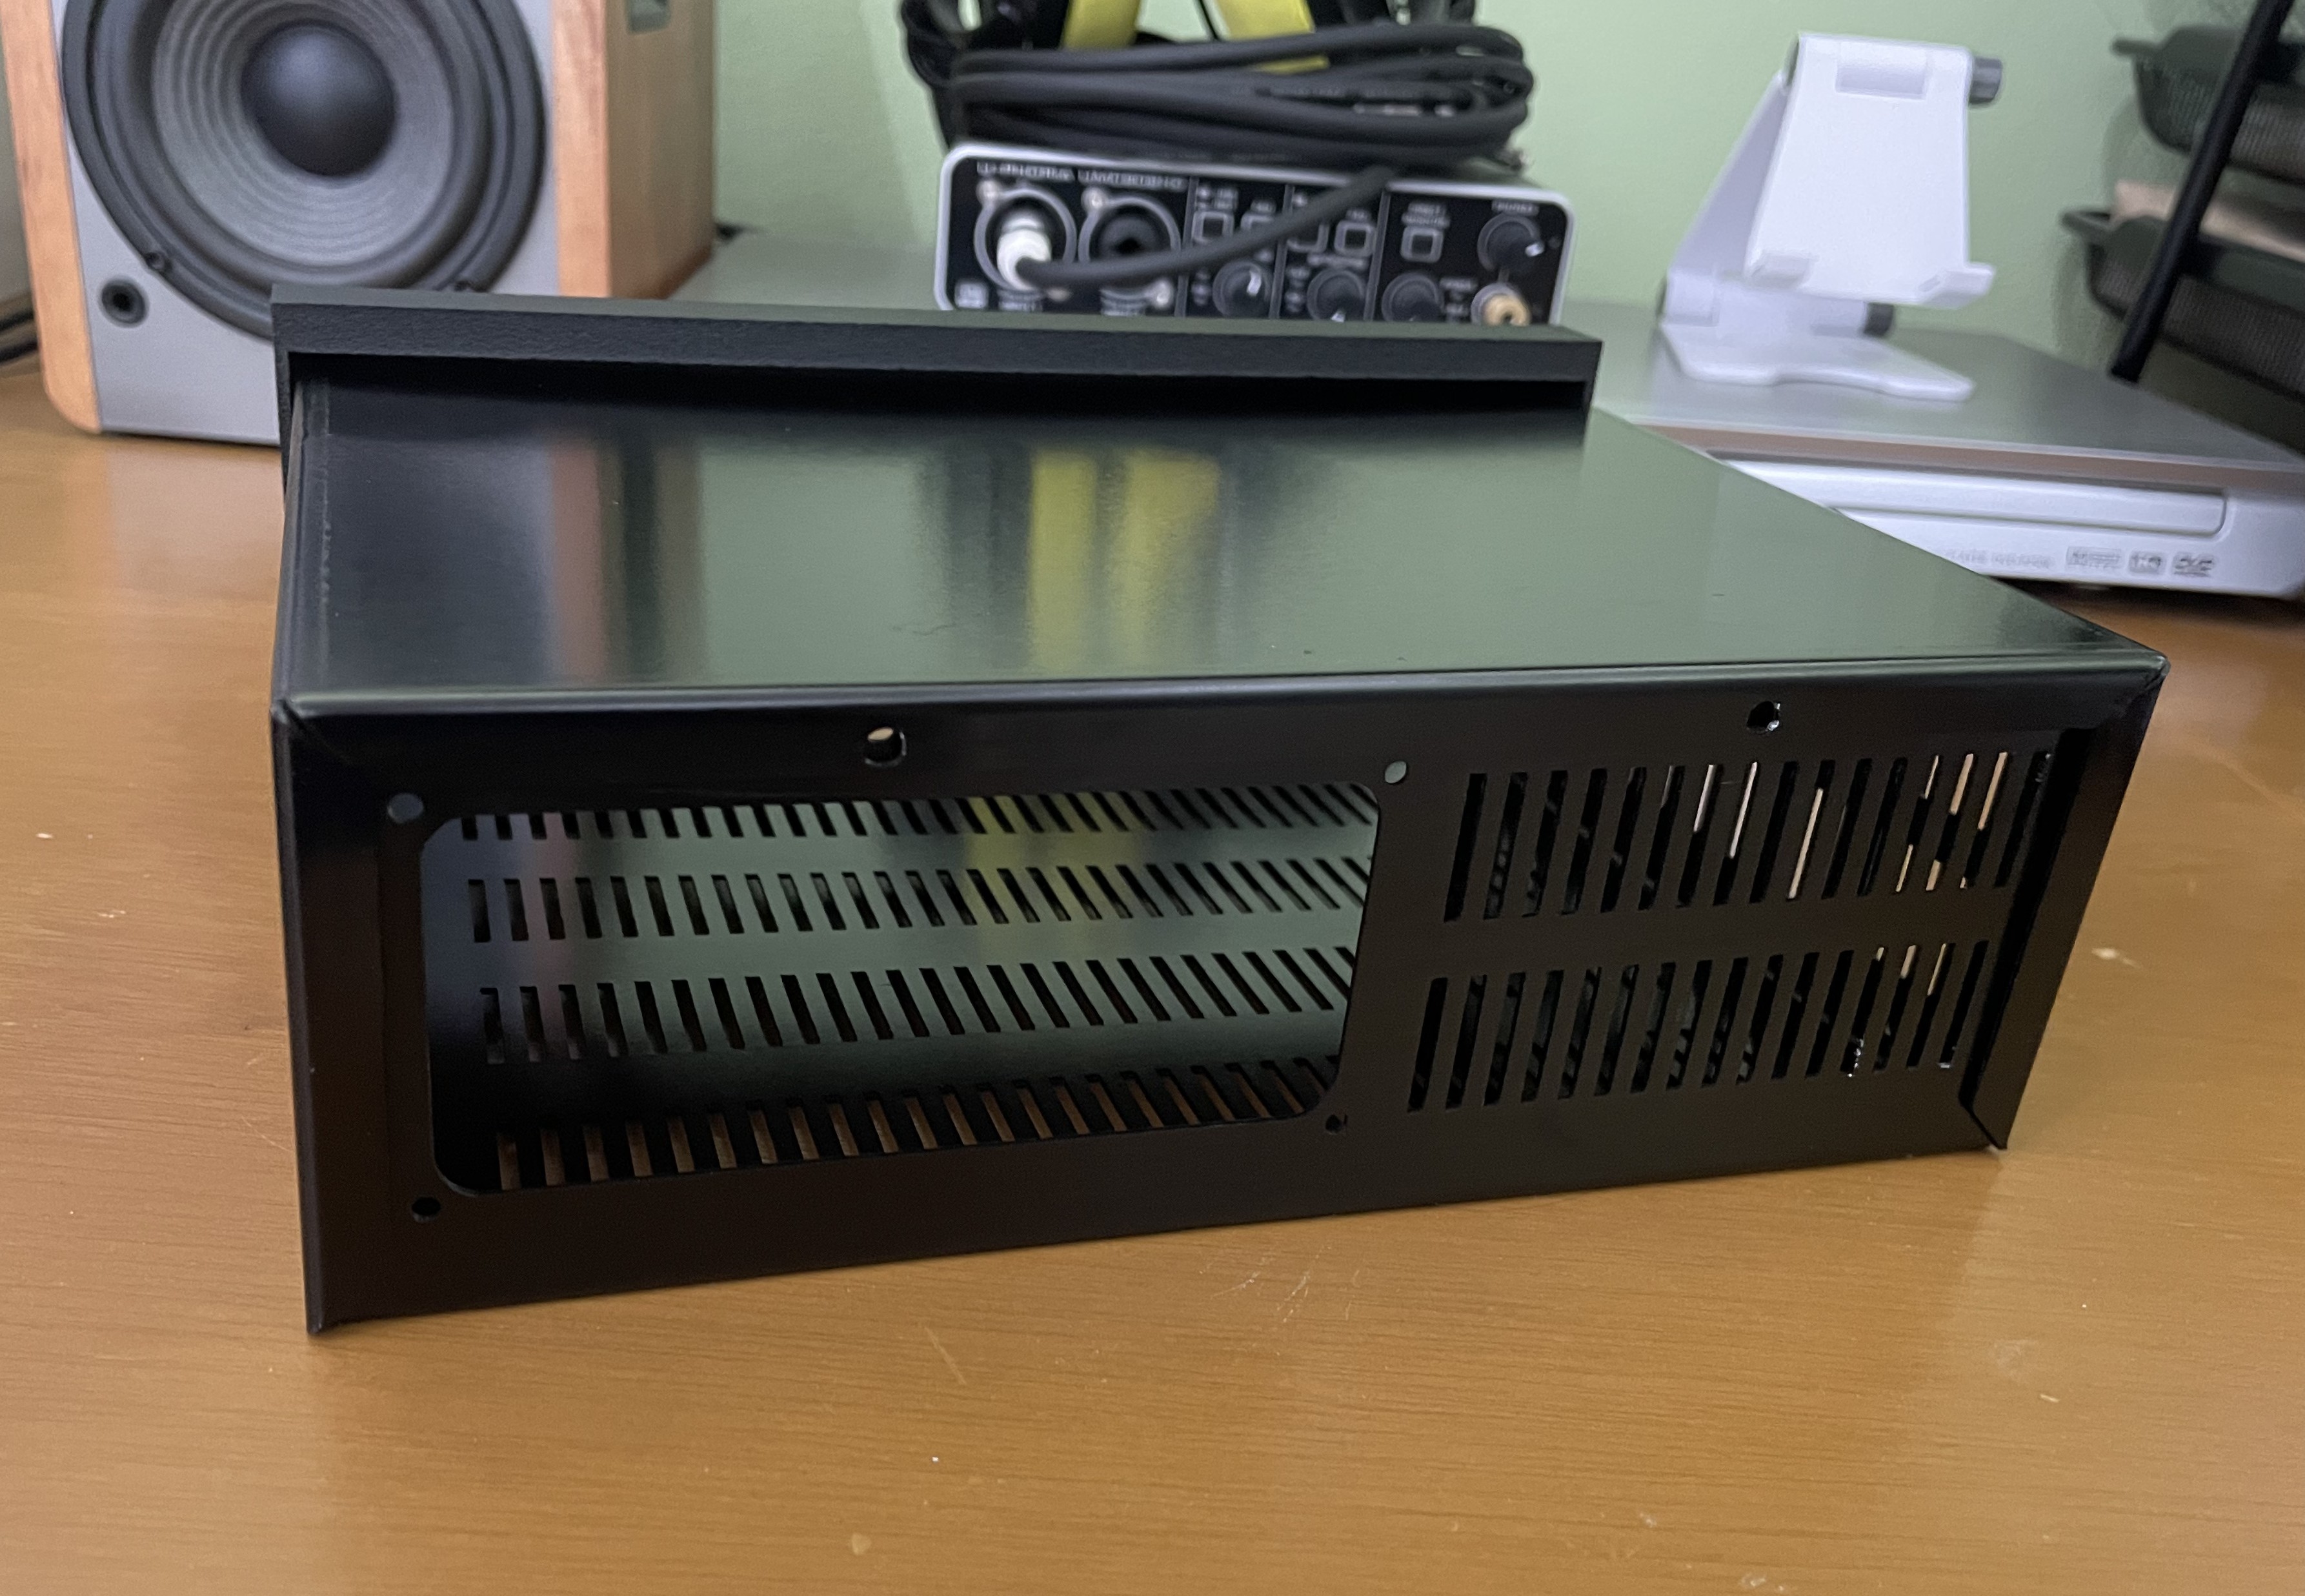
(Test fit of the sheet metal parts and front case, back side)
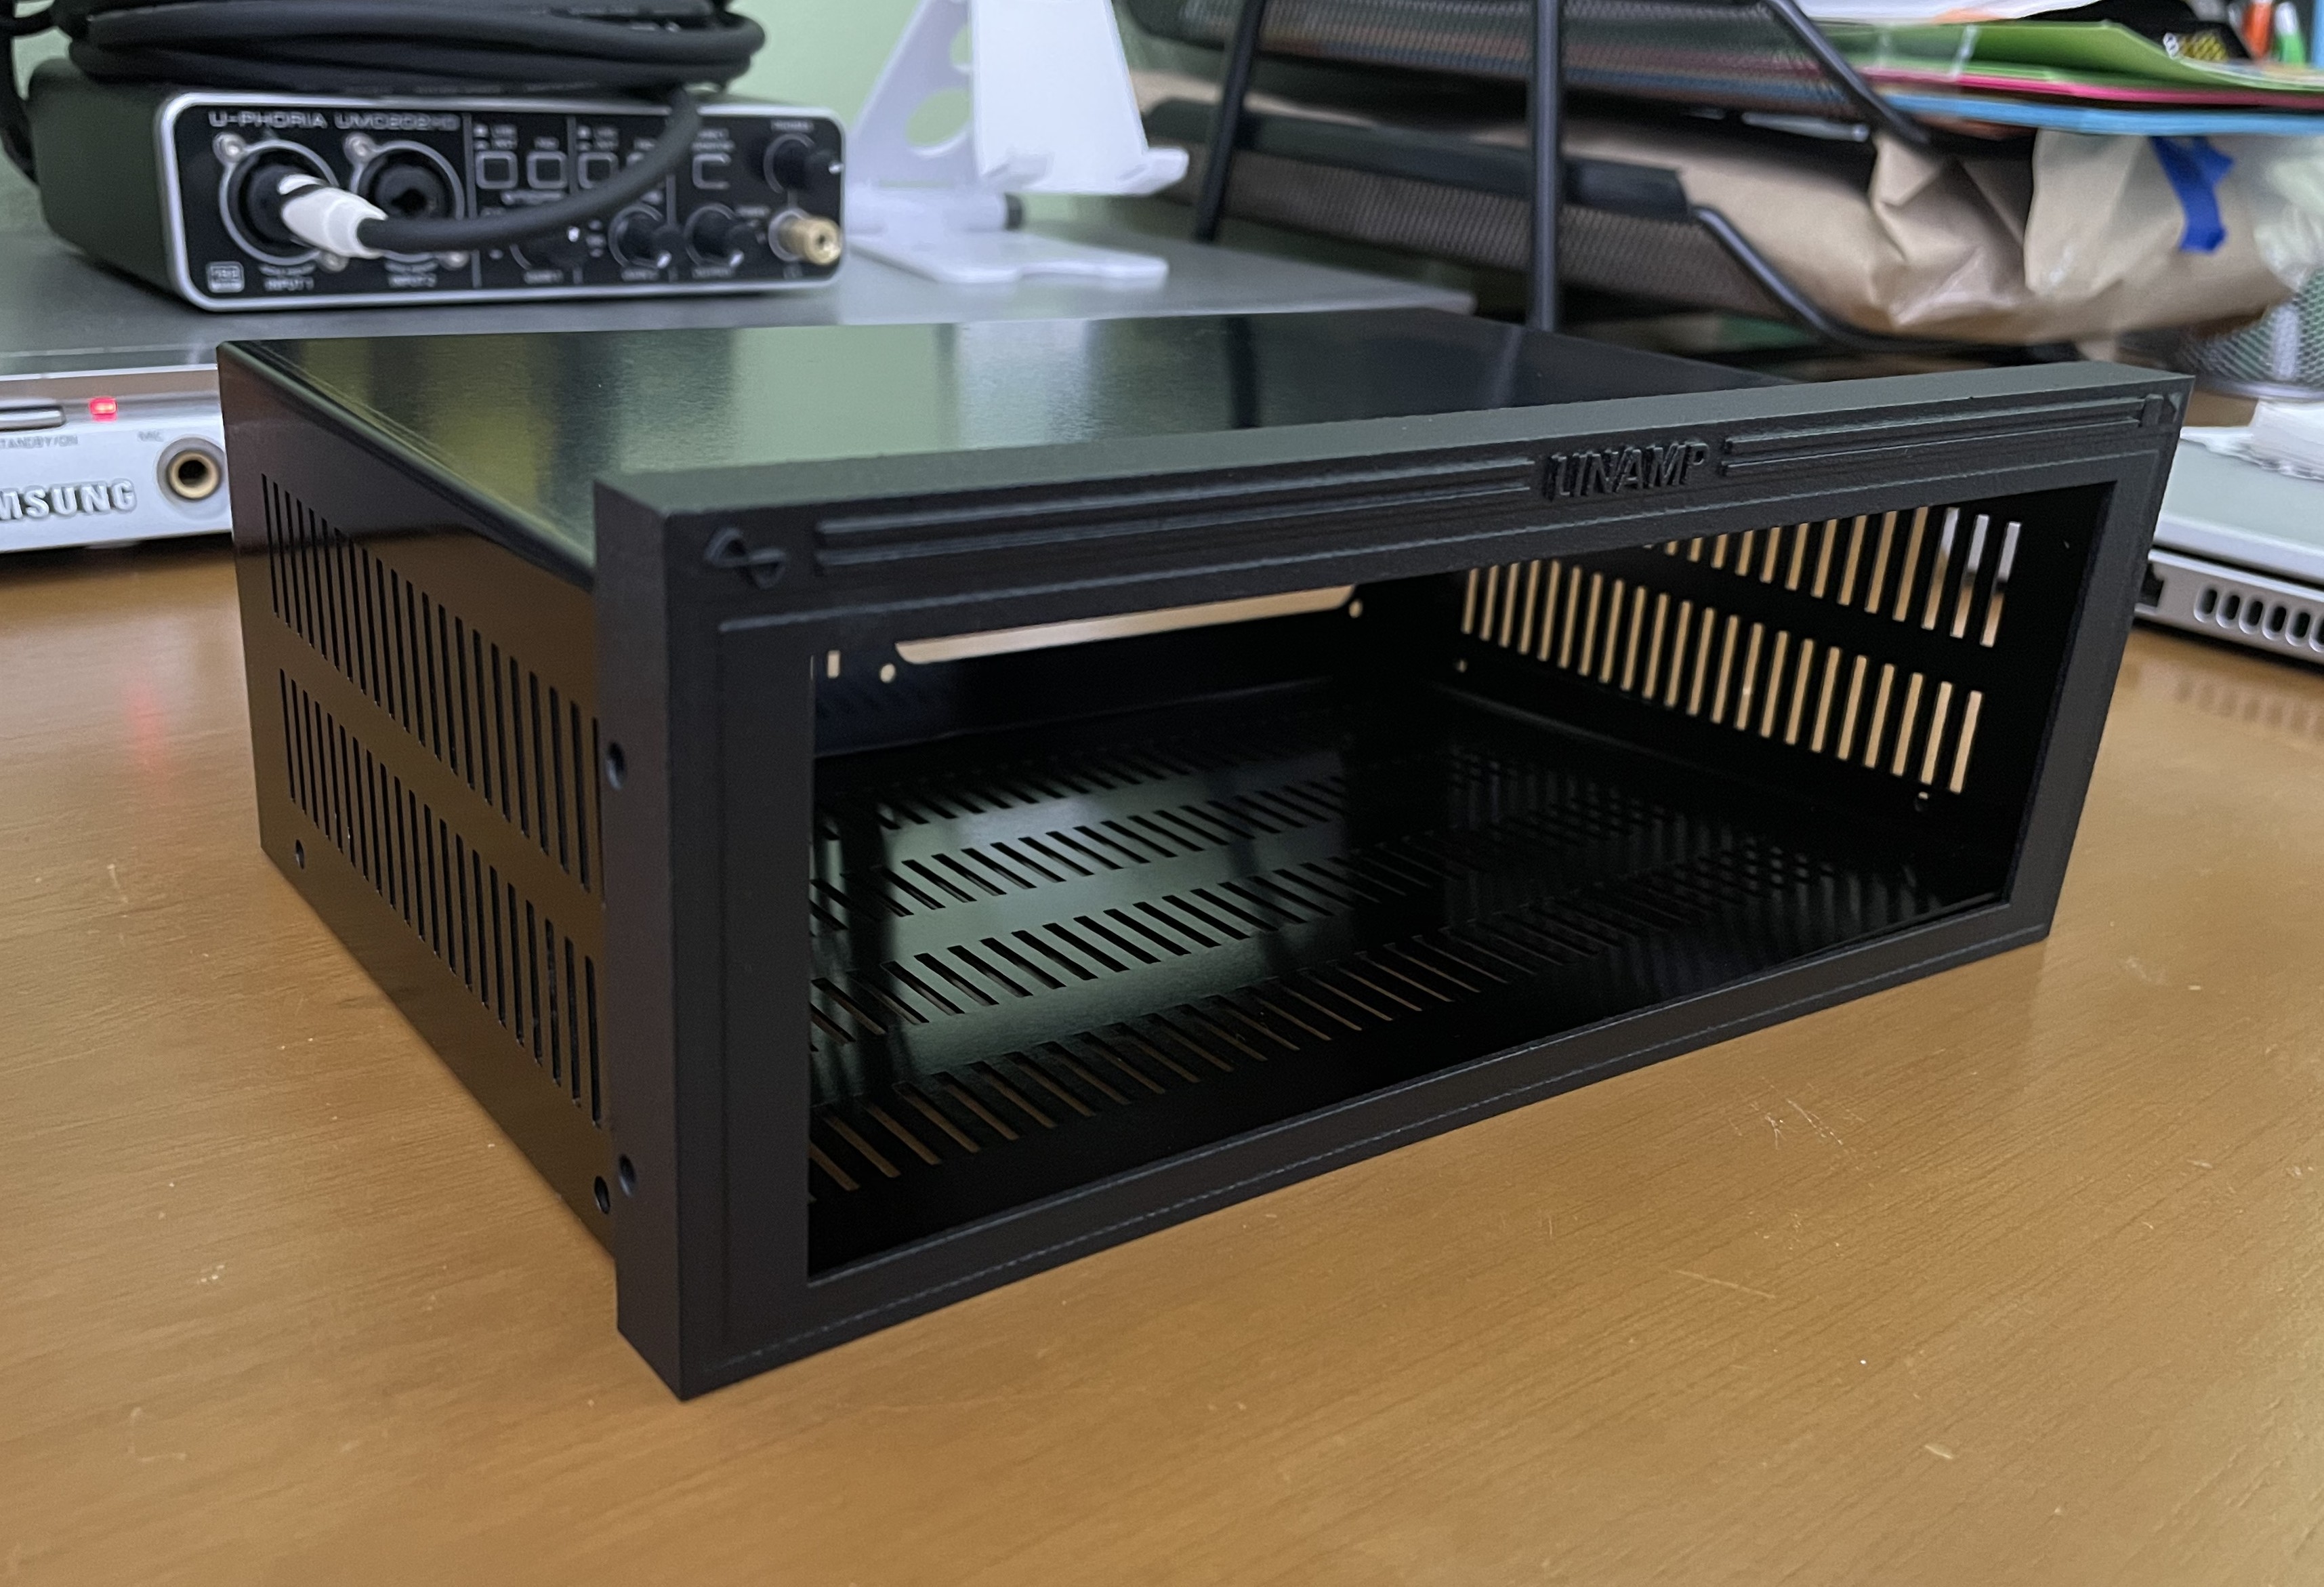
(Test fit of the sheet metal parts and front case, front side)

The sheet metal parts are made of 1mm thick anodized aluminum. Originally I wanted it to be sandblasted so it would have a similar look to the AIWA case, but a PCBWay support engineer told me that they didn't recommend it for 1mm thick aluminum because it could deform the metal, so I went with just anodized aluminum.

For the user interface, I originally planned on using physical buttons, by creating a custom PCB for the buttons, connecting it to the Raspberry Pi GPIO, and 3D printing the buttons. However, I also wanted to have the bar spectrum analyzer and the scrolling song information display to work and look as close as possible to the original Winamp app.

I searched for small, extra wide screens, but couldn't find one small enough to span the whole width of the player (so it could display both the spectrum analyzer and the track info widgets), that still left enough space for the physical...

Read more »

  • Linamp DIY Digital Pack now available!

    Rodmg09/11/2024 at 02:16 2 comments

    I've just released the Linamp DIY Digital Pack, It includes everything you need to fabricate and assemble Linamp, with detailed written and video tutorials, tips on how and where to purchase parts, digital files for 3D printed and sheet metal parts, and a full pre-configured SD card image for the Raspberry Pi.

    Get yours here!: https://store.linamp.org/

    The Pack includes:

    • Guides - Video tutorials and written guides on:
      • Available options for the player case (Sheet metal vs fully 3D printed)
      • Ordering the sheet metal case
      • 3D printing the case
      • 3D printing the player face
      • Sourcing parts with full Bill of materials
      • Preparing the power button and screen
      • Assembly
      • Flashing the SD card and initial setup
      • Advanced configurations and troubleshooting
    • Fabrication assets - the files needed to fabricate sheet metal and 3D printed parts
    • Software - The OS for Linamp in a SD card image

    If you build one, I would love to see it! let's make Linamp the best hackable music player out there!

  • Debuging Screen issues

    Rodmg06/20/2024 at 23:13 0 comments

    Recently I started building a second Linamp, using some extra spare parts I had from the original build and ordered the rest of the parts I needed.

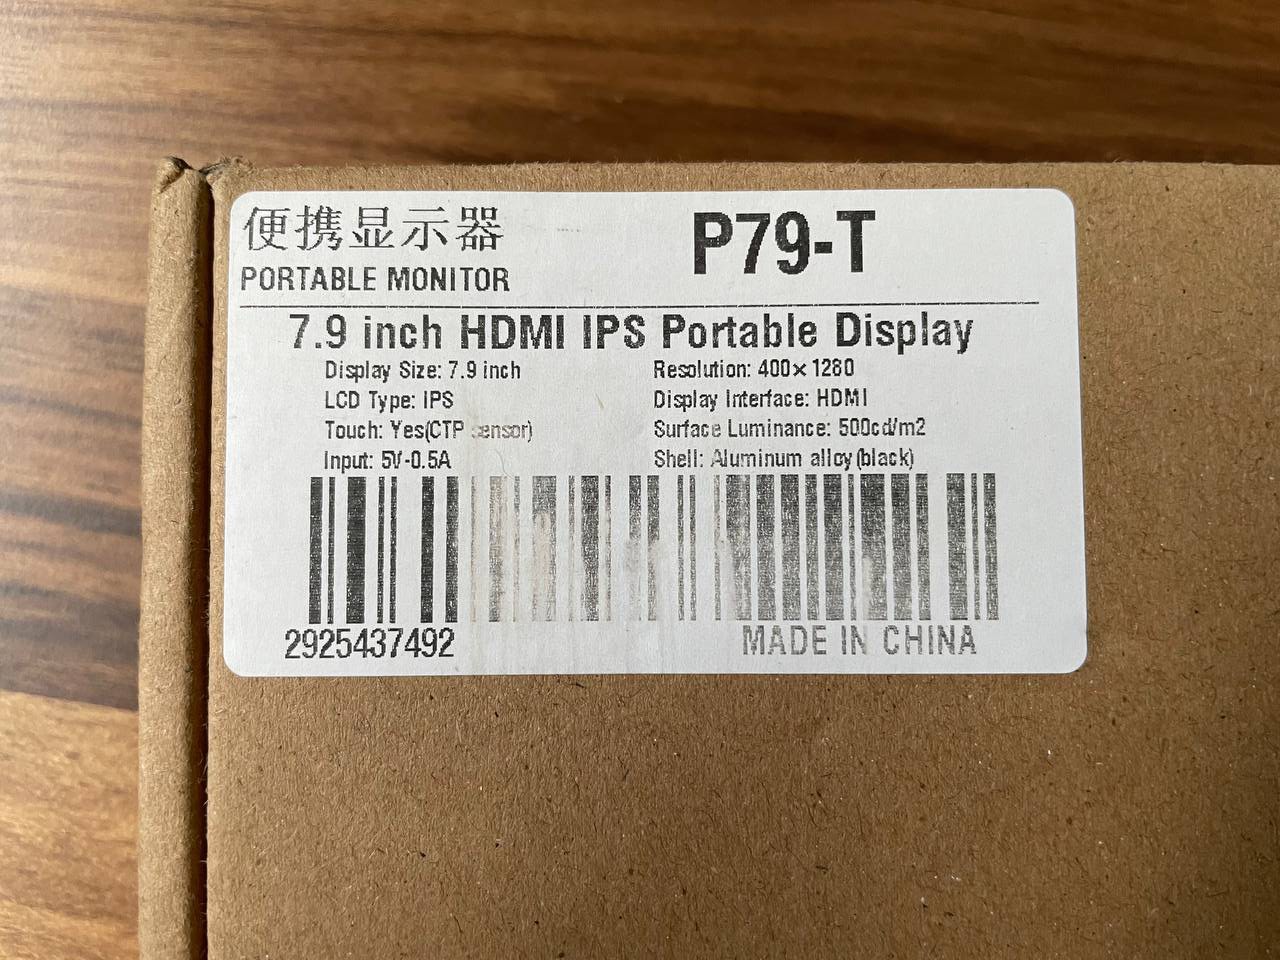
    One of the most important parts is the screen, it is sold under several brand names by different sellers in Amazon and originates from China, the generic model seems to be "P79-T", which is a 7.9'' ultra wide screen with touch capabilities.

    When I did the original build, I struggled to get it working correctly with the Raspberry Pi - because it uses a non-standard resolution, it requires some manual configuration in order to make it work, which is specified in the manual that comes with the screen.

    The thing is, the configuration values mentioned in the manual don't really work, and now I just discovered that the correct settings seem to vary between same-model screens.

    In short, the configuration needed involves modifying the "config.txt" file that lives in the Raspberry Pi boot partition, the manual instructs you to set the following values:

    # DON'T USE THIS! This probably won't work
    max_usb_current=1
    hdmi_group=2
    hdmi_mode=87
    hdmi_timings=400 0 100 10 140 1280 10 20 20 2 0 0 0 60 0 43000000 3

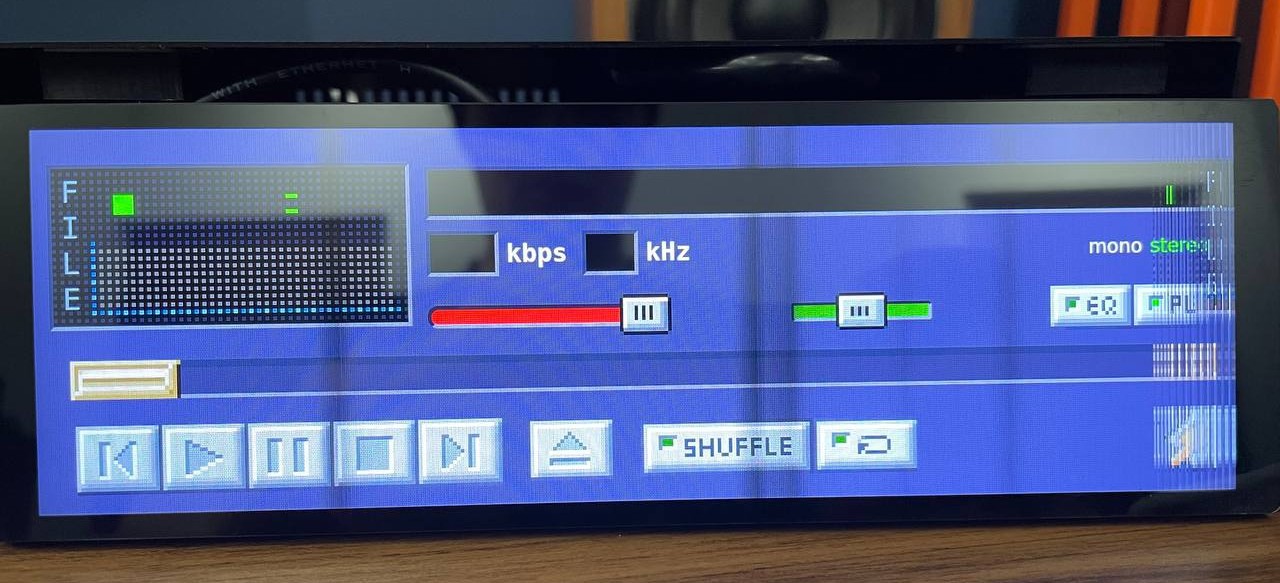
    However, when I used those values on my original screen, I got a flickering image with glitches and lines:

    After a lot of trial and error, I was able to fix it by using the following values:

    # config.txt changes that worked for my original screen
    hdmi_cvt=400 1280 60 3
    hdmi_group=2
    hdmi_mode=87
    hdmi_drive=2
    dtoverlay=vc4-kms-v3d
    

     I also updated the cmdline.txt file, which controls the startup of the Linux Kernel, adding the following parameters:

    video=HDMI-A-1:400x1280M@60,rotate=270

    This worked! I now got a clean picture and everything seemed to work great!

    However this was not the whole story...

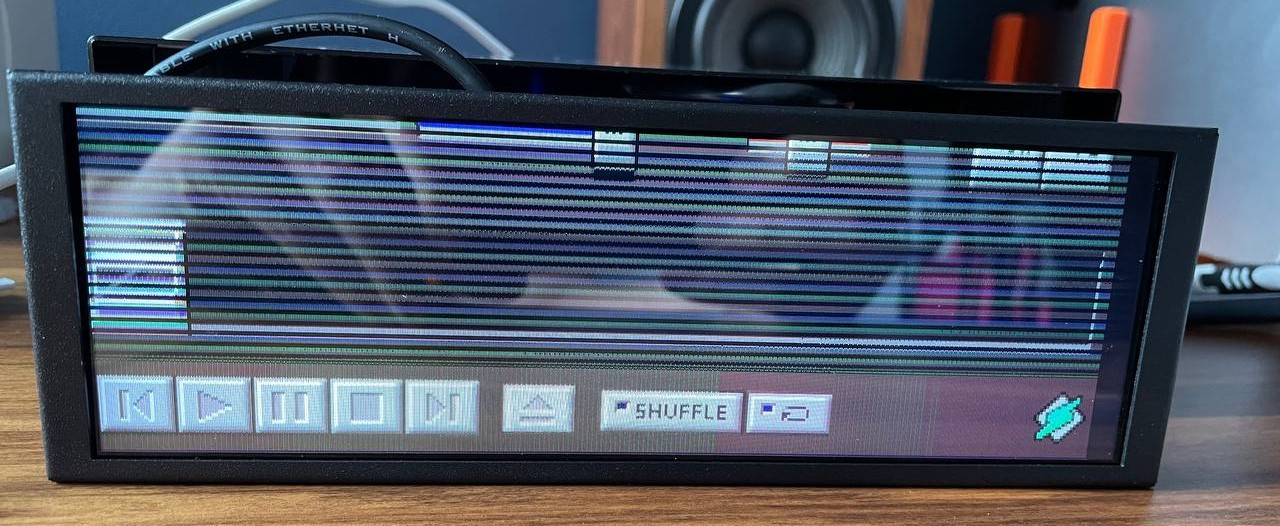
    Now that I'm building a second device, I used another sceen, which came from the same Amazon vendor, in the same box, same manual and same outside looks, but when I connected it to the Raspberry Pi with the same SD card as before, I got a different set of glitches:

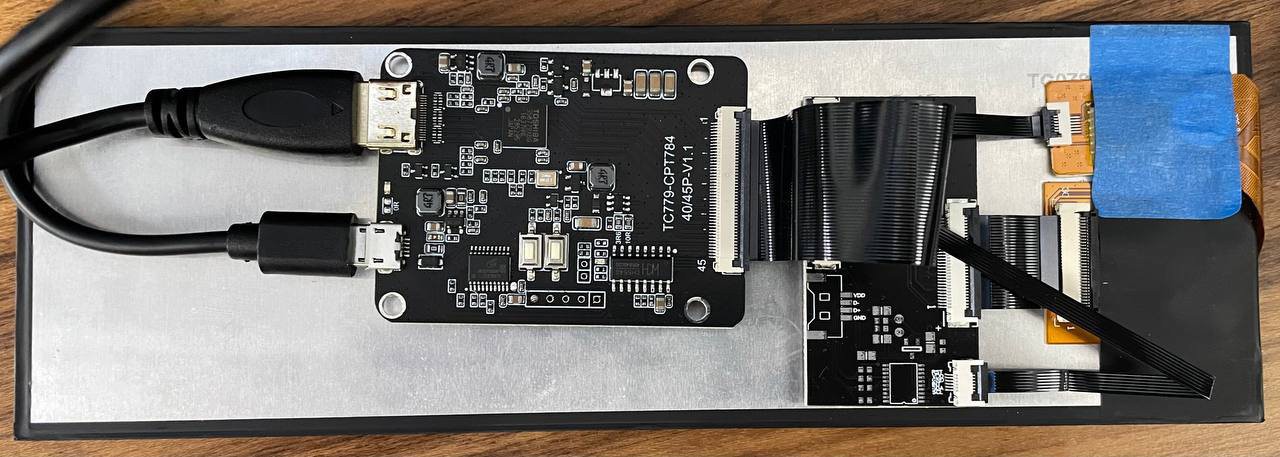
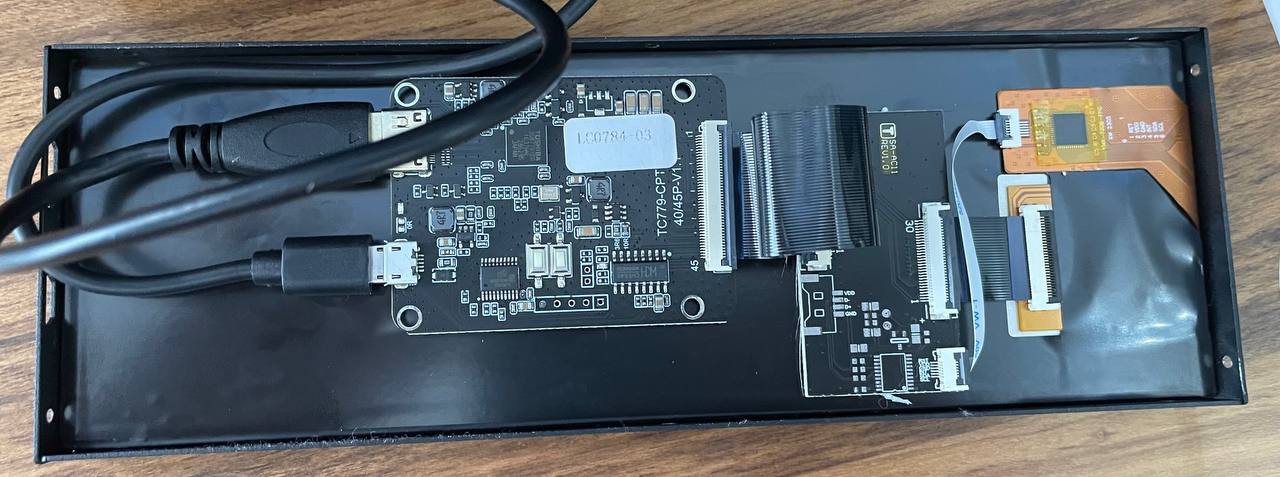
    These screens come with a metal shell which I remove in order to fit it inside my custom case, when I opened it, I saw a slight difference:

    My original screen back side:

    The new screen back side:

    As you can see, the electronics seem the same, but the actual display panel is different.

    And now I also know that the hdmi timing configurations for these are also different.

    Understanding the issue

    There are several things at play here. First of all, these screens, when connected to a macOS or Windows PC, work just fine, but when connected to a Linux machine, being it a Raspberry Pi or PC, they have the issues I'm seeing.

    This seems to be due to non-standard HDMI protocol implementations in these screens, which macOS and Windows seem to correctly parse (probably because when these screens were designed, they were tested to work on those OSes primarily), but Linux is having issues with it.

    Specifically the issues seem related to the "EDID" a kind of identification that displays send to the host computer when connected, which tell the computer what video modes the display supports so it can auto-configure it.

    So that's why the manual instructs us to use the "hdmi_timings" in the Raspberry Pi - that setting overrides the auto configuration of the display and forces specific signal timings that the display needs to work.

    Those timings seem to depend on the actual display panel, so they seem to vary. In an ideal world, the controler board on the display would be correctly configured to report the actual good values the panel supports to the OS, so the OS could auto configure it. But the world is not ideal.

    Also, now comes another complication: How did I manage to make it work without using hdmi_timings on my original display? Well, it turns out that I didn't get it 100% right there, if you look closely, when the Raspberry Pi boots, it firsts displays a test color...

    Read more »

  • Thank you! - Figuring out logistics

    Rodmg06/18/2024 at 23:50 0 comments

    Linamp started as a personal DIY project, something I did for myself and just showed to a couple of friends. Thanks to one of those friends, Javier, who insisted on me publishing it, I got the courage and wrote this project page. 

    Since its publication, I've seen an amazing response from people around the world, this really gives me motivation to continue improving this project and sharing it with the world. For all that, Thank you!

    I've been seeing a lot of interest from people who want to be able to purchase the player, so I'm trying to figure out the logistics to make this a reality.

    Getting there is no small step for me, so I would like to request the help of the community by filling this survey: https://forms.gle/nvo1WEPQZNkJo2Yp6

    Your response will greatly help me to plan the next steps for this project.

    Please note: Linamp is and will continue being an Open Source project, this effort aims to make it available to more people and start a community around it, I'm excited to see what you will do with it!

  • Video: Linamp UI demo

    Rodmg06/07/2024 at 04:06 0 comments

    I've uploaded a video showing the main features of the Linamp UI, you can watch it here:

  • Code now available in GitHub

    Rodmg06/07/2024 at 02:50 0 comments

    The source code for the Player application is now public in GitHub: Linamp

    If you want to try it, you should be able to run it on a modern Linux distribution, I've tested it on Debian Bookworm, you just need to install the Qt development packages, the dependencies mentioned in the repo's README and QtCreator from the official repos and you should be able to build and run it.

View all 5 project logs

Enjoy this project?

Share

Discussions

tuftsanti wrote 11/06/2024 at 22:45 point

Just wanted to say I updated to v1.1 and the software seems much more reliable and speedier!

  Are you sure? yes | no

robsbots wrote 09/22/2024 at 09:43 point

I have wanted this for ever.

 I currently have it built in a tiny laser cut case, but I need to build a proper steel one. Have implemented "Quit" and "Shutdown" buttons on the main menu of the software and added a hardware "soft" power button. Have a small "Line out" audio card to attach to improve the audio quality from the Pi but I need to create a hat to allow access to the header pins above my current cooler setup.

I'm trying to work out if I could create a mould and cast a front bezel in resin for an ultra smooth finish...... ( Want something shiny :) ) 

Love this project. Thanks so much.

  Are you sure? yes | no

roninniagara wrote 08/14/2024 at 00:11 point

I snagged a screen, it arrived today. I am awful at Linux - but had a friend help. GLORIOUS!!! I hope this continues to be developed. I was going to snag a Marantz network attached music player - but this is 1000x better (and cheaper!! plus nostalgia!!). Any way we can donate/give thanks for the hard work done and to help support future development?

OH, one more thing. Can we get access to the faceplate print?

MUCH love!!!!!

  Are you sure? yes | no

Rodmg wrote 09/11/2024 at 02:01 point

Hi! I just released a digital pack which includes everything you need to build Linamp, including the faceplate print, you can get it here: https://store.linamp.org/

  Are you sure? yes | no

roninniagara wrote 09/11/2024 at 02:58 point

Yep! snagged it already! printing now!! :D

  Are you sure? yes | no

roninniagara wrote 09/11/2024 at 23:05 point

I am using a "waveshare" screen. the controller is mounted to the back of the lcd and the hdmi is vertical. Can there be a slightly taller version for any clearance to allow for hdmi 90 degree adapters? thanks!

  Are you sure? yes | no

Rodmg wrote 09/12/2024 at 01:18 point

@roninniagara Do you have the specifications for the screen? Would it be possible to detach the board from the screen and orient it differently?

  Are you sure? yes | no

roninniagara wrote 09/12/2024 at 03:45 point

Can I get in touch with you somehow? I bought the package, but printing has been a striggle....Running into one issue consistently

  Are you sure? yes | no

Rodmg wrote 09/12/2024 at 04:00 point

@roninniagara I sent you a DM

  Are you sure? yes | no

elgoswarlos wrote 08/12/2024 at 11:19 point

No doubt, such a fine music player. Is it valuable for all kinds of windows? Actually, I want to use this for my Marrakech tour agency website. Thanks https://moroccoluxuryhighlights.com/

  Are you sure? yes | no

gt2690b wrote 08/08/2024 at 14:57 point

can we get the milkdrop visualization to show up on the screen too!?!?

  Are you sure? yes | no

Paul Peters wrote 08/08/2024 at 10:05 point

I really like this and brings the nostalgia as a brick into sight, one feature it must support and have is the ability to scrobble plays to sites such as last.fm as some of us nerds record every play from all players including winamp and foobar.

  Are you sure? yes | no

Mrak wrote 08/01/2024 at 23:43 point

Just looking at the way you designed the case makes me imagine this built in a way that it could be used as a replacement for your car stereo. I'd have one of these in my car in a second if I were able to.

  Are you sure? yes | no

William Jacoby wrote 06/29/2024 at 04:09 point

For this you earn your lifetime nerd cred.

  Are you sure? yes | no

sl4ppy wrote 06/14/2024 at 17:43 point

Very cool project!  I raced out and grabbed all the identical hardware and got up and running pretty easily, so thank you!  For the life of me can't get player audio out via the 3.5mm jack (or anywhere?) to work .  Time to dig into Qt Multimedia I guess. :grimace:

  Are you sure? yes | no

Alexander Williams wrote 06/07/2024 at 05:55 point

This is absolutely amazing! Great job! Do you plan to make the Winamp Equalizer for stacking below the player?

  Are you sure? yes | no

Rodmg wrote 06/07/2024 at 17:13 point

I'm undecided on that, for looks that would be cool, but implementing as just another screen in software would probably be more practical and economical

  Are you sure? yes | no

Mrak wrote 08/01/2024 at 23:39 point

I don't know, this seems like one of those projects where aesthetics might just outweigh practicality or economics. Amazing project, btw. I really want to build one of these.

  Are you sure? yes | no

Dan Maloney wrote 06/07/2024 at 00:18 point

Fantastic build, brings back a lot of memories. Wrote this up for the blog, should publish soon. Great work!

  Are you sure? yes | no

Rodmg wrote 06/07/2024 at 02:55 point

Thanks!

  Are you sure? yes | no

Andres Yuhnke wrote 06/07/2024 at 00:06 point

Super cool, balanced outs would make this really useful in pro audio installations, ie connected to a mixing desk for house music before/between performances in a music venue.

  Are you sure? yes | no

Supercrab wrote 06/06/2024 at 18:19 point

Amazing!  I need this!  Great work on the visualiser too. You might have been able to use CAVA for the visualiser 🤔 (c++ dev)

  Are you sure? yes | no

Rodmg wrote 06/07/2024 at 02:57 point

Oh yeah!, I stumbled upon CAVA while researching how to implement it, but at that time I found the Audacious code easier to follow

  Are you sure? yes | no

Adam Wolf wrote 06/06/2024 at 17:21 point

This is awesome, especially if winamp is really going open source soon! Original skin gang unite!

  Are you sure? yes | no

RunnerPack wrote 06/06/2024 at 15:24 point

Very impressive! Needs a diamond-and-lightning icon on the power button ;)

  Are you sure? yes | no

tuftsanti wrote 06/06/2024 at 11:48 point

100% on board with this, I share the same affinity to Winamp. Could you share your files?

  Are you sure? yes | no

Rodmg wrote 09/11/2024 at 02:04 point

Hi! I just released a digital pack which includes everything you need to build Linamp, including all the production files, you can get it here: https://store.linamp.org/

  Are you sure? yes | no

tuftsanti wrote 09/22/2024 at 23:47 point

I purchased the package when it was available. Everything arrived apart from the metal case from PCBWAY. I decided to set it up and try it out and it was mostly working! My biggest issue is I used a 64GB sd card because I wanted to add my MP3 collection to it. I know thi sis a linux project, but is ti possible to make a separate NTFS partition on which to store and access music? I also purchased a switch with an LED and wonder if it can also be powered?

  Are you sure? yes | no

Rodmg wrote 09/23/2024 at 00:59 point

@tuftsanti Hi! thanks!, about the SD card partitions, it's technically possible, however I wouldn't recommend it as you would lose everything whenever you re-flash the OS image (for updates or any issue). The OS image included in the kit supports auto-mounting USB flash drives, you could use one to host your MP3 collection.

I didn't get the second question, what kind of switch are you referring to?

  Are you sure? yes | no

tuftsanti wrote 09/23/2024 at 09:31 point

@Rodmg 

I was hoping you might agree that NTSC is a more universal file system and use it for storage instead of EXT4. If not, I'm still a fan of the project, maybe I can place a USB HDD inside the case attached to the Pi.

The switch I'm referencing is here, a slight variation on that which you suggested. It even came with a harness!
www.amazon.com/dp/B07Q2HLGHZ


  Are you sure? yes | no

Rodmg wrote 09/23/2024 at 14:46 point

@tuftsanti Ah got it, yes, you should be able to power it from the Raspberry Pi GPIO pins it seems, just double check the specifications to see if you need to add a series resistor. About the filesystem, the main OS partition cannot be NTFS, you would need to create a separate partition for data only, and still, I would recommend using FAT32 or exFAT instead, as NTFS is not fully supported on all systems (for example macOS only supports it as read-only by default).

  Are you sure? yes | no

tuftsanti wrote 09/24/2024 at 23:25 point

Could I partition the remaining ~50GB of space as EXFAT or FAT32 and be able to load from it through the software?

  Are you sure? yes | no

Rodmg wrote 09/25/2024 at 02:23 point

@tuftsanti Yes, you can do that, you need to edit the /etc/fstab config file to make it mount it automatically and define a path where you will mount it, after it's done, you can link it to /home/dietpi/Music (or mount it in a folder directly inside that one), and you will see it in the playlist screen (that's the folder that is open by default in the playlist file browser).

Just take into account that if you need to re-flash the SD card, for updating the OS image (which will be the way I'll be relasing updates initially), it will overwrite everything you have in it and will lose all data.

  Are you sure? yes | no

Rodmg wrote 09/25/2024 at 02:28 point

@tuftsanti Related discussion: https://forums.raspberrypi.com/viewtopic.php?t=321175

  Are you sure? yes | no

Similar Projects

Does this project spark your interest?

Become a member to follow this project and never miss any updates