XIAO ROUND DISPLAY
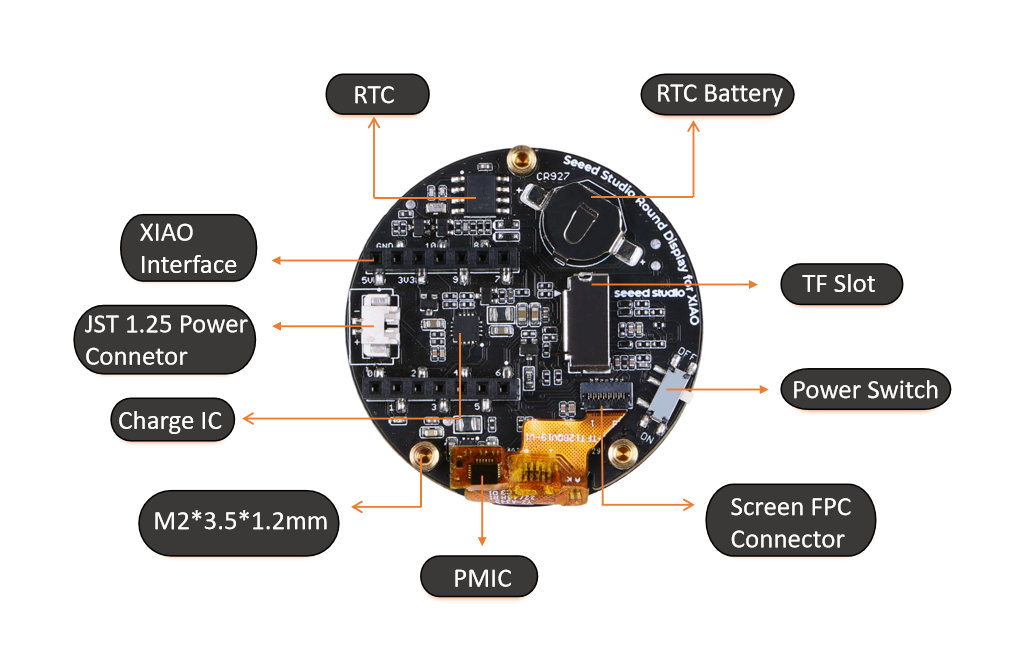
For this project, we're using the Seeed Studio Round Display for XIAO.
Seeed Studio Round Display for XIAO is an extension board with capacitive touch screen and is compatible with all XIAO development boards. It features a fully covered touch screen on one side, designed as a radiant disc with a radius of 39 mm.
With a 1.28-inch circular touch screen that has a resolution of 240 x 240 pixels and 65K colors, this board presents an exhibition of clear and colorful images. It can be applied to design a programmable watch, wearable indicator, etc.
The high integration and rich peripherals on the other side of the XIAO extension board are impressive, with an onboard RTC, TF card slot, battery charging chip, and JST 1.25 battery interface, all within a compact 39 x 39mm size. That is, you can have reliable timekeeping, a way to extend memory up to 32GB FAT, a charging method by the lithium battery.
The pins for Seeed Studio XIAO are all led out and no soldering is needed, which offers a convenient development experience. With its mini size, the XIAO extension board is ideal for wearable and small-volume projects. It is a versatile and powerful extension board that can be used for a wide range of projects, from displaying sensor data to creating interactive interfaces.
As for setting up this round display, we have to use TFT_eSPI Library.
We need to edit the User Setup and modify User_Setup_Select.h file and uncomment the following line.
#include <User_Setups/Setup66_Seeed_XIAO_RoundDisplay.h>
Check out the wiki of this display for more brief details.
https://wiki.seeedstudio.com/get_start_round_display/
XIAO ESP32 S3 Sense Board
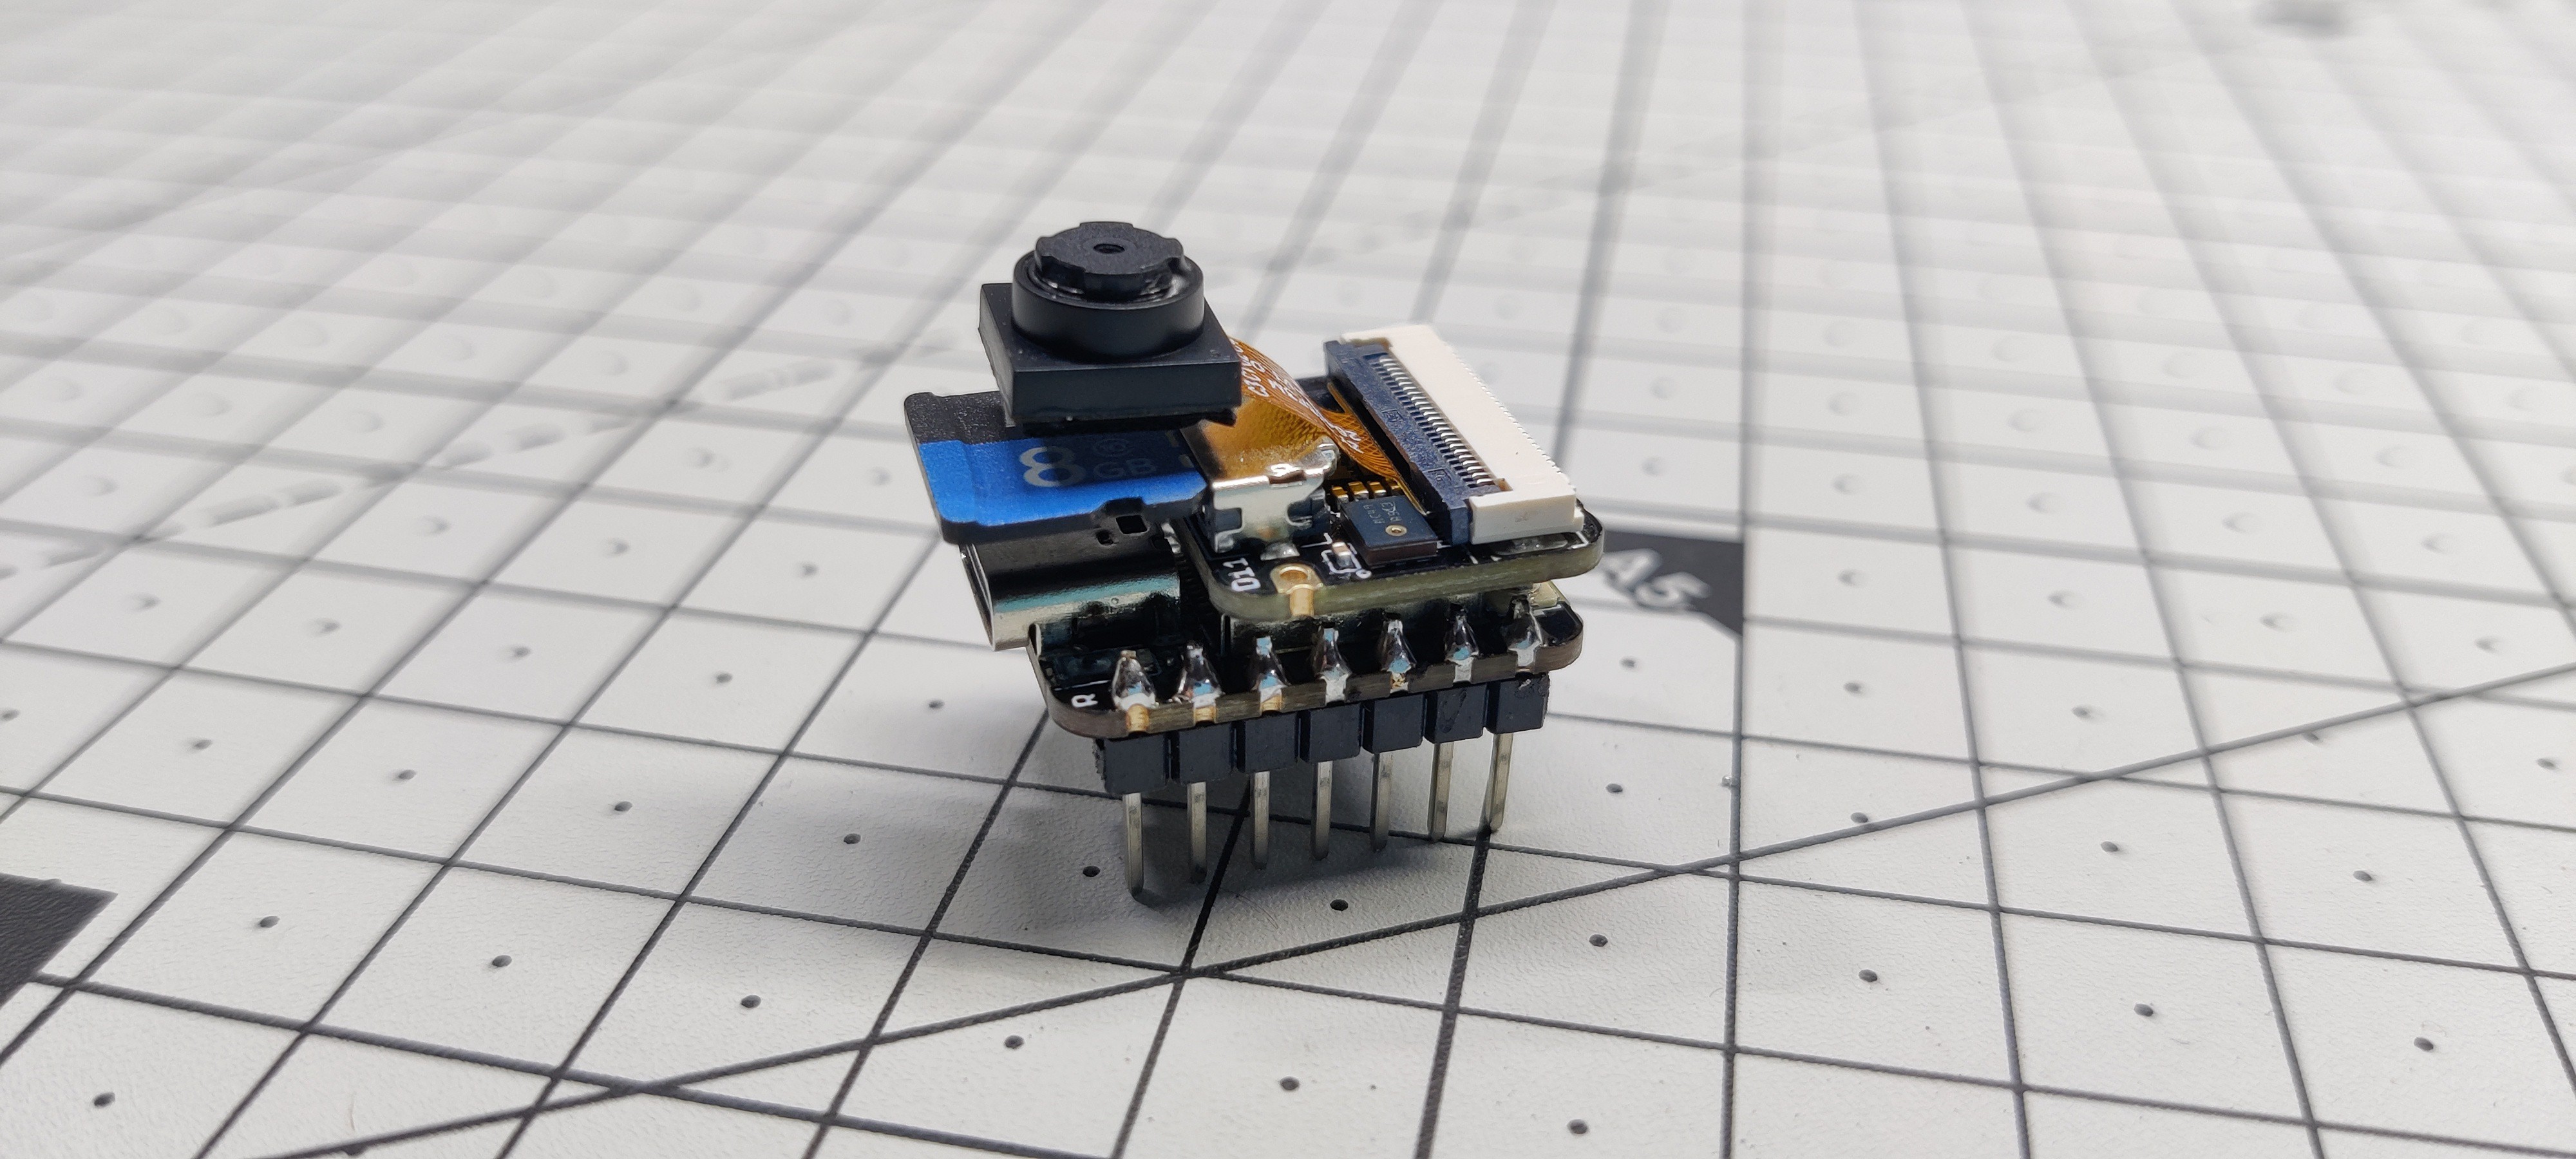
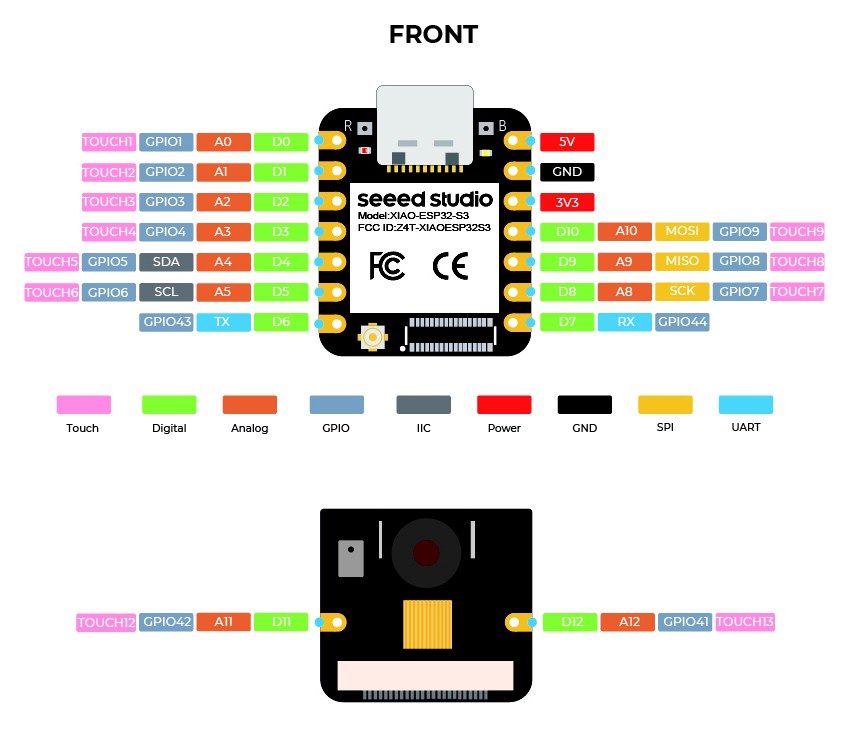
The Seeed Studio XIAO Series is a tiny development board with a thumb-sized size and a comparable hardware design.
We're using the XIAO ESP32 S3 Sense board that integrates a camera sensor, digital microphone, and SD card support. Combining embedded ML computing power and photography capability, this development board can be a great tool to get started with intelligent voice and vision AI.
Here, the ESP32S3 32-bit, dual-core Xtensa processor chip operating up to 240 MHz is being used in the XIAO.
Furthermore, there is a detachable OV2640 camera sensor for 1600x1200 resolution, which is compatible with the OV5640 camera sensor and includes an additional digital microphone.
The onboard lithium battery charge management setup enables four power consumption models, including deep sleep mode, with power consumption as low as 14 μA.
There's a brief wiki documentation of the XIAO Board, along with many of the products you can checkout from here to get in-depth details.
https://wiki.seeedstudio.com/xiao_esp32s3_getting_started/
Modification
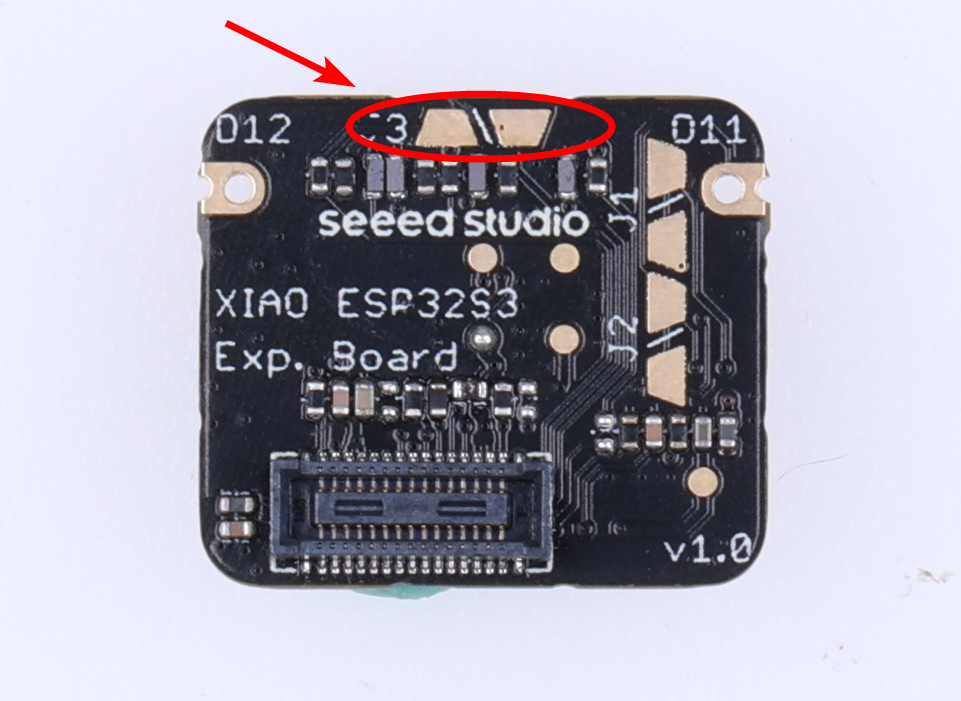
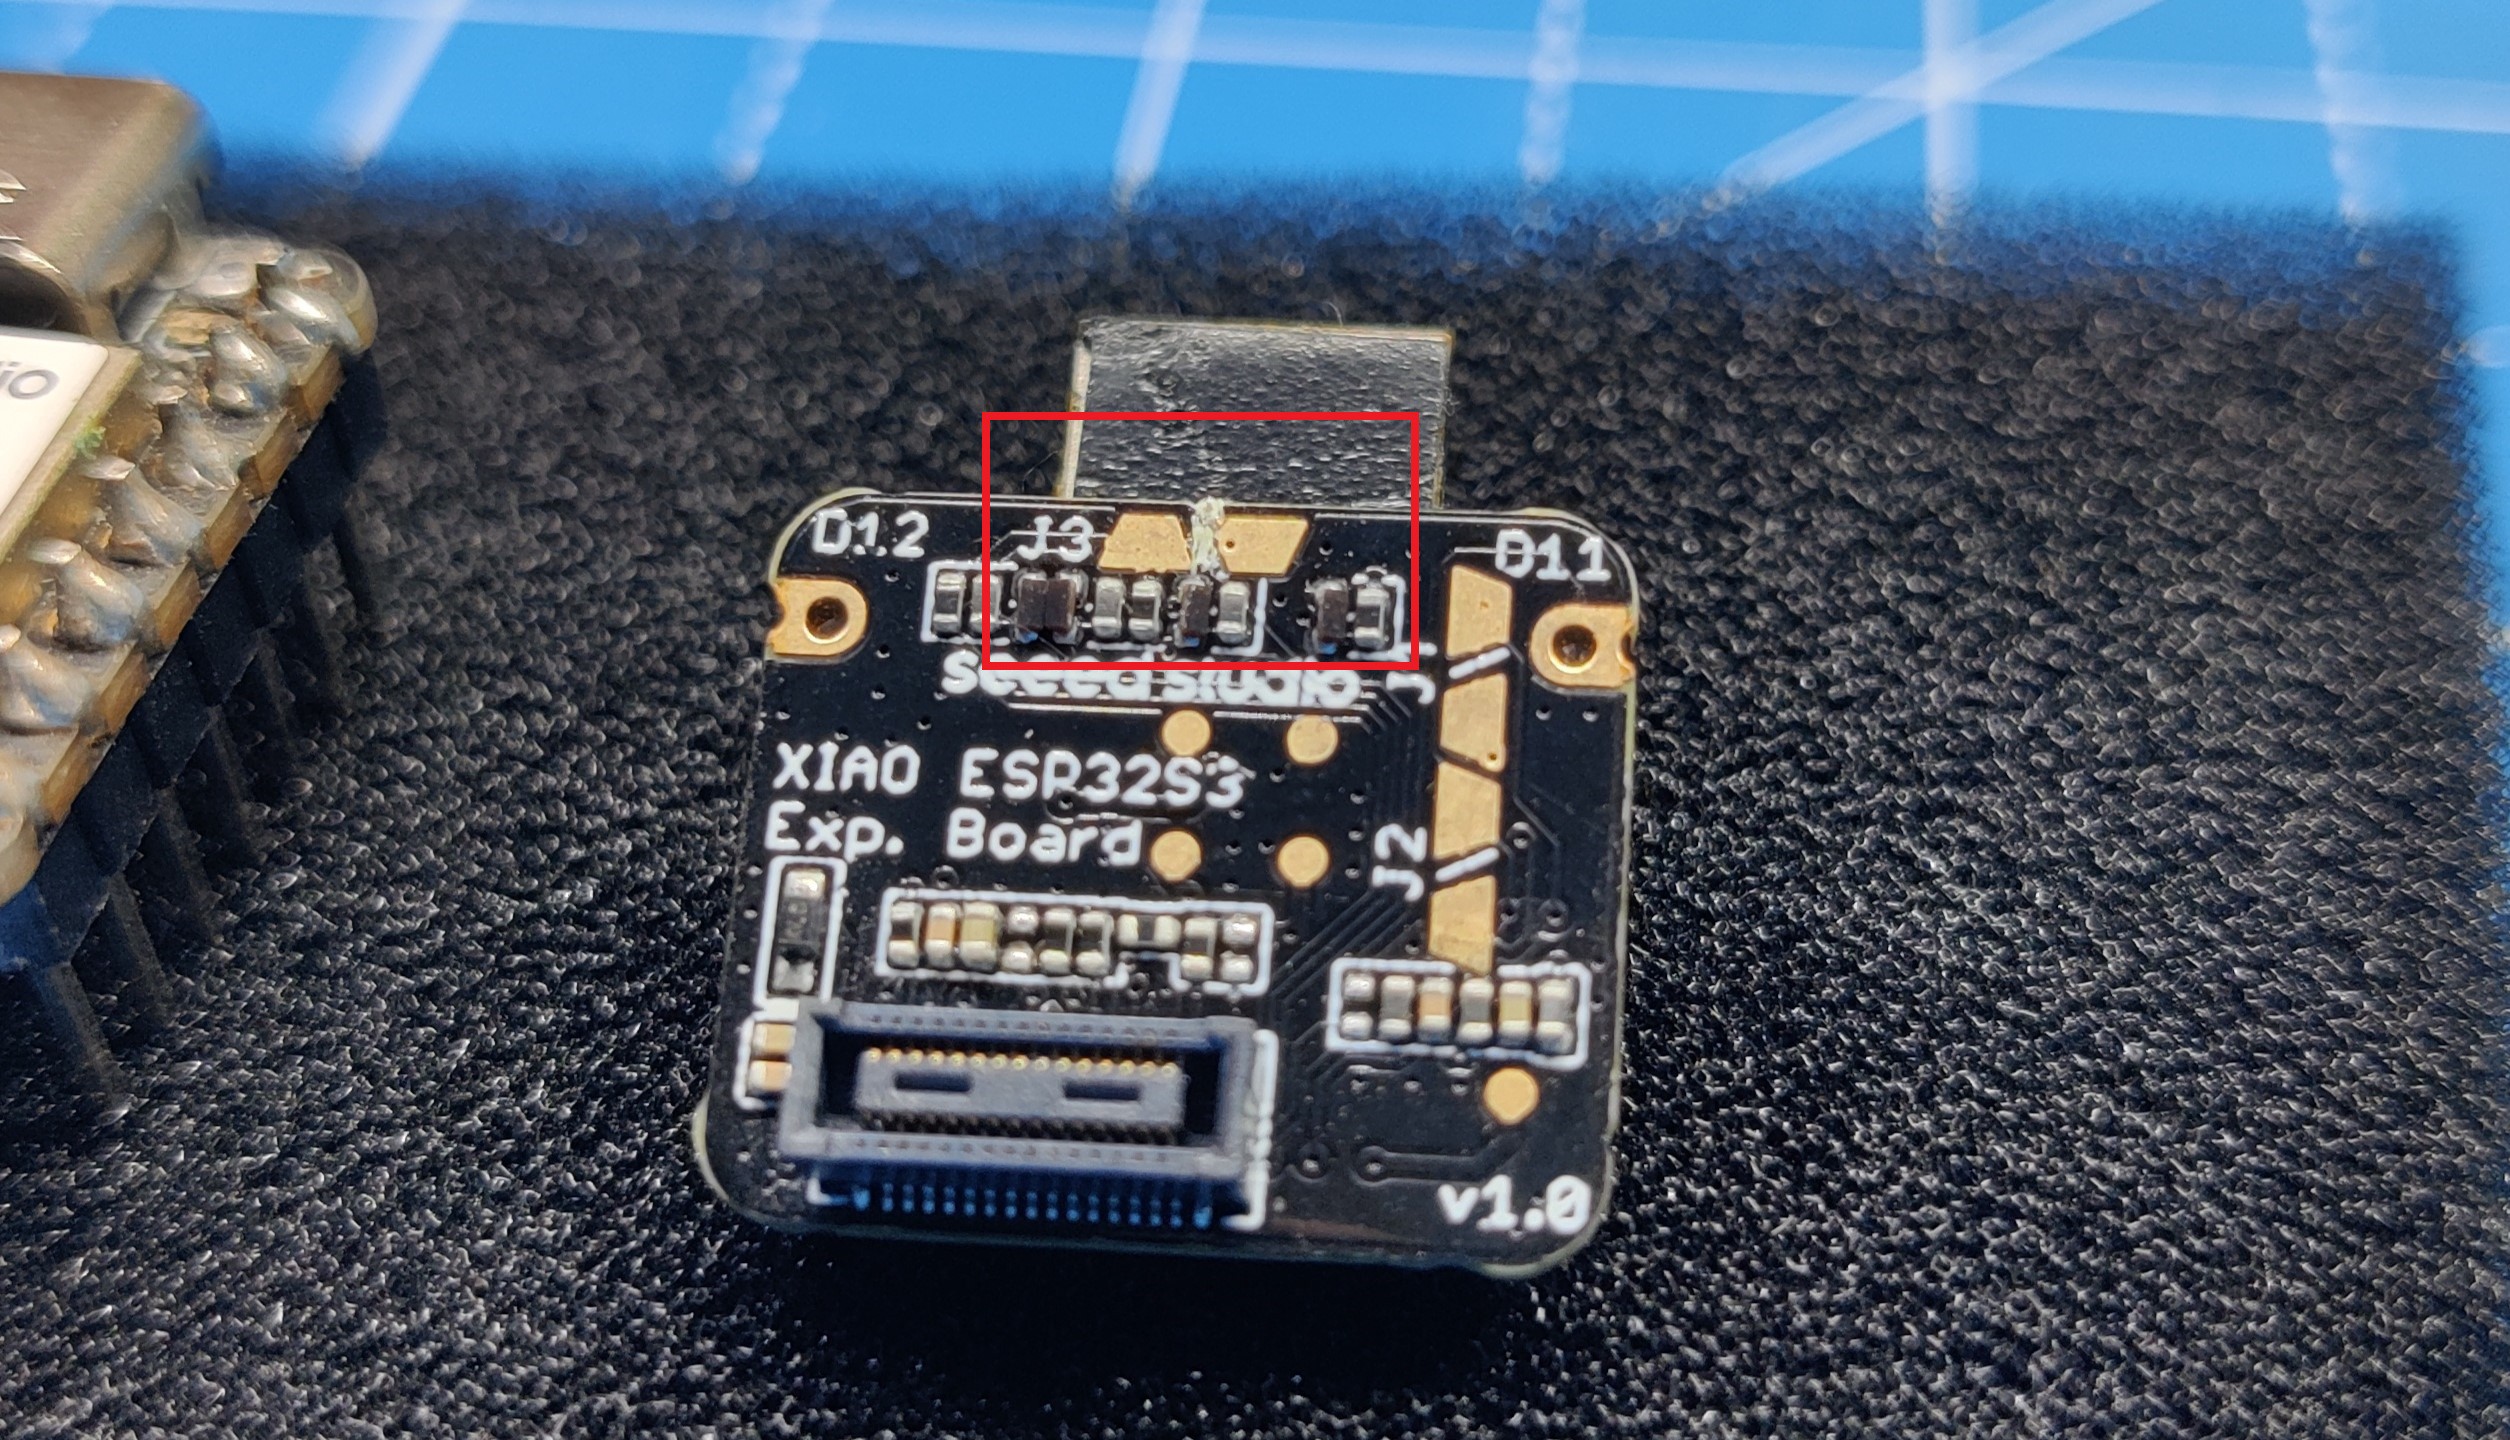
The XIAO EPS32S3 Sense is designed with three pull-up resistors (R4~R6) connected to the SD card slot, and the round display also has pull-up resistors;
The issue here is that the SD card cannot be read when both are used at the same time. To rectify this issue, we need to cut off J3 on the XIAO ESP32S3 Sense expansion board.
After disconnecting J3, the SD card slot on the XIAO ESP32S3 Sense will not work properly, so you need to insert a microSD card into the SD card slot on the Round Display.
CODE
After doing the modifications on the camera board of XIAO, we next uploaded the below sketch to the XIAO Board.
#include <EEPROM.h>
#include <Arduino.h>
#include <TFT_eSPI.h>
#include <SPI.h>
#include "esp_camera.h"
#include "FS.h"
#include "SD.h"
#include "SPI.h"

#define CAMERA_MODEL_XIAO_ESP32S3 // Has PSRAM
#define TOUCH_INT D7

#include "camera_pins.h"

// Width and height of round display
const int camera_width = 240;
const int camera_height = 240;

// File Counter
int imageCount = 1;
bool camera_sign = false;          // Check camera status
bool sd_sign = false;              // Check sd status

TFT_eSPI tft = TFT_eSPI();

// SD card write file
void writeFile(fs::FS &fs, const char * path, uint8_t * data, size_t len){
    Serial.printf("Writing file: %s\n", path);

    File file = fs.open(path, FILE_WRITE);
    if(!file){
        Serial.println("Failed to open file for writing");
        return;
    }
    if(file.write(data, len) == len){
        Serial.println("File written");
    } else {
        Serial.println("Write failed");
    }
    file.close();
}
This sketch captures images using a camera module connected to an ESP32 microcontroller, displays them on a TFT display, and saves them to an SD card. The provided function, writeFile, handles the process of writing captured image data to a file on the SD card, ensuring that the file operations are properly managed and providing feedback via the serial monitor.
For this code to work properly, you first need to download the provided "camera_pins.h" and "camera_index.h" files and put them into the same folder as the main sketch.
Also, make sure to install TFT_eSPI.h and configure it for working with the XIAO ROUND DISPLAY.
Power Source
The power source for this project is a super small 3.7V 50mAh LiPo Cell, which powers both the XIAO Round display and the XIAO ESP32 Sense.
We were able to create a more compact design by employing a tiny LiPo cell.
However, because the LiPo cell we are using has a capacity of 50 mAh, the backup we get is only enough for 10–15 minutes of work, but this can be increased by adding a 100 mAh or 200 mAh cell.
- For use with XIAO, we have added a small JST connector with the LiPo cell's positive and negative terminals provided on PCM.
- The JST connector allowed us to connect the LiPo cell directly to the round screen's battery port.
- We then put back the XIAO board, and the electronics assembly was completed.
Enclosure Design
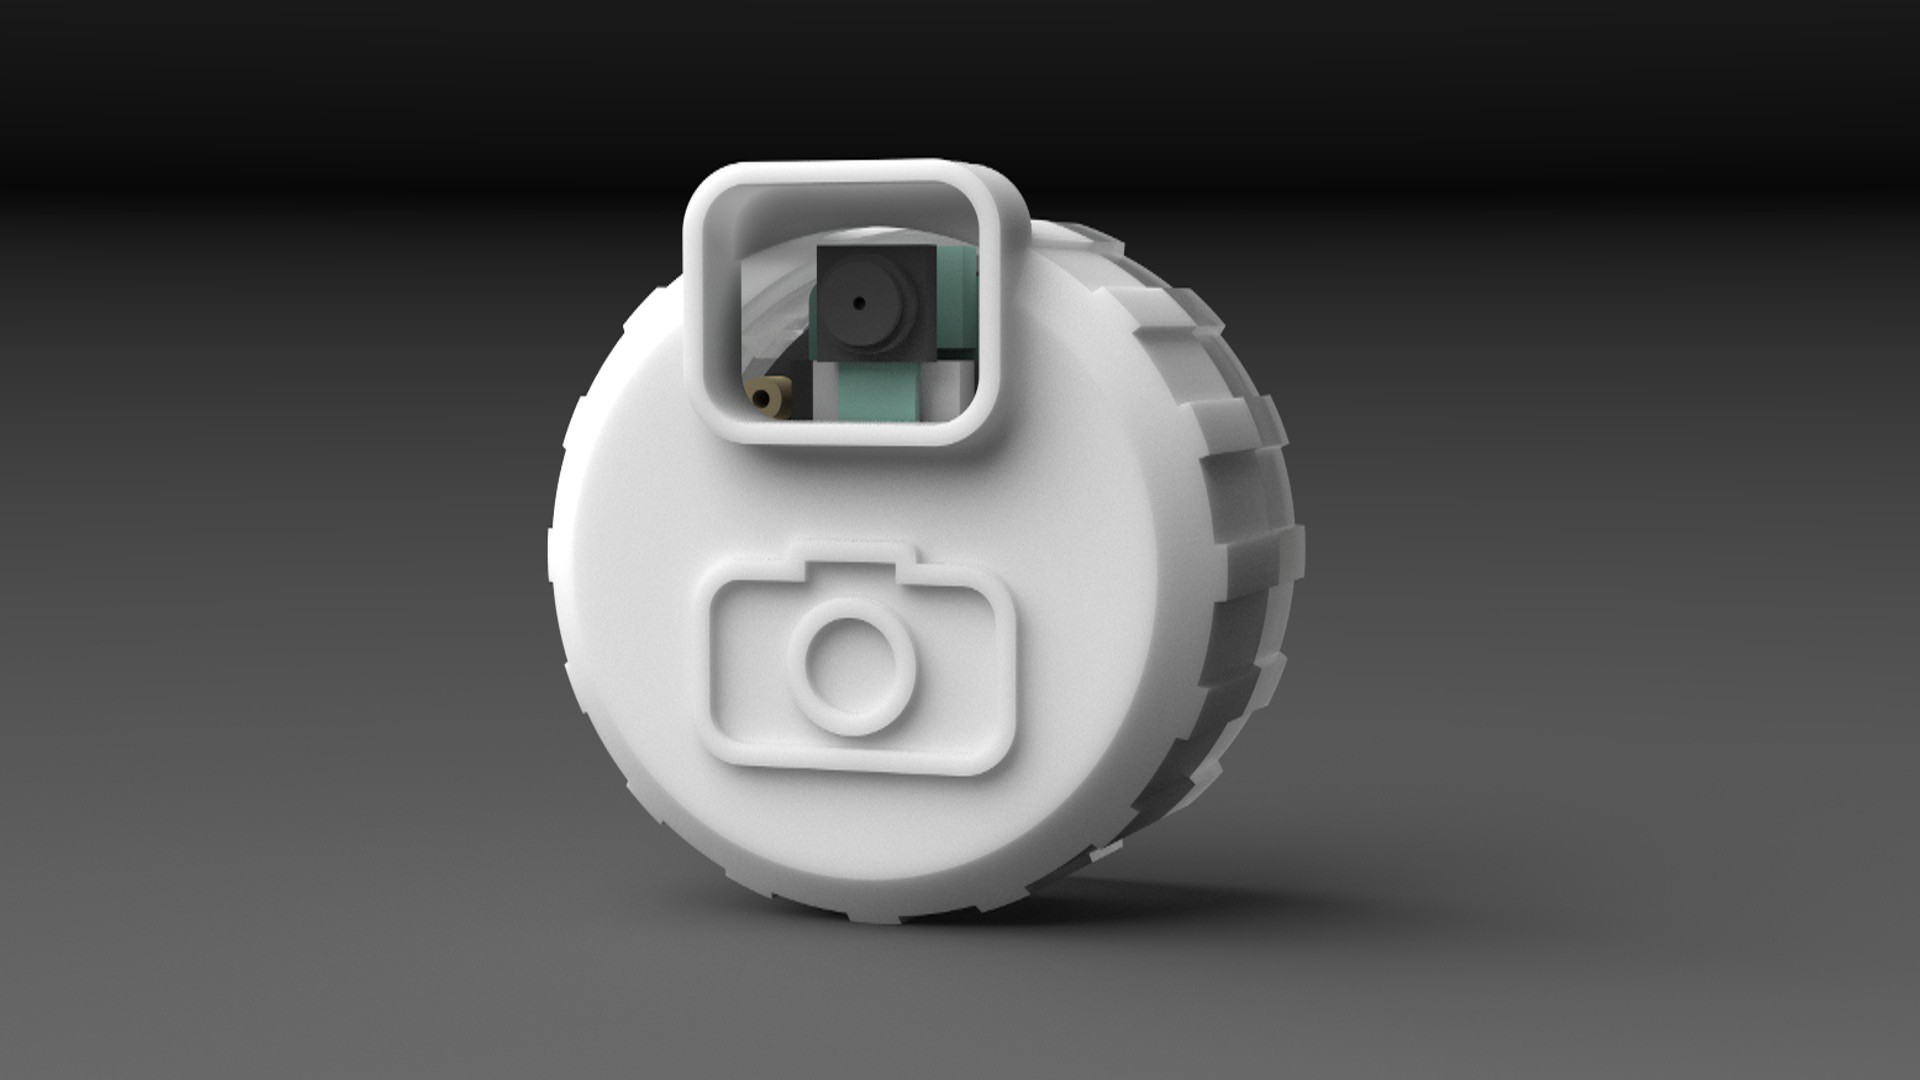
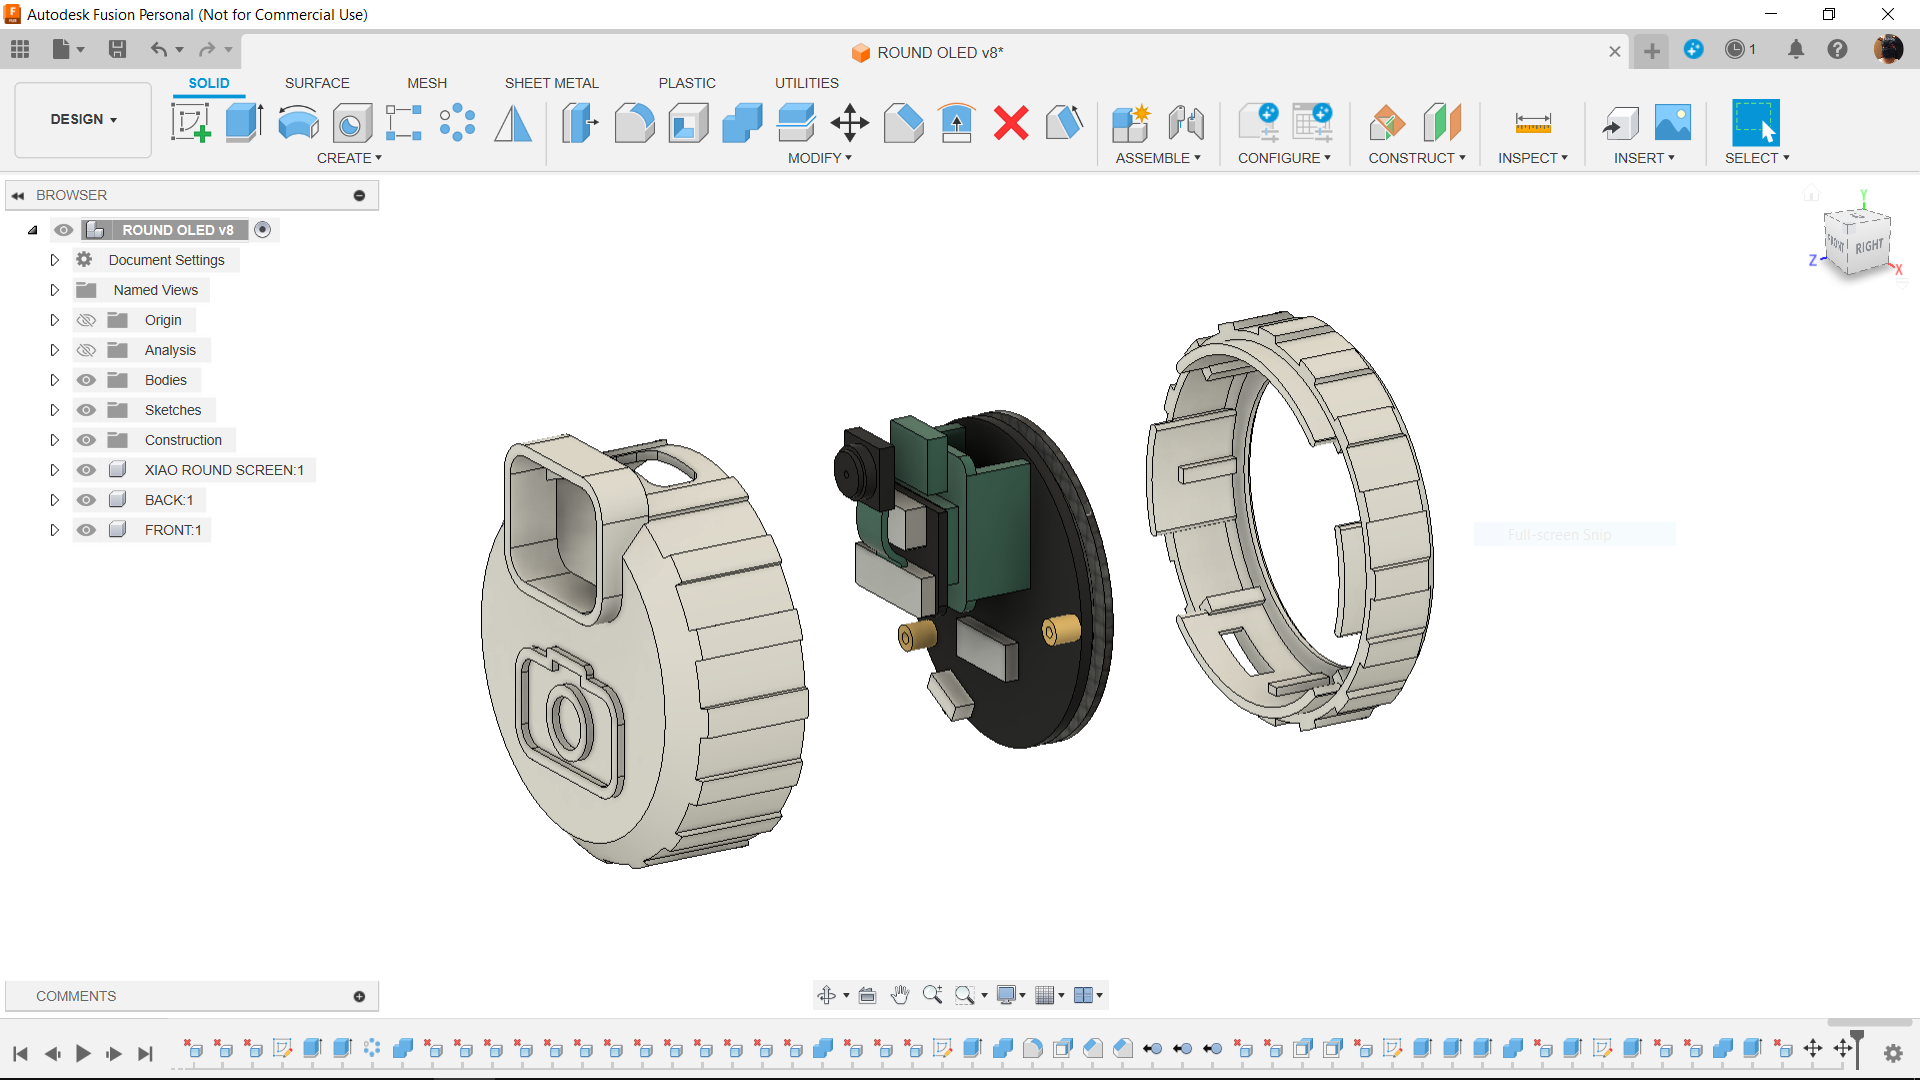
For the enclosure, we created a model of a round display attached to XIAO in Fusion 360 and then constructed an enclosure around it.
The idea was to create a cylindrical-shaped enclosure that was divided into two parts: one to hold the screen in place and the other to serve as a cover.
we added grip all around both parts to make the parts easy to hold.
On the front cover, we modeled a camera icon for aesthetic purposes to make the design look attractive.
After completing the model, we exported each part as a mesh file and 3D printed the back part using transparent PLA and the front cover with white Marbel PLA.
 Arnov Sharma