Demonstration:
Step 0 – The prototype
After
thinking a lot, I just started the design of my card by making a
prototype to validate my idea.
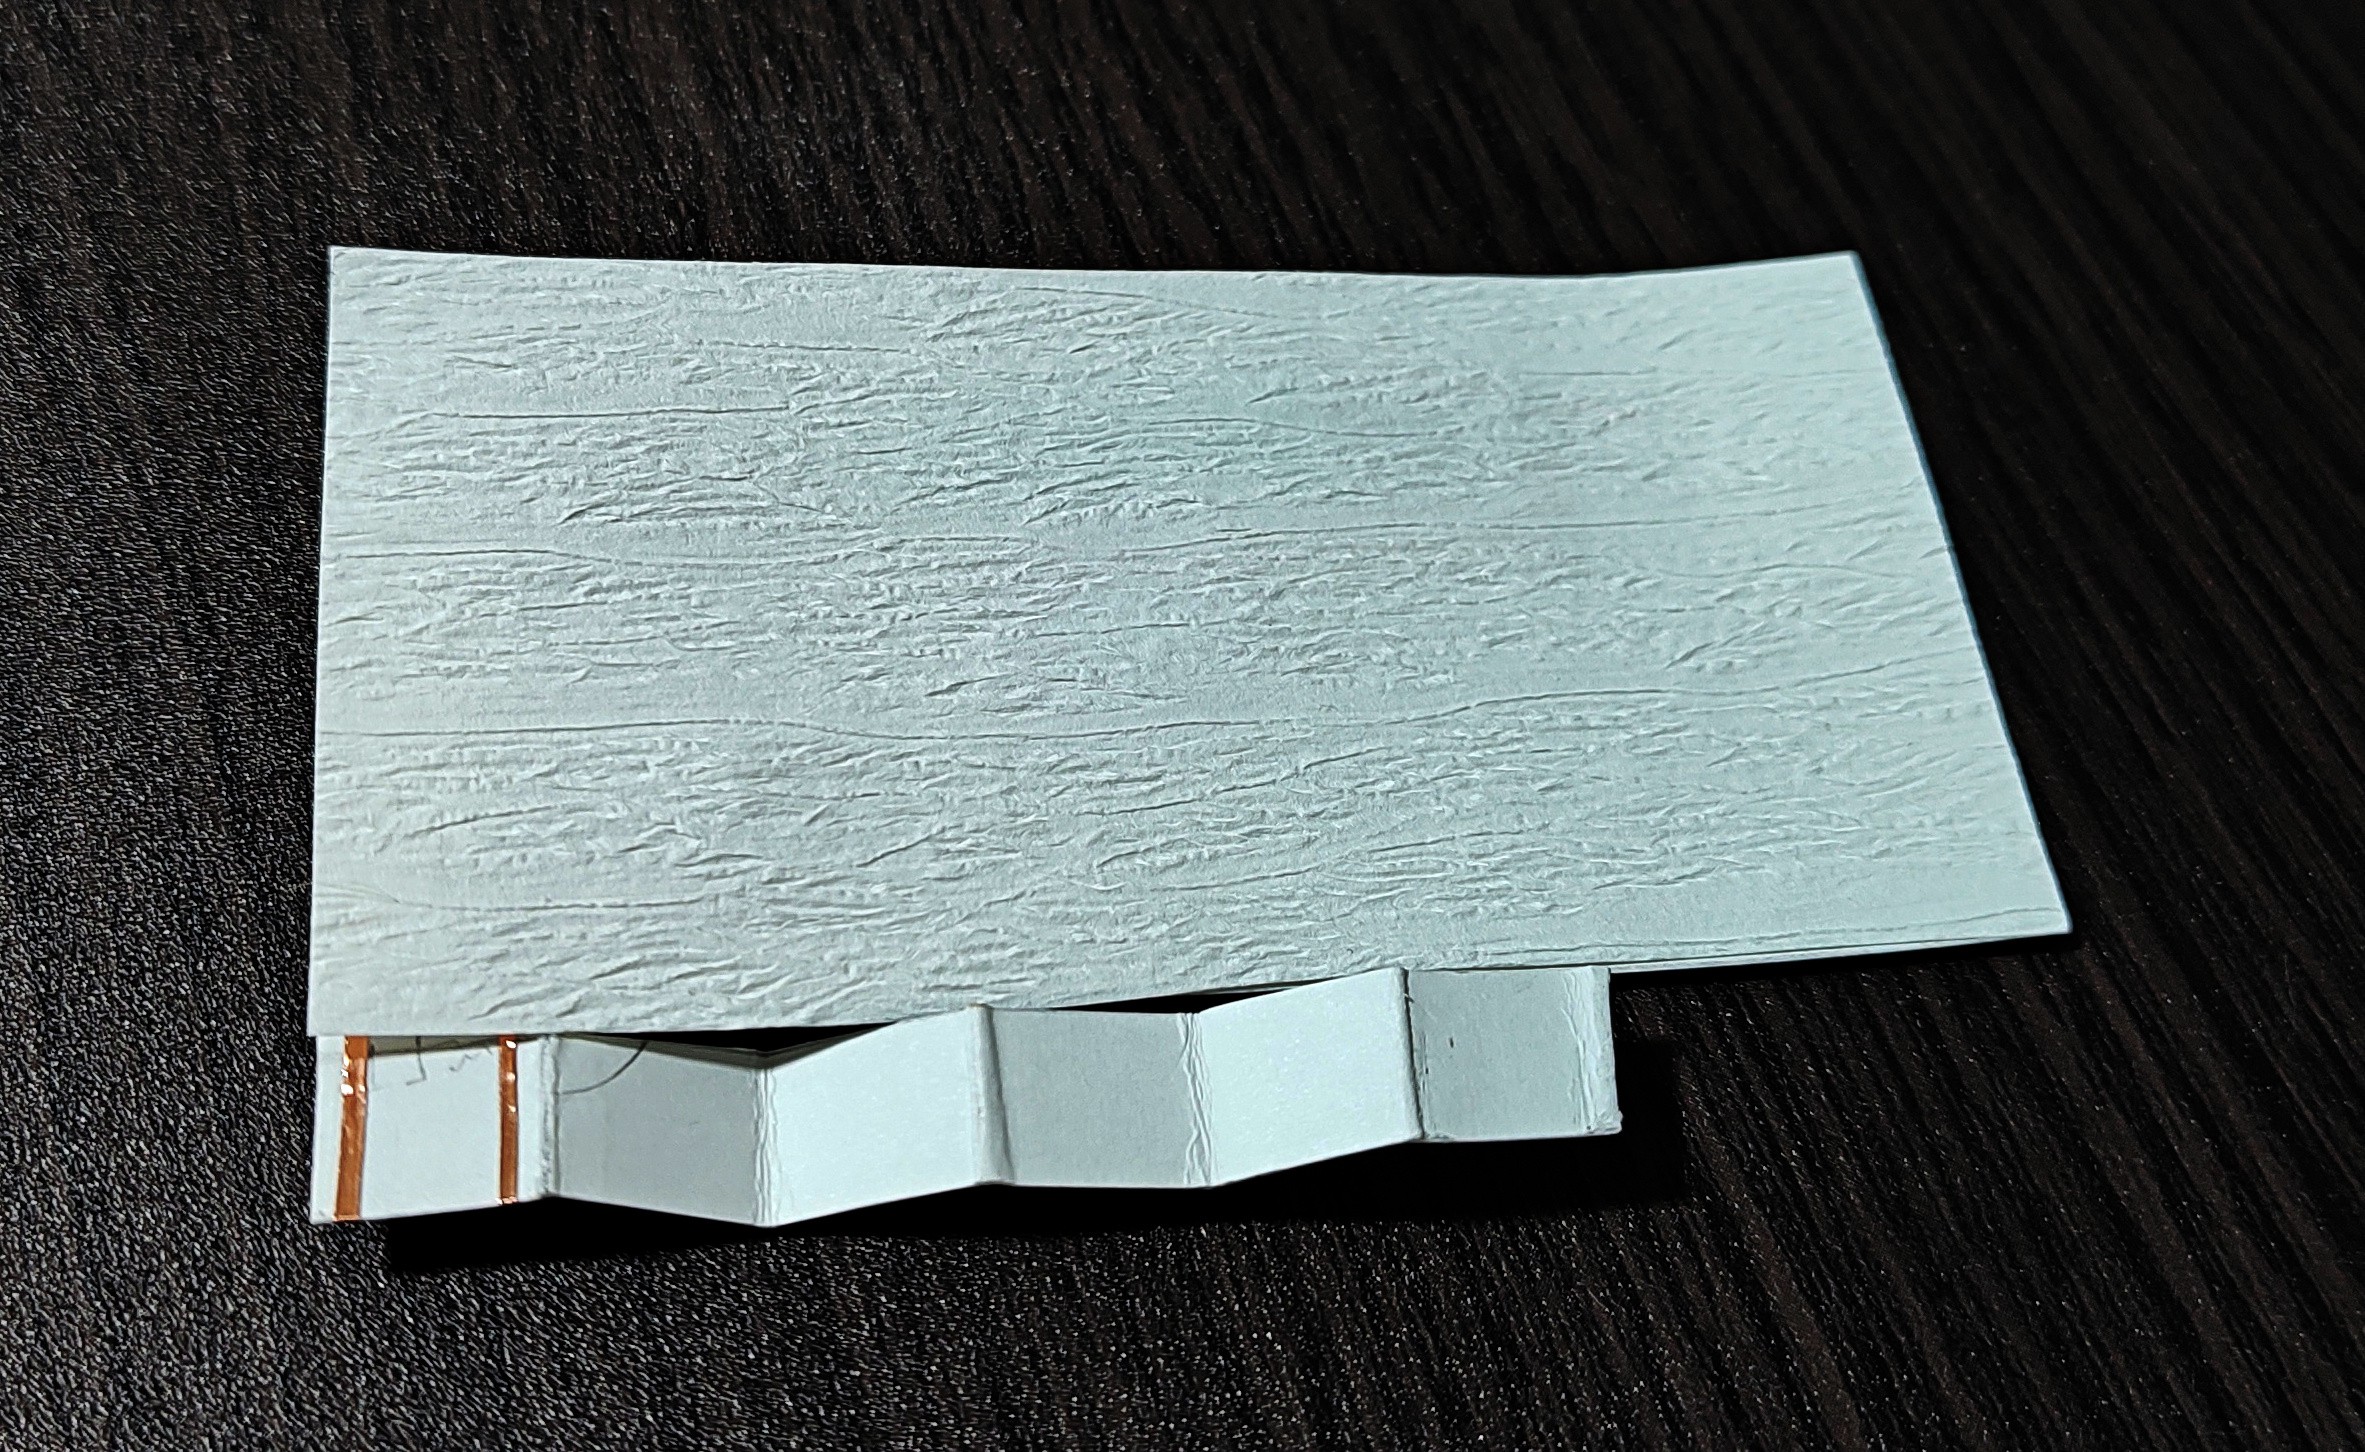
About power source
Since some circuits made in a piece of paper requires a coin battery to interact with, I wanted to eliminate it by using the power source coming from the USB port. However, it comes with another problem: a sheet of paper does not have the thickness necessary to stay fixed in the USB port. Thus, to solve this matter, folding only a part of business card could gain the necessary thickness to stay fixed into USB port.
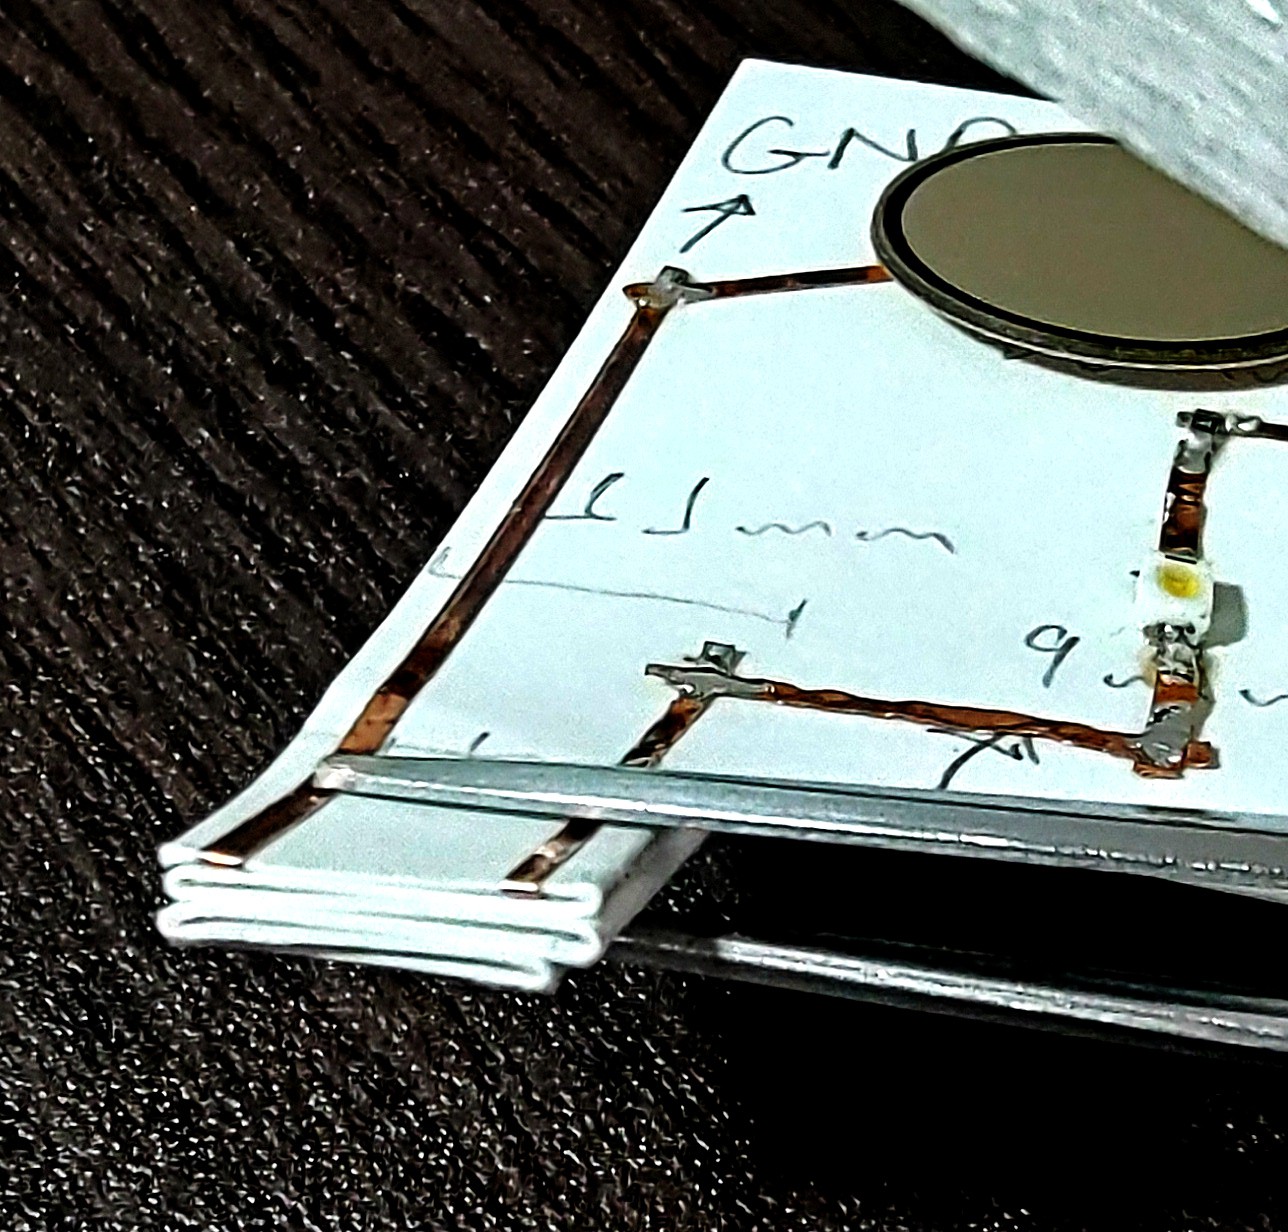
About interaction with the user
I wanted something simple like a button and LED as a interaction, not something too far complex. In this stage of development I acquired a pressure sensor to get an idea of what I wanted, but this component is quite expensive compared to the rest of material (U$7,50), then I decided to make a button using only the copper tape and paper, as it will be explained later.
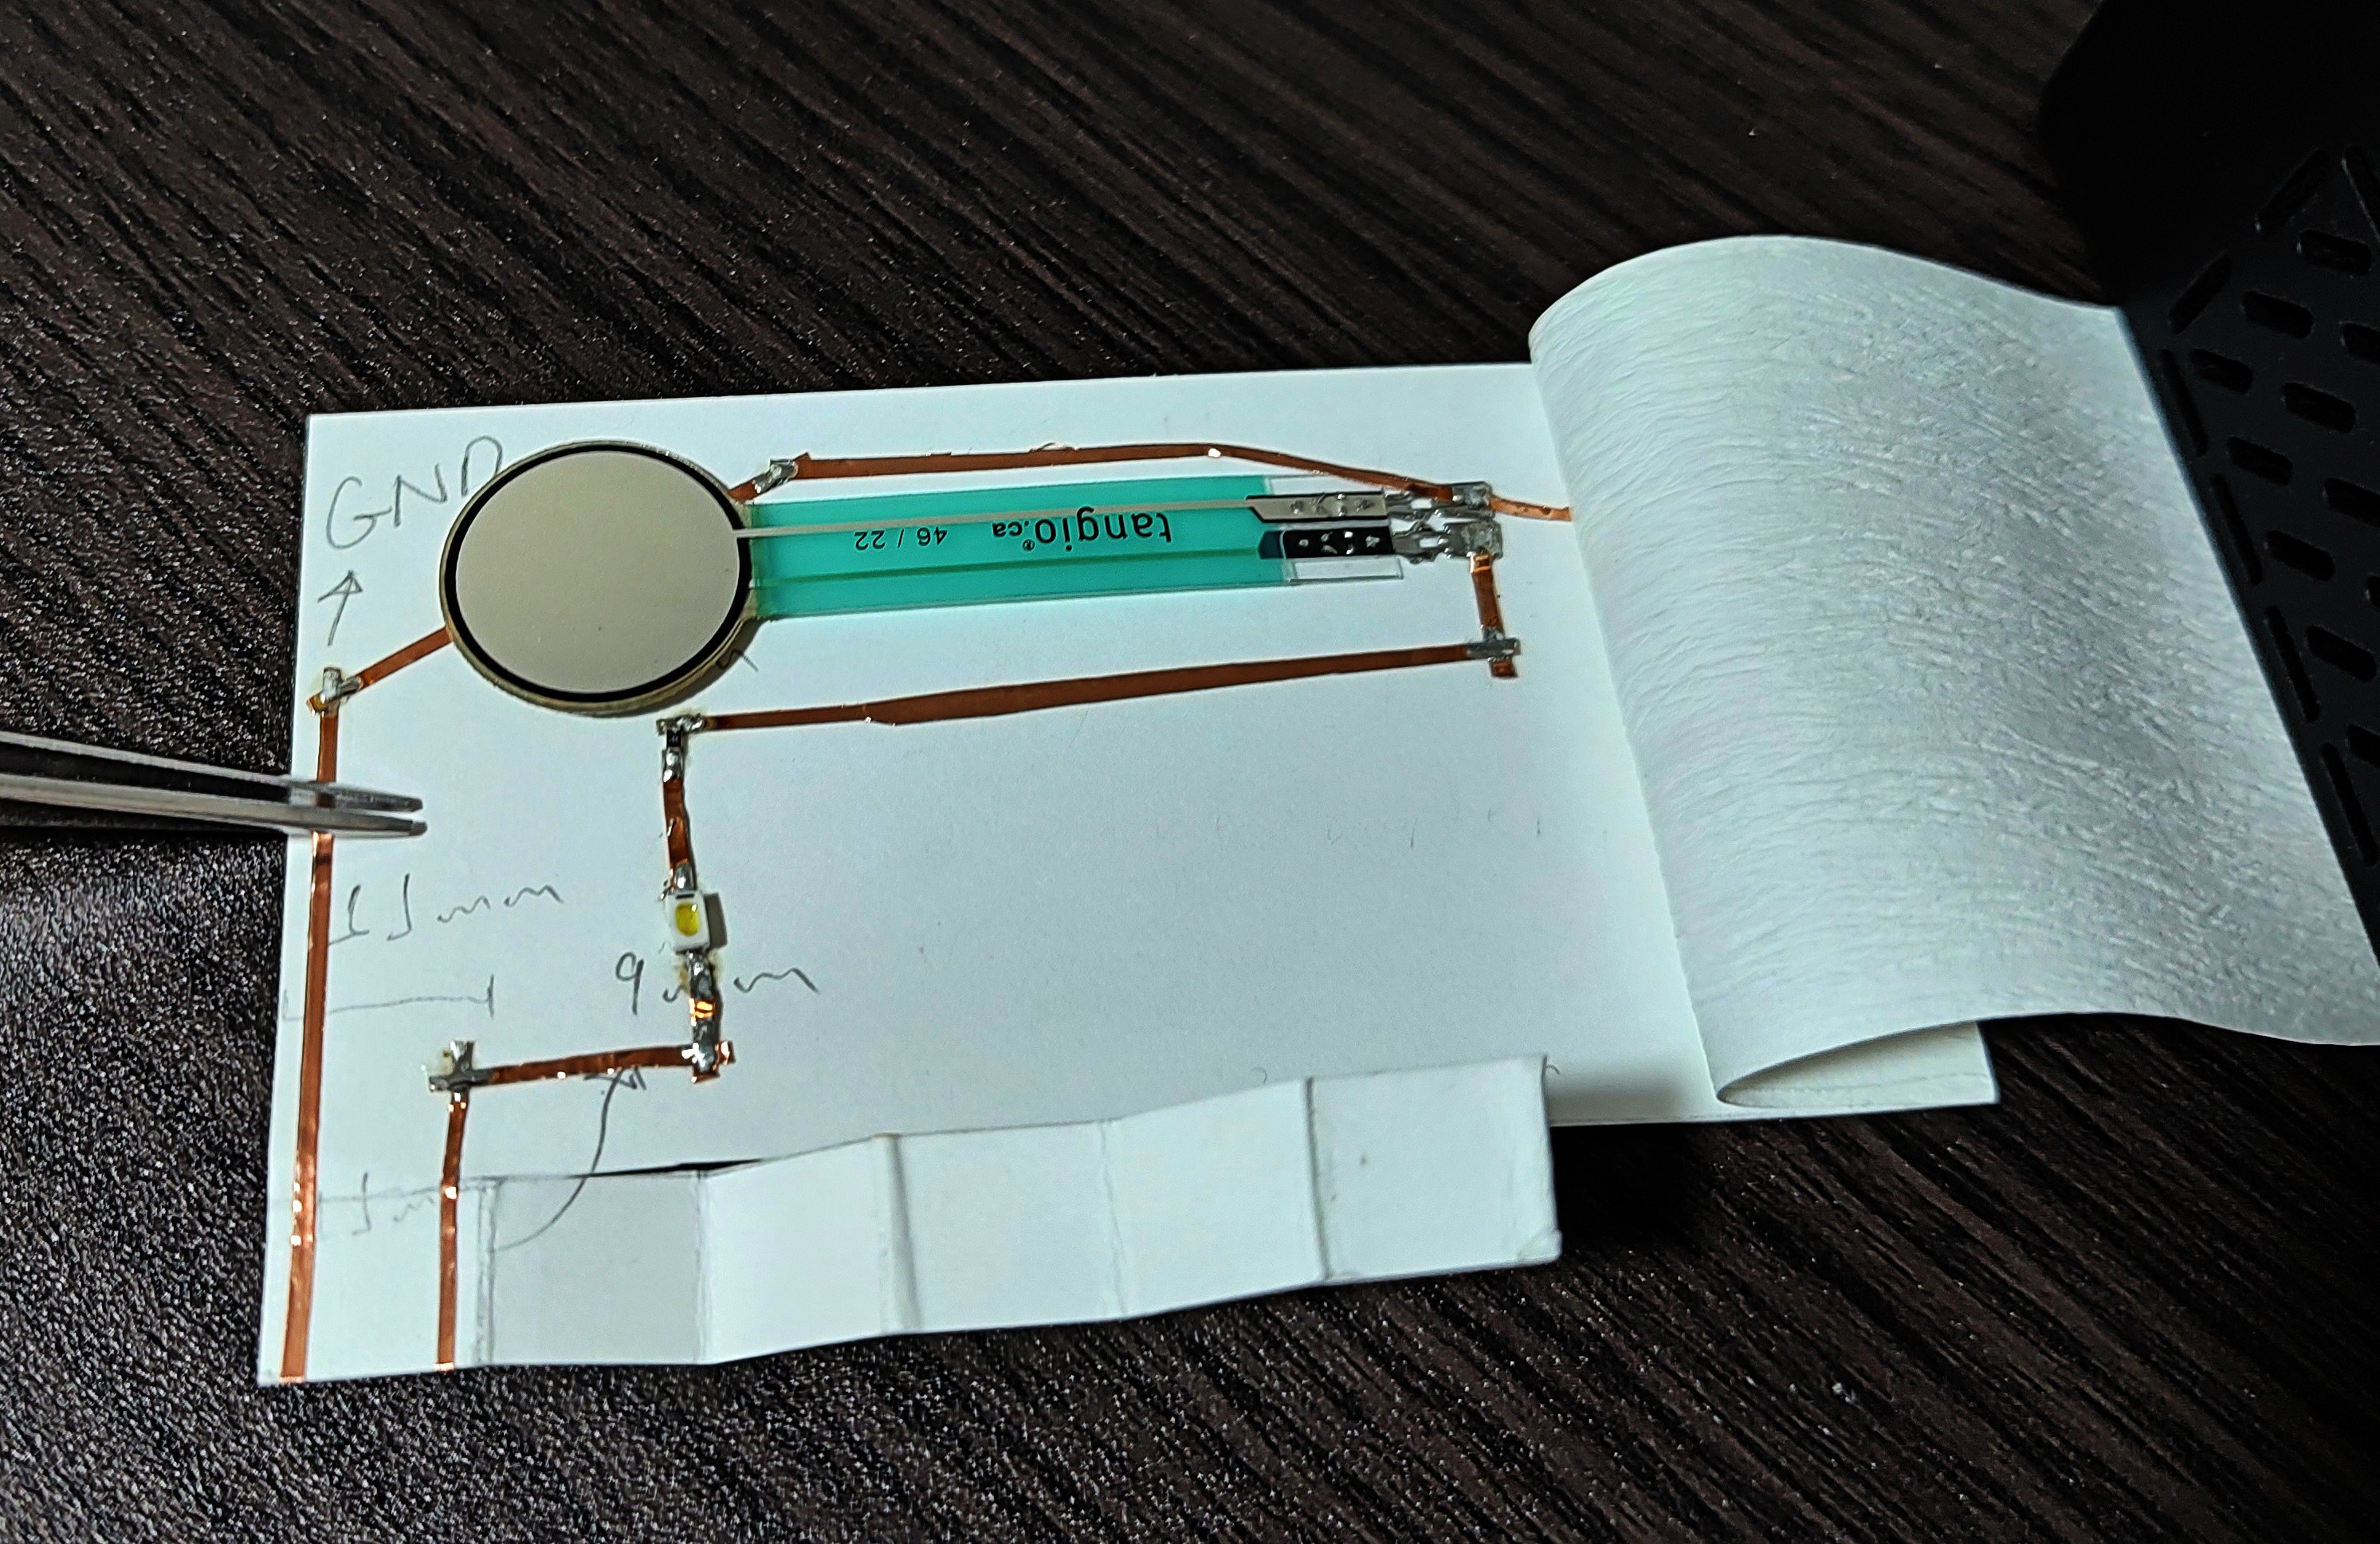
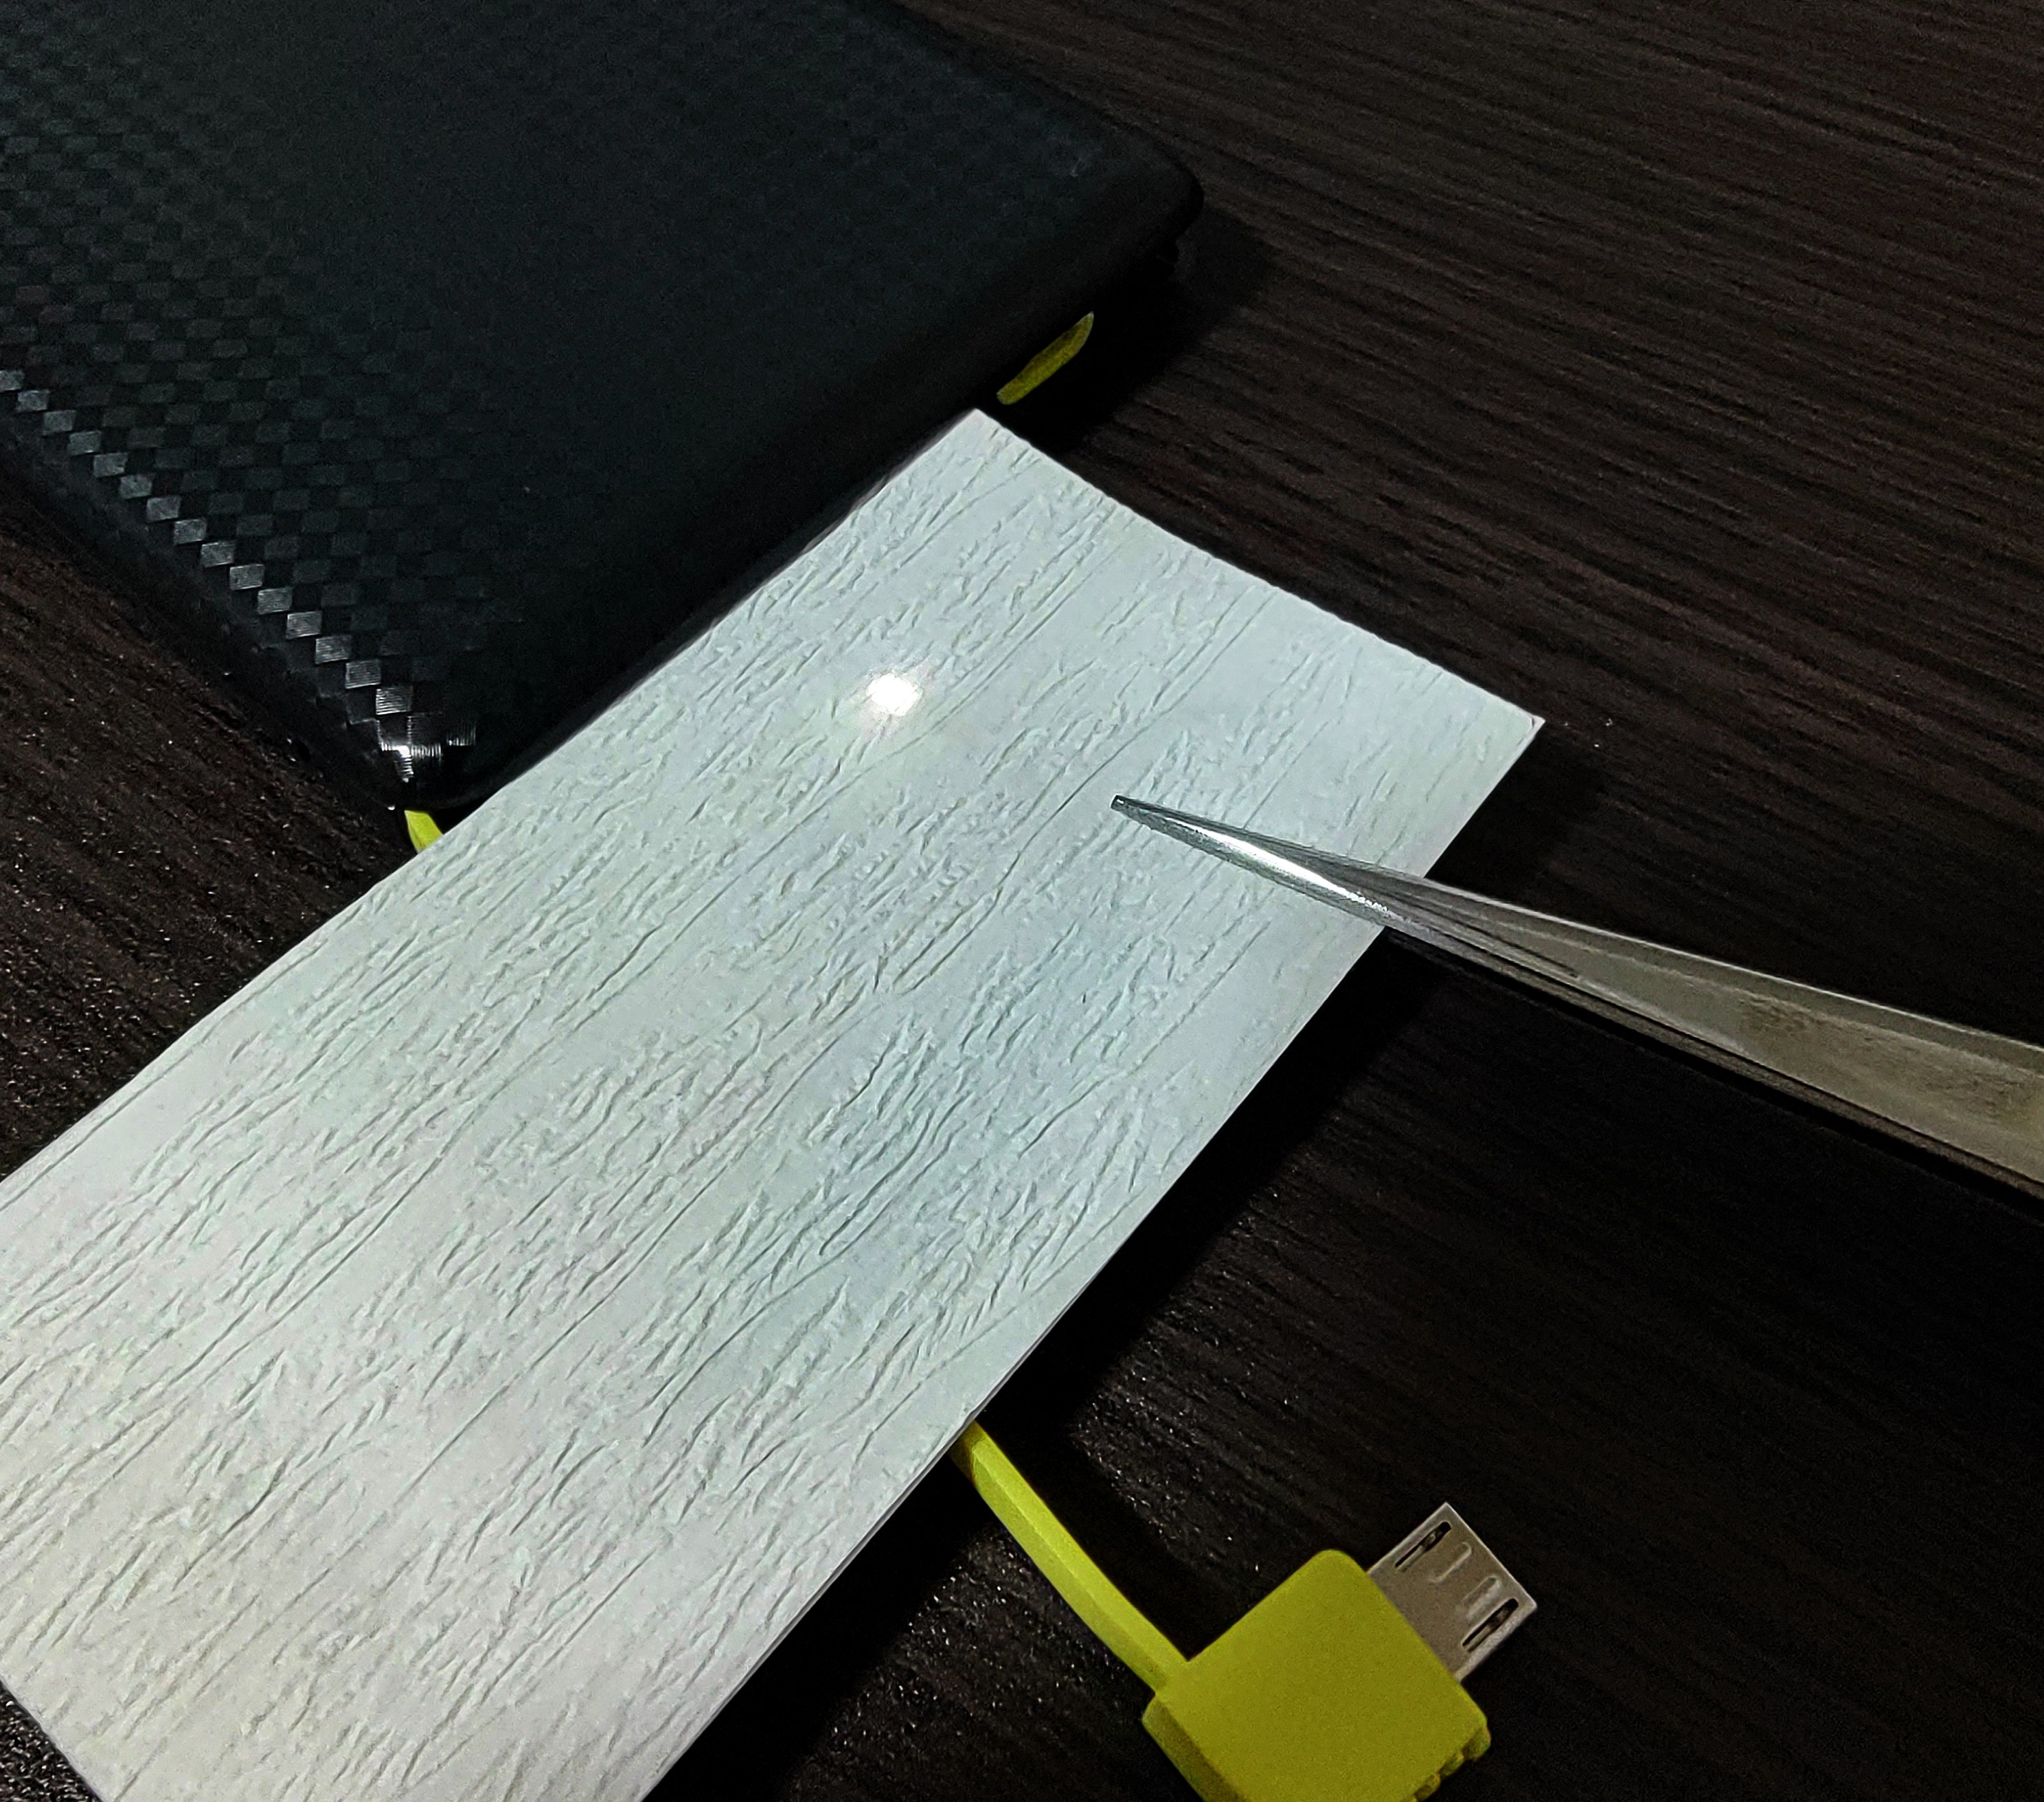
To make the circuit, I cut and soldered copper tape in the desired format. When plugged into the USB port and it lighted up under the paper, it was a “GO signal” to proceed with the project and enhance.
Step 1 – The illustration and information in the card
The card is composed by one thin and one thick papers.
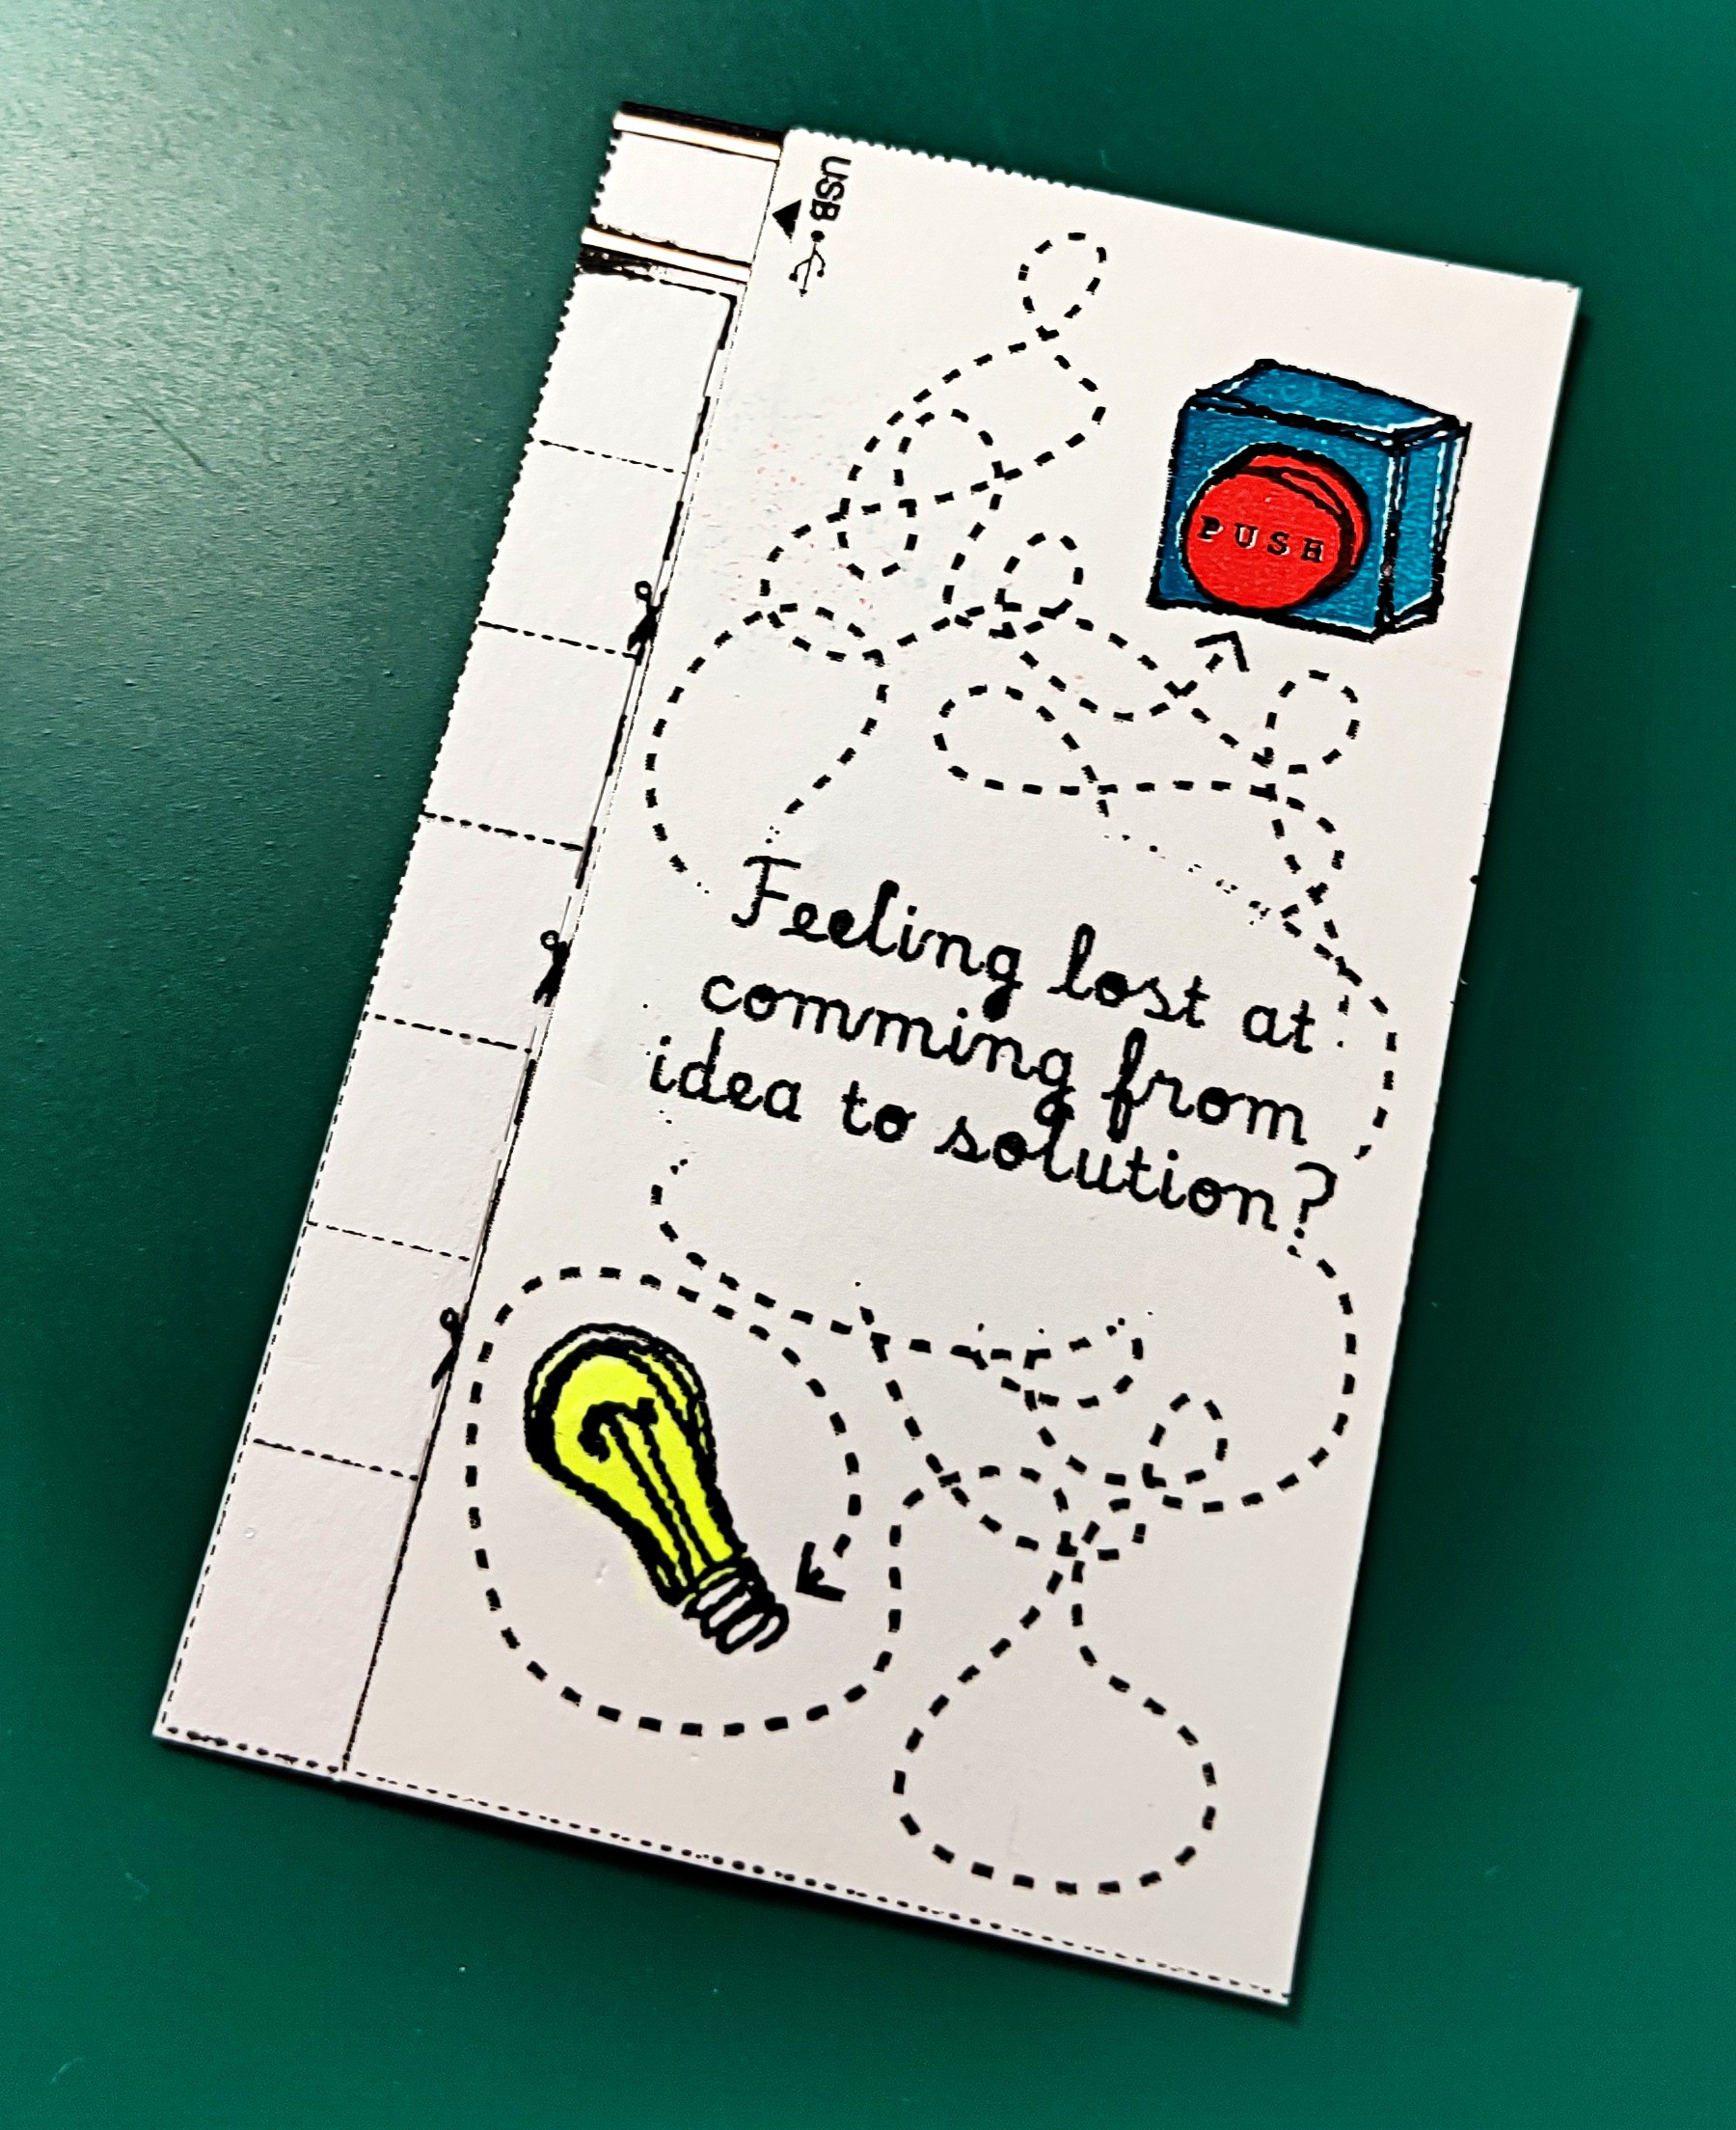
For the illustration, we use the thin paper to the light be possible to bright more and better. The card illustration is simple like a button and a light as you see below. I am not a professional illustrator and the neither a professional marketing guy to pick the best phrase. And yes, I noticed that I misspelled “coming” in the last second of development...
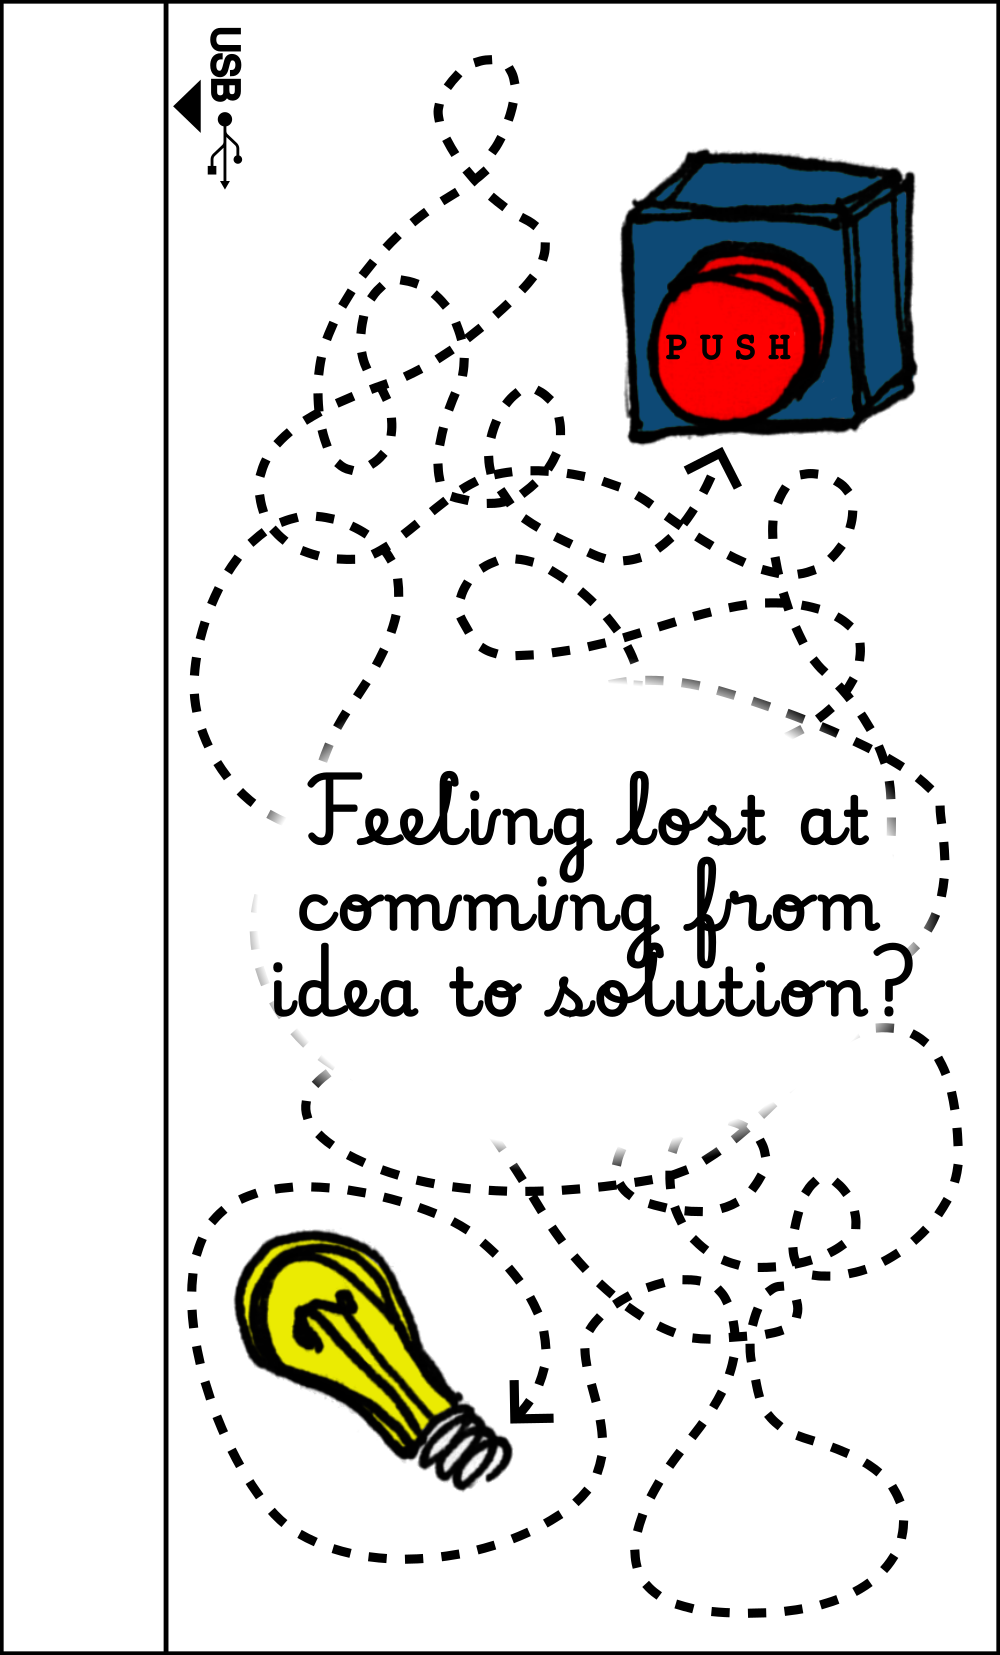
By the way, the size of a Japanese business card is 55 mm X 91 mm. The previous image have this size or proportion, but the line beside the indication of USB port will be cut for the sake of thick paper that comes under, as explained in the next section.
For the
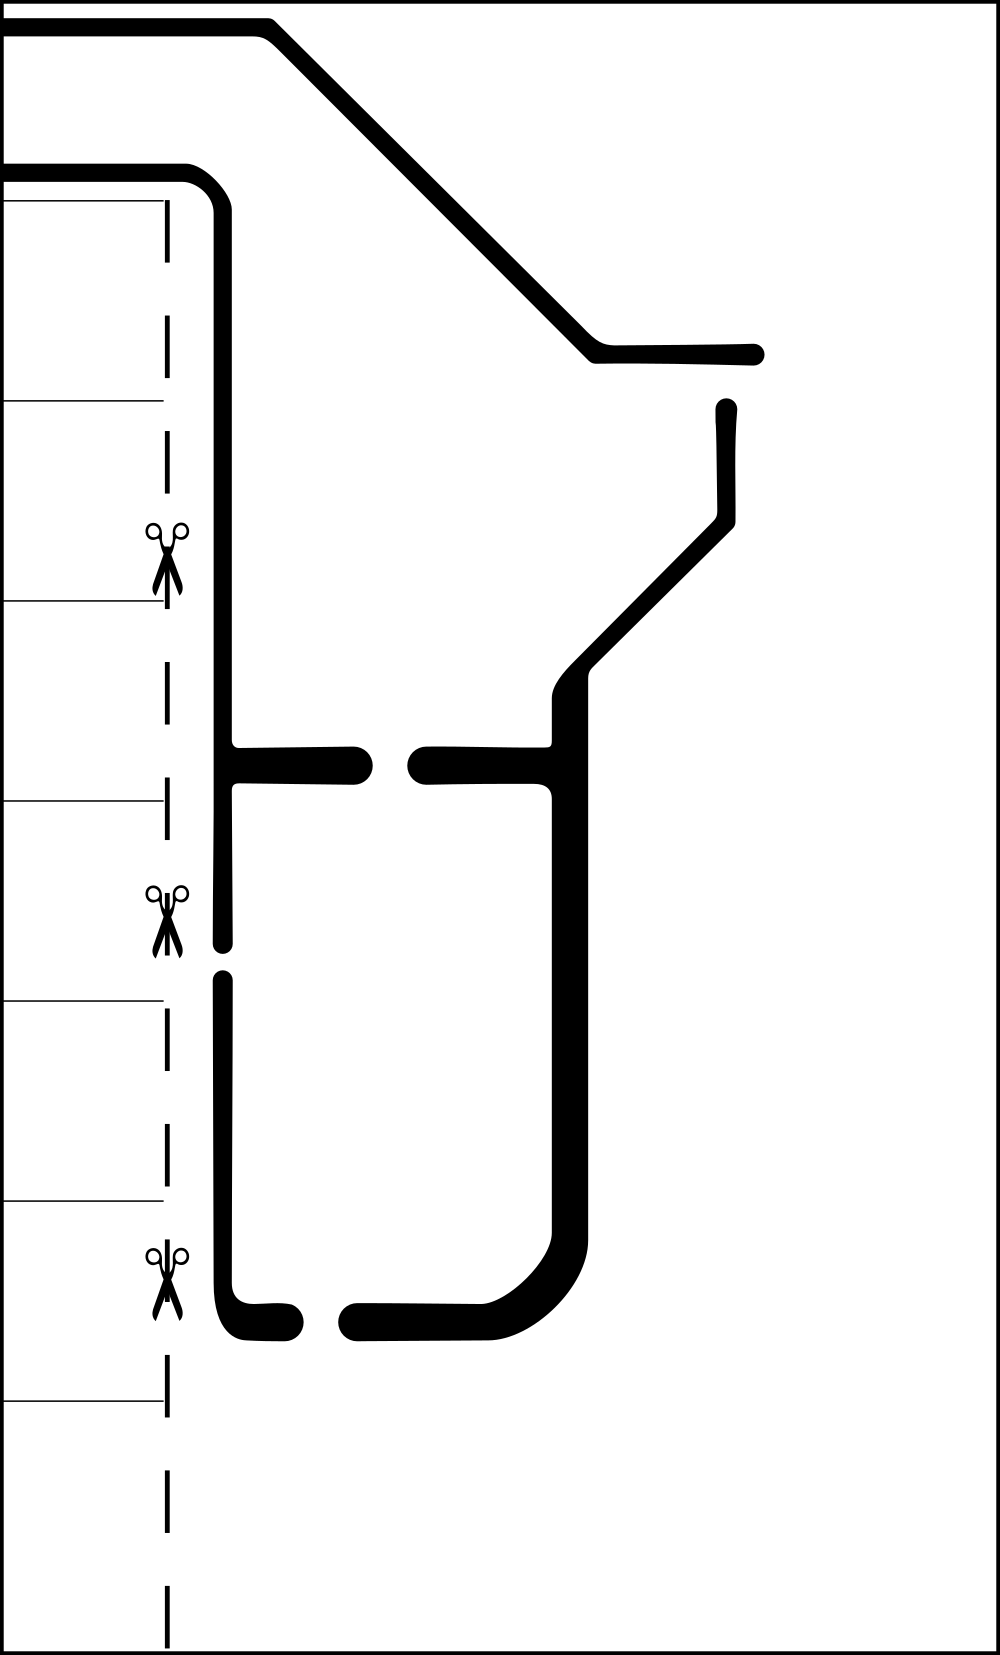
thick paper, I will use both sides. The one that the user will see
have a simple text, QR code and instructions to how to handle the
card. I put some cutting and folding lines to try to indicate
roughly where to do them.

In the back of this thick paper (the inner part that the user won’t see because it’s glued to the thin paper), there is a circuit indication that will be clarified later.
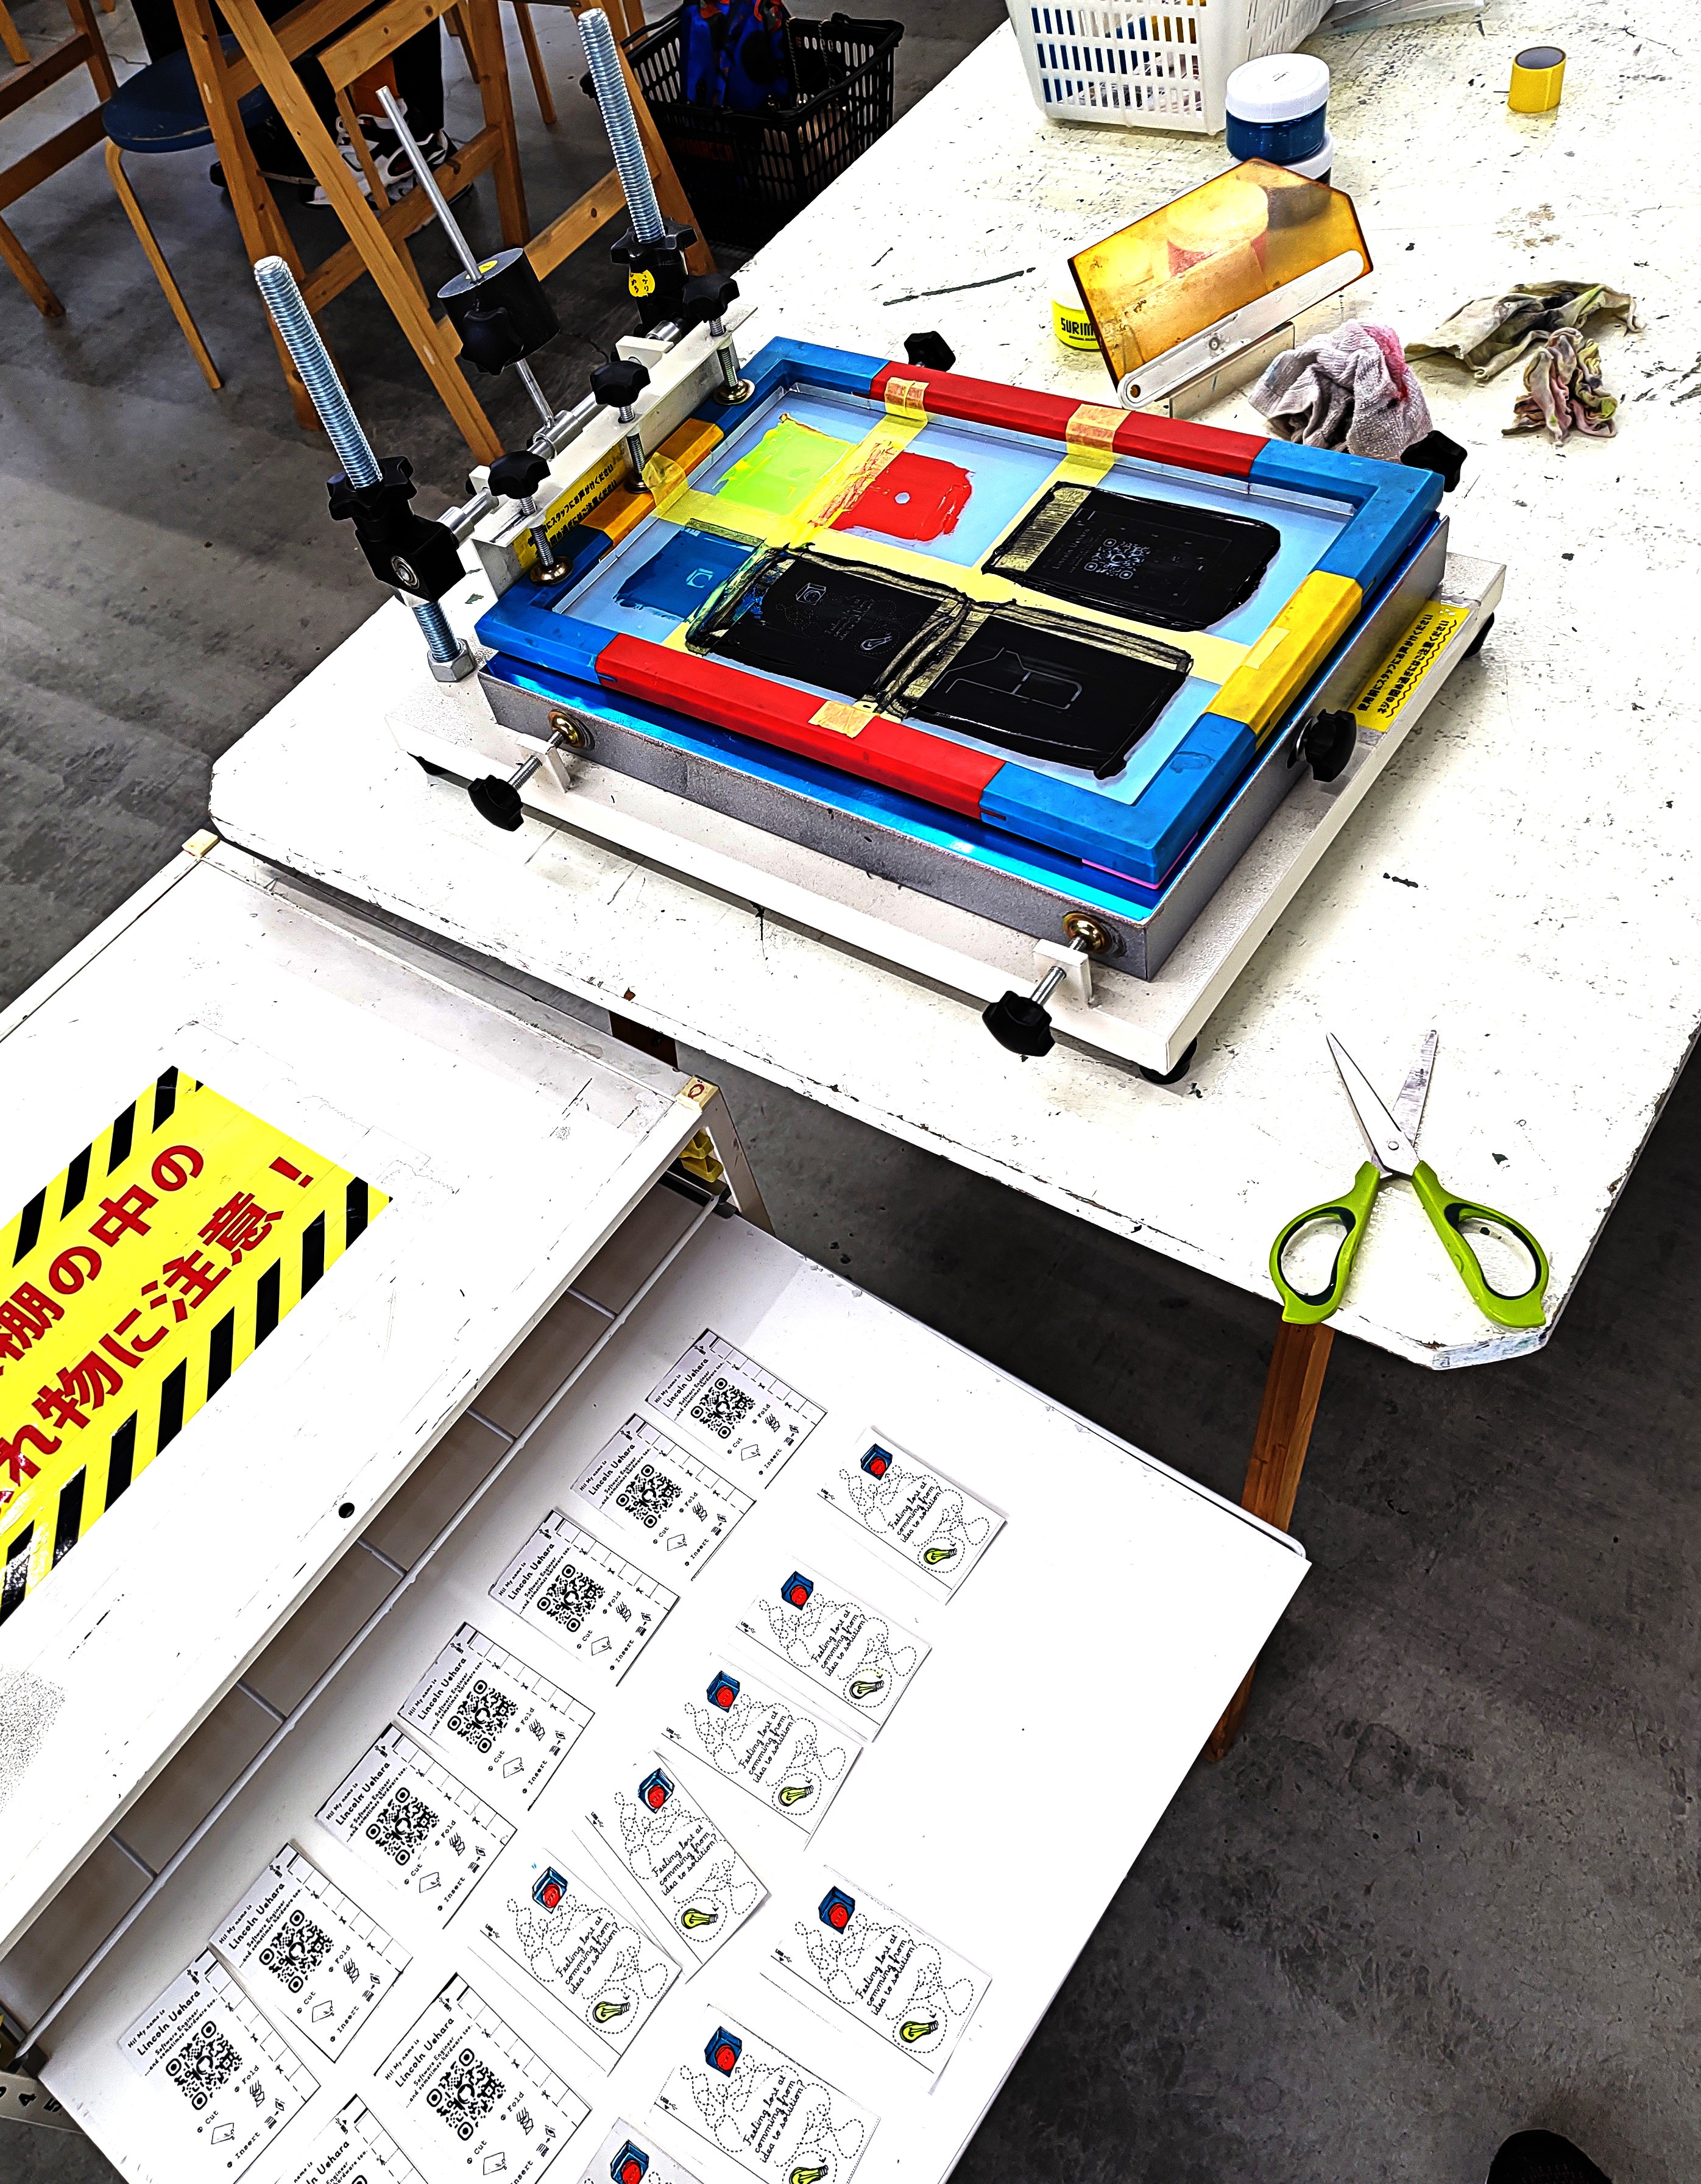
For a lot of reasons (specially time), I decided to make my cards using silkscreen technique. There is a rental space in Osaka called JAM where we can make business cards, t-shirts, towels, etc. using silkscreen by ourselves.
Step 2 – Electronic circuit
I used a sheet of adhesive copper and the cutter machine SDX1200 from the brand “brother”, that I found in a maker space in Osaka called The Deck.
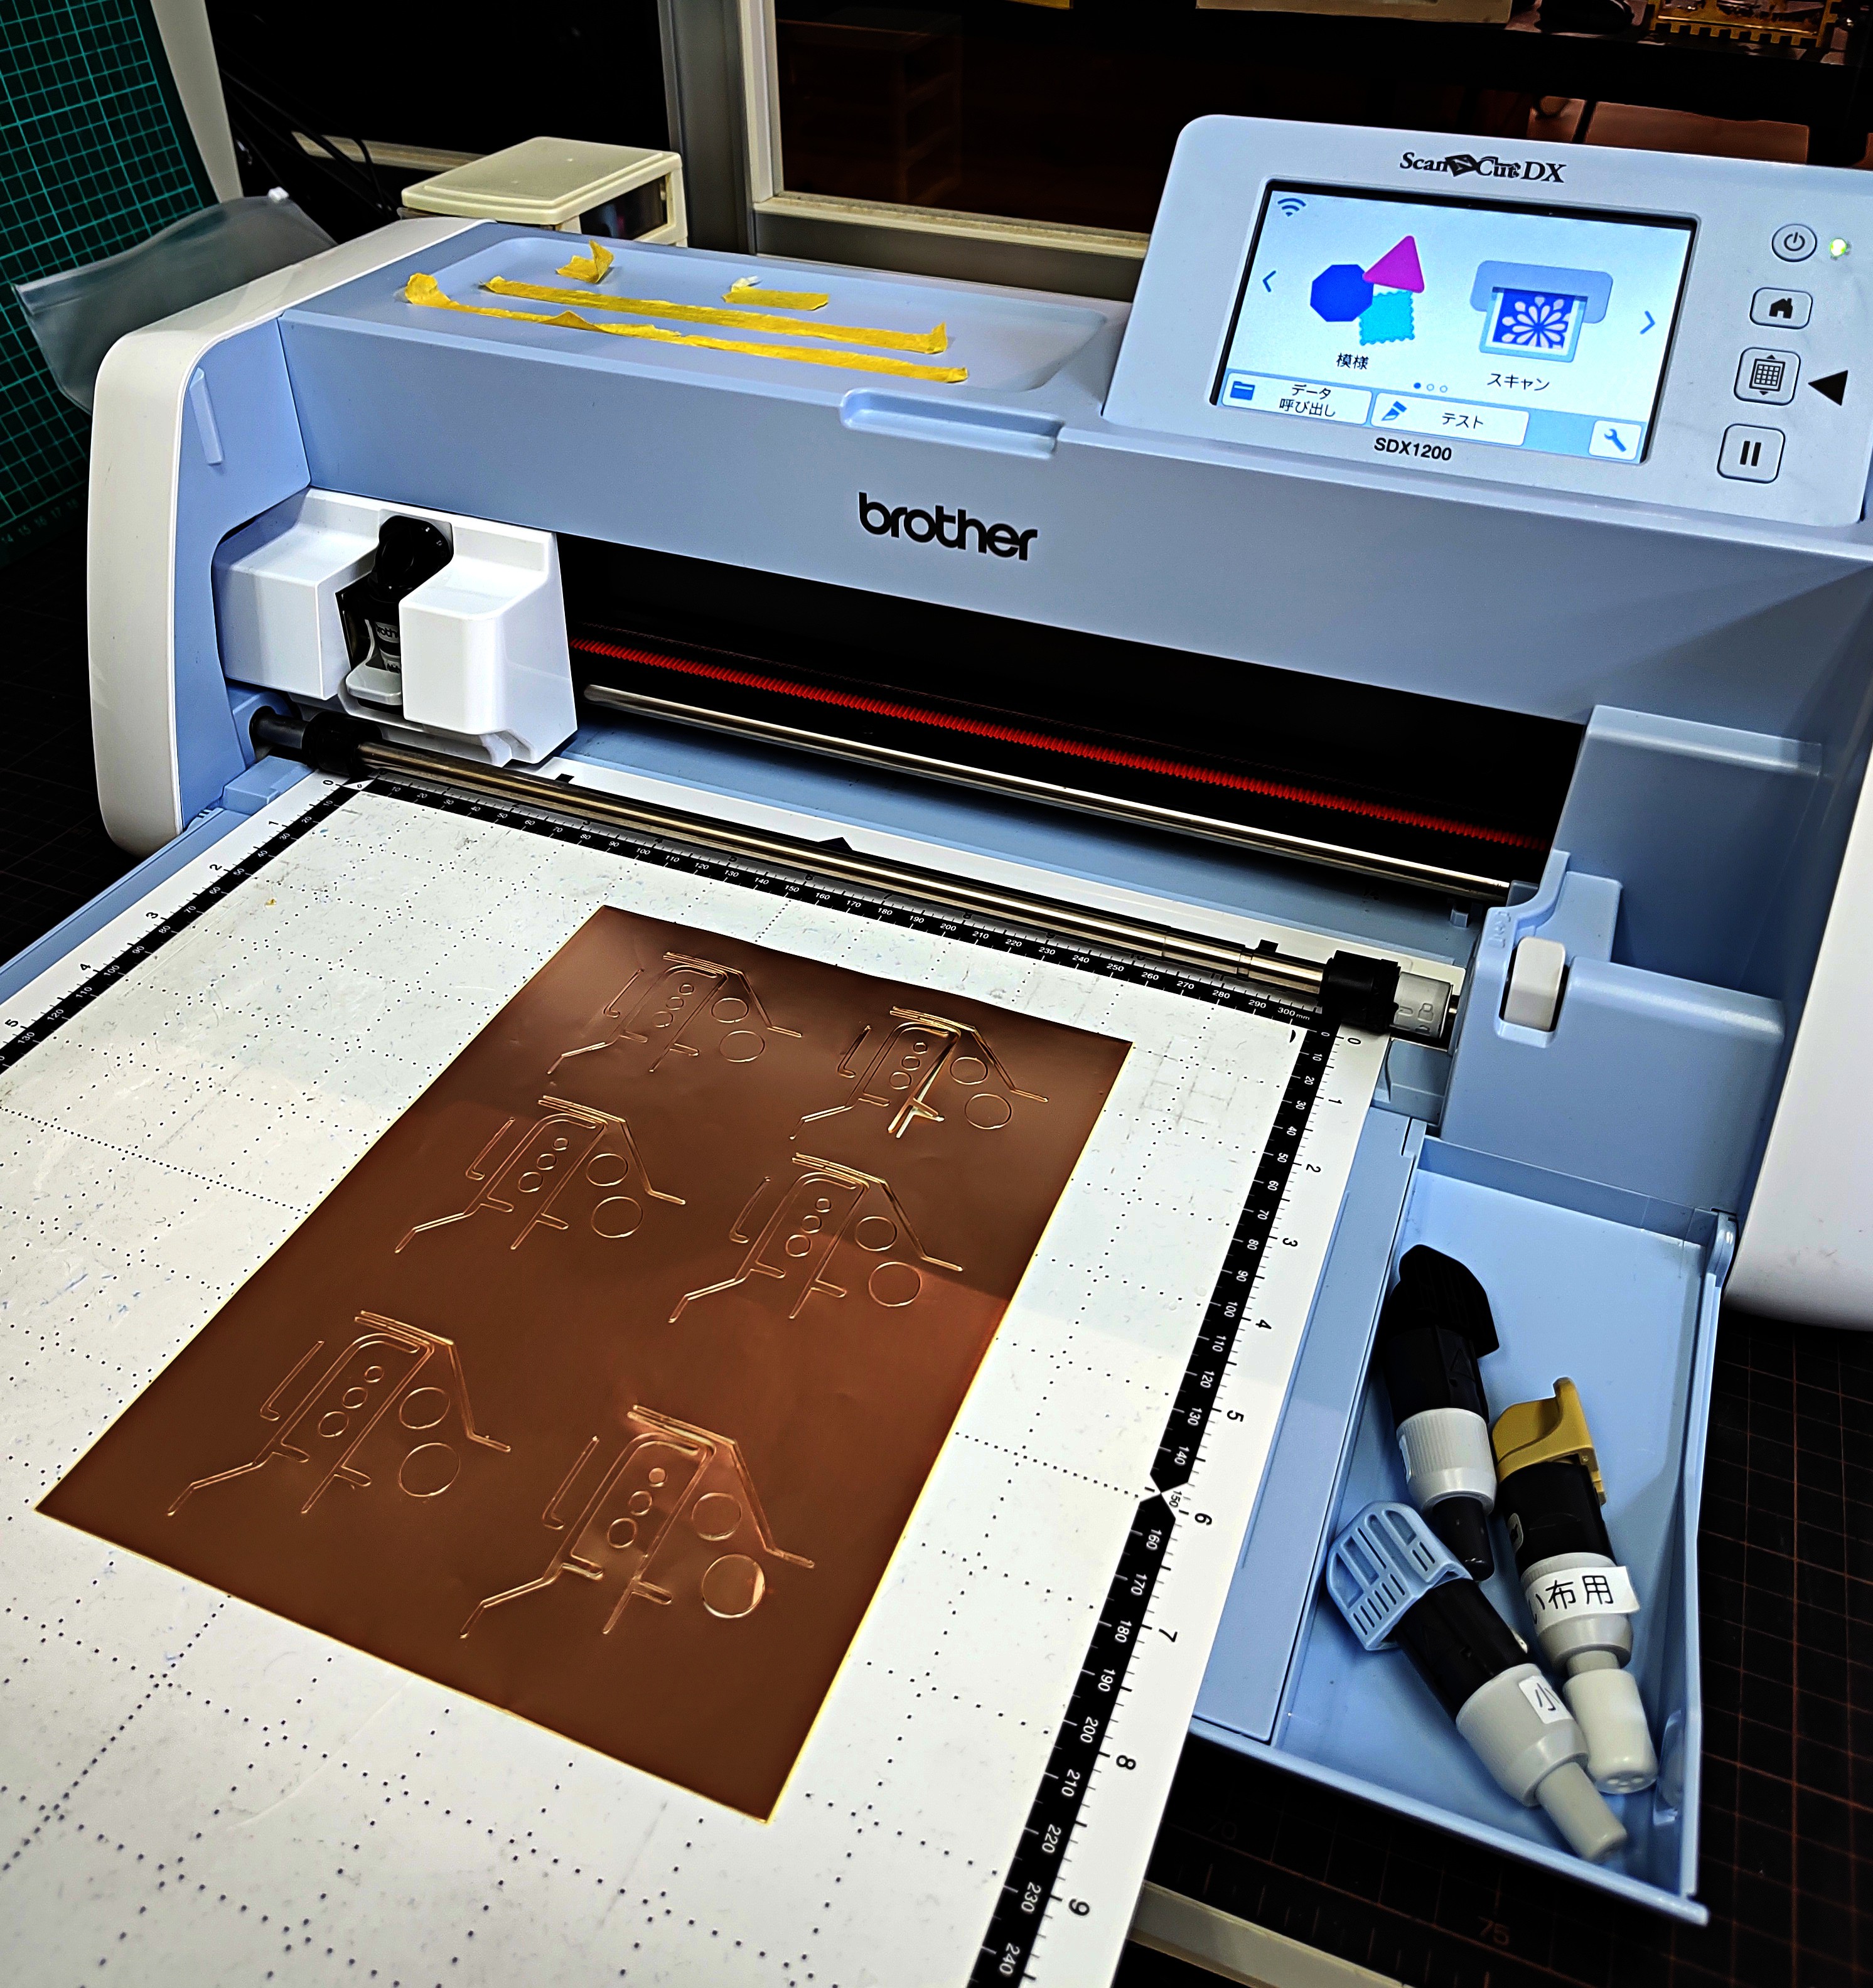
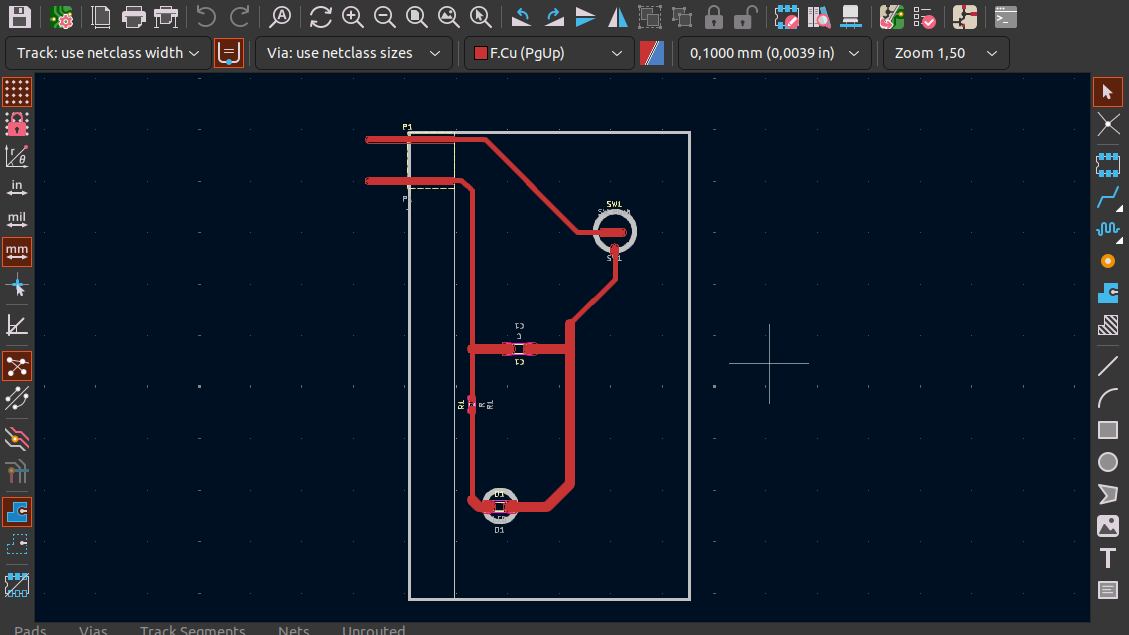
I
designed initially
the circuit on Kicad, but since
the cutting machine does not deal well with sharp edges, I had to
redesign the
circuit on Inkscape to be more circular. It was a back and forth
between Kicad and Inkscape to match the positions, etc.
Step 3 – The Assembly and some further explanations
As you can imagine, the copper tape comes in the exact format in the circuit and thus there is no need to do a lot of soldering points. The mark made in silkscreen highlights the position that the piece should be put.
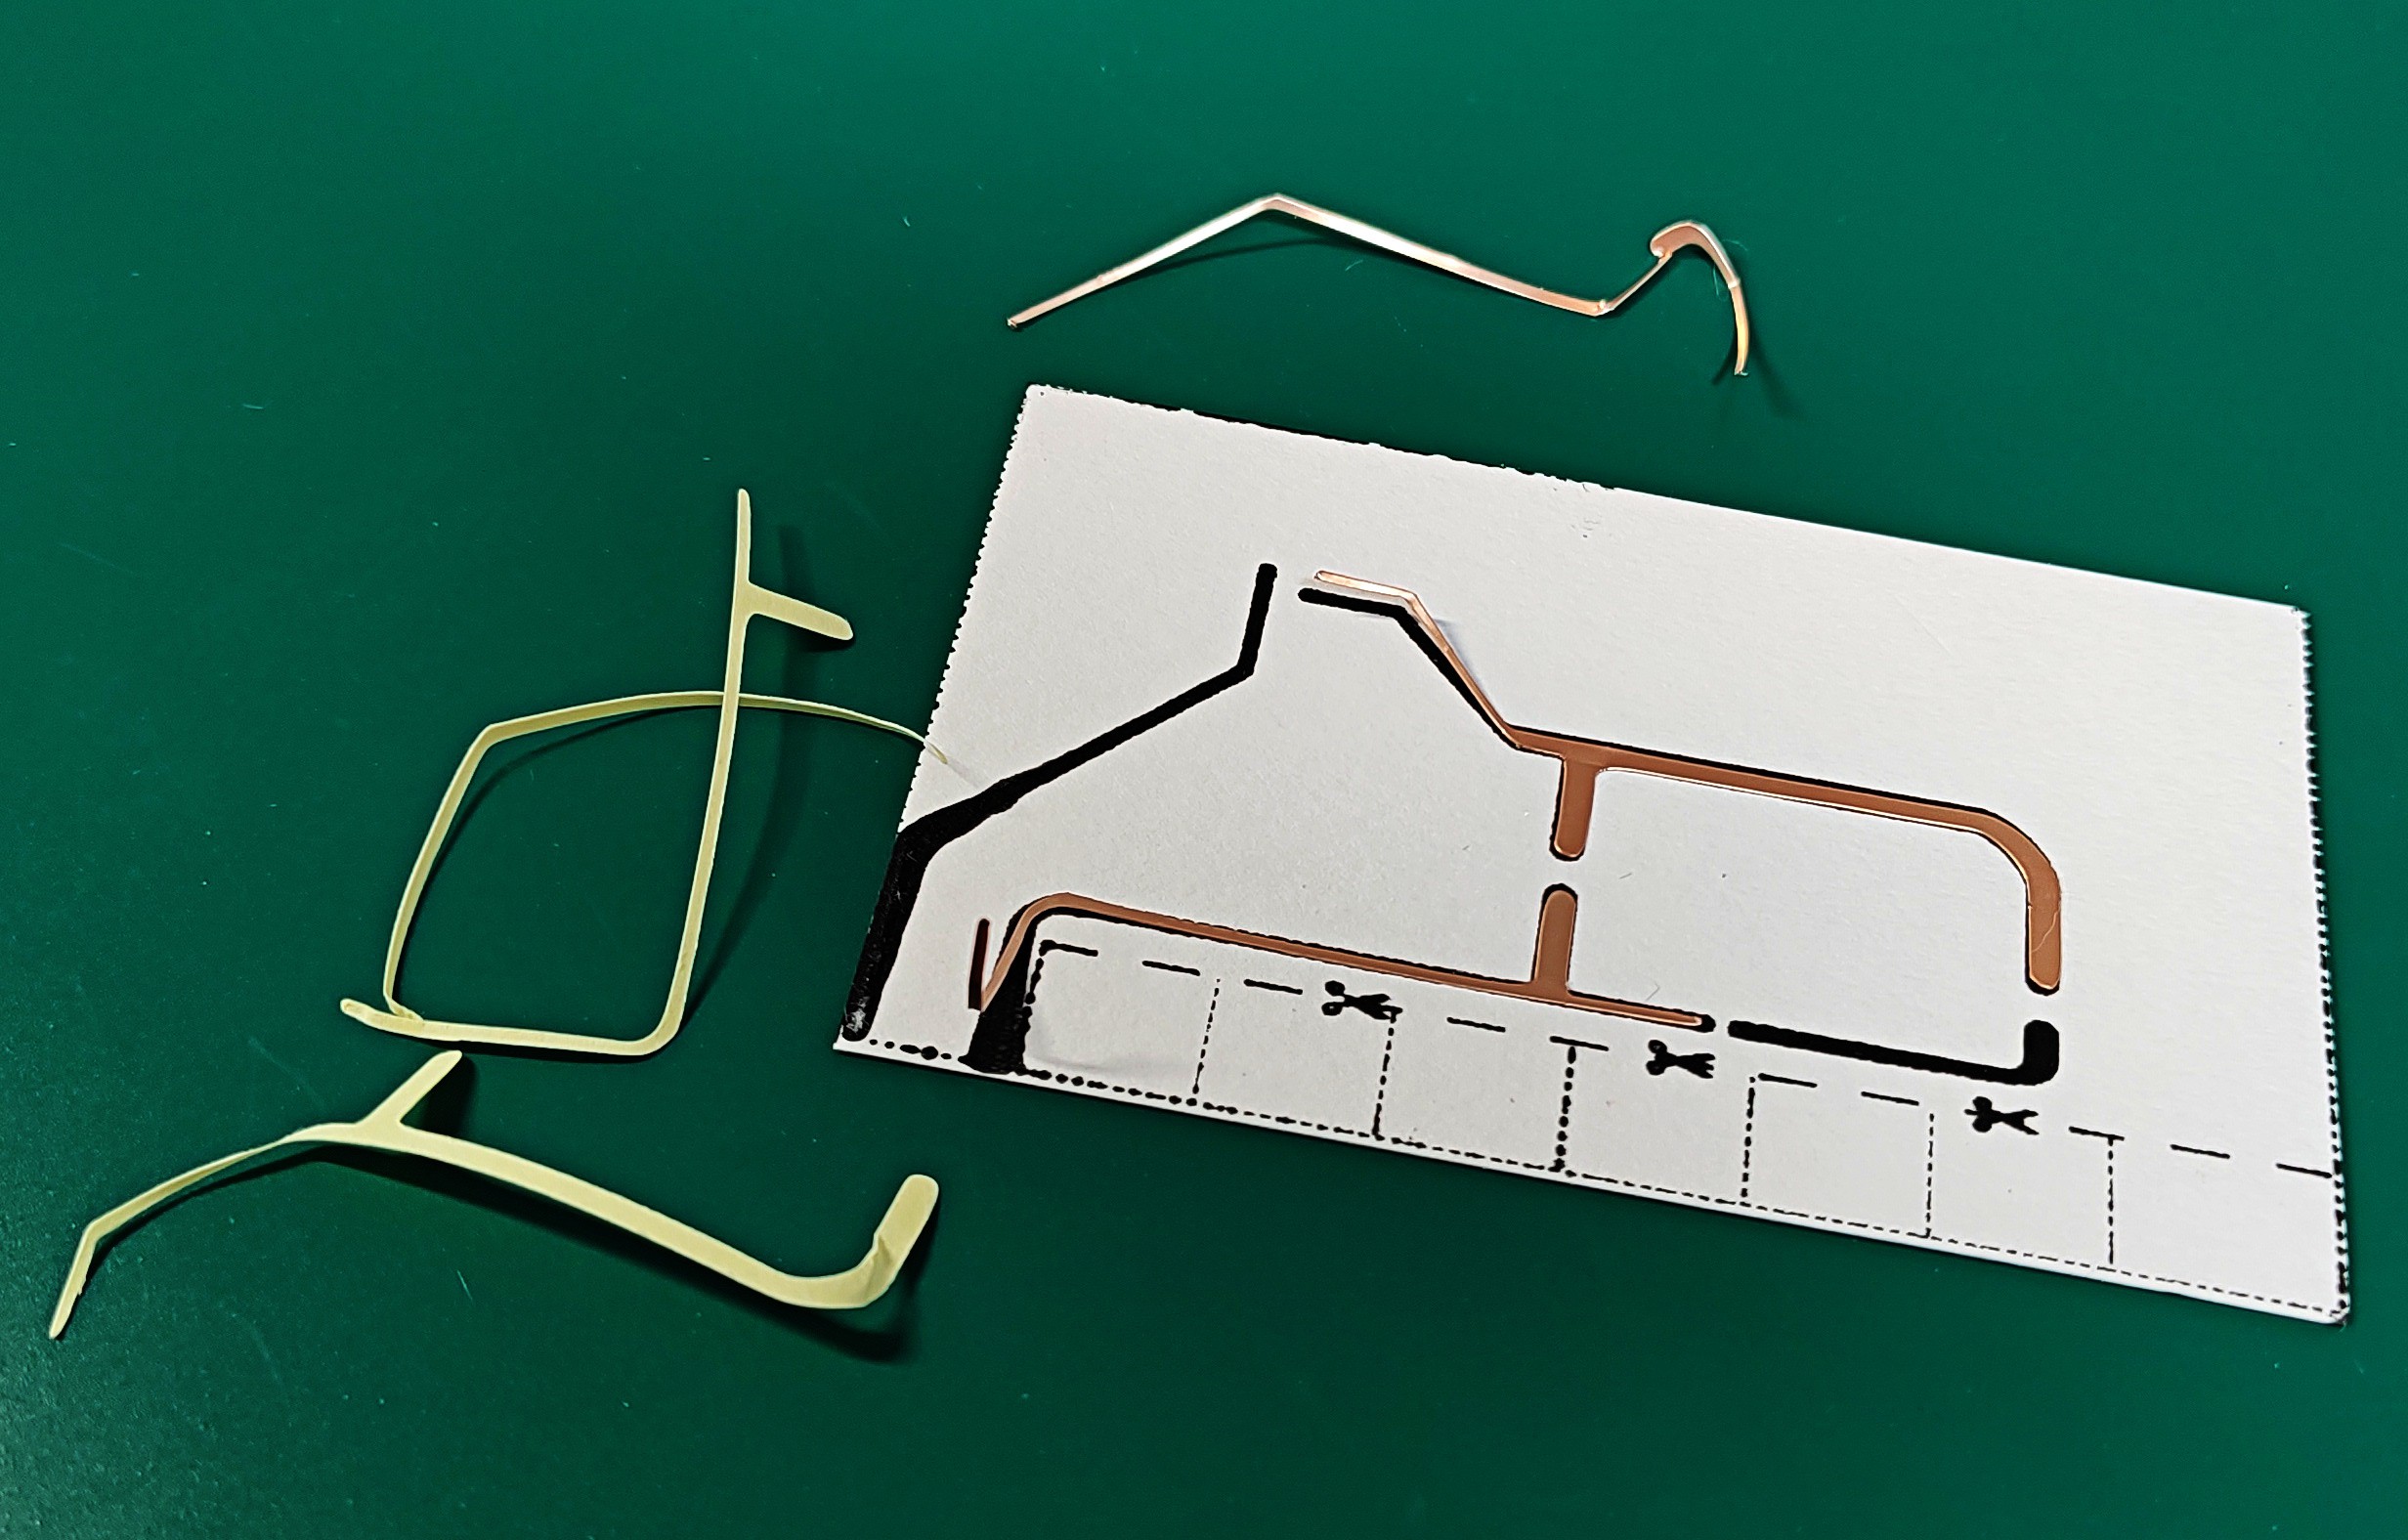
About the button, I excluded the pressure sensor and made a button exclusively with paper and copper tape, as you can see below and explained further as follow.
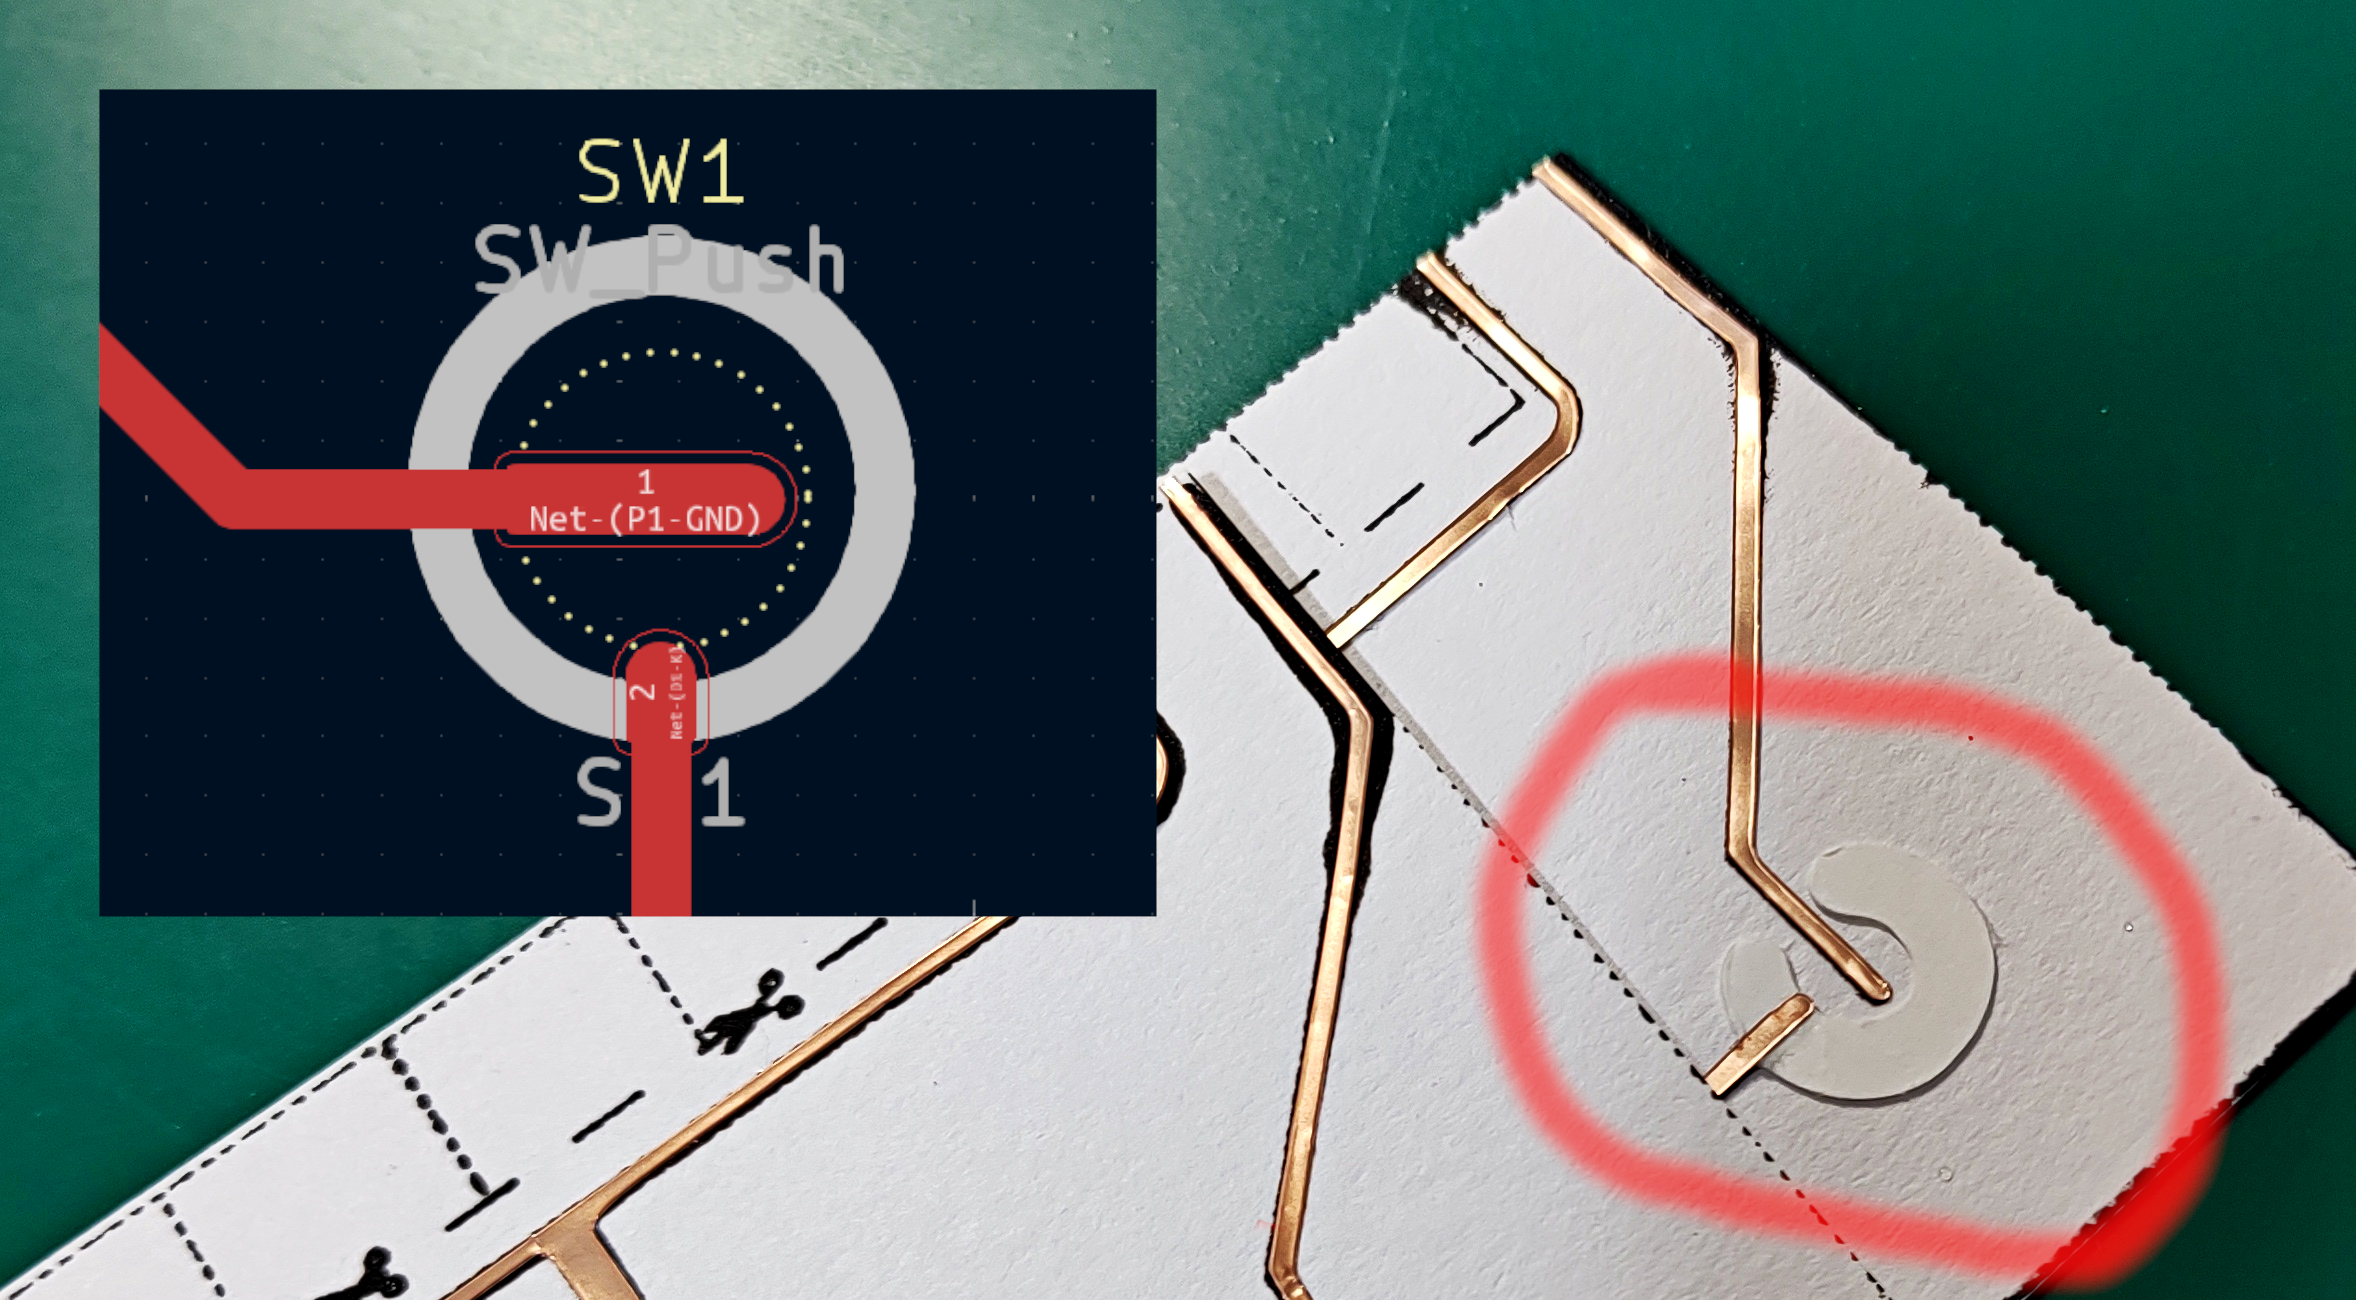
In the thick paper, two copper tapes are not in contact, but one of them is surrounded by a paper in “letter C” format, and another one “climbs” this paper. On the verse of thin paper where the illustration is, there is a copper tape in circular format, which without fingers pressured stays flat, only in contact with the copper that climbed the “letter C” paper in the thick paper. When a finger press the button illustration on the card, by deformation makes all these copper tapes in contact with each other.
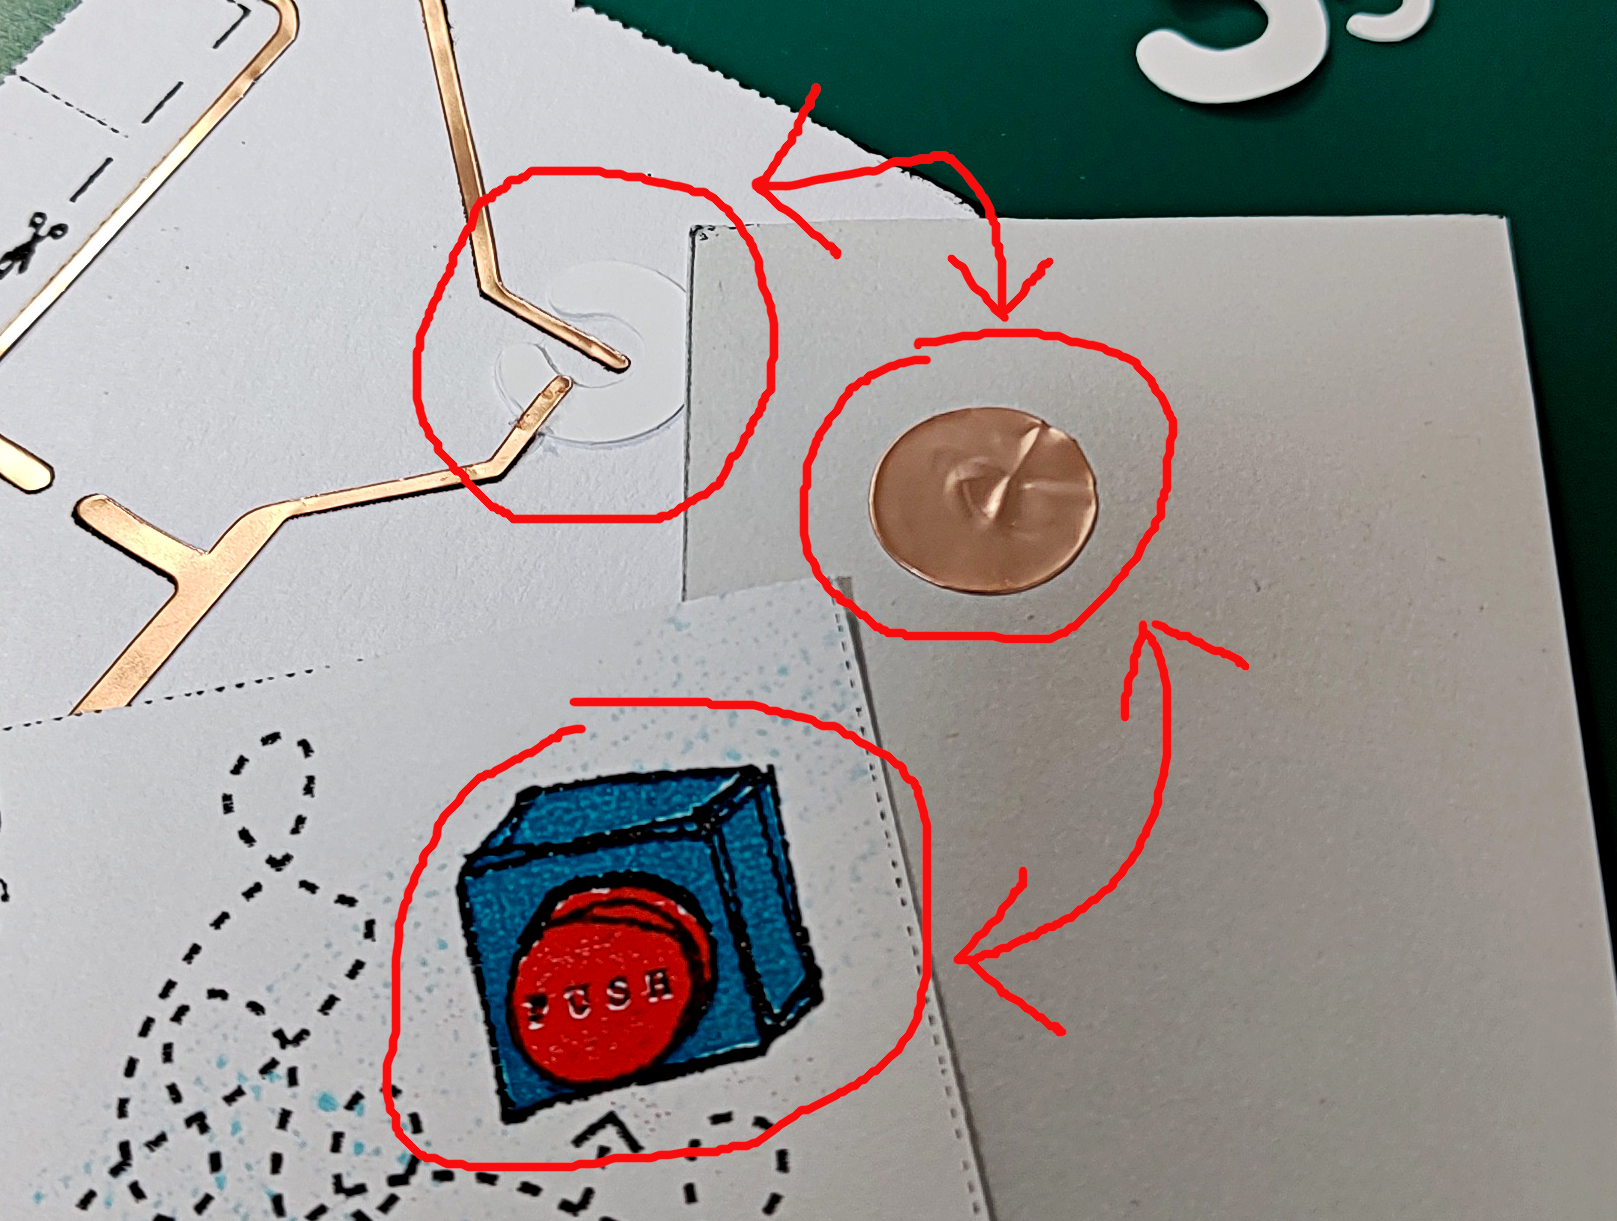
And then, gluing both papers we have the paper business card!!!
About the thickness:
The maximum thickness that we can find in this business card is in that the position of LED, and measuring with a caliper, gives us 1.7 mm.
About the prices per card unit (rough values, without any optimizations or better choice of materials):
Thin and thick paper cards = U$ 1,21
Copper adhesive sheet + cutting service = U$ 0,92
Capacitor + Resistor + LED = U$ 2,04
Total per unit: U$ 4,17
Details of electronic components used:
Resistor → 360 ohms, 1608 package
Capacitor → 390 pF, 3216 package
LED → NSCW100
 Lincoln Uehara