 Icepat
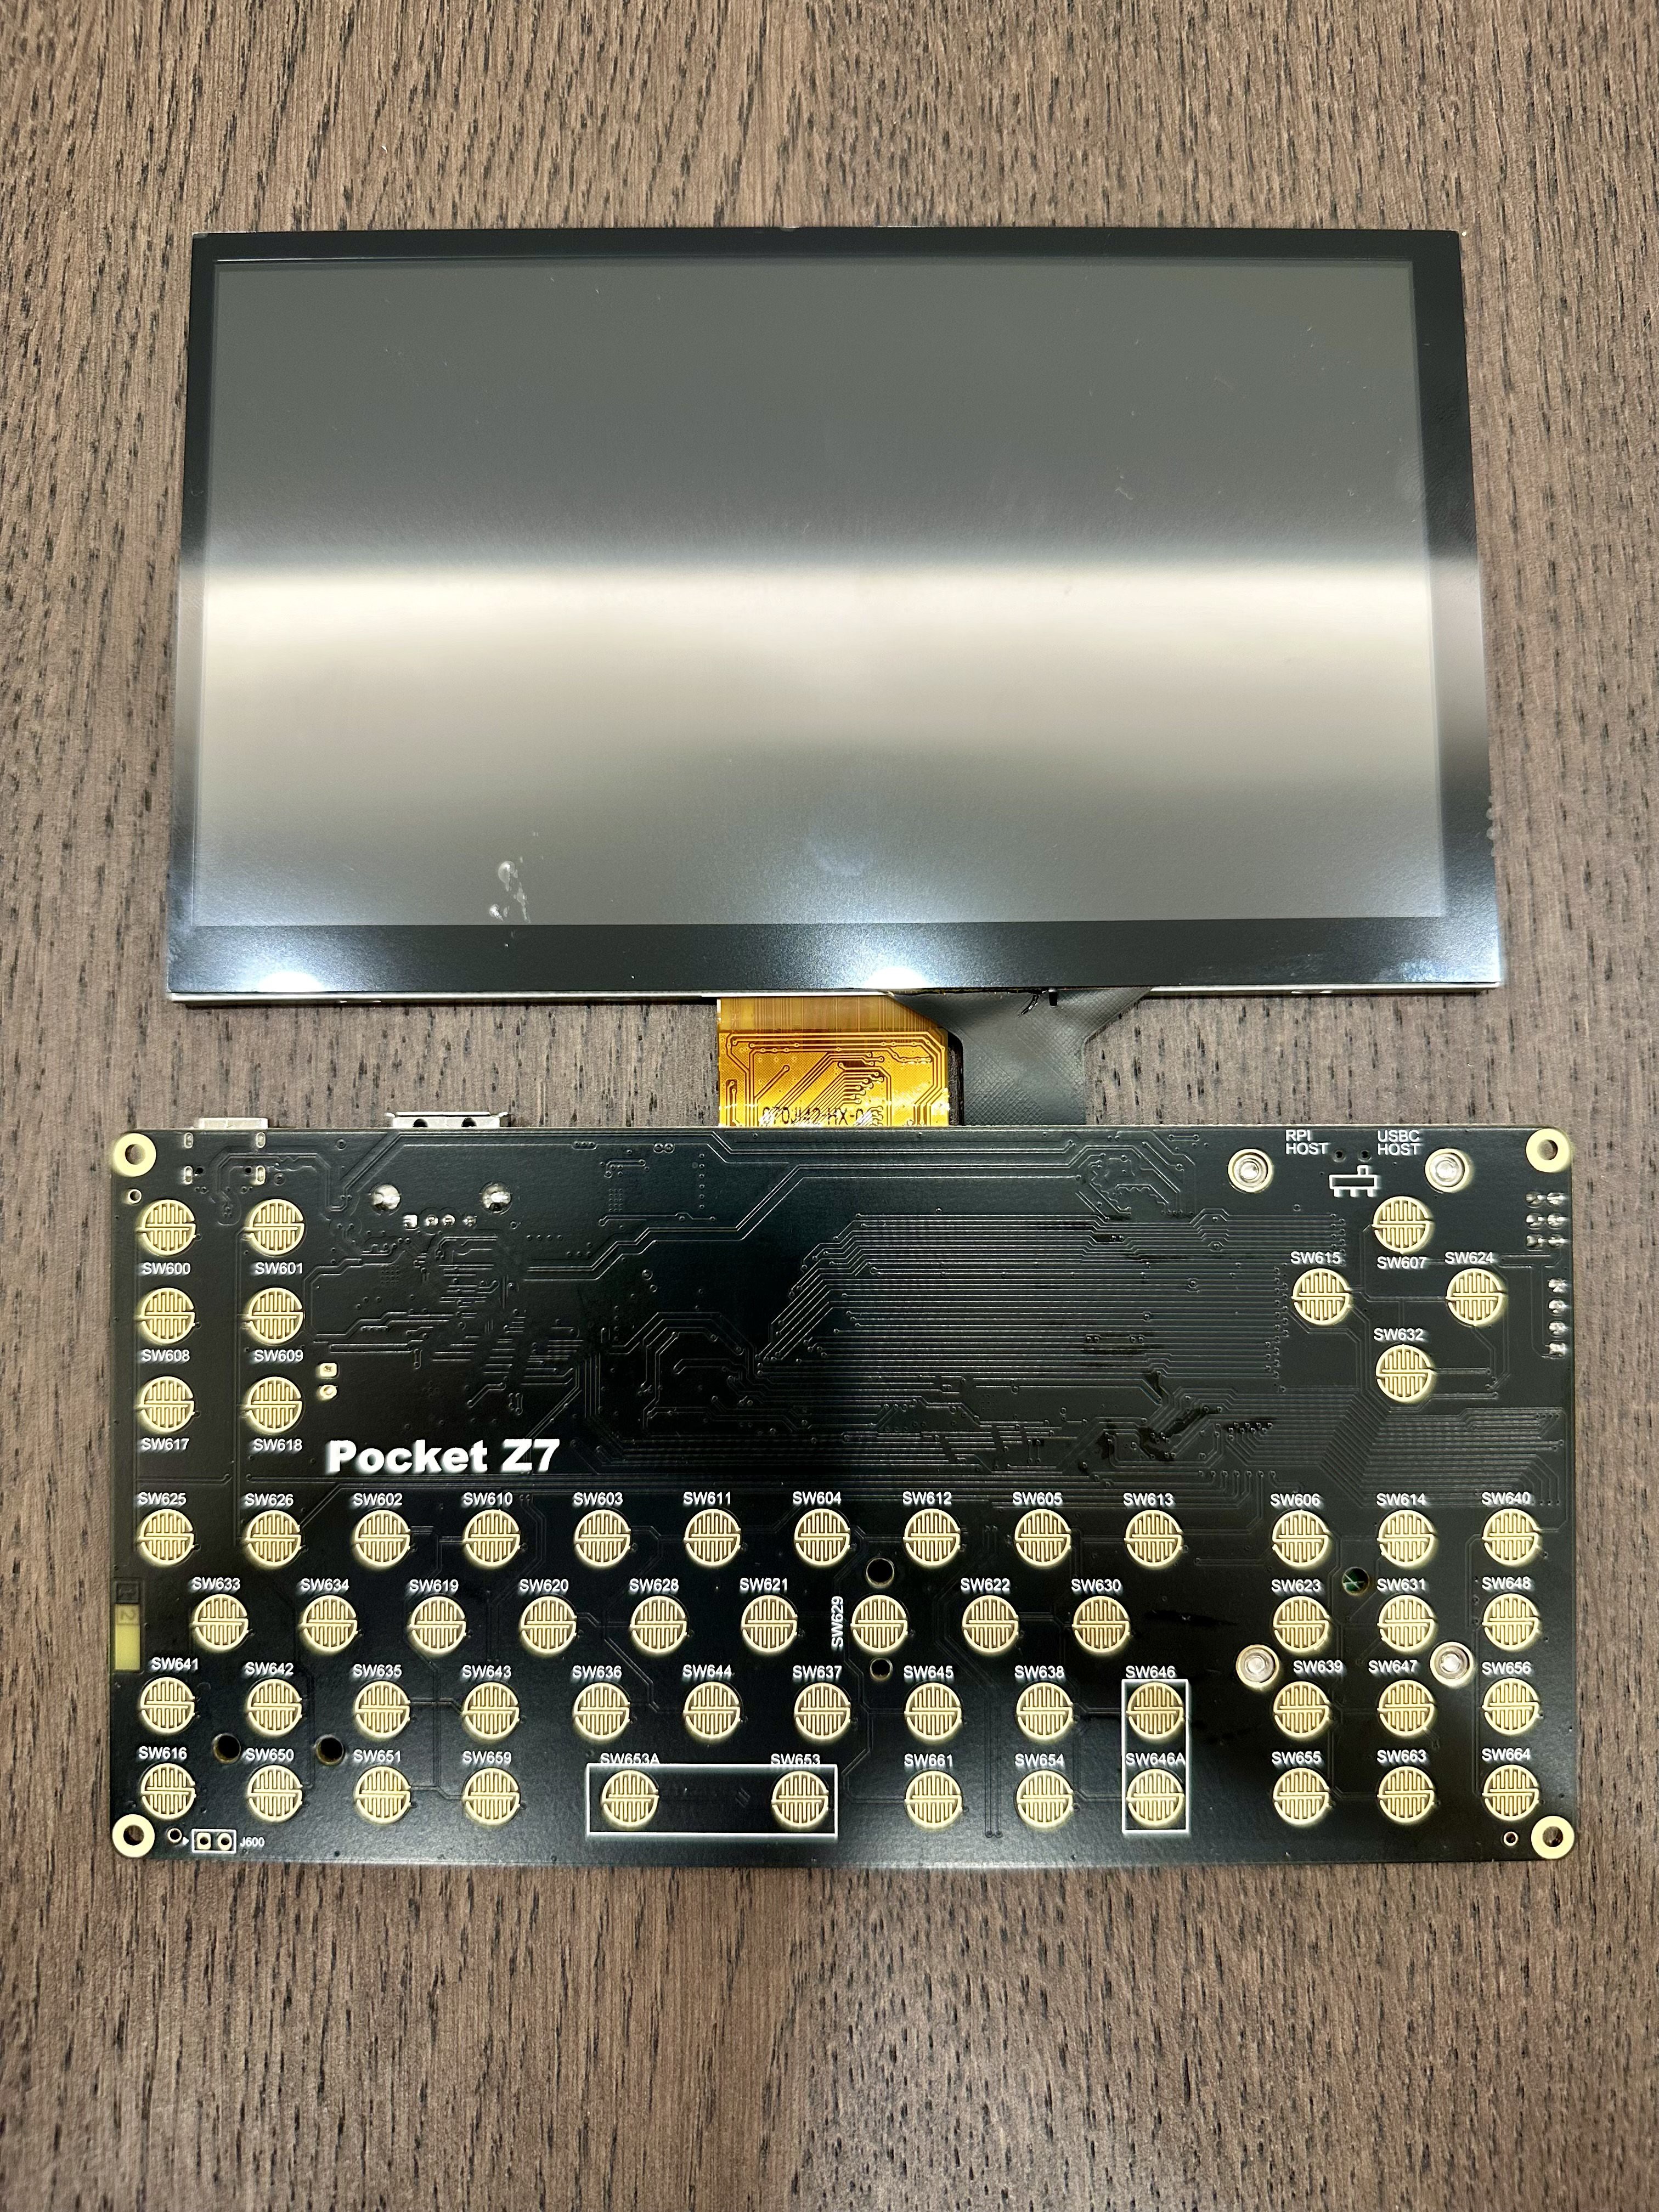

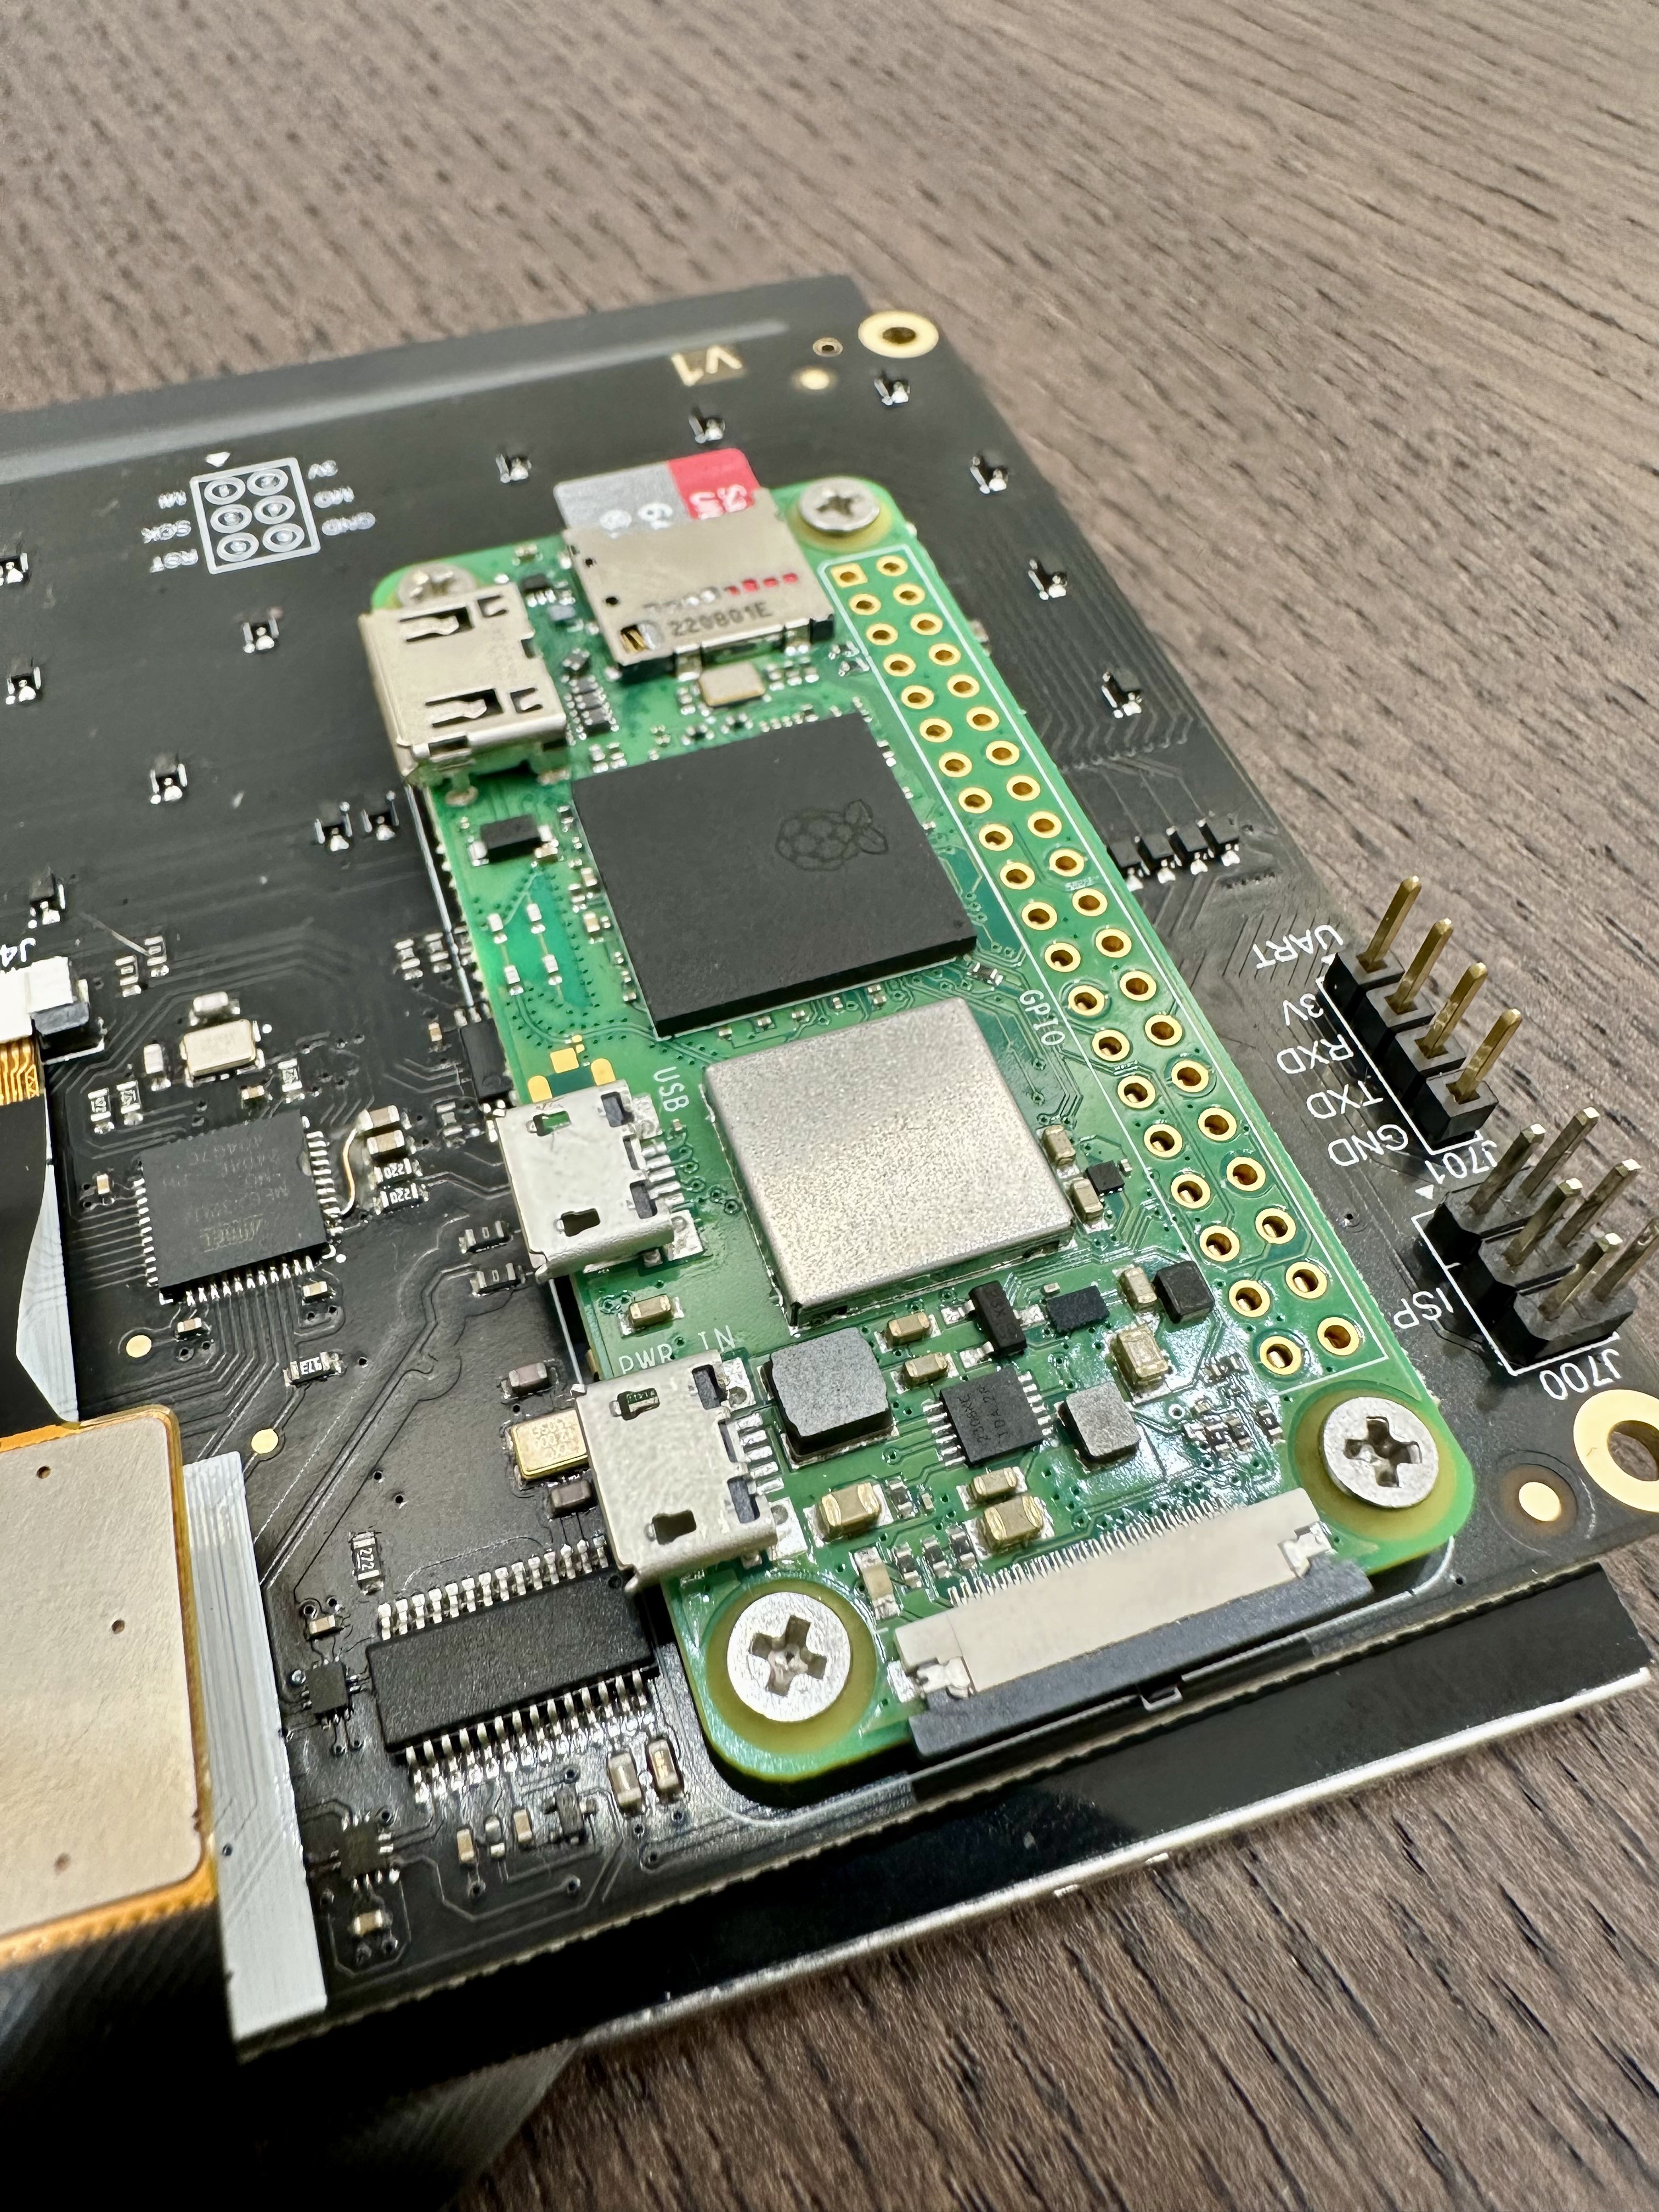
Like explained earlier for the keyboard we are using part of the Ti-92 layout (and silicone membrane & keycaps) to speed up development & reduce cost (two other Hackaday project were used for the PCBs, linked in the Project details). The keyboard is managed by an Atmega32U4 directly connected to the Pi's USB-OTG port (there is pins under the Pi). The Atmega32U4 is visible by Linux as an USB-HID device but we still have to write the software for it (currently waiting to get a Ti-92 from Ebay).
There is room on this version to have a touchpad area, we could integrate this later if there is demand for it (cost should be low). On top of the keyboard we have some action button and a d-pad.
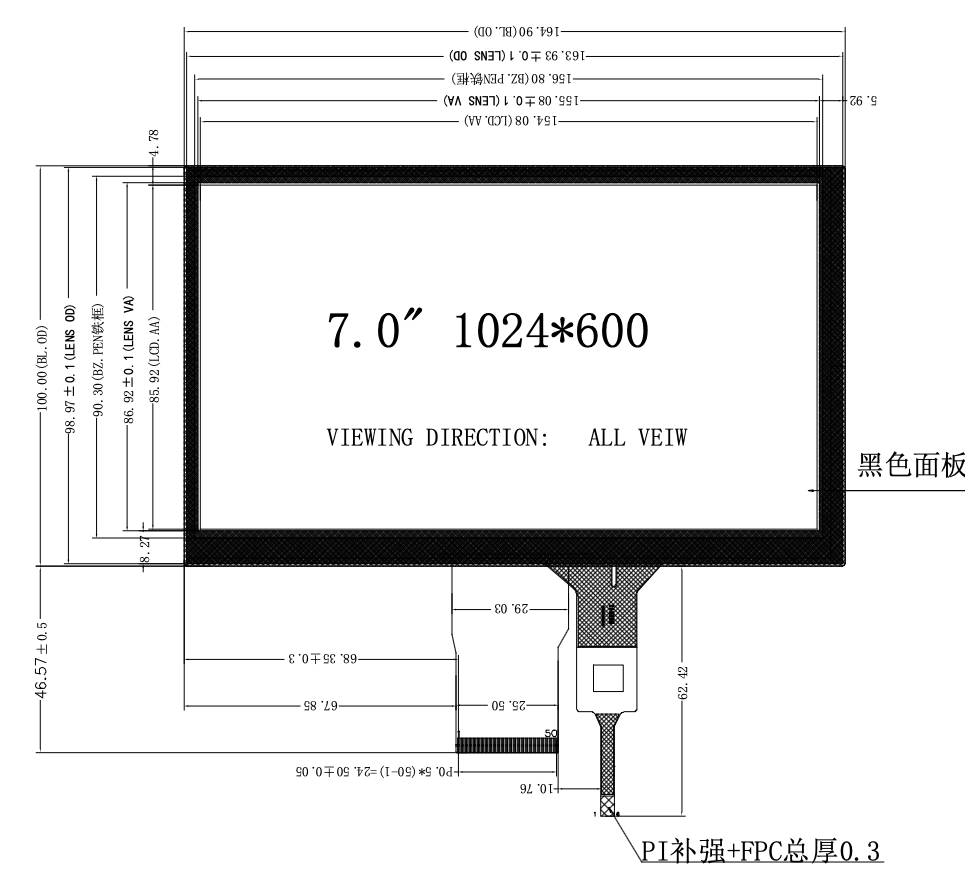
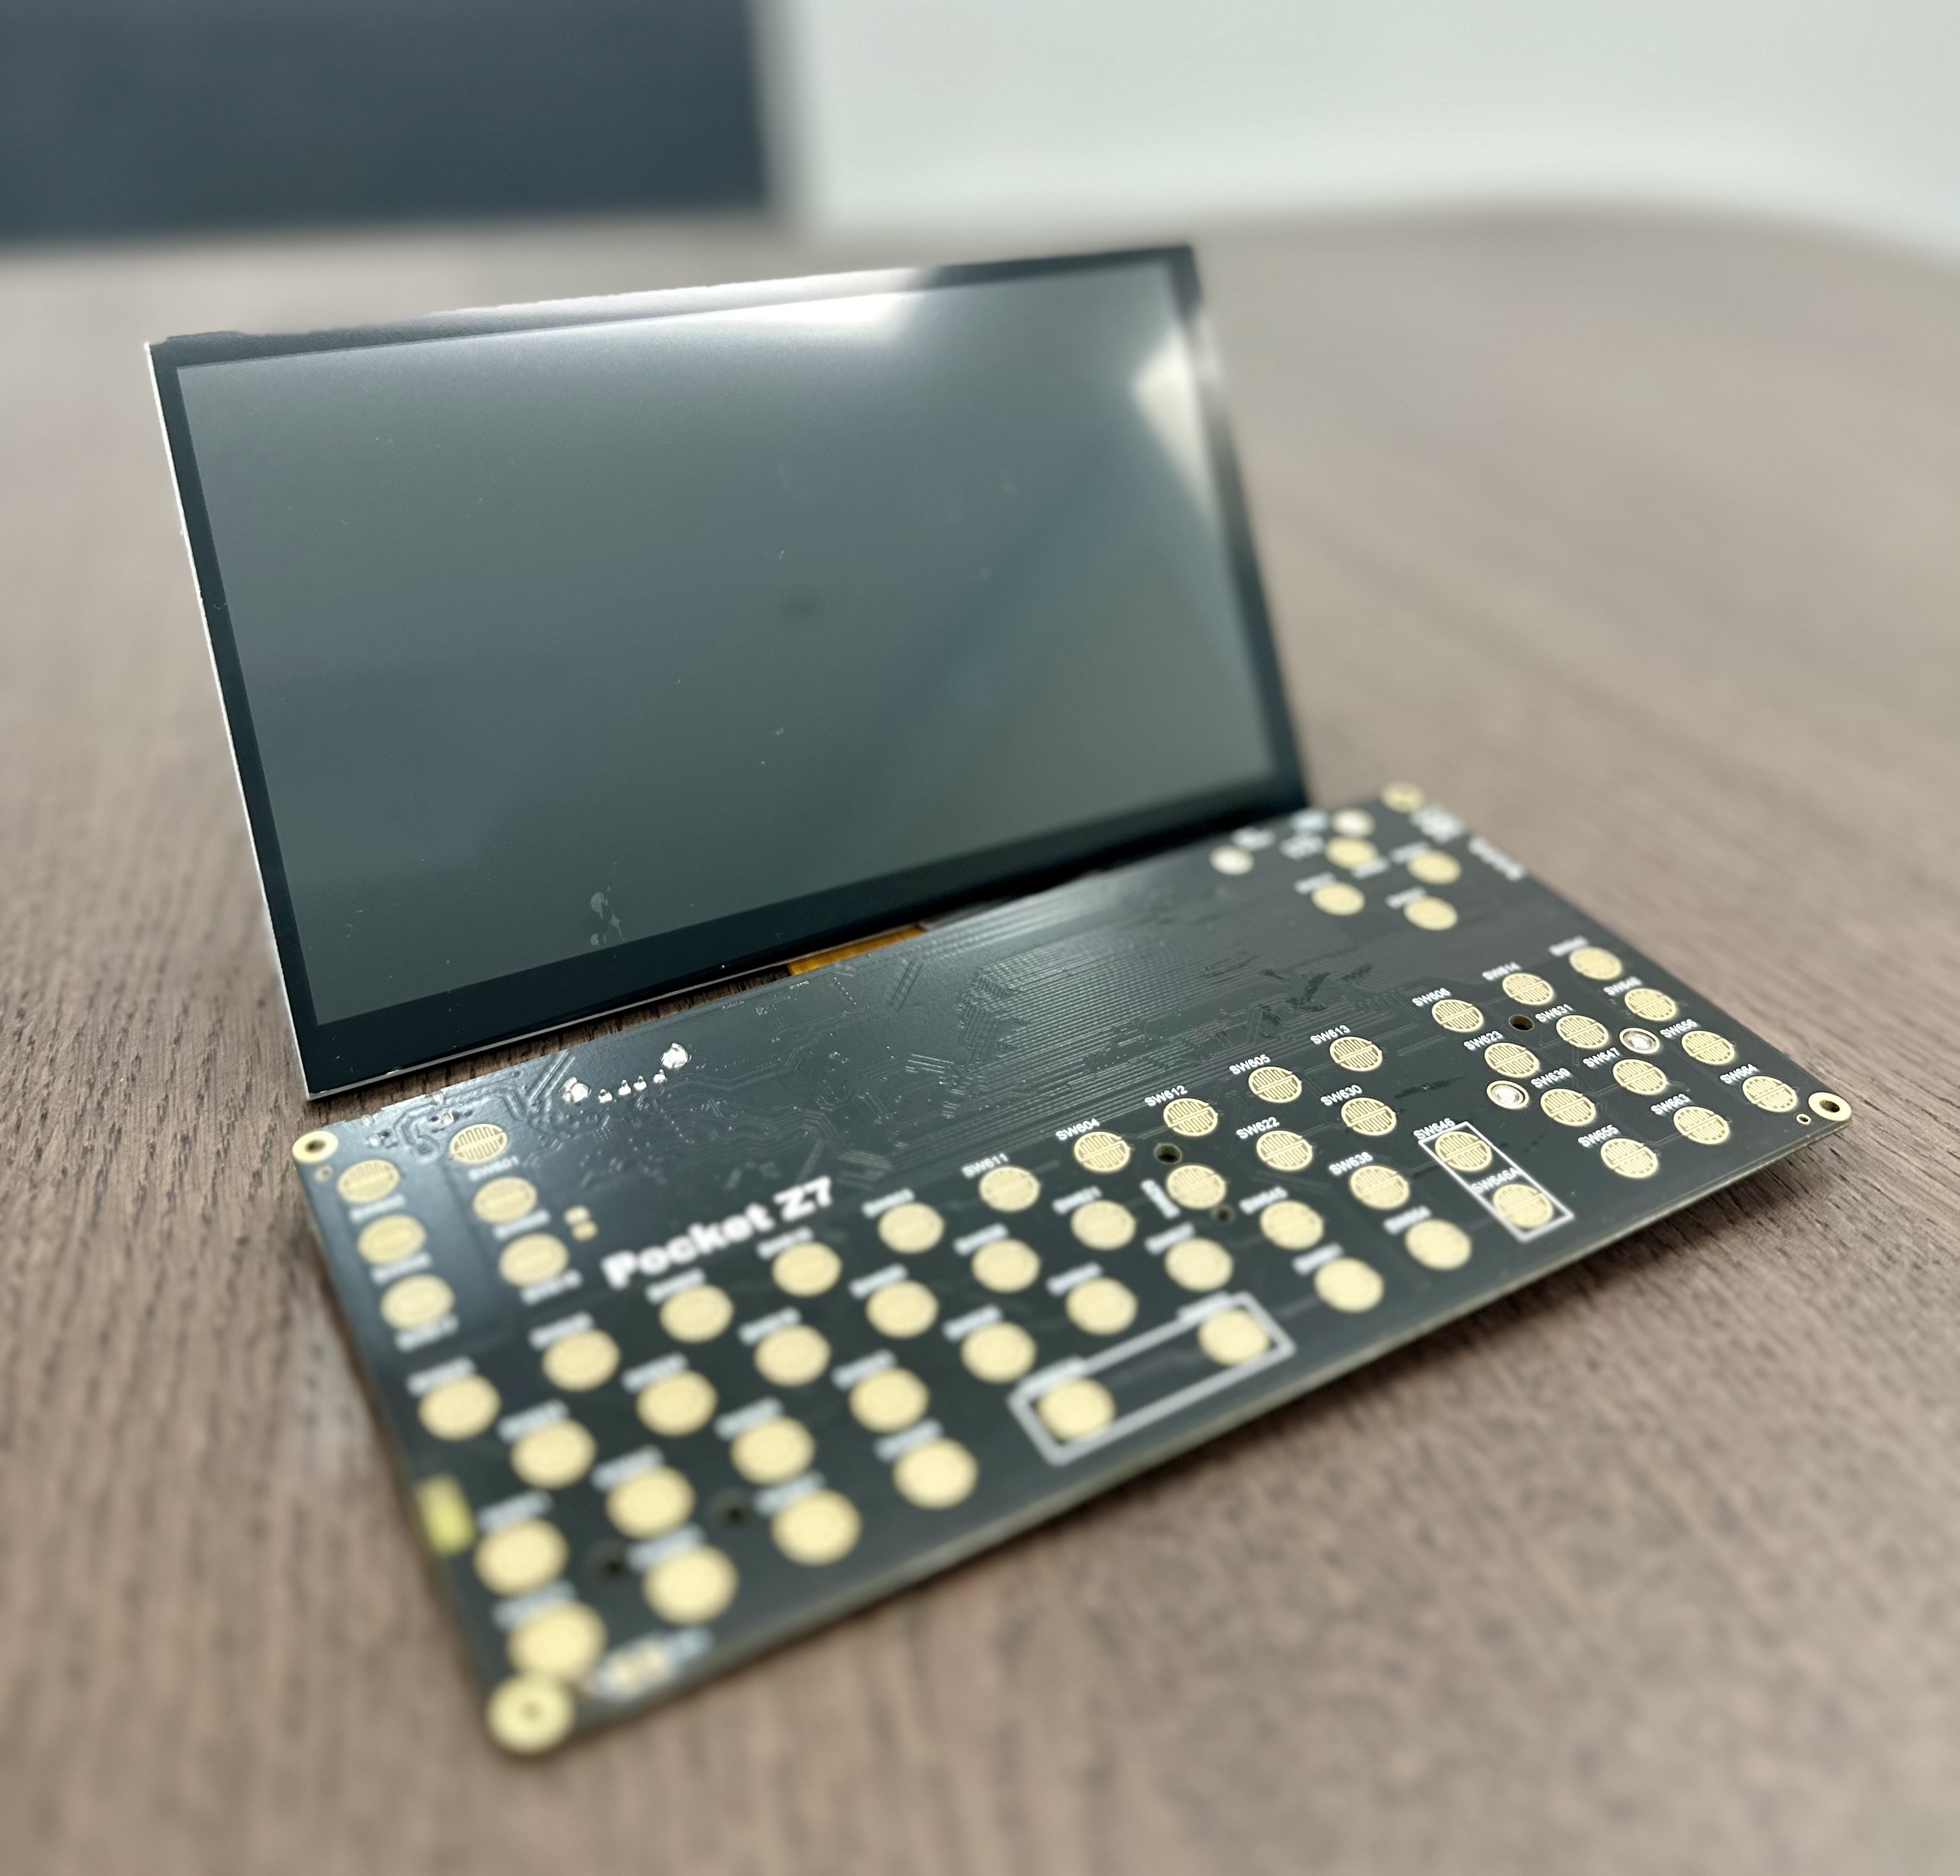
The display is a 7" 1024x600 24 Bits DPI RGB with a Capacitive Touch Panel (GT911 Controller) connected directly through the PI's GPIOs, reducing energy consumption & costs as we don't need extra hardware to drive these kind of displays apart from the backlight controller. The only "problem" is that this display takes up all the Pi's GPIO's so there is none left available for accessories. And the touch controller can't be connected to the Pi directly so we connected it to the Atmega32U4 act as an adapter between the touch controller and the Pi. A similar project is available here and we will most likely base our work on this code (not done yet).
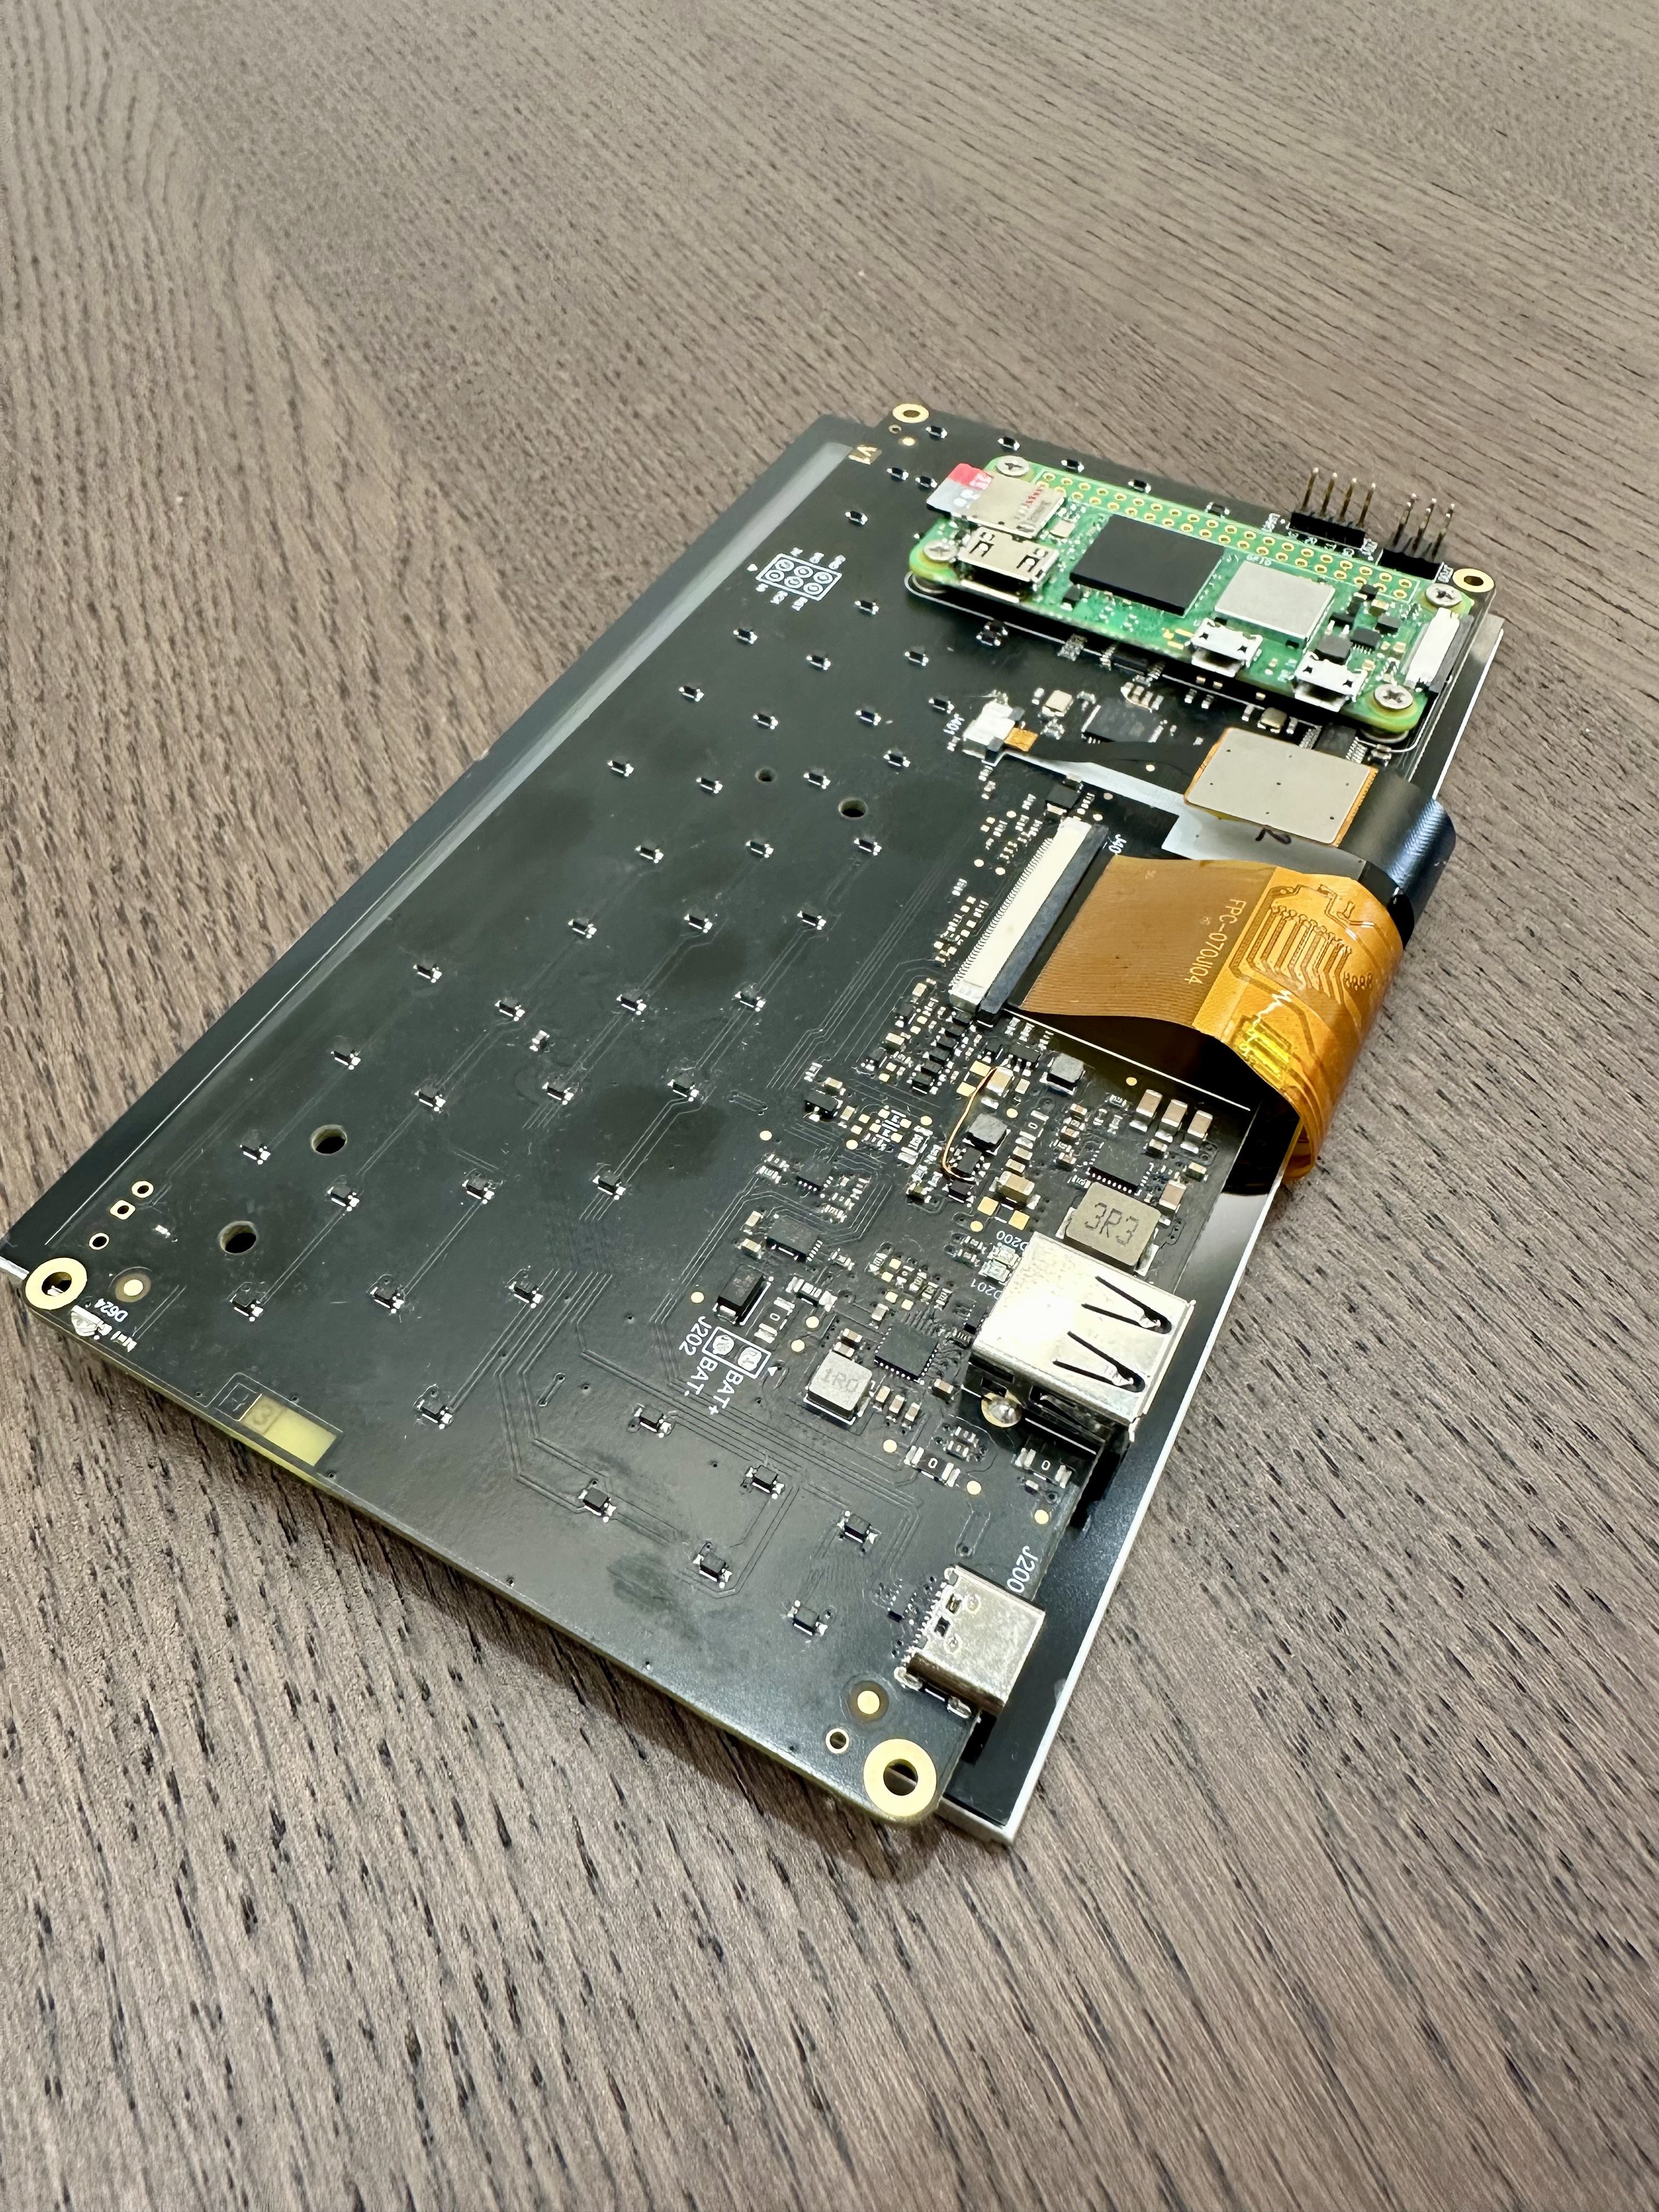
Here is the back of board, with a large emplacement for the Li-Po battery, the connectors, flex cables and the Pi itself. There is not many components and it doesn't take much space so we can definitely create a 5" version of this same board, the only difference will be that the display connector will be 40 pins instead of 50 and that we would have an extension port somewhere with the 8 available GPIOs left.
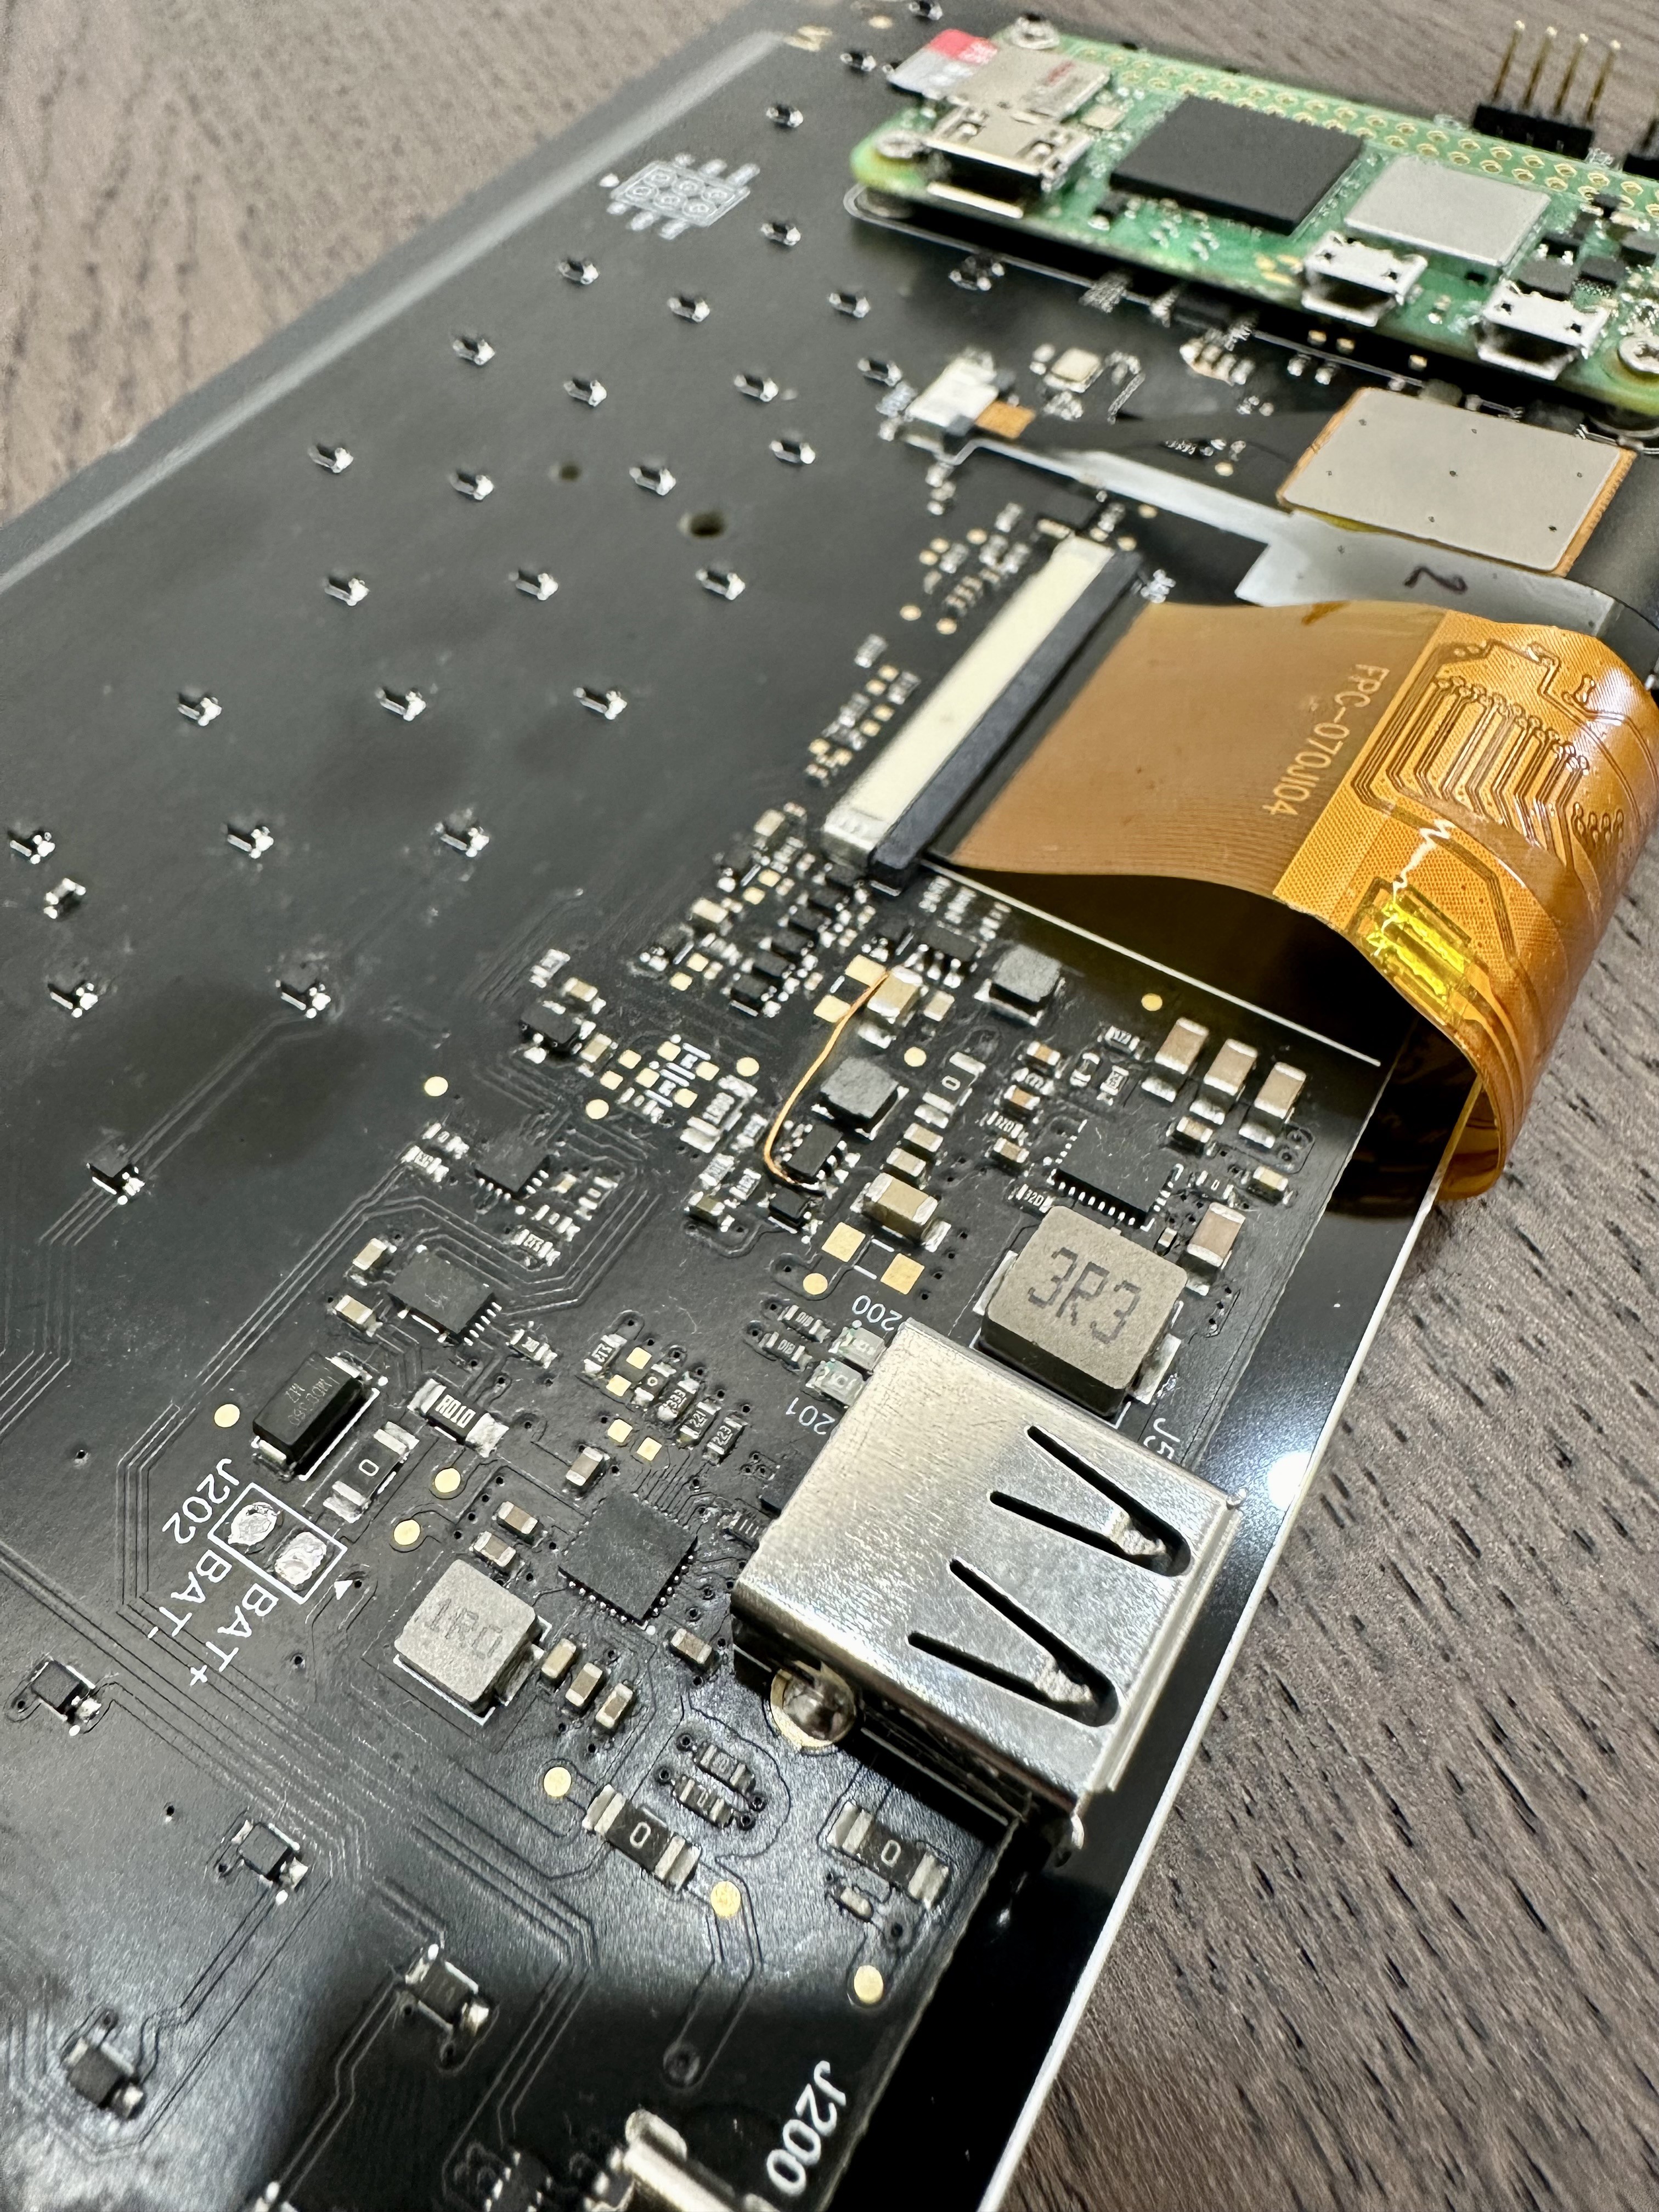
Here is most of the power management components, handling the main power of the boards, the Pi, display's backlight, battery charge/boost.
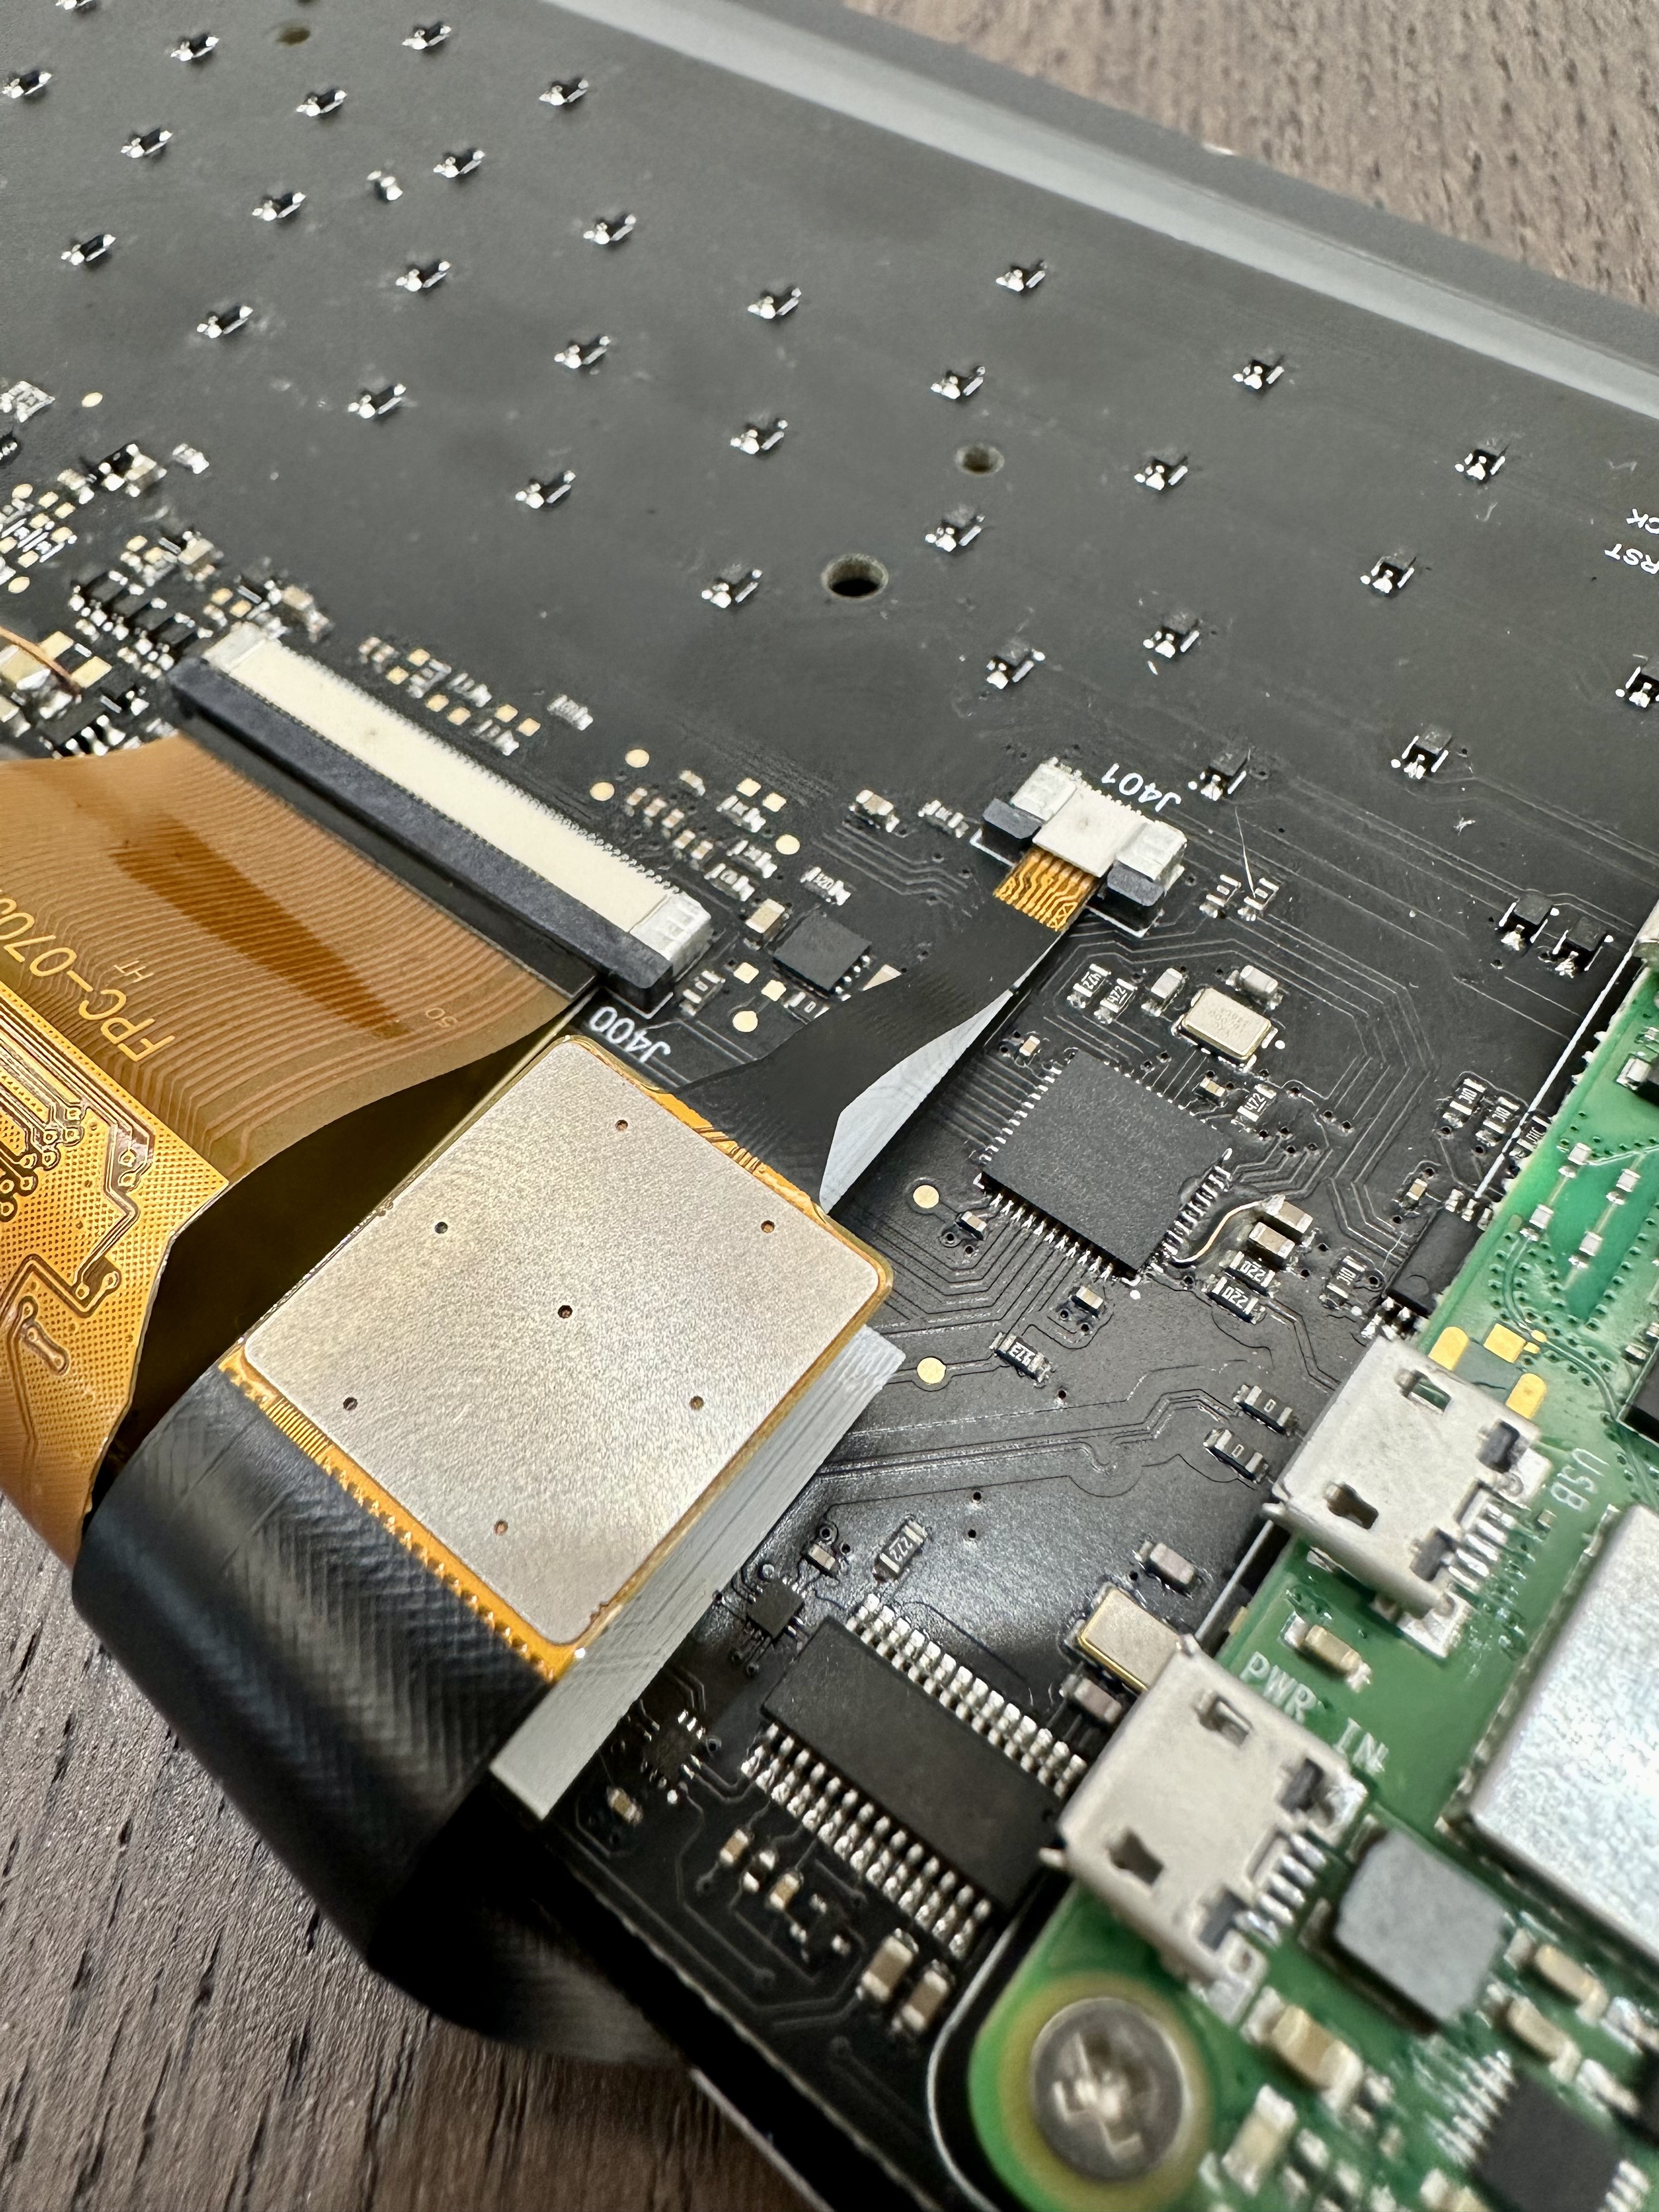
Here we can see the 50 pin display connector that's directly connected to the PI's GPIOs, the Capacitive Touch Pannel connector that's connected to the Atmega32U4 present just next to it, which also handles the keyboard and key presses and will send all this over USB-HID to the Pi through the USB-OTG connector (connected to it under the Pi itself).
Here is a video of the prototype booting a Raspberry Pi OS Lite install customised with XFCE & Conky. There is probably many ways to make that thing boot way faster, nothing has been optimised at the moment. The Pi Zero 2W is definitely not the fastest out there, but it is very cheap, available anywhere, has great support and it has a DPI Display interface reducing the overall cost of the computer.
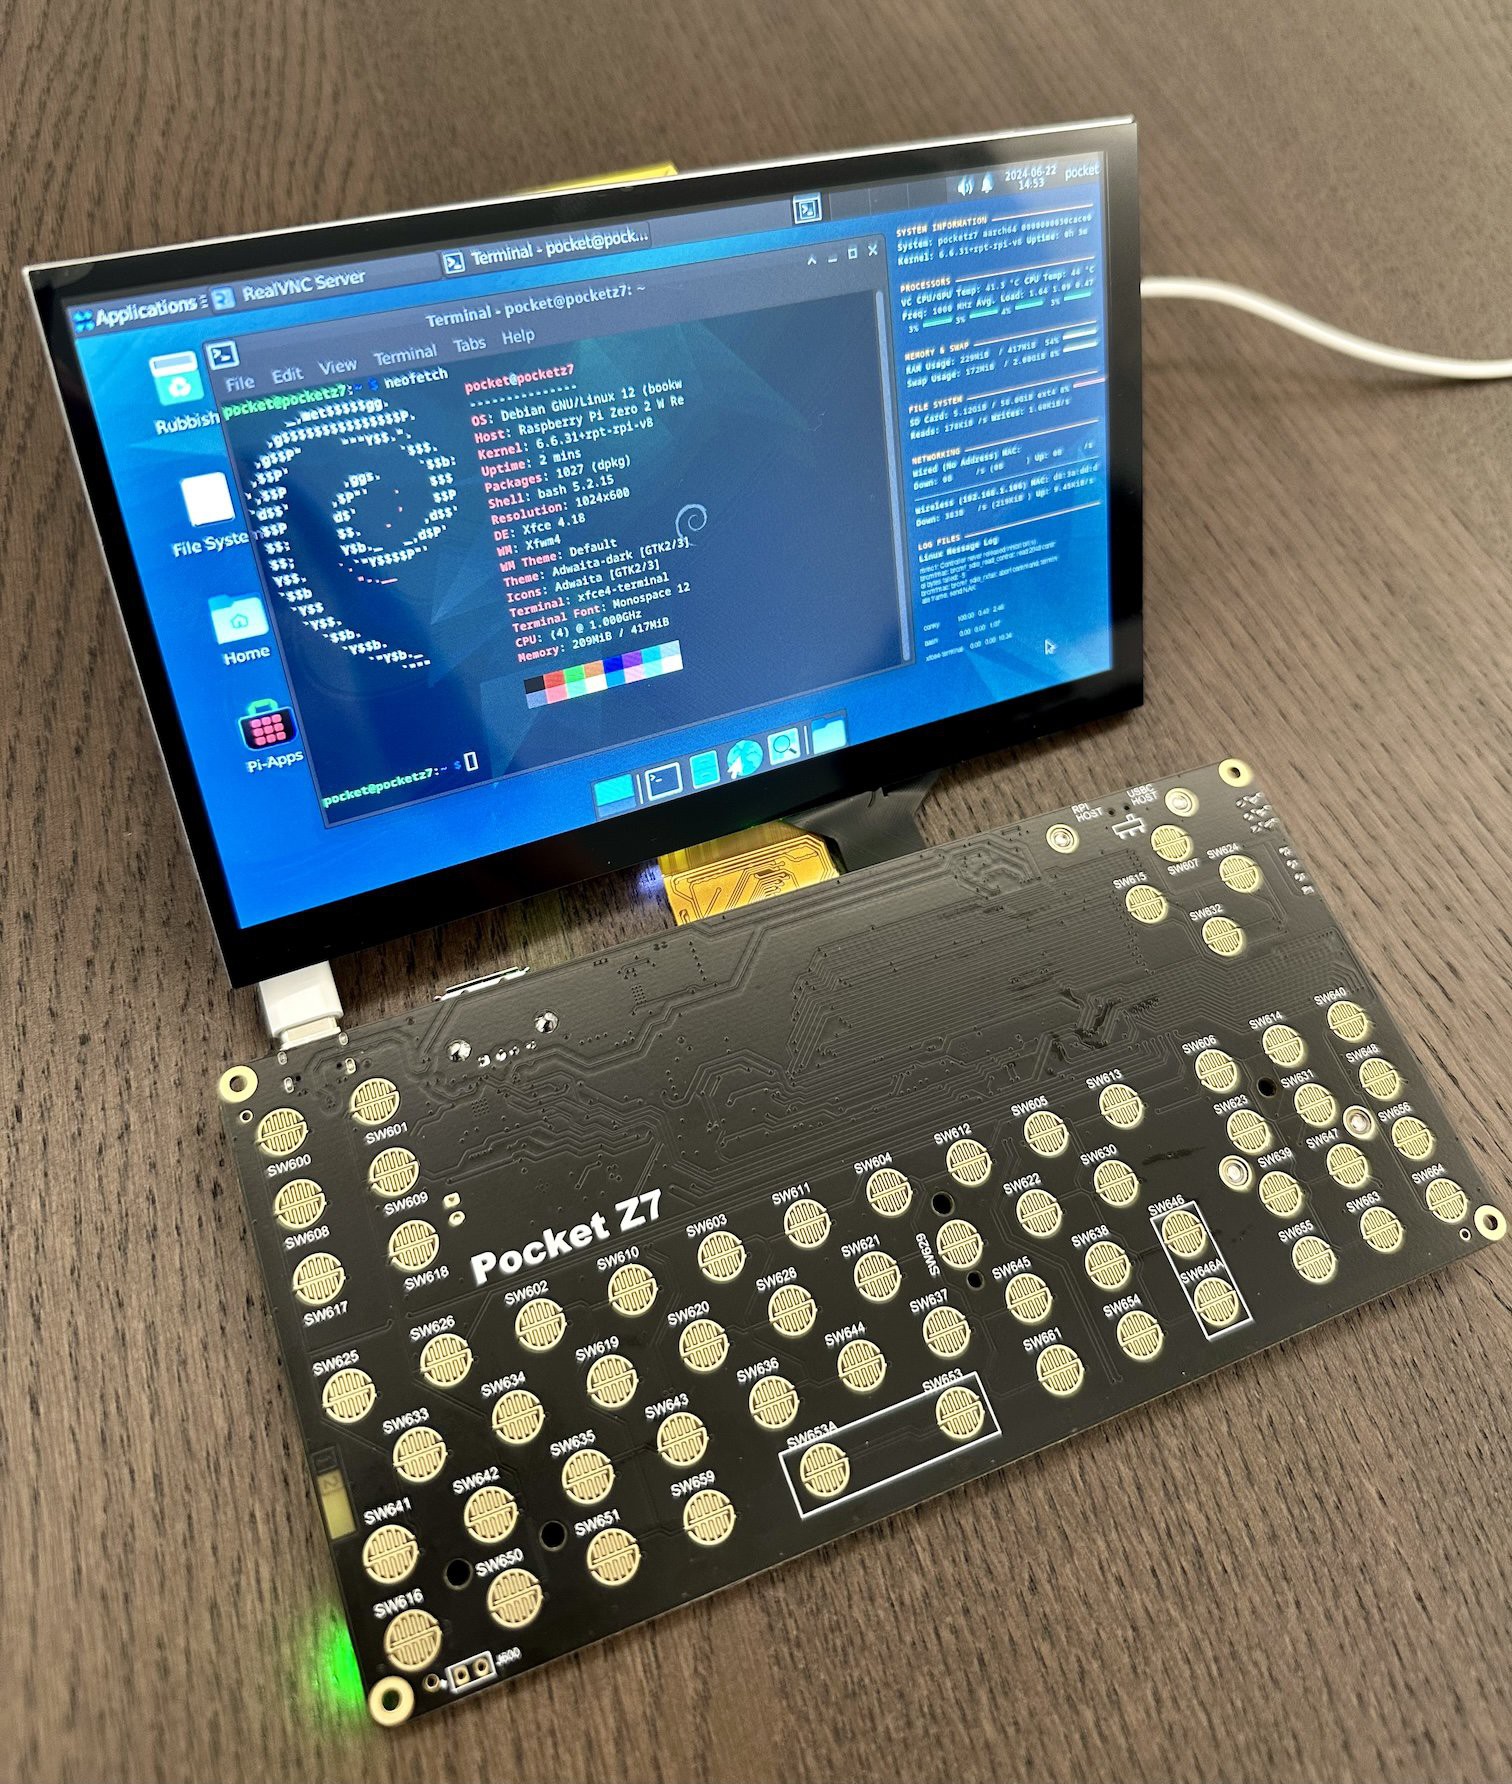
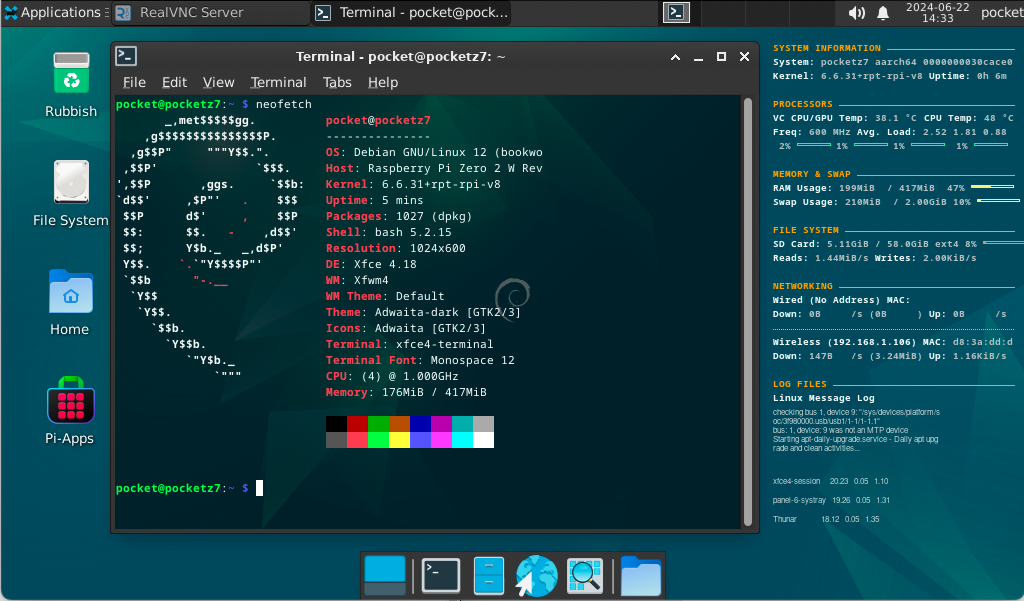
The display is quite good for the price (15$ with the Capacitive Touch) has acceptable viewing angles, contrast and colours. The Linux desktop could be more optimised, some windows will be too big to fit in that screen and it will be more of a problem on the 5" with the 840x480 resolution. But the goal here is not to play 4K HDR videos, but to have a super portable hacking linux computer.
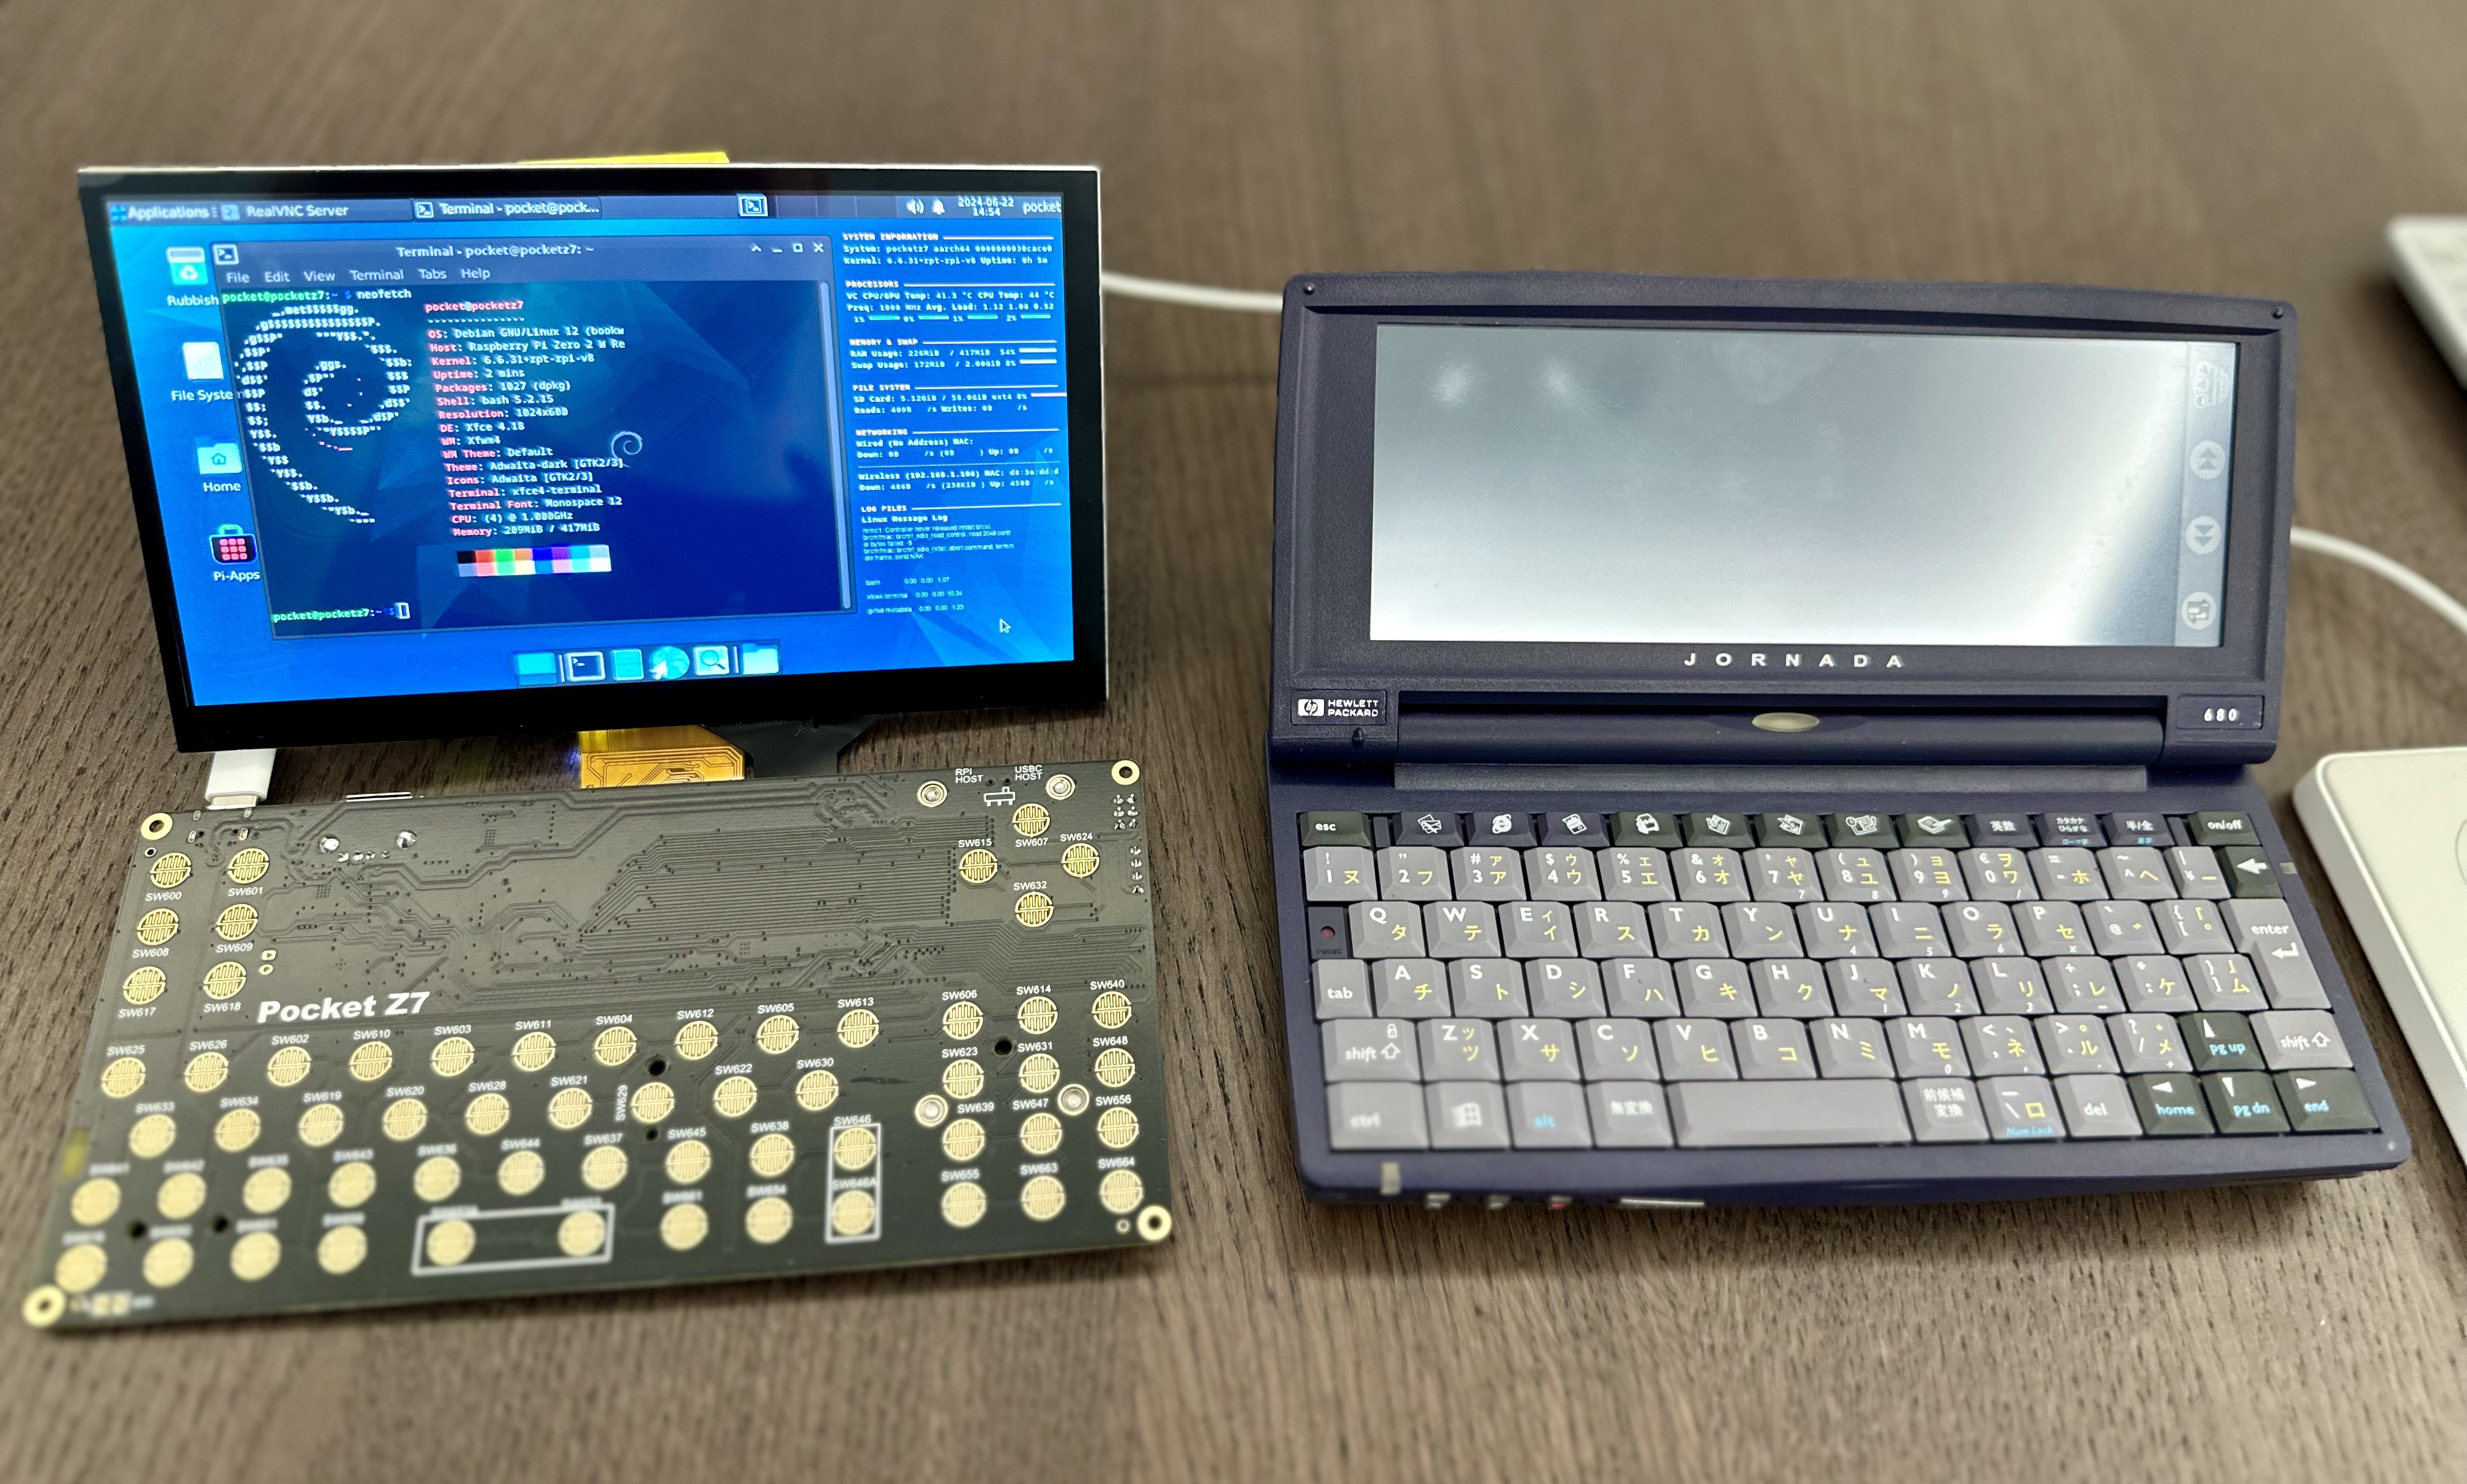
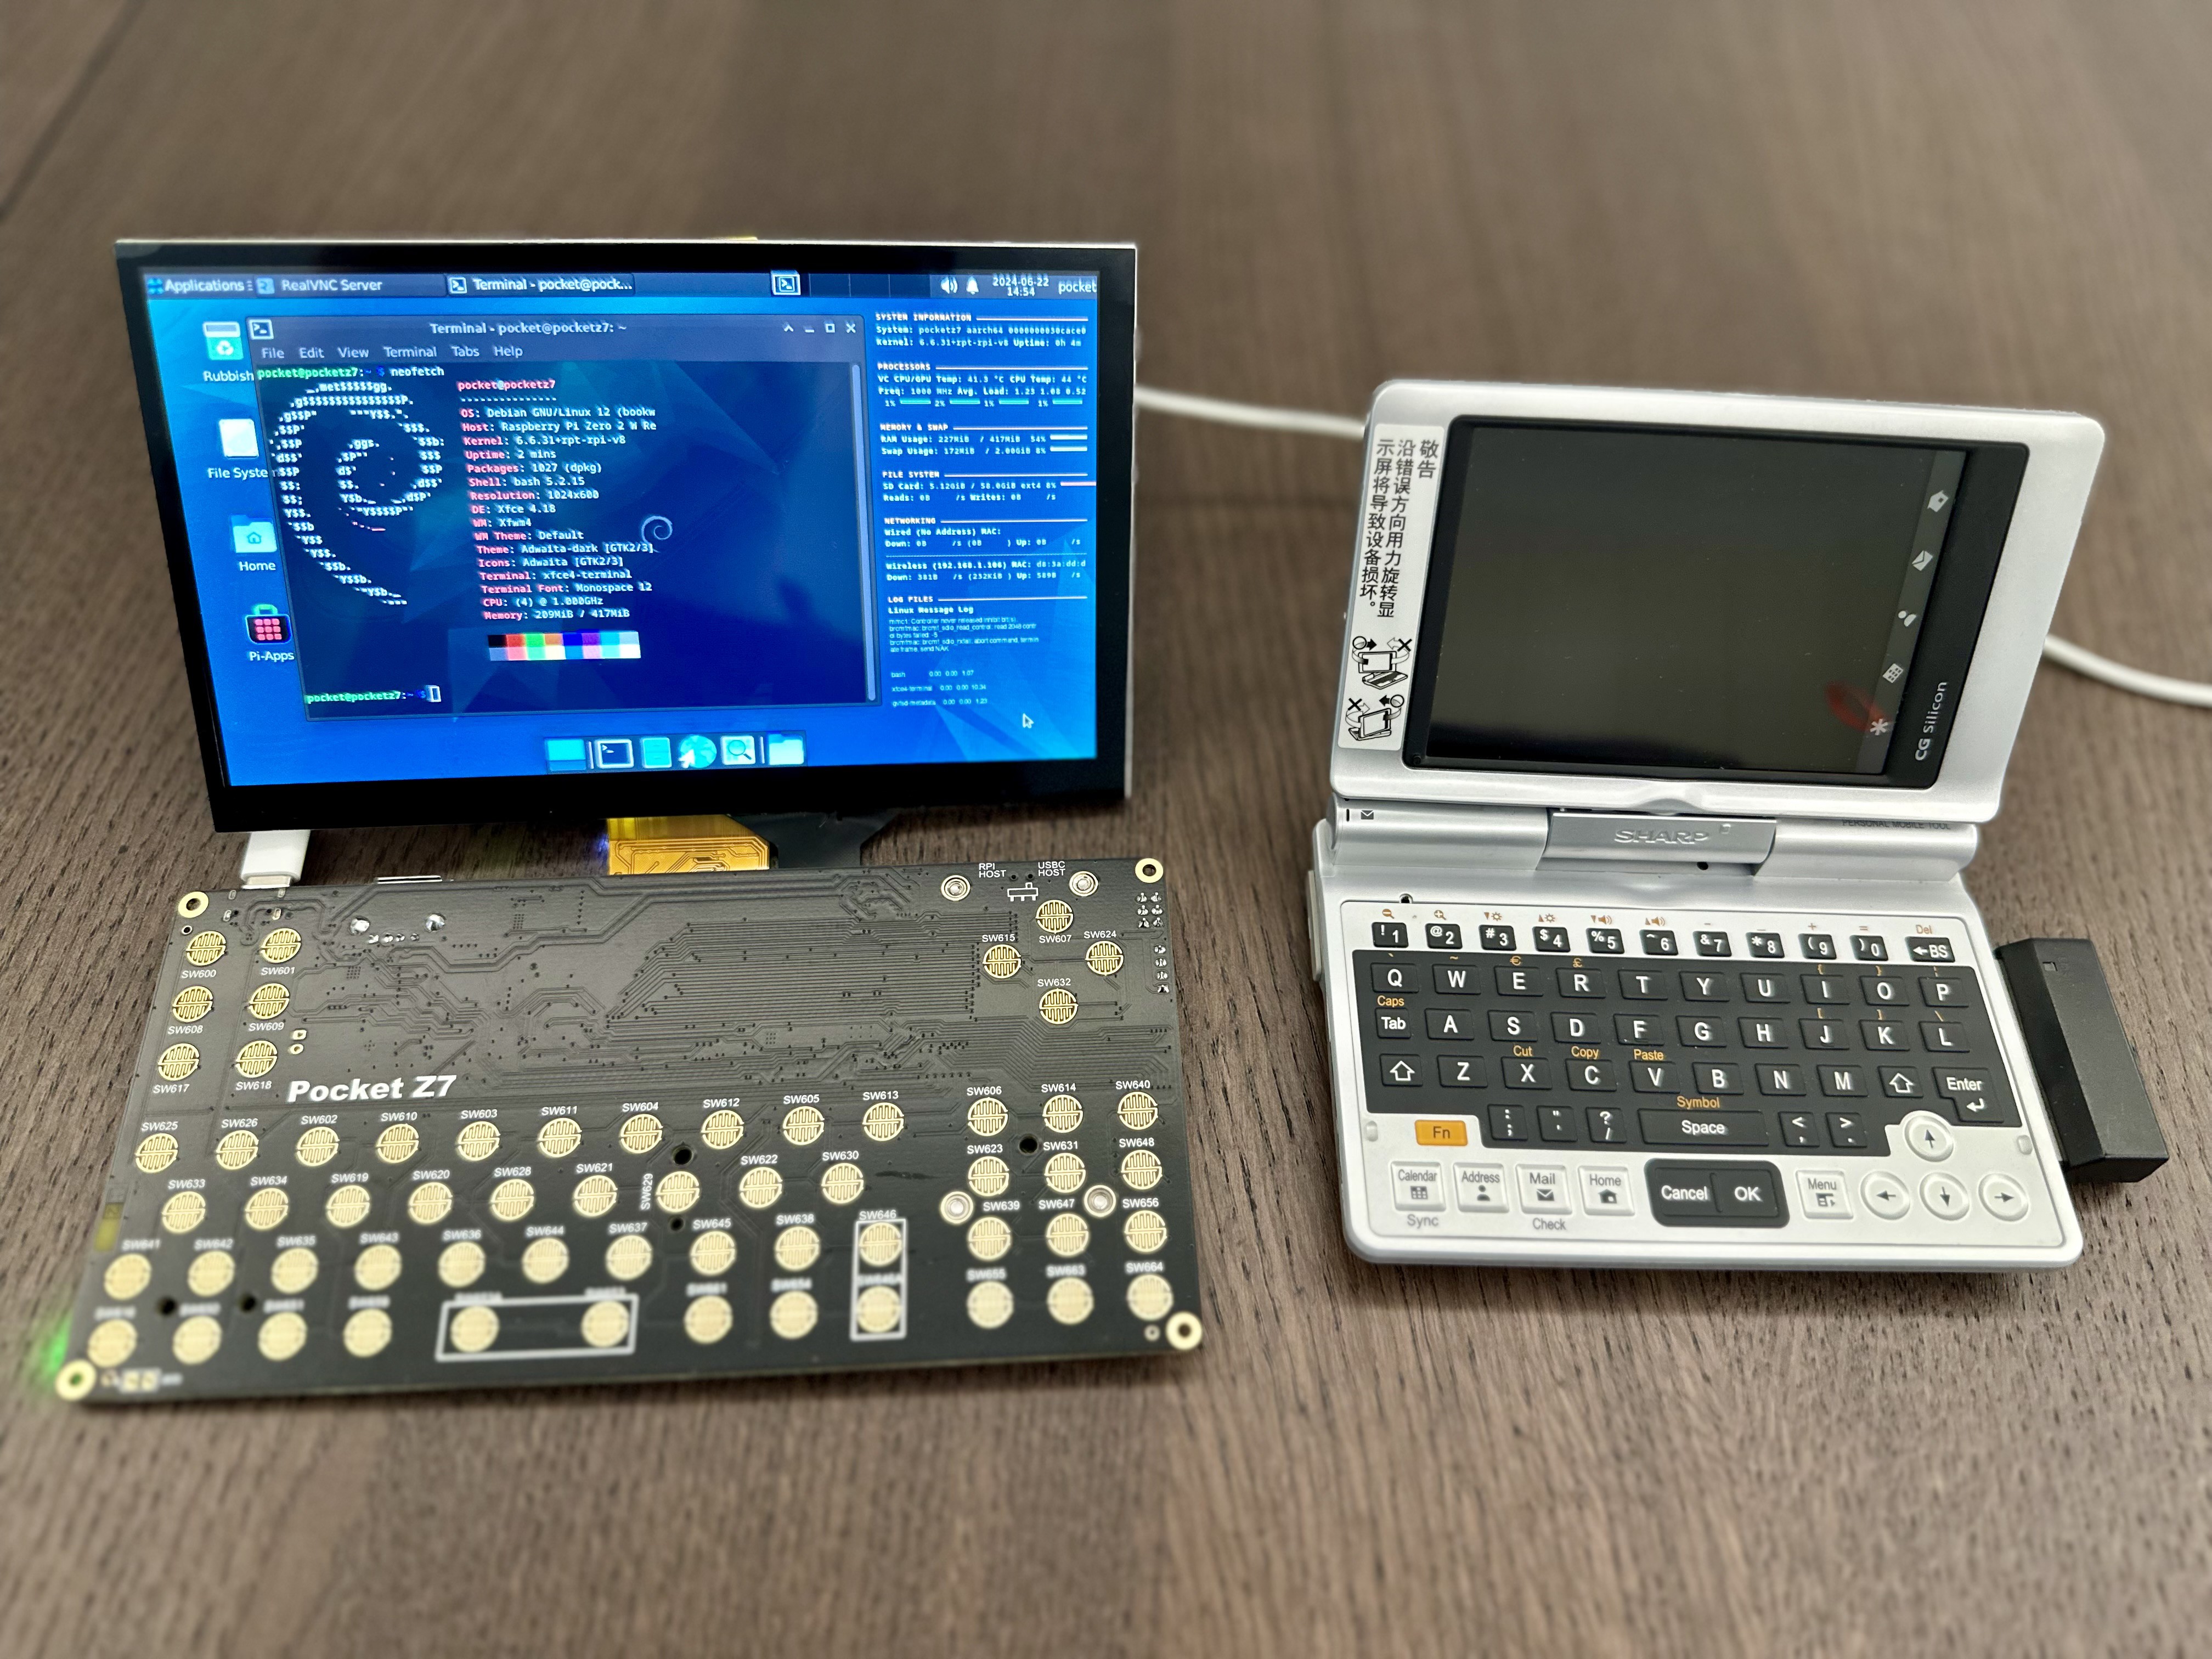
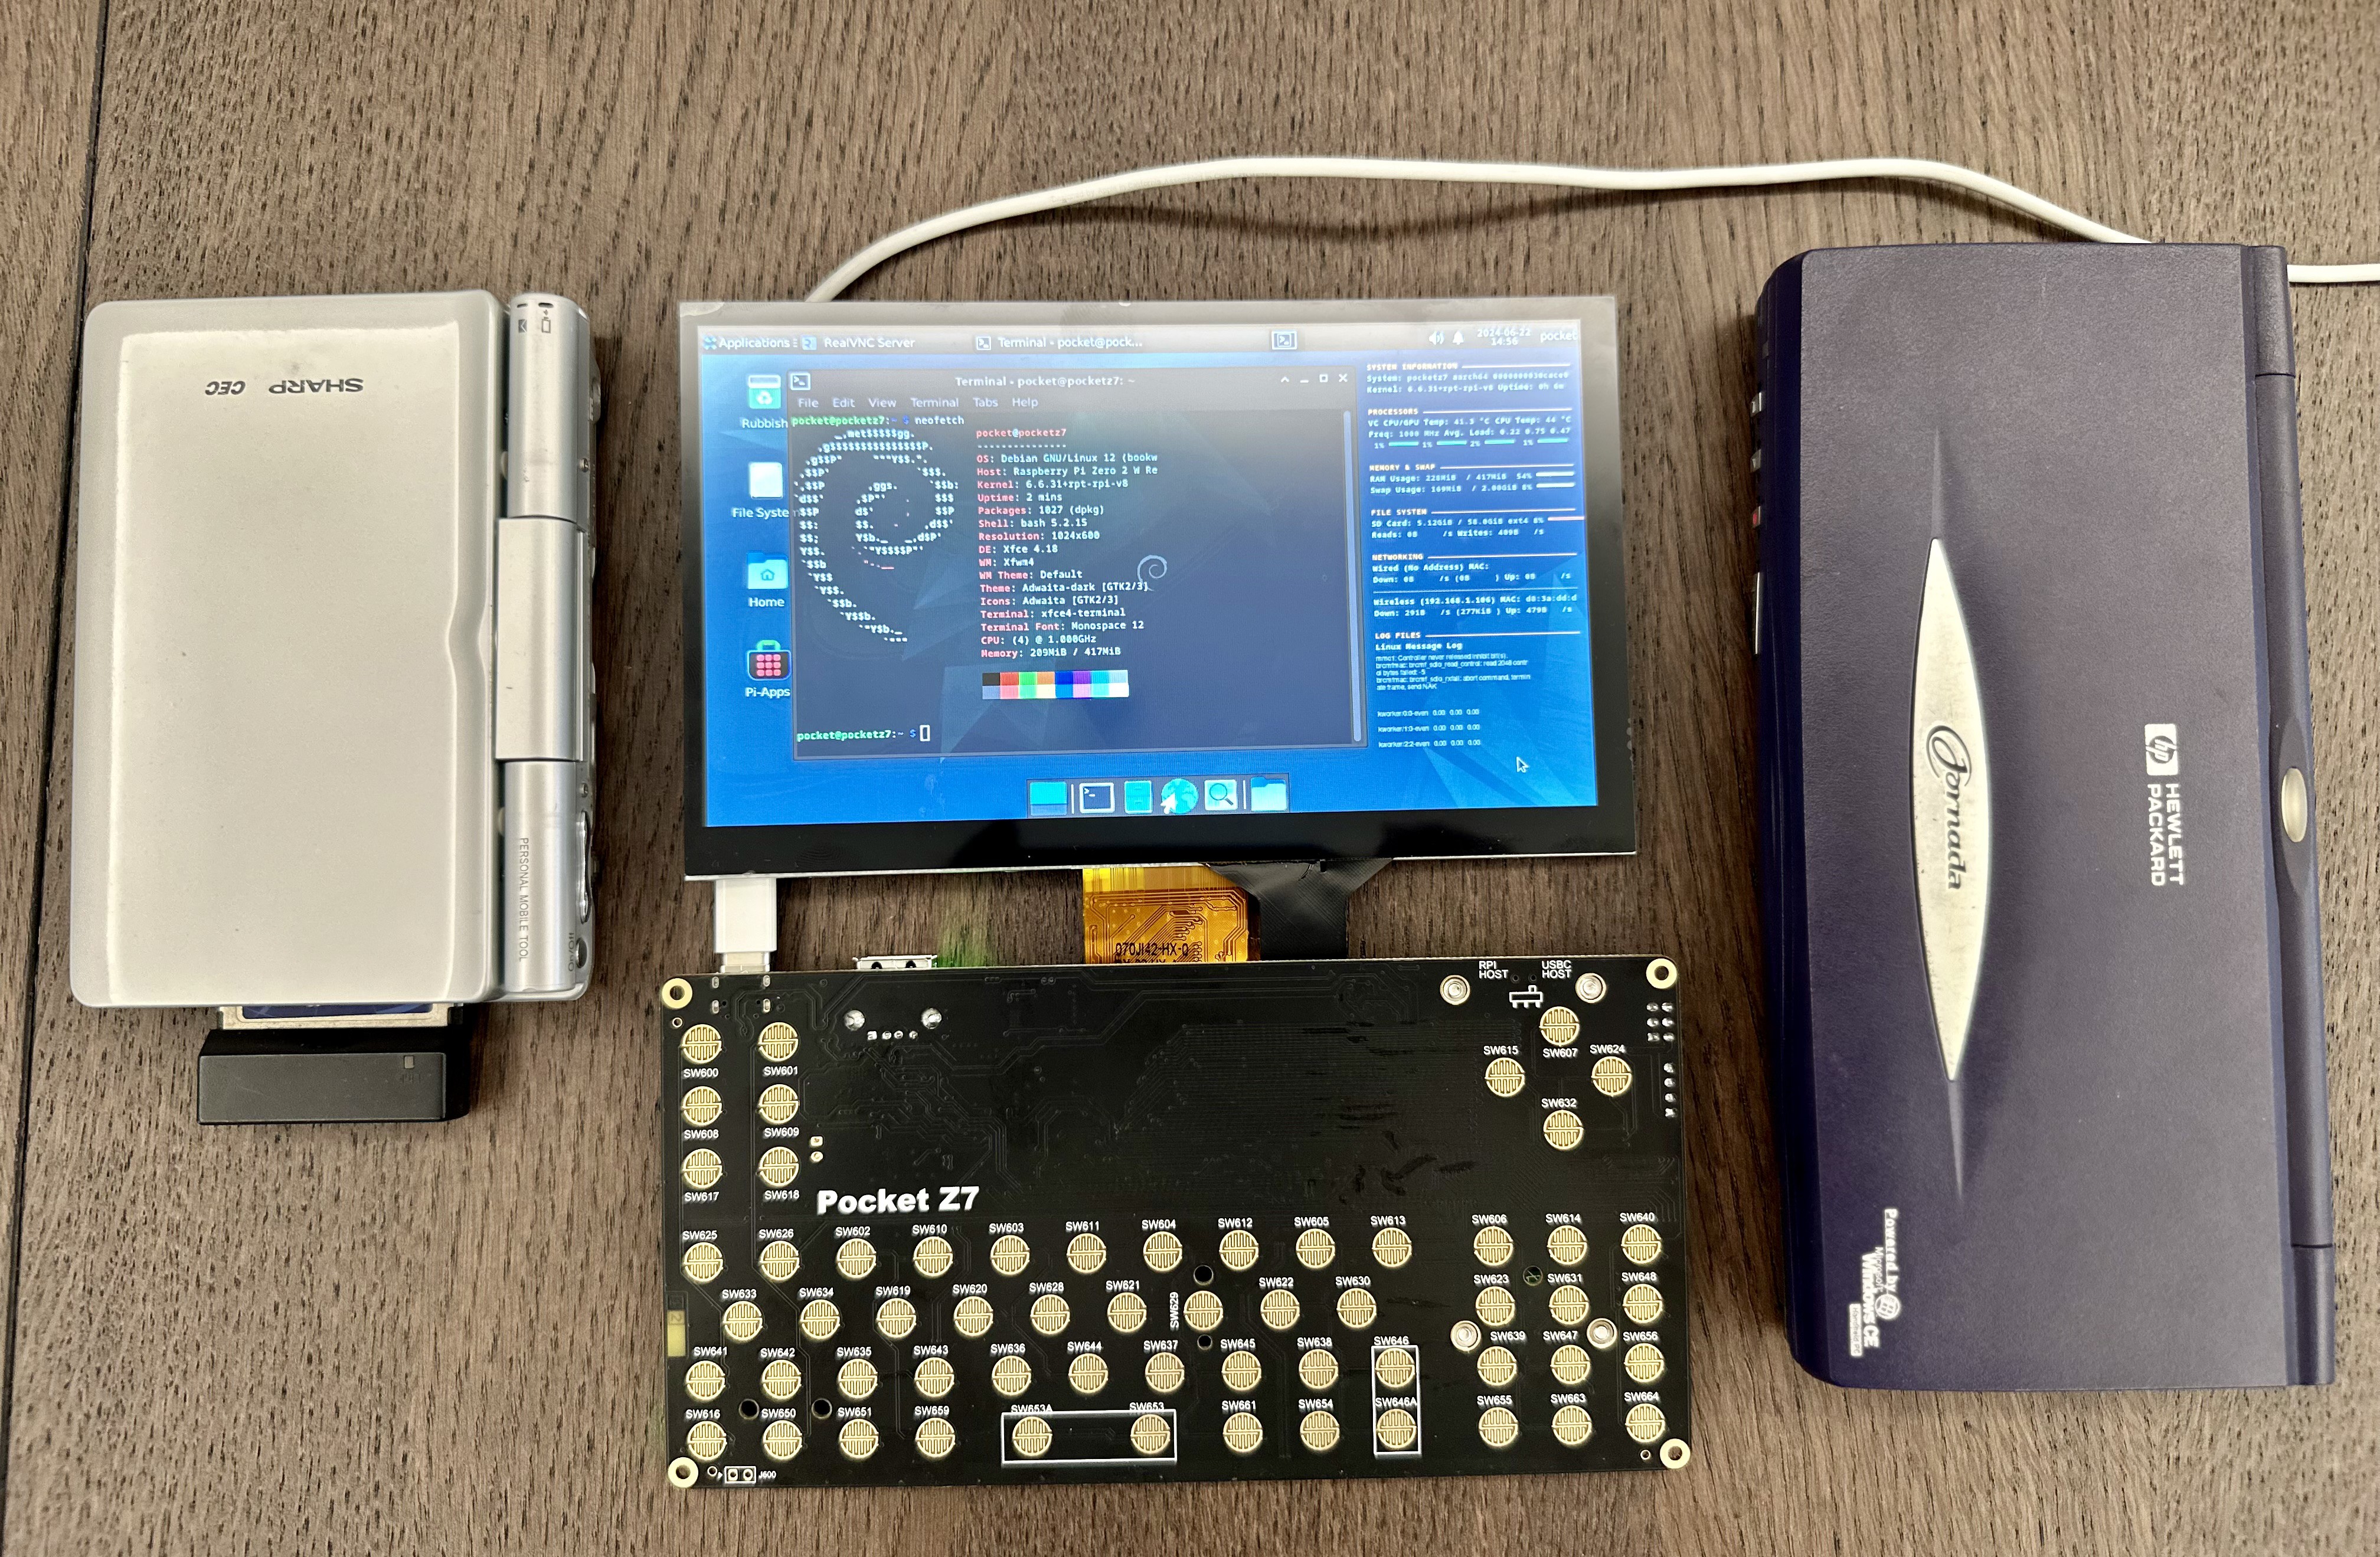
Here is a few pictures to get an estimation of the size compared to a HP Jornada 680 and a Sharp Zaurus SL-C7500c. This 7" version of the prototype will be a great mini linux laptop, while I believe a 5" version (comparable to the Sharp Zaurus in these pictures) will be the ultimate pocket hacking device especially with the 8 GPIOs (& I2C) available for expansion.
Discussions
Become a Hackaday.io Member
Create an account to leave a comment. Already have an account? Log In.