People who post videos on YouTube are called YouTubers. YouTubers who use animated avatars are known as V-Tubers. V-Tubers who use only four PNG images as their avatars are called PNGTubers. But what about people who use animated avatars in real life?
Introducing the CardTuber: an animated avatar on a business card.
The Story
Let's rewind a bit to the beginning. First, the earth cooled. Then came CircuitPython. I created an online IDE for CircuitPython called the "Circuit Python Online IDE" and consider myself a maker. I demonstrated it at the Philadelphia Maker Faire in 2022 and the Long Island Maker Faire in 2023. I was also planning to attend the Long Island Maker Faire in 2024. One thing I always wanted for the Maker Faire is a maker badge, like the fun and powerful one from Supercon. So, I decided to make one for this year.
While thinking about how to design a maker badge, I came across a Business Card Contest on Hackaday. I realized that this was the perfect form factor for a badge:
- Business card size
- Introduces myself
- Does something cool
The design
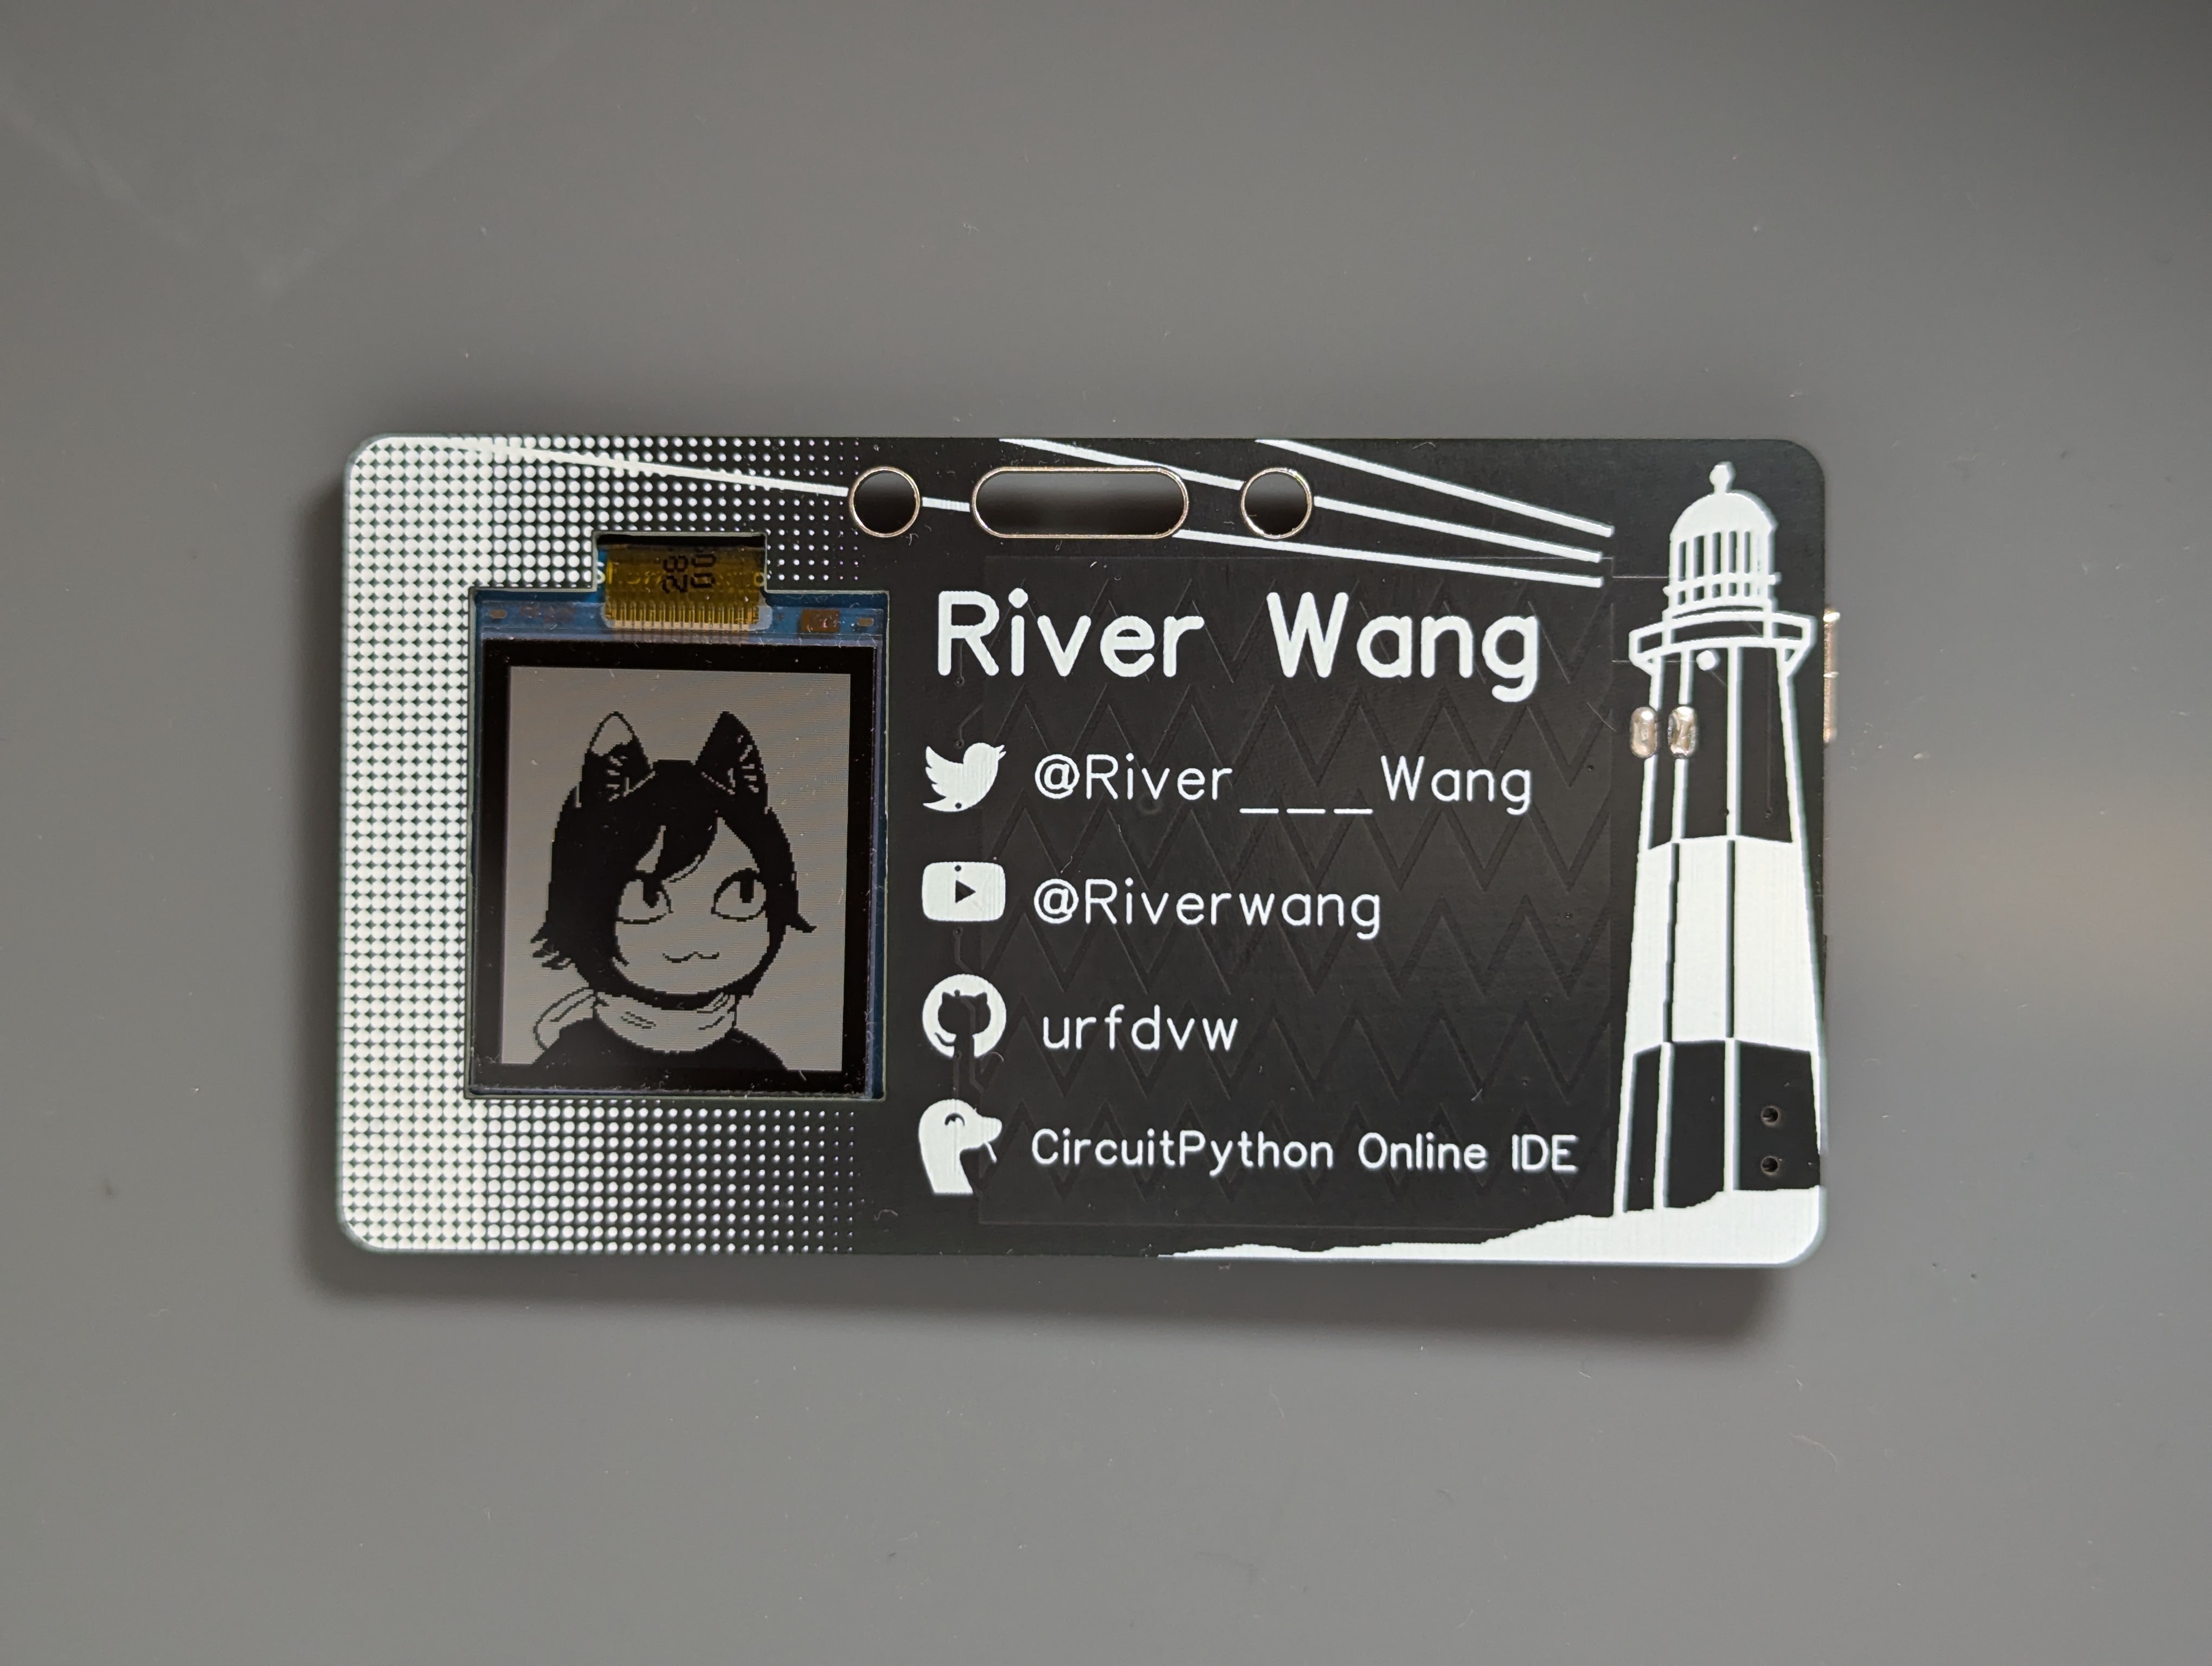
Of course, this is a business card and a badge, so on the right side it has my name on it, along with a brief introduction about myself.
On the left side, people typically include a logo or photo of their business. I could use my YouTube avatar, but that feels too boring. In one of my recent videos, I created an animated avatar by drawing four PNG images (inspired by the character Izutsumi in Dungeon Meshi.) I think it would be a great idea to use that avatar here.
Since this is a maker badge for the LI Maker Faire, I wanted to incorporate elements related to it. The lighthouse in the LI Maker Faire logo is an actual lighthouse in Montauk. As a Long Islander, I’ve visited it several times and really like it. So, I found a good photo of the lighthouse on the MTA's website and drew a sketch of it.
The hardware
PCB can be found at https://oshwlab.com/urfdvw/pod-thing_copy_copy
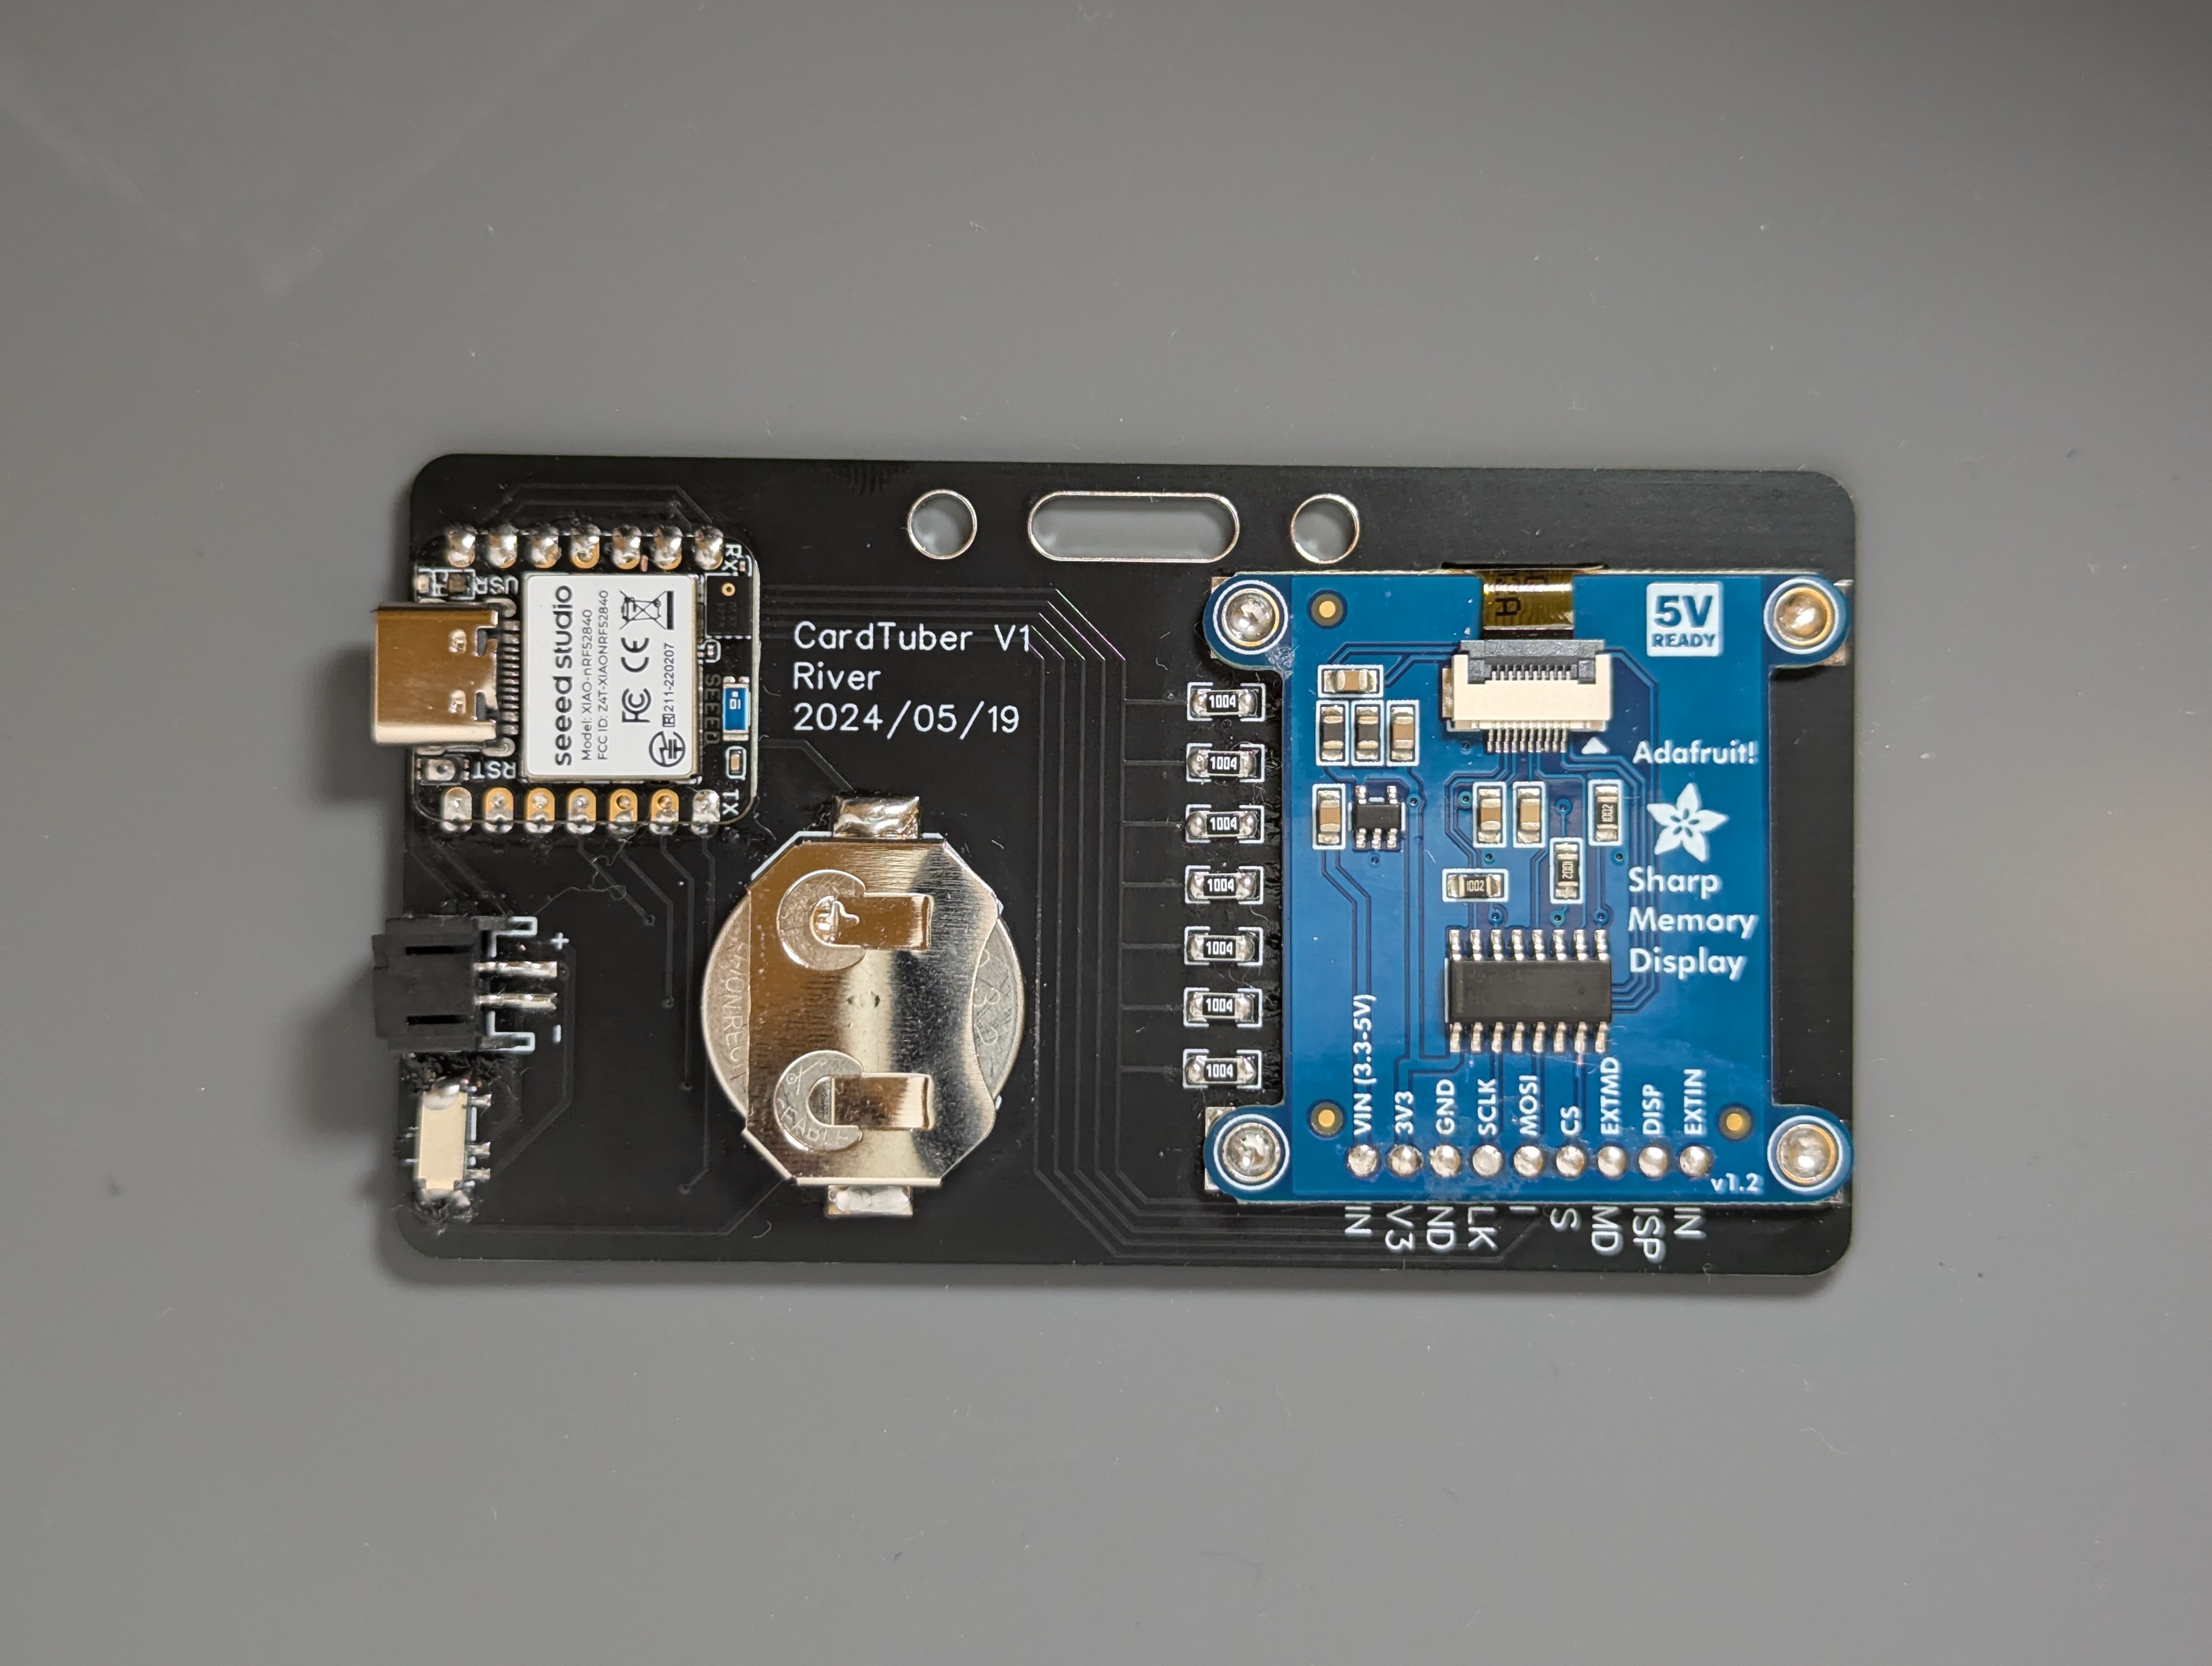
Because the avatar needs to talk when I talk, I need a MIC module to capture the sound. This makes the Seeed Xiao the perfect choice as the microcontroller board. Despite its small size, it includes:
- A powerful computing unit
- A MIC
- A battery management circuit
- (It also has an accelerometer and BLE, which I didn't use for this project.)
The screen I choose is Sharp. I mean it is really Sharp (bad pun).... These Sharp memory LCD are not only power-efficient but also offer excellent image quality.
The Adafruit Sharp Memory LCD module is used here. I used a technique I call "back mounting" to attach the module to the PCB. In back mounting, a hole is made in the PCB for the screen to be visible from the front, while the rest of the module is hidden behind the PCB. There is also a cutout for the cable. The module has four screw holes, but instead of screwing the module onto the PCB, I soldered them together. This way, the module is "stamped" onto the PCB without significantly increasing the thickness, and it looks clean from the front.
If I tell you that this array of resistors is all 1M ohm, you probably know they are used for capacitive touch. Yes, the entire right side of the business card is a linear touchpad. When making capacitive touch PCBs, I usually hide all the traces on the back of the PCB, leaving only the touchpads on the front. And this one is no exception.
There are two battery connectors. A coin cell battery is used to keep the business card thin, but if longer battery life is needed, a LiPo battery can be connected. The Xiao NRF52840 board is in charge of the batteries (bad pun again).
The Software
The code is written in CircuitPython, not only because I am the author of CircuitPython Online IDE, but also because it has excellent support for NRF52840 microcontrollers, MICs, capacitive touch, and Sharp memory displays.
Code can be found at: https://github.com/urfdvw/cardtuber
Blink and Speak
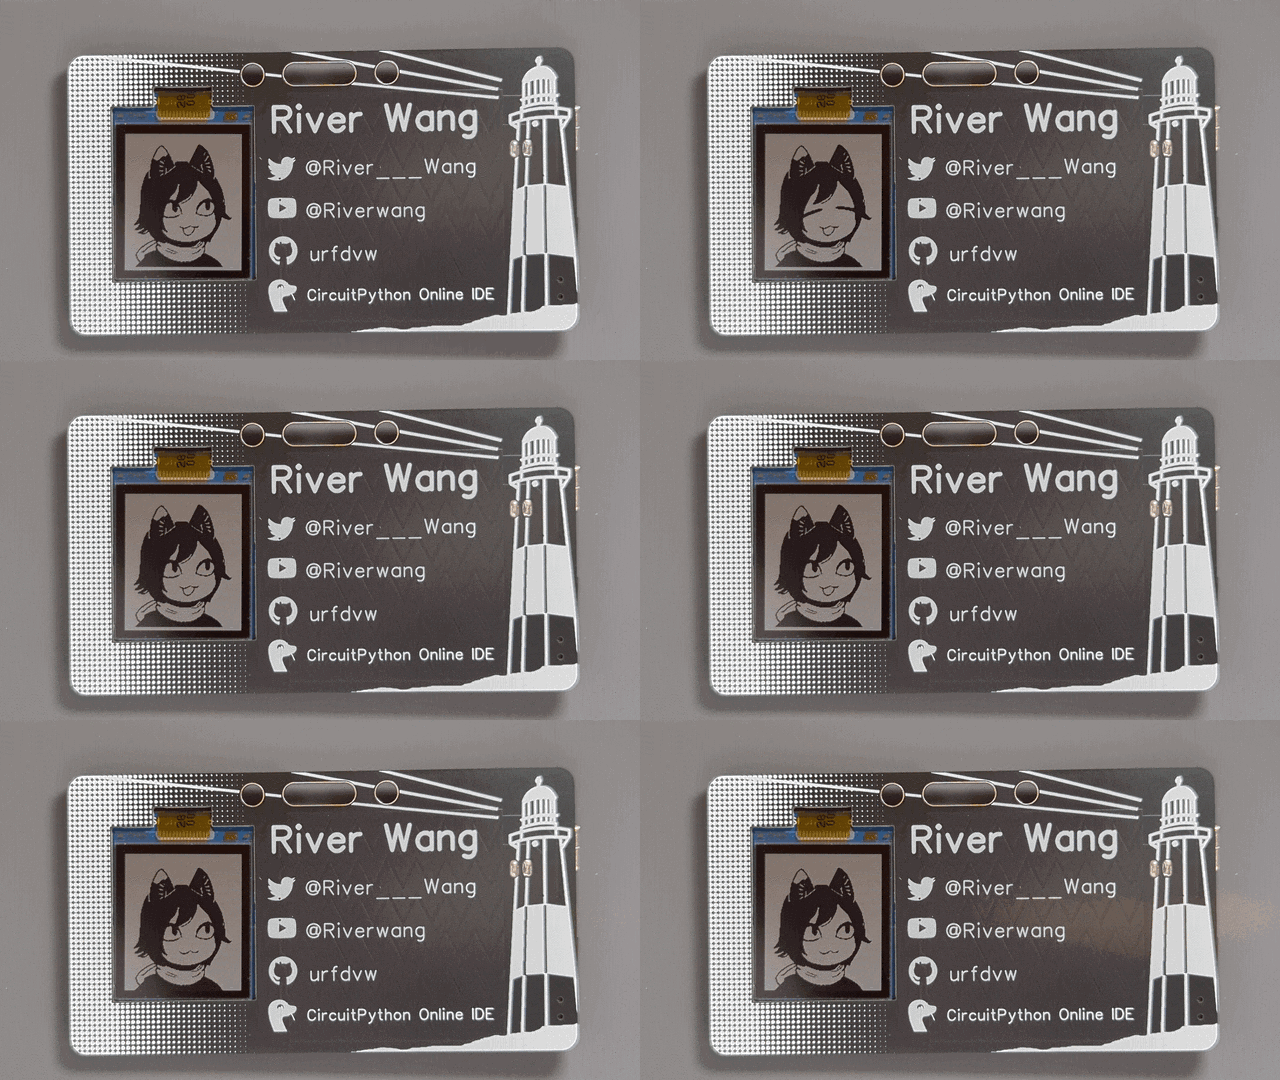
The mechanism is very similar to that of a PNGTuber. Basically, I have four images representing the combinations of mouth open/closed and eyes open/closed. The system selects one of the images based on the current status of the eyes and mouth.
The avatar blinks randomly every 2 to 5 seconds, achieved with a timer set to a random duration.
The avatar speaks when the volume picked up by the MIC exceeds a certain threshold. When speaking, the avatar rises slightly and returns to its original position when it stops, which gives a more lively appearance.
The volume is measured as the logarithm of the sound wave's amplitude. The threshold is just a number. However, the Maker Faire is a very busy environment, so I can't rely on a fixed threshold level due to the unpredictable background noise. Instead, I implemented an adaptive algorithm: The volume levels within a sliding time window are stored in the microcontroller and set the threshold to be slightly above the minimum volume within that window. This adaptive threshold worked very well.
QR code
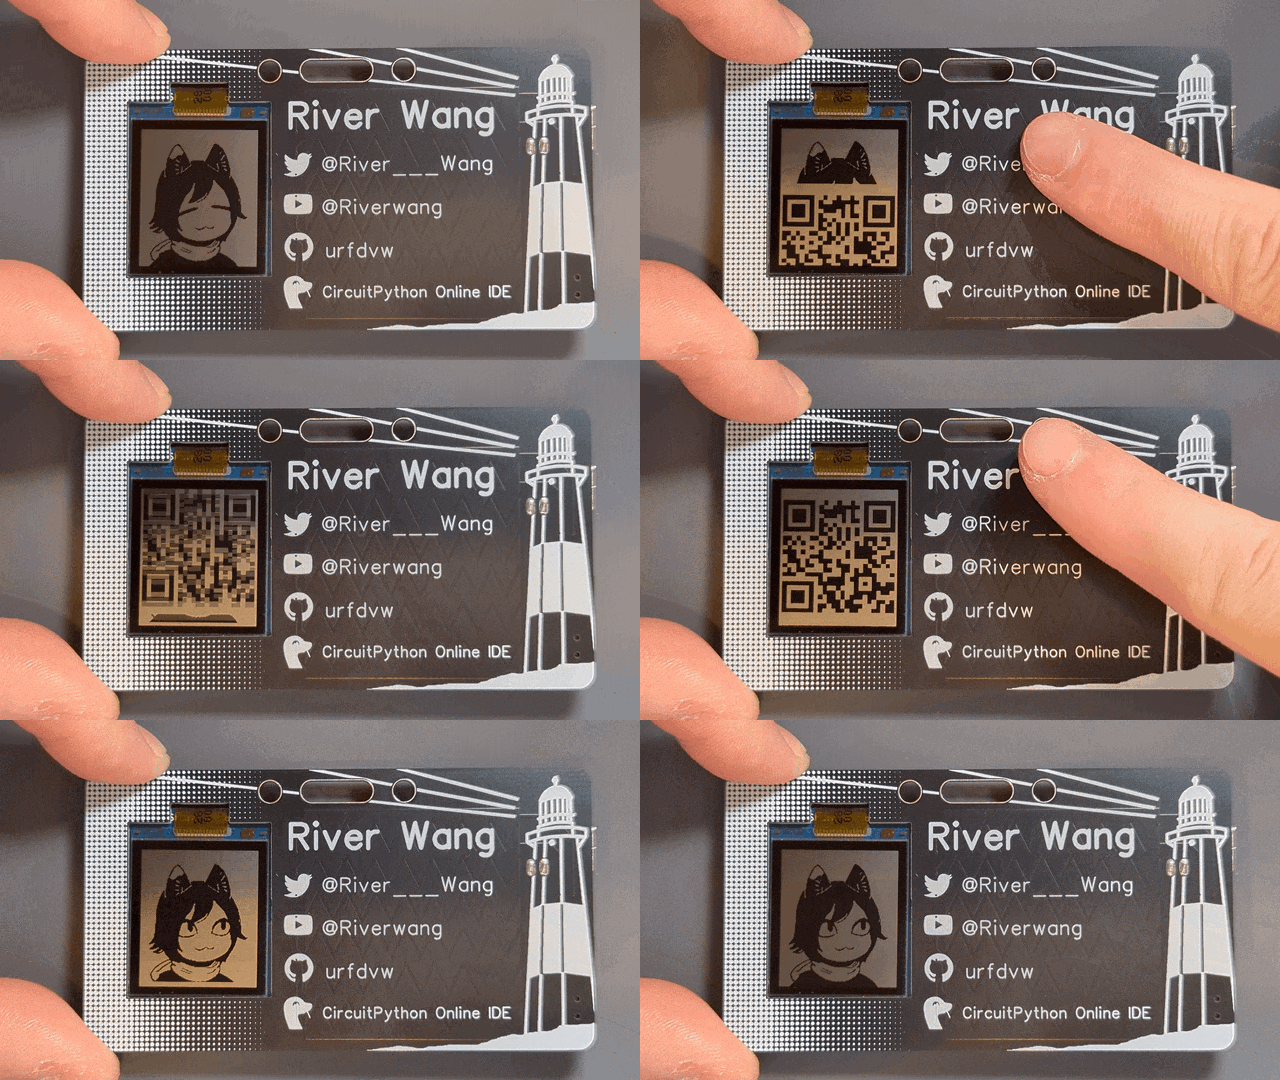
The CardTuber should function as a business card, providing contact information. Even though there's a lot written on the card, I still wanted to present it in a fancier way. When people ask me about my social media or GitHub, I can swipe up on the text to reveal a QR code. Remember, this whole area is a touchpad!
The show
Even though there are holes designed for a lanyard, I wanted to wear this as a maker badge together with the badge of the LI Maker Faire. So, I 3D-printed a case for the badge, which can be attached to the Maker Faire badge with a twist tie. The case also has holes to ensure the MIC is not blocked.
Case 3D module file can be found at https://github.com/urfdvw/cardtuber
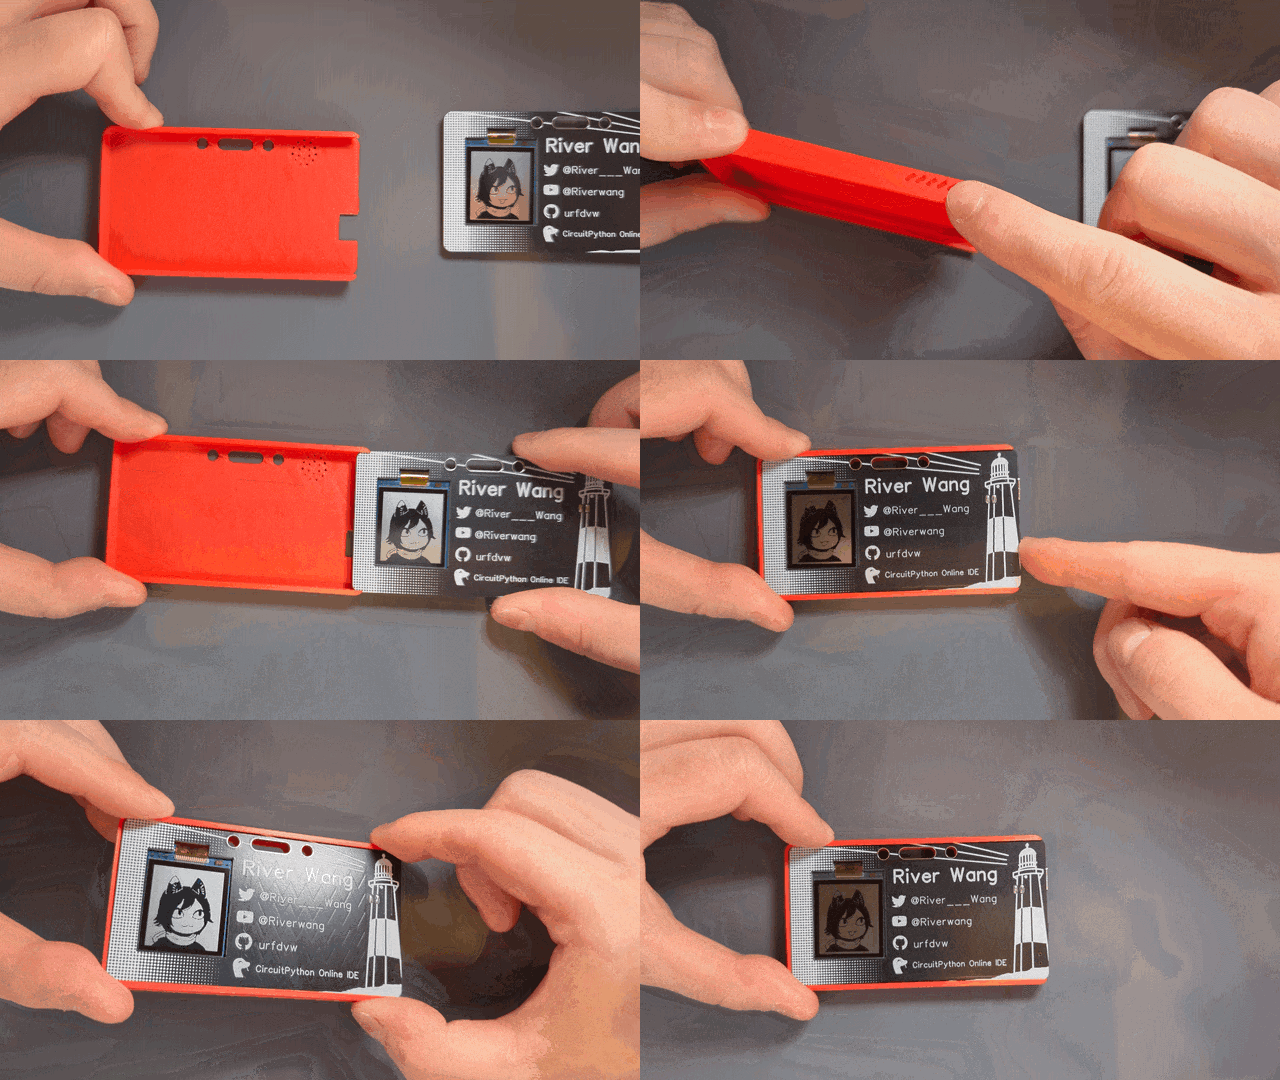
Here is how it looked on Maker Faire day!
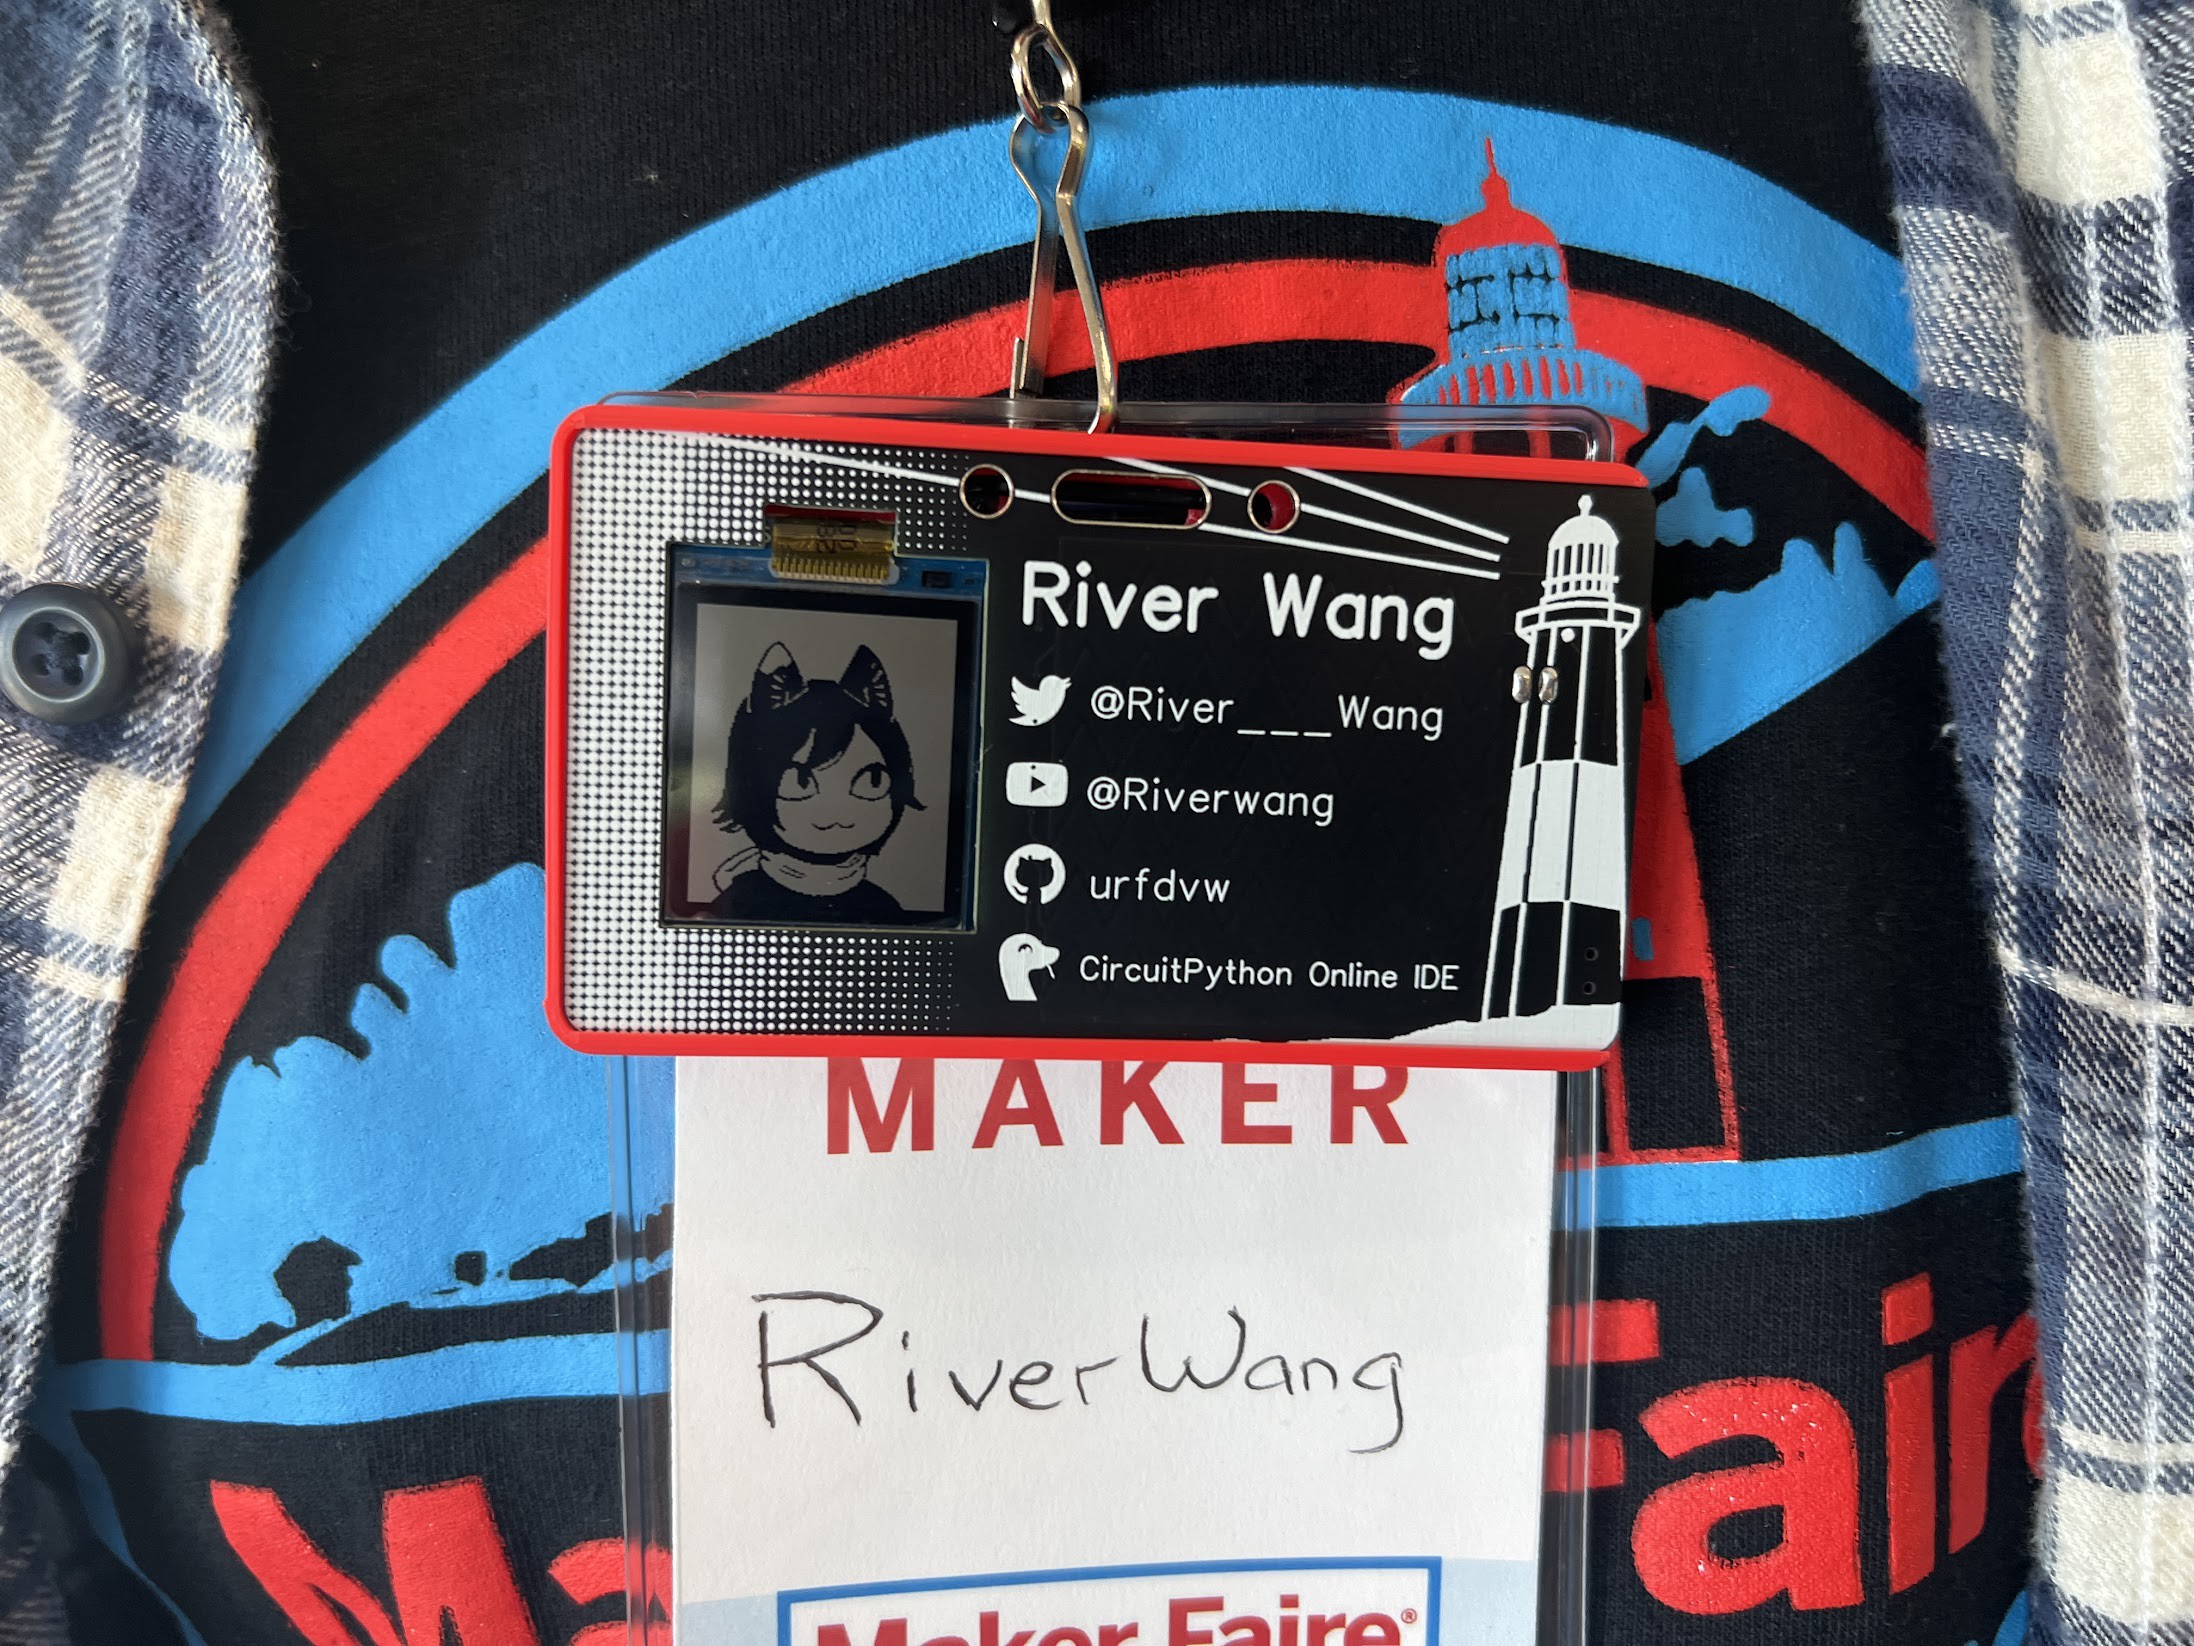
Special thanks to Lisa who took this picture of me on the LI Maker Faire
The bonus
And of course, how can such a thing be complete without games?
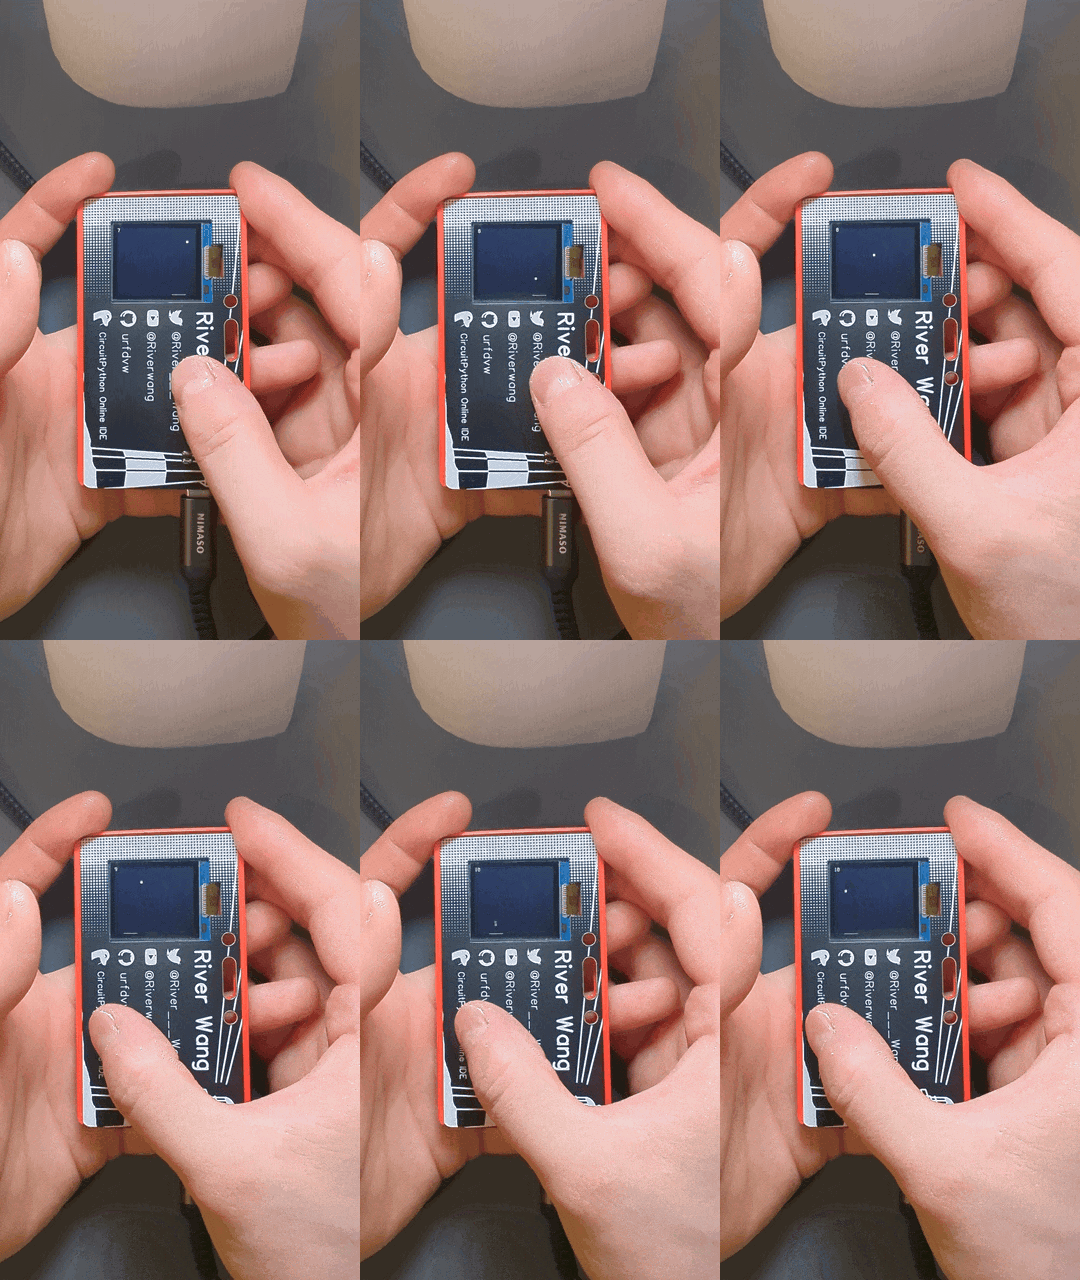
 River Wang