A capacitive proximity sensor is a type of sensor used to detect the presence of an object without physical contact. It works based on the principle of capacitance, which is the ability of an object to store an electrical charge. There are several types of such sensors on the market and each of them is intended for a specific purpose.
This time I will present you an extremely simple way to make such a sensor yourself, which is inexpensive and highly adjustable
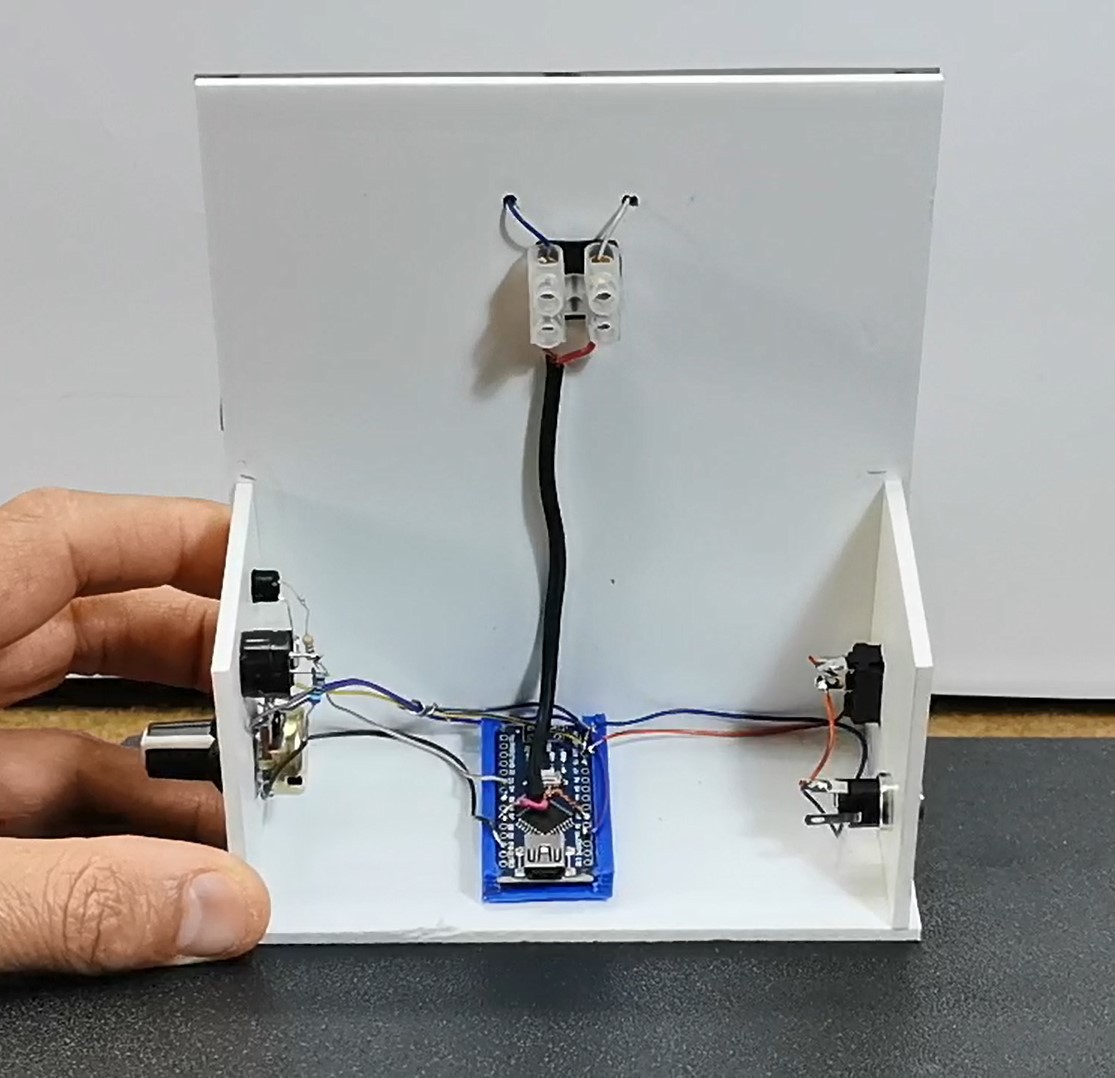
We only need a few components to make the sensor:
- Two thin metal (in my case aluminum) plates
- Potentiometer for setting the sensitivity
- LED and Buzzer for sigmalization, or a relay module to turning on and off a device.
- And Arduino Nano Microcontroller board with appropriate software

This project is sponsored by PCBWay. They has all the services you need to create your project at the best price, whether is a scool project, or complex professional project. On PCBWay you can share your experiences, or get inspiration for your next project. They also provide completed Surface mount SMT PCB assemblY service at a best price, and ISO9001 quality control. Visit pcbway.com for more services.
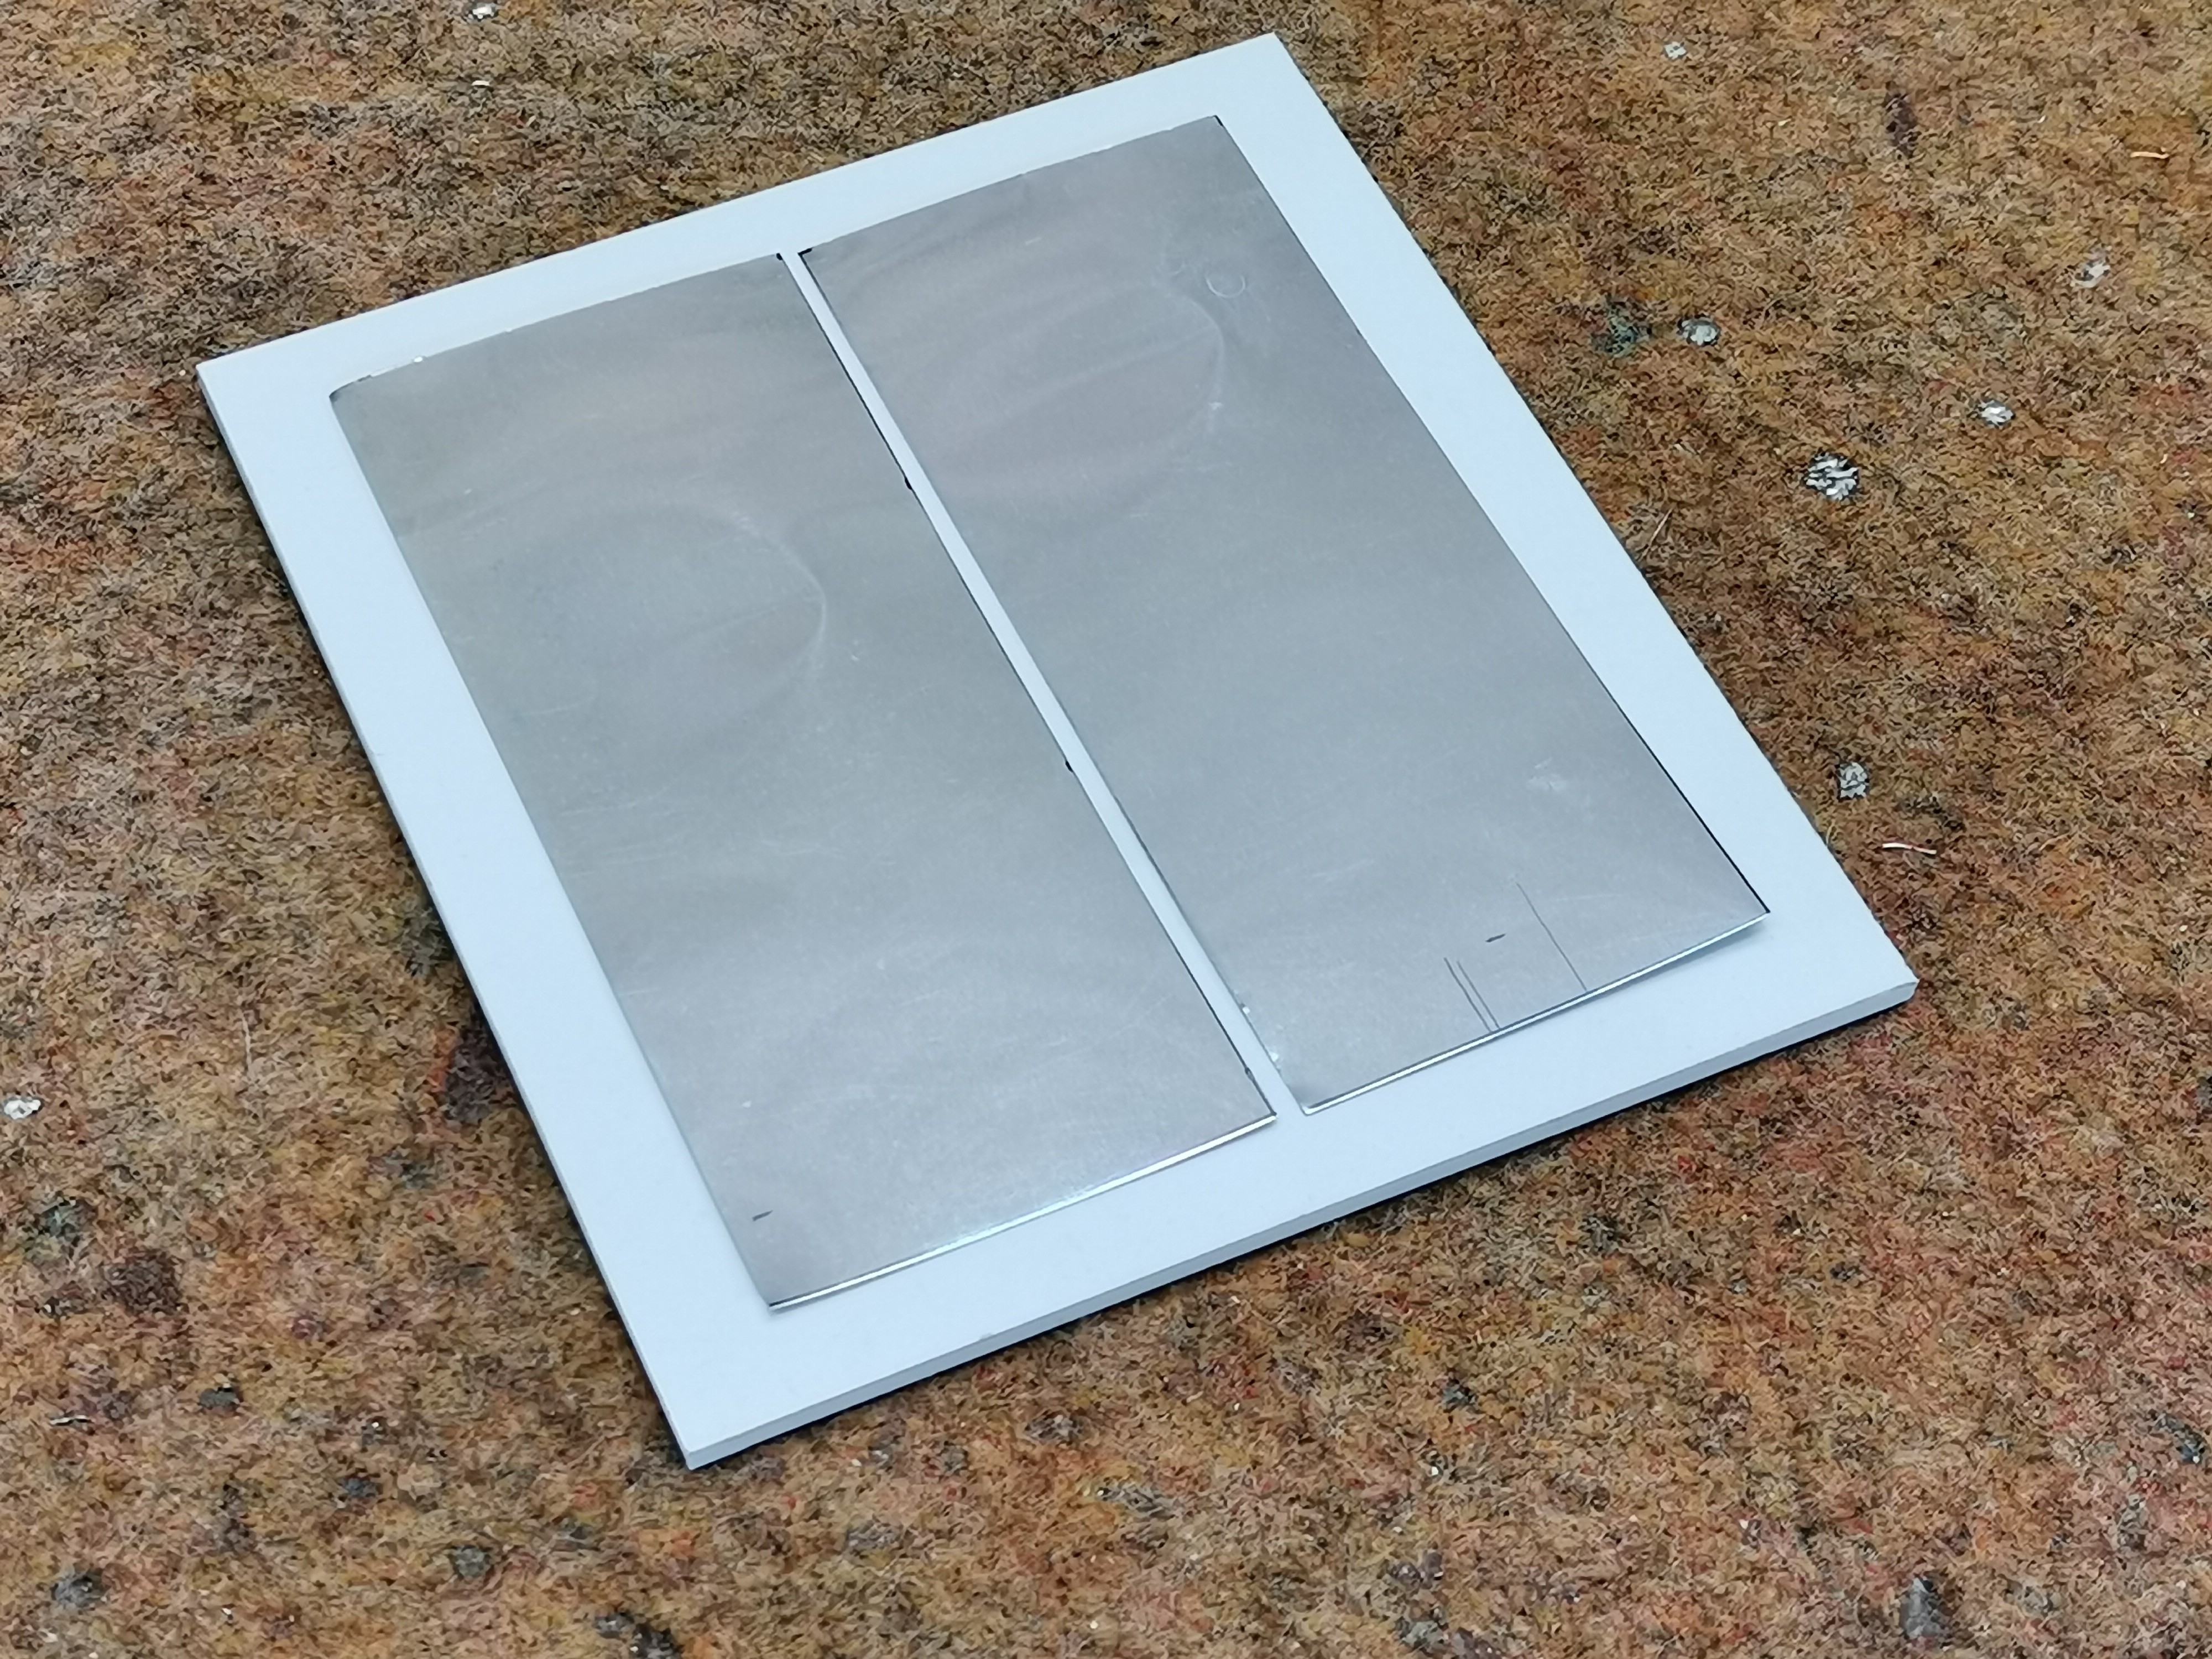
The two plates are glued to an insulating substrate next to each other in the form of a so-called open capacitor, with a certain minimum distance between them. In fact, this is a capacitor with a capacity of 3 to 5 Picofarads in air. If we approach the plates with an object that has a dielectric constant different from that of the air, the capacitance will change, which is detected by the microcontroller and its output gives a suitable signal, or activates some device.
Now let's not go into the explanation of the term dielectric constant, just to give you an example of its value for some materials. For Water, dielectric constant is 80, glass from 4 to 12, PVC 4, for wood about 3, the human body about 40, and dry air has exactly 1 dielectric constant.
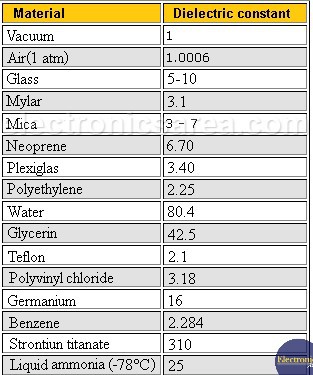
It can be seen from the above that the sensor will be most sensitive to water, than human body, etc...
The microcontroller code is relatively simple thanks to the wonderful "Capacitor" library that accurately measures the capacitance of an unknown capacitor without the use of external components. Now I'll show you what it looks like just using this library and a serial plotter from the Arduino IDE. The relatively constant line represents the capacitance of the open capacitor plus that of the coaxial cable that runs from the plates to the microcontroller. In this case it is about thirty picofarads.
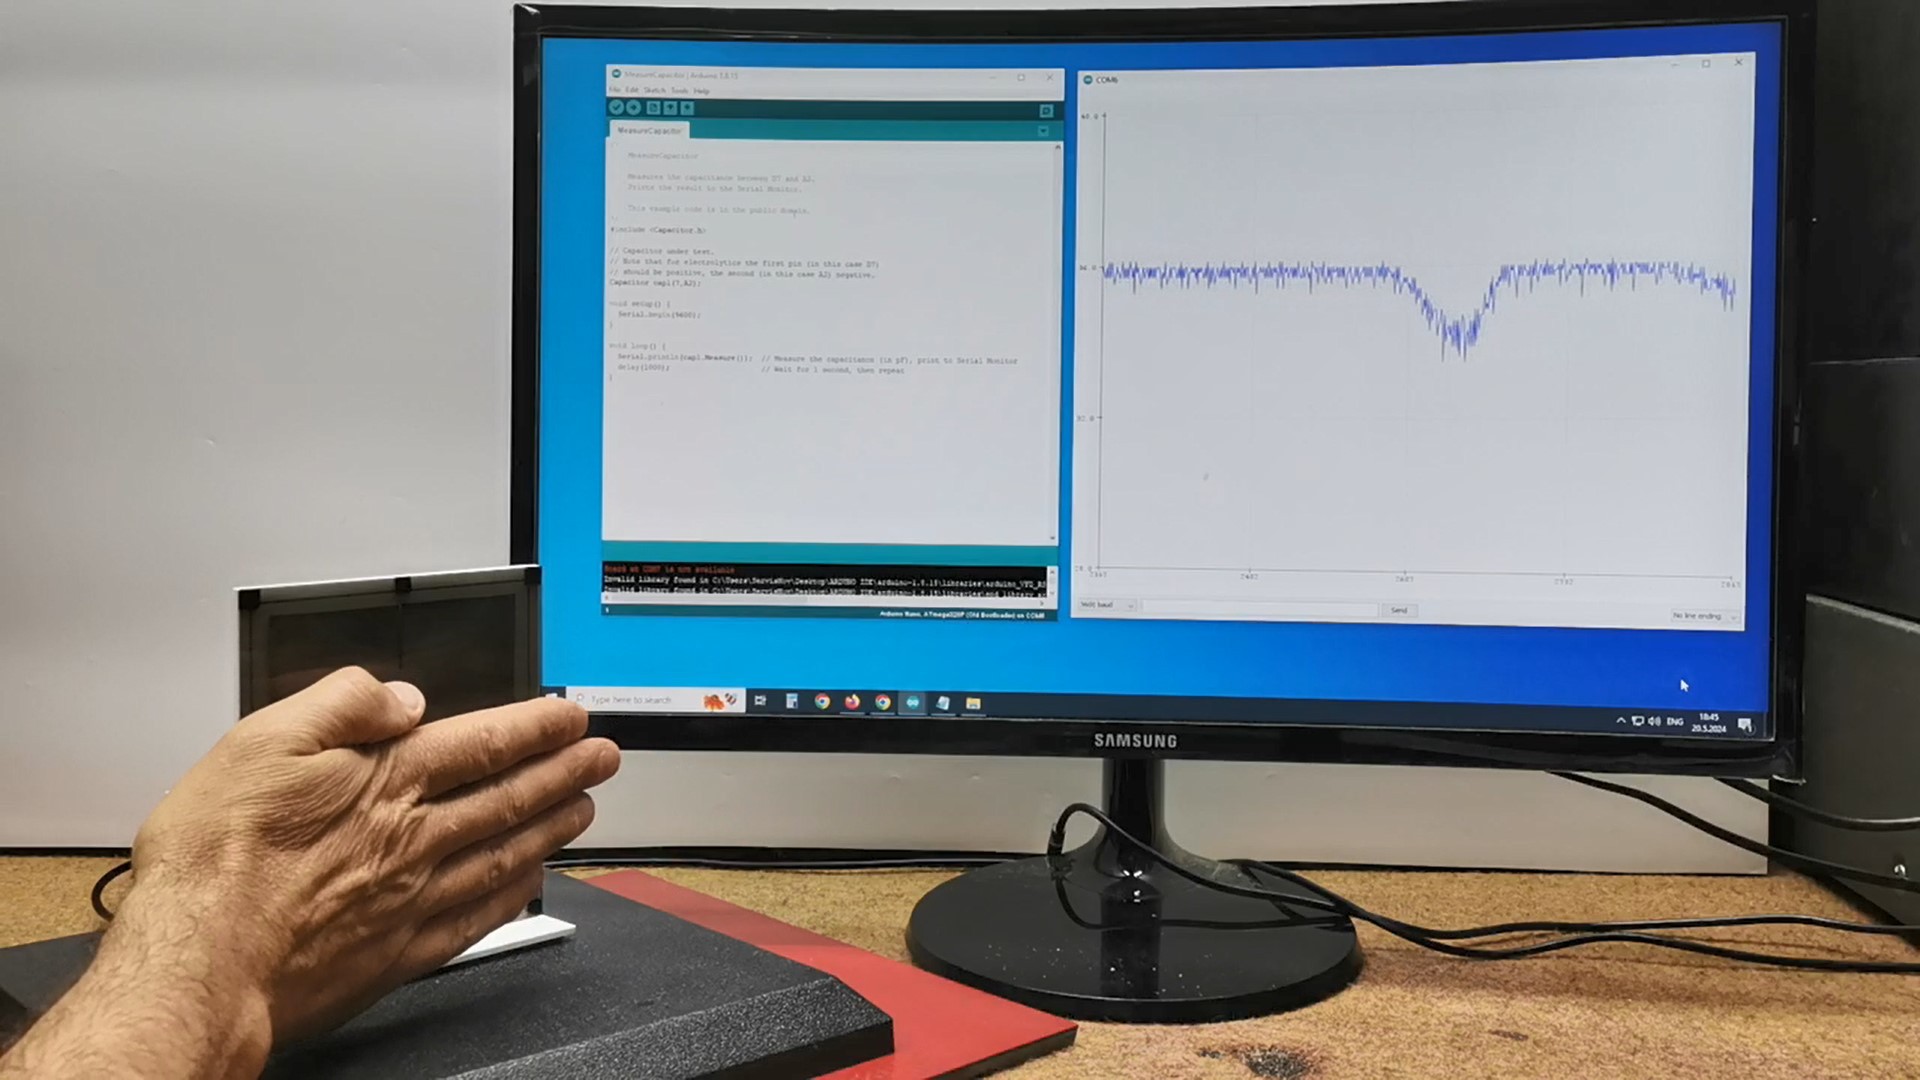
As the hand gets closer to the plates, the capacitance decreases which is clearly seen on the serial plotter. The same applies to water.
For this purpose I wrote an extremely simple code. As we can notice, we first measure the capacitance of the open capacitor plus coaxial cable system, and the value generated by the position of the potentiometer, which we have to adjust to be the closest to the above mentioned capacitance. If we bring an object with a higher dielectric constant close to the plates, the capacitance decreases and when it becomes lower than the previously set constant value of the potentiometer, an alarm is triggered or some device is turned on via a relay module.
Now I will demonstrate the features of the complete sensor device. After turning on the device, with the help of the potentiometer, we need to set the sensor activation threshold in a way that we set it in the position closest to the self-activation of the alarm. Then the sensor is most sensitive. Next I will test the functionality by bringing my hand closer to the metal plates.
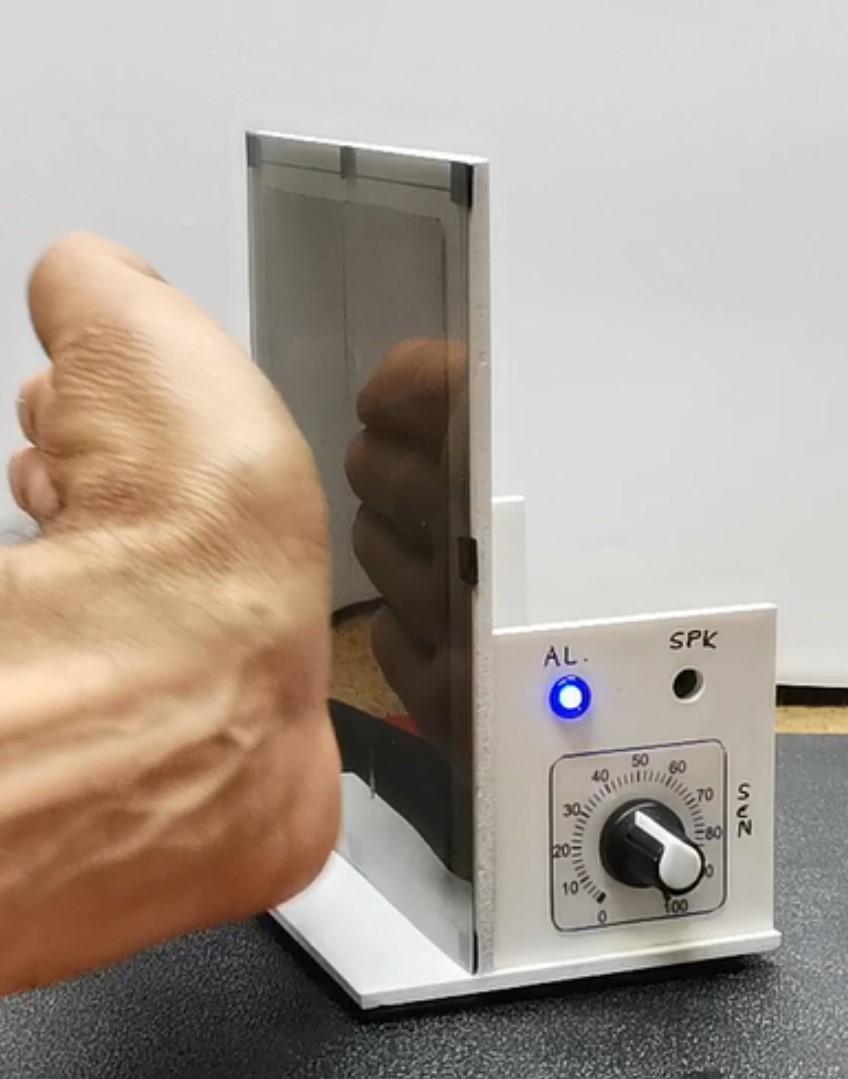
The reaction of the sensor is instantaneous when we bring our hand closer to a certain distance.
If we approach, for example, wood or plastic, the sensor does not react at all. This property can be used very effectively to protect against injuries, for...
 mircemk
 CustomElectronics
 Keerat Singh
 Andrew Lamchenko

 CaptMcAllister