Close
0%
0%

Microfluidic Business Card

Who said only electronic signals can flow through circuits? I used water instead.

Public Chat
Similar projects worth following
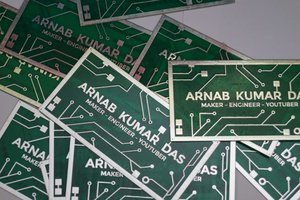
I was inspired by PCB business cards a few years back but I am not an electronics engineer. I can make simple PCB designs but that would send the wrong signals. I admit, I was even a tad jealous, wishing I had something equally unique. Fast forward a few years, I found myself designing an old school paper business card. So I had an idea of making a business card according to my own expertise: in microfluidics.

I did not seek perfection. Instead, I wanted to make it quick and dirty, resource friendly (using old/expired materials) and learn something along the way.

Perhaps in the future, I would like to try some microfluidic concepts, such as droplet generators, sorters, valves etc. Even an embedded system with a PCB attachment is a possibility. Please, feel free to join me :)

I had to reupload the video with some personal info blurred. You can find the old link below, which I will remove later at some point. New video:

Old Video

  • 1 × SLA printer
  • 1 × UV curable resin
  • 1 × PDMS (optional for the PDMS version)
  • 1 × UVC lamp (optional for the PDMS version) or lot's of sun bathing
  • 1 × Tubings of choice

View all 12 components

  • 1
    2D Design

    Design your credit card in a vector graphics format. I used Inkscape. You can take your existing designs. Convert it into paths. Convert lines into 2D objects (squares, circles etc.). Basically, make sure that everything is a 2D shape with no strokes. No need to design the channels etc. at this stage.

  • 2
    2D to 3D design

    Import the SVGs into your CAD software. I used FreeCAD. Extrude everything by a defined length. I also made a quick macro to refer the extrusion length to a spreadsheet value. That way it is more parametric and you can easily update it. This value is the depth of your visible features (text/logo/QR code).

  • 3
    Card Design
    • For the printed only version: Join (union) all those features. Design a prism (thick paper card) and
      subtract those features. The card needs to be thicker than the features! Features should leave empty pockets on the card.
    • For the PDMS version: Join (union) all those features. Design a prism (thick paper card), add some rims/walls* and
      add those features on the surface. The card needs to be thicker than the features! Features should extrude on the surface of the card.
    • * this piece will be a mold for the PDMS. It should be a container to contain the viscous PDMS until it cures. That's why we need the walls.

View all 7 instructions

Enjoy this project?

Share

Discussions

8171forcheck wrote 07/23/2024 at 17:05 point

https://8171check.com

  Are you sure? yes | no

morgan wrote 07/10/2024 at 01:51 point

Nice work! I saw the video on YT and rushed over here to make sure you submitted it!

  Are you sure? yes | no

Saren Tasciyan wrote 07/11/2024 at 08:06 point

Thanks! :)

  Are you sure? yes | no

Saren Tasciyan wrote 07/02/2024 at 08:06 point

I would like to try some microfluidic concepts, such as droplet generators, sorters, valves etc. Even an embedded system with a PCB attachment is a possibility. Please, feel free to join me :)

  Are you sure? yes | no

Similar Projects

Does this project spark your interest?

Become a member to follow this project and never miss any updates