Oops! Well, at least now I have a nice example of everything that could go wrong with this concept and can improve with the next iteration.
I'll 3D-print the display thicker for better diffusion, but that will cost brightness. Some more efficient LEDs would be really handy now. The ones in second V1.0 batch should have some 20% more millicandelas per watt, but a 200-300% increase is also possible with just slightly more expensive LEDs. Well, there's V1.1 coming up anyway soo...
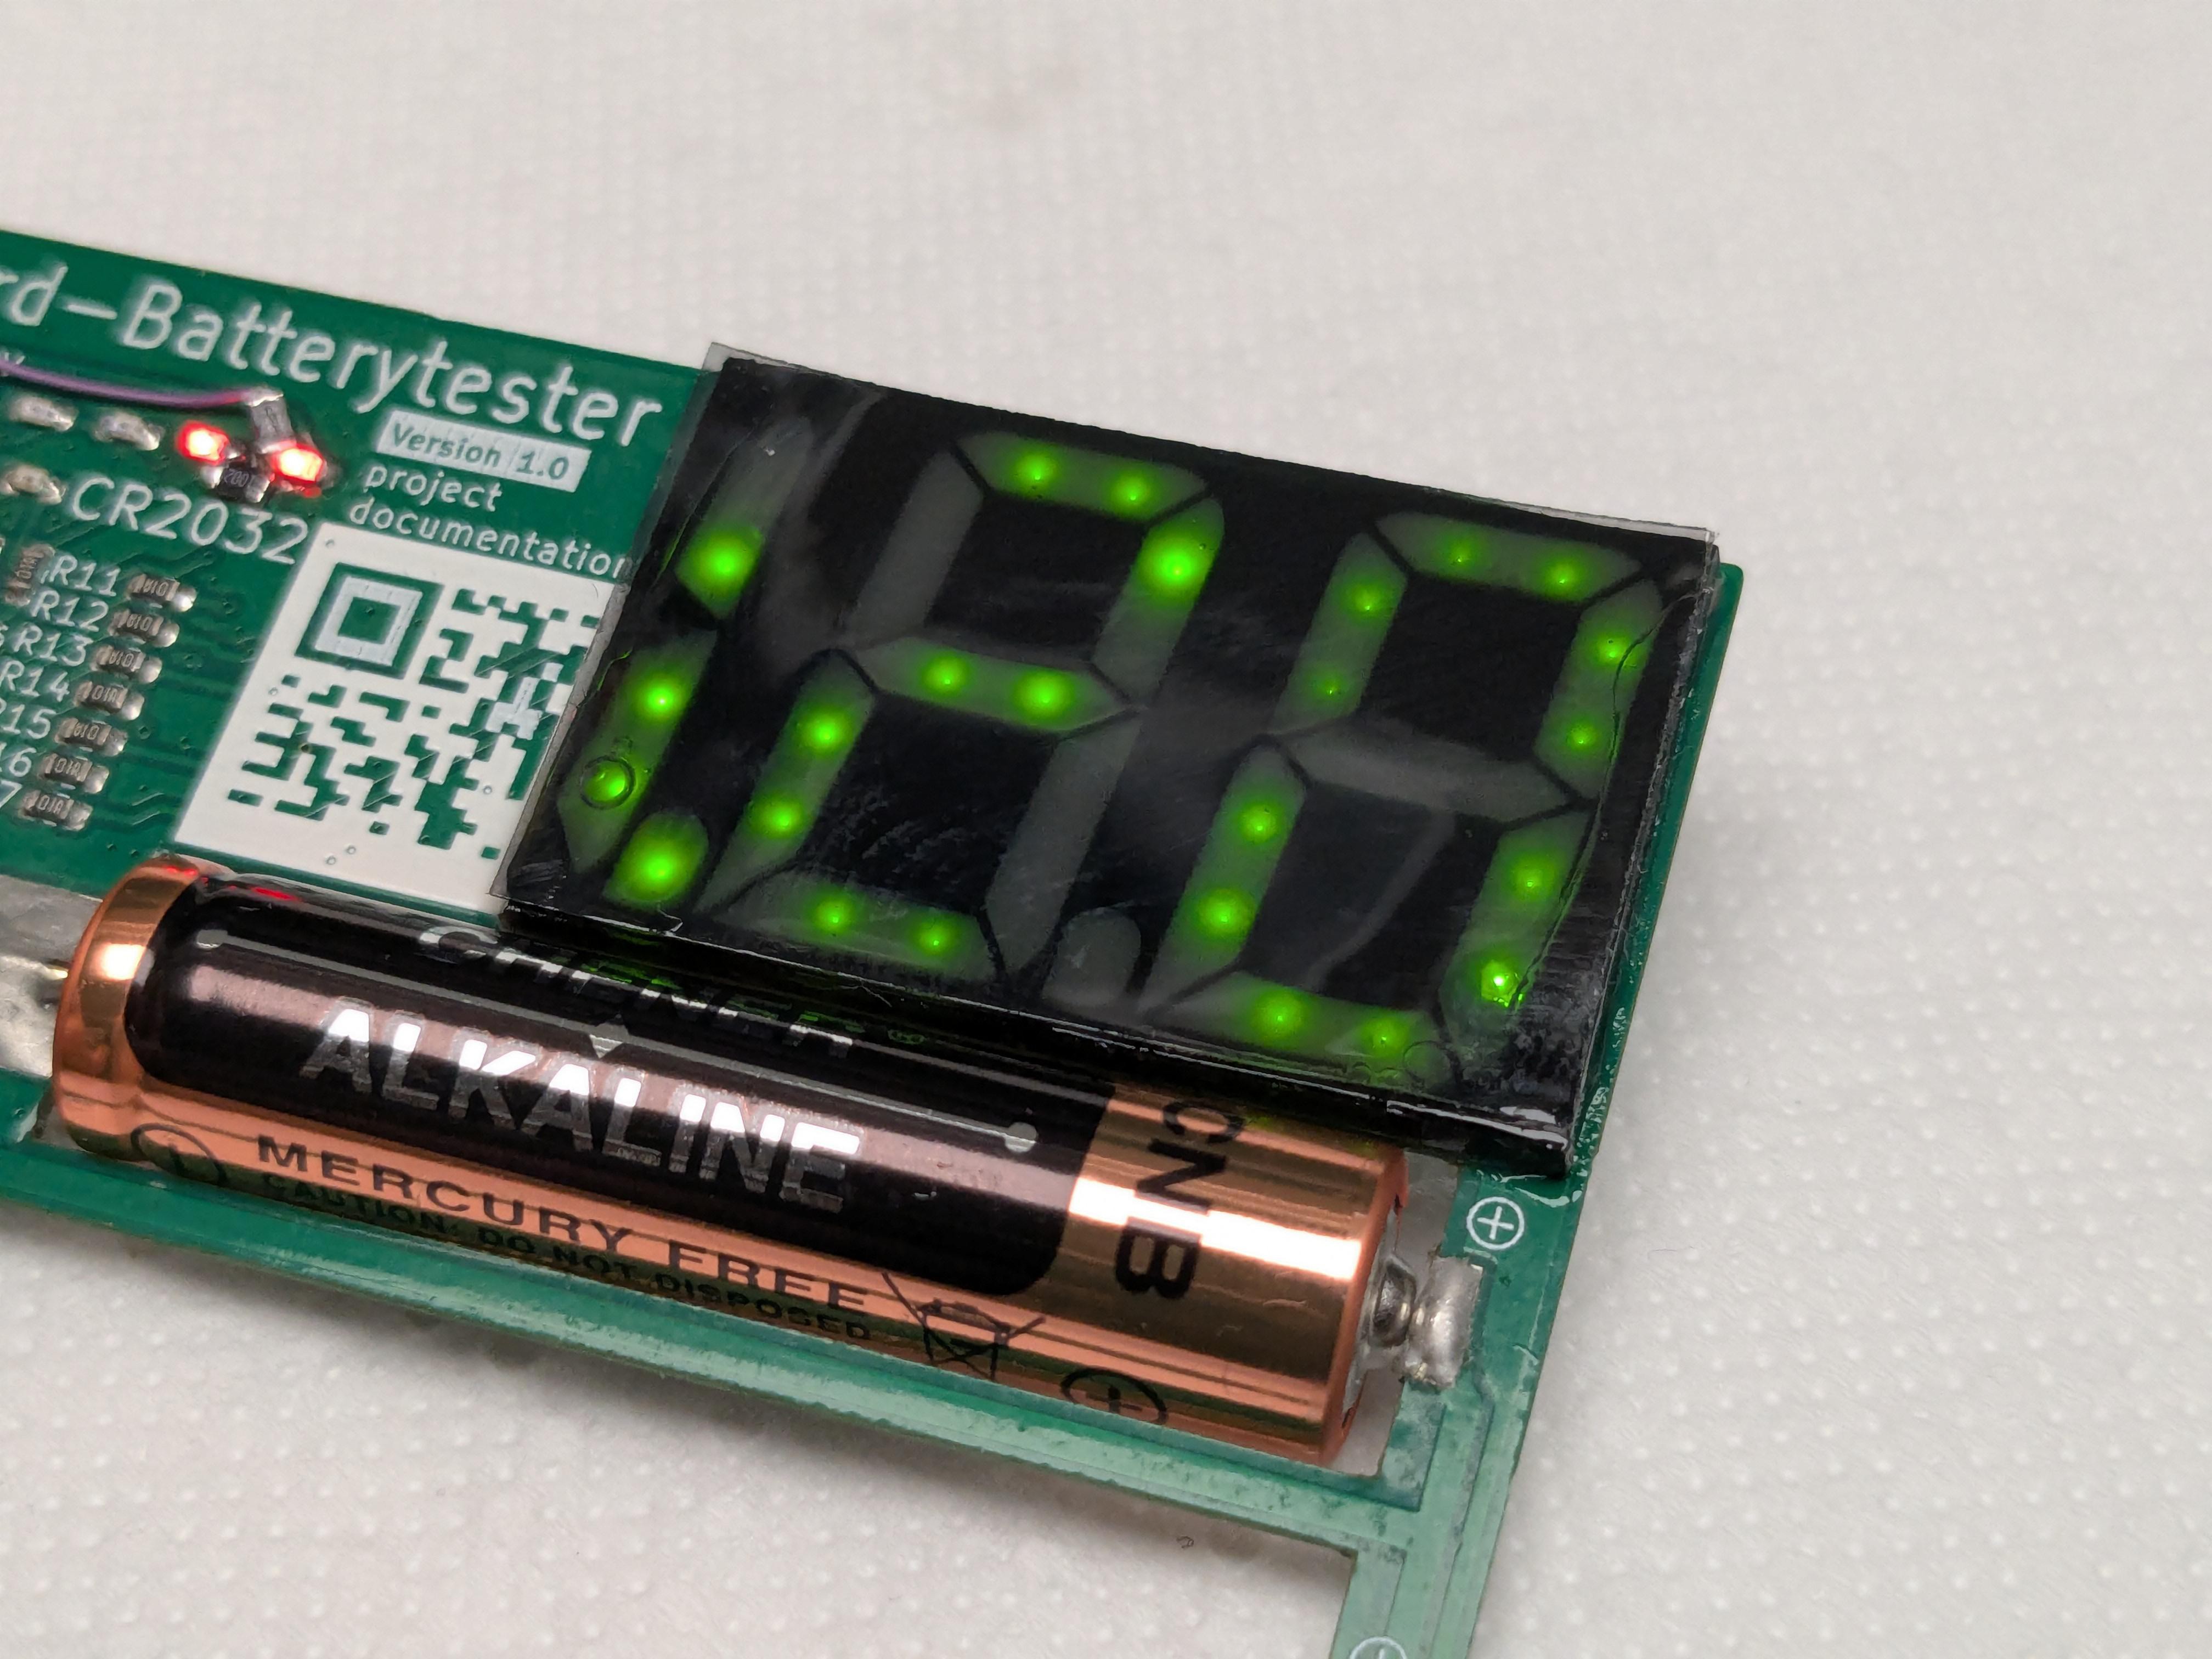
I've been holding off on experimenting with improving the display by using milky resin to diffuse the segments and adding a circular polarization film, because like many things, I've wanted to film the process and something was always not ready. Well, the ball is finally rolling!
Seen here:
- the CPL filters also filtered out a lot of diffused light, so that's just not the way to go.
- It's hard to avoid air bubbles in the resin
- (for this application) should have gone with emerald green LEDs due to much greater efficiency and thus higher brightness
Less visible:
- resin can easily pour out at the edges (happened near the QR code)
- the center pieces are wiggly before fully curing, as they're effectively held in place by a compliant mechanism. Need to manually hold them and cure with a flashlight.
- the segments aren't perfect due to printing vertically with overhangs. Previous version had a flat piece in the front that prevented a lot of printing issues.
Next I'll experiment with increasing the display thickness from 1.8mm to 3mm. That's as far as I'm willing to go in the name of better segment diffusion.
Discussions
Become a Hackaday.io Member
Create an account to leave a comment. Already have an account? Log In.