CanHobby.ca
In a previous project I covered Getting Started with the Arduino core on a MILK-V Duo. If you are not familiar with preparing the SDcard boot loader I recommend you check out this project. This same bootloader will be used in this example. There exist more up to date boot images for the Linux core but they do not yet support Arduino. In my next project I will be showing how to use the inter-core mailbox to pass data to the Arduino core.
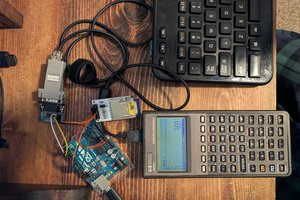
The following examples assume that the MILK-V Duo is connected to your Linux PC using a USB-C cable. If no mods have been done to the SDcard the blue LED should be blinking.
Like most Linux SOC implementations such as the fruit PIs the MILK-V Duo has more than 1 way to skin a cat when it comes to manipulating the hardware I/O. The 2 principle methods are:
- the '/sys' file system where values are written to, or read from a file to produce I/O. This is handy when doing quick operation with a BASH script, but can be slow.
- the 'wiringX' library which allows us to run "Arduino-like" 'C' programs to manipulate I/O.
- kernel drivers which are found in the '/dev' directory. These are normally called from a 'C' program using standard Linux file I/O conventions.
- First we will tackle a BASH script using the '/sys' system.
WorkFlow:
To run a simple BASH script on the Linux core only requires that you login to the Linux core. This can be done via SSH by opening a terminal window and typing:
ssh root@192.168.42.1
you will be asked to enter the password which is milkv. The first time you will most likely need to confirm the security key by typing yes.
You should now have a root milkv-duo linux prompt in your terminal window. Try a pwd - you should be in /root which is root's home directory. If the blue LED is blink you should go to the /mnt/system directory and do the following to disable the default blink script so that we can write our own (by renaming the script).
 [root@milkv-duo]~# mv blink.sh blink.sh.backup && sync
 [root@milkv-duo]~# reboot
We want to create a BASH script called "blink.sh" . There is a copy in the Files section.
to create our script we will use the vi editor.
[root@milkv-duo]~# vi blink.sh
type i to enter insert mode. You can now just copy and paste the script from the Files section. Hit 'ESC' to exit insert mode and then type ":wq" to save the file and exit the editor.
Type:
[root@milkv-duo]~# chmod +x blink.sh
[root@milkv-duo]~# ./blink.sh
to make the script executable and run it. You should see the blue LED begin blinking. Type "Ctl-C" to stop the script. If you want to get creative change the numbers after each sleep command. They represent a delay command expressed in seconds.
Now is as good a time as any to act like serious Linux origrammers, seeing as that what we will be doing in the next step. There are 2 easy short cuts to streamline the above instructions.
- First we can have our own Linux PC remember the IP address of the MILK-V. We can do this
by simply adding the line 192.168.42.1 milkv to our /etc/hosts file.
with this we can change the 192.168.42.1 to milkv in the ssh command.
- Second install putty if not already present on your system and set it up with an entry for
ssh into "milkv" - then we can open putty instead of terminal
In the next section we will be using this approach when we write a 'C' program, compile it, and then send it over to the Linux core.
 WestfW
 Wassim
 Ember Leona