Easy-to-Use Touch Sensor and Timer IC Electronic Piano Toy - Perfect for Kids and Learning!
I wanted to create a simple musical toy, so I found a classic electronic piano circuit using the 555 timer IC on the internet. The circuit was famous, so instead of using a button, I decided to use a touch sensor for input. This was my first time working with a touch sensor, but by using a dedicated touch sensor chip, I was able to create a working touch board easily. This simple circuit plays accurate musical notes, making it perfect for kids' gifts and educational purposes. I hope this information on the touch sensor IC helps you in your own designs.
Easy-to-Use Touch Sensor IC : AI08B
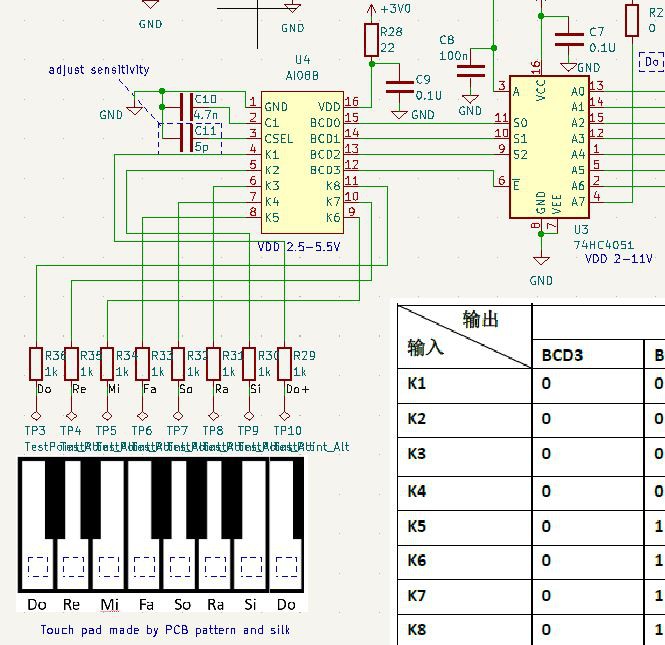
I used the Sam&wing AI08B chip to control the touch sensor. This IC works very well with only a few extra external CR components and can create an 8-point touch sensor. Here is the link to the datasheet.
Schematic
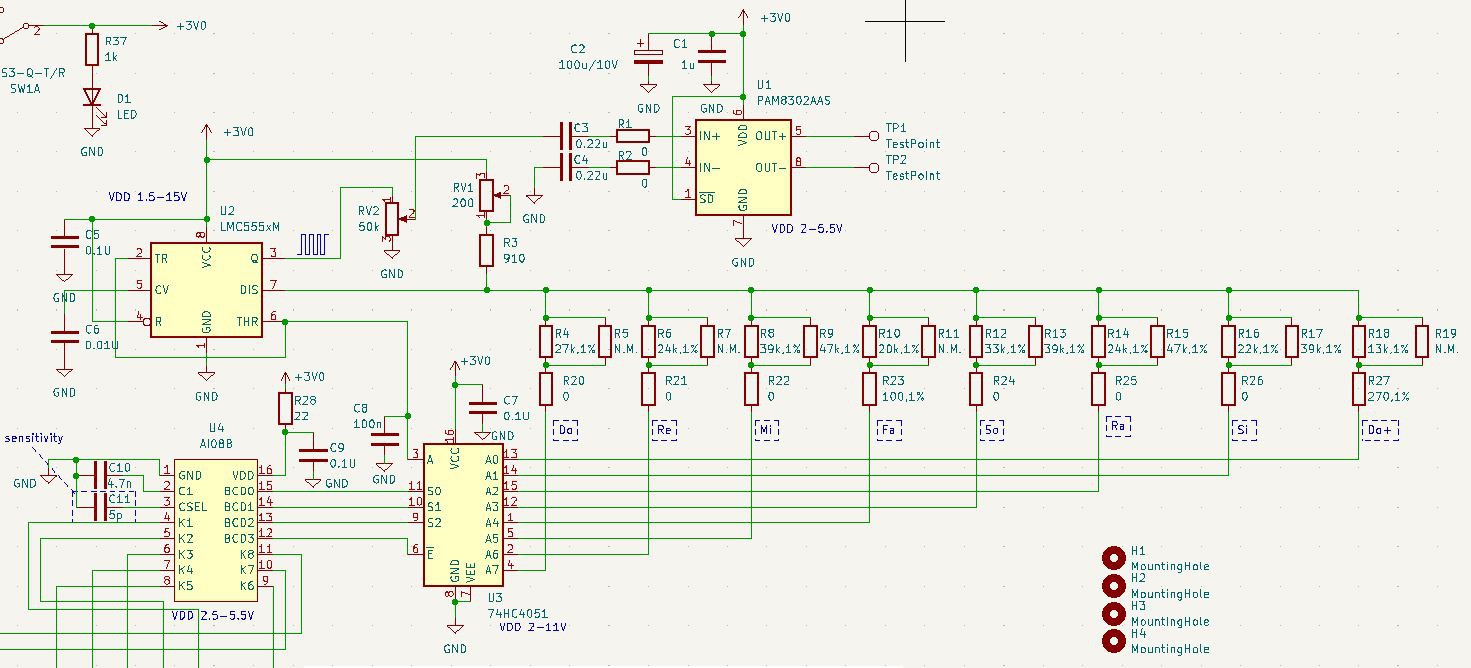
I attached the schematic and PCB gerber files in this project. Please refer to it.
The oscillator and electronic piano circuits using the 555 timer IC are classic designs, so you can find information about them anywhere. The three points I focused on improving are as follows:
- Use a low-voltage version of the timer IC for battery operationWhile the regular NE555 timer IC works from 5V, the low-voltage LMC555 works from 1.5V, making it suitable for battery-powered devices.
- Implement high-precision surface-mount film capacitors for accurate pitchFor the capacitor C8, which determines the oscillation frequency along with the resistor, I used a high-precision Panasonic surface-mount film capacitor (±2%) ECHU1H104GX9.
- Allow fine-tuning of the oscillation frequency using a resistor networkTo accurately tune the musical notes, I made it possible to combine multiple resistors in series and parallel. (In the end, thanks to the high-precision Panasonic film capacitors, the correct notes played perfectly without any adjustment.)

RV1 and R3 are for fine-tuning the oscillation frequency, but adjusting them didn't change the pitch much. So, replacing them with a single 1k, 1% resistor should be fine.
I used this online simulator to calculate and check the oscillation frequency of the oscillator circuit using the 555 timer IC.

The touch sensor circuit is basically the same as the recommended circuit from the AI08B chip's datasheet.
The AI08B touch sensor IC outputs the status of 8 touch sensors in BCD format, so I use the 74HC4051 multiplexer to convert it to outputs 1-8. Each of the 8 touch sensors connects a different resistor network to the 555 timer IC, setting the oscillation frequency.
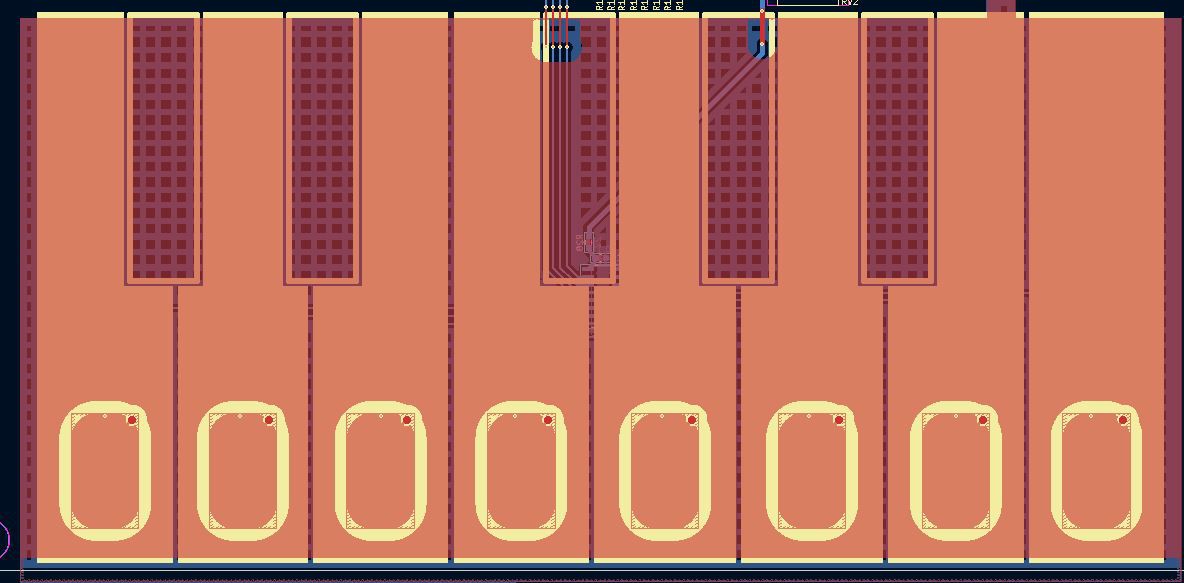
This was my first time making a touch sensor board, so I referred to this site for guidelines on touch sensor design.


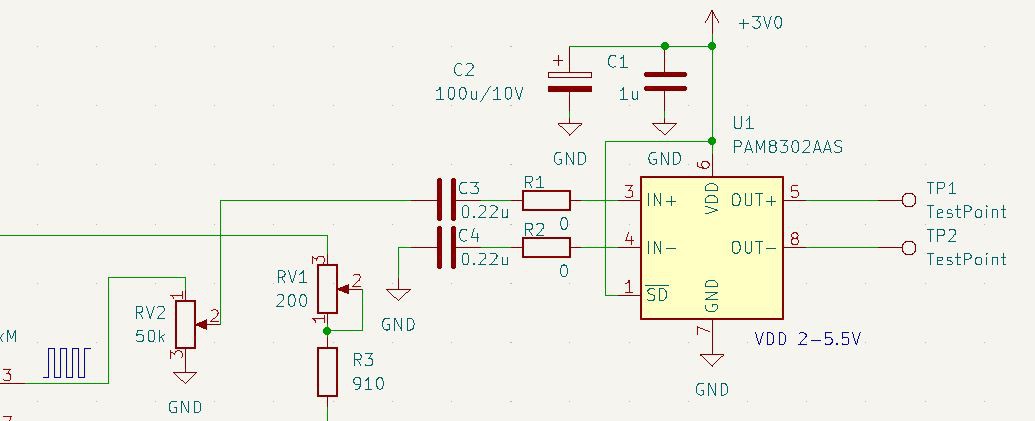
To drive the speaker, I used the PAM8302AAS Class-D amplifier IC, which operates from 2V. The circuit is exactly as shown in the PAM8302AAS datasheet.
Demo
Thank you for reading until the end! I'm selling original hardware like music samplers online. If you're interested, please take a look at my store.https://snapbeat.net/
 Hiro Akihabara