 moosepr
If you have ever used a tiny keyboard like this, you will know how important the design of the keyboard is. While I would love to have some really good mechanical keyboard action, that would make the device too big to fit into a pocket.
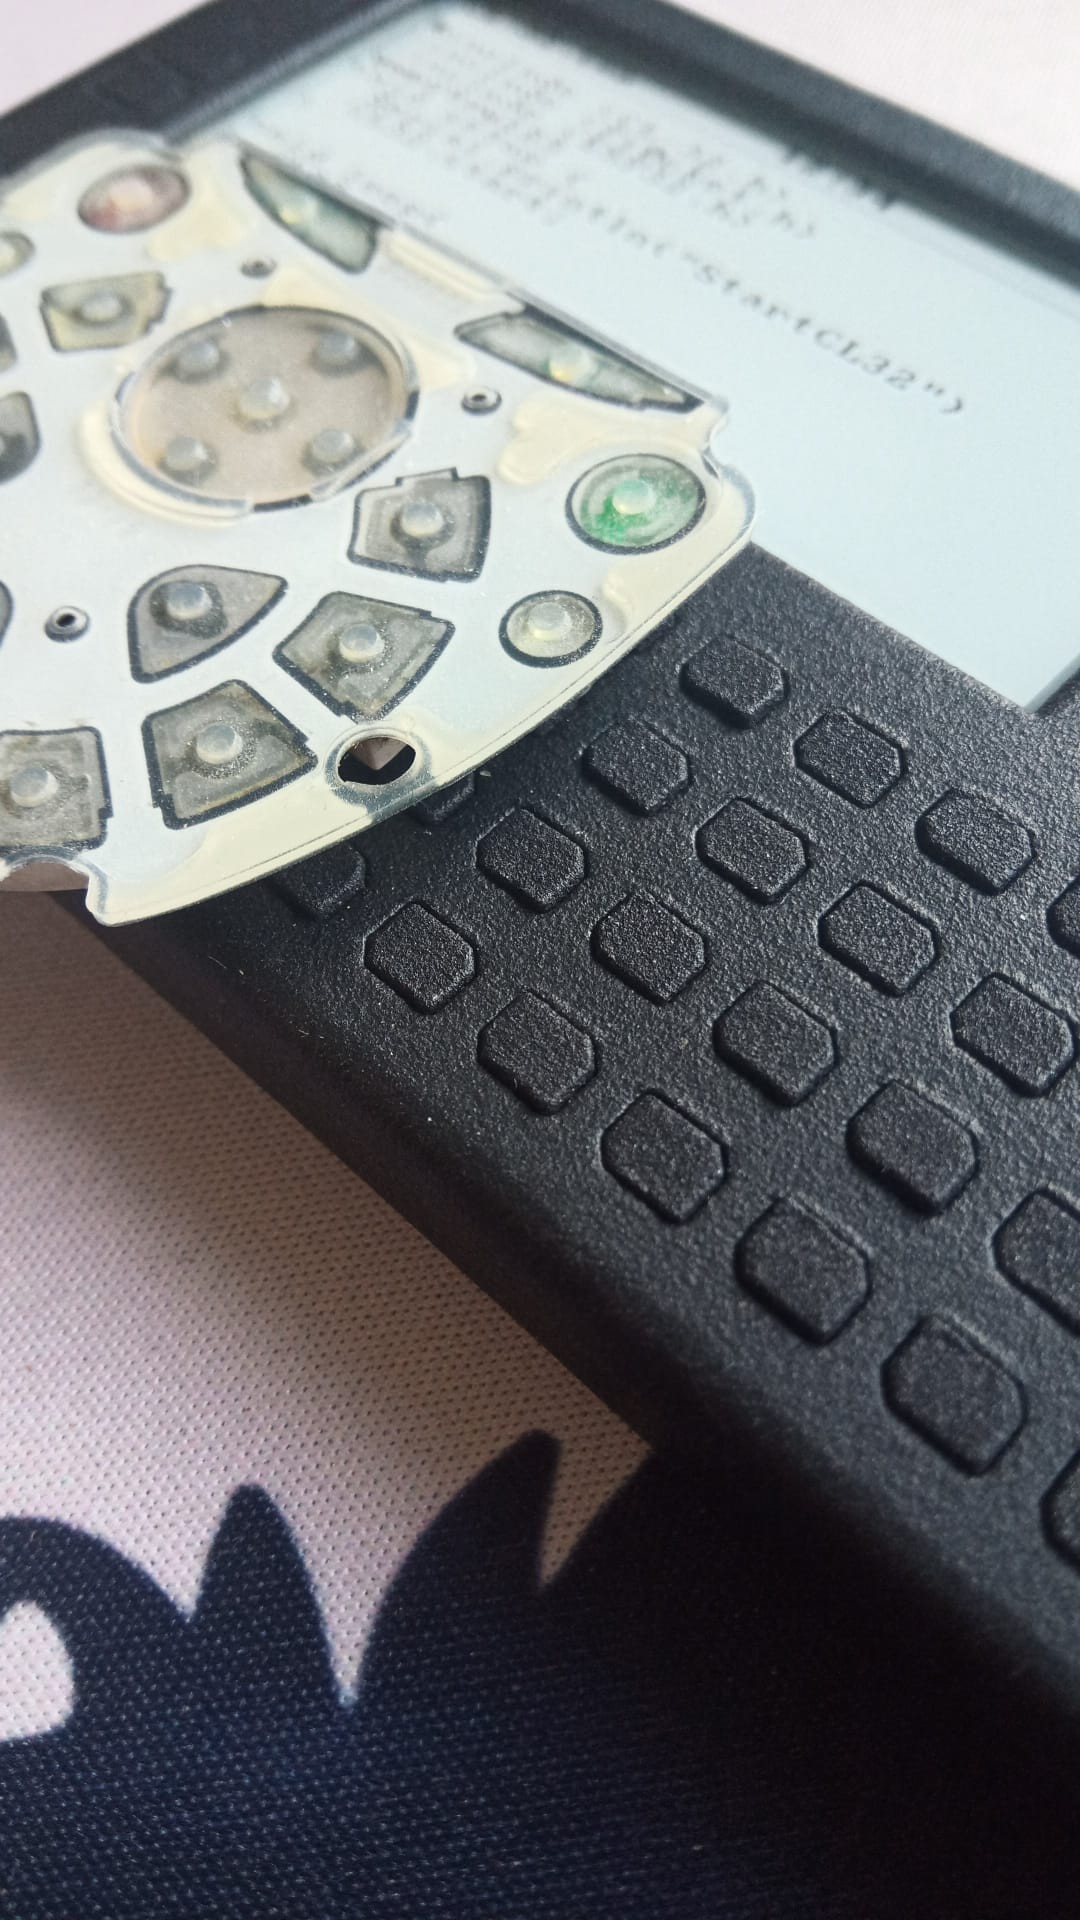
The snap dome buttons used are pretty damn tiny, they are 5mm diameter and a miniscule 0.25mm tall. this means we are only going to get 1/4 of a millimetre of key travel, so the tactile feedback is going to be important.
In the past I have not really paid much attention to the activation force of the domes, and so they have been harder to press and pretty noisy. This is where clicker got its name
I initially got the lightest force domes they make (55g) which with no button on top you can barely feel them move, and they are totally silent. They are probably a bit too soft, and I will have to buy a range forces and do some testing.
Toppers
Anyone who has used a pocket c.h.i.p. will know that typing on the bare button domes is not a fun task. The domes are actually designed to be 'activated' with a small contact point (like a peg) pressing into the center of the dome to properly snap it
This means we will need actual buttons sat above the domes, with the appropriate peg to activate the dome. If you take apart old device with buttons, you will see this with the button being on the rubber membrane at the back, and a nice printed topper on the button with the fancy legend and such. This is what I would like to have in the future. but that would need mass production numbers, and we are not there yet!!
My first attempt at buttons was a simple one. basically the buttons had a taper, and the holes did too. This meant that the button could be pressed inwards, but not fall outwards. Each key had its own little peg to press the dome, and they all had to be installed one by one

This worked, however it was not fun if you were to drop the device and all of the buttons ping out all over the floor!! It also made it difficult to add legends to the keys, they would all have to be uploaded to the printer as individual items, and it was generally just a nightmare.
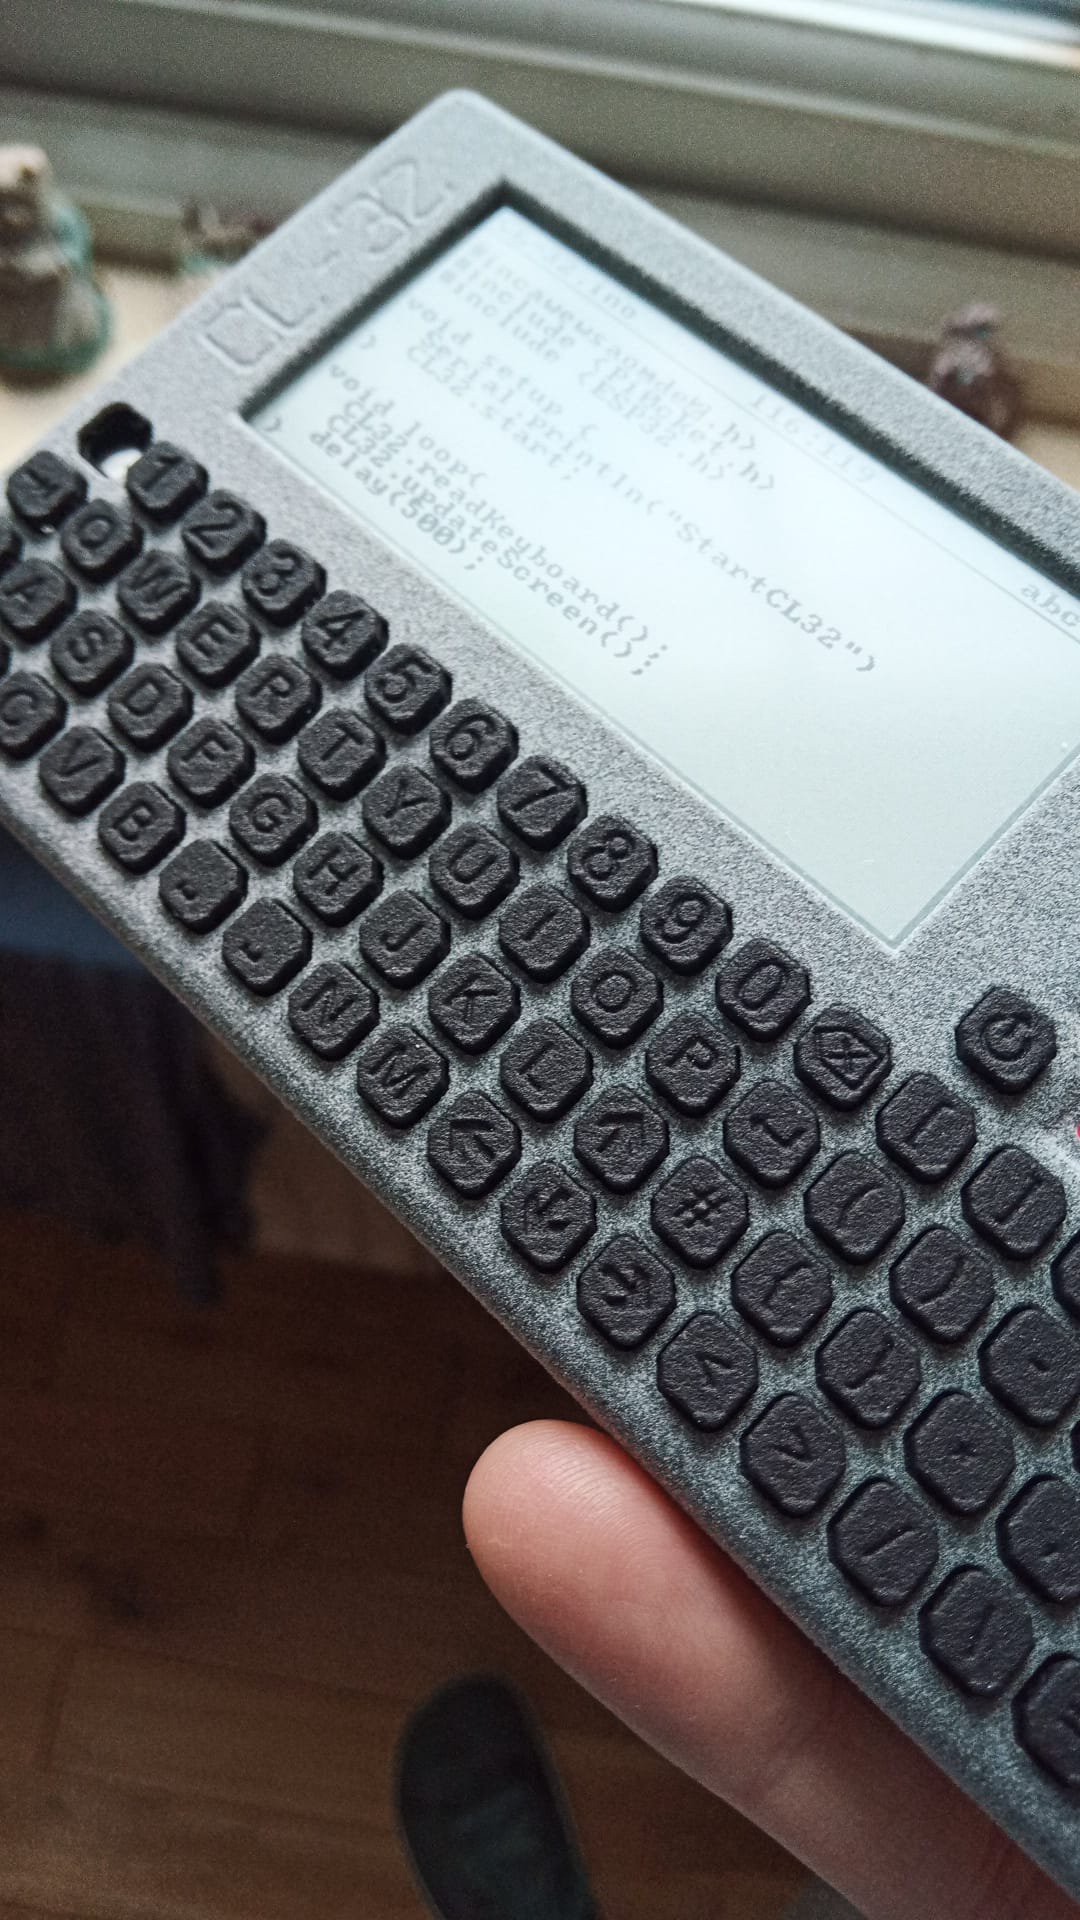
I made the buttons bigger, which meant I needed to remove the taper to maximise the material between them. Getting round this means tying all the buttons together internally, meaning that adding legends was then possible
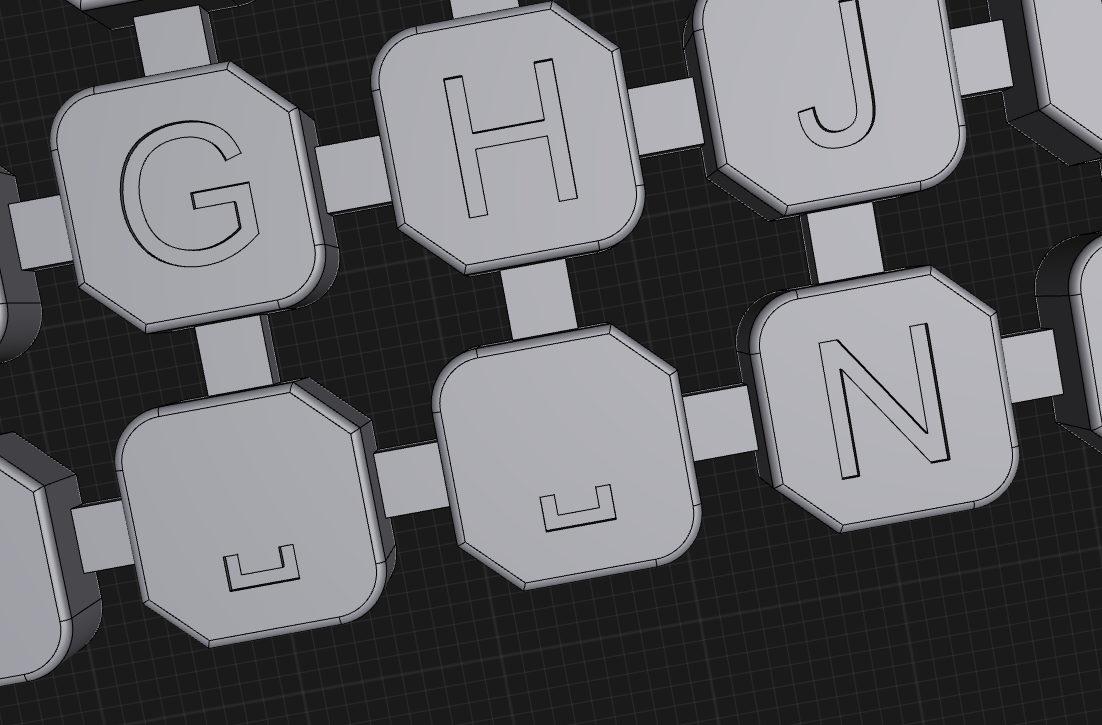
The keys could then be a single entity that can be dropped into the case. This would also open up opportunities of having alternative key maps available that could be swapped out reasonably easily. Printing on MJF printers means that even these small buttons come out well
I didnt go deep enough with the legends, so you can still see them from some angles, but generally they are a bit useless. The bigger problem of course is that the very rigid print with some snug fitting meant that it was super hard for a single button to move independently.
MJF printing has a bit of flexibility with the limits of what you can do. I had a bit of a play with making the buttons springy, while still being tied together. After some messing with CAD I came up with this
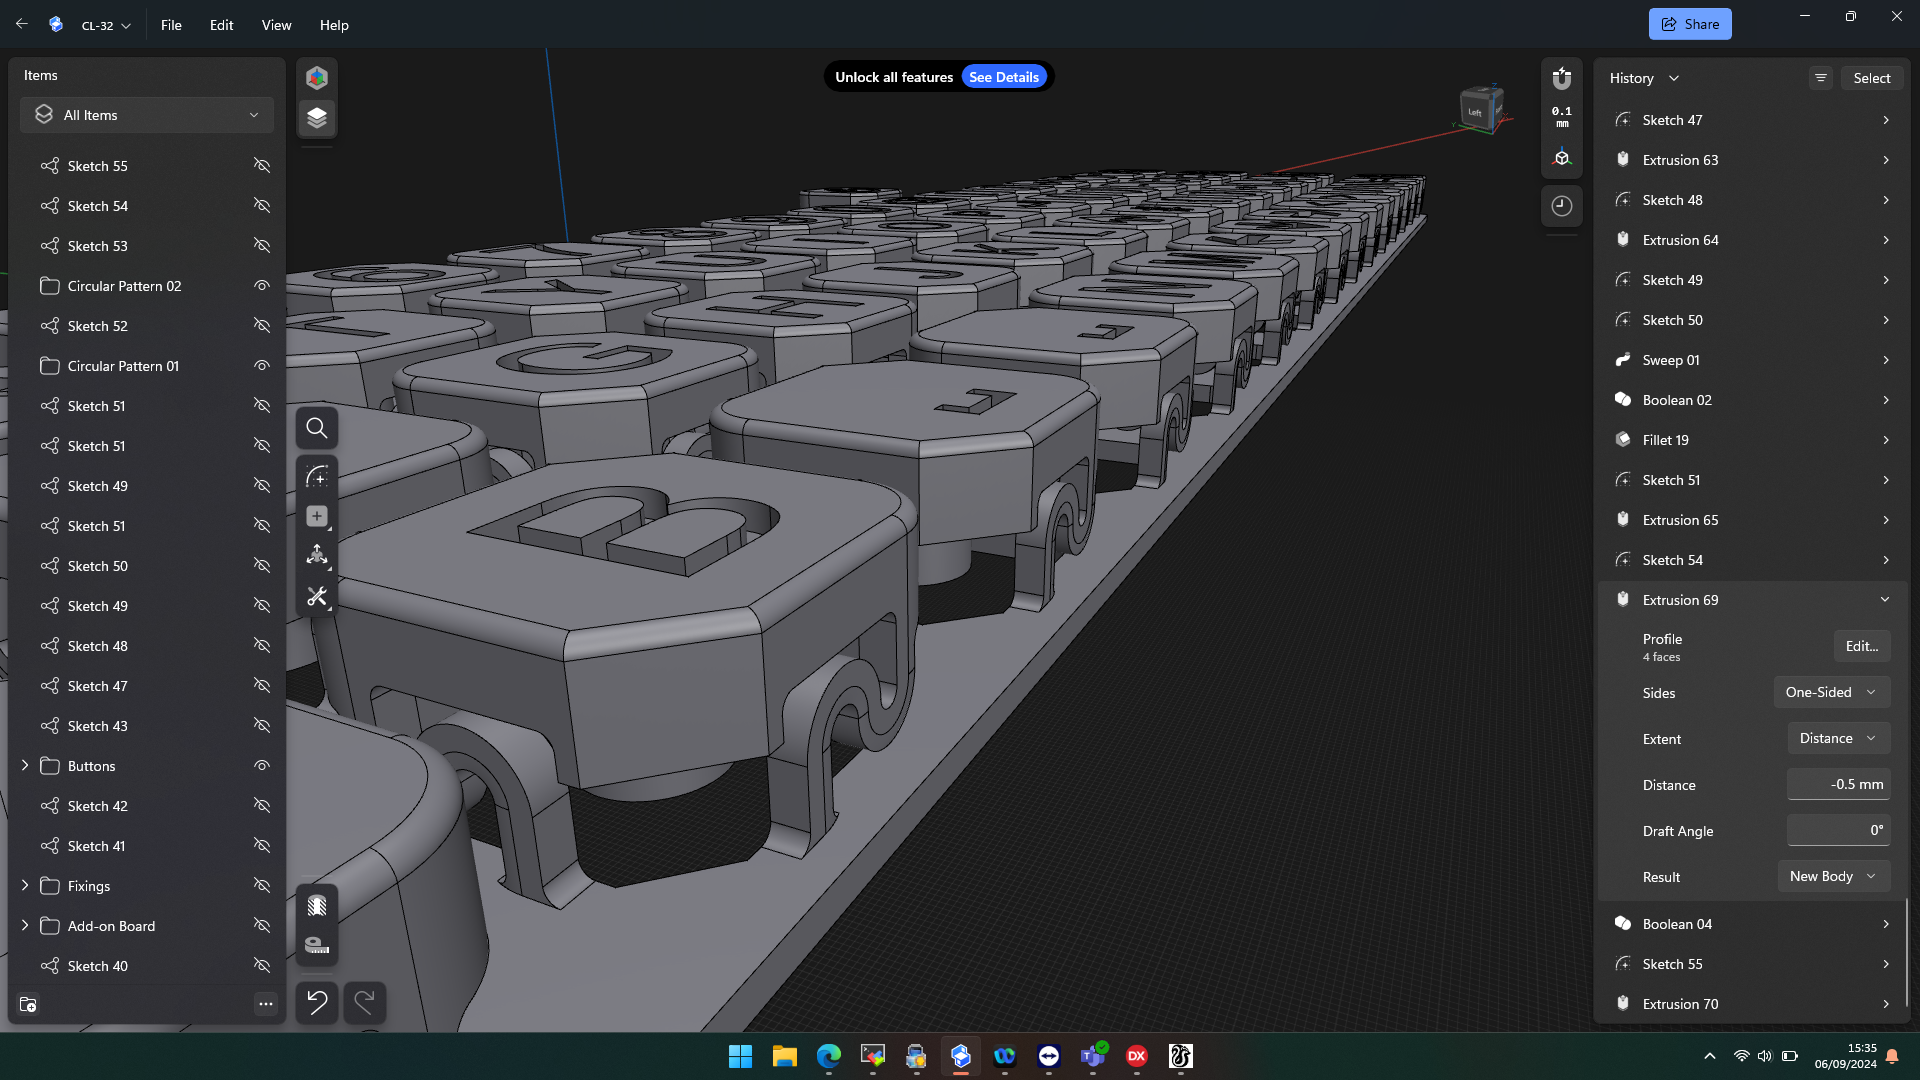
You would have no chance of printing this on FDM, and a resin print would be able to do the detail, but support material needed would make it too hard to process afterwards. This limits it to MJF or SLS printing, so that the un-fused powder can support the part.
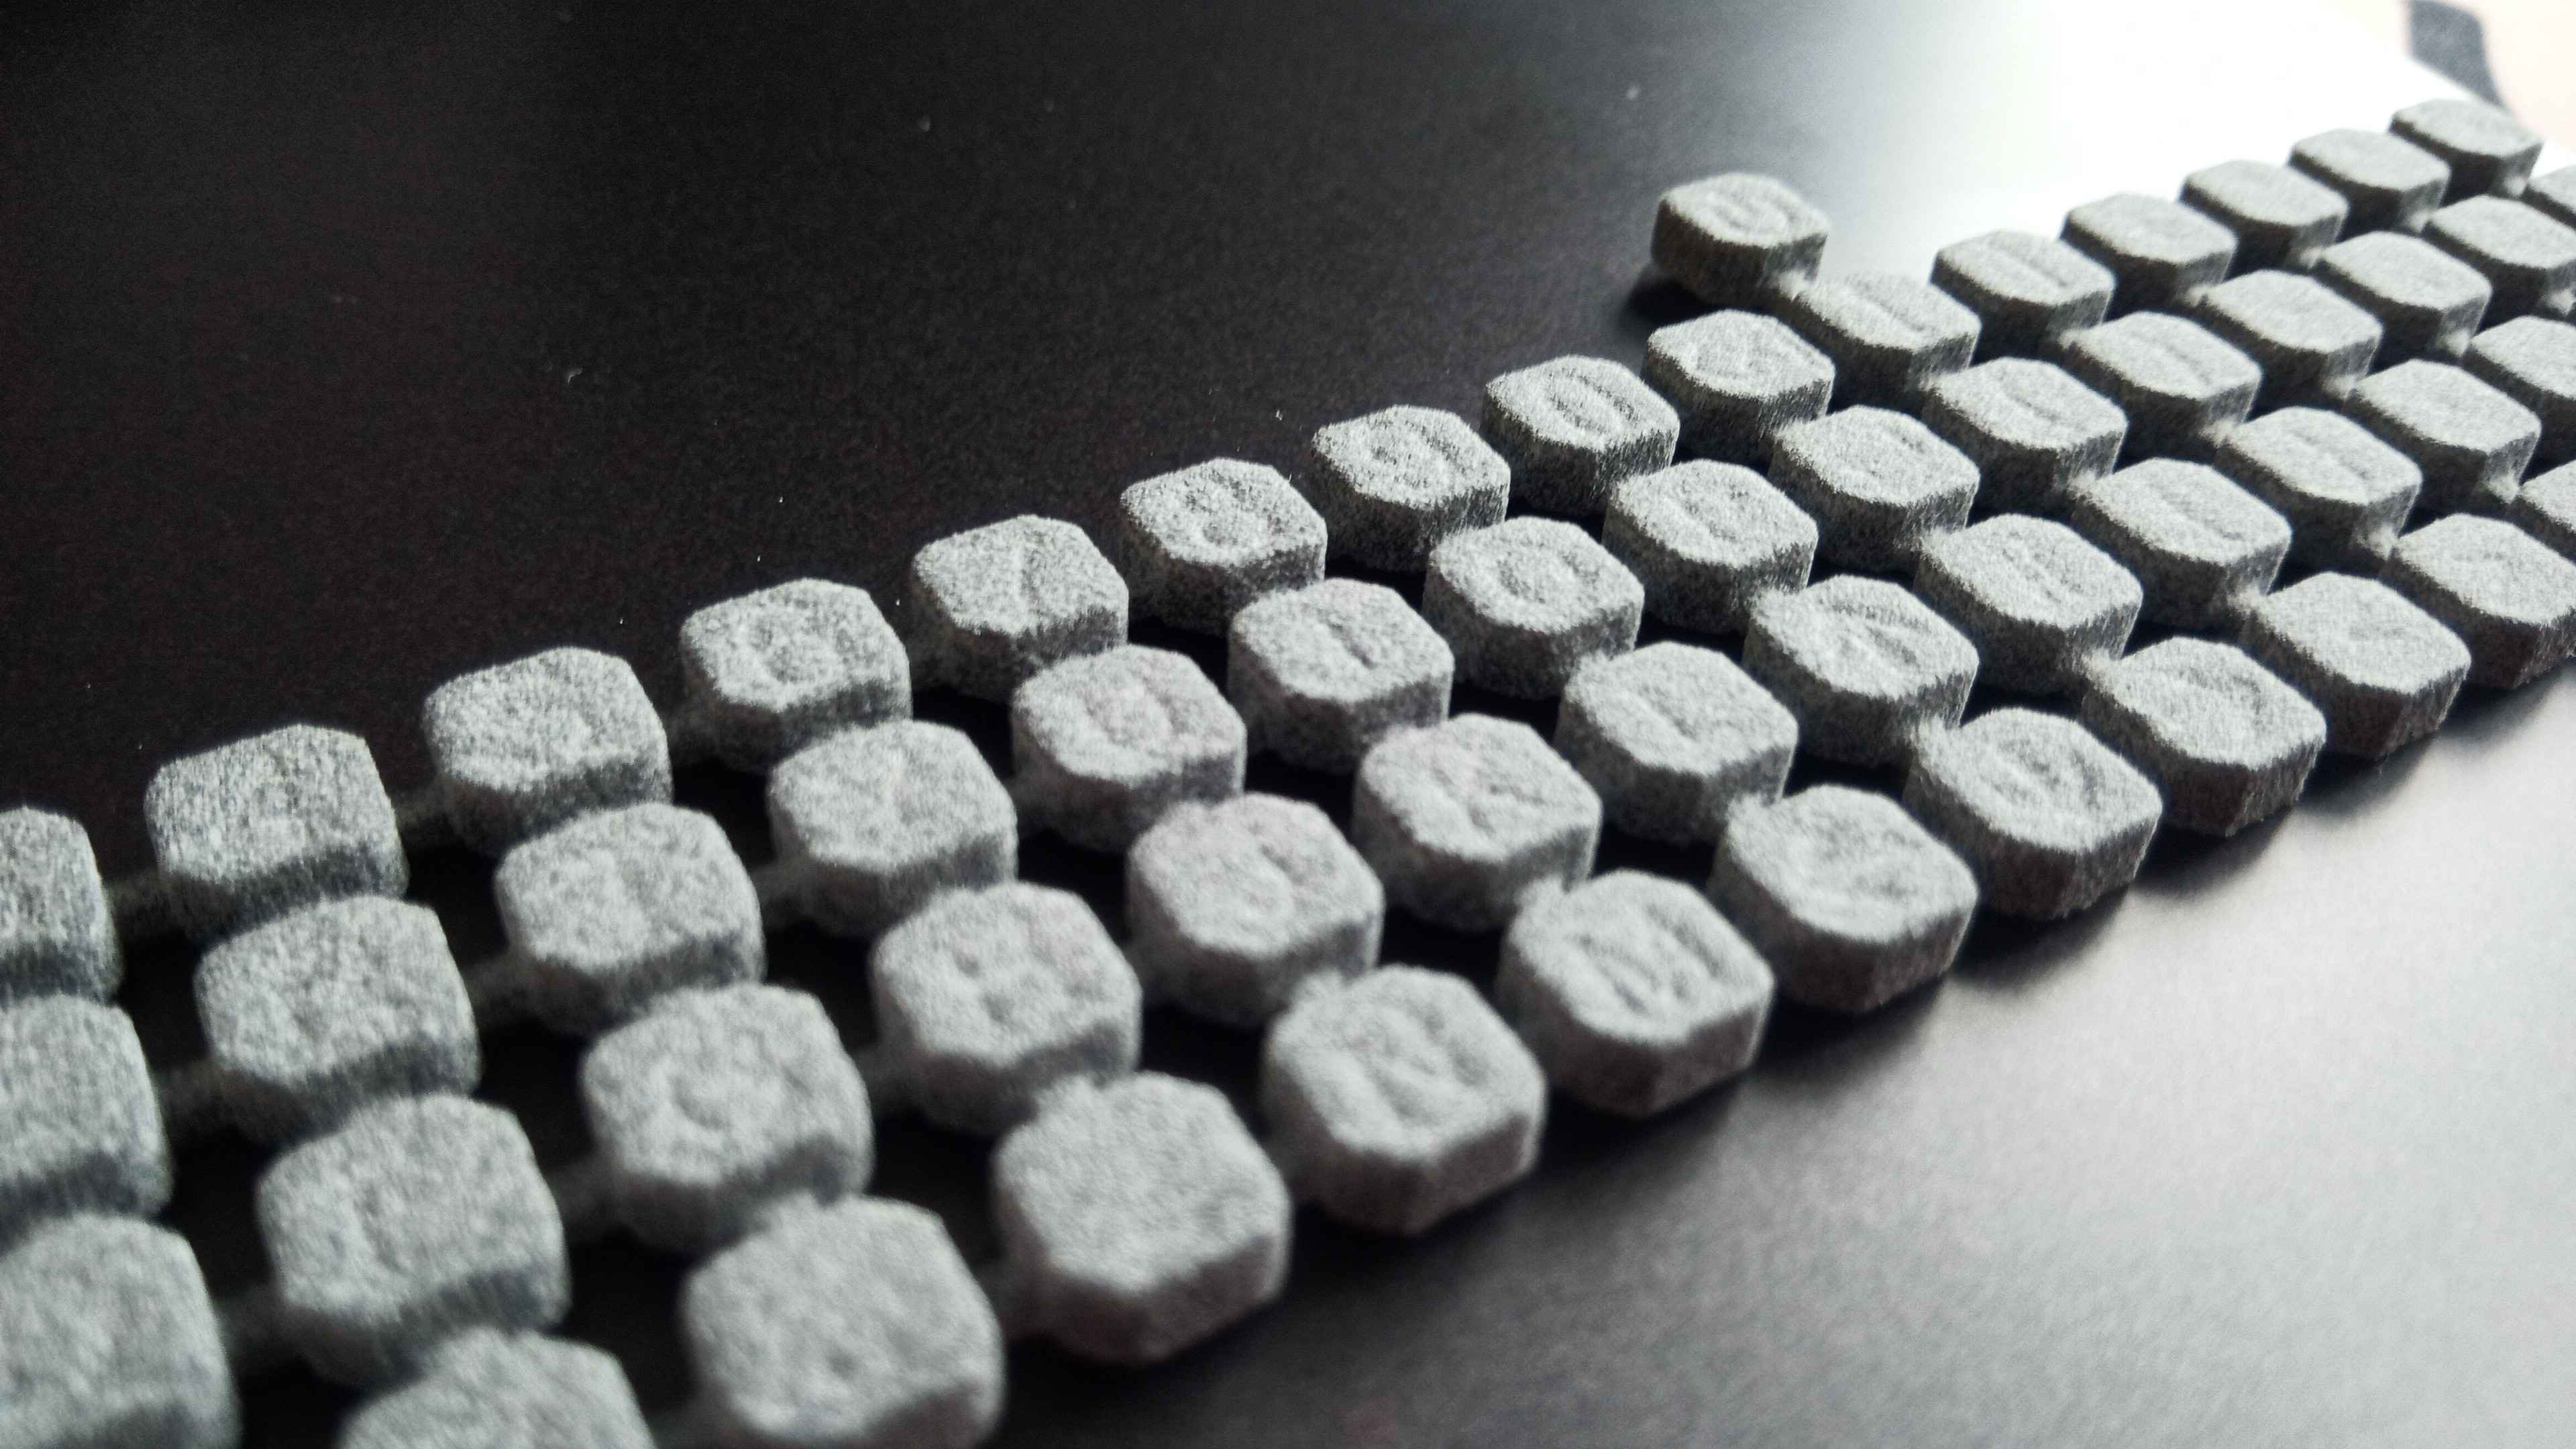
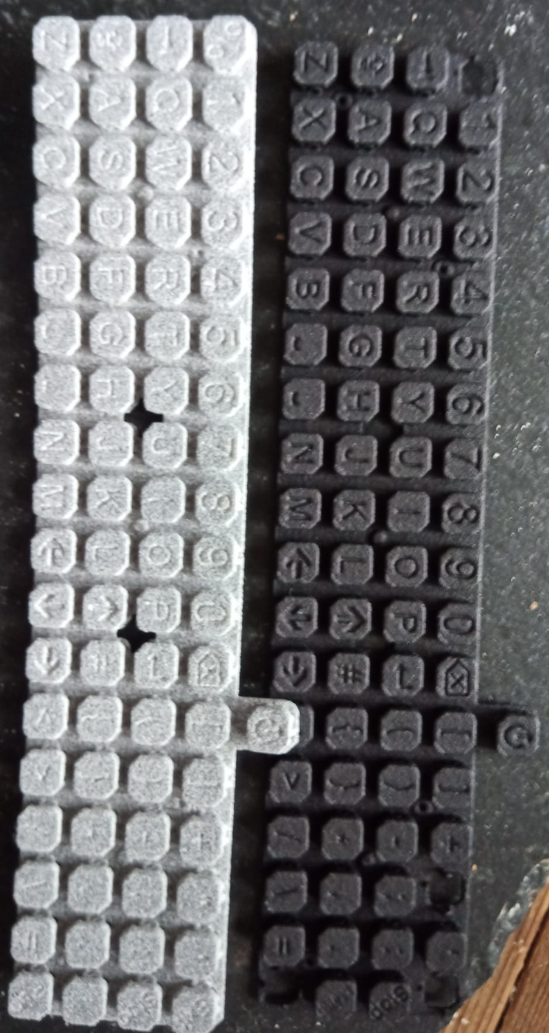
Thanks to the guys at Midlands3d for trying to print this monster!! I originally chose the dyed black option, which gets shot blasted before it is dyed. it seems the shot blasting was a little too much for this design, and some of the keys vanished without a trace. They re-printed it in bare grey material and it came out pretty well
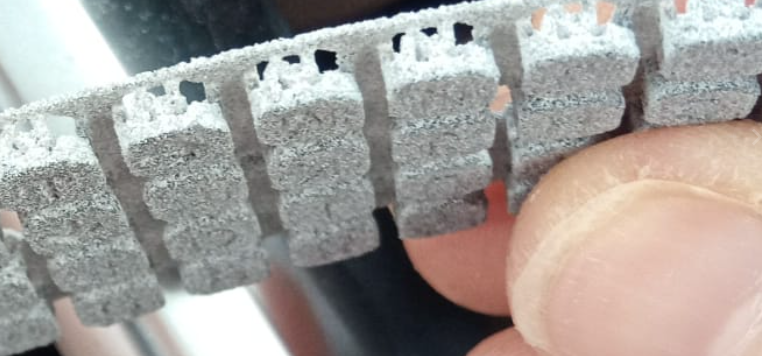
Its quite hard to photograph as its all pretty tiny, but the clearance round the springy bits wasnt enough, so its all fused together and become a solid lump again. The legends are there though this time, and the blasted and dyed version looks way crisper (ignoring the missing keys :P )
(please excuse the fuzzy photos)
So back to the drawing board we go, onwards to the holy grail of a nice tiny keyboard... and making it strong enough to dye black, because that is sexy!!
How good really is MFJ printing?
I knew MFJ printing was good, but I got a surprise on this print!! I have step files for the screws im using to hold it all together so that I can see how far they will penetrate the case and check for clearance etc. when I exported the STL for the keyboard, I had left the screws active in the CAD, and so they were printed too!!
The screws are 1.4mm diameter, so you wouldnt expect them to print, but they were sat popping out bold as brass (and out of focus!!)
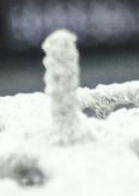
i popped them out and compared to the real screw, its really impressive!!

Discussions
Become a Hackaday.io Member
Create an account to leave a comment. Already have an account? Log In.
Awesome! With the key names printed on there like that, and in black you could roll key surface with an almost dry paint roller or something similar to paint a lighter color just on surface of keys to make the key characters really stand out.
I just got a 3d printer, but have not had the time to even take it out of the box yet. I was wondering recently if something flexible like TPU would work good for a key mat like this...
Are you sure? yes | no
technically yes, but normal FDM 3d printing isnt quite up to the accuracy. I was talking to my printer guy the other day, he is considering getting an SLS printer than can do TPU prints. so that would open up some doors for sure.
The eventual goal is an injection moulded rubber map with nice rugged keys on top, but thats reliant on a big ol kickstarter :)
Are you sure? yes | no