 Guido
GuidoOVERVIEW
Using the following architecture I want to test if it is possible to have a laser scanner (RPLIDAR C1) working on a hardware (Raspberry PI 4 - 1GB) that can be placed on a moving robot to:
- get around autonomously
- avoid obstacles
- map the environment
TARGET ARCHITECTURE
The first goal is to get the following architecture working.
Host:
- HW:
- Raspberry PI 4 - 1 Gigabyte
- RPLIDAR C1
- OS: Ubuntu 22.04 (Jammy) 64 bits
- Platform: ROS2 (Robot Operating System) - Humble version - 64 bits
- App: ROS2 Node publishing the RPLIDAR C1 laser scan on topic /scan
Client:
- HW: Intel I9 12th gen - 64 bits
- OS: Ubuntu 22.04 (Jammy) 64 bits
- Platform: ROS2 (Robot Operating System) - Humble Version - 64 bits
- App: ROS2 Node publishing the RPLIDAR C1 laser scan on topic /scan
Constraints:
- ROS2 because it is the evolution of ROS, which is a bit outdated
- 64 bits because ROS2 needs it
- ROS2 Humble distribution because my Ubuntu Client is 22.04 Jammy. ROS2 Humble distribution:
- is the most recent based on Ubuntu 22.04 Jammy
- has Long Term Support: up to November '27
- RPLIDAR C1 because is the cheapest Laser Scan I've found
INSTALL UBUNTU 22.04 (Jammy) 64 BITS OS
Using the Raspberry PI imager, I installed this OS image in a 64GByte SD card.
In half an hour I got the OS working and WiFi connected
INSTALL ROS2 HUMBLE
I followed these instructions ROS2 Humble - Ubuntu Install Debs to install ROS2 both in Host and Client
TESTING ROS2 HUMBLE
The testing suggested in the instructions ROS2 Humble - Ubuntu Install Debs (talker / listener) worked fine if executed on the same machine (e.g. talker on Host and Listener on Host), but failed when "talker" was in the Host and "listener" on the Client or viceversa.
NETWORKING
ENABLE MULTICAST
To let ROS2 Nodes (running on different machines on the same network) to communicate you need to Test Multicast
Then:
- Enable Multicast on the network interfaces but also on the WiFi Router. In my fiber optic modem and WiFi Router SAGEMCOM F5684 I have this setting:

Note: at the moment I'm not able to have Multicast working between an Ethernet interface and a WiFi interface but it works fine among WiFi interfaces. I'll investigate it in the future.
ENVIRONMENT SETTINGS
1)
ROS_LOCALHOST_ONLY=0
must be 0 or not present.
2) ROS_DOMAIN_ID must be the same number (e.g. 12) on all the machines or not be present (it defaults to 0)
NO JOY?
If after the previous settings things doesn't work all the same, because of Multicast, you can use a sub optimal solution enabling eProsima Fast DDS using
RMW_IMPLEMENTATION=rmw_fastrtps_cpp
as documented in eProsima Fast DDS
Please note that you don't need to install it as in the document, because it is already installed by default with ROS2 Humble.
INSTALL RPLIDAR C1 PACKAGE FOR ROS2
This is the repository for the RPLIDAR C1 package on ROS2. SLAMTEC ROS2
Just to be sure everything was OK, I installed and tested it on the Client without any problem.
On the contrary, as you can read in the log, I wasn't able to build the package on the Host because of lack of memory (1 GB only on my Raspberry PI 4). In this case you need RPLIDAR_C1_for_Raspberry_PI_4
HARDWARE
Connect the RPLIDAR C1 cable to the Raspberry PI 4
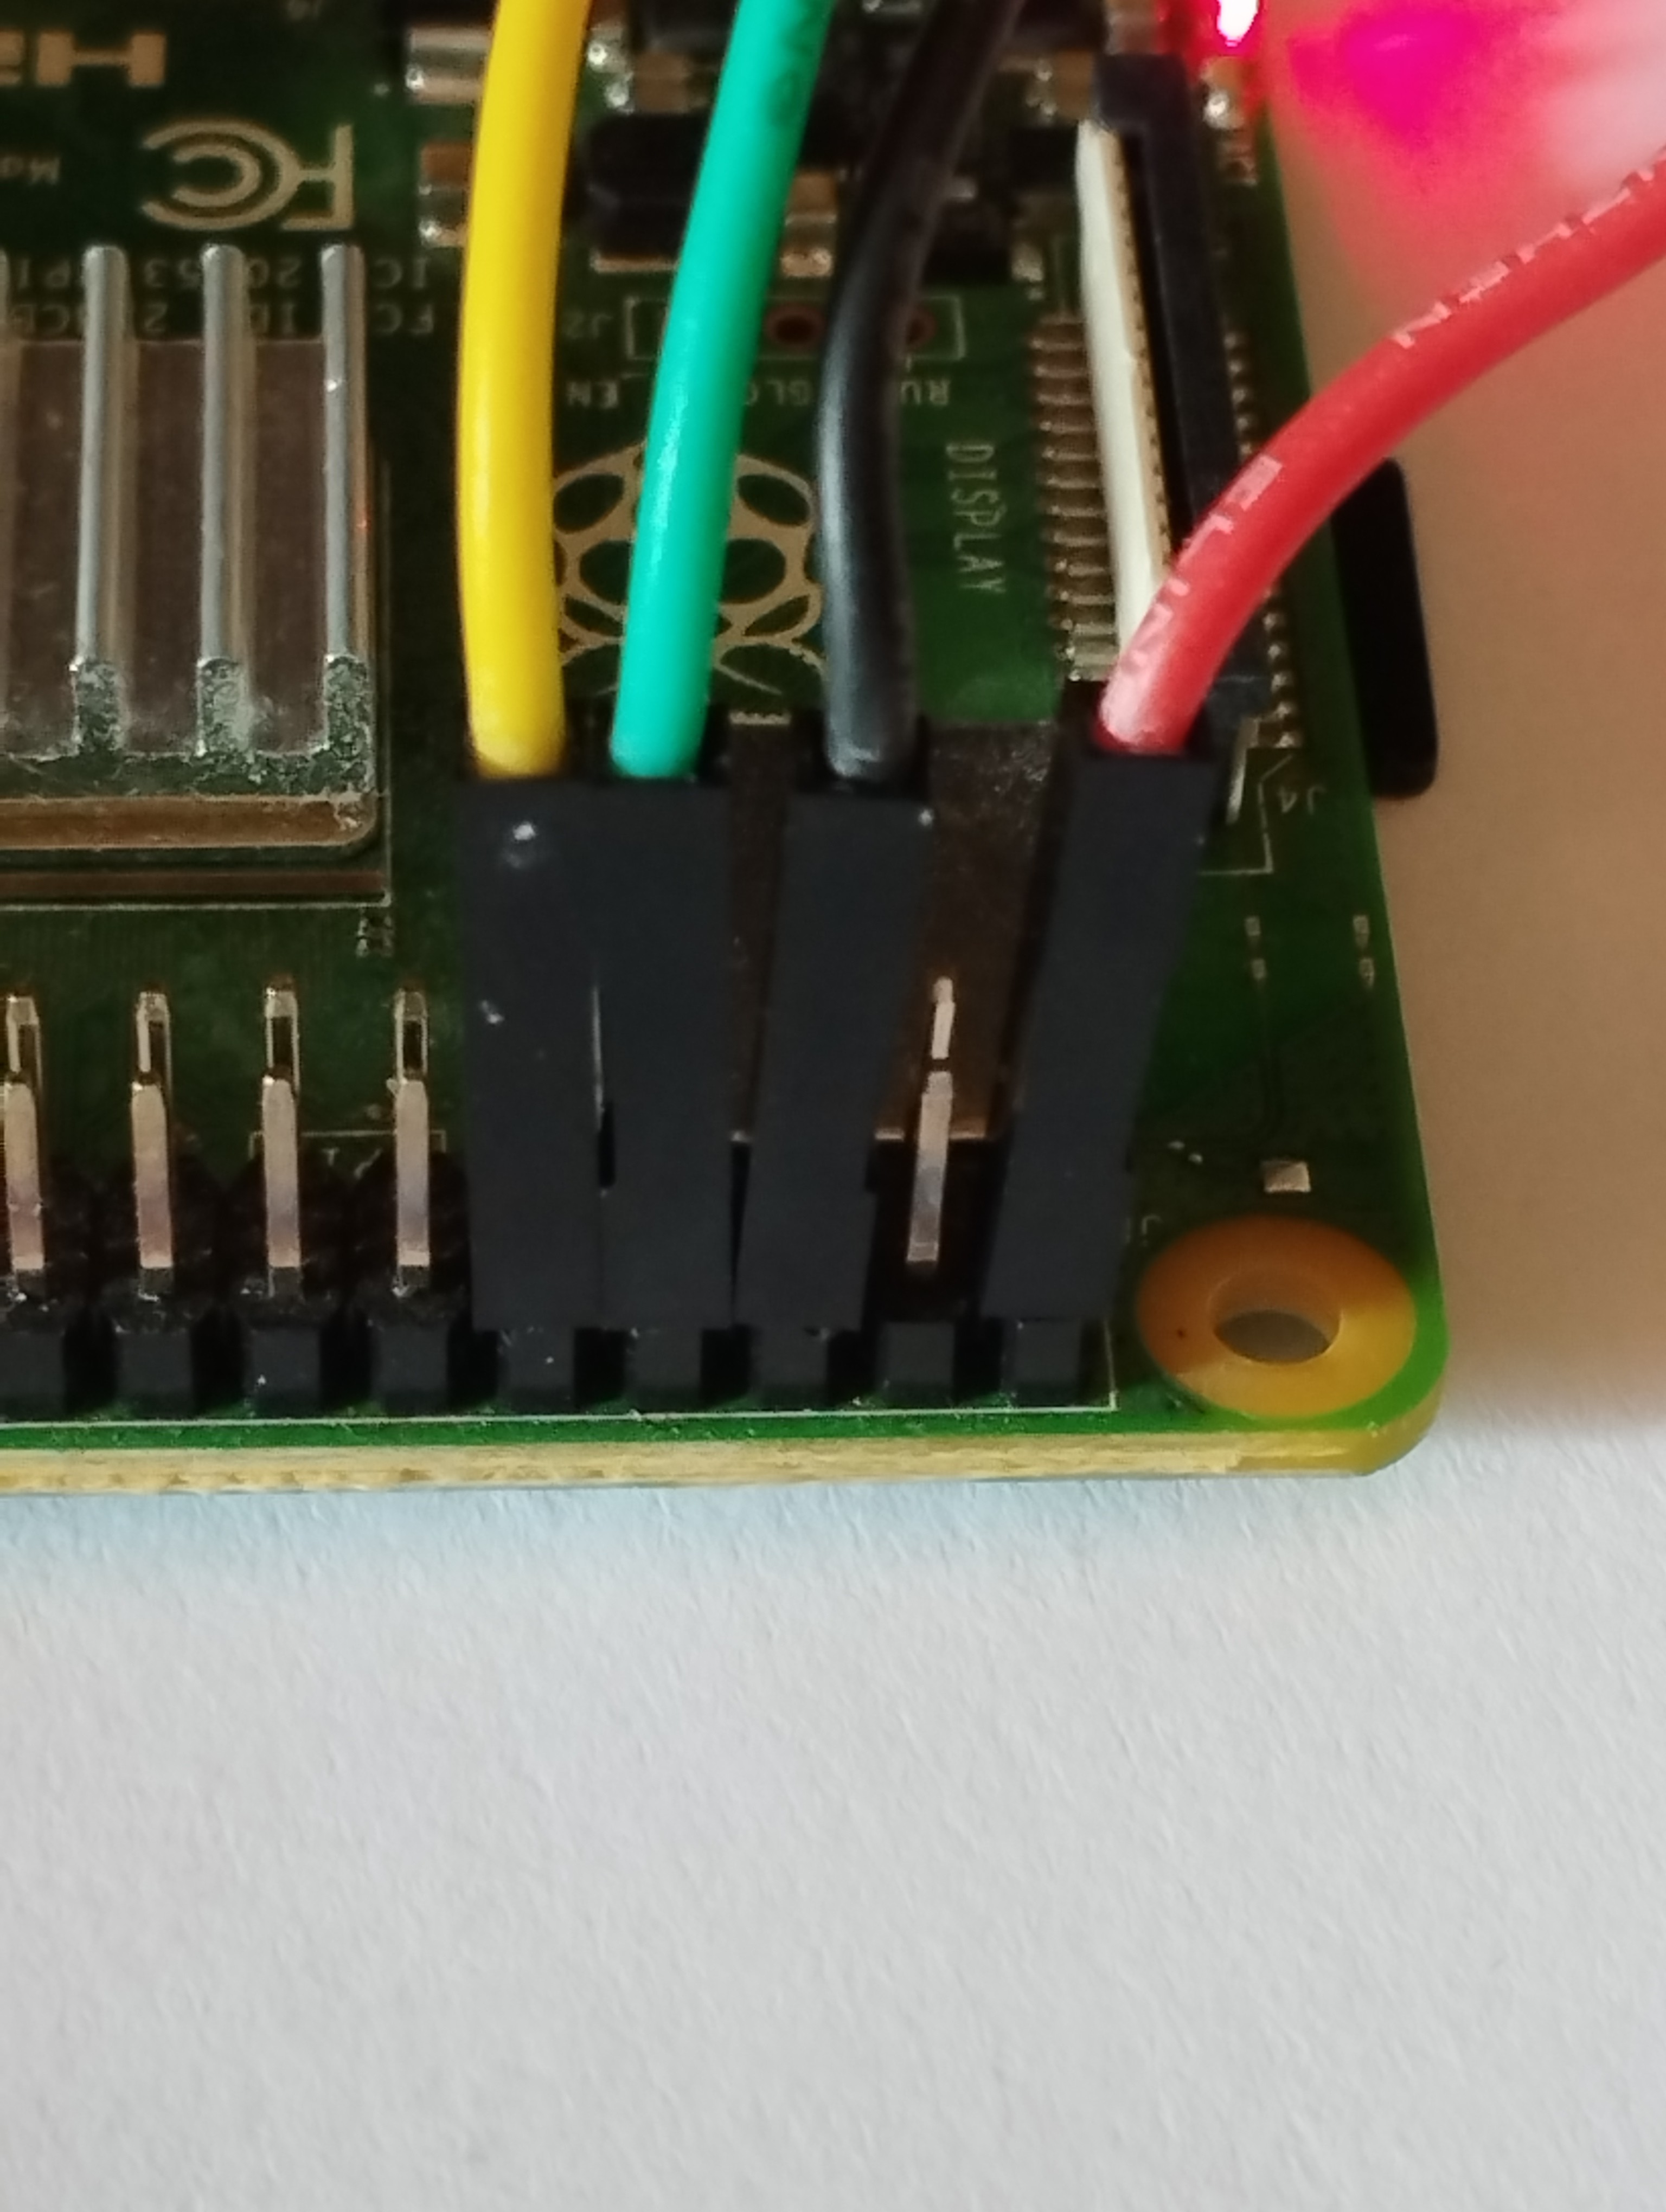
Just for information, we are using pins GPIO14 (green cable) and GPIO15 (yellow cable) which Ubuntu for Raspberry calls Serial0
SERIAL PORT RASPBERRY PI 4 - UBUNTU 22.04 SETTINGS
In /boot/firmware/config.txt check that the uart is enabled
# Enable the serial pins
enable_uart=1
In /boot/firmware/cmdline.txt, remove console=serial0,115200, as we are going to use Serial0. it should appear like the following:
dwc_otg.lpm_enable=0 console=tty1 root=LABEL=writable rootfstype=ext4 rootwait fixrtc quiet splash cfg80211.ieee80211_regdom=I
As a final step, set your robot user to belong to the dialout group
sudo usermod -a -G dialout robot
Reboot
Now you have /dev/ttyS0 ready to manage the serial port Serial0, where you connected the RPLIDAR C1.
RUN THE RPLIDAR C1 PACKAGE
Open a shell to the Host (192.168.1.63 is my Host IP)
ssh robot@192.168.1.63
Go to the directory where your RPLIDAR C1 Package is.
cd /home/robot/RPLIDAR_C1_ws
Source the ROS2 environment
source /opt/ros/humble/setup.bash
Source the RPLIDAR C1 package environment
source ./install/setup.bash
Launch the Python program sllidar_c1_launch.py which executes the Lidar Scanning
ros2 launch sllidar_ros2 sllidar_c1_launch.py serial_port:=/dev/ttyS0
Please note the you'are passing the parameter serial_port:=/dev/ttyS0 to the sllidar_c1_launch.py program as your RPLIDAR C1 is connected to ttyS0
The result should be something like this:
robot@robot:~/RPLIDAR_C1_ws$ ros2 launch sllidar_ros2 sllidar_c1_launch.py  serial_port:=/dev/ttyS0
[INFO] [launch]: All log files can be found below /home/robot/.ros/log/2024-08-30-17-47-39-505033-robot-1724
[INFO] [launch]: Default logging verbosity is set to INFO
[INFO] [sllidar_node-1]: process started with pid [1725]
[sllidar_node-1] [INFO] [1725032859.814331906] [sllidar_node]: SLLidar running on ROS2 package SLLidar.ROS2 SDK Version:1.0.1, SLLIDAR SDK Version:2.1.0
[sllidar_node-1] [INFO] [1725032860.318384293] [sllidar_node]: SLLidar S/N: D418E1F4C2E398C0BCEA9AF35AC34806
[sllidar_node-1] [INFO] [1725032860.318669437] [sllidar_node]: Firmware Ver: 1.01
[sllidar_node-1] [INFO] [1725032860.318772547] [sllidar_node]: Hardware Rev: 18
[sllidar_node-1] [INFO] [1725032860.319388705] [sllidar_node]: SLLidar health status : 0
[sllidar_node-1] [INFO] [1725032860.319509222] [sllidar_node]: SLLidar health status : OK.
[sllidar_node-1] [INFO] [1725032860.556282743] [sllidar_node]: current scan mode: Standard, sample rate: 5 Khz, max_distance: 16.0 m, scan frequency:10.0 Hz,
TEST ROS2 NODE AND TOPIC
In another shell of the Host, or in your Client, executing:
"ros2 node list" you should see the "/sllidar_node" node appear;
guido@guido-Neptune-series-i9:~$ ros2 node list
/sllidar_node