 Michael Gardi
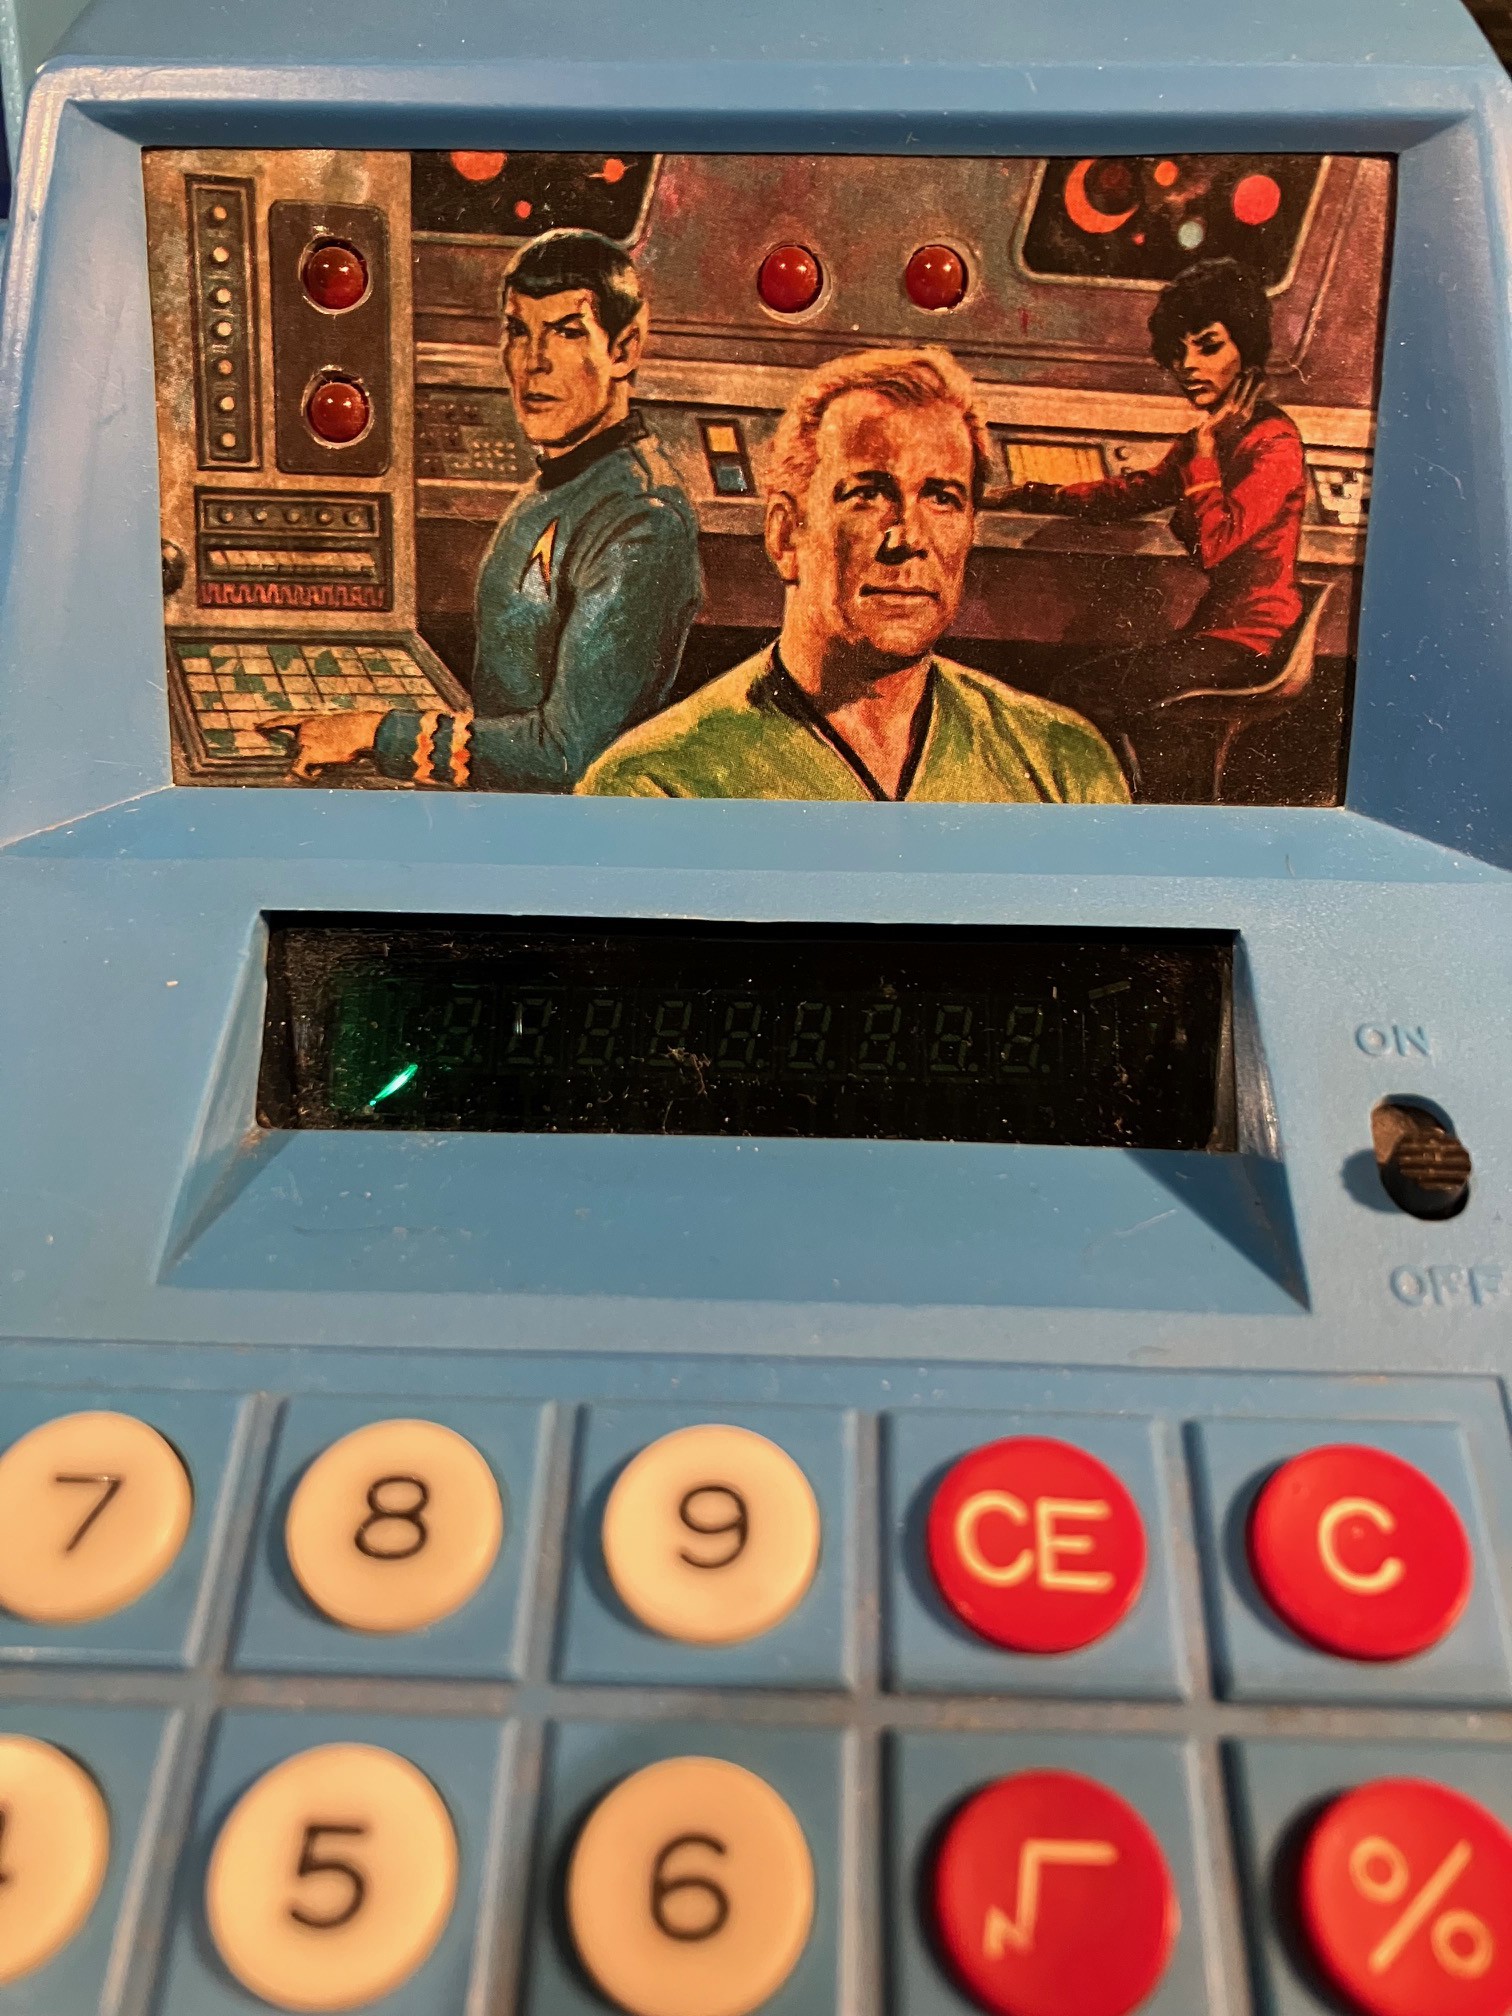
The original Trekulator has four red LEDs imbedded into the still picture of Kirk, Spock, and Uhura.
I was about to start adding these when I had a thought. My intention all along was to mount a real display back there for my Next Generation implementation. It occurred to me that with a display I could easily emulate the LEDs for an "authentic" original experience so I decided to avoid some rework and jump directly to adding a display.
I had purchased a 3.5 Inch TFT Display for this purpose. It has 480 x 320 resolution, a touch screen, and an integrated SD card reader; all of which use an SPI interface keeping the I/O pin count down. The display is based on the ILI8488 driver chip which is well supported library wise. These modules are readily available and relatively cheap.

The screen itself is not wide enough to fill the whole Trekulator display area, but the height is pretty close so I think I can make this work.
I added the display/touch/SD card to my breadboard and wired it to the ESP32. I removed the Adafruit MicroSD Card Breakout Board since I no longer needed it. I am using the TFT_eSPI library to communicate with the display devices. The library come with many great examples to test the device. Below is a "Cellular Automata" test of the display.
I also tested the SD Card and touch capabilities. With the display working, all of the components for my Trekulator reproduction are in place. Now I just have to figure out how to cram all of this into the case, and oh ya write calculator program.
Discussions
Become a Hackaday.io Member
Create an account to leave a comment. Already have an account? Log In.