 TheCatwoman
Big Update: We Got Sponsored by PCBWay!
Super excited to share that we got sponsored by PCBWay! The folks over there were incredibly helpful and walked me through the process of getting my PCB printed and shipped honestly couldn’t have done it without them.
Since this was my very first time designing a PCB, I was kind of overwhelmed and had no idea where to start.
To keep things manageable, I decided to make the first version of the board pretty straightforward. Rather than designing a complex schematic with all new components, I focused on simply connecting the discrete parts I already had just a clean layout of wires and pads to solder everything together.
“I’m all about biting off more than I can chew sometimes… but I still have to swallow it either way.”
– someone wiser than me, probably
That quote randomly came up at my old job, but it stuck with me and it really captures the spirit of this project.
For this board, I knew I’d need holes to mount the ESP32 dev board, spots for two buttons, and space for the coil. The idea was to make a super simple, clean board that would tie everything together nicely.
That was the plan. Here's what I came up with:
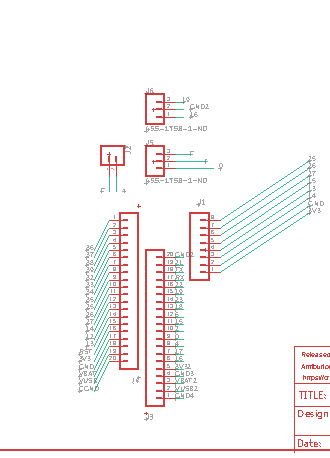
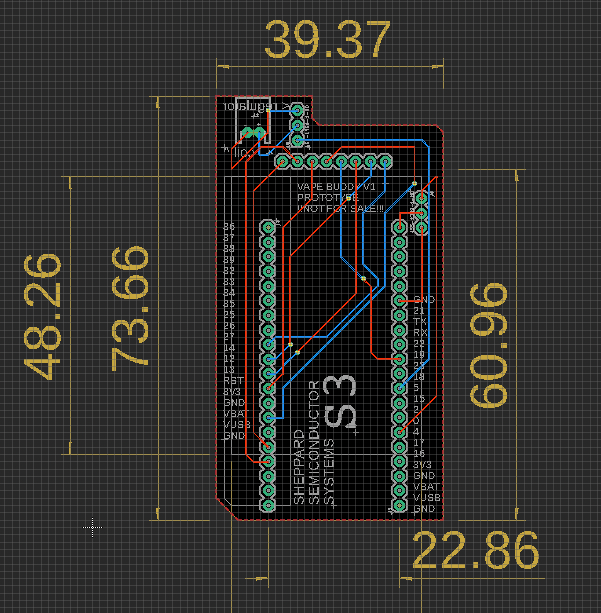
As you can see, there are vertical rows of holes for the ESP32, horizontal ones for the e-paper display, and space for the coil and two buttons (those little 3-hole clusters). I felt like a genius for a moment and sent it off to PCBWay to work their magic.
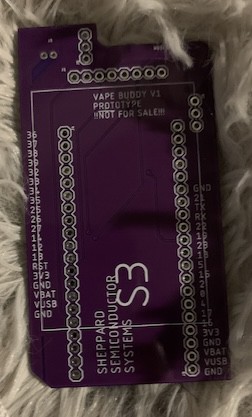
Oh and I picked this awesome purple color for the board. It doesn’t add anything technically, but it definitely earns some serious style points. Check it out:
Isn’t it beautiful?? PCBWay absolutely crushed it.
Now, one thing I didn’t initially think about was the BMS (Battery Management System). The vapes I’d been salvaging had their own built-in regulation, but I realized I’d need to design something myself to integrate power management directly onto the board.
That said the board does work, and it is beautiful. This version has been a huge step forward.
Since getting it back, I’ve also cleaned up and reorganized the code. The next version of the PCB will be even better with all the components integrated from the start, and way less soldering after the fact.
Wrapping It Up
This part of the project has been a huge learning experience. I honestly don’t think I would’ve pushed myself this far if it weren’t for PCBWay’s support. Just hearing that they were interested in backing the project gave me a real sense of validation like, okay, maybe I am on the right track.
Massive thanks to PCBWay for helping bring this to life. I’m seriously hyped to work with them again on the next phase!

Discussions
Become a Hackaday.io Member
Create an account to leave a comment. Already have an account? Log In.