 Andy Geppert
Starting with an existing SAO project makes this project pretty quick to spin up. From a schematic perspective, it looks like everything is passive, with just five footprints to place.
All I need from the badge which is the power host, are two of the size SAO pins. But I hate to leave pins unconnected, and I have use case brewing that will help me prototype another SAO, so here is how I plan to use all size pins of the host side SAO connection:
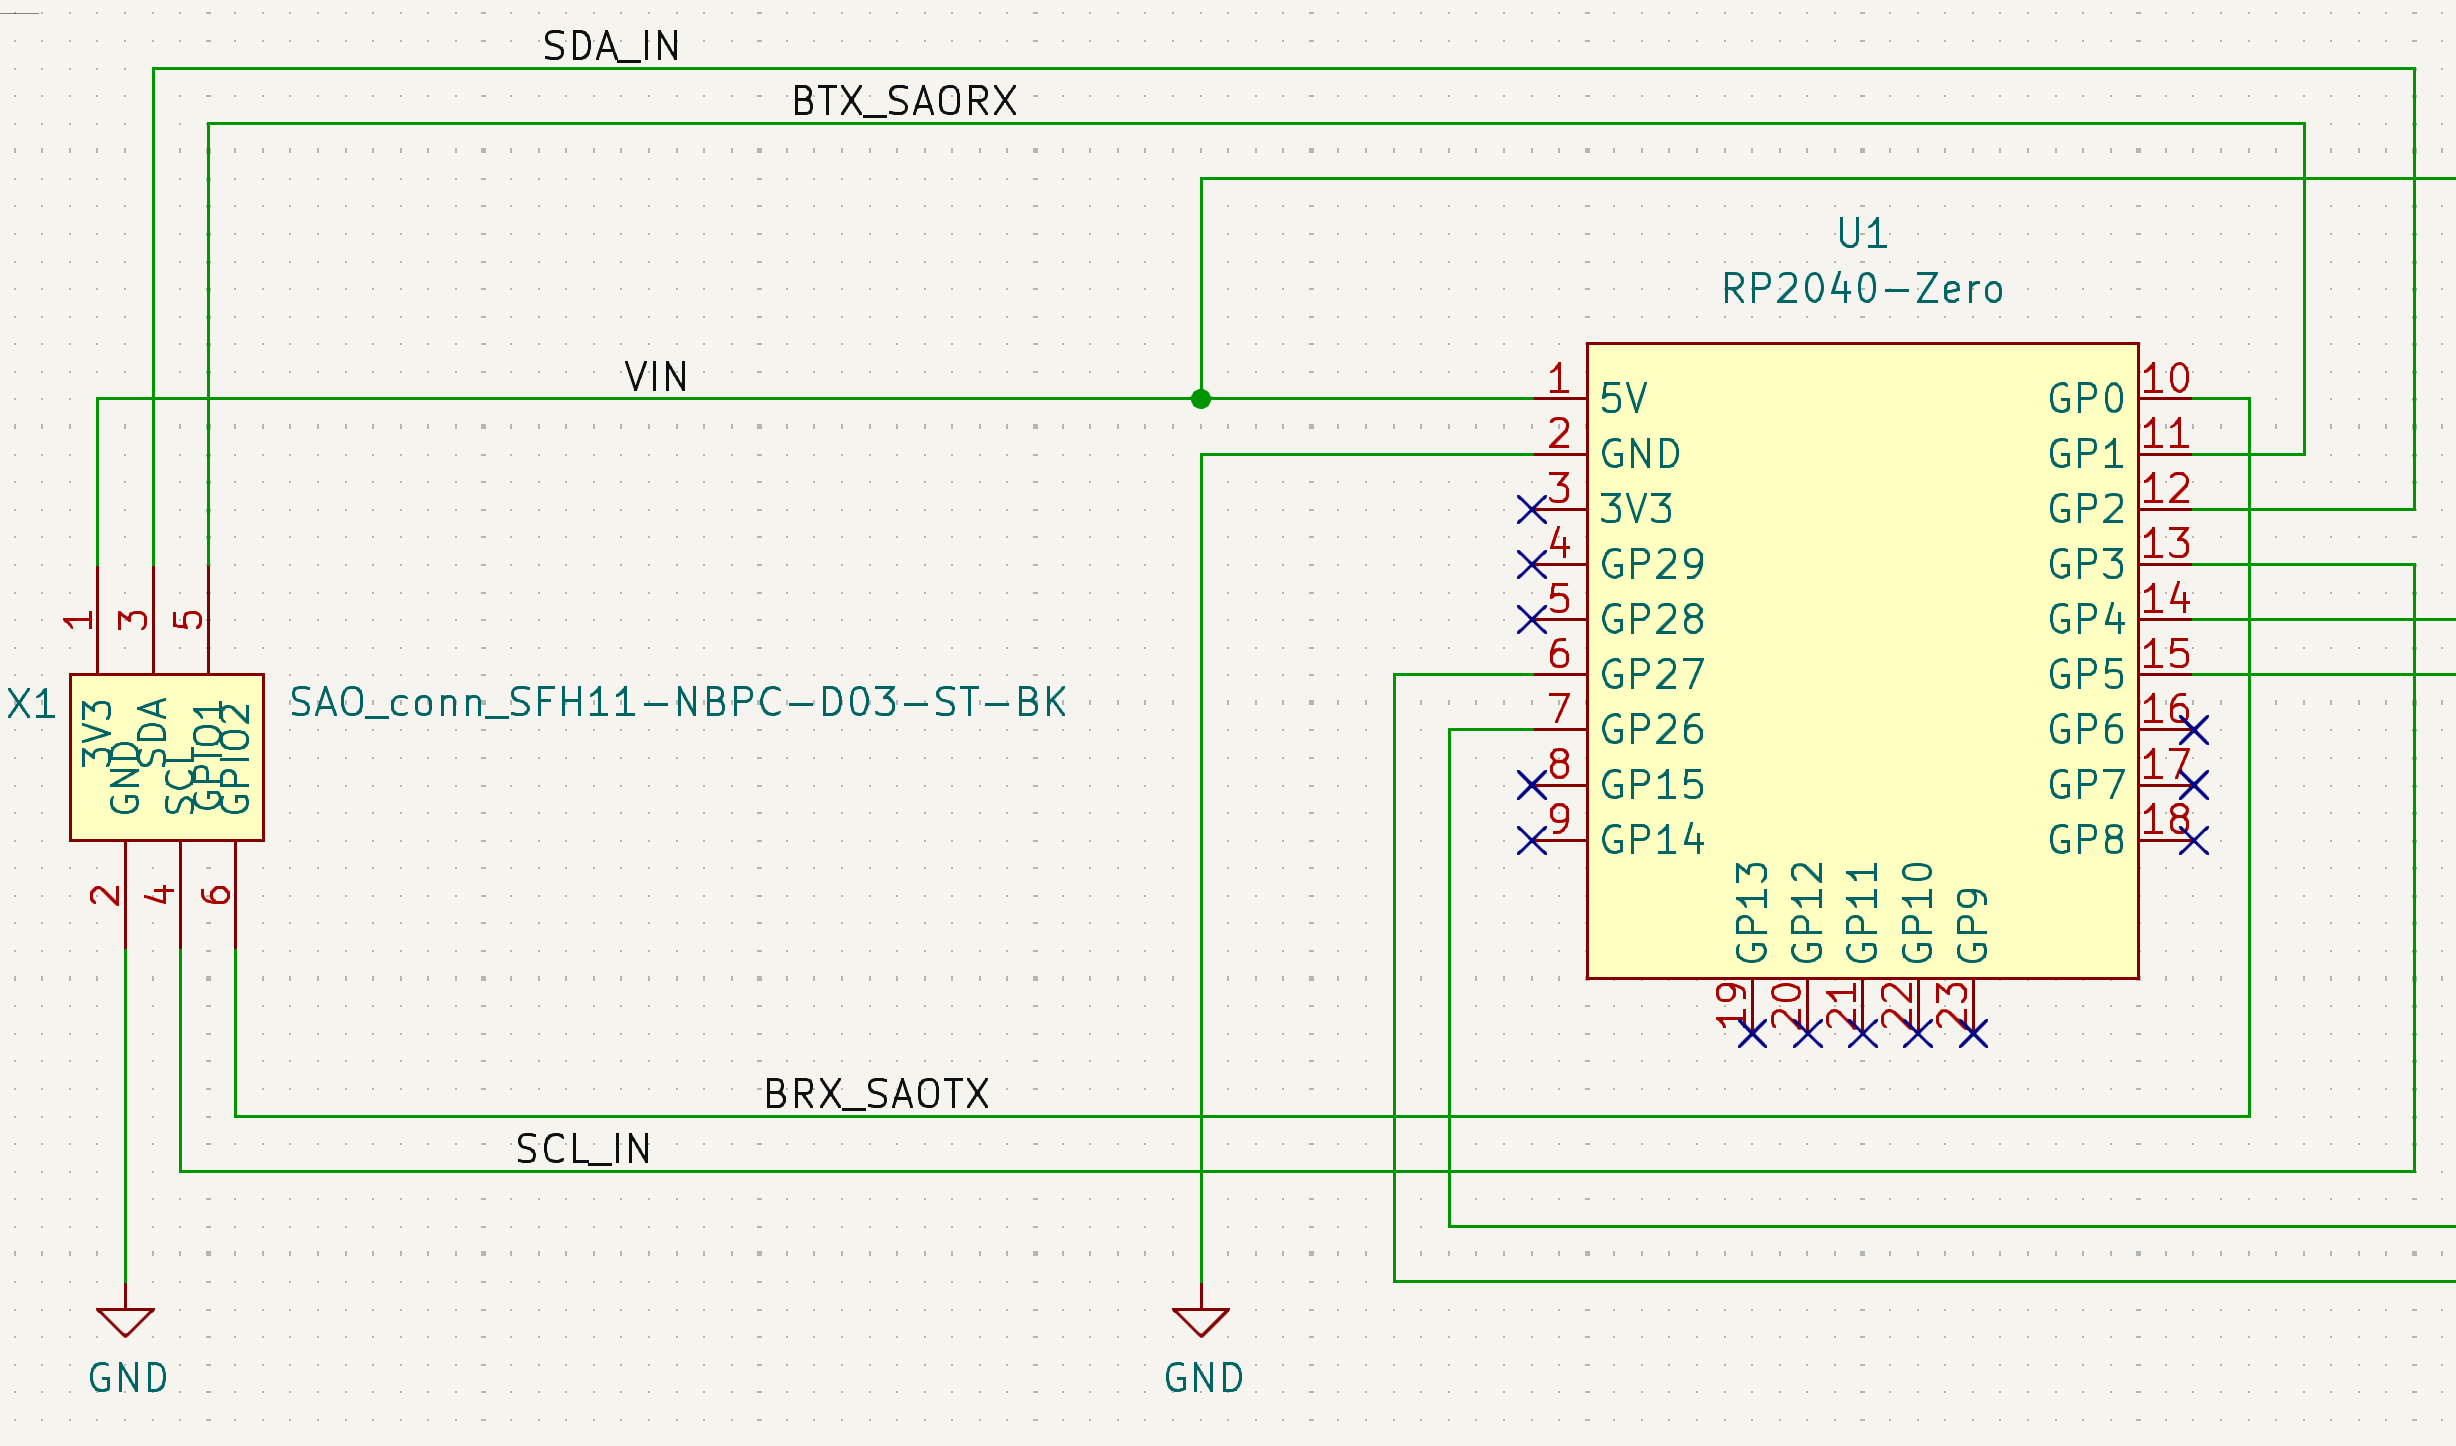
I'll route the I2C into a spare I2C port of the RP2040 so I the RP2040 can be configured as a slave on the badge I2C Bus. By doing this, the RP2040 can become an advanced I2C device, and control several other things down stream. Such as: a SPI device, analog in/out, another I2C bus, or expanded GPIO. I'm considering this for my Etch sAo Sketch that would use an ePaper display, which only come in the SPI variety as far as I know. Having this capability in the SAO Demo Controller will let me experiment with the concept.
And if that proves to be too difficult (it's certainly not trivial if I want true bidirectional I2C behavior), by Plan B for that project is to use the GPIO of the SAO port as a UART, with the RP2040 translating simple UART commands into SPI control for the ePaper.
Both of these pin pair usages are not core to the SAO Demo Controller, but I feel better connecting those pins to the RP2040, and letting them be ready for possibilities yet to come.
The downstream side will be configured like this:

This allows your to configure the RP2040 to drive the default I2C bus and communicate with your downstream SAO, and optionally, two QWIIC/STEMMA ports for testing break-out boards and accessories.
Routing is refreshingly simple:
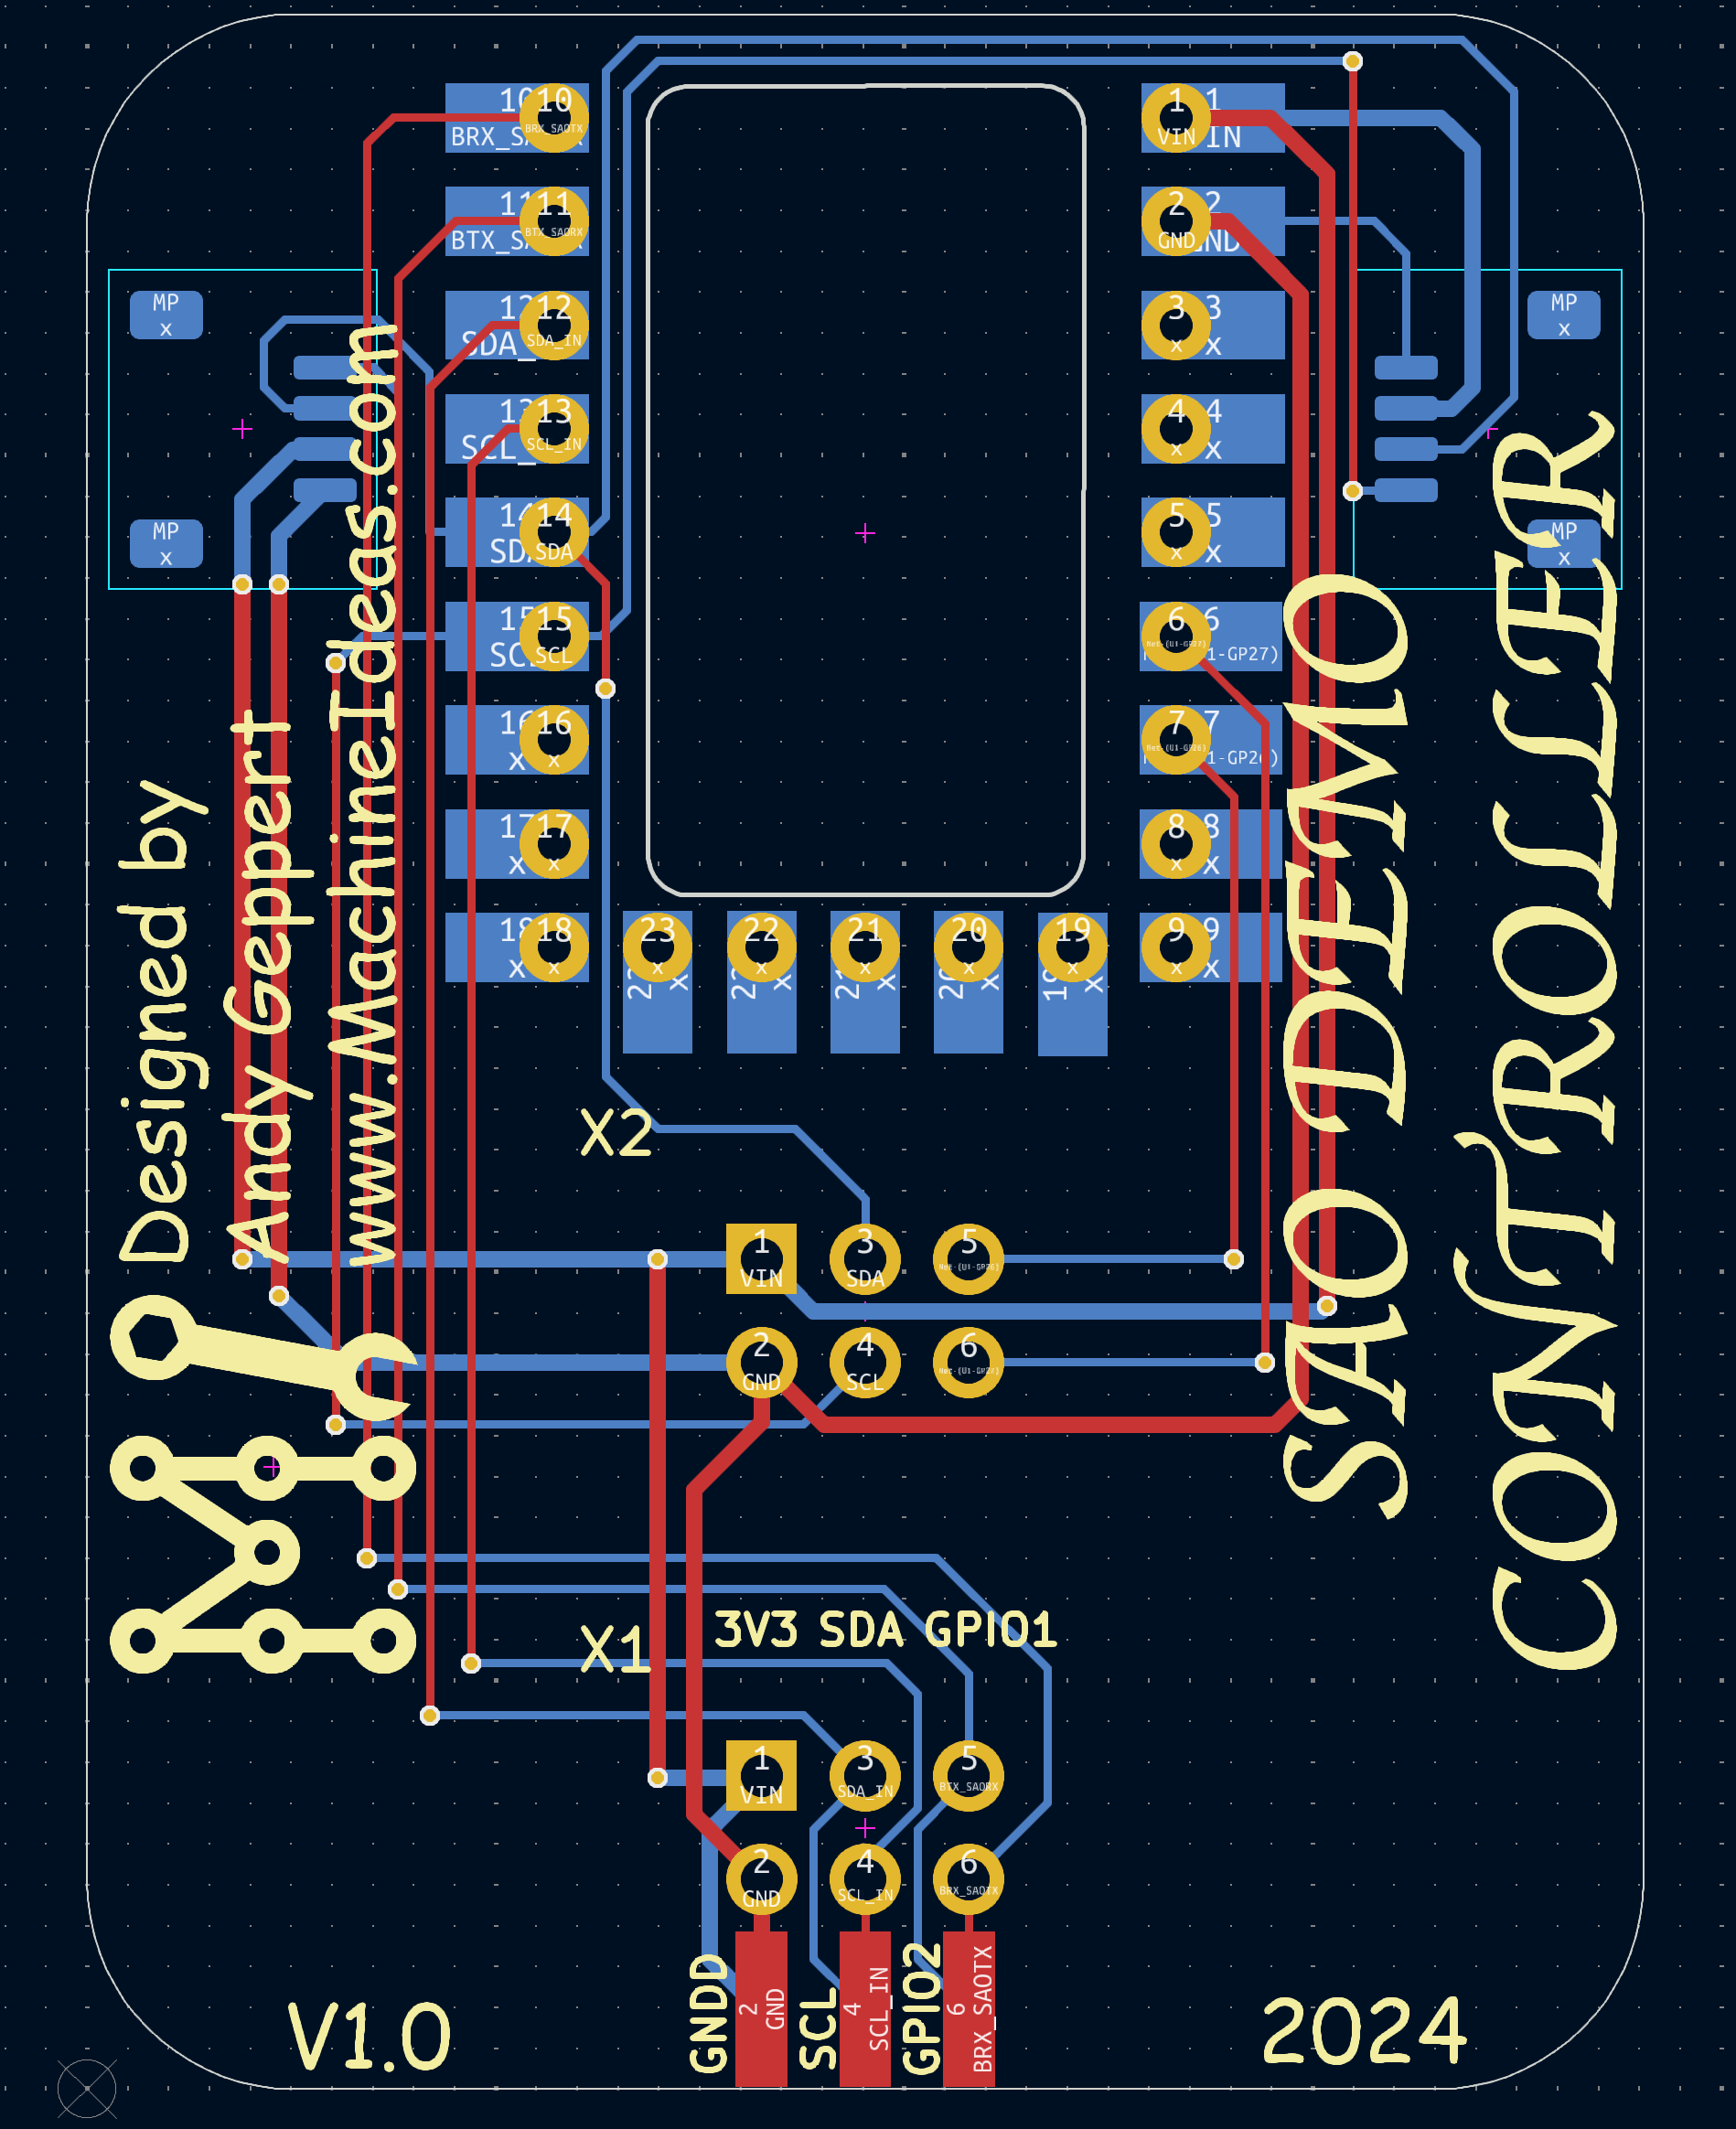
And here's a render in blue to try and match the RP2040-Zero board:

Click. Click. Ordered!
Discussions
Become a Hackaday.io Member
Create an account to leave a comment. Already have an account? Log In.