Close
0%
0%

RC plane sound machine

play motor and machine gun sounds on your RC warbird

Similar projects worth following
A friend of mine wanted a realistic RC plane warbird with "engine" and "machine gun" sounds.

Throttle stick will startup the engine, then sound will realistically change with the throttle until you fully stop the motor.
Additionnally a button can trigger machine gun shots !

This kind of system already exists even with DIY solutions :

So I decided to build mine with the following features :

  • play start engine sound when throttle stick leaves "zero" position
  • seamlessly increase/decrease motor RPM sound with the throttle stick
  • while motor running, play machine gun sound when pressing the gun button on the radio
  • play stop engine sound when turning motor off

And to get a good sound level and quality :

  • store the sound files into a SD card (you can change these files easily)
  • use a DFPlayer mp3/wav module to decode the files
  • amplify the sound with a 60W amplifier
  • change the sound volume with a radio channel (potentiometer) or select a fixed volume value 
  • use an audio exciter instead of a regular loudspeaker

Audio Exciters are loudspeaker components that lack the frame and cone of traditional speakers and function by vibrating a rigid surface to create sound. Instead of mounting them with screws, they're adhered to whatever surface is intended to function as the speaker. In our use case it will be glued on the plane frame inside the cockpit.

All this should cost as cheap as possible (around 30/40 €)

Here is a small video of the system during tests on my desktop :


And a second one with the system fully hidden into the plane.

A software modification was made in order to synchronize the start and stop sounds with the propeller motion.

Result is more realistic. More details into this log


Electronics

Most of the electronics should be based on already available modules:


DFPlayer mini

This small module was originally designed by DFRobot

This player supports an microSD card on which can be stored mp3 or Wav files
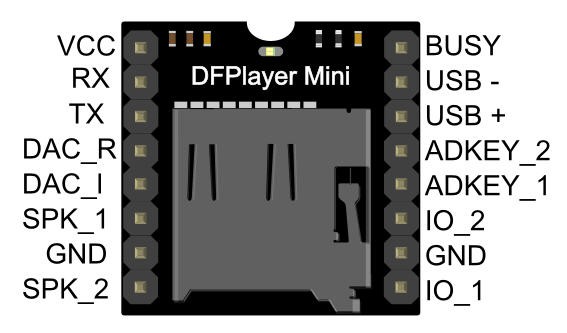
This chip has a 3.3V ttl logic but its VCC can be between 3.3V and 6V max. A good value is 4.8V. We cannot power this module via the 3.3V of the ESP32 as its voltage regulator would be too weak... So an external power supply is mandatory

DFPlayer can be directly connected to an ESP32 using serial port. And its 3W built in amplifier (Speaker pins) can directly feed a small loudspeaker (less than 3W).
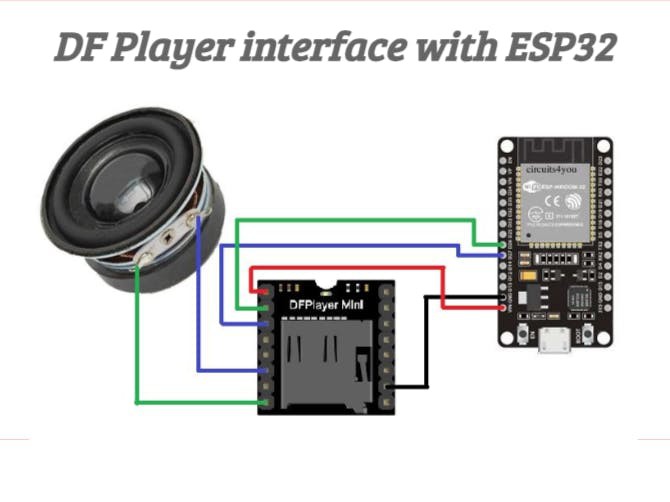
Unfortunately this amplifier is only a 3W model.. So we can add an external amplifier an connect it to the DACs output of the Player.

For my application I will only use a mono amplifier so only connect the amplifier to one of the DACs (DAC_left see schematics below).


Schematics

Here is how to connect the modules.
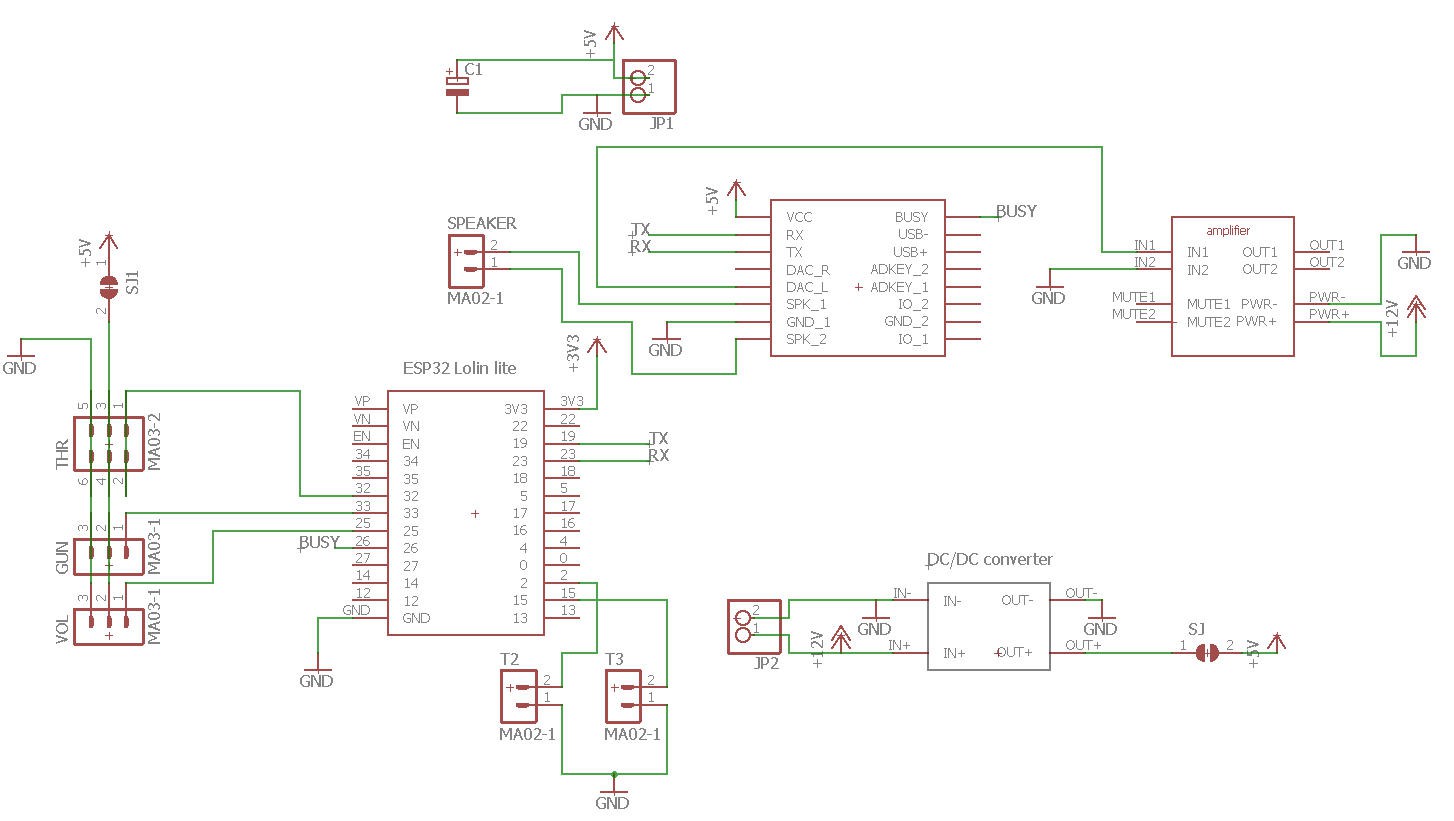
From left to right :

  • 3 pin headers (THR, GUN and VOL) will be connected to 3 servo channels of the RC receiver, their values will be read by the ESP32
  • The DFPlayer mini will be connected to the Serial2 port of the ESP32 (TX/RX pins)
  • The DAC_Left output of the player will feed the audio amplifier (IN+ pin). IN- being connected to Ground
  • Power of the amplifier will be supplied by the plane battery (more details will come) and it will also enter the DC/DC converter to output a strong 5V supply for both ESP32 and DFPlayer mini.


PCB

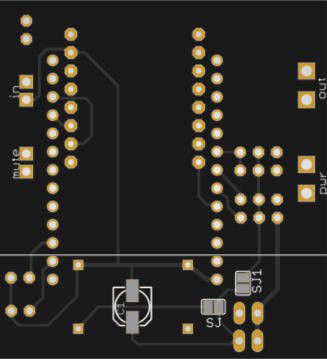
This schematics was easily routed on a dual sided PCB board.
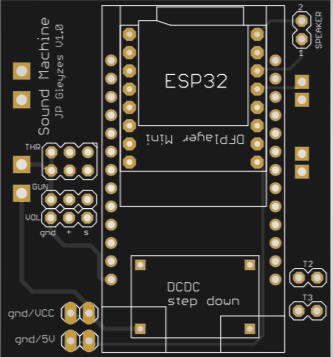
The PCB was kindly sponsored by PCBWay and is as usual of excellent quality.

You can order it here : PCBWay shared project. It's cheap, delivered very fast and so professional looking!

and if you are new to PCBWay please use this affiliated link : https://pcbway.com/g/o35z4O

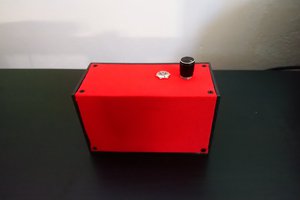
This board allows a "mezzanine mount" of all the components, so that the final product enters into a 5x5x2 cm box.

Soldering is fairly...

Read more »

siren_to_SD_card.zip

plane + siren + gun sound pack to unzip into the SD card

x-zip-compressed - 11.08 MB - 10/09/2024 at 08:48

Download

ESP32_SoundGenerator_BoM.xlsx

Bill of Material

sheet - 10.83 kB - 10/08/2024 at 11:52

Download

YX5200_Datasheet.pdf

Original DFPlayer Datasheet

Adobe Portable Document Format - 836.93 kB - 10/03/2024 at 16:11

Preview

sound.zip

Planes sounds pack to unzip into the root of the SD card

x-zip-compressed - 3.78 MB - 10/03/2024 at 15:37

Download

dayton-audio-daex25ct-4-spec-sheet.pdf

Exciter datasheet

Adobe Portable Document Format - 598.58 kB - 10/03/2024 at 09:43

Preview

View all 6 files

  • plane integration and propeller synchronization

    JP Gleyzes10/24/2024 at 12:16 0 comments

    Mustang plane integration

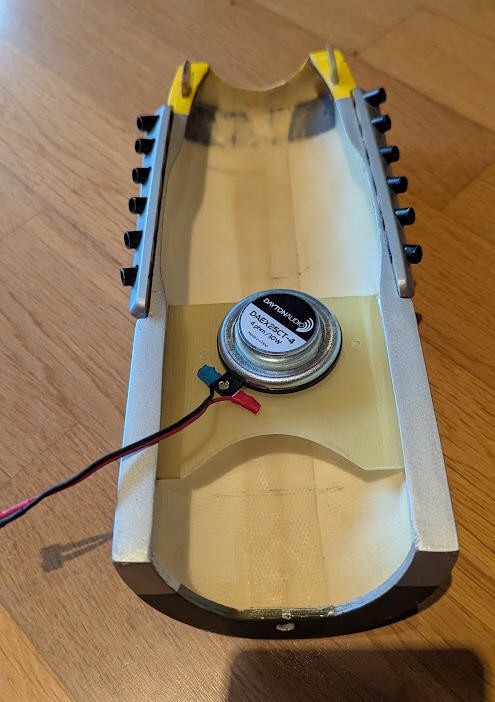
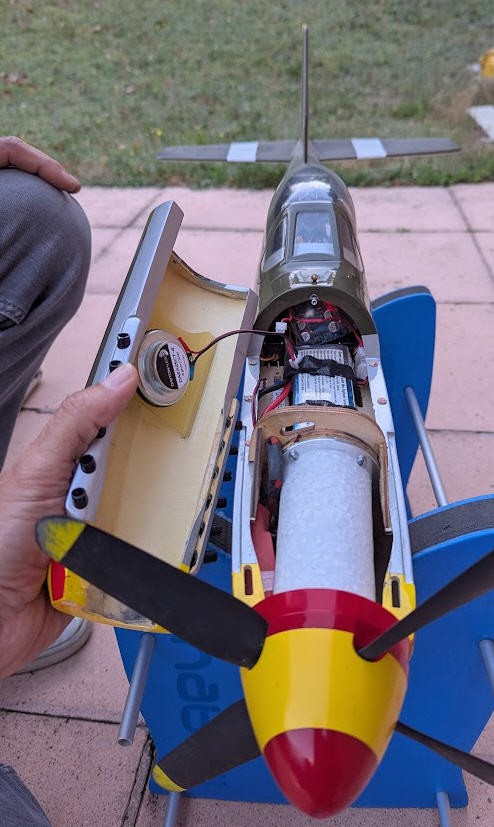
    To integrate the sound machine into the Mustang plane we glued an epoxy plate into the cockpit and the exciter was glued on this plate.

    The cockpit cover, being as well made with epoxy and fiber glass, acts as a resonating chamber.

    Then the sound machine is hidden into the plane and ready to run

    And we discovered that the propeller was starting to rotate too quickly before the start sound of the engine was played...

    So I made a small modification into the code to handle this behavior :

    • start the "start sound" as fast as possible before the propeller is rotating
    • start the "stop sound" when the propeller is still rotating

    The specification is easy but the implementation needs some tricky modifications into the code...

    We have to introduce 2 new thresholds into the code, let these tresholds accessible for tuning and compute the "derivative" of the throttle to know in which direction we move the throttle stick...

    the "start" and "stop" thresholds are parameters that you can modify as usual: use a serial link to your ESP32 and type this command:

    • STA=20 (or Sta=20 or sta=20) to set the start throttle to 20 (value between 0 and 200)
    • STO=80 (or Sto=80 or sto=80) to set the stop throttle to 80 (value between 0 and 200)

    And here is the result with the mustang plane :

  • Add a Stuka siren to your plane !

    JP Gleyzes10/09/2024 at 08:46 0 comments

    In the default implementation of the firmware, the sound files are located into two different folders selected by the "gun switch".

    Why not adding a third folder to embed the siren sound of a "Stuka" warbird.

    This was an easy modification of the firmware!

    now 3 folders :

    • 00: motor only sound at various speeds
    • 01: motor + siren (at various speeds)
    • 02: motor + siren + gun (at various speeds)

    Of course you will need to decode the "gun" channel at three states instead of  two to address the right folder. And that's it.

    Here is the zip file contaning the sounds : siren sound pack

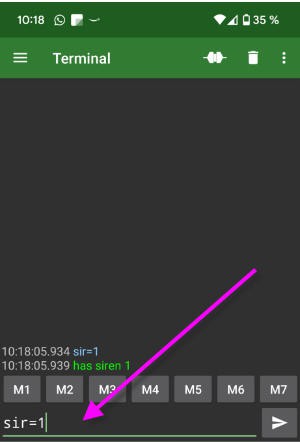
    Firmware is also modified to accomodate both sounds packs. to select siren use a serial link to your ESP32 and type this command:

    • SIR=1 (or Sir=1 or sir=1) to activate the siren option
    • SIR=0 (or Sir=0 or sir=0) to desactivate the siren option and stay with "motor+gun" files

  • change sound volume

    JP Gleyzes10/09/2024 at 08:32 0 comments

    if you want to change the sound volume you have several options :

    • use a receiver channel
    • use default value
    • set it with the serial USB cable

    change volume with a receiver channel

    This is probably the easiest option:

    connect a receiver channel on the pin "vol" of your board. Then you can cahnge the volume with the potentiometer of your radio; Easy

    use the default value

    If you do not connect the Vol Pin to a receiver channel, this is detected by the ESP32 and it will set volume to the latest received value.

    To be sure to keep the latest value you should remove the power to your board (VCC pin) while the radio is stiff on and conencted to "Vol" pin

    set volume with the serial link

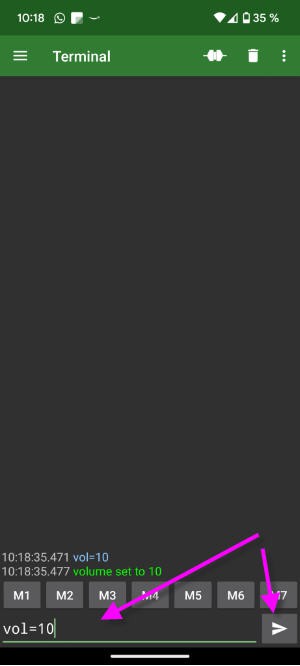
    You can use your smartphone to connect it to the usb port of your ESP32 (with an OTG cable) or to the Serial port of your PC with a regular USB cable.

    Then ope a serial terminal. It can be the arduino IDE on a PC or the excellent Serial USB  application on your android phone.

    Then enter the command : Vol=xx or VOL=xx or vol=xx with xx between 0 and 30 to setup the default volume.

  • Struggling with DFPlayer

    JP Gleyzes10/02/2024 at 10:09 0 comments

    My first idea was to use the DFRobotDFPlayerMini Arduino library. But I quite soon discovered that my DFPlayer was not a genuine one ...

    I got the bad error message at startup :

    Unable to begin:
    1.Please recheck the connection!
    2.Please insert the SD card!

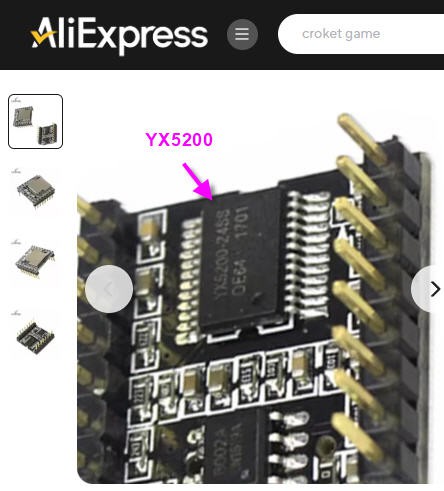
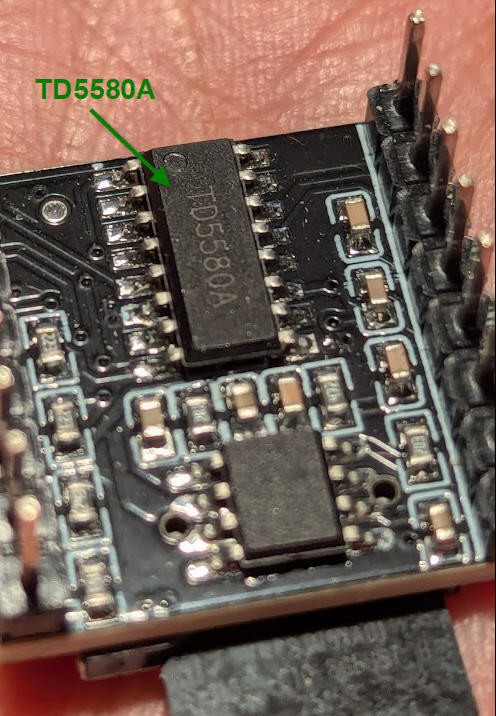
    Looking at the Audio chip on the back of the DFplayer I found a reference which was not the genuine one 

    I ordered this one

    I got that one:

    Well... After searching on internet I found the datasheet of this TD5580A chip... but in chineese !

    So I translated this document with the help of Google Translate. And I got a readable document : TD5580A datasheet

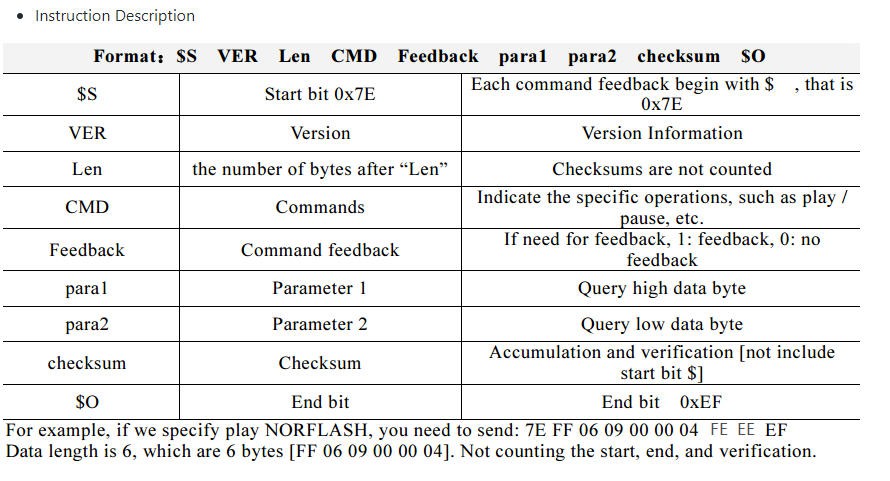
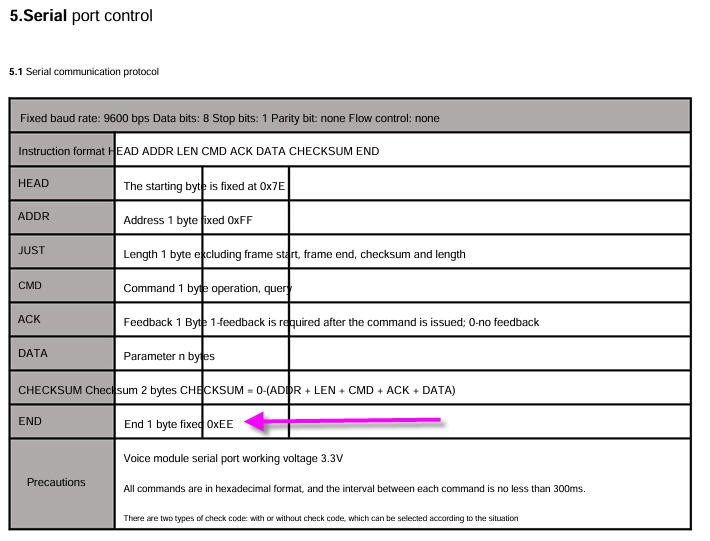
    I carefully read this document and found that it was the same as the original one excepted the end byte of the frame which was said to be 0xEE instead of 0xEF.

    Original:

    TD5580A:

    Unfortunately it was a mistake into the Chineese datasheet... End byte is actually 0xEF as with the original chip.

    So after digging into the DFPlayer serial output I finally discovered that this clone was sending an error message after receiving a chip reset command :

    Of course this 0x7E error code was not documented into the datasheet nor implemented into the library!

    So I finally decided to skip this error and to write my own code as the protocol was quite simple and as I didn't need all the commands offered by the DFrobotDFplayerMini libray...

View all 4 project logs

Enjoy this project?

Share

Discussions

Similar Projects

Does this project spark your interest?

Become a member to follow this project and never miss any updates