 JP Gleyzes
This kind of system already exists even with DIY solutions :
- here is a very good project : https://amaury-laurent.fr/bruiteur-pour-avion-de-modelisme/ but without "gun effect"
- and an excellent commercial one "MrRCSound ASPIRE Sound System" but with a discontinued product
- and another commercial system but with weak amplifier and no "gun effect" : https://www.mr-rcworld.co.uk/shop/realtime-engine-sound-playback-module/
So I decided to build mine with the following features :
- play start engine sound when throttle stick leaves "zero" position
- seamlessly increase/decrease motor RPM sound with the throttle stick
- while motor running, play machine gun sound when pressing the gun button on the radio
- play stop engine sound when turning motor off
And to get a good sound level and quality :
- store the sound files into a SD card (you can change these files easily)
- use a DFPlayer mp3/wav module to decode the files
- amplify the sound with a 60W amplifier
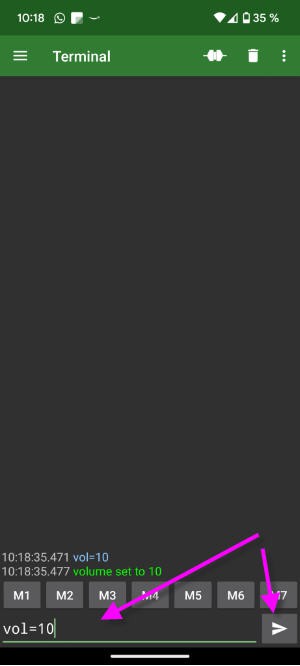
- change the sound volume with a radio channel (potentiometer) or select a fixed volume value
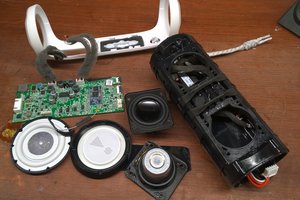
- use an audio exciter instead of a regular loudspeaker
Audio Exciters are loudspeaker components that lack the frame and cone of traditional speakers and function by vibrating a rigid surface to create sound. Instead of mounting them with screws, they're adhered to whatever surface is intended to function as the speaker. In our use case it will be glued on the plane frame inside the cockpit.
All this should cost as cheap as possible (around 30/40 €)
Here is a small video of the system during tests on my desktop :
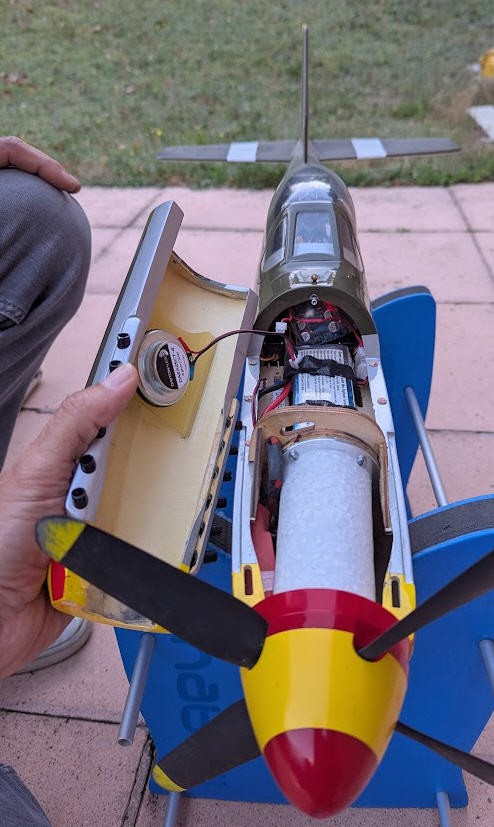
And a second one with the system fully hidden into the plane.
A software modification was made in order to synchronize the start and stop sounds with the propeller motion.
Result is more realistic. More details into this log
Electronics
Most of the electronics should be based on already available modules:
- An ESP32 lolin32 lite MCU
- A DFPlayer Mini mp3/Wav player
- a 60W audio amplifier
- a DCDC mini 360 stepdown converter
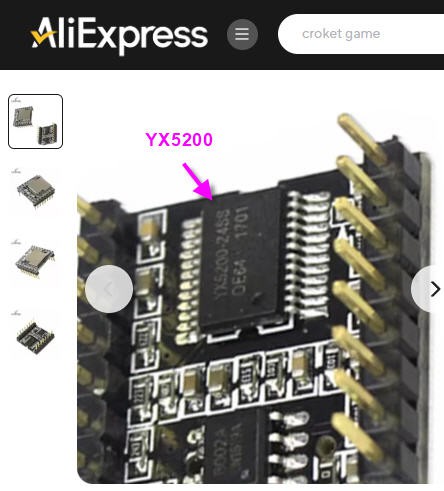
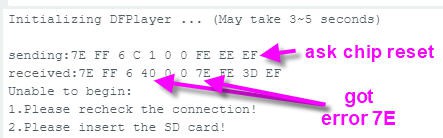
DFPlayer mini
This small module was originally designed by DFRobot
This player supports an microSD card on which can be stored mp3 or Wav files
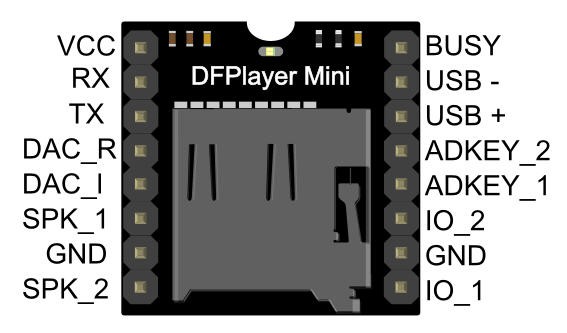
This chip has a 3.3V ttl logic but its VCC can be between 3.3V and 6V max. A good value is 4.8V. We cannot power this module via the 3.3V of the ESP32 as its voltage regulator would be too weak... So an external power supply is mandatory
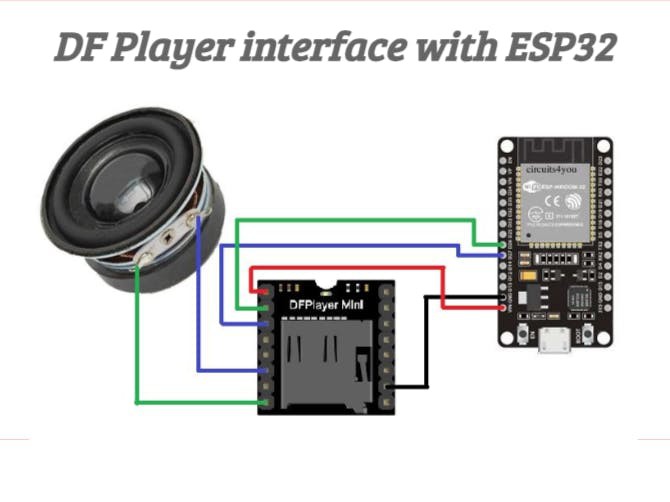
DFPlayer can be directly connected to an ESP32 using serial port. And its 3W built in amplifier (Speaker pins) can directly feed a small loudspeaker (less than 3W).
Unfortunately this amplifier is only a 3W model.. So we can add an external amplifier an connect it to the DACs output of the Player.
For my application I will only use a mono amplifier so only connect the amplifier to one of the DACs (DAC_left see schematics below).
Schematics
Here is how to connect the modules.
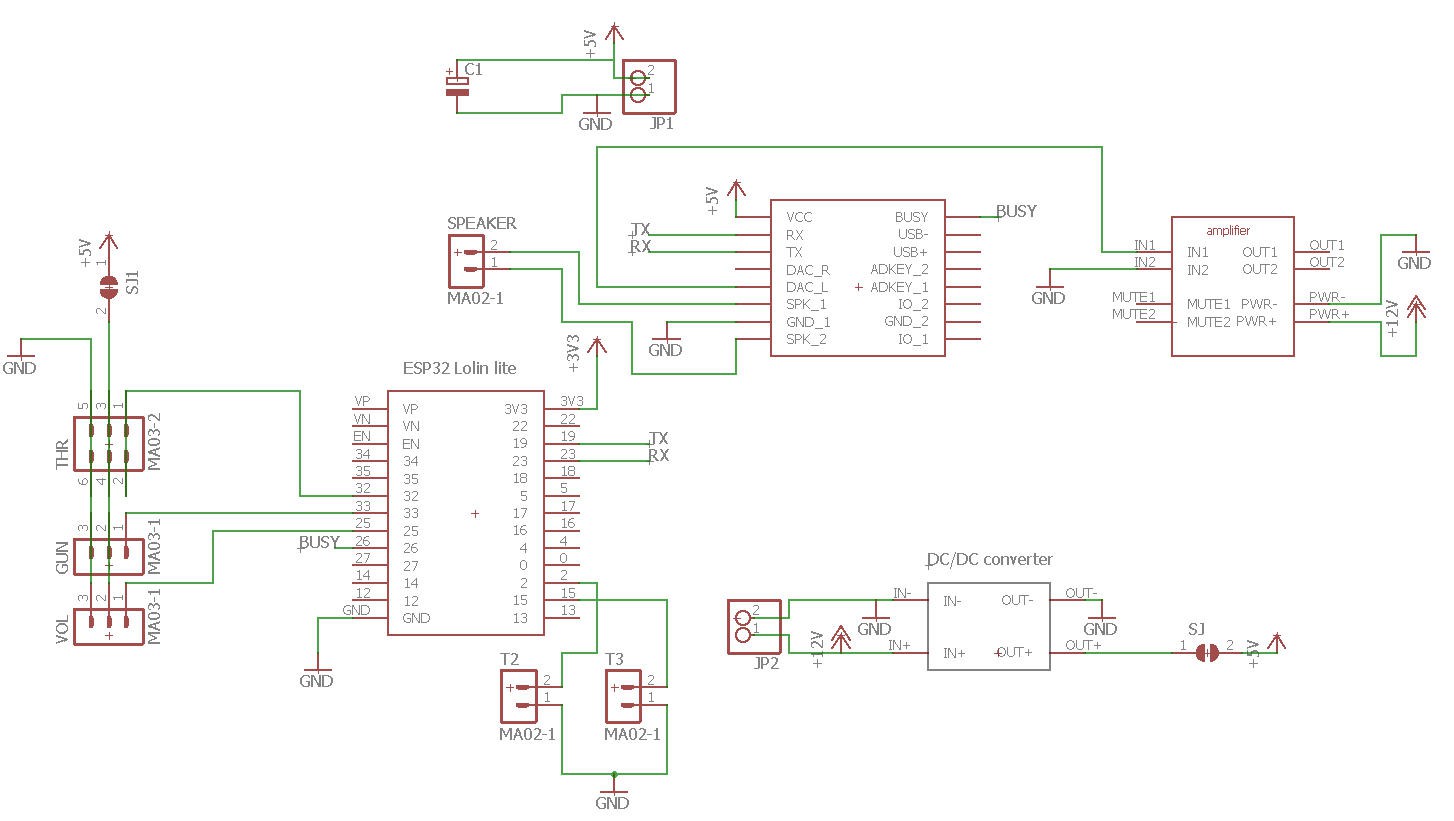
From left to right :
- 3 pin headers (THR, GUN and VOL) will be connected to 3 servo channels of the RC receiver, their values will be read by the ESP32
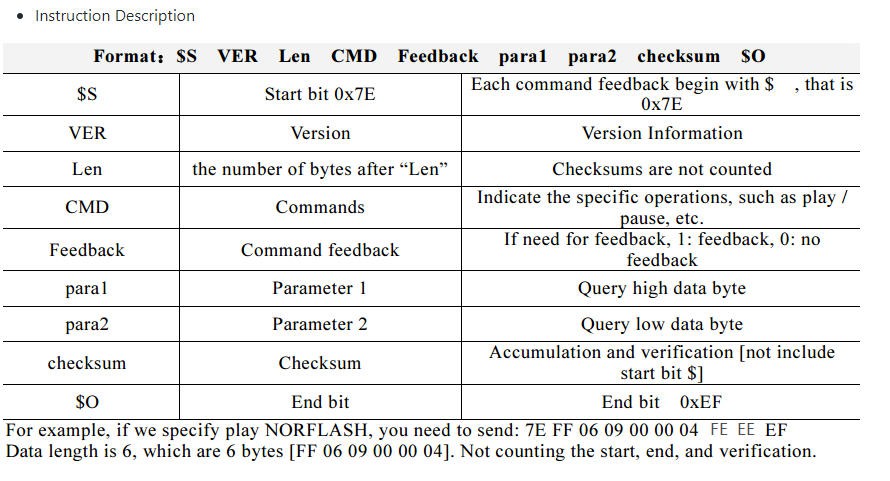
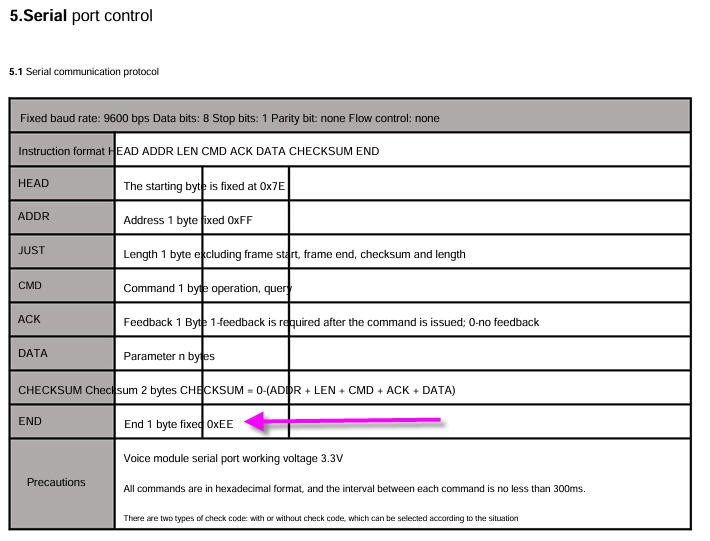
- The DFPlayer mini will be connected to the Serial2 port of the ESP32 (TX/RX pins)
- The DAC_Left output of the player will feed the audio amplifier (IN+ pin). IN- being connected to Ground
- Power of the amplifier will be supplied by the plane battery (more details will come) and it will also enter the DC/DC converter to output a strong 5V supply for both ESP32 and DFPlayer mini.
PCB
This schematics was easily routed on a dual sided PCB board.
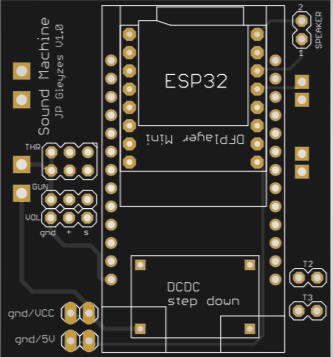
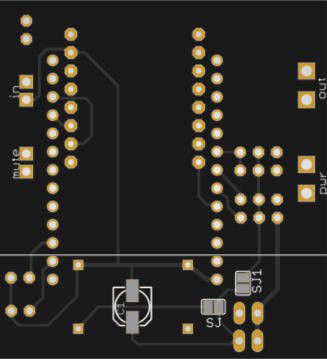
The PCB was kindly sponsored by PCBWay and is as usual of excellent quality.

You can order it here : PCBWay shared project. It's cheap, delivered very fast and so professional looking!
and if you are new to PCBWay please use this affiliated link : https://pcbway.com/g/o35z4O
This board allows a "mezzanine mount" of all the components, so that the final product enters into a 5x5x2 cm box.
Soldering is fairly...
Read more »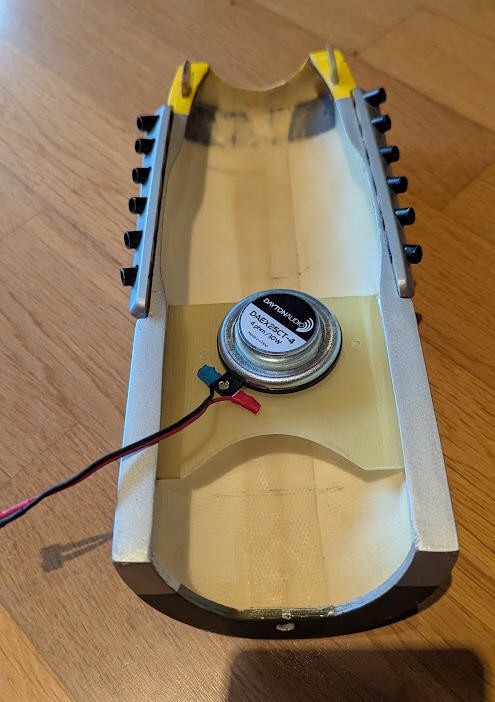

 DeepSOIC
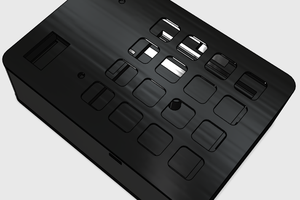
 Michele Perla
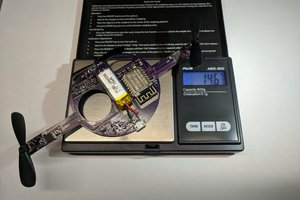
 Sophi Kravitz
 M. Bindhammer