 morecat_lab
First Attempt: Generating MIDI Note-On and Note-Off with ChatGPT (Continued)
1. Code Review
I conducted a detailed review of the program generated by ChatGPT. The following issues were identified:
- Incorrect ACIA initialization Since ACIA is already initialized by SCM, I decided to omit the initialization step and commented out the corresponding section.
- Destruction of the A register in the SEND_BYTE routine The A register, which stores the data to be transmitted, was being overwritten. To fix this, I modified the routine to push the A register onto the stack at the entry point and pop it before outputting the data.
- Incorrect address for the ACIA data register The address should be $A1 instead of $A0.
- Infinite loop After outputting the Note-On and Note-Off messages, the program returned to the start. For testing purposes, I modified the program to output only once and then return to the monitor.
The manually corrected program is as follows:
; Z80 Assembly Program to send MIDI Note messages via ACIA at $A0
; Program starts at $8000

    ORG $8000           ; Program starting address

START:
    ; Initialize ACIA
;    LD A, $03       ; Control register: 8 data bits, no parity, 1 stop bit, divide by 16 clock
;    OUT ($A0), A    ; Write to ACIA control register

    ; Send MIDI Note On (Channel 1, Note 60, Velocity 127)
    CALL MIDI_NOTE_ON

    ; Delay (for demonstration purposes)
    CALL DELAY

    ; Send MIDI Note Off (Channel 1, Note 60, Velocity 0)
    CALL MIDI_NOTE_OFF

    ; End of program loop
    ;    JR START        ; Jump to the beginning to repeat
    RET

; Routine to send MIDI Note On
MIDI_NOTE_ON:
    LD A, $90       ; Status byte for Note On, Channel 1
    CALL SEND_BYTE

    LD A, $3C       ; Note number (Middle C)
    CALL SEND_BYTE

    LD A, $7F       ; Velocity (maximum)
    CALL SEND_BYTE

    RET             ; Return from subroutine

; Routine to send MIDI Note Off
MIDI_NOTE_OFF:
    LD A, $80       ; Status byte for Note Off, Channel 1
    CALL SEND_BYTE

    LD A, $3C       ; Note number (Middle C)
    CALL SEND_BYTE

    LD A, $00       ; Velocity (0)
    CALL SEND_BYTE

    RET             ; Return from subroutine

; Routine to send a byte to the ACIA
SEND_BYTE:
    ; Wait until ACIA is ready to transmit
    PUSH AF
WAIT_TX_READY:
    IN A, ($A0)     ; Read status register
    BIT 1, A        ; Check if transmit buffer is empty (bit 1)
    JR Z, WAIT_TX_READY ; If not empty, wait

    POP AF
    ; Send the byte
    OUT ($A1), A    ; Send byte to ACIA data register
    RET             ; Return from subroutine

; Delay routine (simple loop for demonstration)
DELAY:
    LD BC, $FFFF    ; Load BC with a large value
DELAY_LOOP:
    DEC BC          ; Decrement BC
    LD A, B         ; Check if BC reached 0
    OR C
    JR NZ, DELAY_LOOP ; If not zero, keep looping
    RET             ; Return from subroutine
After making these corrections, I saved the program on my computer as midi_test.asm.
2. Assembly Process
To execute the above program, I created a HEX file using a Z80 assembler. Although I usually develop on a Mac mini, I used sjasm and bin2hex for Z80 development. The following commands can be used to assemble the program:
$ sjasm test_ai.asm
$ bin2hex -o0x8000 -b16 test_ai.out > test_ai.hex
In practice, I automated the process using a Makefile:
.PHONY: clean
.SUFFIXES: .out .hex .asm
TARGET : midi_test.hex
.out.hex:
        bin2hex -o0x8000 -b16 $< > $@
.asm.out:
        sjasm $<
clean:
          rm -f *.out *.hex *.lst
Run the make command generate the following messages.
$ make
sjasm midi_test.asm
Sjasm Z80 Assembler v0.42c - www.xl2s.tk
bin2hex -o0x8000 -b16 midi_test.out > midi_test.hex
rm midi_test.out
3. Test Environment
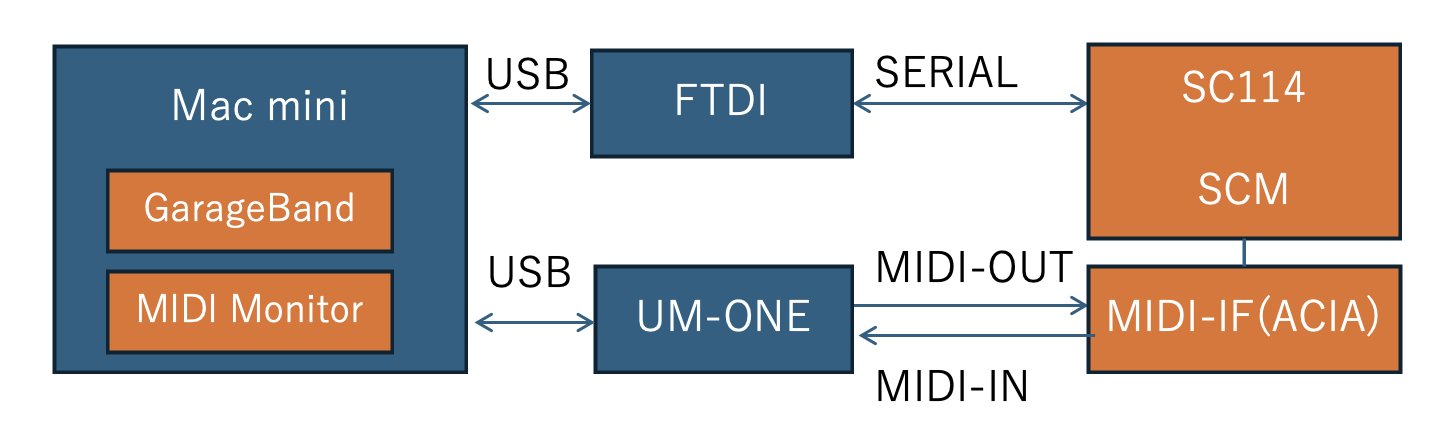
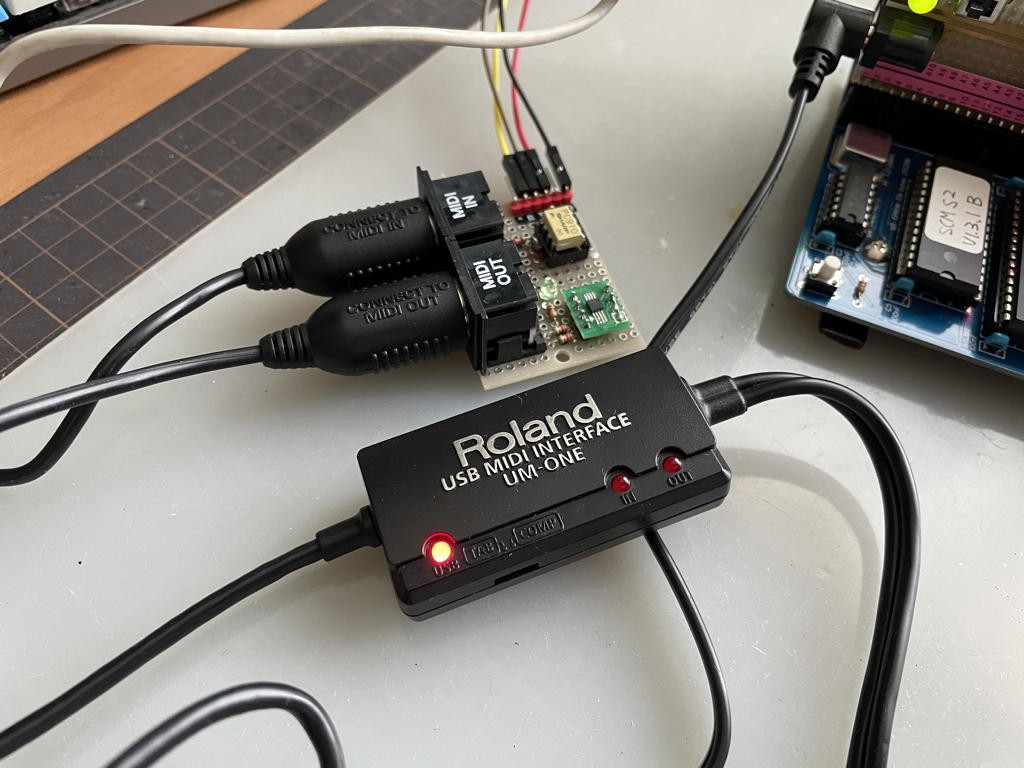
To debug, I needed to verify that the MIDI messages were being sent correctly. Instead of using a MIDI sound module, I used a MIDI interface on my Mac, which made it easier to check the program's behavior. I looped back the messages from the RC-2014 using a Roland UM-ONE-MK2 MIDI interface I had on hand. Below is a diagram of the setup:
4. Results
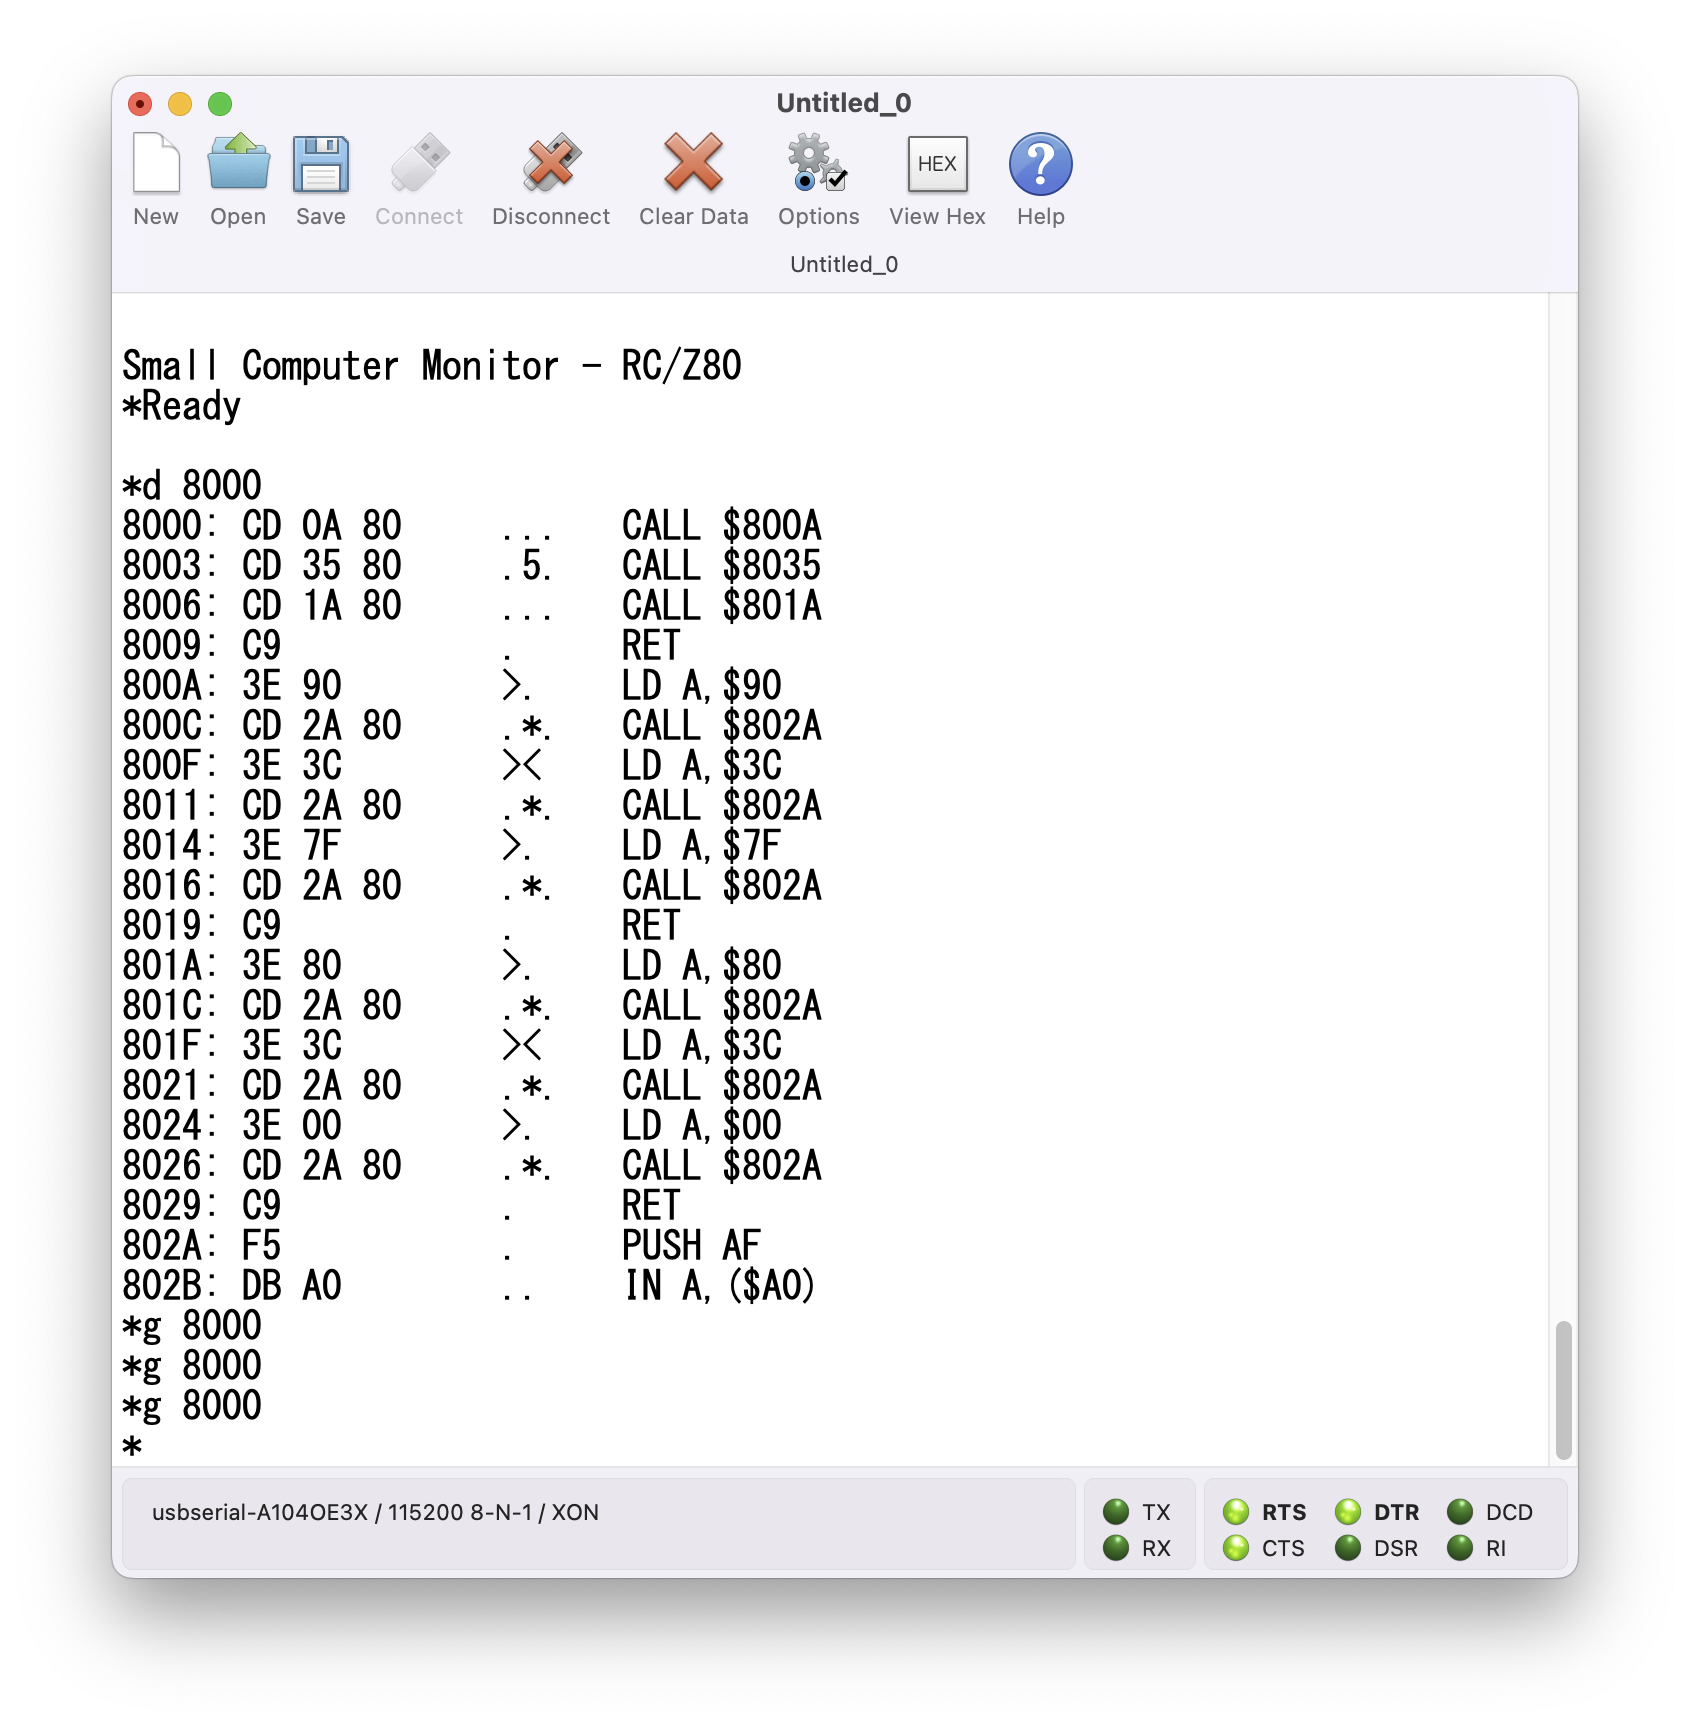
Dropping the HEX file into the SCM console sends the file. You can verify that it was sent correctly using the D command. To execute the program, type g 8000 in the SC114 console. As expected, both the Note-On and Note-Off messages were output.
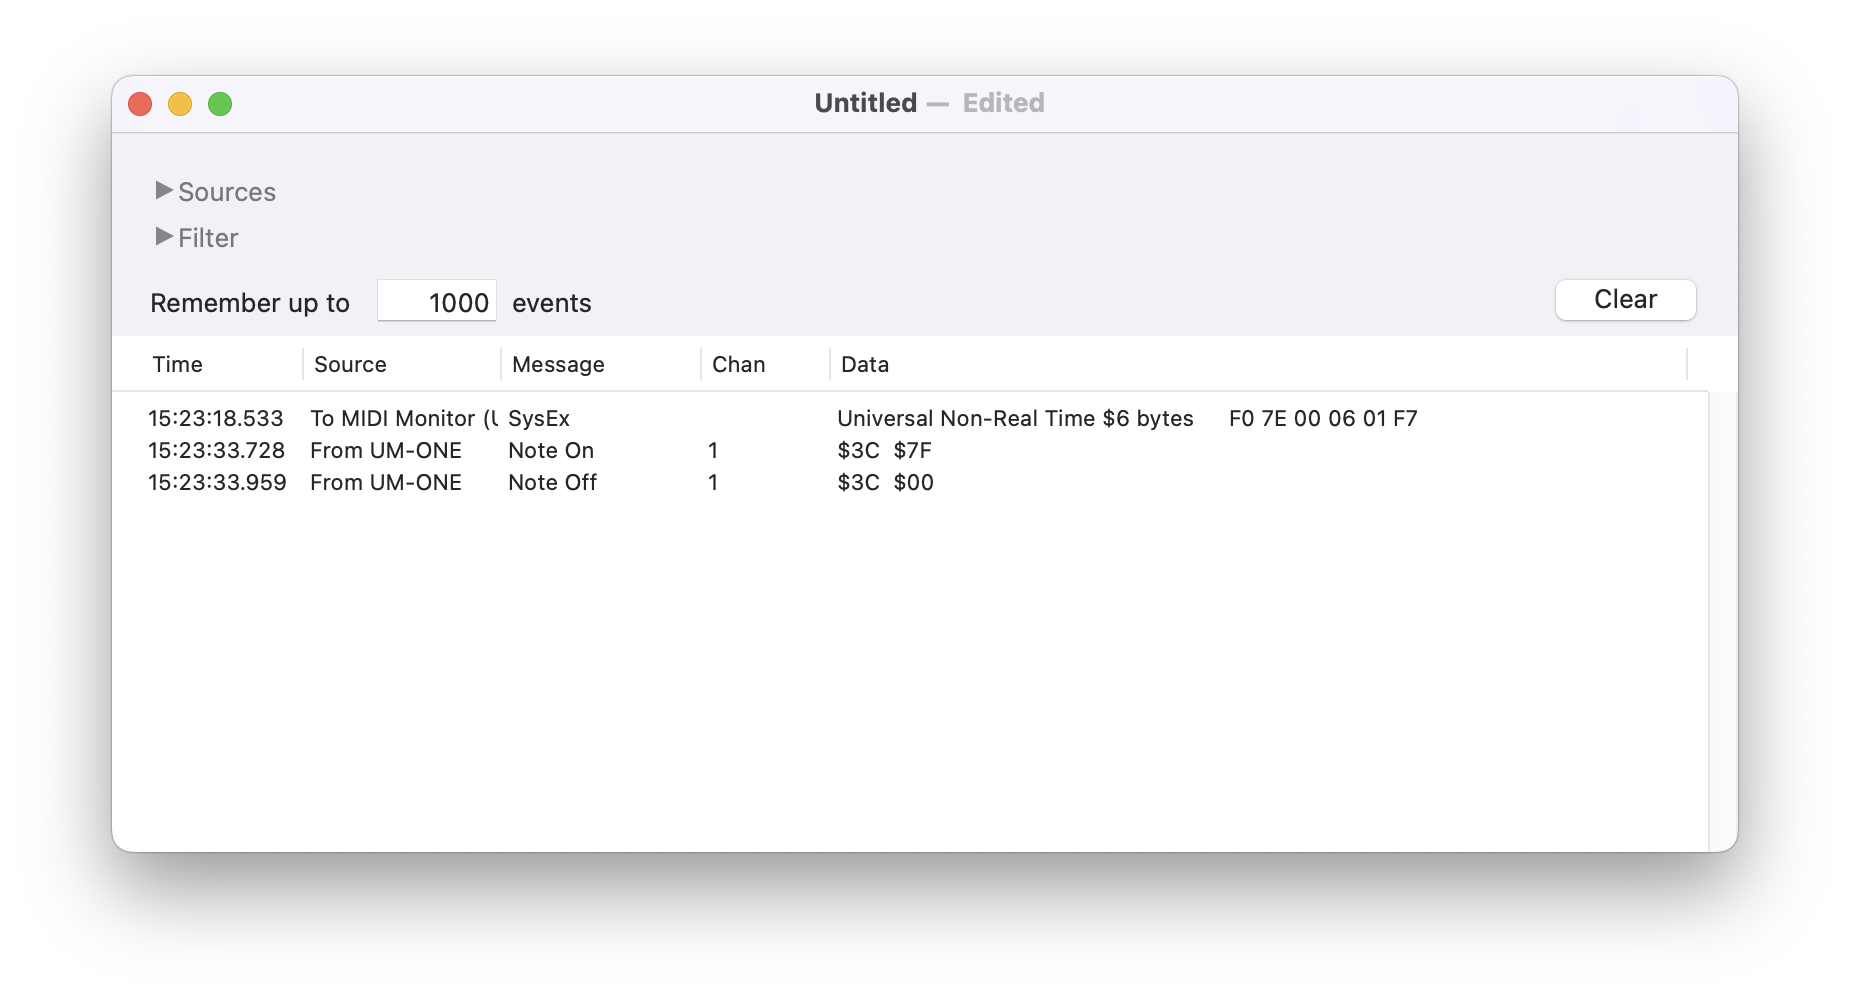
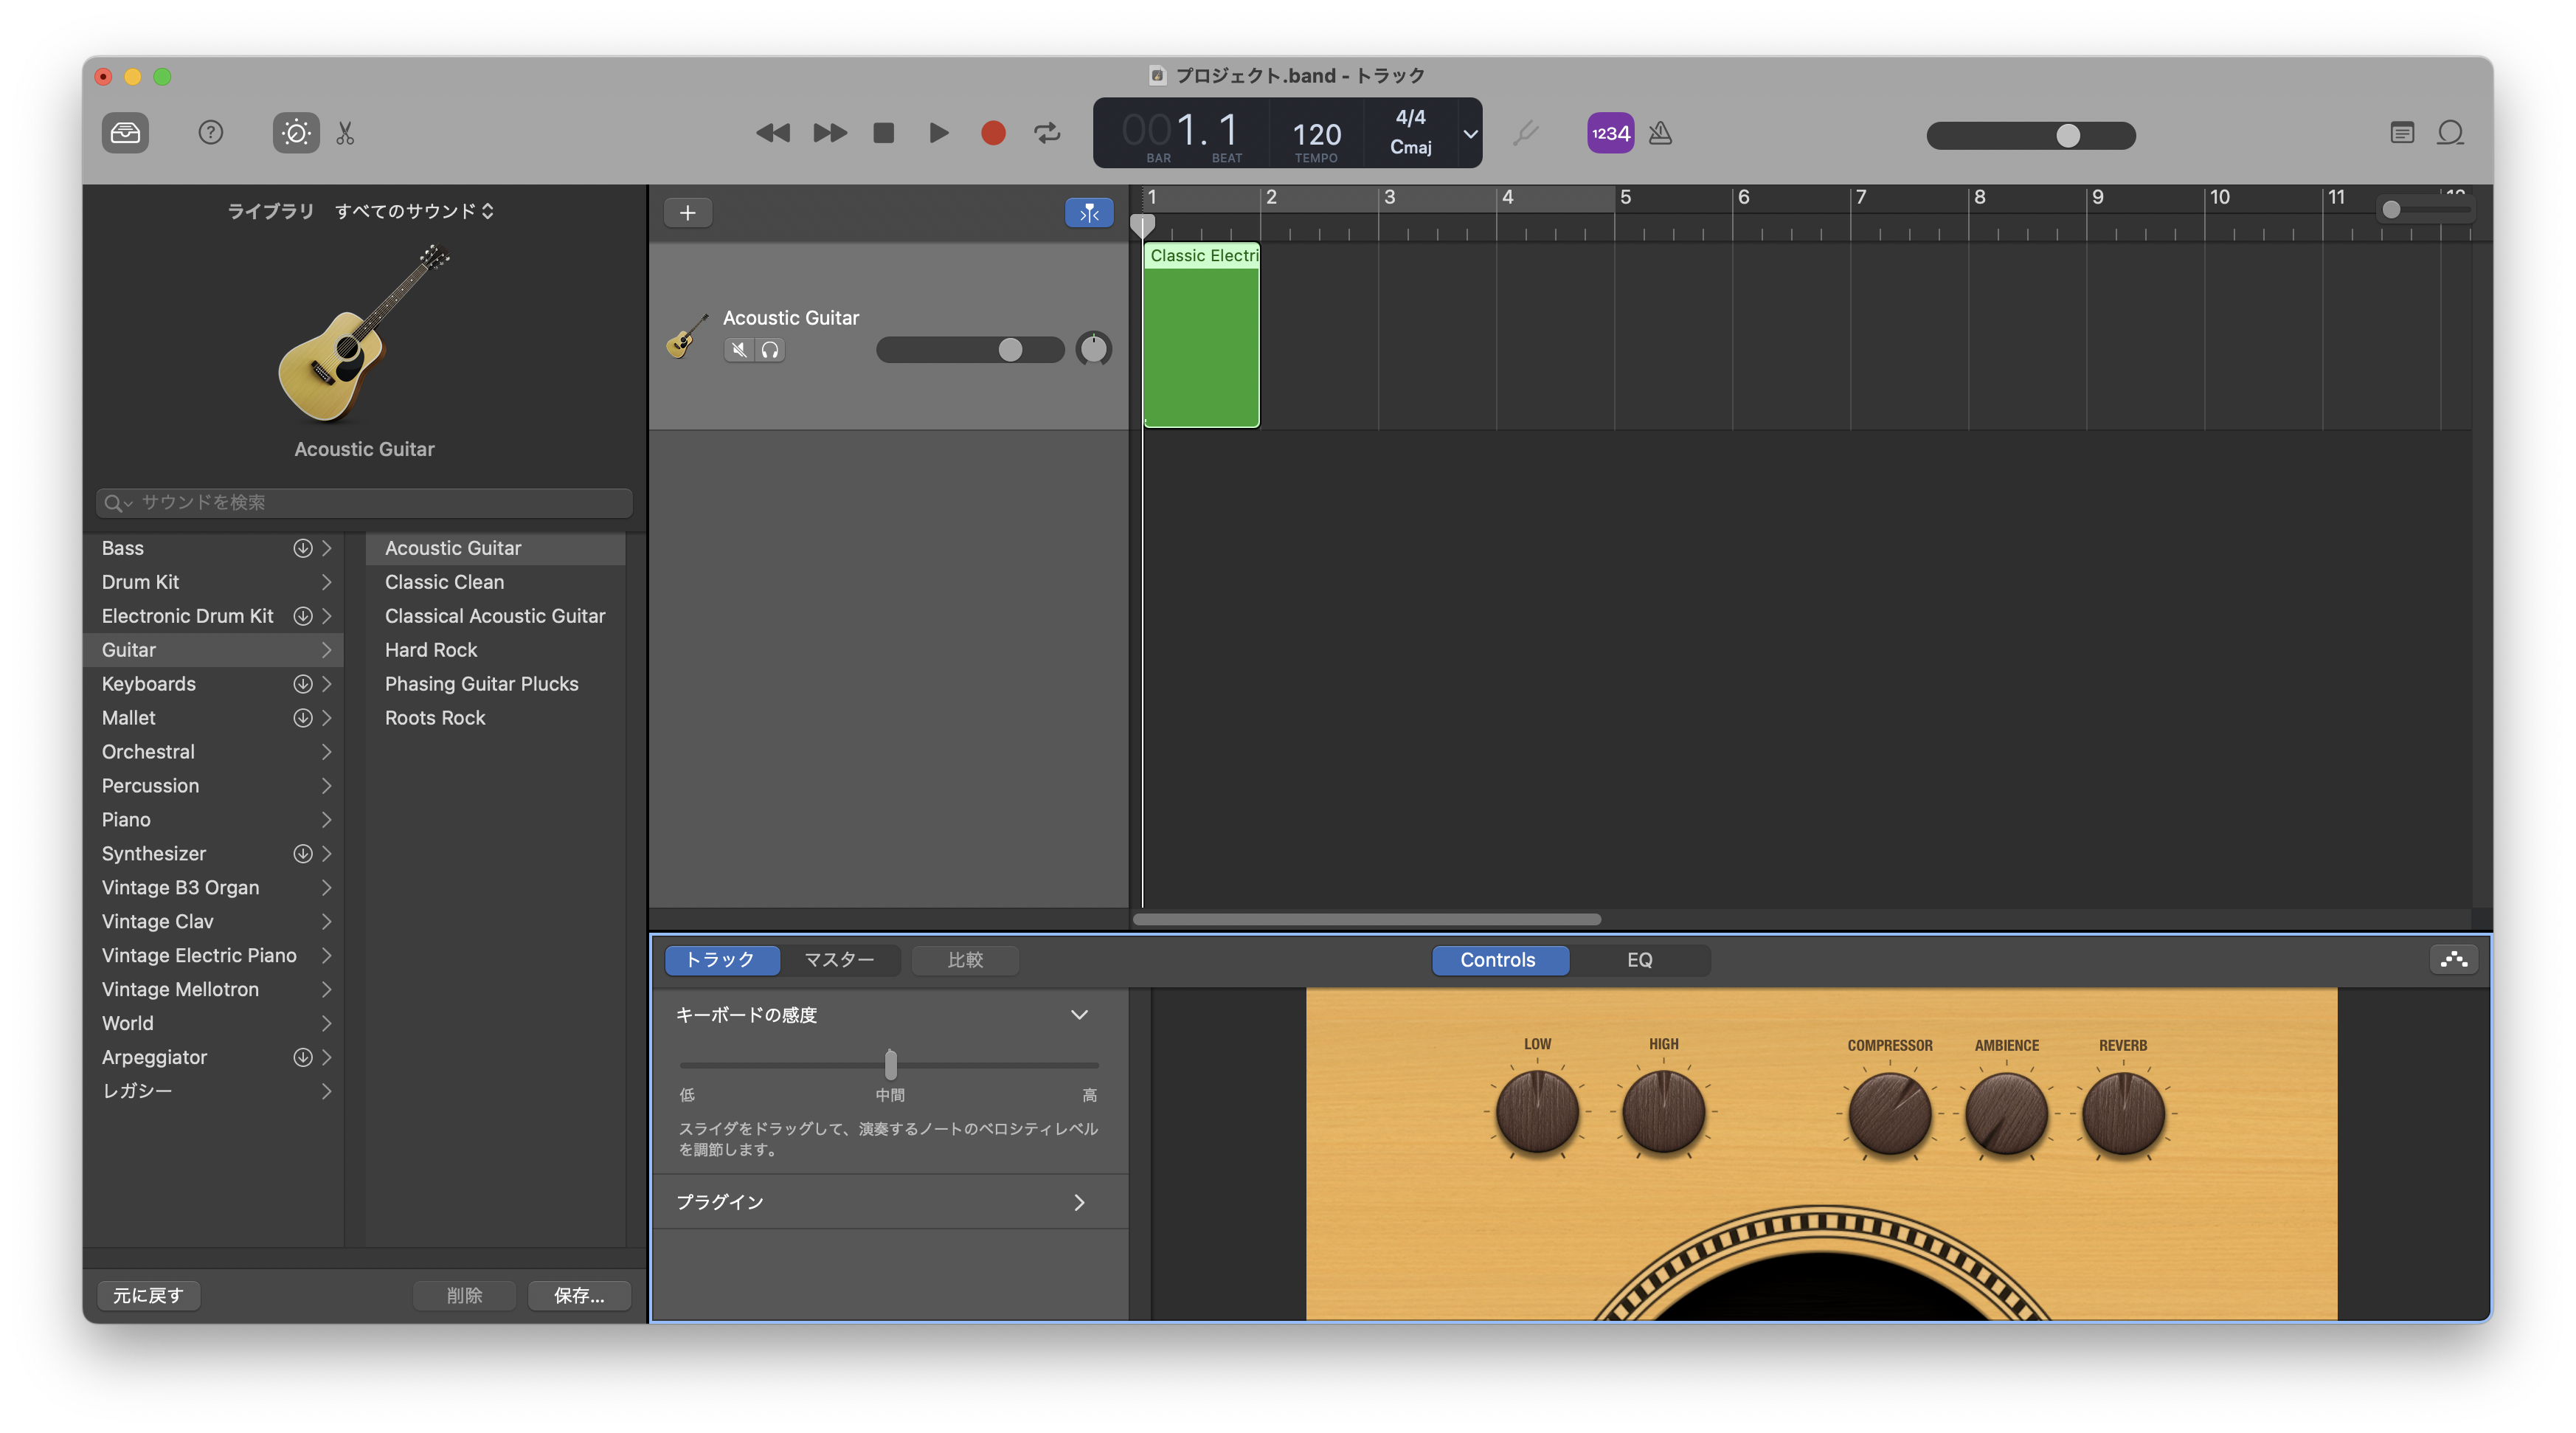
By using MIDI Monitor, I was able to directly confirm the MIDI messages. Additionally, I launched GarageBand and configured a software instrument, which played the corresponding sounds based on the MIDI messages.
And so, all is well that ends well.
Discussions
Become a Hackaday.io Member
Create an account to leave a comment. Already have an account? Log In.