Story
Introduction
In the rapidly evolving world of Internet of Things (IoT), there's a growing need for centralized, user-friendly control systems that can manage multiple smart devices efficiently. This project presents a smart home terminal using the UNIHIKER platform, addressing key challenges in current IoT ecosystems and providing a versatile solution for home automation.
Project Overview
The UNIHIKER Smart Home Terminal serves as a central control system for IoT devices, allowing users to monitor sensor data from various rooms and control appliances throughout their home. By leveraging the UNIHIKER's capabilities and integrating it with ESP32 modules, this project creates a robust, scalable smart home solution.

Challenges in Current IoT Platforms
Several challenges in existing IoT platforms motivated the development of this project:
- Complexity: Setting up and managing multiple IoT devices can be complex for average users, often requiring separate apps or interfaces for each device
- Fragmentation: Many IoT devices use proprietary protocols, leading to a fragmented ecosystem where devices from different manufacturers don't communicate effectively.
- Privacy Concerns: Cloud-dependent IoT solutions raise privacy concerns as sensitive data is transmitted and stored on external servers.
- Reliability: Internet-dependent IoT systems may fail during network outages, rendering smart home features unusable.
- Scalability: Many current solutions struggle to scale efficiently as users add more devices to their smart home setup.
UNIHIKER Solution
The UNIHIKER Smart Home Terminal addresses these challenges by:
- Centralization: Providing a single interface to control and monitor all connected devices, regardless of manufacturer.
- Simplicity: Offering an intuitive touchscreen interface that's easy for users to understand and operate.
- Local Processing: Performing data processing and storage locally on the UNIHIKER and its SD card, enhancing privacy and reducing cloud dependence.
- Offline Functionality: Maintaining core functionalities even when internet connectivity is lost.
- Expandability: Easily integrating new devices and sensors through the UNIHIKER's versatile interfaces.
Why UNIHIKER?
- Built-in touchscreen display for instant visual interface.
- Python compatibility for rapid development and access to extensive libraries.
- Versatile connectivity options (Wi-Fi, Bluetooth, GPIO) for easy integration with various smart home devices.
- Wireless programming
- Compact, energy-efficient design suitable for 24/7 operation as a home control hub.
- Secure local processing enhancing privacy and reducing reliance on cloud services.
Find out more about the UNIHIKER on their website:https://www.unihiker.com/
System Architecture
The system consists of three main components
- UNIHIKER Central Terminal: Acts as the hub, processing data and providing the user interface.
- ESP32 Nodes: Deployed in various rooms to collect sensor data and control appliances.
- Local Network: Facilitates communication between the UNIHIKER and ESP32 nodes.

Features
- Real-time Monitoring: Display current temperature and humidity for each room.
- Appliance Control: Toggle lights, fans, ACs, and other appliances in different rooms.
- Intuitive Interface: Easy-to-use touchscreen interface with icon-based navigation.
- Expandability: Easily add new rooms or appliances to the system.
- Offline Operation: Core functionalities work without internet connectivity.
Hardware Components
- UNIHIKER board
- Multiple ESP32 modules
- Various sensors (temperature, humidity)
- Relay modules for appliance control
- LEDs
Software Implementation
The software is implemented in Python, utilizing the following key components:
- Tkinter GUI: Creates an intuitive interface for users to interact with the system.
- Socket Programming: Enables communication between the UNIHIKER and ESP32 nodes.
- JSON Data Format: Used for structured data exchange between devices.
- Threading: Allows for concurrent operations, such as periodic data updates and user interactions.
- PIL (Python Imaging Library): Handles image processing for icons and visual elements.
Key features of the implementation include:
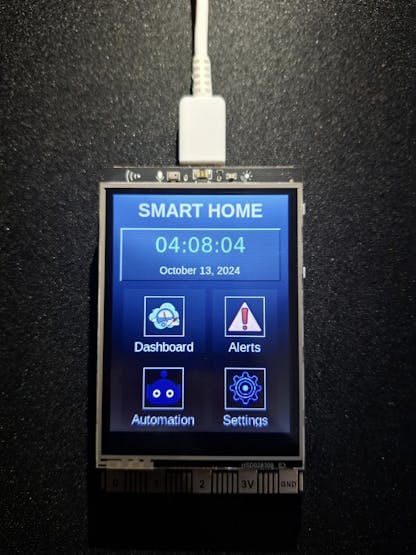
- Real-time clock display
- Room-specific dashboards showing temperature and humidity
- Appliance control toggles/Buttons
- Navigation between different system pages (Dashboard, Alerts, Automation, Settings)
Step-by-step Guide
Follow this link to the UNIHIKER website to learn how to get started
Here is an overview of the board peripherals. I will not be using the built-in sensors for this project but I will in the upcoming one

1. Setting up the Unihiker
Power on your Unihiker by connecting it to a power source using the USB-C port.Connect to the Unihiker's Wi-Fi hotspot. The SSID should be "Unihiker-XXXX" where XXXX are the last four characters of the device's MAC address.Open a web browser and navigate to http://192.168.4.1. This will open the Unihiker web interface.Follow the on-screen instructions to connect your Unihiker to your local Wi-Fi network.Once connected, the Unihiker will display its IP address on the screen. Note this down for future use.

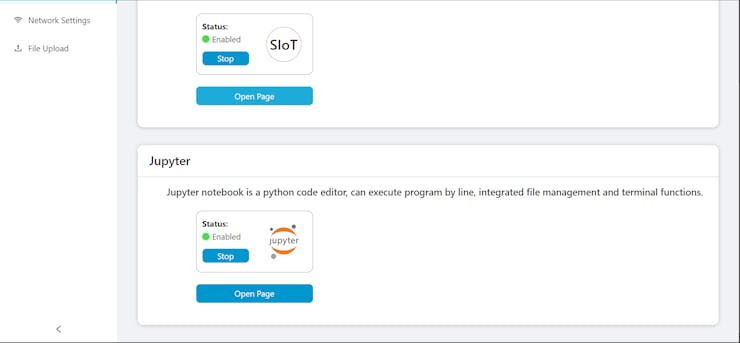
2. Accessing Jupyter Notebook
On a device connected to the same network as your Unihiker, open a web browser.Enter the IP address of your Unihiker followed by ":8888". For example: http://192.168.1.100:8888You should now see the Jupyter Notebook interface.
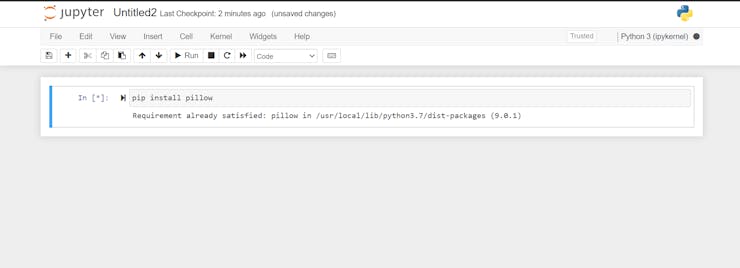
3. Installing Required Libraries
In the Jupyter Notebook interface, click on "New" and select "Terminal".In the terminal, use pip to install the required libraries:Note: tkinter should already be installed in the Unihiker's Python environment.
4. Creating and Running the Smart Home Dashboard
In the Jupyter Notebook interface, click on "New" and select "Python 3".In the new notebook, copy and paste the entire Smart Home Dashboard code we developed earlier. Save the notebook with a name like "SmartHomeDashboard.ipynb"
Download the Python code from the UNIHIKER CODE repository

5. Preparing Icon Files
Prepare the following icon files:
- temperature.png
- humidity.png
- living_room.png
- bedroom.pngkitchen.png
- bathroom.png
- dashboard.png
- alerts.png
- automation.png
- settings.png
Upload these files to the same directory as your Jupyter Notebook:In the Jupyter interface, click the "Upload" button.Select all the icon files and upload them.

6. Running the Dashboard
In your Jupyter Notebook with the Smart Home Dashboard code, run all cells by selecting "Cell" > "Run All" from the menu.The dashboard should now start running on your Unihiker's display.
7. You can altenatively run the program by accessing the unihiker menu then click option 4-Run Programs, then click on /root then now run your notebook or code file
Key components of the GUI:
_CQKuxmwbF5.jpg?auto=compress%2Cformat&w=740&h=555&fit=max)
_GW1hSyZEH4.jpg?auto=compress%2Cformat&w=740&h=555&fit=max)
_s2cIRl1f65.jpg?auto=compress%2Cformat&w=740&h=555&fit=max)
Room and Dashboard Classes
class Room:def __init__(self, name, controls, ip_address):# Room initialization codeclass Dashboard:def __init__(self, master):# Dashboard initialization code
Main Dashboard
def create_main_dashboard(self):# Code to create main dashboard buttons
Room Dashboard and Appliance Control
def show_room_dashboard(self, room):# Code to display room data and control buttons
Sending Commands to Devices
def send_command(self, ip_address, appliance, status):# Code to send commands via sockets
Real-Time Updates
def periodic_update(self):# Code for background data updates
Main Function
def main():# GUI initialization and main loop
2. Configuring ESP32 Nodes
Install Arduino IDE
Download and install the Arduino IDE on your computer.Add ESP32 board support to Arduino IDE.
Connect Sensors and Relays
Wire the DHT sensor to the designated pin (e.g., D1).Connect relays for appliance control to the specified pins.
Download the code from the Project's Repository
Upload the Arduino Code
Open the provided ESP32 code in Arduino IDE.Update Wi-Fi credentials:Modify pin assignments if necessary:Select your ESP32 board from Tools > Board menu.Choose the correct port from Tools > Port.Click the Upload button to flash the code to your ESP32.
Verify Connection
Open the Serial Monitor (Tools > Serial Monitor).Set the baud rate to 115200.You should see the ESP32's IP address printed once it connects to Wi-Fi.
Repeat for Each Room
Follow steps 2-4 for each ESP32 in your system.Note down the IP address of each ESP32 for use in the UNIHIKER code.
Final Steps
Ensure Network Connectivity
Make sure the UNIHIKER and all ESP32s are on the same Wi-Fi network.
Update UNIHIKER Code
If needed, update the ESP32 IP addresses in the UNIHIKER Python script.
Test the System
Run the UNIHIKER script. Verify that you can see all rooms and control the appliances.
With these steps completed, your UNIHIKER Smart Home Terminal should be operational, communicating with the ESP32 nodes in each room.
Expanding the System
To add a new room or device:
- Configure a new ESP32 with the provided code.
- Update the UNIHIKER dashboard to include the new room/device.
You can create a new room, assign its appliances and add the ip address of the ESP32 connceted
You can also add or remove the appliances in the existing rooms
self.rooms = [ Room("Living Room", ["Light", "TV", "AC", "Fan"], "192.168.137.236", "living-room.png"), Room("Bedroom", ["Light", "Fan", "Heater"], "192.168.137.59", "bedroom.png"), Room("Kitchen", ["Light", "Oven", "Fridge"], "192.168.1.103", "kitchen.png"), Room("Bathroom", ["Light"], "192.168.1.104", "bathroom.png") ] self.current_room = None
How Everything Works
- The UNIHIKER Smart Home Terminal project creates a centralized, customizable home automation system using a UNIHIKER board as the main hub and multiple ESP32 microcontrollers as room-specific nodes.
- The UNIHIKER, equipped with a touchscreen display, runs a Python-based graphical user interface that allows users to monitor and control various aspects of their home environment. Each room is outfitted with an ESP32 that connects to sensors (such as temperature and humidity) and controls appliances (like lights, fans, or heating systems).
- The UNIHIKER communicates with these ESP32 nodes over a local WiFi network using a simple yet effective protocol based on JSON-formatted messages.
- Users can view real-time data from each room, toggle appliances on or off, and potentially set up automated routines.
- The system's modular design allows for easy expansion, enabling homeowners to add new rooms or devices as needed.
- This DIY approach to smart home technology offers a flexible, cost-effective alternative to commercial solutions, empowering users to tailor their home automation setup to their specific needs and preferences.
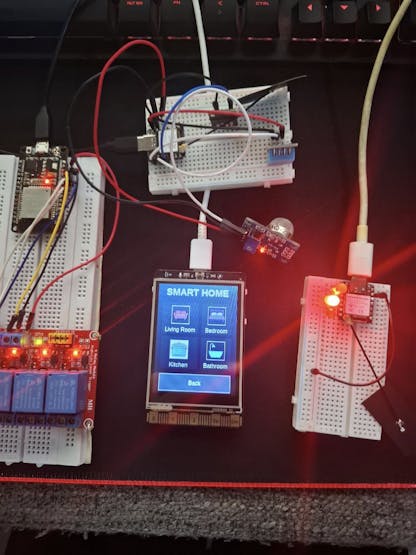
Results
After following these steps, you'll have a fully functional home control system. The UNIHIKER's screen will display your home's vital statistics and allow you to control connected devices with a simple touch.
DEMO TIMEE!!
Now we have learnt how it works and how you can build it, let's see it working
Future Improvements
While the current system provides a solid foundation for home automation, there's always room for improvement:
- Energy Monitoring: Integrate power consumption tracking for appliances.
- Voice Control: Add voice recognition capabilities for hands-free operation.
- Machine Learning: Implement predictive algorithms for automated climate control.
- Machine Learning: Implement predictive algorithms for automated climate control.
- Mobile App: Develop a companion mobile app for remote access.
- Advanced Automation: Create complex routines and scenarios for home automation
- Voice Control: Add voice recognition capabilities for hands-free operation.
Conclusion
The UNIHIKER Home Control System demonstrates the power of open-source hardware and software in creating practical, customizable smart home solutions. By following this guide, you've not only built a powerful home automation system but also gained valuable skills in embedded systems programming, networking, and UI design.
Collaboration/ Contributing
I encourage you to experiment with the system, add your own features, and share your improvements with the community.
Link to GitHub Repository
Remember to document your journey, including any challenges you faced and how you overcame them. This not only helps others learn from your experience but also makes your project more relatable and engaging
If you're interested in collaborating to improve or customize this project, or if you'd like to explore potential partnerships and promotions, feel free to reach out. Let's work together to make it even more versatile and impactful! Looking forward to hearing from you.
Happy hacking!