 Travis Lin
Introduction
ESP8266+0.96'OLED=D-duino
ESP8266+1.3'OLED=D-duino-B
ESP8266(Tiny NodeMCU) = X-8266
This tutorial has 2 parts: How to start with Arduino and How to start with NodeMCU.
If you know Arduino well, I recommend you use Arduino IDE to control D-duino.
If you know LUA well, I recommend you use Esplorer to control D-duino.
Prepare:
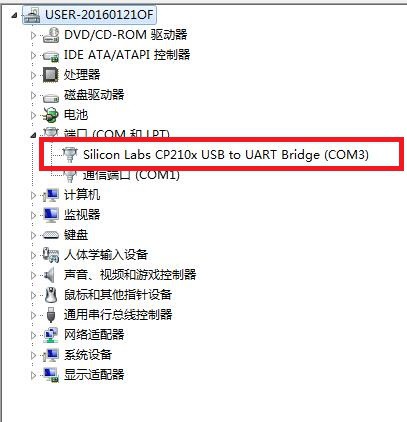
You need to download CP2102 driver first.
Start with Arduino
First, please go to https://www.arduino.cc/en/Main/Software to download arduino software.
Then start Arduino and open Preferences window.
Enter http://arduino.esp8266.com/stable/package_esp8266com_index.json into Additional Board Manager URLs field.
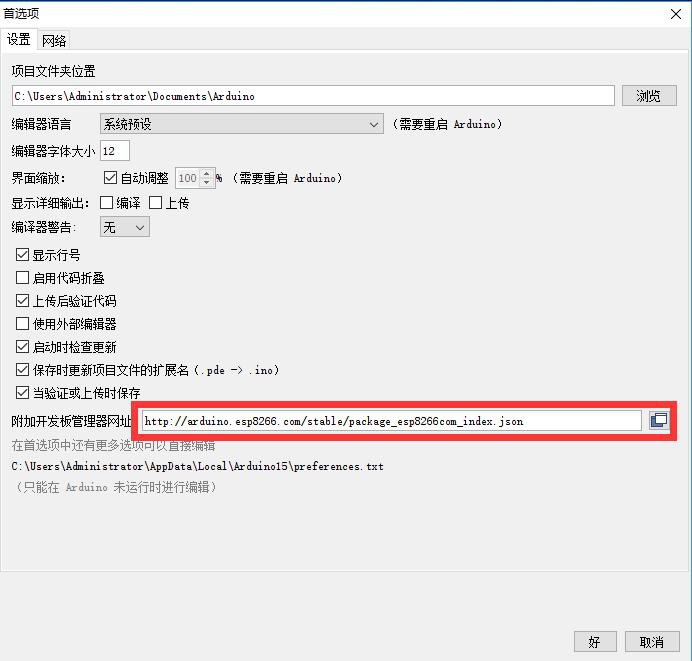
Click "OK"
Open Boards Manager from Tools > Board menu and install esp8266 platform
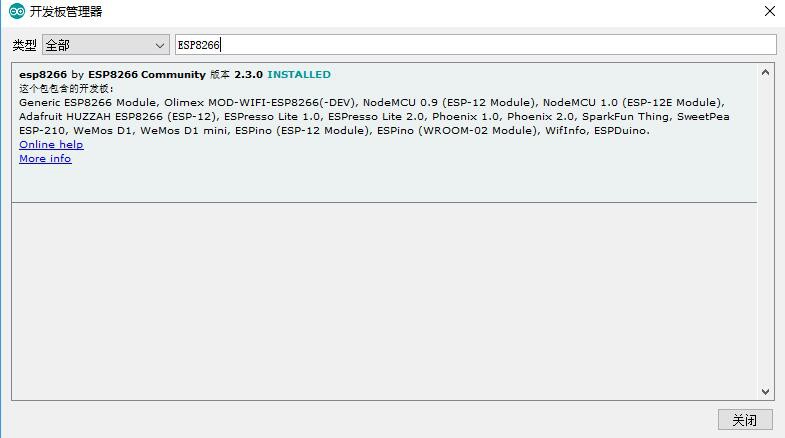
After you install it restart Arduino IDE, then you will see the ESP8266 examples has already been integrated into the software.
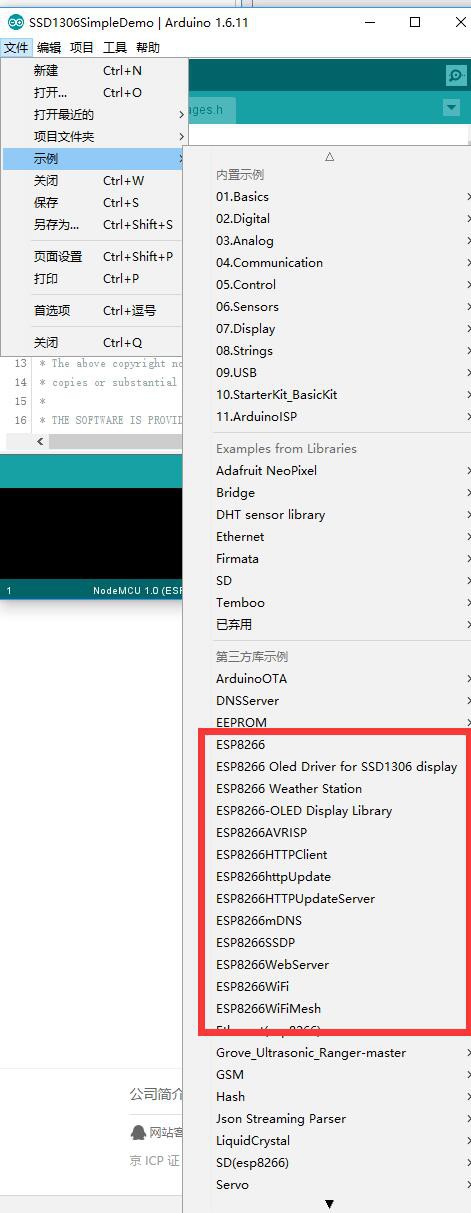
Please download https://github.com/squix78/esp8266-oled-ssd1306 this file and unzip to you Arduino library.
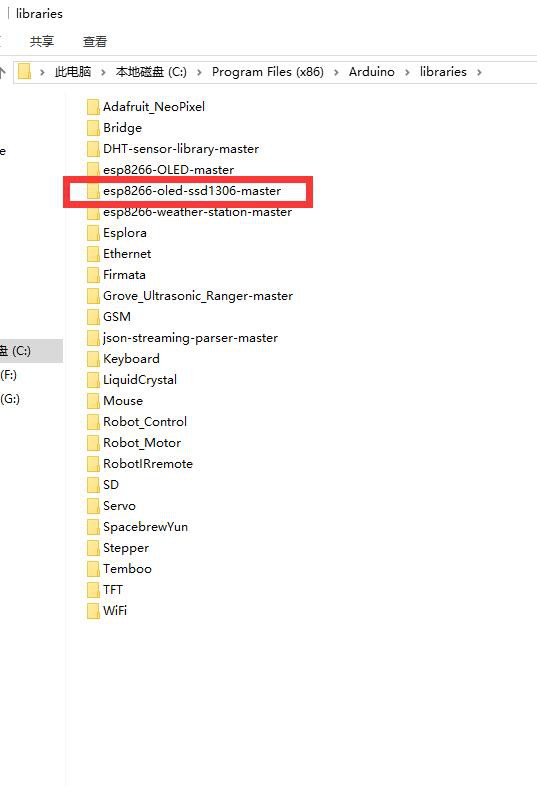
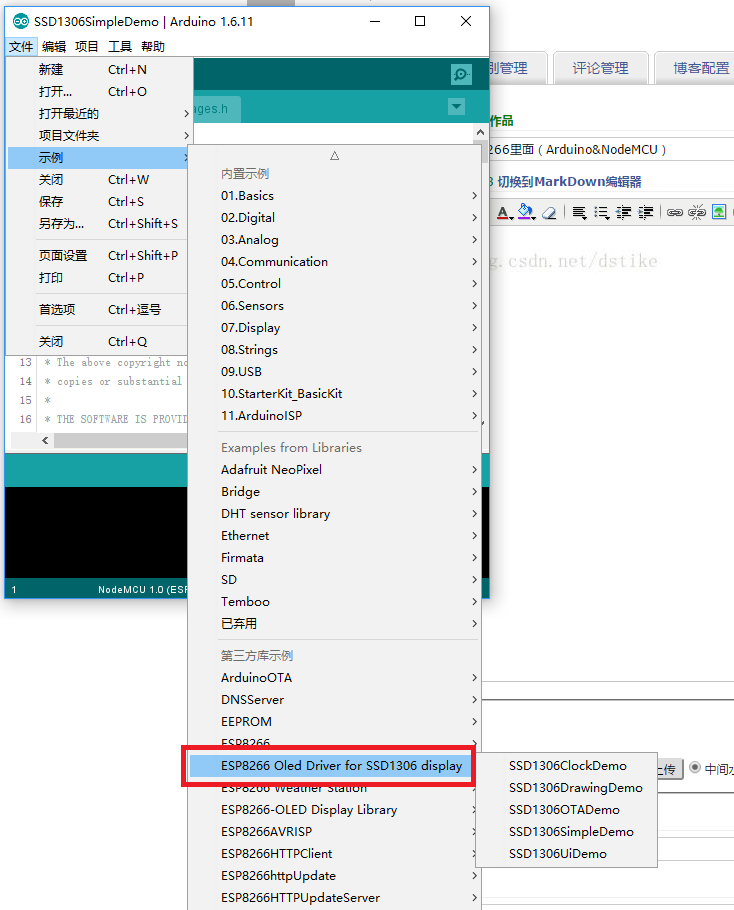
Then you will find OLED example has already been existed in your IDE.
You should use D1(SDA) and D2(SCL) to control D-duino.
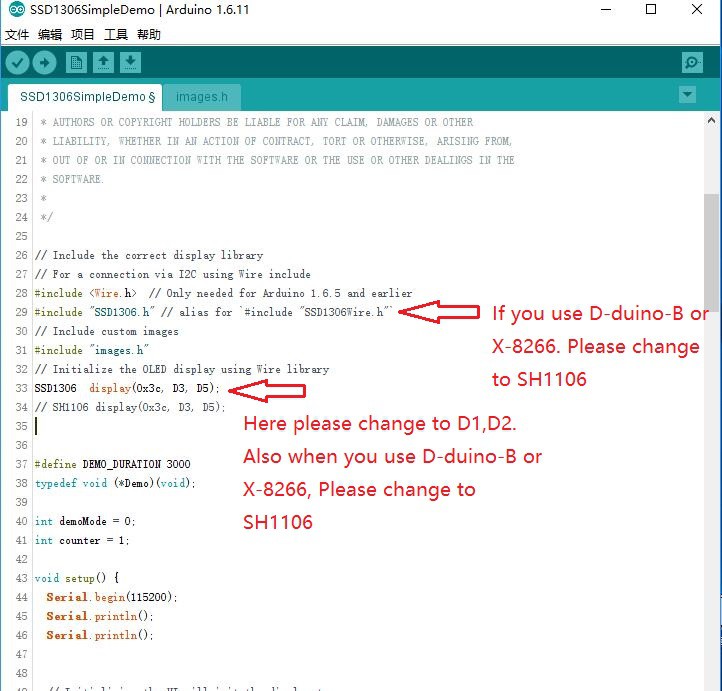
When you coding , you need change "SSD1306 display(0x3c, D3, D5)" to SSD1306 display"(0x3c, D1, D2)".
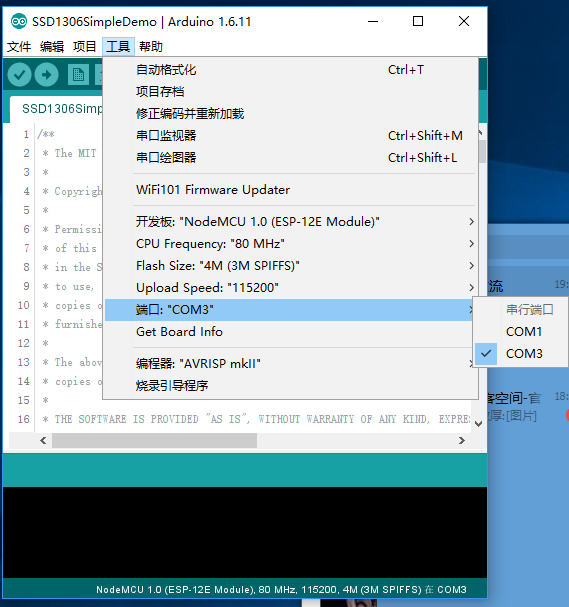
Please configure the board like this:
 Attention: When you use D-duino-B or X-8266 please change SSD1306 to SH1106.
Start with NodeMCU
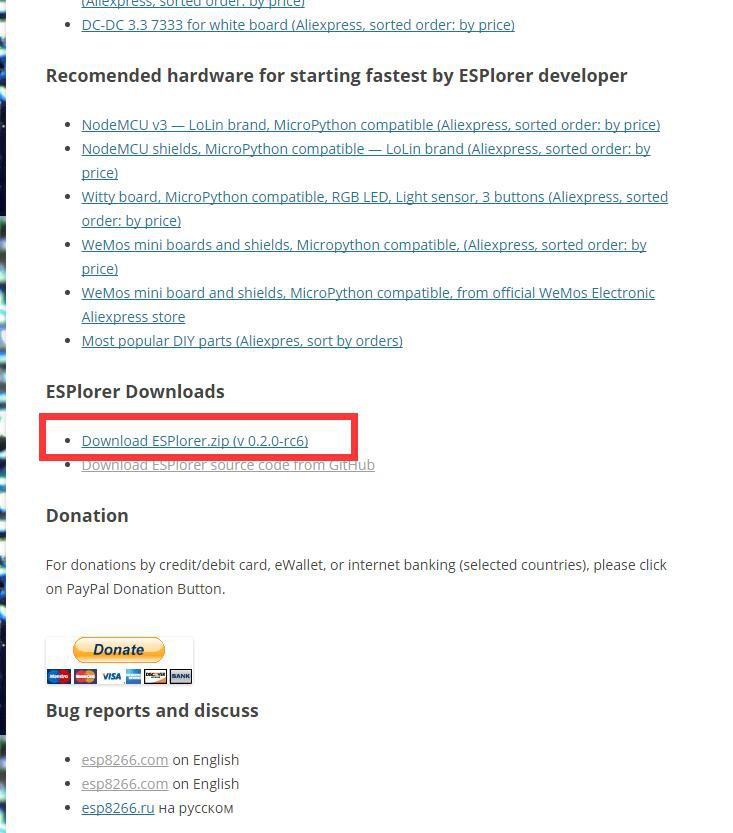
First , download ESPlorer :https://esp8266.ru/esplorer/
Then we need to build a NodeMCU firmware.
Please go to http://nodemcu.readthedocs.org/en/dev/en/build/
Your firmware will be compiled at cloud.
You can choose the module you need, be attention IIC and U8G must be needed.
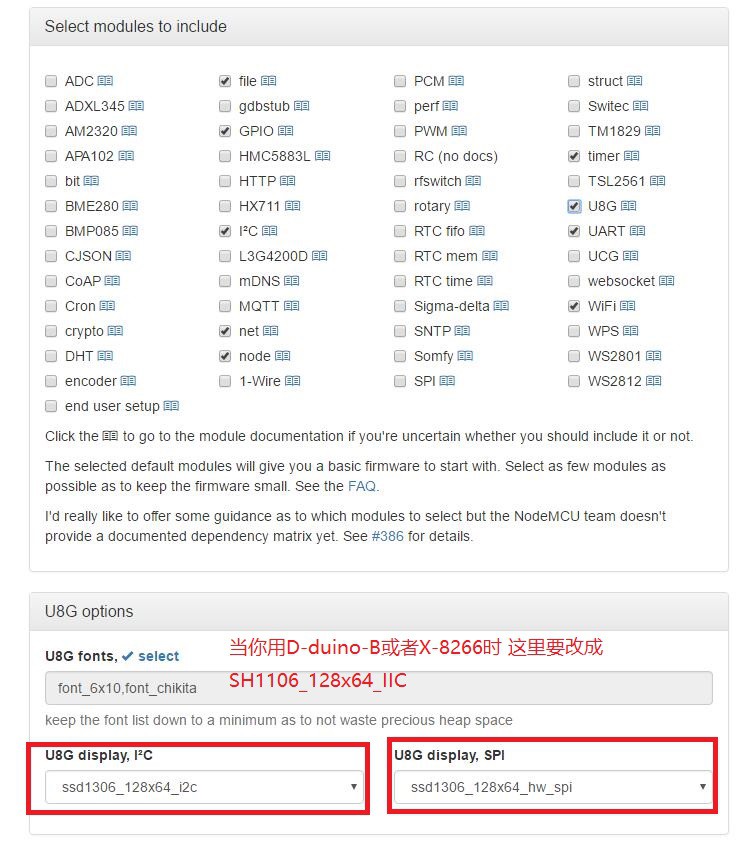
Becareful when you use D-duino-B or X-8266, the U8G options should be changed to SH1106.
You will receive a E-mail including download address. Download your firmware into your desktop.
Then we can start burning.
Download the flashing tool: http://dong-sen.com/wp-content/uploads/2016/02/ESP8266Flasher.rar.
Open it.
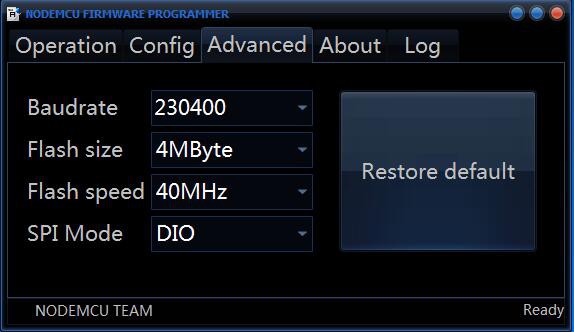
You can choose any baudrate here. When you fail to download, change baudrate and try again.
Choose the file you downloaded:
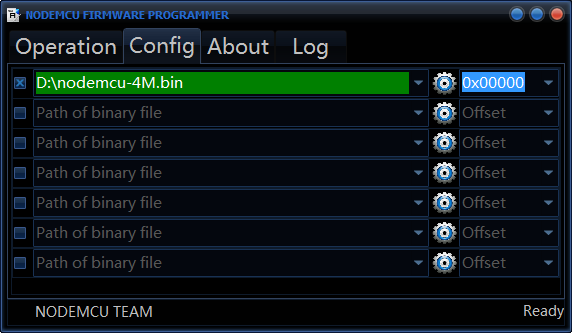
Click Flash:
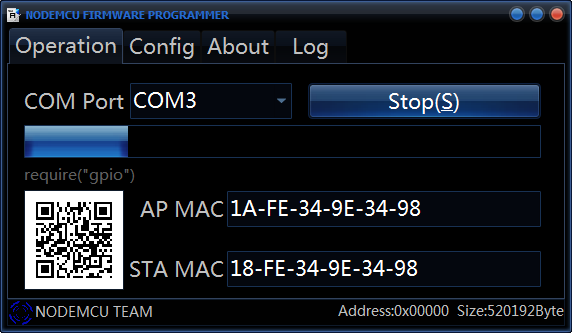
Finish!

Open ESPlorer:
The Baudrate of software must be 115200!
Click RST button of D-duino you should receive the information like this:
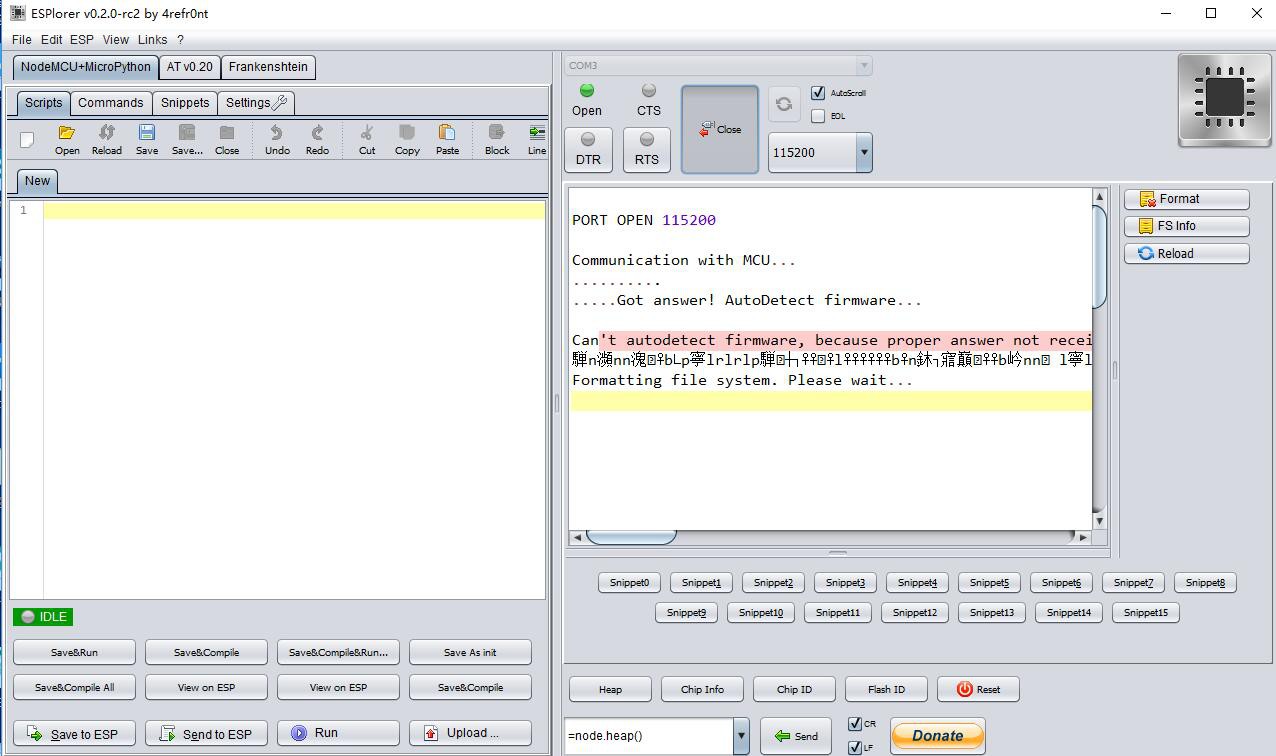
When you see "Formatting file system. Please wait..." ,Just wait a little...

When you see "can not open init.lua" means everything is OK.
Let me teach you how to write your first program.
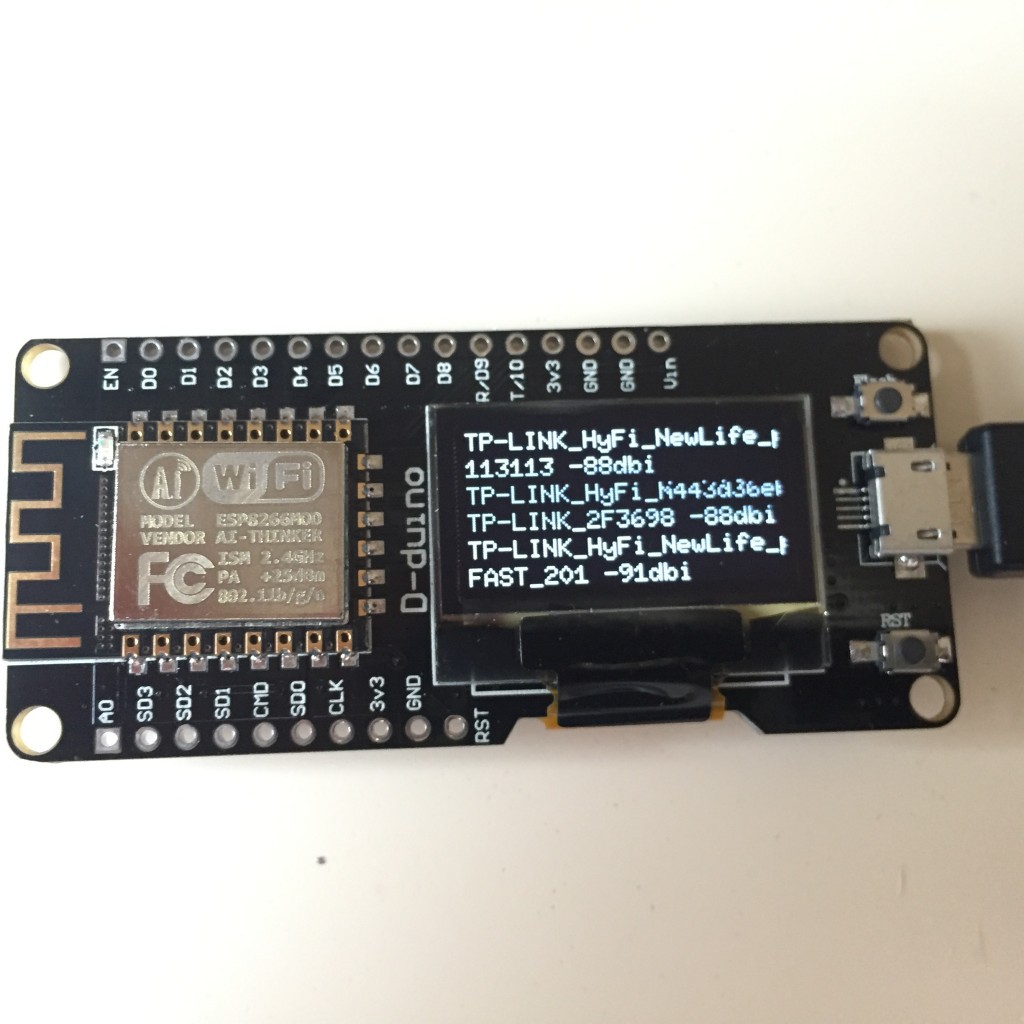
Here I provide a WiFi scanner example:
wifi.setmode(wifi.STATION) --Set mode to STATION so he chip can receive the SSID broadcast
function init_OLED(sda,scl) --Set up the u8glib lib
     sla = 0x3c
     i2c.setup(0, sda, scl, i2c.SLOW)
     disp = u8g.ssd1306_128x64_i2c(sla)
     disp:setFont(u8g.font_6x10)
     disp:setFontRefHeightExtendedText()
     disp:setDefaultForegroundColor()
     disp:setFontPosTop()
end
init_OLED(1,2) --Run setting up
tmr.alarm(0,3000,1,function() --A timer, which used to run the following program
    wifi.sta.getap(function(t)
         disp:firstPage()
         repeat
            lines = 0
            for k,v in pairs(t) do
                disp:drawStr(0,lines * 11,k.." "..v:sub(3,5).."dbi") --Print the data out
                lines = lines + 1
            end
        until disp:nextPage() == false
    end)
end)
You can copy this code to the left window of ESPlorer, Save this code to "init.lua". Then click "Save to ESP", D-duino should work like this:
 Hari Wiguna
 Just4Fun
 doctek
 PixJuan
I am attracted to the D-duino project since it is promising to teach me about the IoT using a novel approach. Read dissertation team reviews before purchasing any essay online. With the help of this tutorial, I have already learned how to reap out maximum projects using this tool.