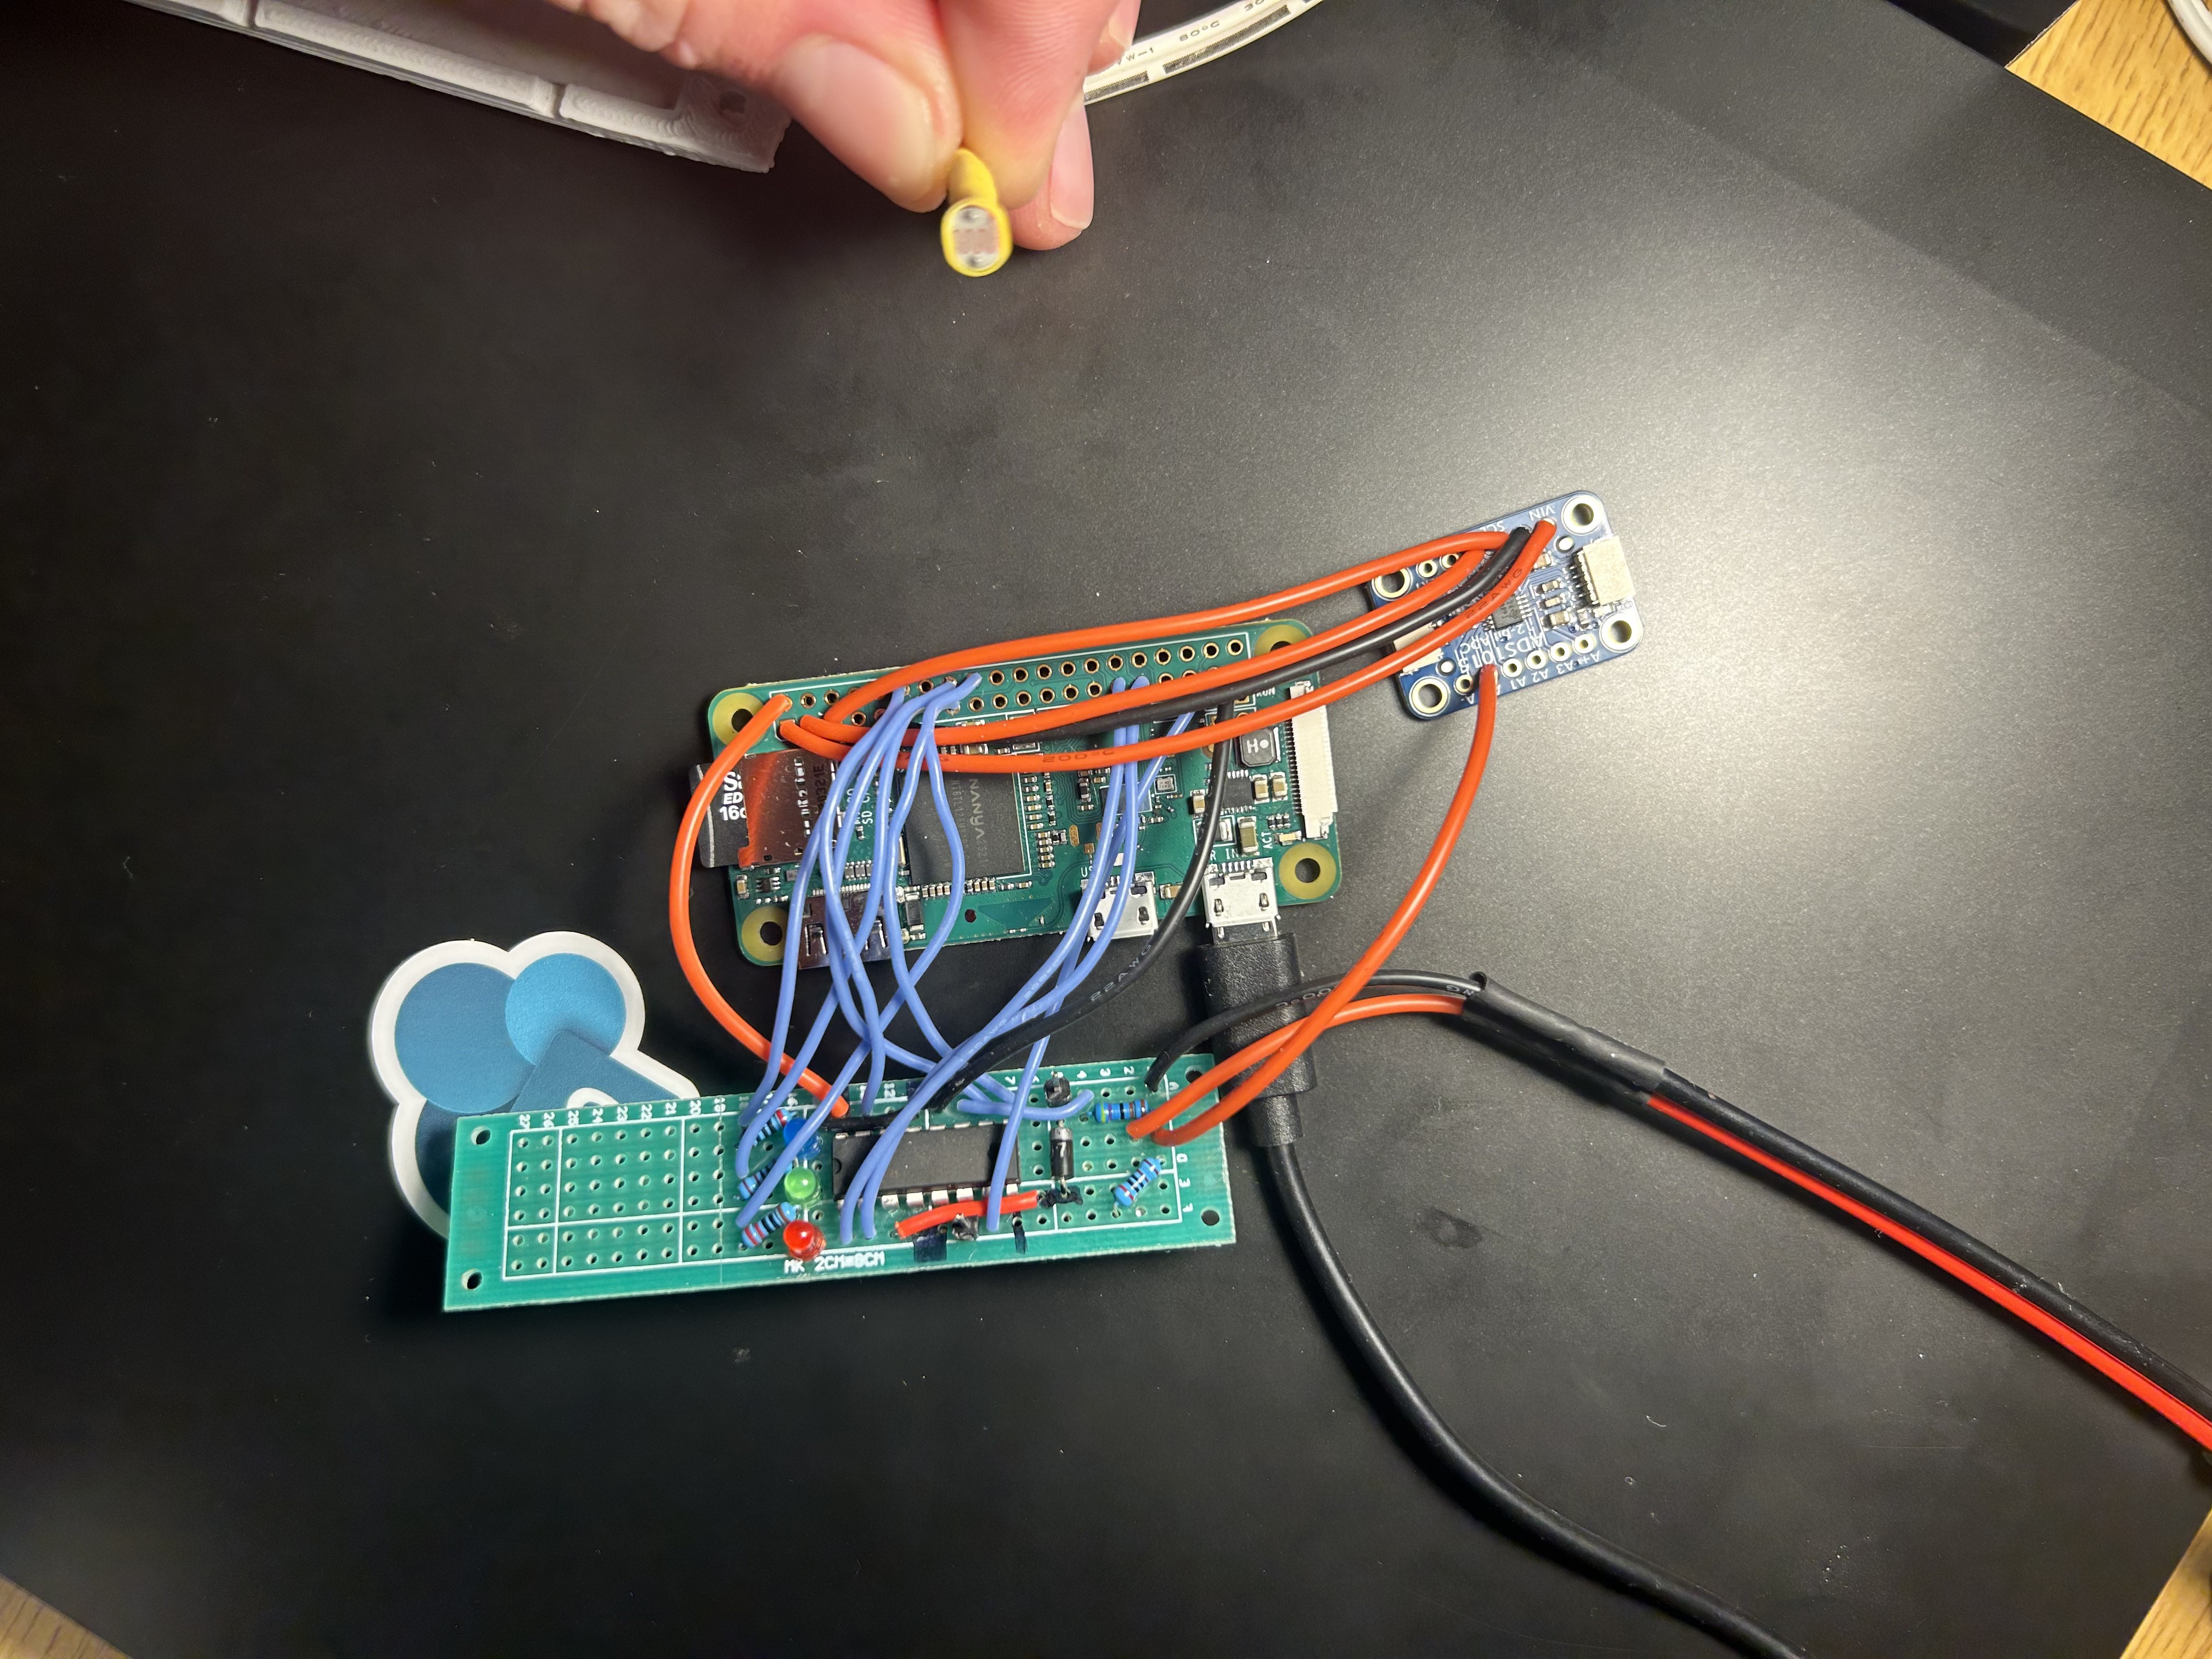
In the picture shown above, you can see how I've wired the system up. The ADC board on the right just picks up the I2C pins on the SBC.
The perfboard at bottom has a L293D H-bridge chip to protect the GPIO pins from the light sensor and potentially the relay. This board also includes 3 LED indicators, just for fun. Blinkenlights!
Perhaps the most interesting part of this system is the sensor circuit. It is a daylight sensor, which will be helpful for letting the system calibrate its timing and avoid watering at a sub-optimal time. It is made up of a LDR on a long lead, which is attached to the perfboard in such a way as to form a voltage divider. On one side of the voltage divider, there is a 4.7k resistor, and wired in series with the LDR on the other side is an additional 2k resistor. Together with an nomial input voltage of 5v, these produce a range of output voltages that go from 0v at the darkest to about 3.5v at the brightest (experimental values). This was a fun one to design. I'm glad I chose to study electrical engineering.
With that 0-3.5v range being fed into the ADC, it is well within its operating input range. Of course, the opposing consideration is that using more of the possible range of the 5v input would provide more granularity, but I get 10 bits of detail out of this ADC. More than enough. And, when testing on the bench, the computer was able to output a highly consistent value for the brightness level. Very nice, great success.
 ty
ty
Discussions
Become a Hackaday.io Member
Create an account to leave a comment. Already have an account? Log In.