 John Anderson
With the keyboard sorted out and the case ready for assembly, I started building, installing, and wiring.
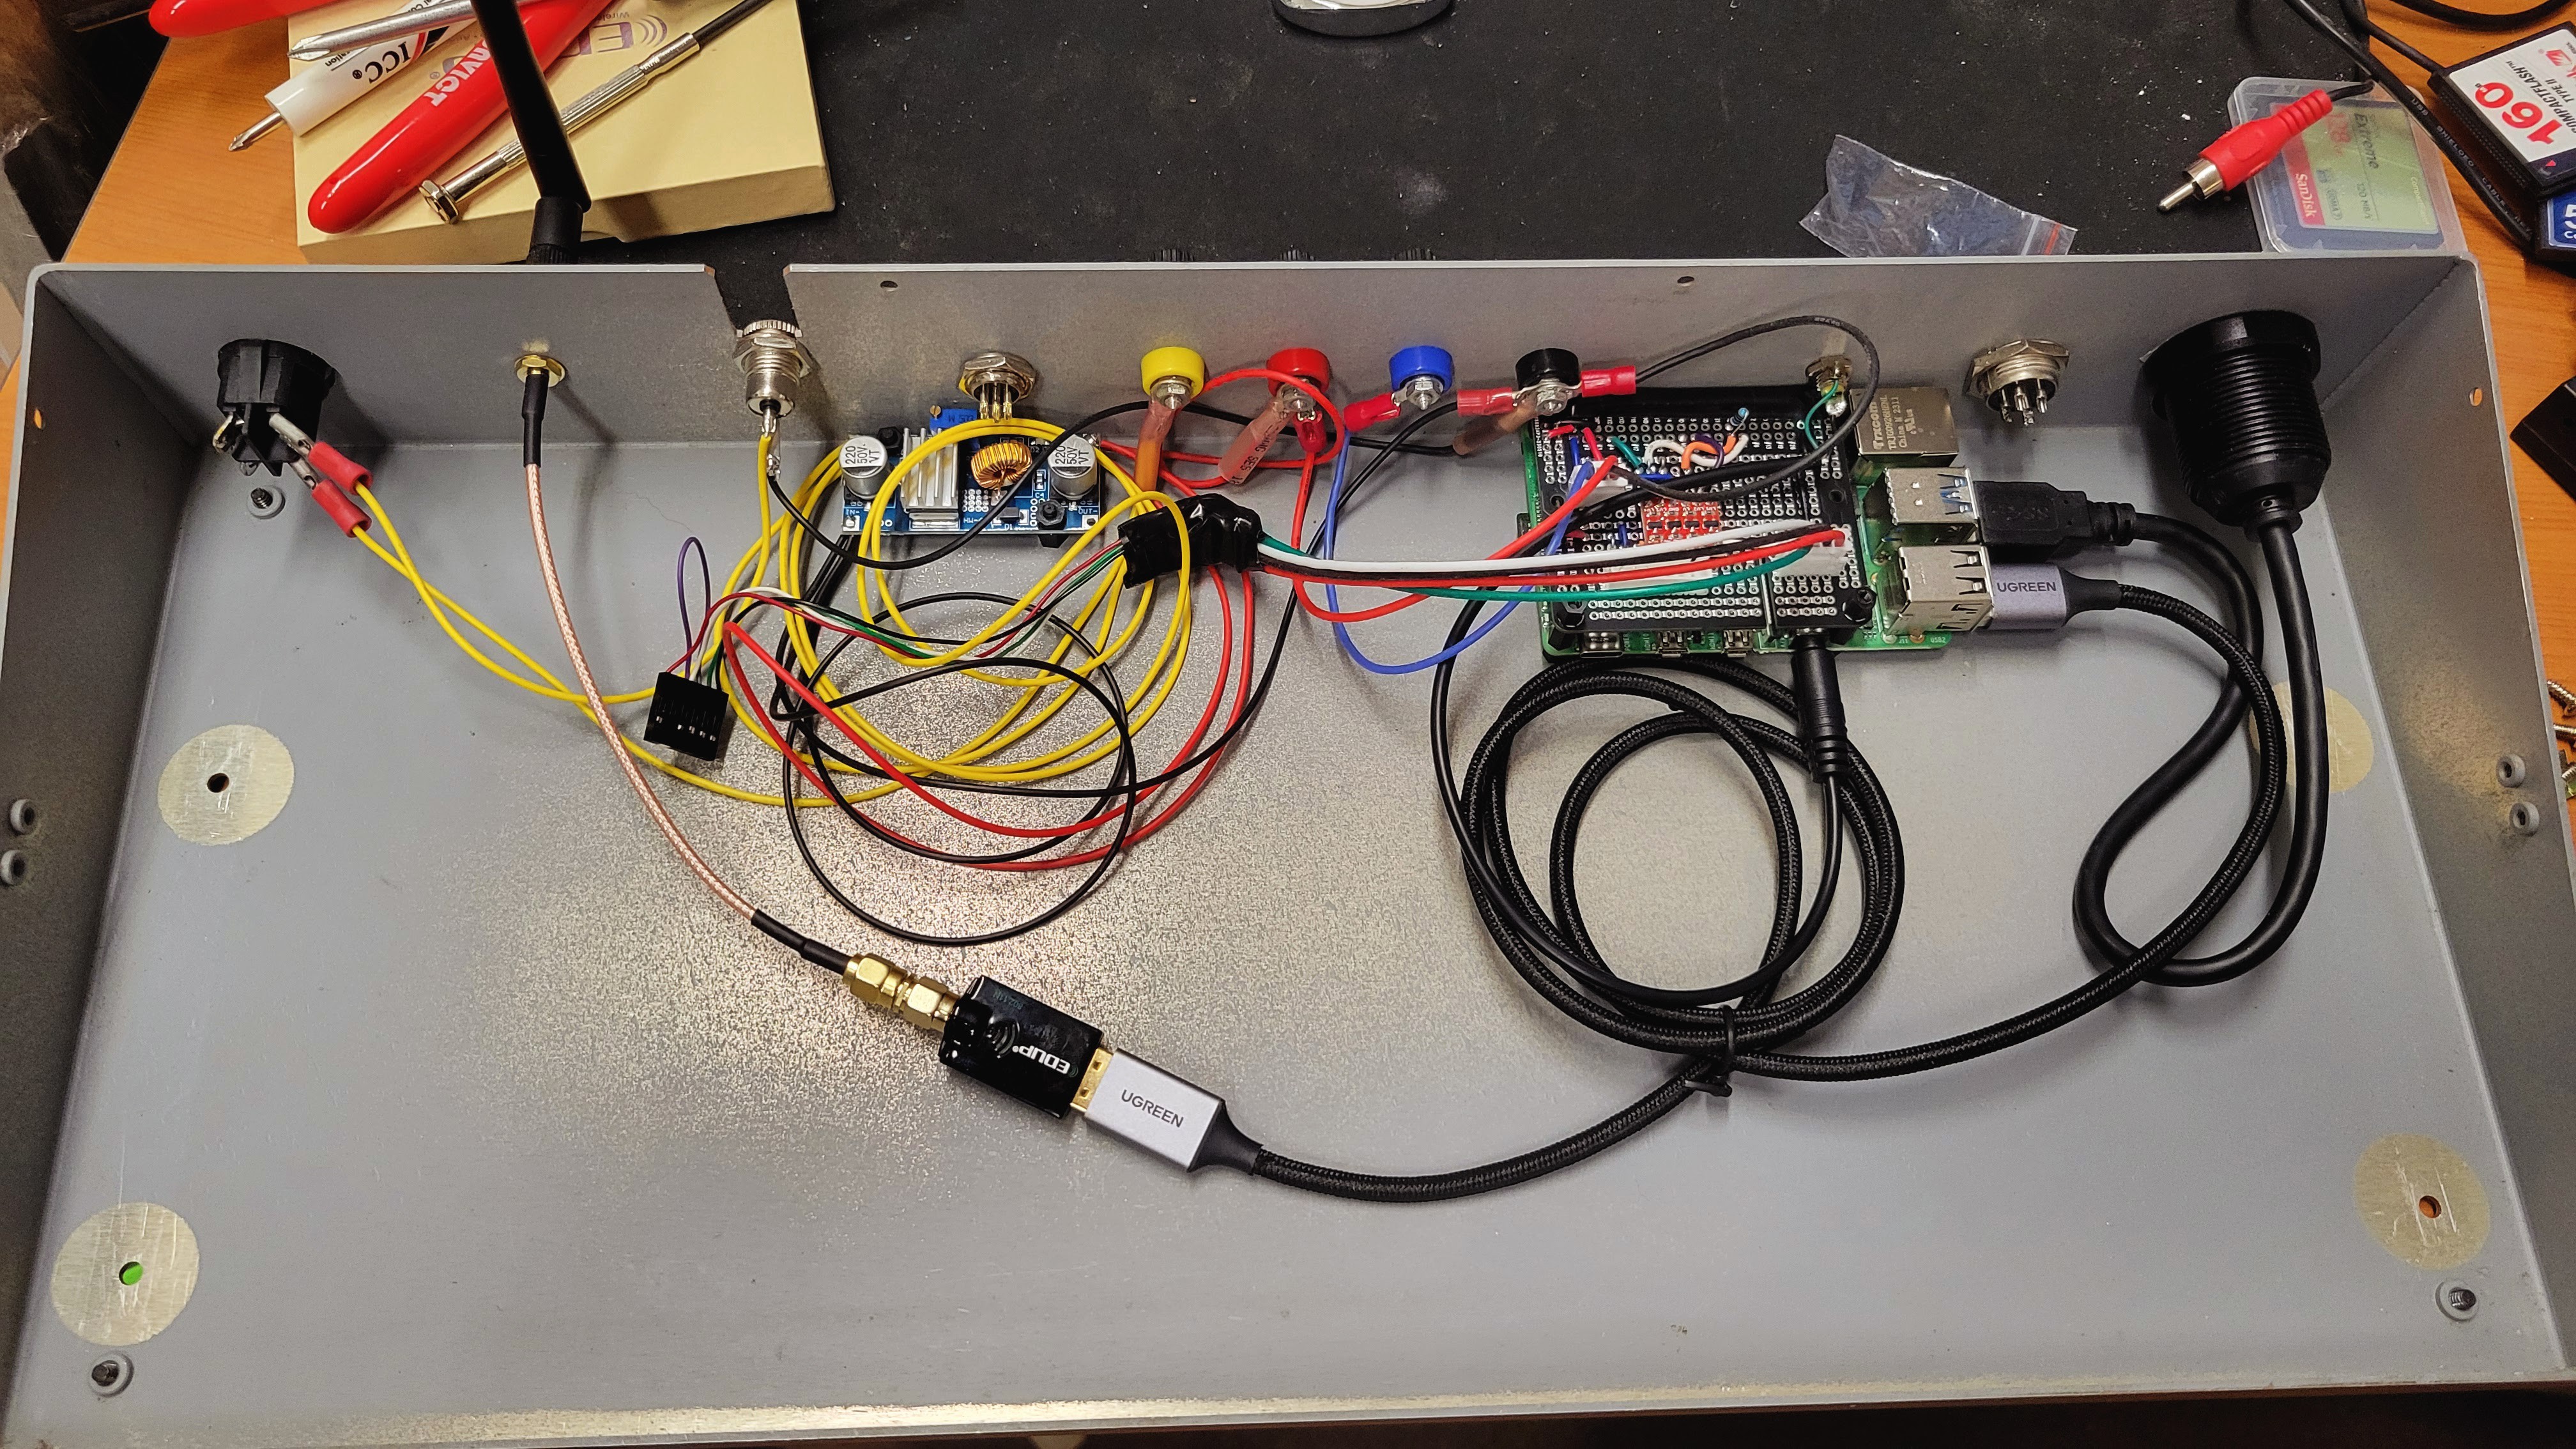
I installed a power switch, 12v to 5v DC to DC converter, banana plugs to bring out 12v, 5v, 3.3v, and ground to be used with the prototyping area, a USB type A port, a 6 pin aviation style connector for the UPDI programming cable w/power, and a SMA WiFI antenna. Next I soldered up a hat for the PI that has a 5v to 3.3v level shifter for the serial lines going to the keyboard and the AVR programming board. The AVR programming board is powered through the 6 pin cable. A toggle switch on the faceplate selects 5v or 3.3v. The PI was installed and wired up. In addition, I plugged in a USB WiFi dongle to make installing the external antenna easier. The PI doesn't have pads to solder an external antenna connector.
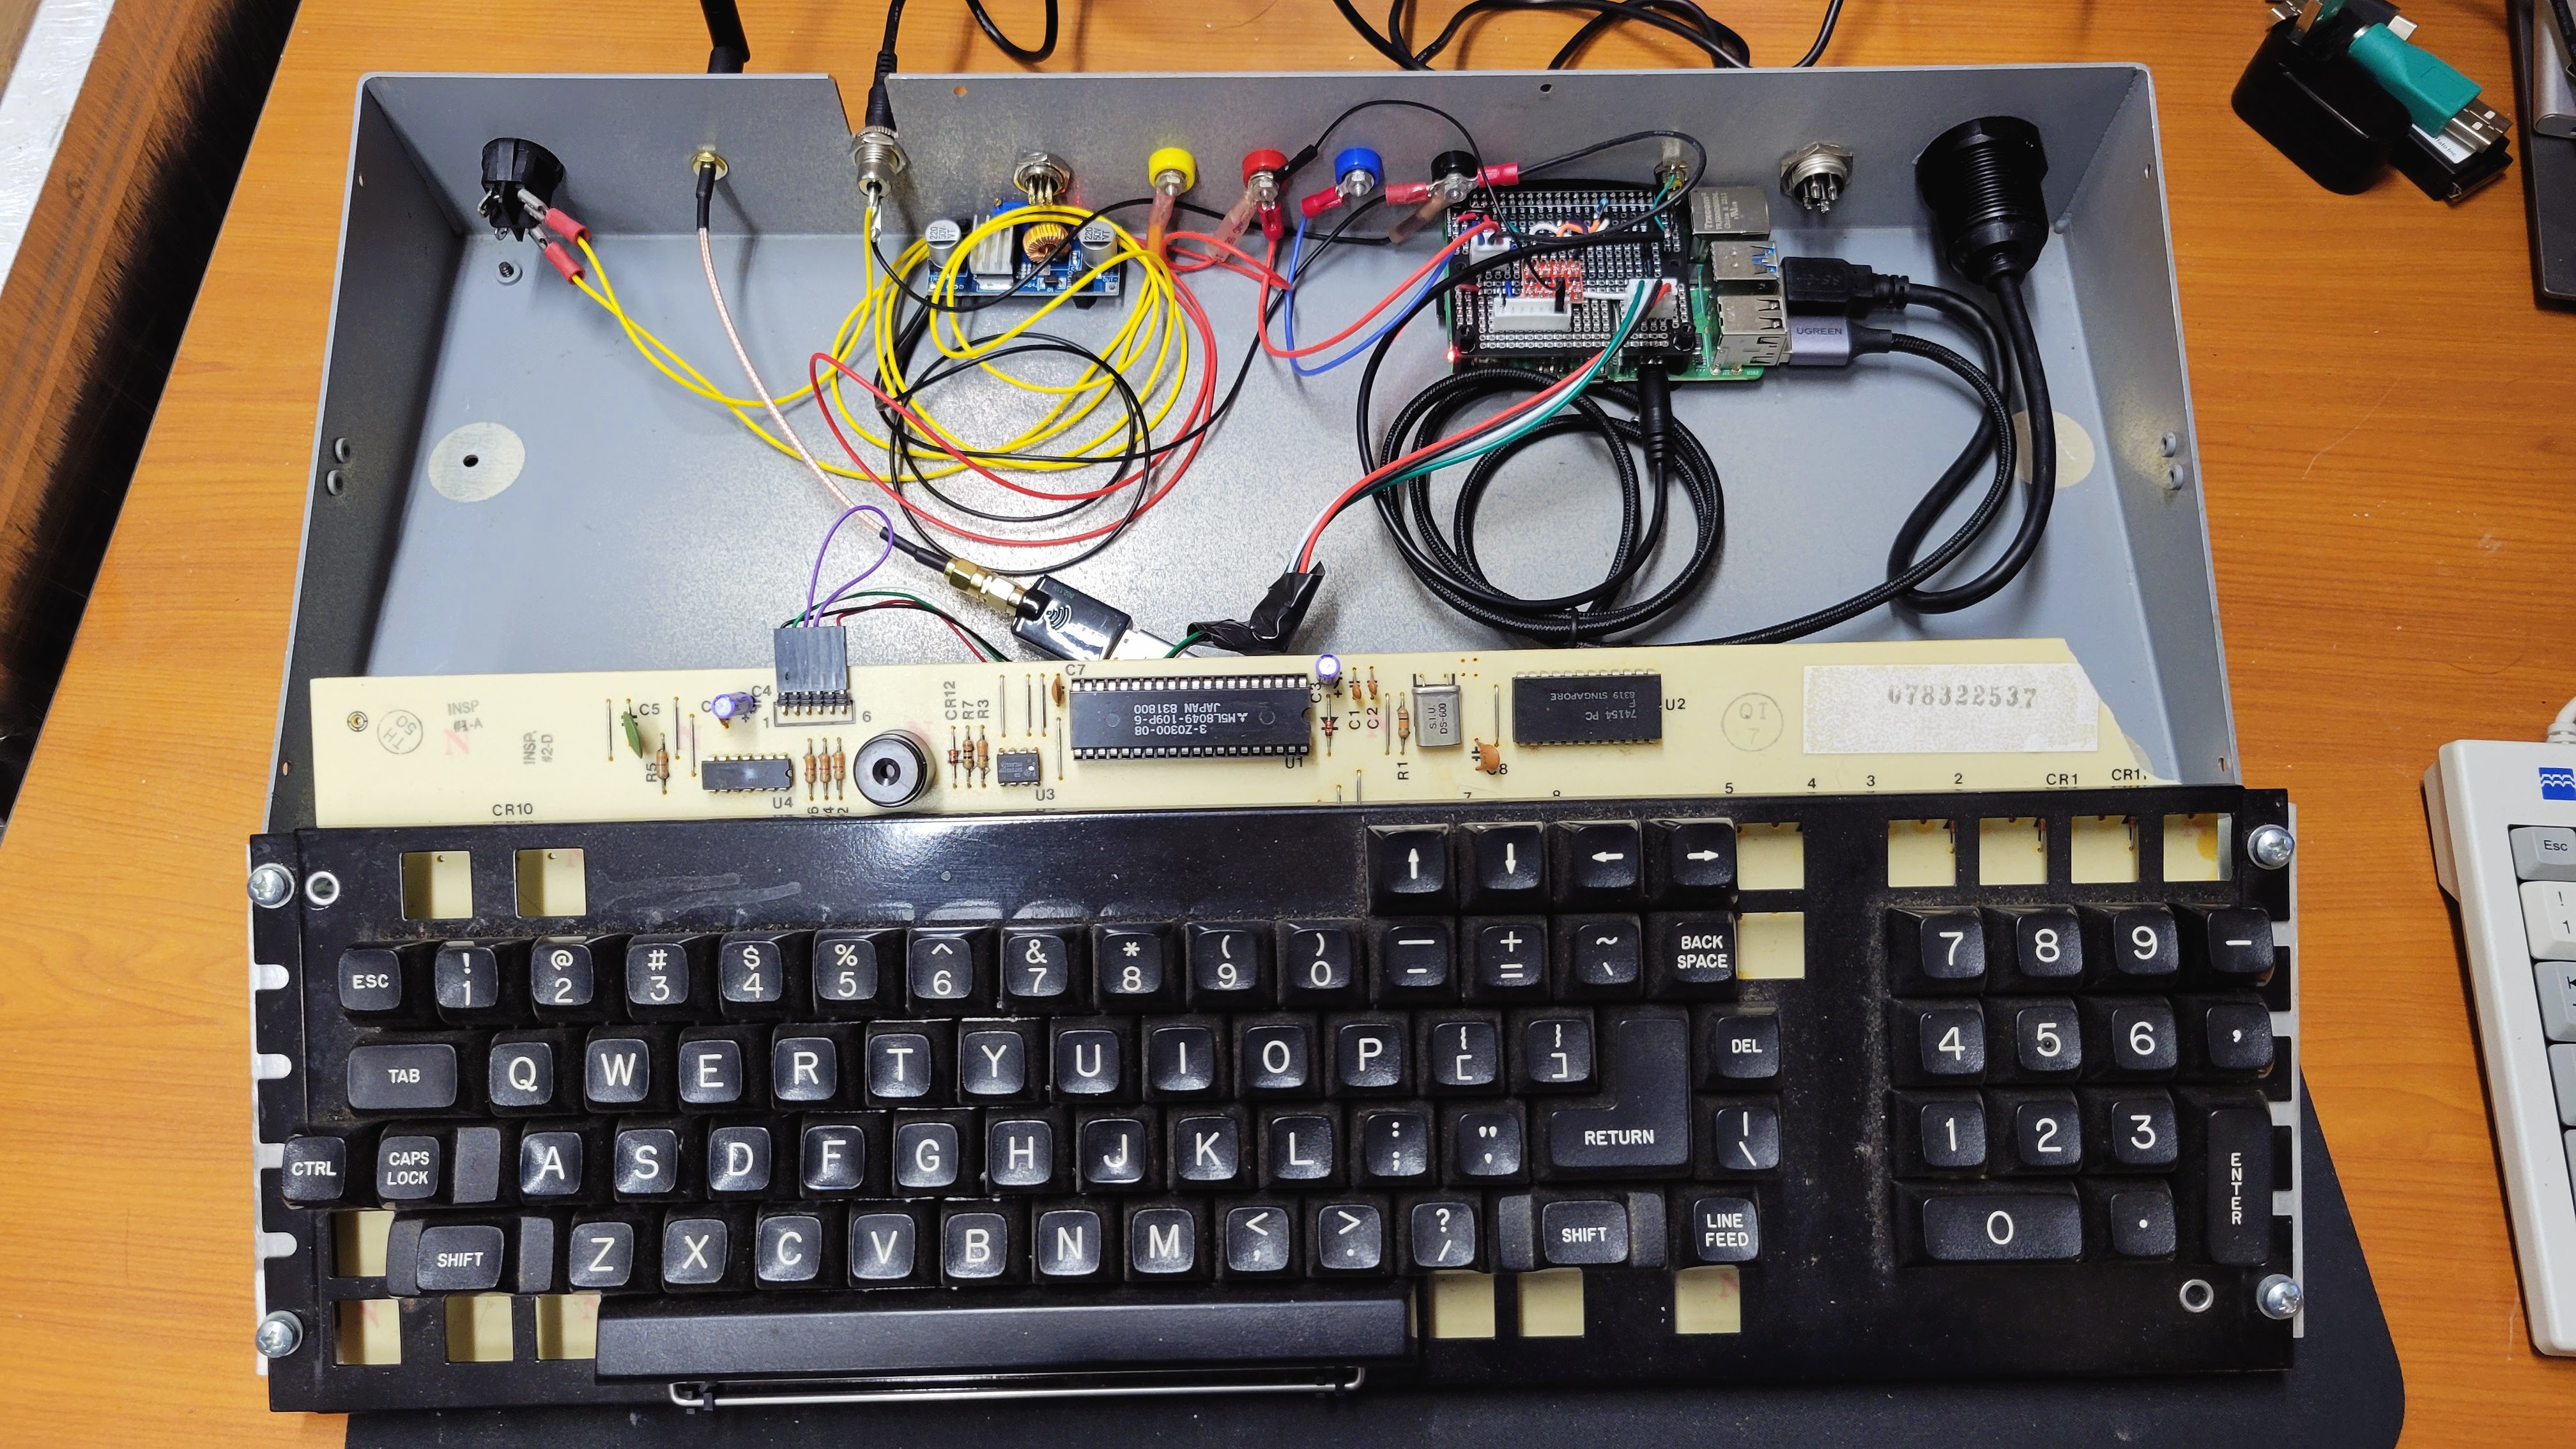
Then the keyboard was ready to be connected and screwed back into it's original place in the case. The size of the USB A port on the back panel necessitated that I cut a corner out of the keyboard PCB for clearance. This portion of the PCB had no traces. The USB A port was located there just for that reason.
Discussions
Become a Hackaday.io Member
Create an account to leave a comment. Already have an account? Log In.