Close
0%
0%

TinyJaguar

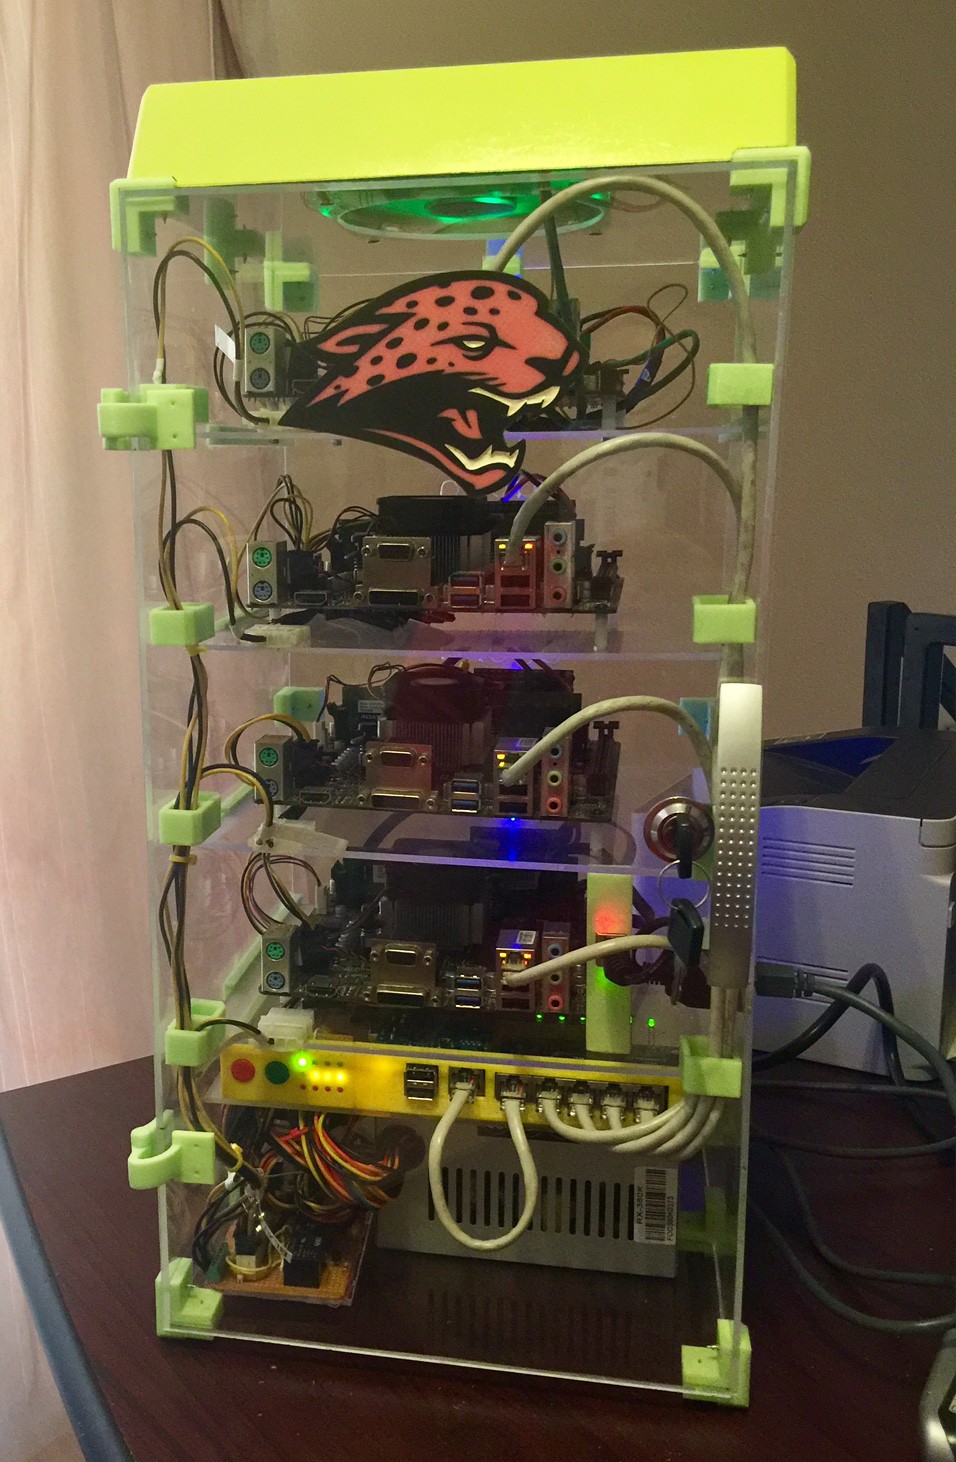
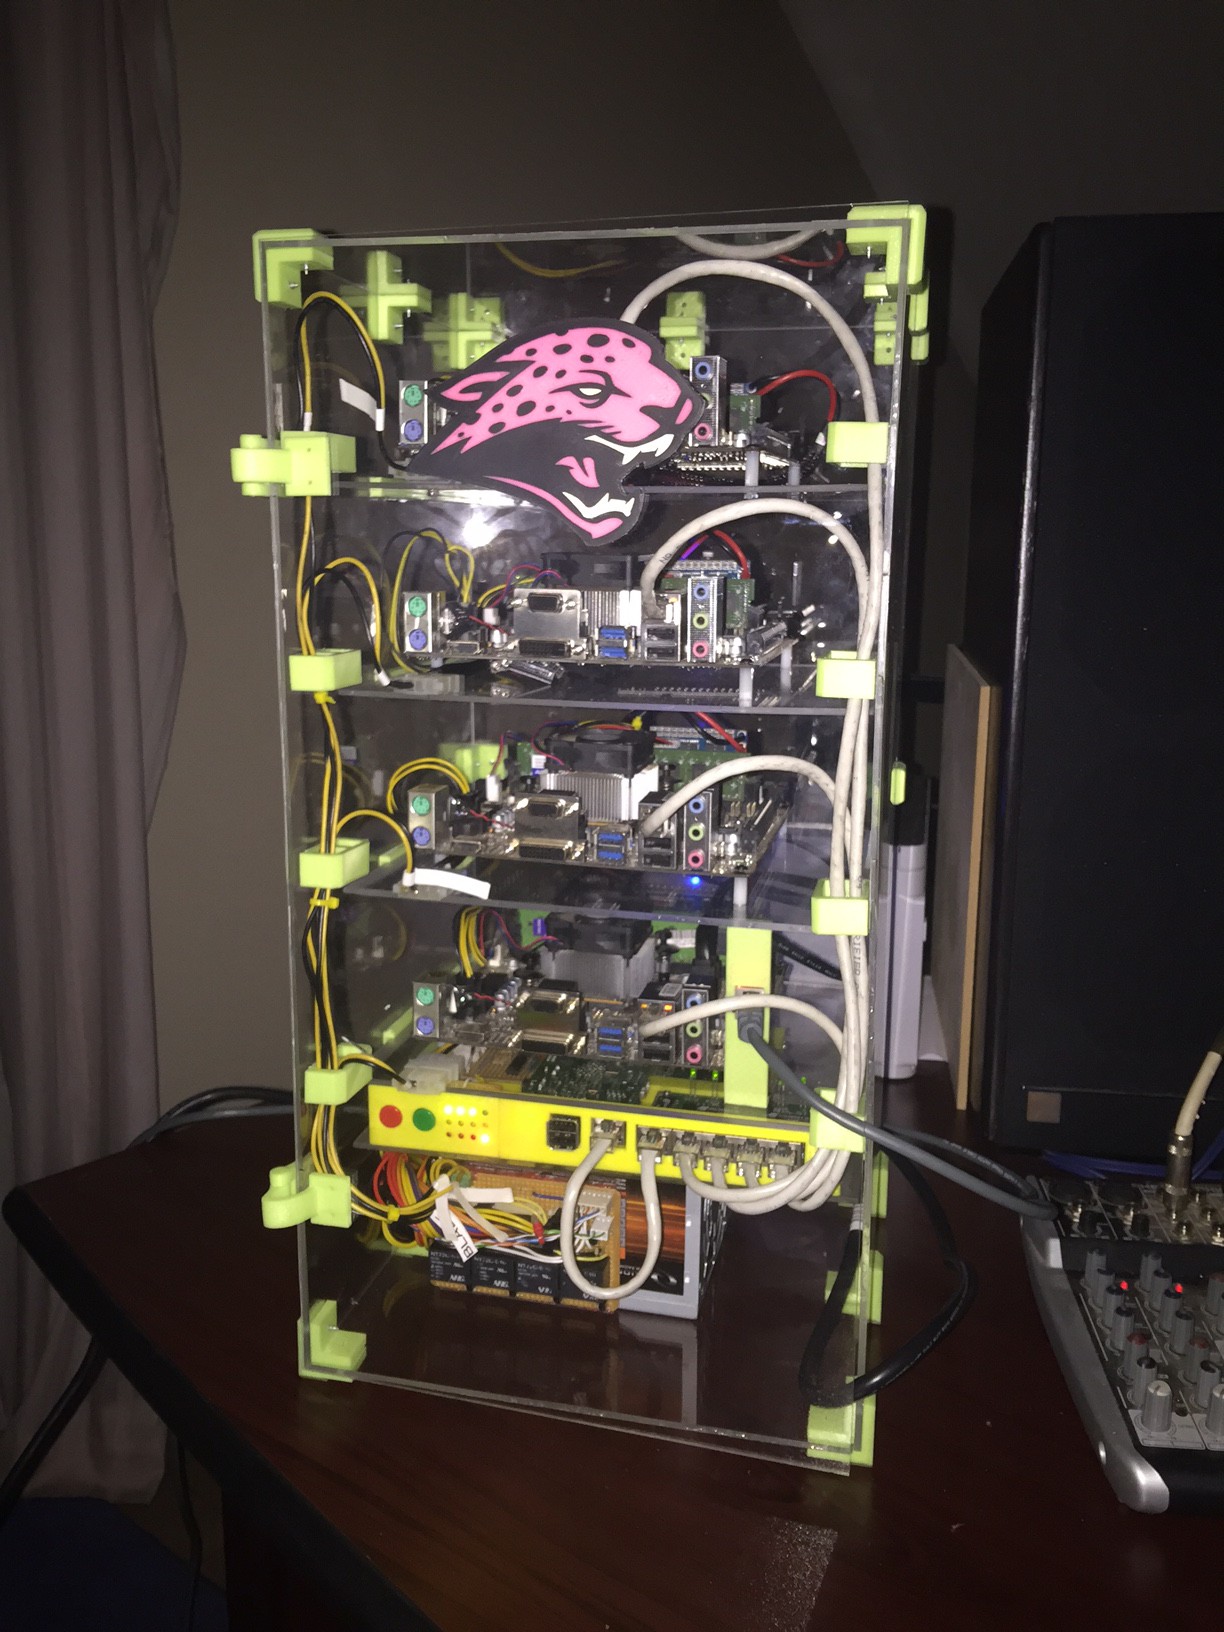
An AMD Jaguar cluster computer

Similar projects worth following
A not-so-super computer, to learn about super computers and how to not build them.

For some time I'd been thinking about building my own little supercomputer to use as a test bed for software I use at work like Elasticsearch and Ceph, and then also earn about the more esoteric work of HPC with MPI and funny interconnects. I came across someone selling some populated MiniITX boards with AMD Jaguar architecture chips on them, with 2GB of memory included they were around the same price as a RaspberryPi - only infinitely more flexible. For starters a Pi only has 1GB of memory, and you're stuck with that - which is annoyingly too little for running anything serious. The other more significant problem is the lack of gigabit ethernet on the Pi's. SATA is also nice to have, although the compute nodes have no disk at all attached - they boot and run entirely from LAN.

And so I embarked on building the TinyJaguar, named in part for the CPU architecture, and its idol the Oak Ridge Jaguar... which it has absolutely no parts in common with
  • 4 × MSI AM1I Mini-ITX motherboard Socket AM1 ITX Motherboard
  • 4 × AMD Sempron 2650 APU CPU/GPU
  • 4 × 4GB DDR3-1333 DDR Memory
  • 1 × 400W ATX Power supply Power supply
  • 4 × 12V relay Relay

View all 12 components

  • Exploiting the GPU/APU

    Colin Alston03/13/2017 at 09:26 0 comments

    I spent a bit more time playing with OpenCL with PyOpenCL. This was a real tricky pain to get working really, since it requires the Catalyst drivers to use the GPU. It would have been easier if I'd known this before building all the nodes because I had to rebuild the initramfs for TFTP and then for some reason OpenCL was just segfaulting. The OpenCL packages in Debian are also old and didn't want to work properly, and the new one wouldn't build properly on the nodes. There seems to be some kind of weird memory glitch happening, possibly due to the shared VRAM. Gah!

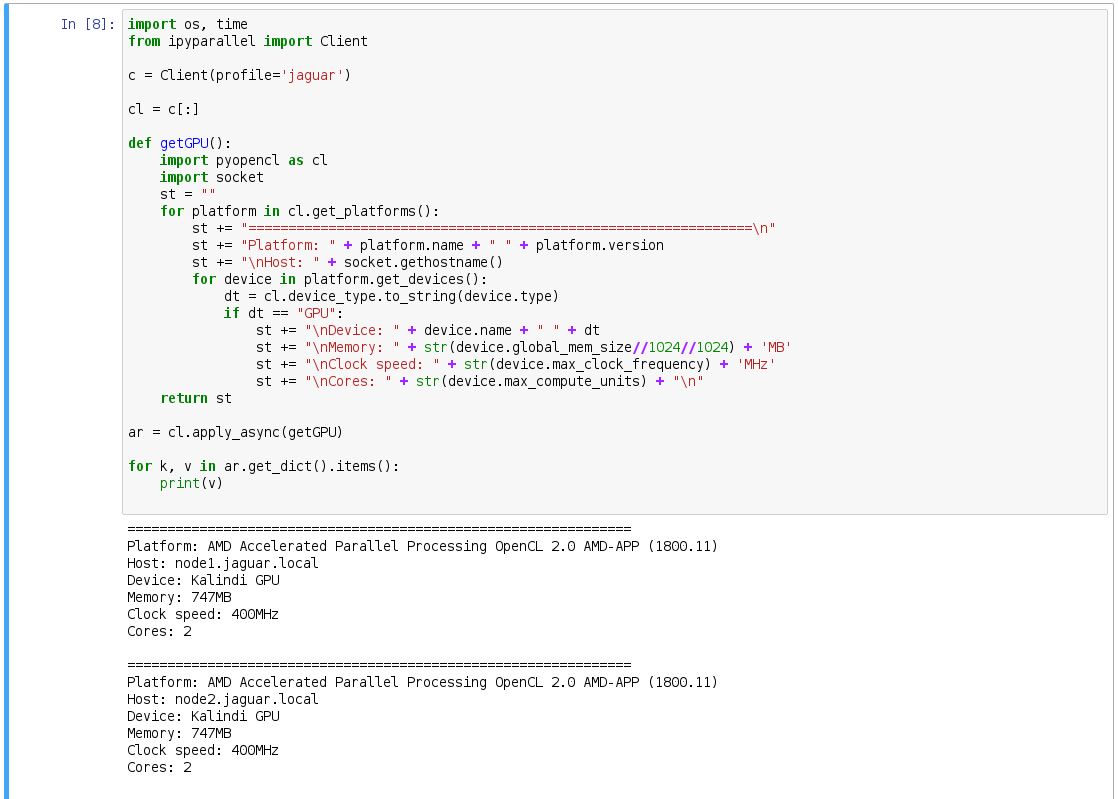
    Through trial and error and then sheer luck I managed to get PyOpenCL to behave itself and made a quick MPI program to check the nodes.

    Now that everything is working I can try build some interesting software to make use of my whole two extra GPU cores, bringing the whole pile to 16 cores of amazing computing power.

  • Setting up Jupyter with MPI and IPyParallel

    Colin Alston03/12/2017 at 16:37 0 comments

    It's about time I actually cluster computed some things. I played around with various HPC things like Slurm and VCL and to be honest I didn't really understand any of it, documentation is either scant or overwhelming to an HPC noob like me.

    In the end I decided to battle my way through getting Jupyter notebook running with IPyParallel and mpi4py. This ended with great success! Once I figured out its little dark corners that is.

    Given that it became laborious manually synchronising and installing things across 4 nodes I decided to use Ansible from my RaspberryPi management node to do the clusters real system administration. In a larger cluster I'd certainly go with Puppet as my preferred configuration management system because it can actually continuously manage stuff, but my bastion is a Pi B+ and there's no way I'd get a fully fledged Puppet server going on that.

    Instead of prattling on about how I got Jupyter and the ipcluster stuff working I stuck the Ansible scripts in the Github repository here https://github.com/calston/tinyjaguar/tree/master/ansible

    I decided to use Jupyter Hub which is pretty cool, instead of having to manually spin up a notebook process with my user. One thing that wasn't immediately obvious in the setup documentation is the ipcluster profile has to be started by the user of the notebook, so I wasted a lot of time building a systemd script for ipcluster which turned out to be useless - you just boot your cluster straight from the Jupyter web interface when you need it, which is actually much better.

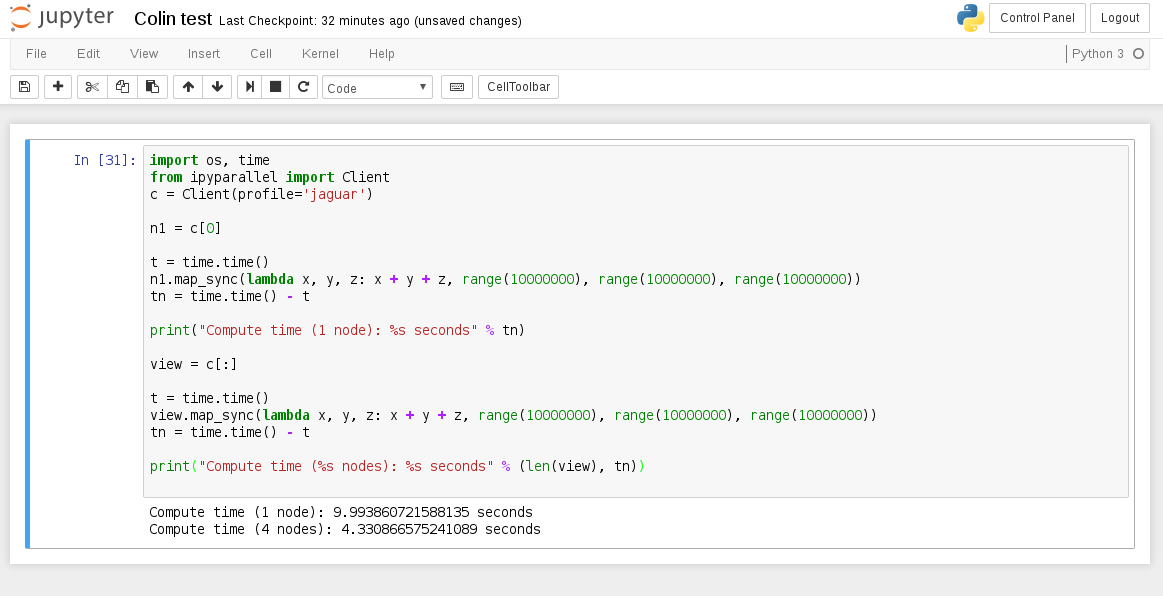
    A quick test and it all seems to work great, hooray!

    This is one of the basic examples from ipyparallel docs that I just knocked up a notch in iterations because obviously at small iterations the performance hit from reducing the computation results from the nodes over GigE stuff is actually slower over multiple nodes. This is quite a good reflection of Amdahl's Law in the perils of parallel workloads, you don't always get a performance increase over multiple compute nodes, and you almost never get a linear performance increase by adding more nodes. This is why Cray's and what-not have ridiculously expensive high bandwidth connections between computing cores to overcome the latency bottleneck, and also why wiring code for an HPC is not so easy as for a single system.
    Now I want to try do some neat visualisations, and I'll keep putting stuff into my ansible repo moving all the manual cluster bootstrapping I did (like debootstrap, NFS, NTP and DHCP) to playbooks in-case I need to rebuild the system from scratch

  • Management module software

    Colin Alston03/11/2017 at 21:43 0 comments

    The management module needs some software to manage the cluster. I'll detail setting up NFS and TFTP to boot the nodes and get MPICH2 running in a later post because it's fairly involved.

    I put the code for my management interface on GitHub here https://github.com/calston/tinyjaguar

    This provides simple control for the ATX power supply, and makes the buttons and LED's do the right things.

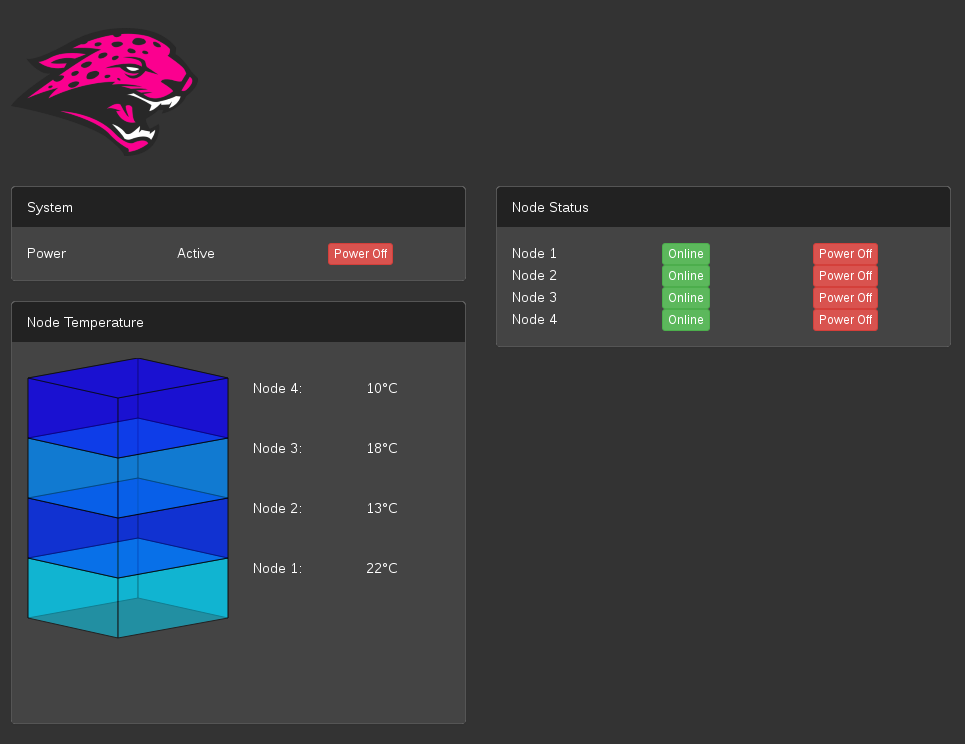
    Just for fun I added in a little isometric view of the cluster which updates in real time according to the temperature of each node which is somewhat hypnotic to watch, especially when I apply load and it starts warming up and turning green and then yellow. The ambient temperature today is pretty cold in my lab, seems Winter Is Comming.

  • Finishing touches

    Colin Alston03/11/2017 at 11:21 0 comments

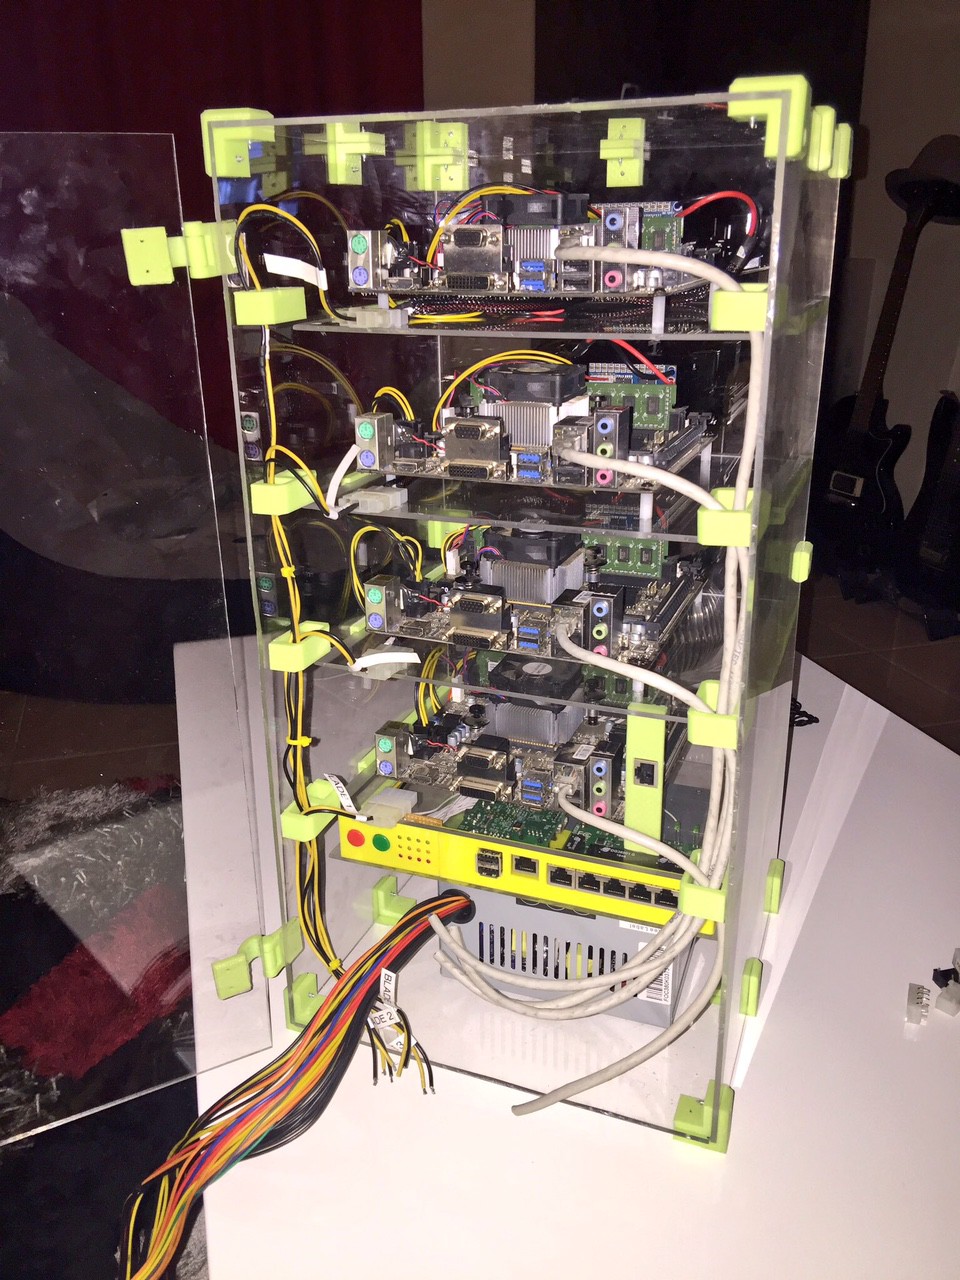
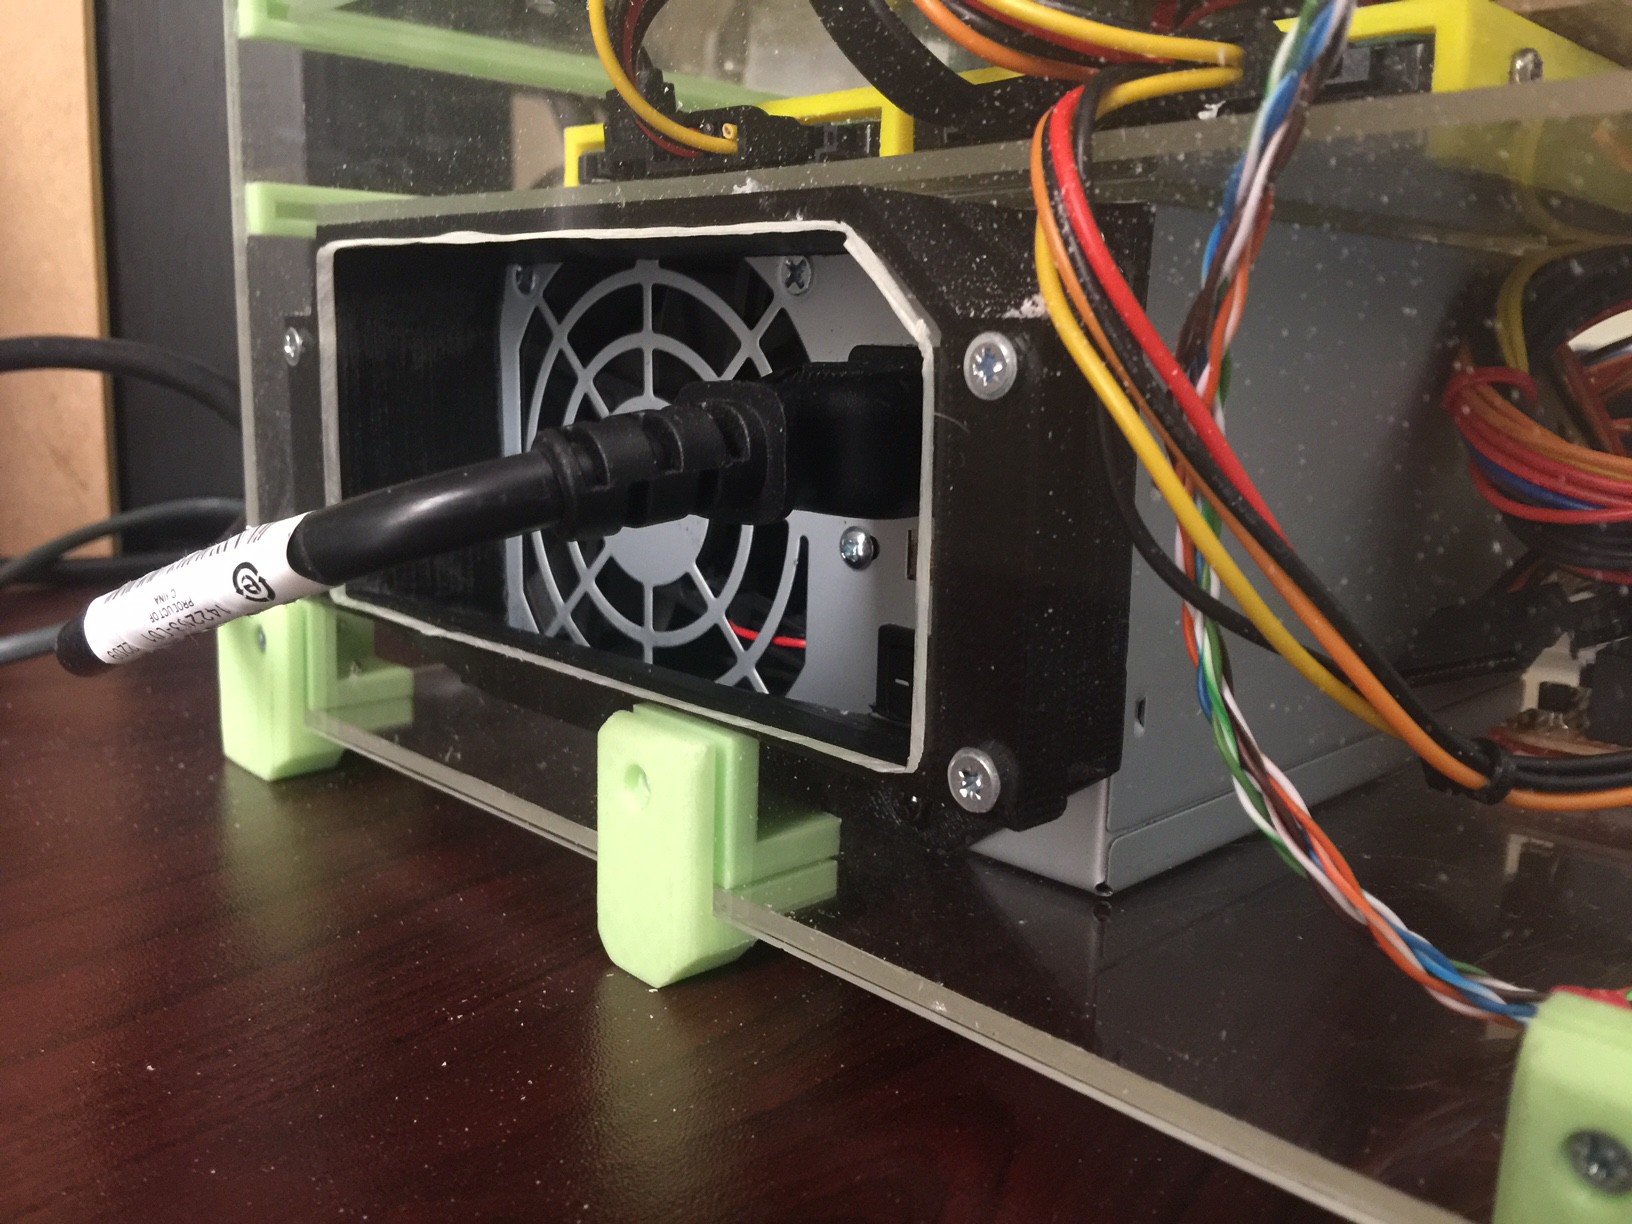
    Having the power supply lying in the bottom was pretty useless so to complete the cooling I drilled ventilation holes behind the blades and made a baffle to screw the power supply into the bottom part of the cabinet. This way I have two exhausts top and bottom, and air coming in behind the blades.

    I tested this for a day and it worked well. Then I stopped by the hardware store and got some cupboard finishings and lime green spray paint and set to work on finishing touches.

    Tada! I mounted an RJ45 extension to the side because that was the only place it would reach and I didn't want an ugly extension to the back. Looks a bit strange with an Ethernet cable plugged into the side but now at least I can close the cabinet and have proper airflow.


  • Cooling and some fixes

    Colin Alston03/08/2017 at 18:58 0 comments

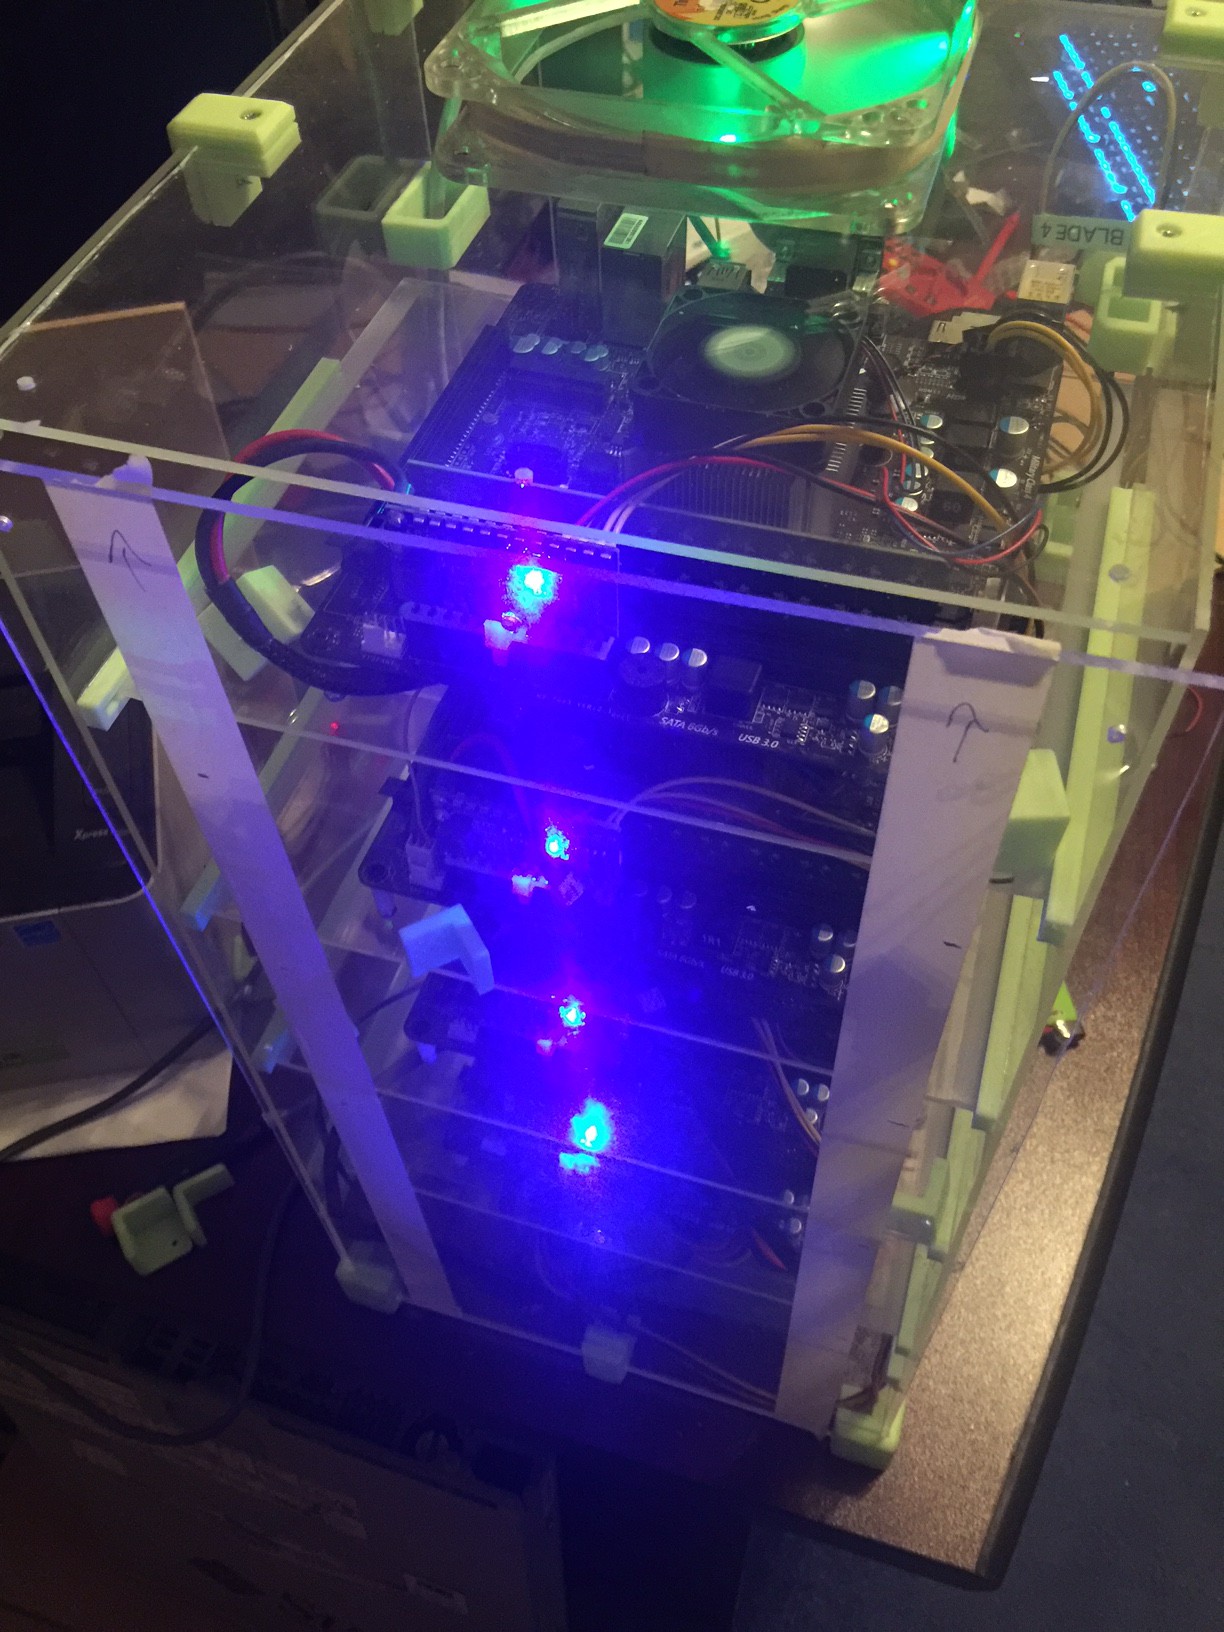
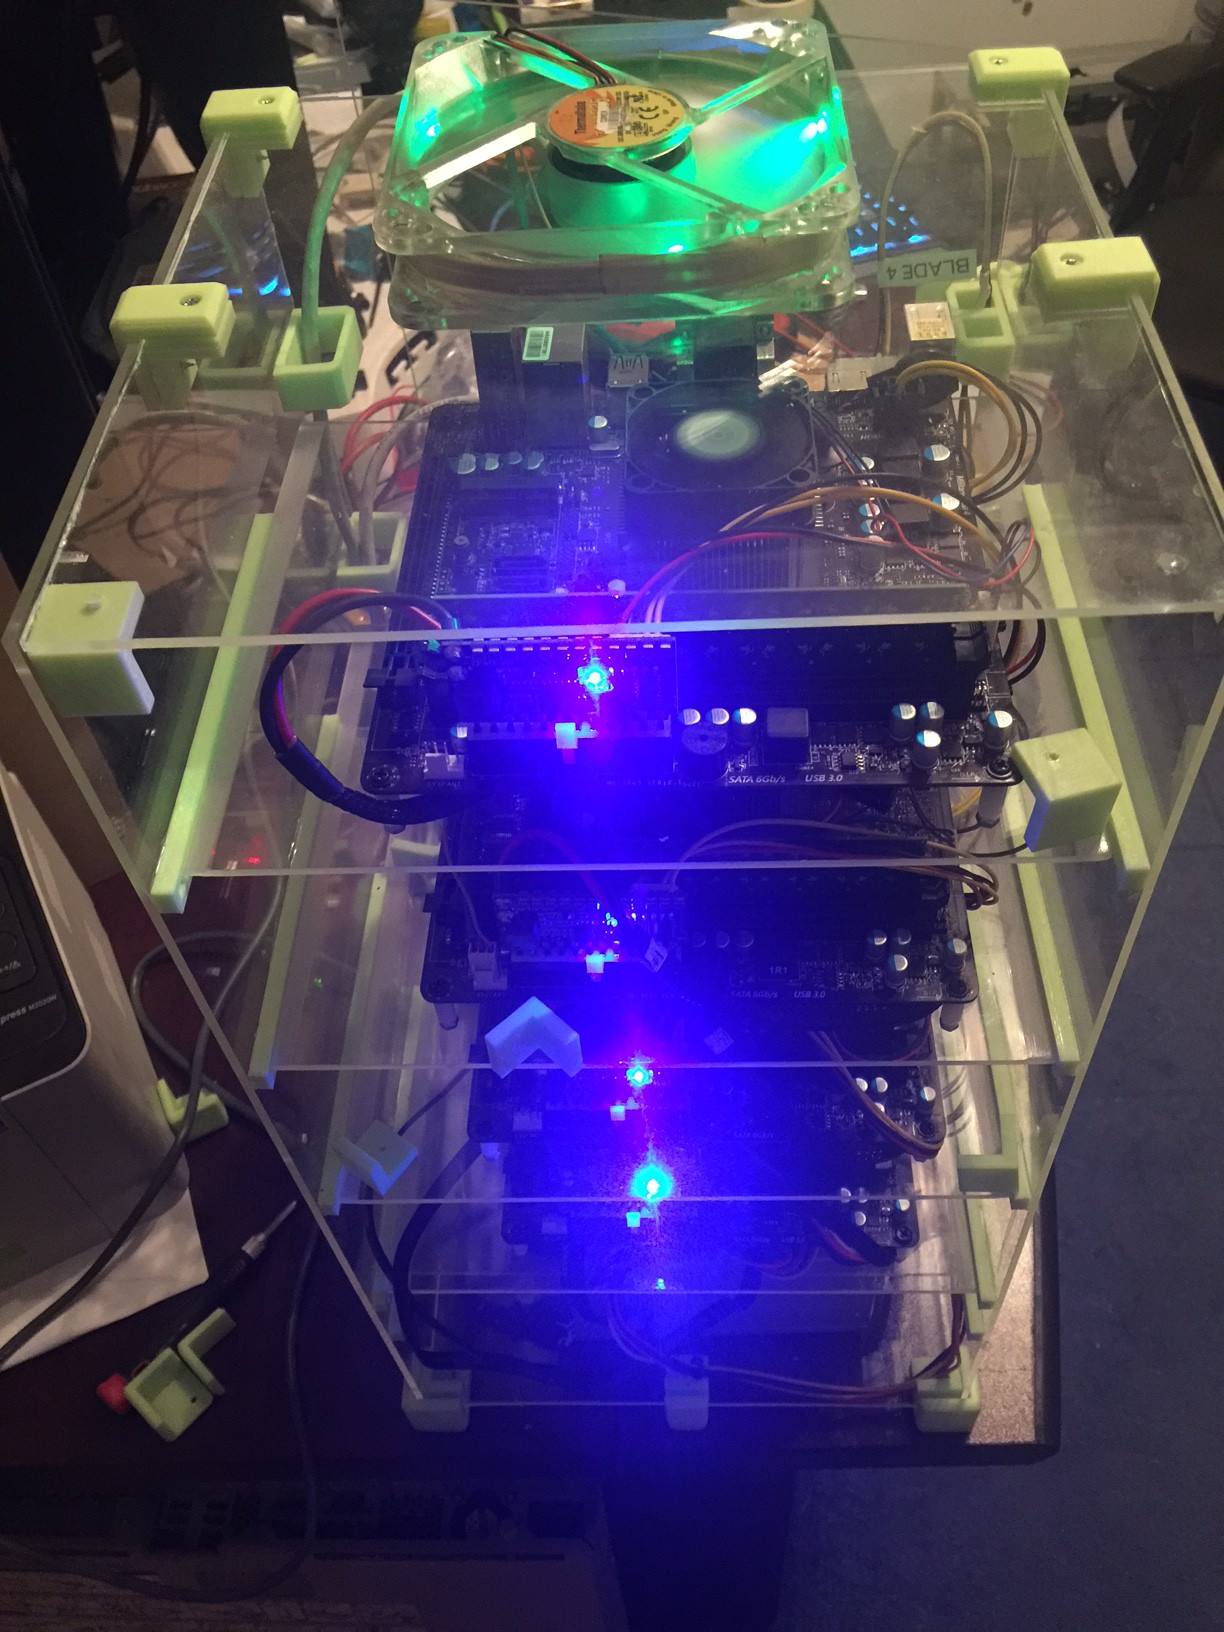
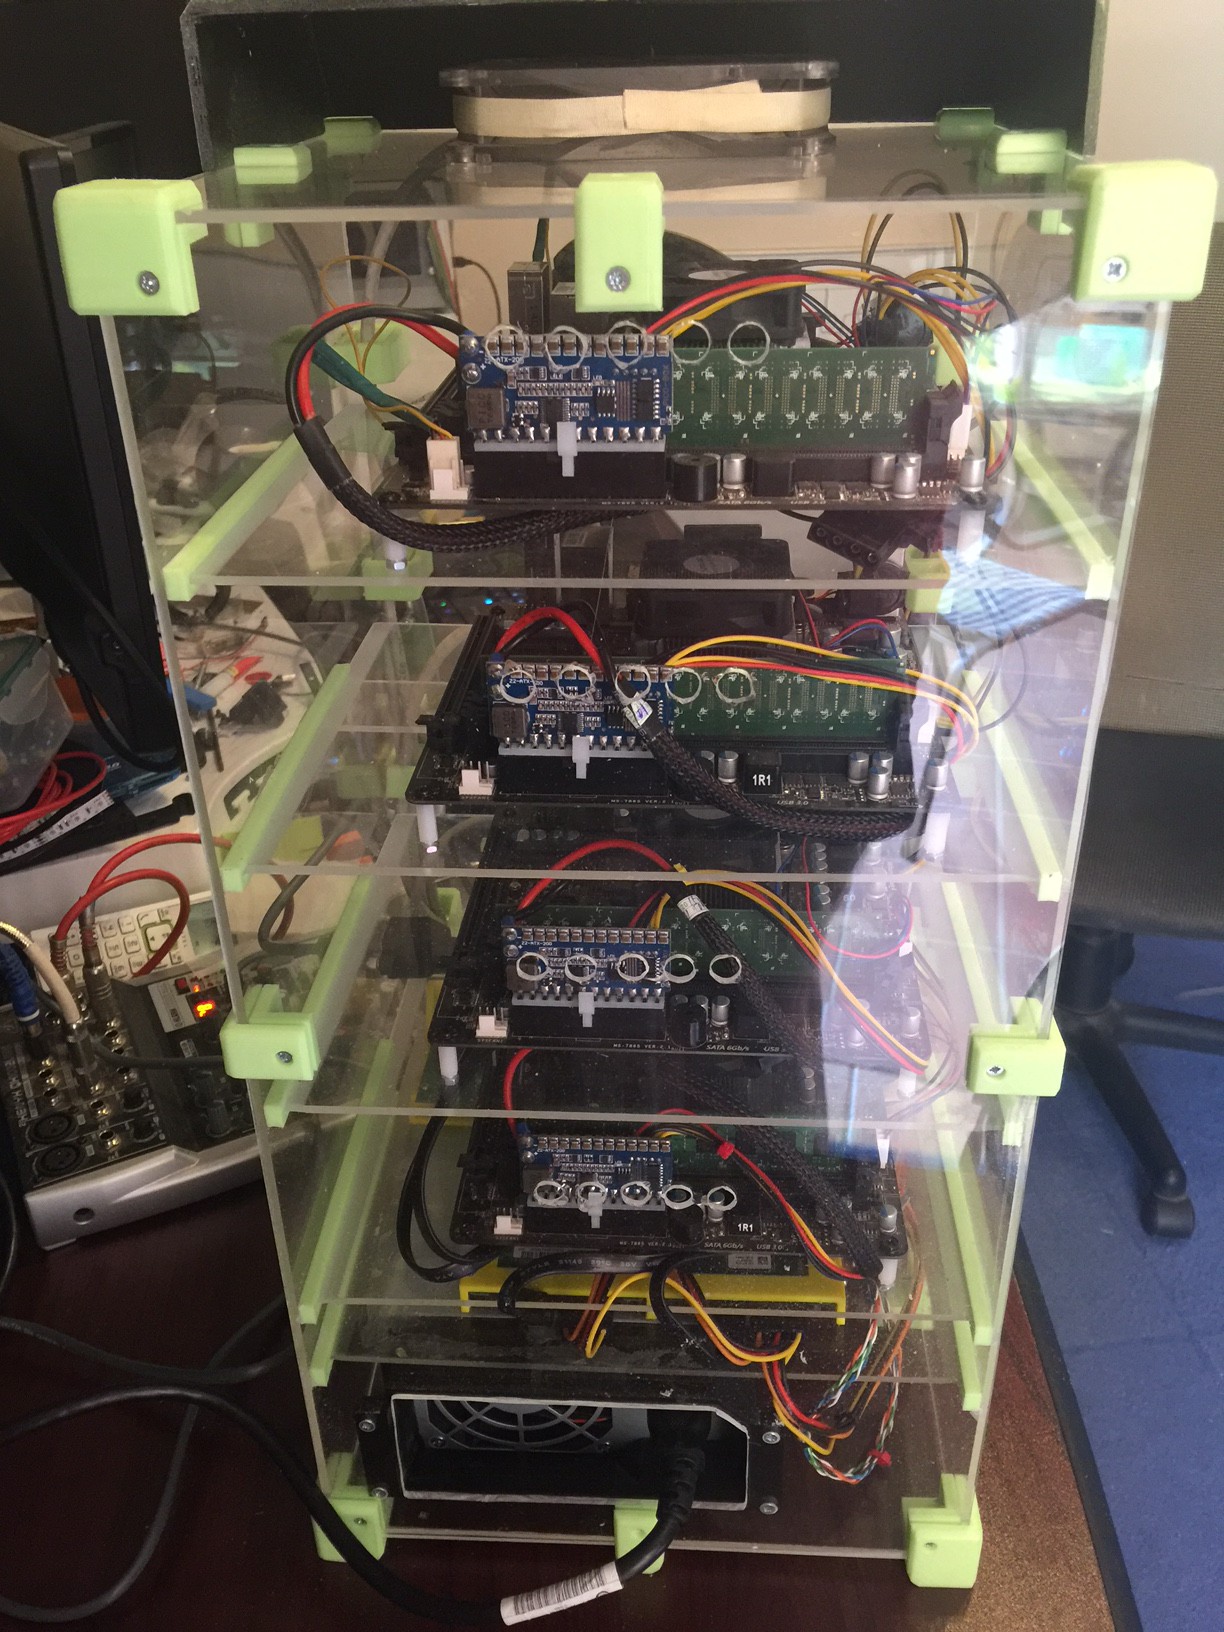
    I decided to work on improving cooling a bit in the machine. I didn't really make much provision for it because I figured I could deal with it later. After 2 days of idle cooling wasn't much of an issue, there were hot spots but nothing critical. Not having any airflow isn't sustainable though, so I decided to simply add a large 120mm fan at the top of the case to extract hot air, and then add some inlets behind each blade. In theory this should pull air through the back of the blades, up the front and out the top.

    Since I had it all open I decided to fix whatever was going on with the 4th node's power control, turns out the transistor had bent slightly and the emitter was making contact with the base resistor - luckily this is not fatal since all it does is holds the base down to ground which doesn't harm either the transistor or the GPIO but it's still a layout design lesson for future.

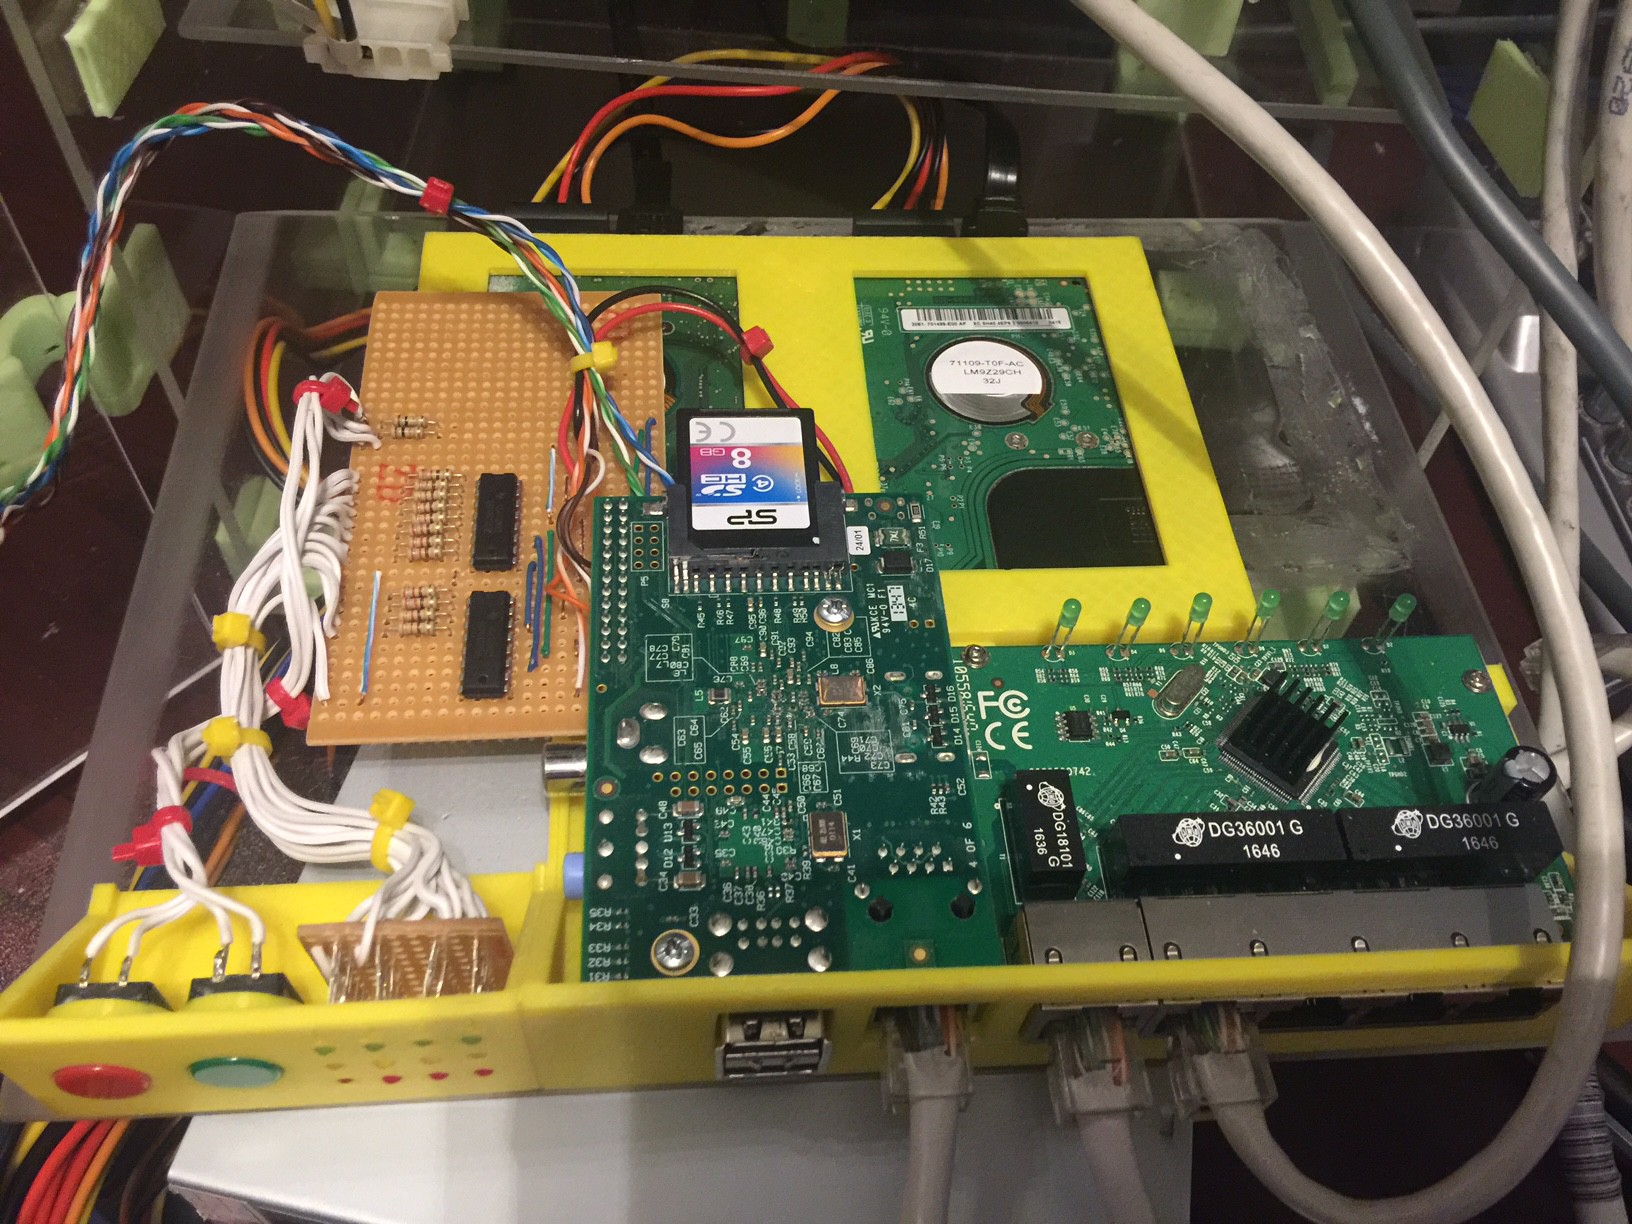
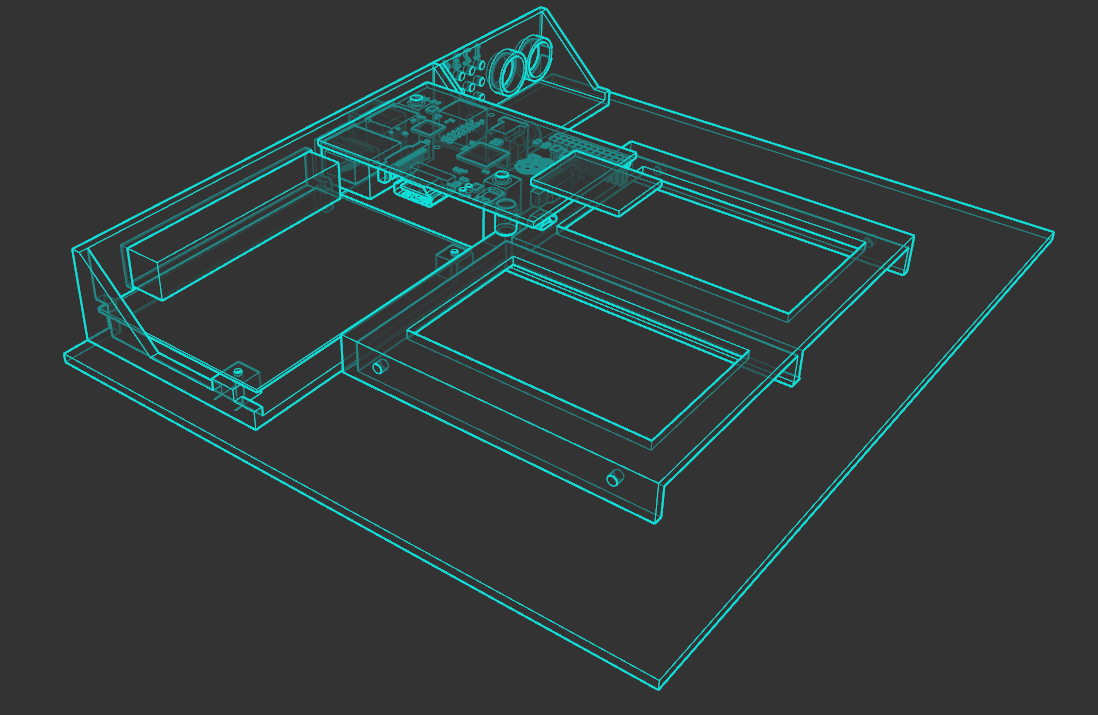
    While I was doing that I got a better picture of the management node and the 2.5" drive bays I had added to it.

    Next I got to cutting a hole for the fan, which was simple enough with my trusty Dremel. The spare fan I had has a green LED in it, not sure it really works with the PicoPSU's blue lights and all the other light but I don't care for now.

    An interesting side effect of my case design which I discovered is it's pretty easy to slip out the back and top panels without taking the entire box apart. This made life a lot easier - just undo the screws and slide it out of the clamps and there we go!

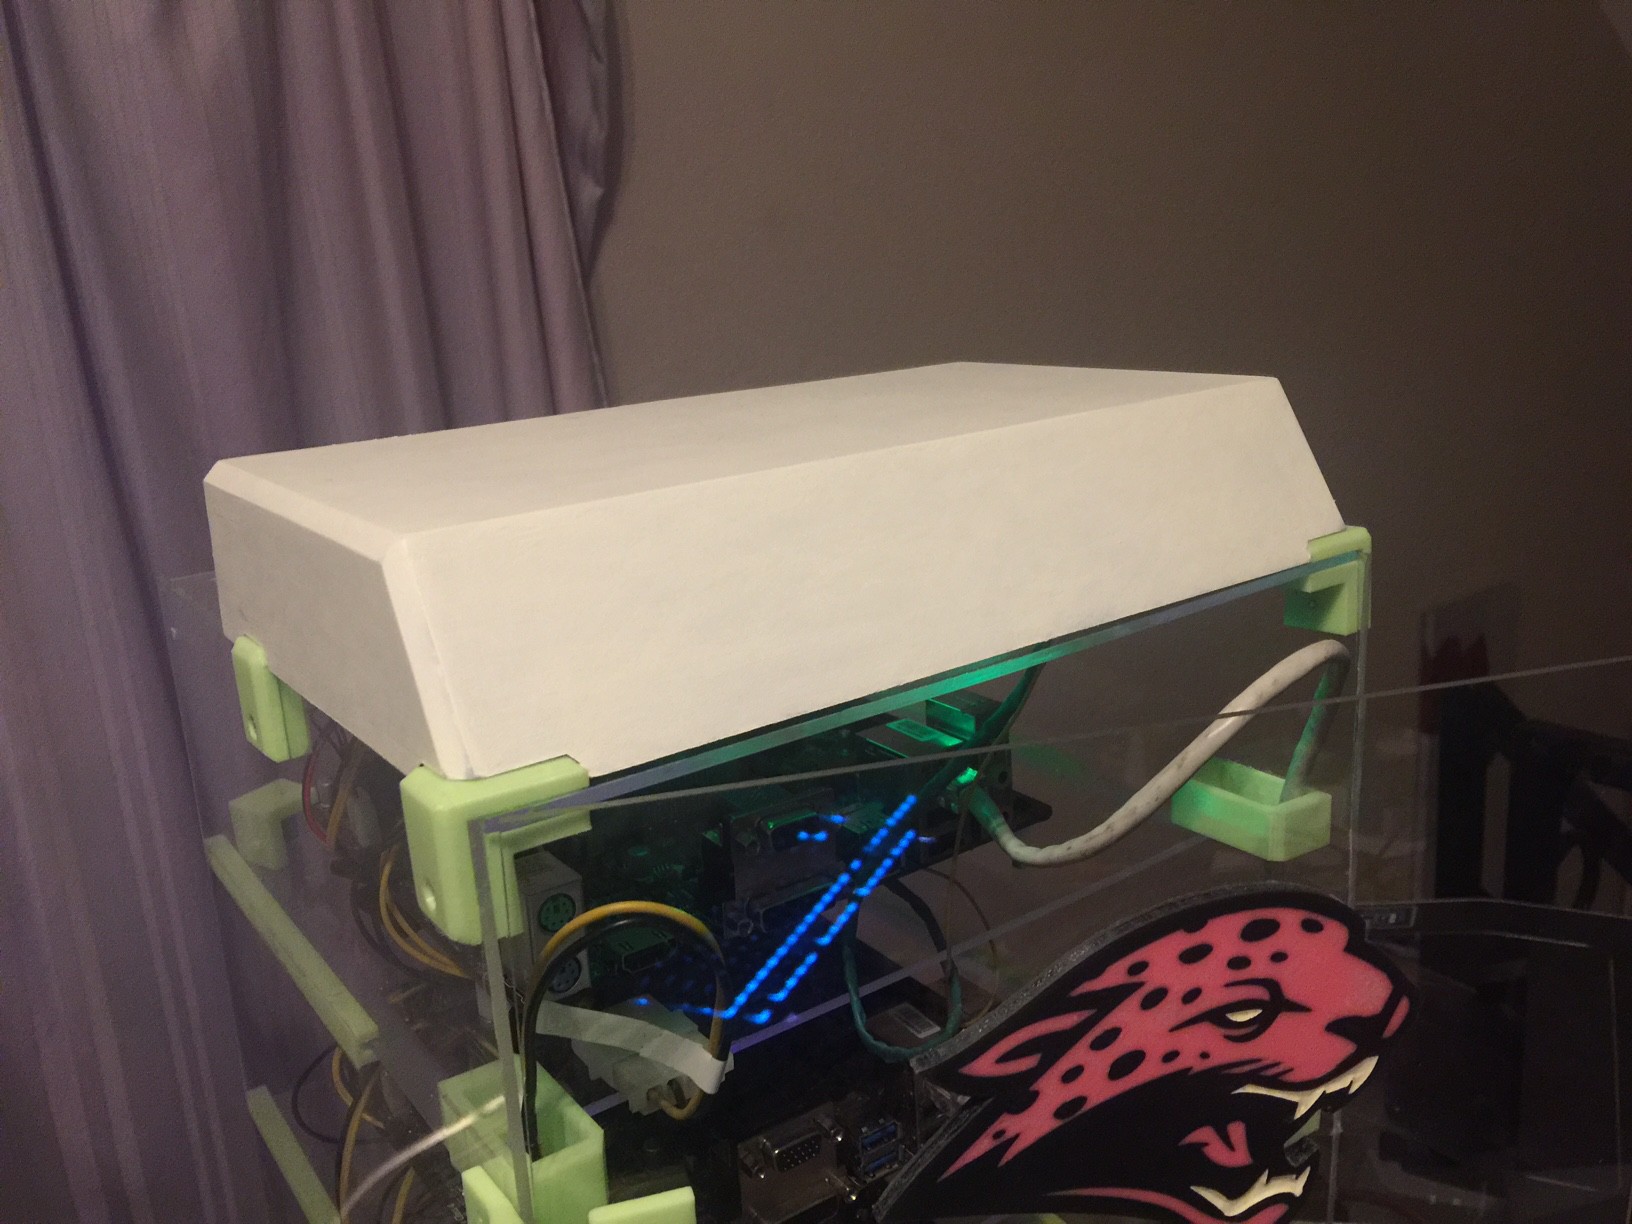
    I 3D printed a baffle to go on the top to hide the ugly fan and direct hot air back. This probably isn't ideal since there will be some recycling of air between the inlet and outlet but this isn't a Cray or an overclocked gaming PC so it will probably fine.

    The baffle is a pretty simple design that clips onto the clamps holding the case together. There's enough friction for a good fit but easily removed without having to poke inside to undo screws or clips. It's mostly decorative though, and to prevent things falling in through the top onto compute node 4.

    That's it for now, I'm going to find some matching paint for the baffle next and cut the vents and power supply mounting into the rear panel next, then it's time to get into some software.

  • Cable routing

    Colin Alston03/07/2017 at 20:48 0 comments

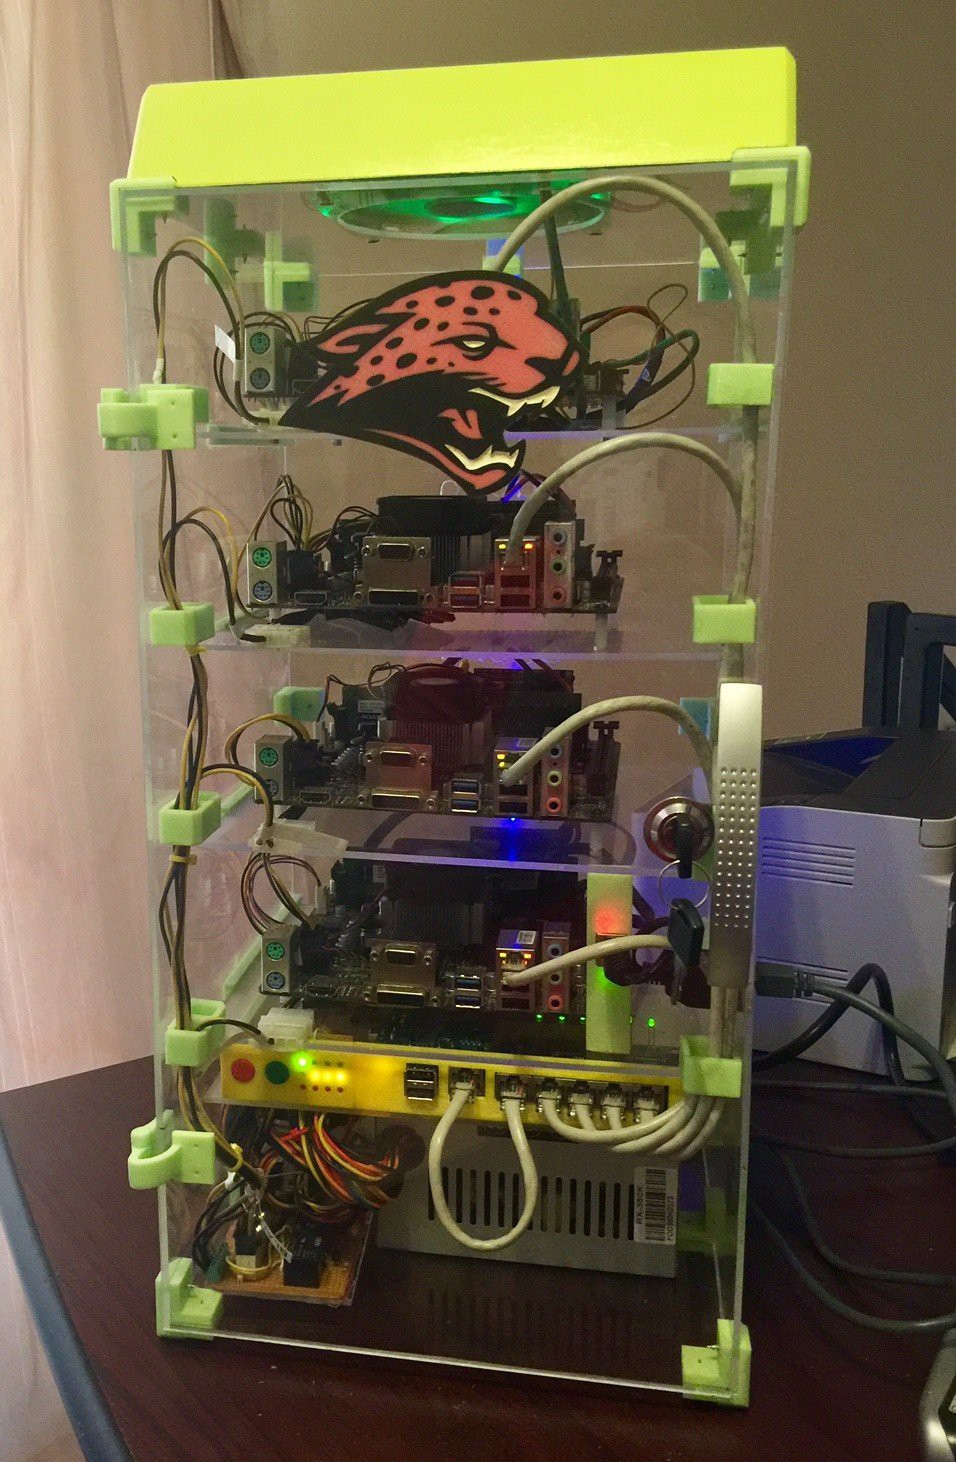
    No PC related build is complete without careful cable routing. I 3D printed some simple cable management loops which clip into a base plate attached to the side with some transparent double sided tape

    After some careful research it turns out if you're using CAT-5E cable and gigabit then there is no 1 meter minimum length as there was with 100Base ethernet to prevent reflections. So I pulled out some CAT-5E and started crimping. I had a bunch of male molex power connectors (or are they female? molex is kinda both at the same time) so I crimped on some wires and then it was just a matter of connecting up the ATX controller and we're in business!

    Next task is cooling

  • Building the management module

    Colin Alston03/07/2017 at 19:36 0 comments

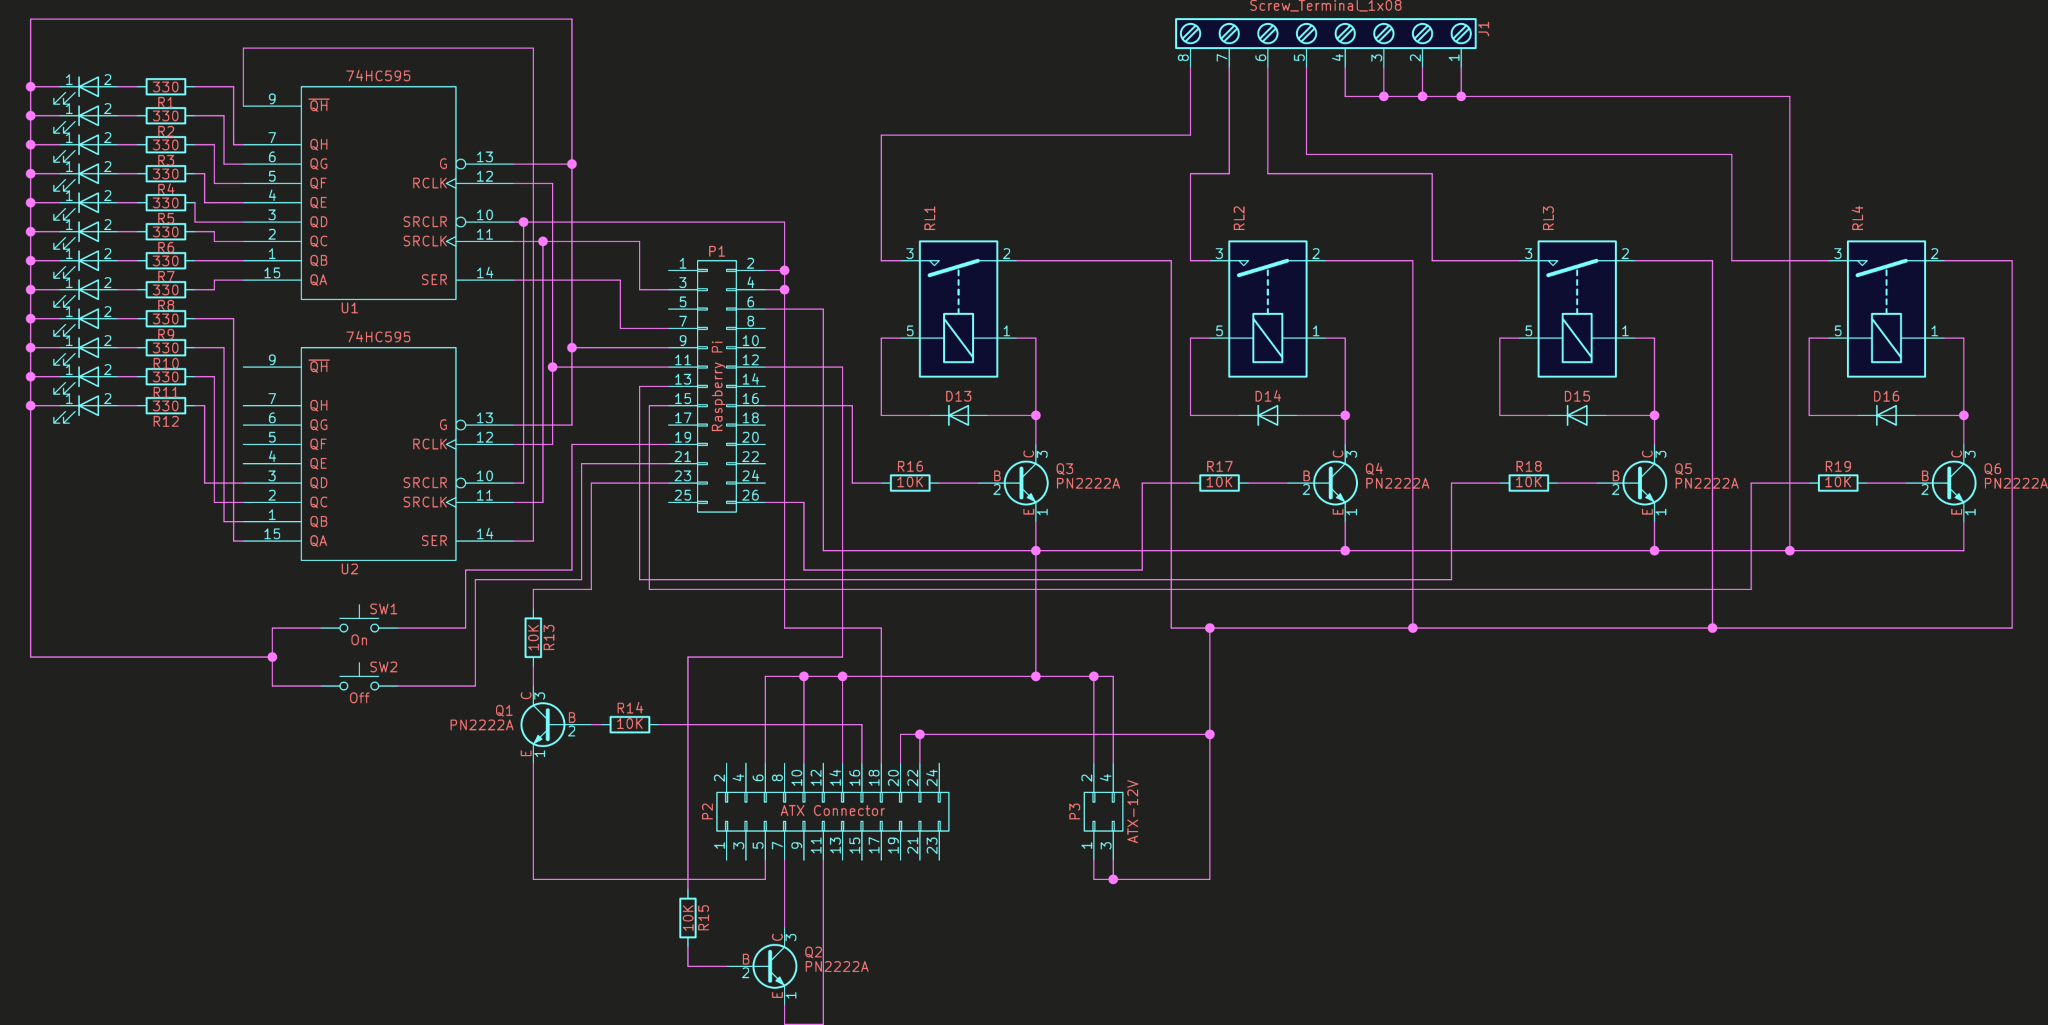
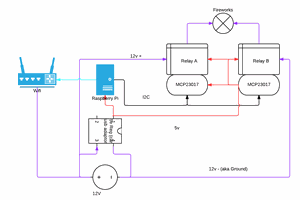
    The schematic for the management module circuit looks somewhat complicated but it's really just a lot of painful wiring.

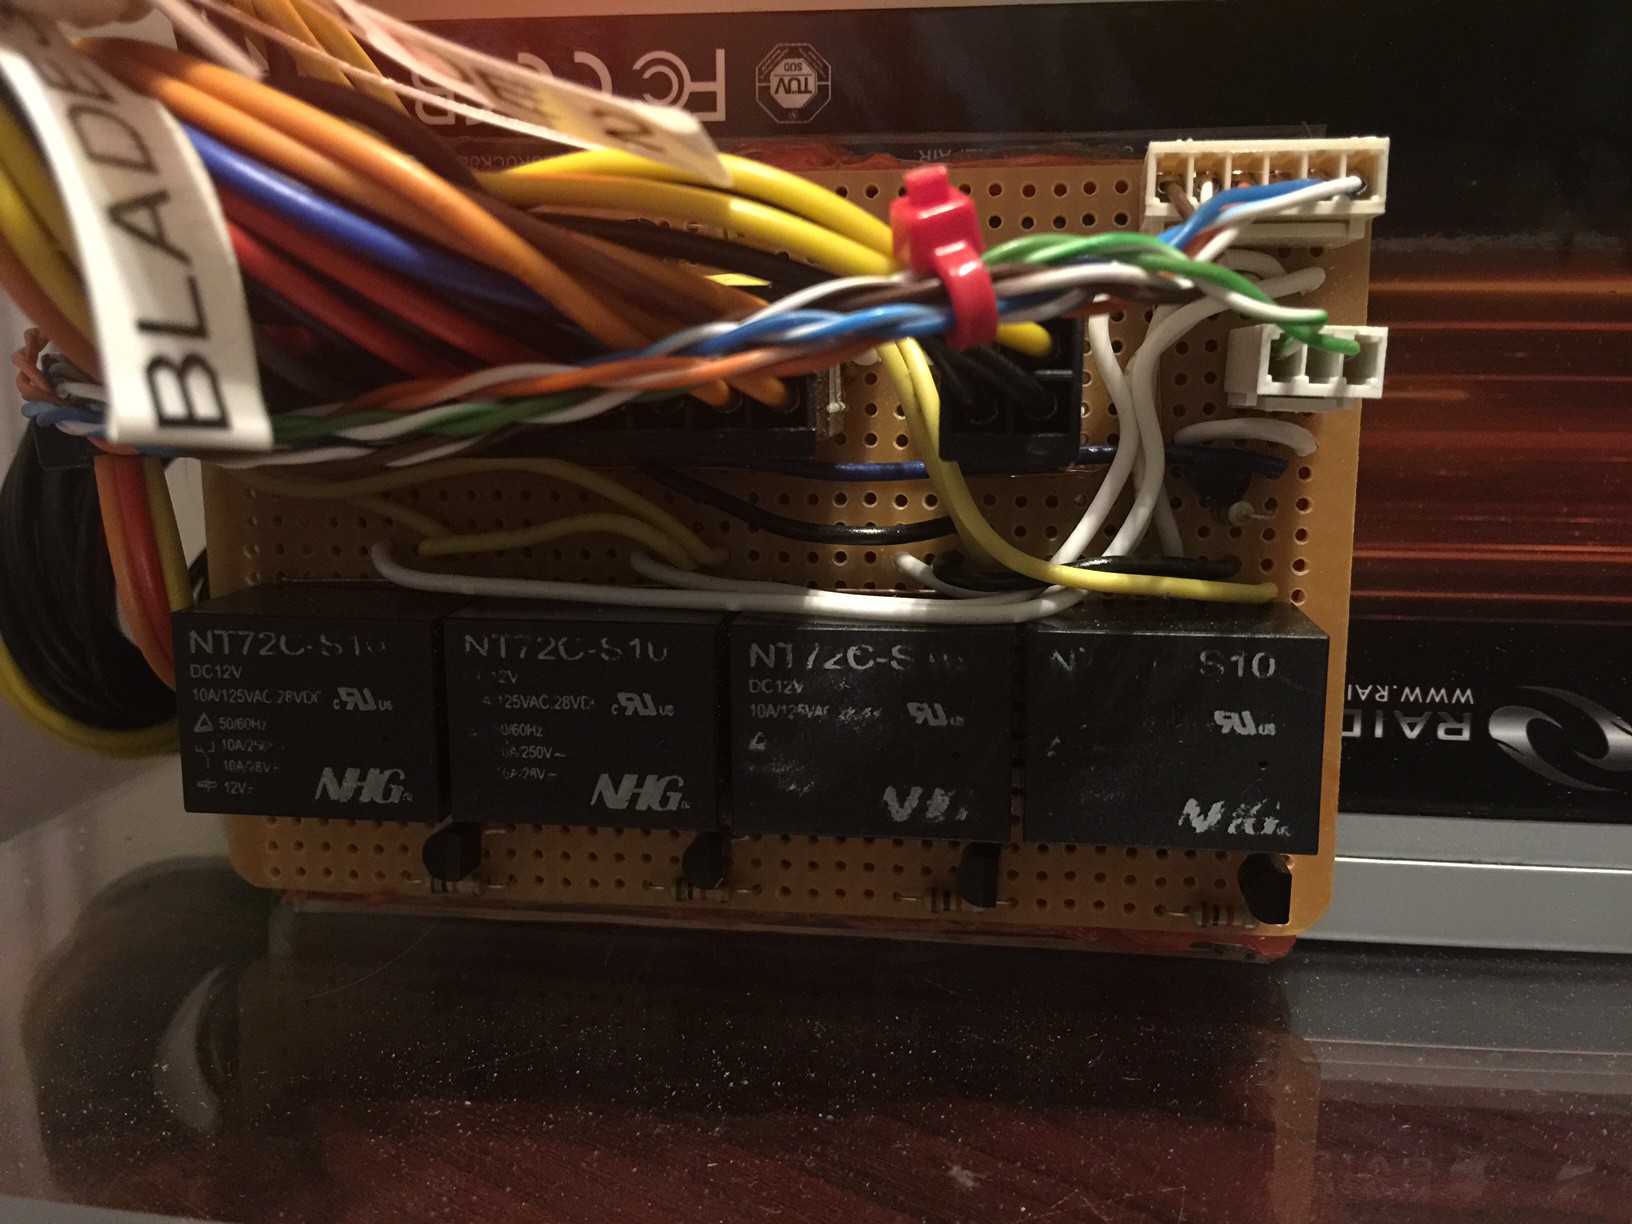
    The gist of the functionality lies in implementing the ATX standard, which is simply dropping the PS ON (green wire) to ground, and then waiting for Power Good (grey) to go high. If you actually care about your Raspberry Pi then it would be a good idea to isolate those signals with optocouplers rather than transistors. The 5V standby line on my power supply provides more than enough power for the Raspberry Pi. I also went for 12V relays because I had a bunch of those lying around but using 5V relays would also work just be sure to connect them to the 5V supply obviously (not the standby supply).

    I had a bit of a difficult time locating new ATX PCB connectors somewhere quick and local, except RS who rip us off in developing countries. Molex call these things 24 pin Mini-Fit Jr connectors, but I also made use of the extended 12V supply to ensure a better current rating to my nodes. In the end I desoldered the connectors from an old water damaged motherboard I had in my junk pile.

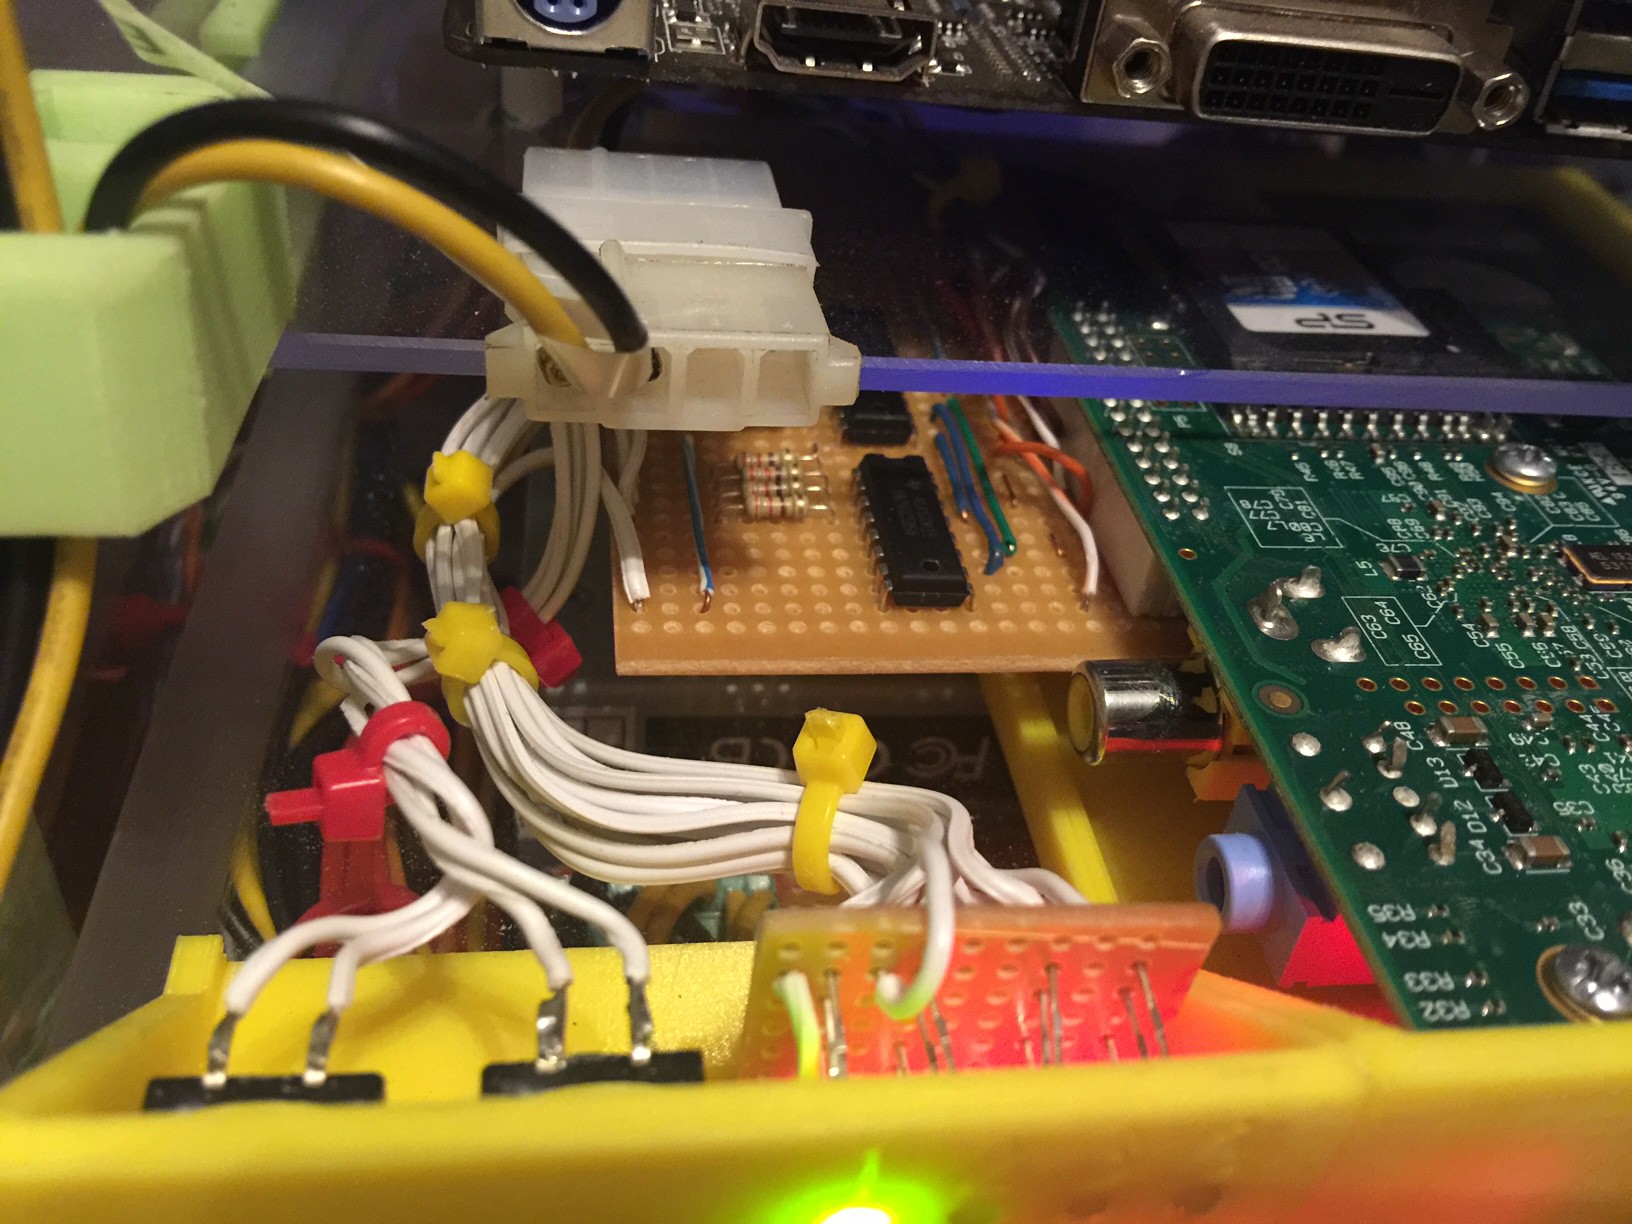
    I wired up the schematic using some cheap and easy strip board because I'm bad at laying out PCB's and wanted to see if it worked first. I also split the controller into two parts, with one board handling the status LEDs and buttons and another handling the power supply. The two are connected using some CAT5 cable and SIL connectors.


  • Management module

    Colin Alston03/06/2017 at 09:13 0 comments

    The cluster is controlled by a Raspberry Pi B+ that I had sitting in my drawer because I blew the serial UART on it working on another project, but the other GPIO's on it still worked so it seemed perfect. I decided to make the Raspberry Pi handle switching power to the nodes and providing a DHCP server. I was going to use it as a TFTP boot server too but in the end I just elected node-1 as a master with some 2.5" disks attached to it because that was already going to serve as NFS storage for the rest of the cluster.

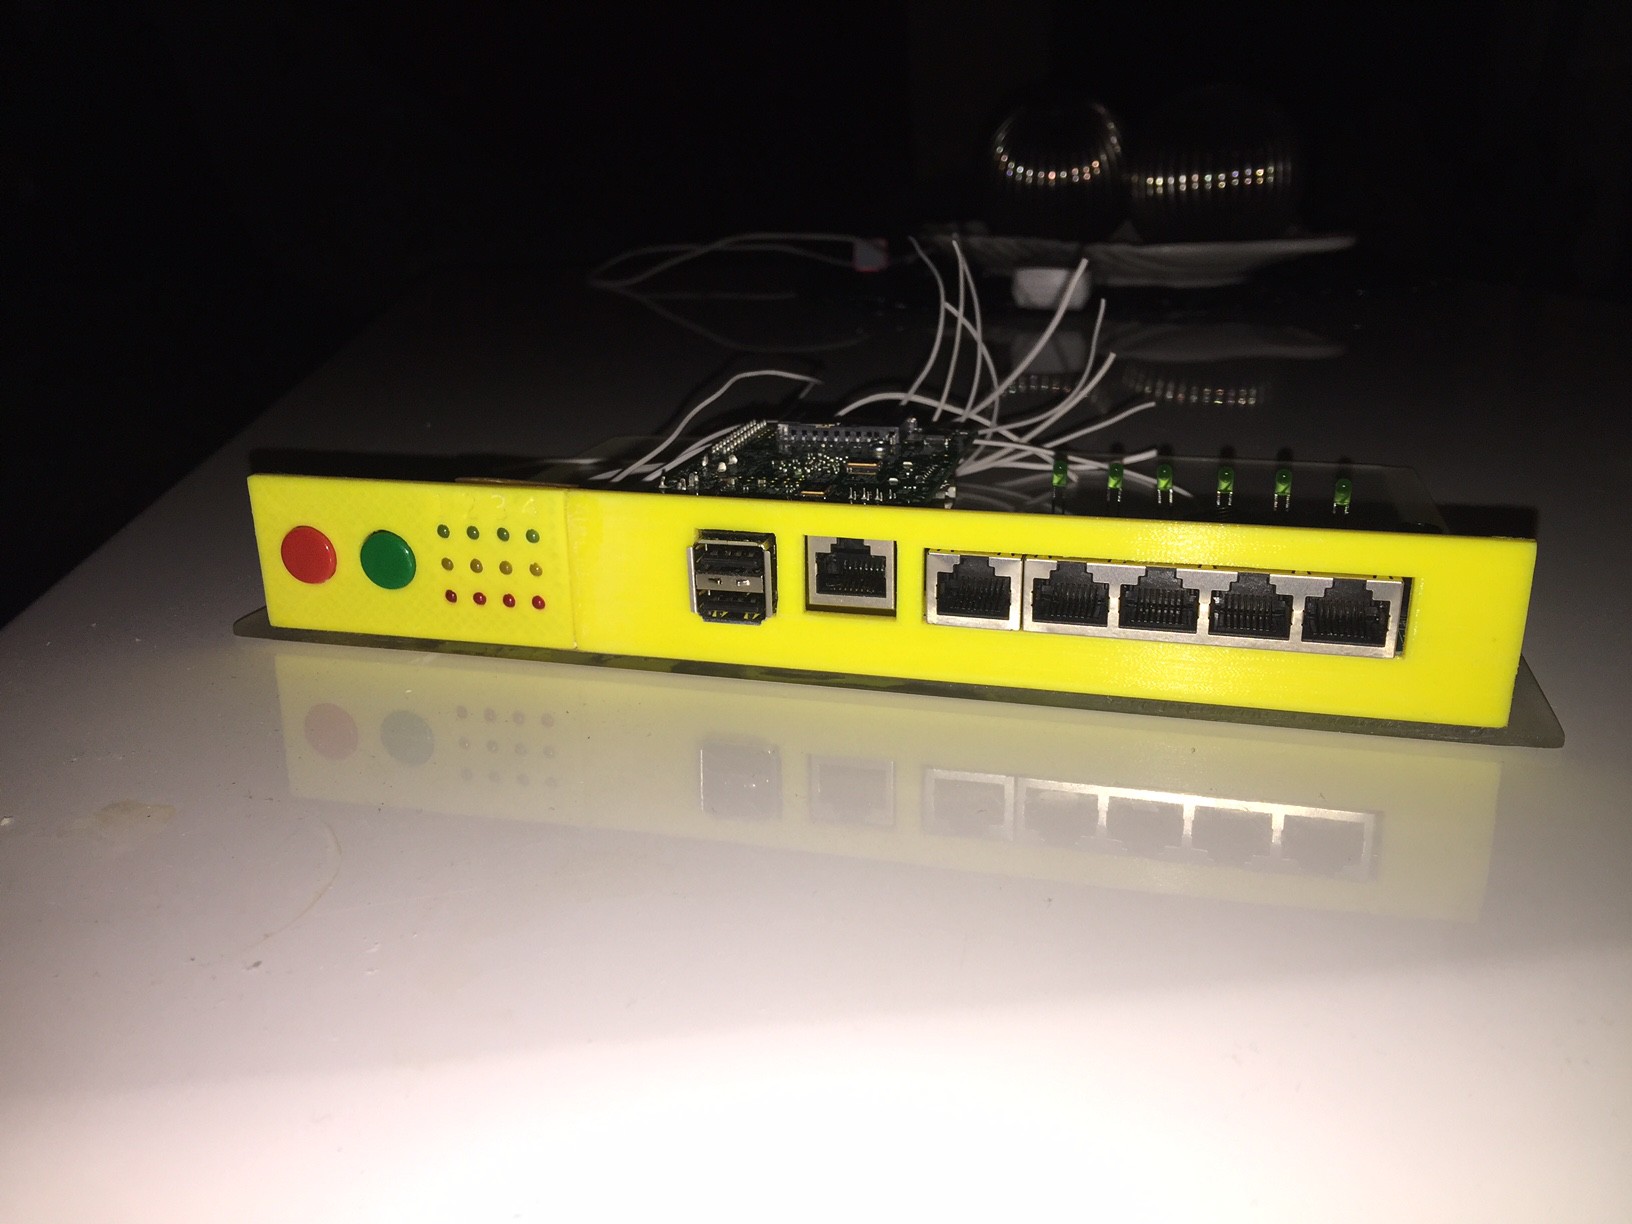
    The switch is just a cheap 5 port TP-Link gigabit switch that I picked up at my local computer store. I ripped its case off and designed a simple L shaped front panel that was 3D printed. Sadly I ran out of green filament so I used yellow as the next closest thing, but in the end the whole thing started to look like a bit of a clown costume.

    The LED's are hooked up to two 74HC595 shift registers on a daughter board that connects to the Raspberry Pi GPIO header. Next the fun begins of wiring up the 12 LED anodes. I'll post some schematics of the control board and the ATX module soon.

  • Assembling the nodes

    Colin Alston03/06/2017 at 08:56 0 comments

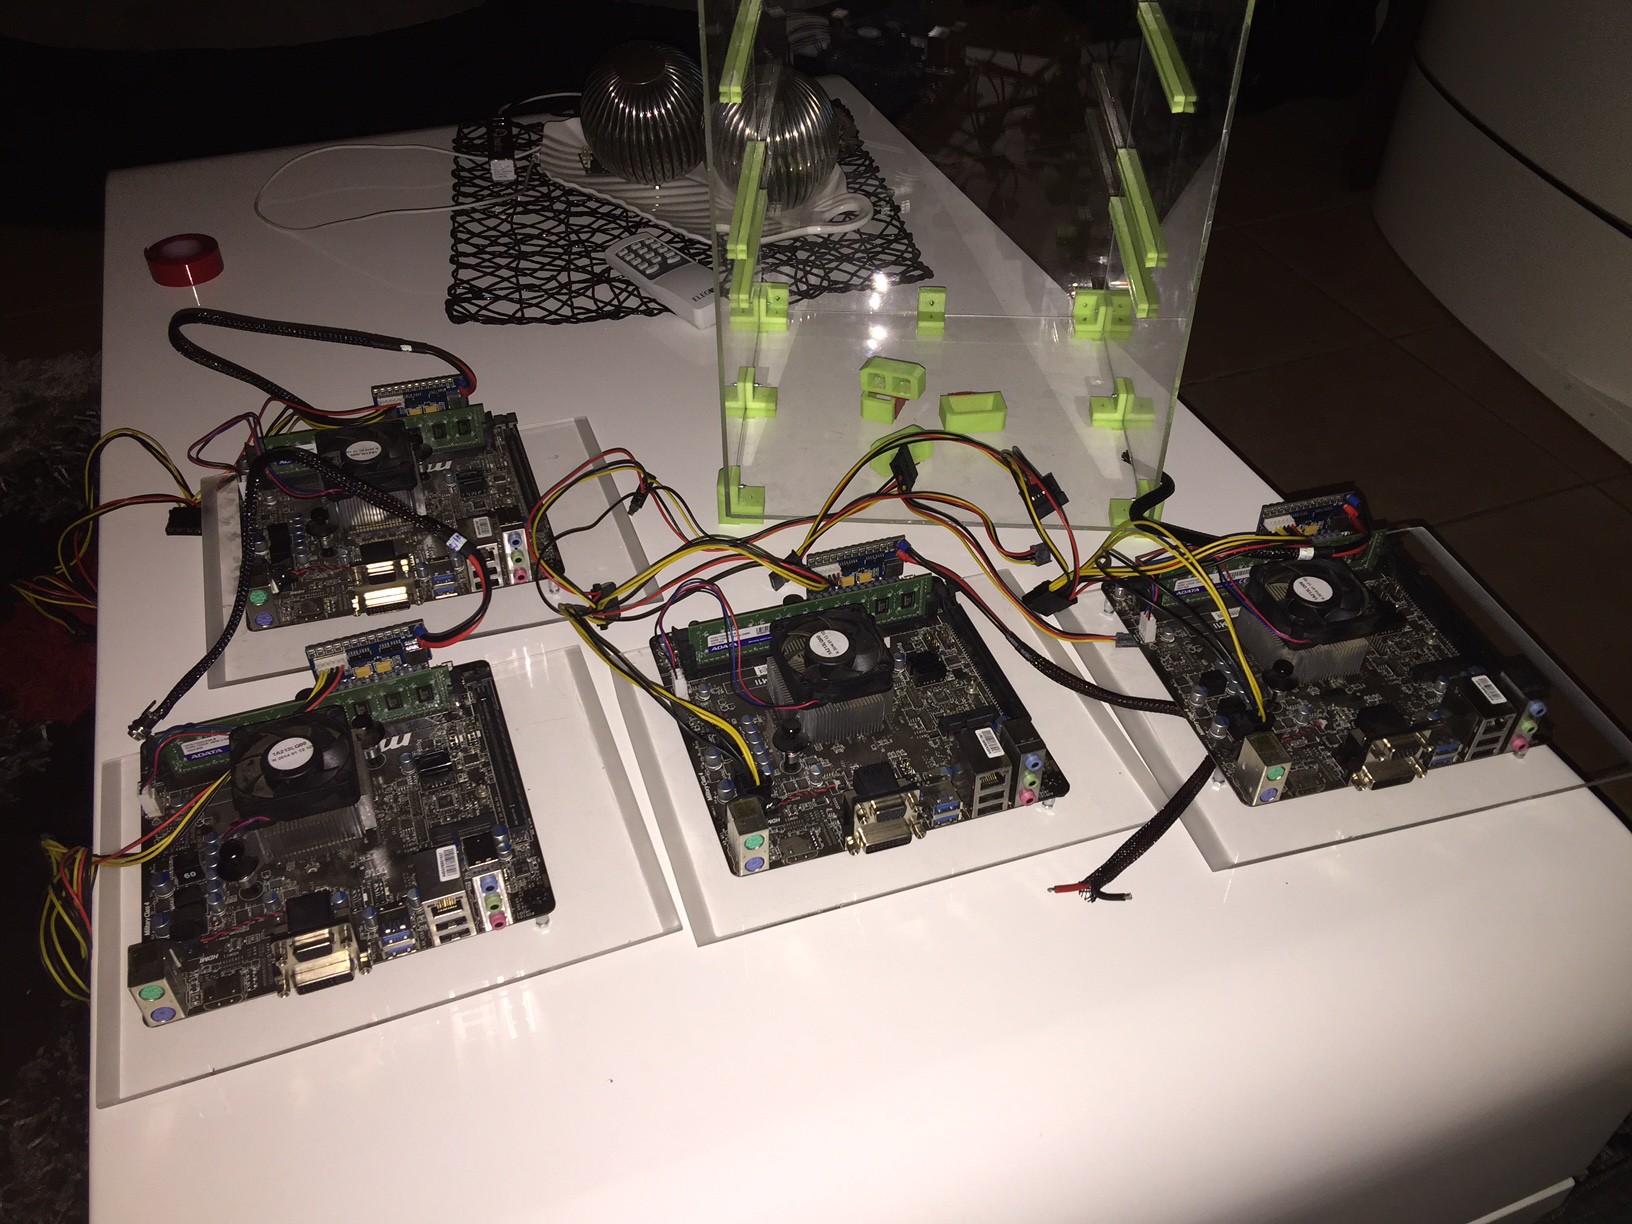
    The idea for trays was fairly good but proved slightly frustrating because acrylic doesn't slide so well against the PLA printed slots. I tried sanding out the slots to make them larger which helped a lot but was incredibly time consuming. In the end I just sanded down a 10mm wide strip on each of the acrylic trays. This worked great and also makes it a lot easier to see what you're doing when you fit them in.

    With some holes drilled in the trays the boards were mounted on nylon spacers and fitted with some 200W knock-off PicoPSU modules.

    Let the wiring begin... I needed a simple way to connect power to the tray a) without being ugly and b) able to handle the current draw from the boards. Fortunately these are very low power boards, a test run with the PicoPSU on my lab power supply showed it drawing about 1.5Amps at load from 12V, which is easily handled by a single ATX power supply with a decent rating.

    How to actually manage that power for the nodes is a story for a later time...

  • Building the box

    Colin Alston03/06/2017 at 08:48 0 comments

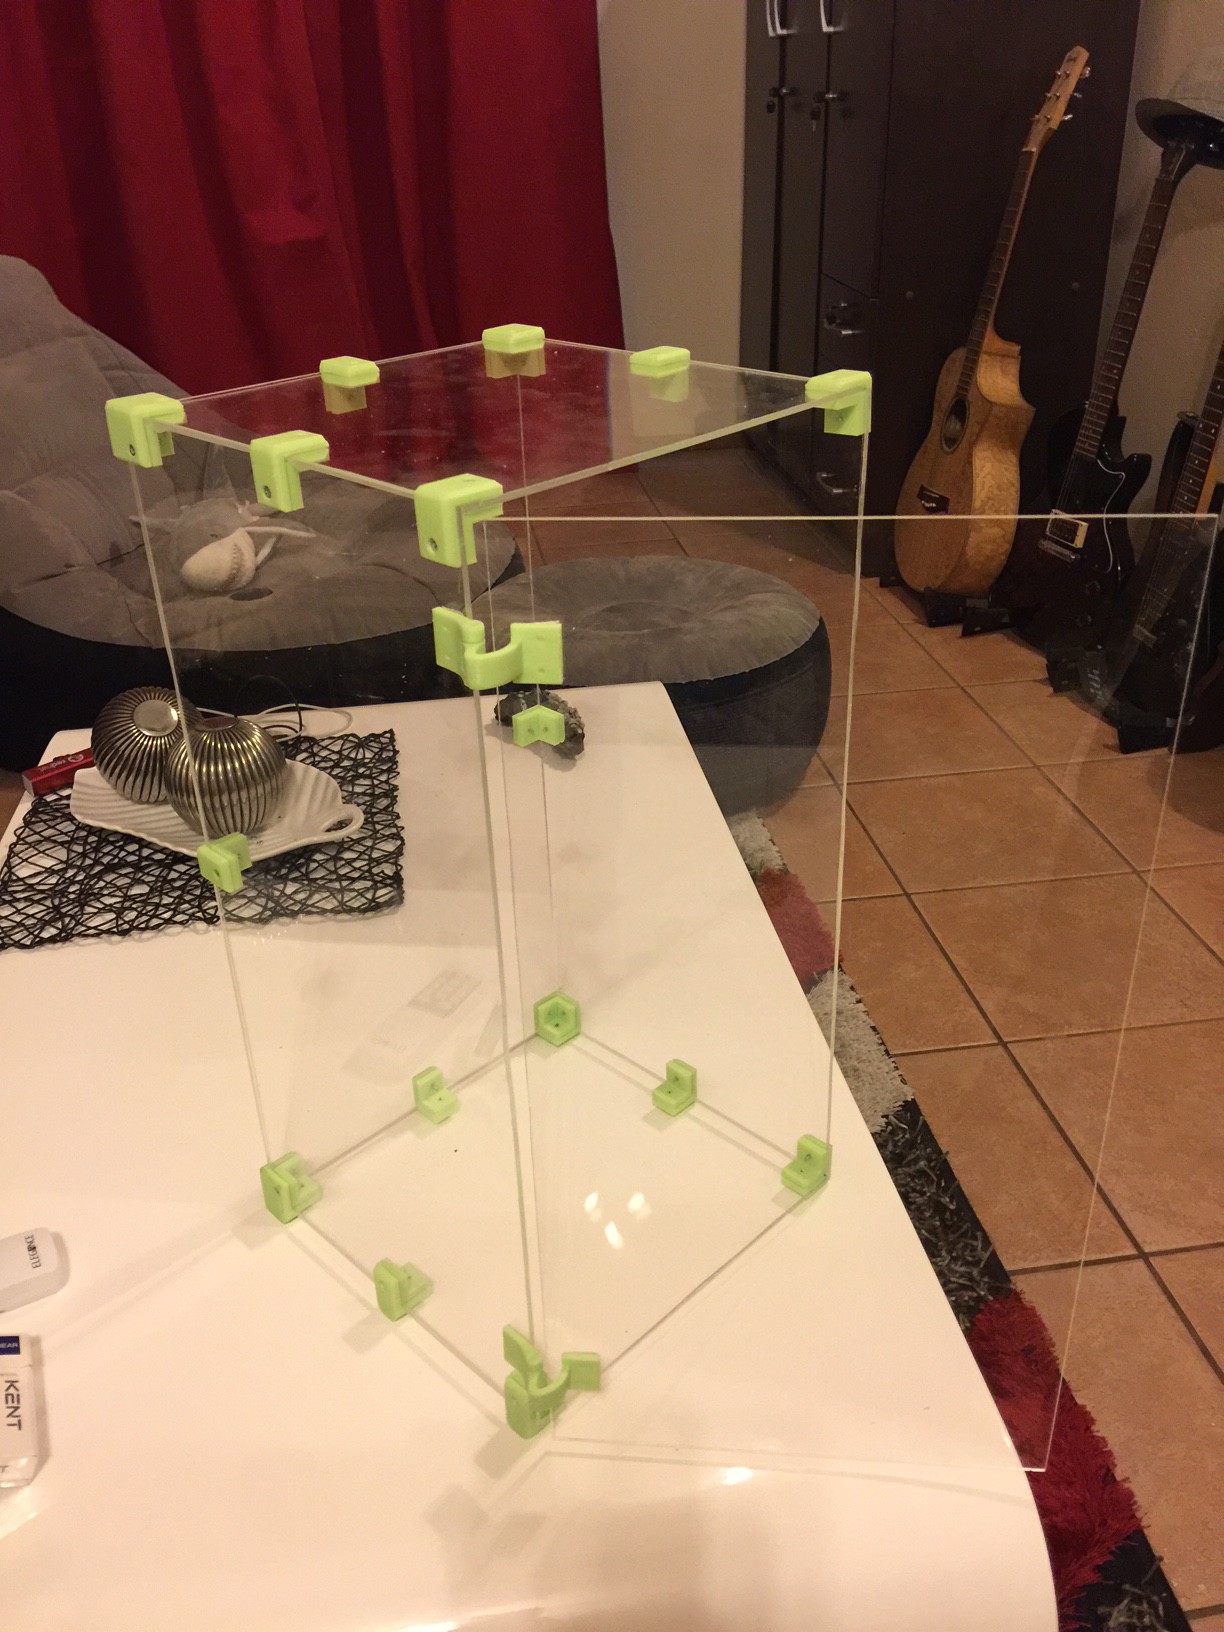
    I figured the easiest way to get started was to build a box using acrylic panels which are connected with corner pieces I could 3D print. This was a fairly easy process. I cut some acrylic into the sides of a 250x500mm box, put together a design in Sketchup and then drilled and screwed it all together. The hinges come from a design I found on Thingiverse by DarkDragonWing which I scaled up to double the size. The nice thing about this hinge design is that the door can close flat against the front instead of needing a gap at the hinge side to clear the axis it rotates on, and the curved shape looks pretty nice in my opinion.

    This actually turned out so well I wanted to cancel the whole idea and keep the display case for my lounge, but I kept going.

    The idea from here is to have tray slots in the sides that a simple flat piece of acrylic can slide into making sure to leave a bit of clearance for cables on the sides and still have some airflow. I didn't really consider airflow and connections at this point because that can be addressed later.

View all 10 project logs

Enjoy this project?

Share

Discussions

maxwell.meyers wrote 11/14/2019 at 21:10 point

Any information on getting one power supply to power multiple ITX motherboards?

  Are you sure? yes | no

Vixepti wrote 03/15/2017 at 22:13 point

Really nice work ! 

  Are you sure? yes | no

Similar Projects

Does this project spark your interest?

Become a member to follow this project and never miss any updates