 Rohan Barnwal
Gesture and Voice-Controlled Home Automation System
Introduction
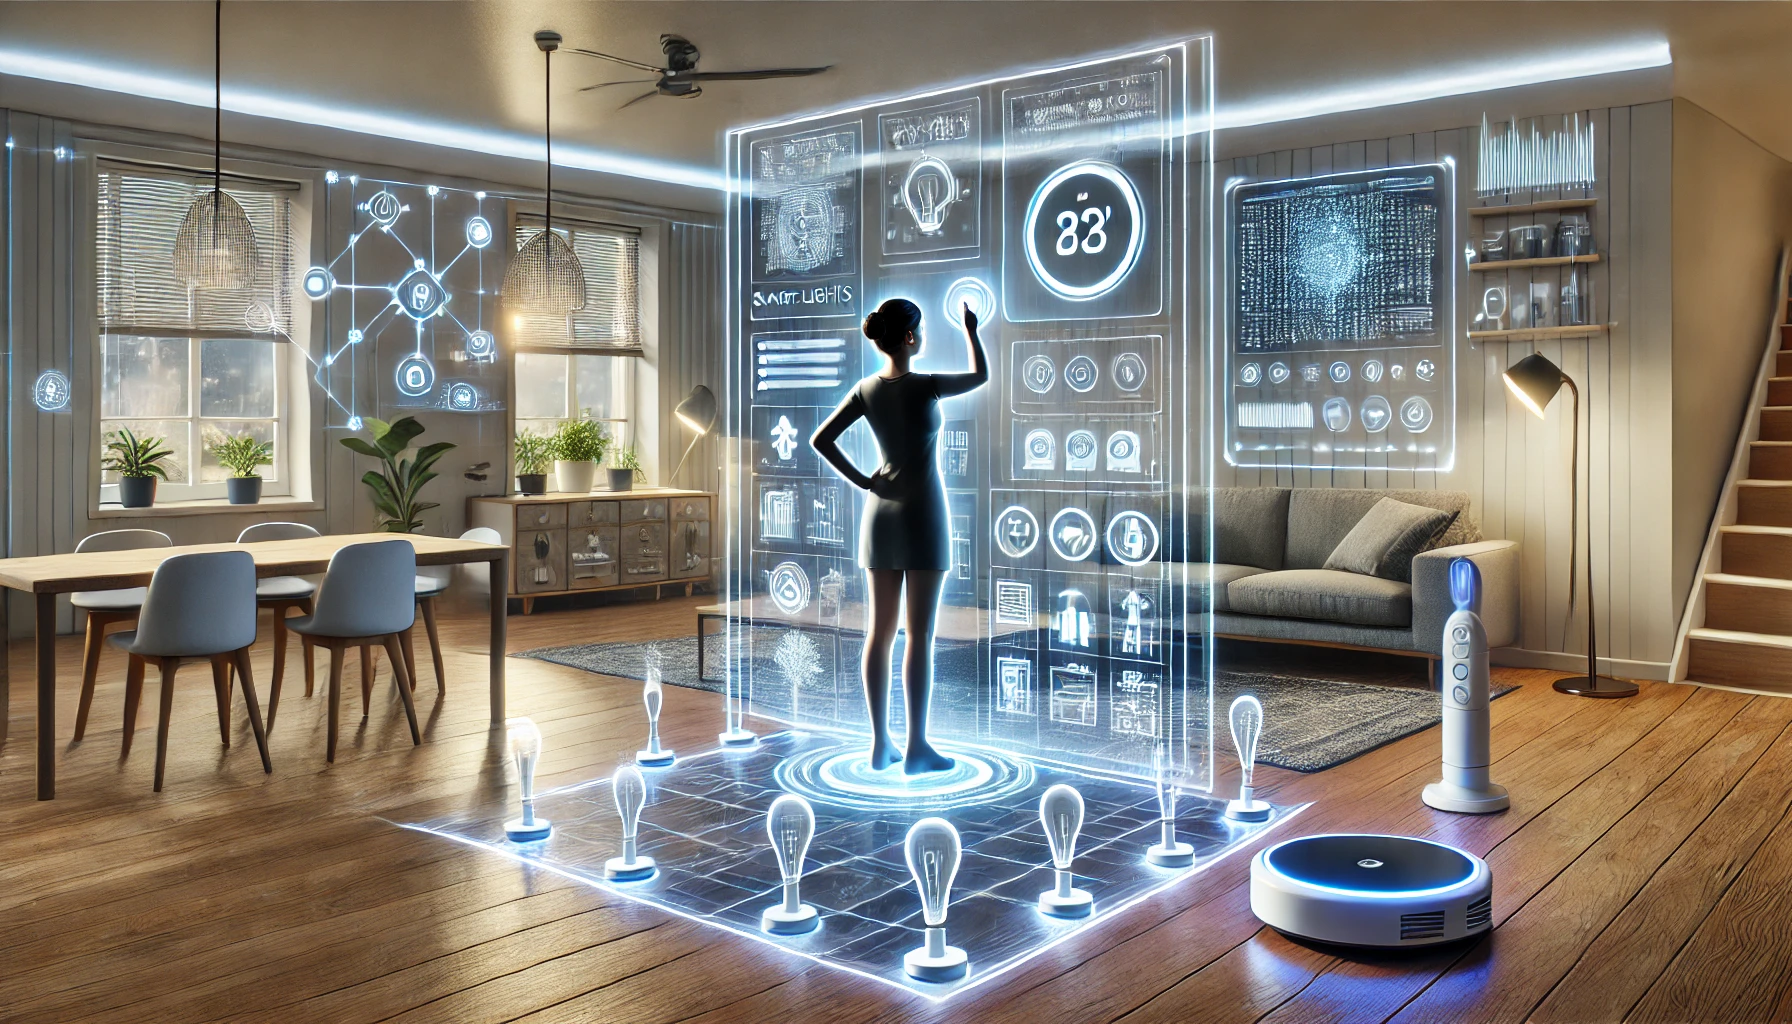
Welcome to a project that redefines the way the defines the way we interact with home automation Using the power of DFRobot Gravity GR10-30 Gesture Sensor and DFRobot Gravity Offline Language Learning Voice Recognition Sensor, this system offers an intuitive and futuristic way to control appliances. This project combines two cutting-edge technologies from DFRobot a trusted name in the open source hardware community.
What Makes This Project Unique?
This isn't your regular home automation project. it's powered by advanced DFRobot Gravity GR10-30 Gesture Sensor with 12 distinct gestures and DFRobot Gravity Offline Language Learning Voice Recognition Sensor all offline, it's privacy-focused, fast, and reliable-perfect for smart homes of the future.
Story Behind the Project
The idea for this project was born from a desire to create something truly futuristic-a system that feels like it's straight out of a sci-fi movie. Imagine walking into the a room, swiping your hands to control lights, or saying a command to turn on appliances, all without touching a switch!
Challenges and Learning

Building this wasn't easy. Integrating multiple sensors, ensuring the real-time responsiveness, and achieving seamless operations, prototyping, and countless hours of coding. However, the journey was worth it, resulting in a project that's not only functional but also truly innovative. The DFRobot sensors played a significant role in simplifying this process. Their ability to switch seamlessly between I2C and UART communication made with integration much easier and more efficient.
DFRobot: Providing This Innovation

DFRobot is a leading innovator in open source hardware, offering a wide range of high quality sensors, controllers, and modules. Their products are known for their user friendliness, reliability and comprehensive documentation, making them a favorite among the developers and hobbyists alike

The Gravity series is DFRobot's flagship line of of plug-and-play modules, designed for ease of use. These modules come with Product Wiki, Extensive Compatibility and Robust Design
The Boson Series by DFRobot is a modular, plug and play system of over 50 electronic building blocks designed for creators, educators, and hobbyists. It simplifies prototyping with color-coded, solder free modules like sensors, actuators, and logic controls. It is Ideal for STEAM education and DIY Projects. its user friendly design, robust safety features, and detailed wikis make it perfect for beginners and professional alike, enabling quick and hassle free project development.
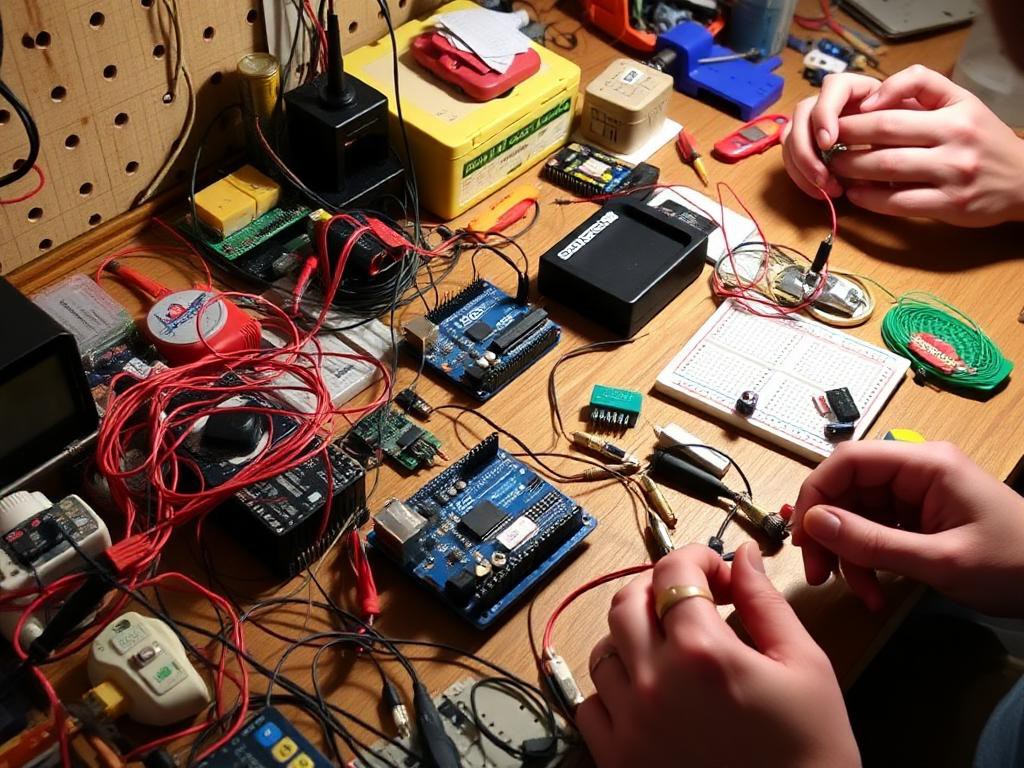
Components Used in This Project
1. Gravity: GR10-30 Gesture Sensor
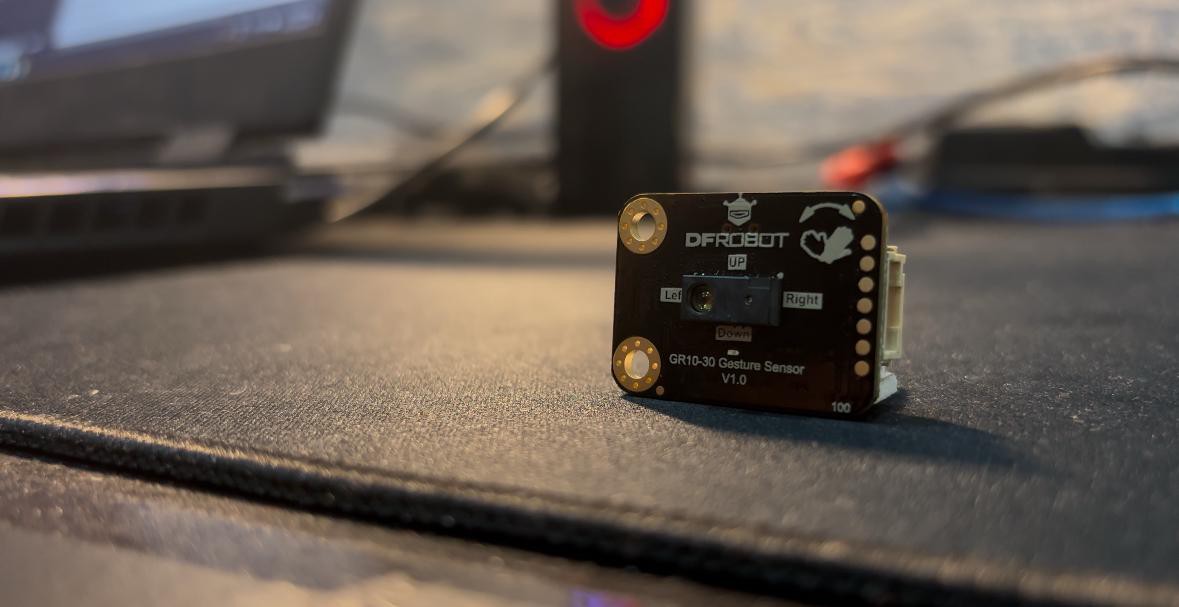
- Recognizes up to 12 gestures.
- Supports both UART and I2C communications.
- Adjustable recognition distance up to 30cm.
- Ideal for gesture-based control in smart devices.
- ProductWiki for more information
2. Gravity: Voice Recognition Module
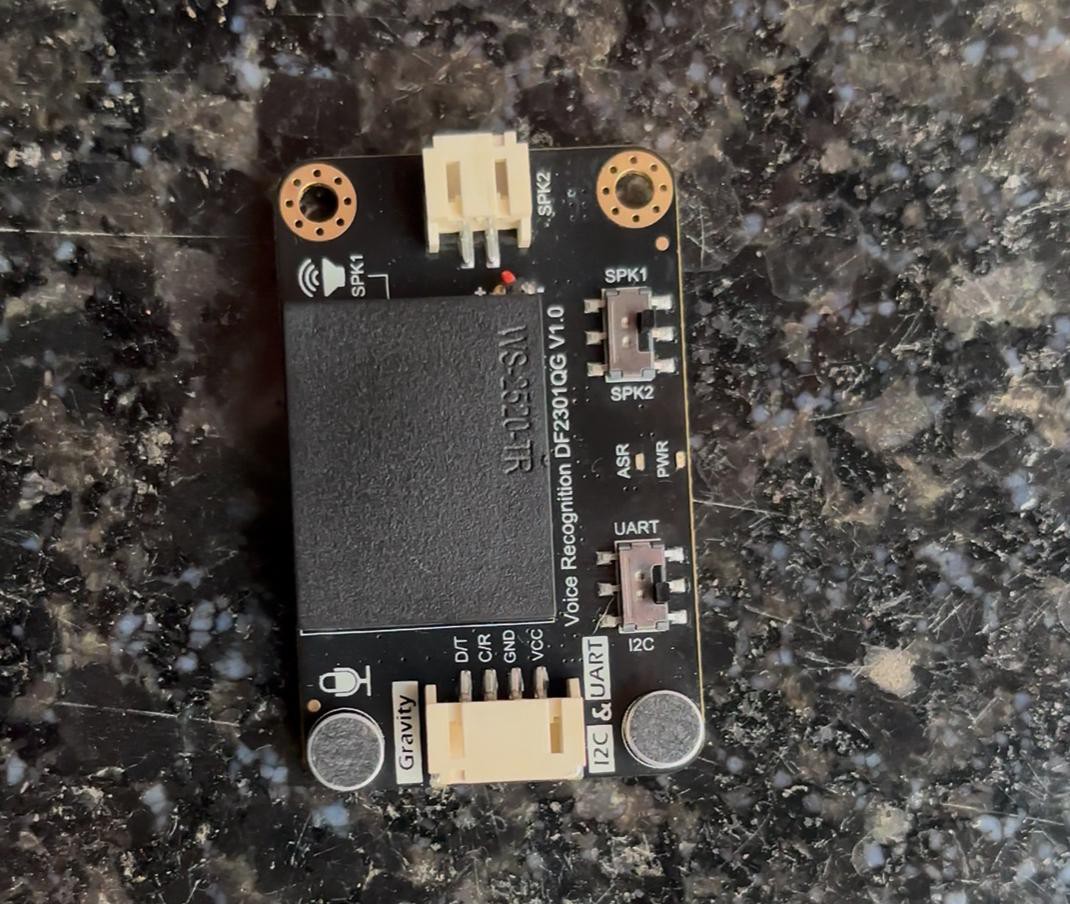
- Offline voice recognition with 121 pre-programmed commands.
- Supports 17 custom command words and custom wake words.
- Compatible with Arduino, micro:bit, and ESP32.
- Provides instant voice feedback and operates without a network.
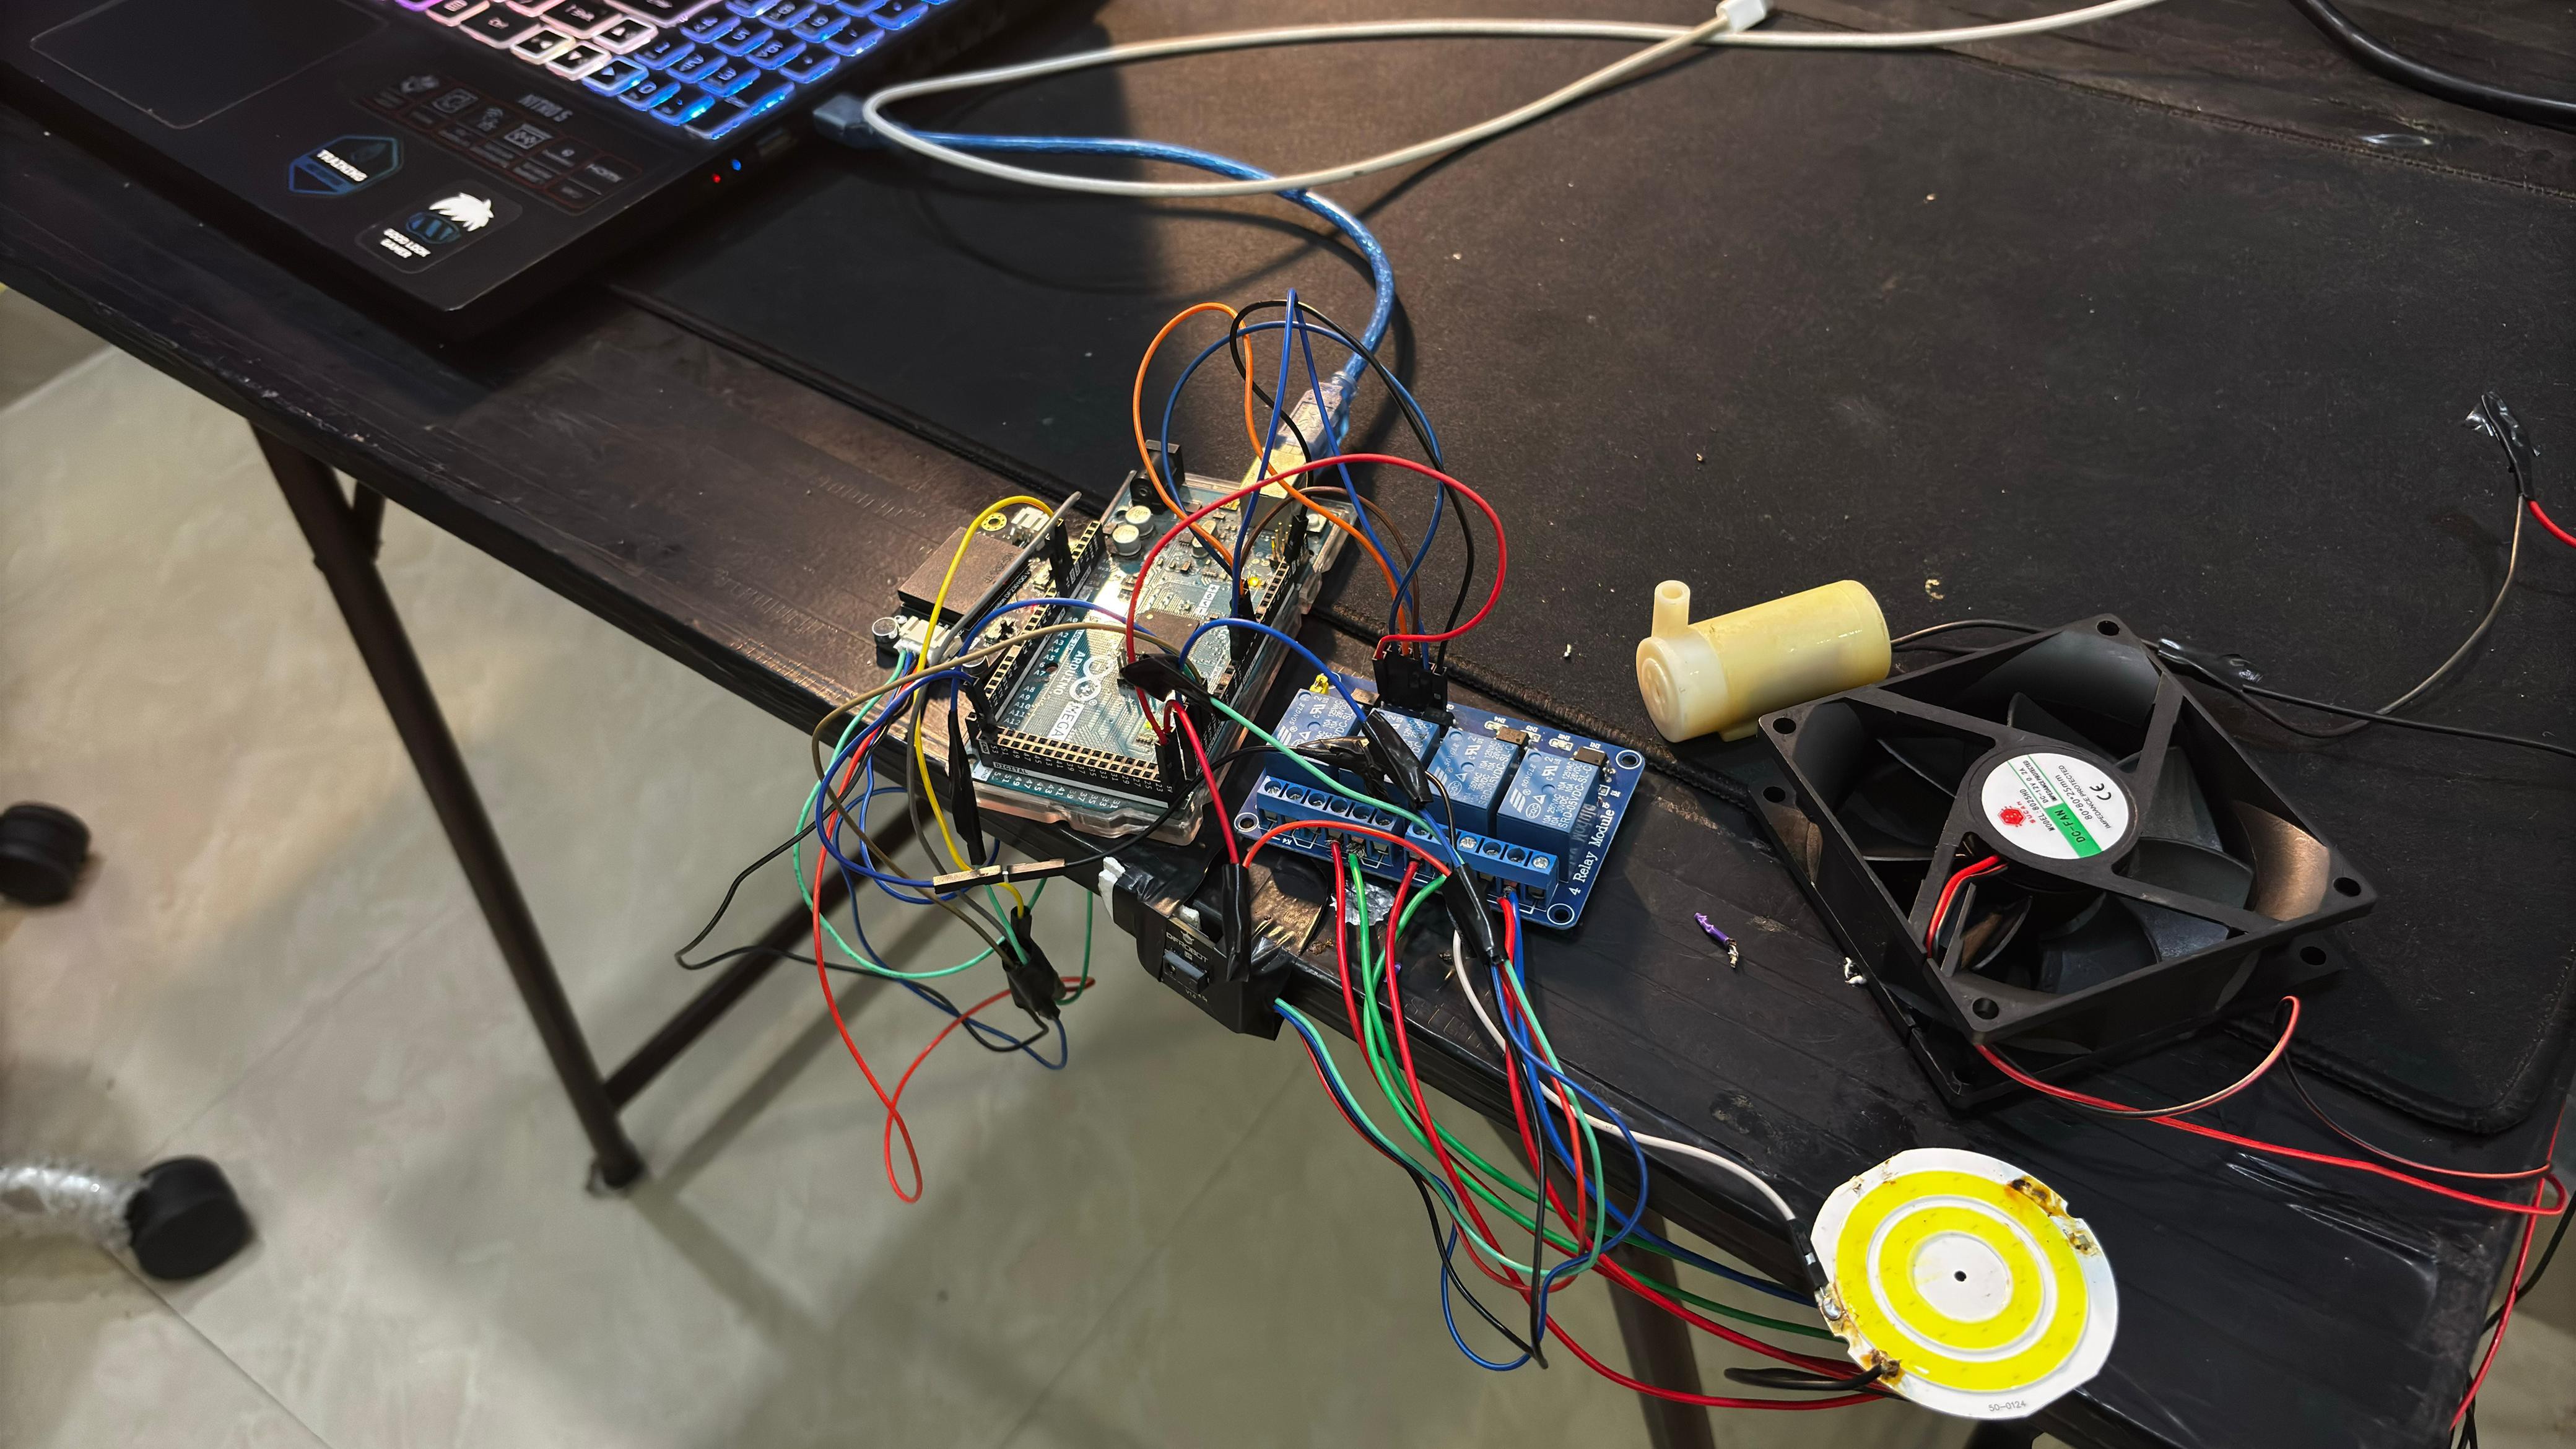
3. Arduino Mega 2560
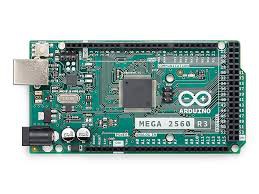
- High-performance microcontroller with multiple I/O pins.
- Ensures seamless integration of multiple sensors.
- Reliable for real-time data processing and control.
4. 4-Channel Relay Module
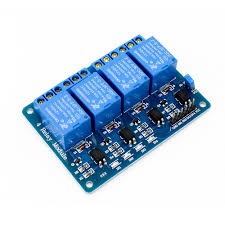
- Enables the control of high-power devices like lights and fans.
- Compatible with lower-power microcontroller outputs.
- Provides isolation for safe operation.
5. Connecting Cables & Power Supply

- Used to connect sensor and modules.
- Provides stable and efficient power to the entire system.
Features of the Project
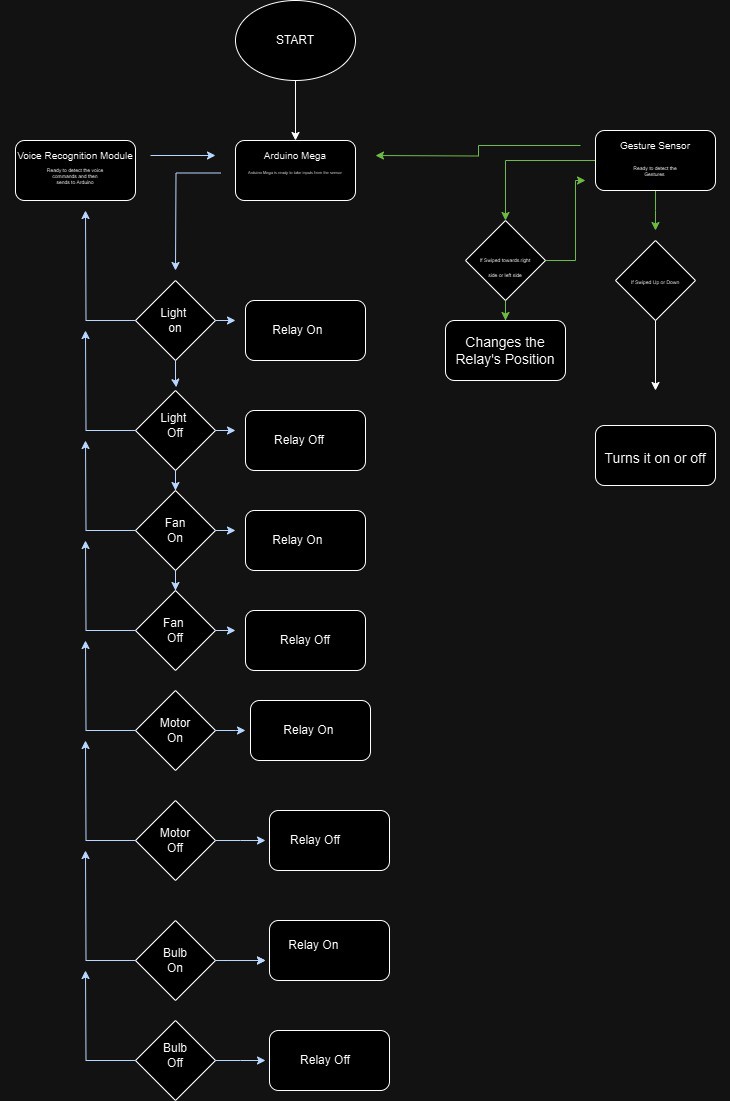
Gesture Control:
- Swipe right: Change the position of the relay from 1 to 2 to 3 to 4.
- Swipe left: Change the position of the relay from 4 to 3 to 2 to 1
- Swipe Up/Down: Turns the selected relay ON or OFF.
Voice Recognition:
- Pre-programmed and custom commands for precise control.
- Offline functionality for enhanced privacy.
- Self-learning capabilities to add unique wake word and commands
Setting Custom Wake ID
1. Use the default wake-up word to activate the assistant.
2. Say the phrase: "Learning wake word" to begin.
3. Follow the prompts:
- You'll be asked to repeat the desired wake word (e.g., "Hello, there") three times for learning.
- Ensures a quiet environment for accurate learning.
4. You can now use this wake-up word to activate the assistant.
| S.no | Wake-up Words | ID |
| 1 | Wake-up words for learning | 1 |
| 2 | Hello Robot | 2 |
Setting Custom Command IDs
1. Activate the assistant using the wake-up word (default or customized).
2. Say: "Learning command word" to initiate the process.
3. Follow the prompts:
- For each command, say the phrase you want to learn (e.g., "Turn on light") three times.
- Repeat the process for additional commands.
4. After completing the process, a unique ID will be assigned to each learned command.
- For example: "Turn on light" may be assigned ID 5, "Turn off light" ID 6.
Deleting Wake and Command Words
1. Activate the assistant with the wake-up word.2. Say "I want to delete" and follow the prompts to:
- Delete a specific wake word or command phrase
- Delete all learned wake words and commands if necessary
Using the Command IDs
- Once learned, use the command IDs in your code to trigger specific actions
- Refer to the documentation or library for mapping the IDs to actions in your project.
By following these steps you can fully customize the voice assistant to meet your specific needs and enhance your project's functionality. For more Information Check this Out ProductWiKi
Connections
Wiring Diagram:
| Gesture Sensor | Arduino Mega 2560 |
| SDA | SDA |
| SCL | SCL |
| GND | GND |
| VCC | VCC |
| Voice Recognition | Arduino Mega 2560 |
| RX | 18 TX |
| TX | 19 RX |
| GND | GND |
| VCC | VCC |
| 4 CHANNEL RELAY | ARDUINO MEGA 2560 |
| IN 1 | 2 |
| IN 2 | 3 |
| IN 3 | 4 |
| IN 4 | 5 |
| VCC | VCC |
| GND | GND |
Code
Required Libraries:
Download the libraries from the above links before uploading the code
#include "DFRobot_GR10_30.h"
#include "DFRobot_DF2301Q.h"
#if defined(ARDUINO_AVR_UNO) || defined(ESP8266)
#include <SoftwareSerial.h>
#endif
const int relayPins[] = {2, 3, 4, 5}; // Relay pins for relays 1, 2, 3, and 4
int relayStates[] = {0, 0, 0, 0};     // Array to track states of all relays (0 = OFF, 1 = ON)
// Gesture Sensor Initialization
#if defined(ARDUINO_AVR_UNO)||defined(ESP8266)
SoftwareSerial softSerialGesture(/*rx =*/4, /*tx =*/5);
DFRobot_GR10_30 gr10_30(/*addr = */GR10_30_DEVICE_ADDR, /*pWire = */&Wire);
#else
DFRobot_GR10_30 gr10_30(/*addr = */GR10_30_DEVICE_ADDR, /*pWire = */&Wire);
#endif
// Voice Recognition Module Initialization
#if (defined(ARDUINO_AVR_UNO) || defined(ESP8266))
SoftwareSerial softSerialVoice(/*rx =*/6, /*tx =*/7);
DFRobot_DF2301Q_UART asr(/*softSerial =*/&softSerialVoice);
#elif defined(ESP32)
DFRobot_DF2301Q_UART asr(/*hardSerial =*/&Serial1, /*rx =*/D3, /*tx =*/D2);
#else
DFRobot_DF2301Q_UART asr(/*hardSerial =*/&Serial1);
#endif
int S = 1; // Variable for relay selection, initial value 1
int W = 0; // Variable for ON/OFF control, initial value 0
void setup() {
Serial.begin(115200);
for (int i = 0; i < 4; i++) {
pinMode(relayPins[i], OUTPUT);
digitalWrite(relayPins[i], HIGH); // Turn all relays off initially (default state)
}
// Gesture Sensor Initialization
while (gr10_30.begin() != 0) {
Serial.println("Gesture Sensor initialize failed!!");
delay(1000);
}
Serial.println("Gesture Sensor initialize success!!");
gr10_30.enGestures(GESTURE_UP | GESTURE_DOWN | GESTURE_LEFT | GESTURE_RIGHT);
// Voice Recognition Module Initialization
while (!(asr.begin())) {
Serial.println("Voice Recognition Module initialize failed!!");
delay(3000);
}
Serial.println("Voice Recognition Module initialize success!!");
asr.settingCMD(DF2301Q_UART_MSG_CMD_SET_MUTE, 0);
asr.settingCMD(DF2301Q_UART_MSG_CMD_SET_VOLUME, 7); // Set volume to 7
asr.settingCMD(DF2301Q_UART_MSG_CMD_SET_WAKE_TIME, 20);
}
void loop() {
// Gesture Handling
if (gr10_30.getDataReady()) {
uint16_t gestures = gr10_30.getGesturesState();
if (gestures & GESTURE_RIGHT) {
S++;
if (S > 4) S = 1; // Reset S to 1 if it exceeds 4
Serial.print("Relay selected: ");
Serial.println(S);
}
if (gestures & GESTURE_LEFT) {
S--;
if (S < 1) S = 4; // Reset S to 4 if it goes below 1
Serial.print("Relay selected: ");
Serial.println(S);
}
if (gestures & GESTURE_UP) {
W = 1; // Turn ON the relay corresponding to S
relayStates[S - 1] = 1;
Serial.print("Relay ");
Serial.print(S);
Serial.println(" ON");
}
if (gestures & GESTURE_DOWN) {
W = 0; // Turn OFF the relay corresponding to S
relayStates[S - 1] = 0;
Serial.print("Relay ");
Serial.print(S);
Serial.println(" OFF");
}
// Update the states of all relays
for (int i = 0; i < 4; i++) {
digitalWrite(relayPins[i], relayStates[i] ? LOW : HIGH);
}
}
// Voice Recognition Handling
uint8_t CMDID = asr.getCMDID();
switch (CMDID) {
case 5:
relayStates[0] = 1;
Serial.println("Relay 1 ON");
Serial.println(CMDID);
break;
case 6:
relayStates[0] = 0;
Serial.println("Relay 1 OFF");
Serial.println(CMDID);
break;
case 7:
relayStates[1] = 1;
Serial.println("Relay 2 ON");
Serial.println(CMDID);
break;
case 8:
relayStates[1] = 0;
Serial.println("Relay 2 OFF");
Serial.println(CMDID);
break;
case 9:
relayStates[2] = 1;
Serial.println("Relay 3 ON");
Serial.println(CMDID);
break;
case 10:
relayStates[2] = 0;
// Serial.println("Relay 3 OFF");
Serial.println(CMDID);
break;
case 11:
relayStates[3] = 1;
Serial.println("Relay 4 ON");
Serial.println(CMDID);
break;
case 12:
relayStates[3] = 0;
Serial.println("Relay 4 OFF");
Serial.println(CMDID);
break;
default:
if (CMDID != 0) {
Serial.print("Unknown CMDID: ");
Serial.println(CMDID);
}
}
// Update relay states for voice commands
for (int i = 0; i < 4; i++) {
digitalWrite(relayPins[i], relayStates[i] ? LOW : HIGH);
}
delay(300);
}
Demonstration
Check out this project in action ! Watch the video below to see how gestures and voice commands control the relays effortlessly
Conclusion
This home automation system system is a perfect blend of innovation and practically. It showcases the immense potential of DFRobot's Gravity series while setting a new bench for what smart home systems can achieve.
If you've never seen such a project before, now's the time to dive into the future of home automation