This is a smart sleep-assisting lamp that could (probably) improve your sleep and help you feel more refreshed in the morning.
Now, let me be clear, it won't magically make you feel better if you're sleep-deprived due to overworking or excessive TikToking. Think of this lamp as an enhanced alarm clock replacement that primarily does two things:
First, it gently wakes you, simulating the rising sun. When it's time to get up, the lamp gradually increases in brightness, transitioning from a warm orange to a bright white, mimicking a beautiful sunrise over a period of five to ten minutes.
The second part is even more intelligent. It actually calculates the optimal time for you to wake up, based on your desired wake-up time and your actual sleep time, and ensuring you're roused at the end of a sleep cycle.
Read on to learn more about the concept.
Theory
To understand how the lamp works, we need to understand the concept of sleep cycles.
When you fall asleep, you go through 4 main stages. Stage 1 is light sleep. This is the transition between wakefulness and sleep, lasting for about 5-10 minutes.
Then you go into a slightly deeper sleep. In this stage, your body temperature drops, and your heart rate and breathing become more regular.
Stage 3 is deep sleep. It’s harder to wake up during this stage, and if you do, you might feel disoriented.
Finally, you go into REM sleep, most vivid dreams occur during REM sleep. Your muscles are temporarily paralyzed to prevent you from actually getting up and running when you are running a marathon in your dream.
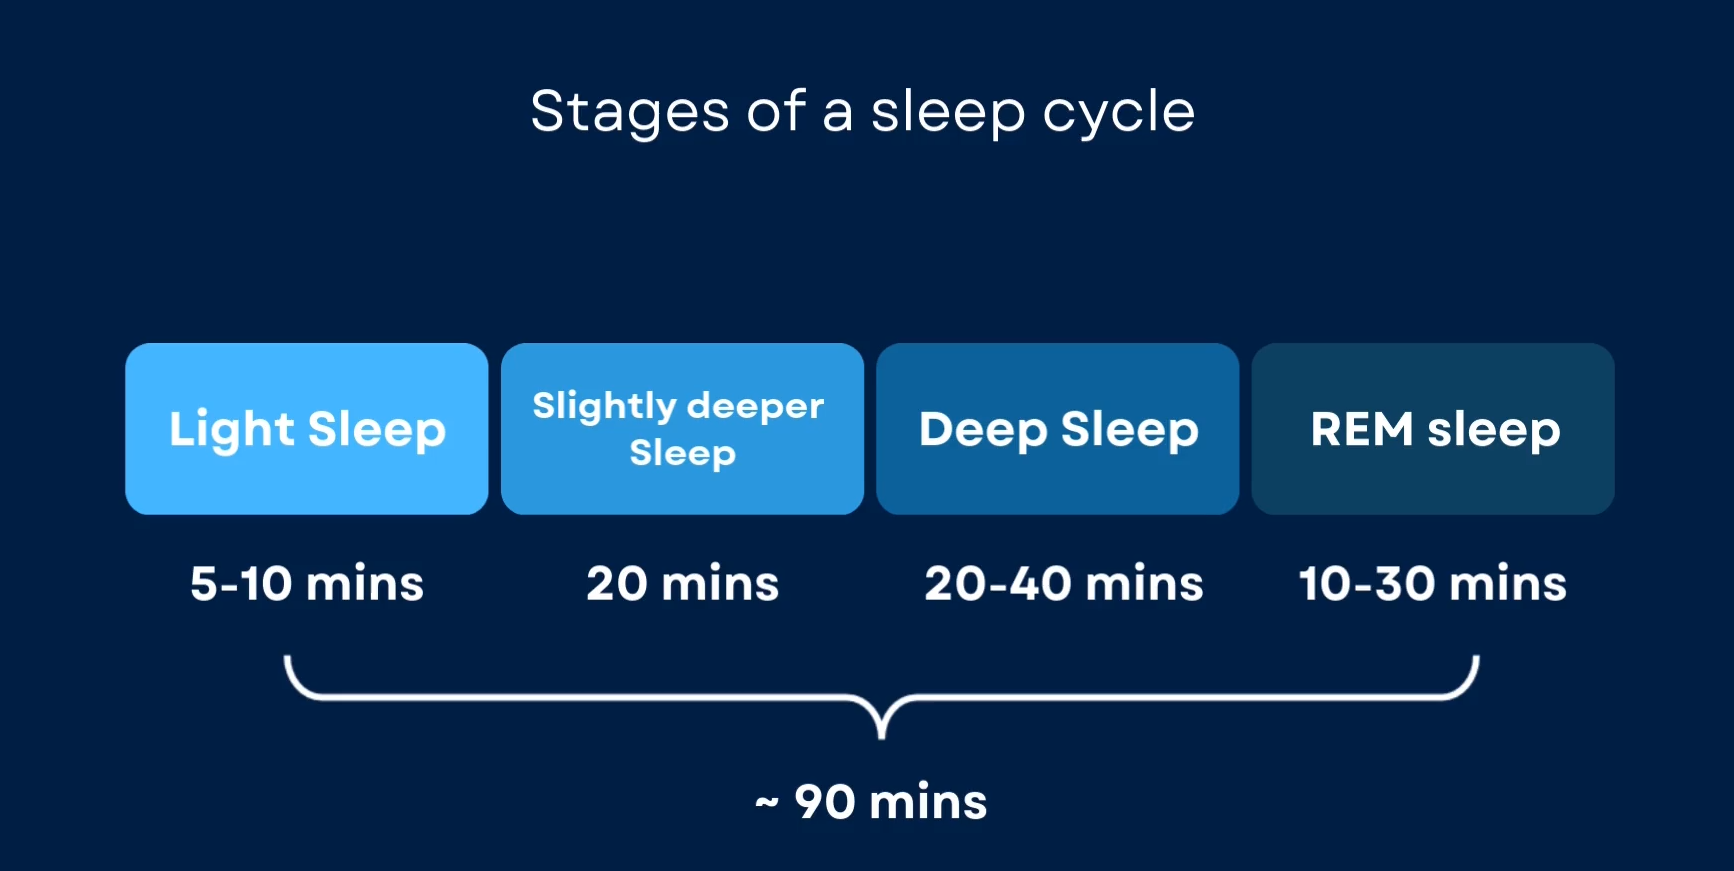
All these four stages make up one sleep cycle which lasts for about 90 minutes. And you experience several of these cycles during the night. While the duration may vary a bit from individual to individual, the average seems to be about 90 minutes based on several studies.
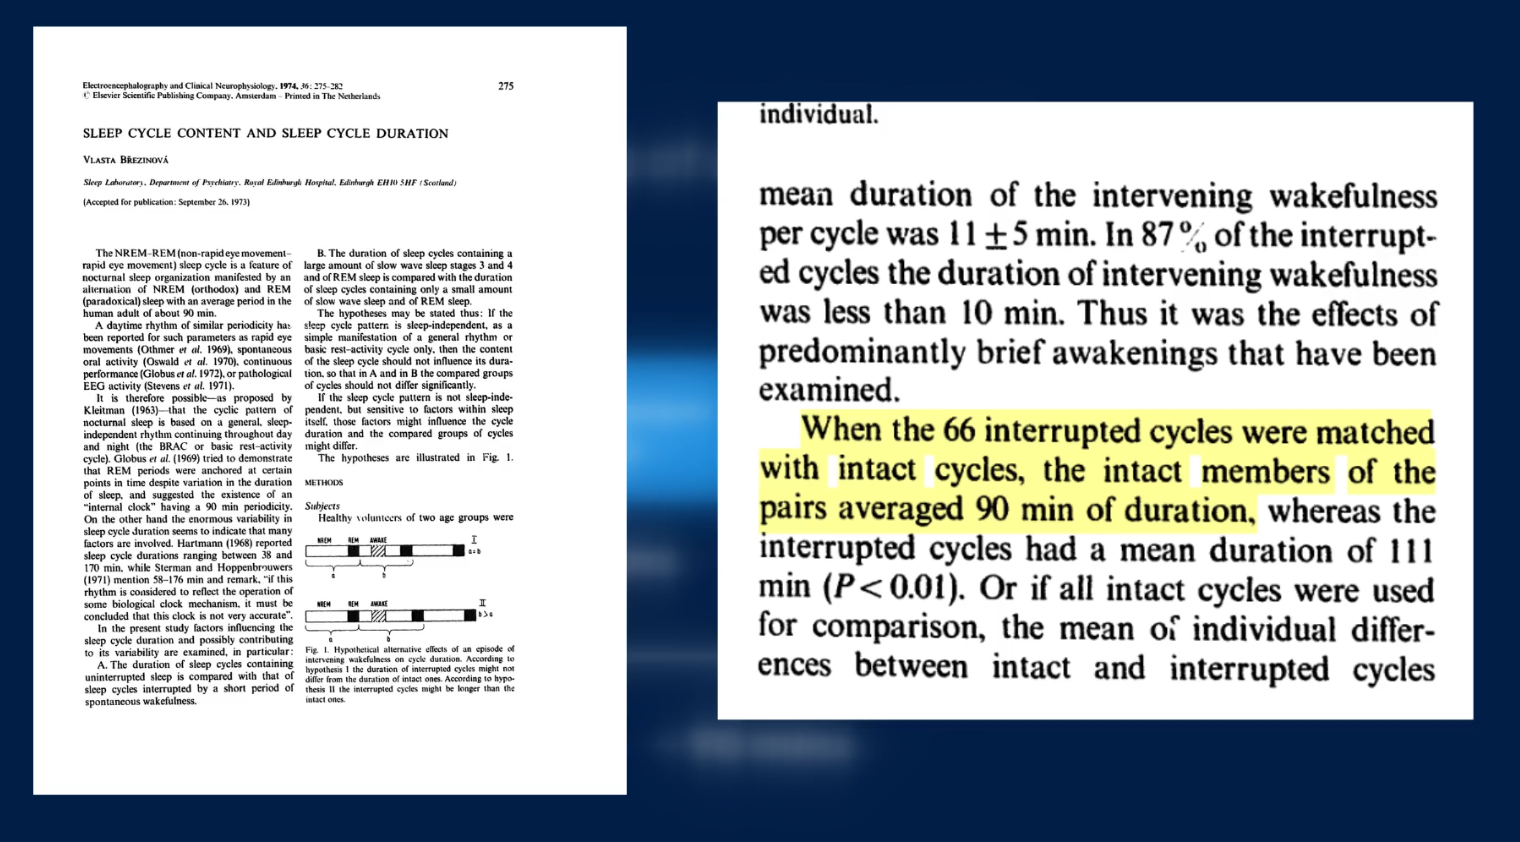
A fairly old paper by Vlasta Brezinova, for example, investigated the sleep cycle duration of groups of different aged individuals. While there were some differences in the durations, the average duration was about 90 minutes. Other research papers seem to agree on this too. I have written down my research on this google doc. Feel free to go through it for more details.
The Concept
Like I mentioned, the lamp figures out the best time for you to wake up, based on when you want to wake up and when you fall asleep, and makes sure you're roused at the end of a sleep cycle.
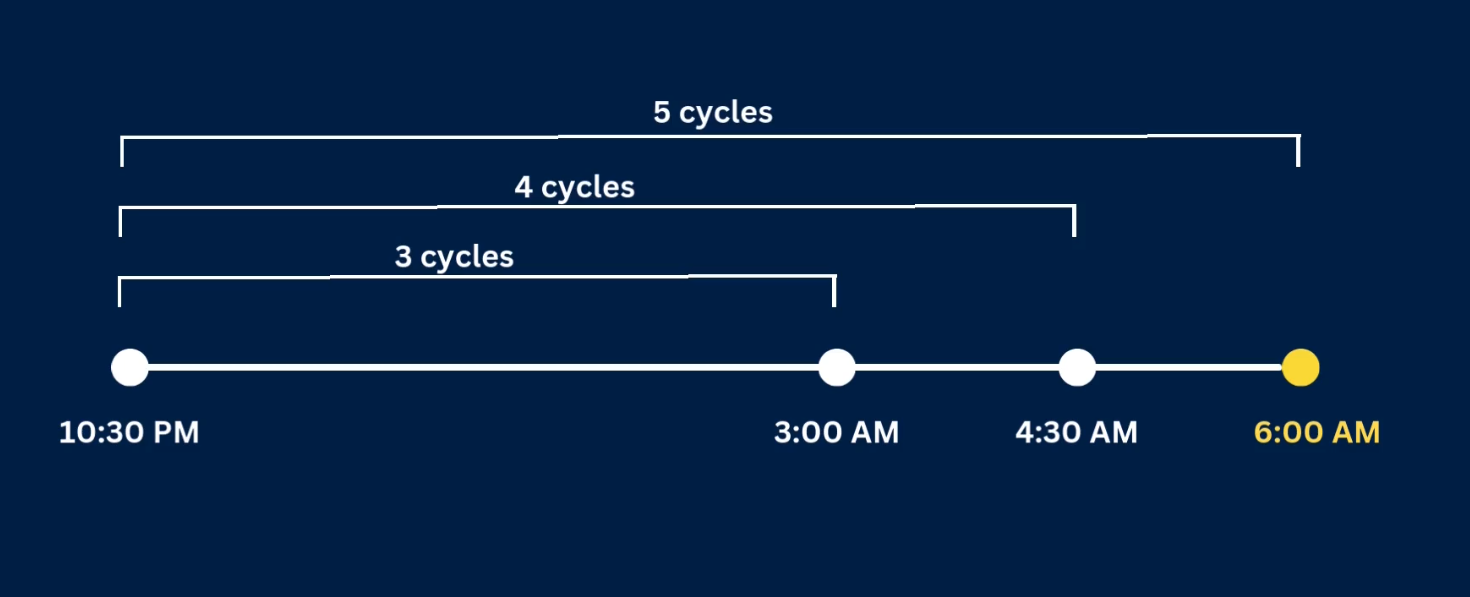
Let me explain how that works. Let's say you sleep at 10:30 PM and you want to be up by 6:00 AM. The lamp does some quick math and calculates the end times for three, four, and five sleep cycles. That would be 3:00 AM, 4:30 AM, and then right at 6:00 AM. In this case, the lamp would wake you up at 6:00 AM.
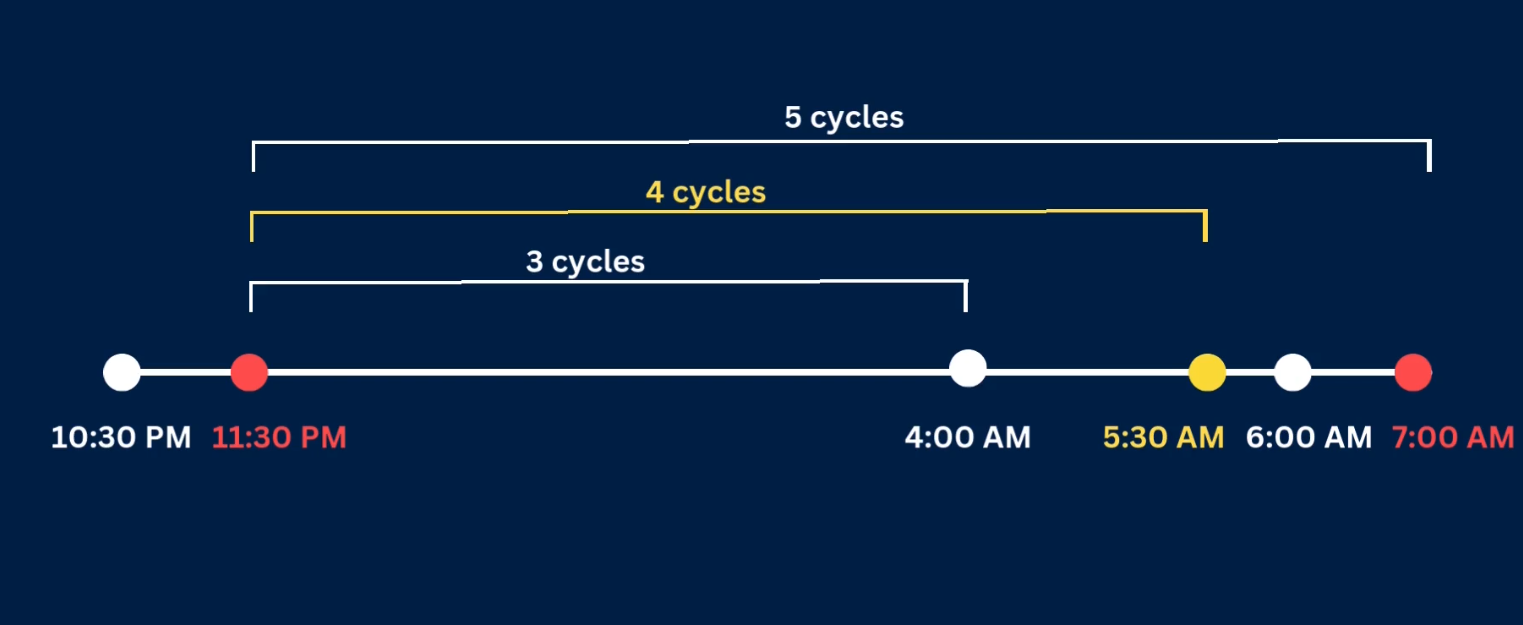
Now, if you go to bed a bit later, say 11:30 PM, the same process happens. The end of the third cycle would now be 4:00 AM, the fourth at 5:30 AM, and the fifth at 7:00 AM. Since your target wake up time is 6:00 AM, it checks which of those cycle end times is closest. Here, it's the end of the fourth cycle, at 5:30 AM. So, that's when the lamp would wake you up.
Figuring out sleep time
Now, you might be wondering, 'How on earth will this lamp know when I actually fall asleep?' Well, the truth is, it doesn't know exactly. But, it makes a very clever educated guess. And to do this, we make two key assumptions.
First, we figure that most people spend a little time winding down before sleep, maybe scrolling through their phone or reading a book in bed. Second, we rely on some past research that suggests the average adult takes about 15 minutes to fall asleep after they've laid down for the night. This 15-minute window is also commonly used by those online sleep calculators you might have seen.
So, here's what we do: we attach a little proximity sensor underneath the lamp. Once you're done with your phone or your book and you're ready to drift off, you simply place it in front of the lamp where the proximity sensor detects it. The lamp then waits...
Read more » Makestreme



 Lex Kravitz
 Stephen Holdaway
 David Truong
 shane kirkbride
Interesting project! I have a lamp which simulates sunrise although at a fixed time. It also has a lovely feature which I suggest you could implement to your lamp - instead of turning the lamp off you could simulate setting sun for a preset time (I use 10 mins). I love this feature as it is gradual transition from light to dark and also helps me fall asleep better.