 Julius
When thinking about what I needed for this project I determined I needed: a microcontroller, a display, 4 buttons, 4 LEDs, and resistors. It happened that I had all of those things in one form or another in the kit I already had at home.
For the microcontroller I decided to go with the ESP32-C3 Supermini I had because it was a super small chip that was very capable. Not only does it have 11 GPIO pins which is just short of the 10 I needed; it has Wi-Fi, Bluetooth, and a very capable processor. This will give me the room to do more with this project in the future.
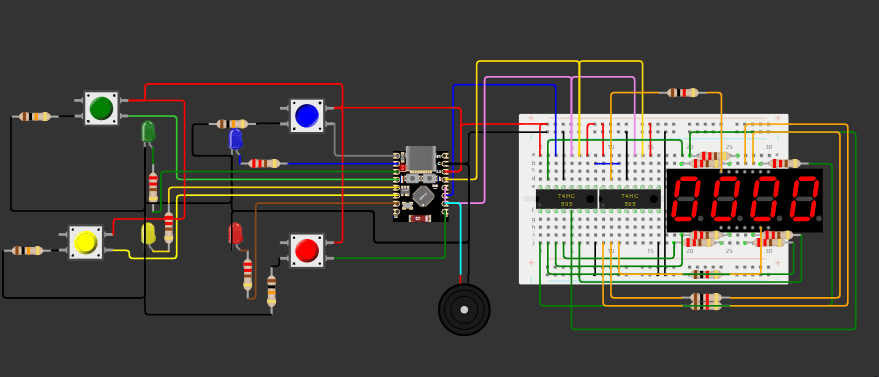
For the display I originally wanted to go with two 1 digit seven segment displays so I can show scores from 0-99. However, I started to realize the wiring can get very complicated and the 2 displays would actually take up a decent amount of space on the PCB. Instead I went with a four digit seven segment display with the same number of pins as a single digit display. It also wasn't too small and it seemed doable with 2 shift registers, which are used to drive the display.
It was easy to find the rest of the components, I had LEDs with 4 different colors, 4 buttons, and a plethora of different resistors so it was onto building the circuit on a simulator.
Simulating And Prototyping
To simulate to test what I wanted to do was feasible or not I used the ESP32 Simulator called Wokwi. Their platform allows me to wire up components to an ESP32 and verify whether or not my circuit works. The best part of the simulator is that I can upload my C code and it will simulate how the microcontroller interacts with the rest of the circuit.
Learning About 7 Segment Displays
I did the simulation in a few stages, especially since I did not know how to use seven segment displays. So I first started off by wiring up a 1 digit display and testing it to learn how they work. I found out that I can use a shift register to write to these displays by shifting data (or in this case electrical signals) out to the correct pins of the display to light up the segments that need to be lit. Another video (LINK VIDEO HERE) taught me how to utilize 2 shift registers which is what I ended up going with to drive the 4 digit display. I was able to confirm that this was possible with the wiring I wanted for the PCB and that my code was able to drive the display correctly.
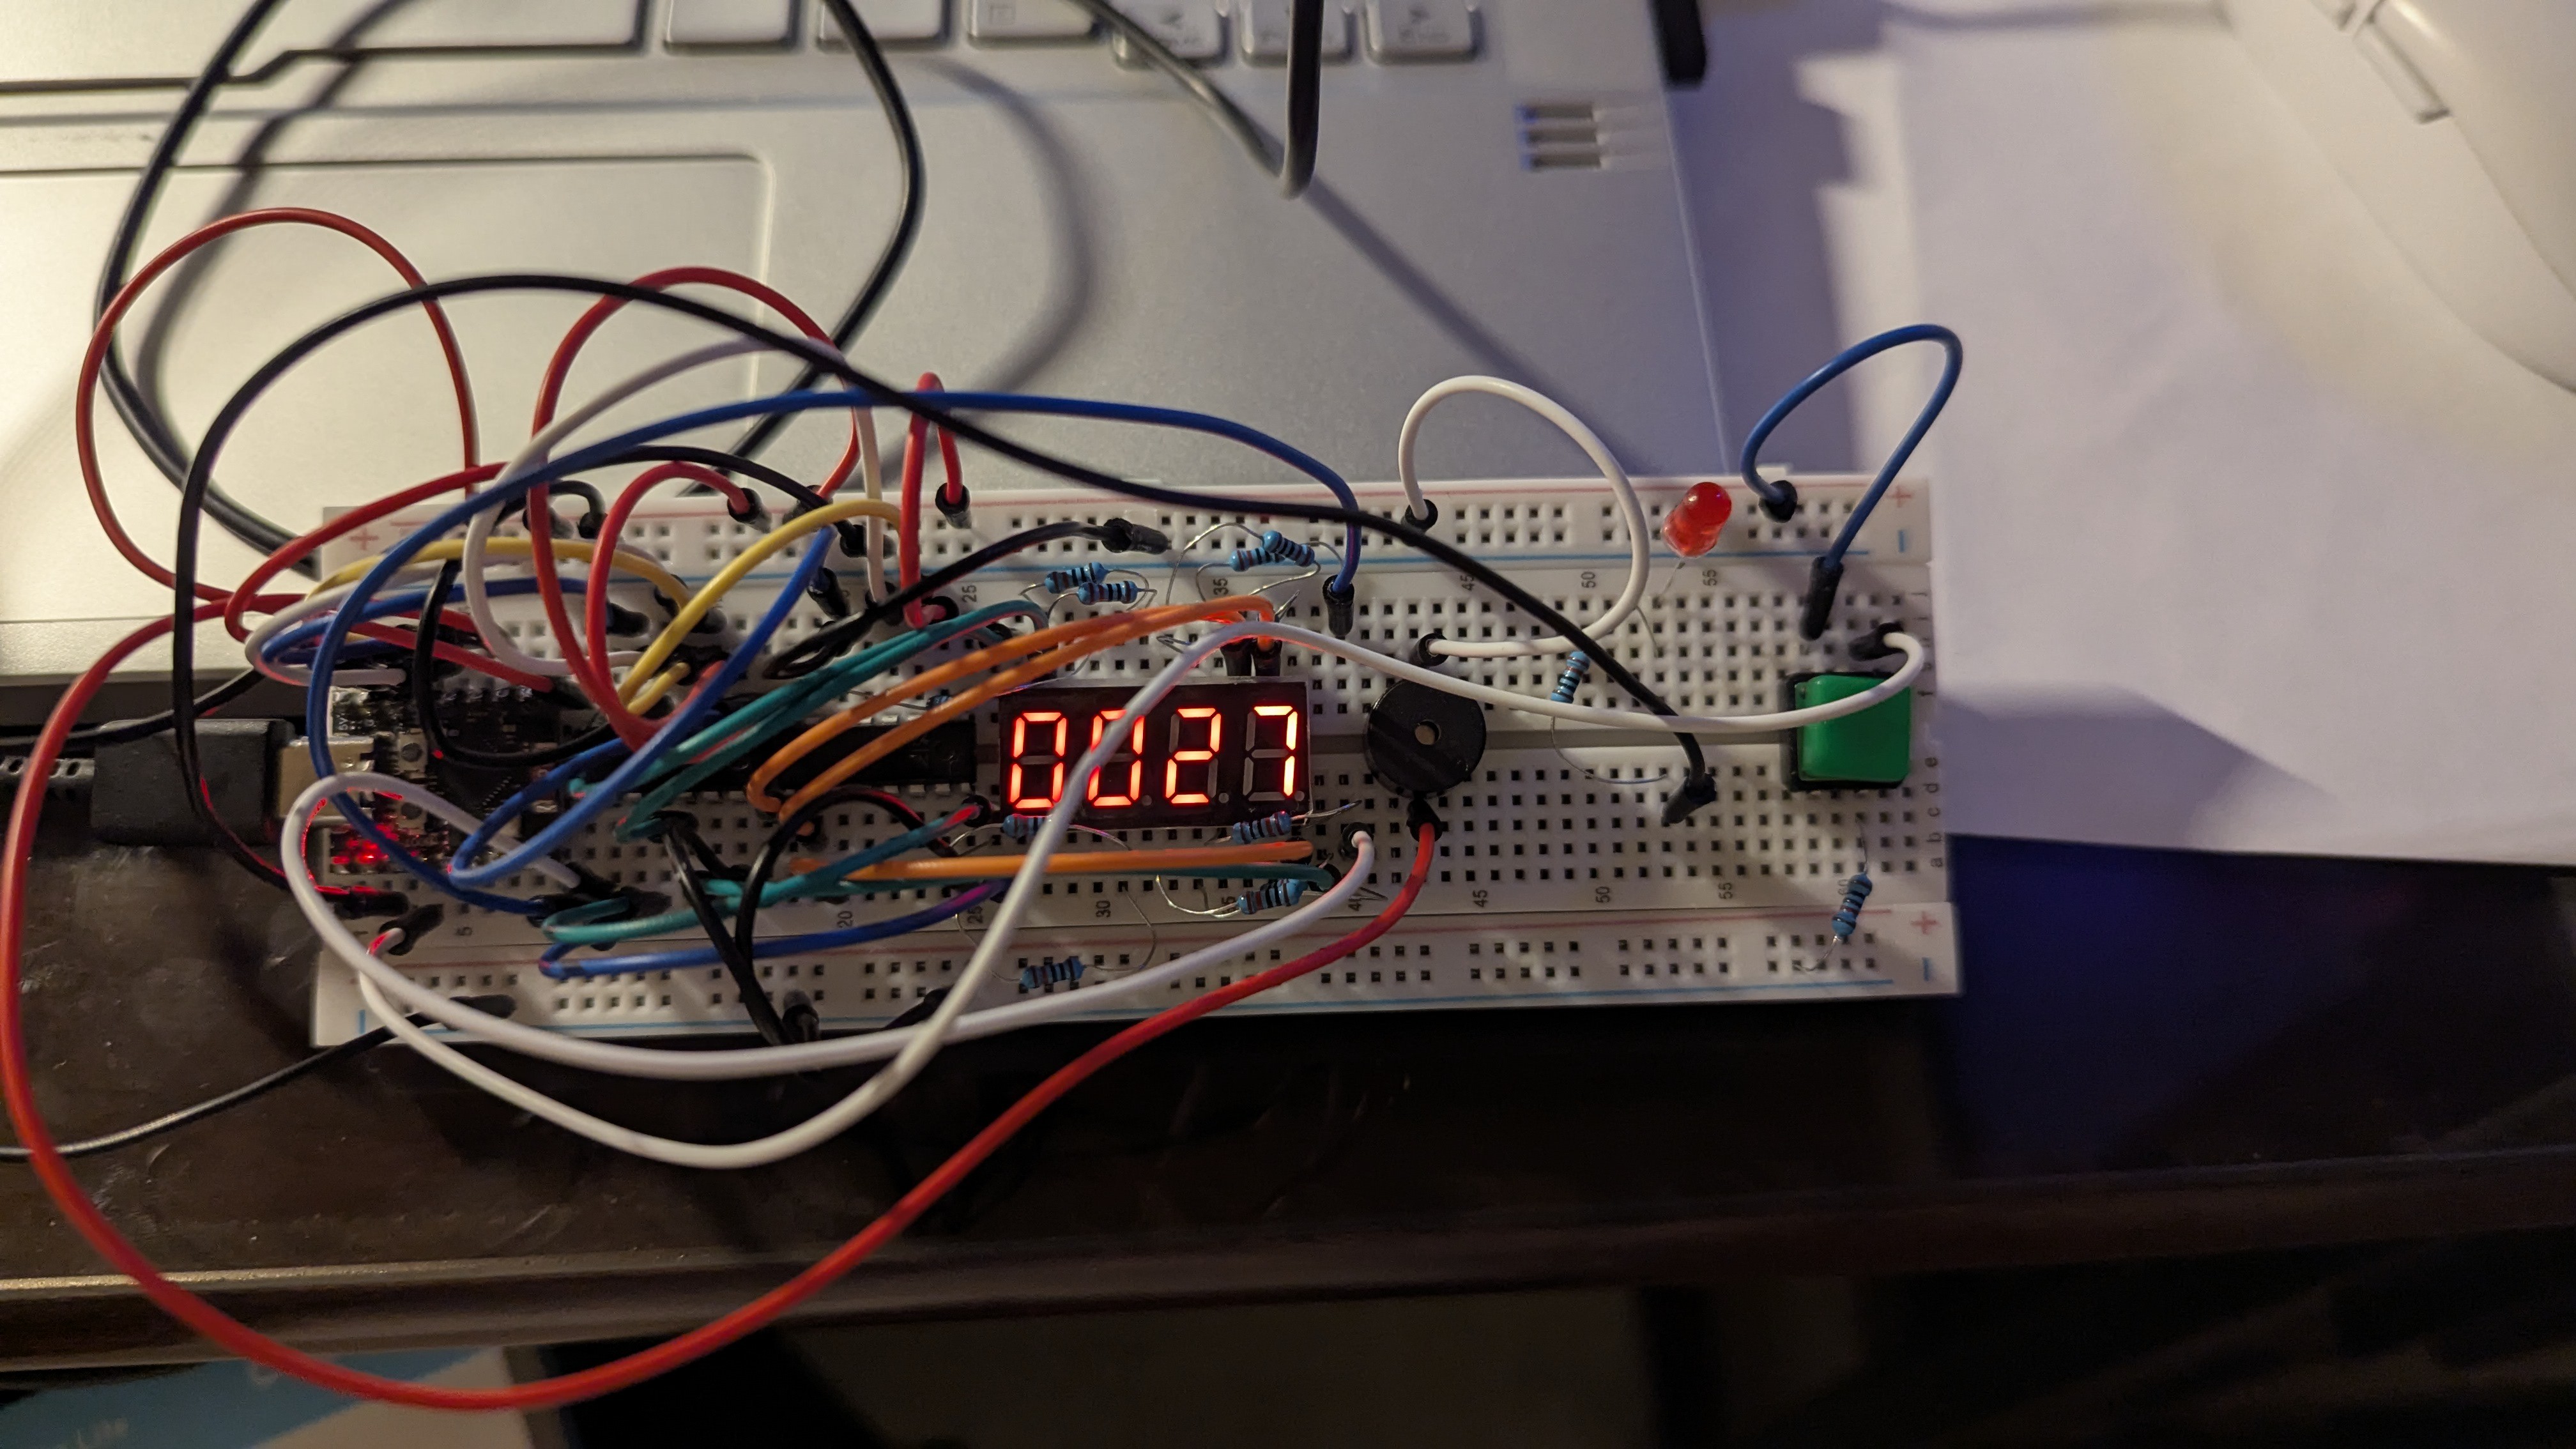
After verifying the simulation I then went to create a prototype using the wiring and code from the simulation. I was super worried when my display was not showing the digits correctly at first, segments that were lit weren't supposed to be on. However, it turned out to be 2 wires that were in the wrong position and I got the display to work. My prototype just increments the counter every second and to see it work was a relief.
Connecting Everything Else
Once I got my display working I started to wire up the buttons, resistors, LEDs, and a buzzer that I decided to include to add audio. I wrote up code that would increment a counter by 1 whenever a button is pressed. The LED corresponding to the button's color will light up, and the display will show the count every single time. I did not want to create the full Simon game just yet; I wanted to first check that my wiring was correct and that all of my components were able to work with each other.
Prototyping
Now that the simulation is done I needed to test my circuit by building it out in the real world. Since I was limited by the size of my breadboard, I decided to connect everything but 3 sets of buttons and LEDs. I just wanted to verify that the button can trigger a sound to play on the buzzer and then change the display. I uploaded the same code I wrote onto my ESP32 and it worked just how I intended it to. Now that the wiring was verified and I knew there was a path forward to making the full game I went onto coding the full game.
All of this was done between December 30, 2024 and January 3, 2025
Discussions
Become a Hackaday.io Member
Create an account to leave a comment. Already have an account? Log In.