 Julius
After exporting my project files and getting my PCB manufactured it finally came! I truly am astonished at how quickly we can go from project design to getting a physical PCB in hand; it only took me a week and a half and it was very affordable to get a custom PCB produced.

Now that I have all of my parts in hand and the PCB as well it is time to assemble it! The first thing I started off with was the SMD resistors. I used 1206 size SMD resistors since I was going to be hand soldering them to my board. To do that I first applied my solder to one end of the pad, soldered the resistor to that end, and finally soldered the other end once the resistor was secured. With so many resistors on my board (mainly for current protection), this process took me awhile to do.
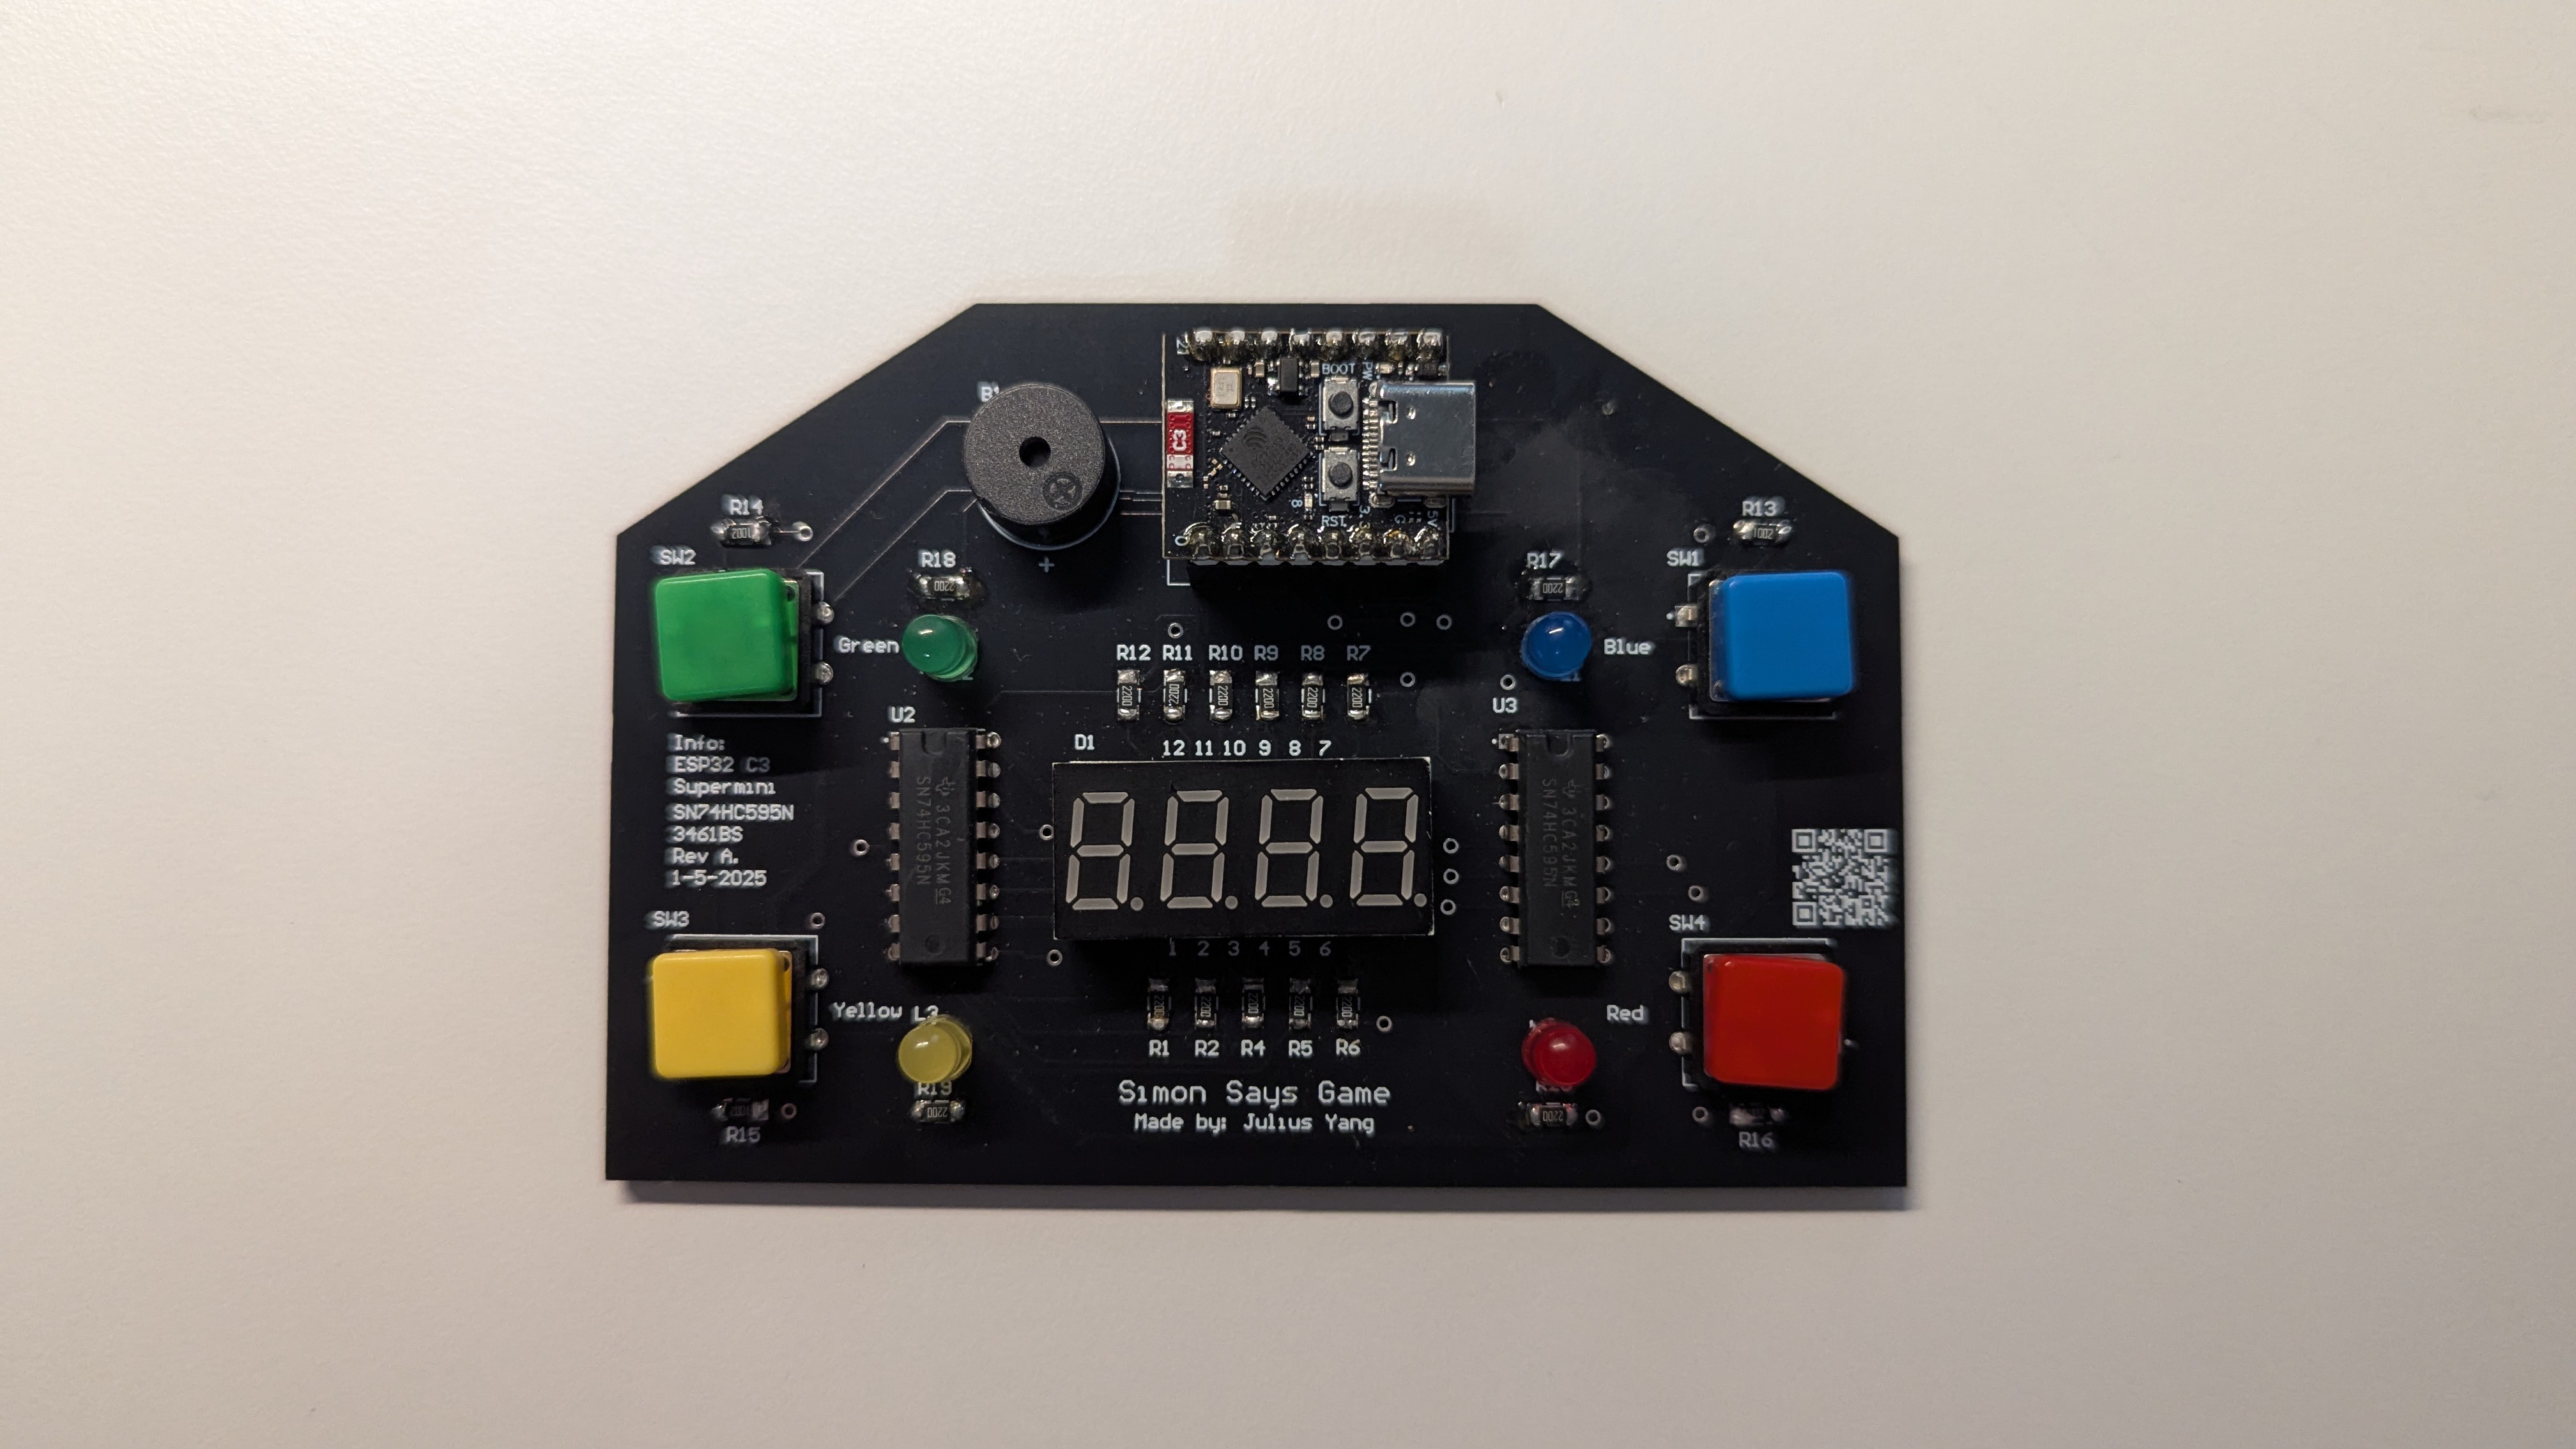
After soldering my resistors I soldered the rest of my through hole components. This part wasn't too bad, however I messed up when soldering my display. I forgot to check to see if the display was flat before I went ahead and soldered the rest of its pins. That was a grave mistake, because after hours of trying to desolder and manipulate the pins so that the display lie flat, I could not get it to budge. Another issue I noticed was that most of my through hole pads were too narrow; I should have increased the pad sizes. Although I was still able to secure all of my components, it did make the tolerances for soldering much tighter than they should've been. For my ESP-32 I did not want it to be a permanent fixture to the PCB, so I used some male to female header pins and soldered them in place instead. Here's the final result of the finished PCB!
My next step is to finish coding and upload my final code to the ESP-32
Discussions
Become a Hackaday.io Member
Create an account to leave a comment. Already have an account? Log In.